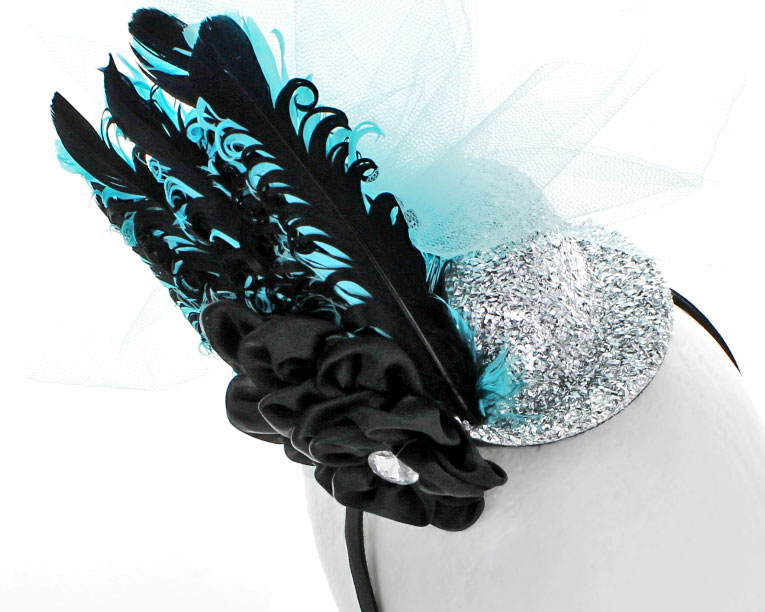
Looking for a fun way to spruce up a costume? Well, look no further! I have the perfect tutorial for you! This tutorial will show you how to add accessories to a top hat to achieve an elegant, sophisticated look that will be perfect for any costume party, or Halloween costume. You could even use them for birthday parties or photo shoots! :) Here is a list of items you will need:
- silver glitter top hat
- turquoise and black curly nagori goose feathers (I used five of each color)
- black cascading satin rhinestone hair flower
- black ribbon lined metal headband
- 72" of 6" aqua tulle
- black 4.25" felt pad
- 3/8" black grosgrain ribbon: Used to line metal headband
- Double sided sticky tape: Used to line metal headband
- Two 1.5" long pieces of 3/8" black grosgrain ribbon
- glue gun
- needle and thread
- lighter: heat seal ends
- scissors
- butter knife
- ruler
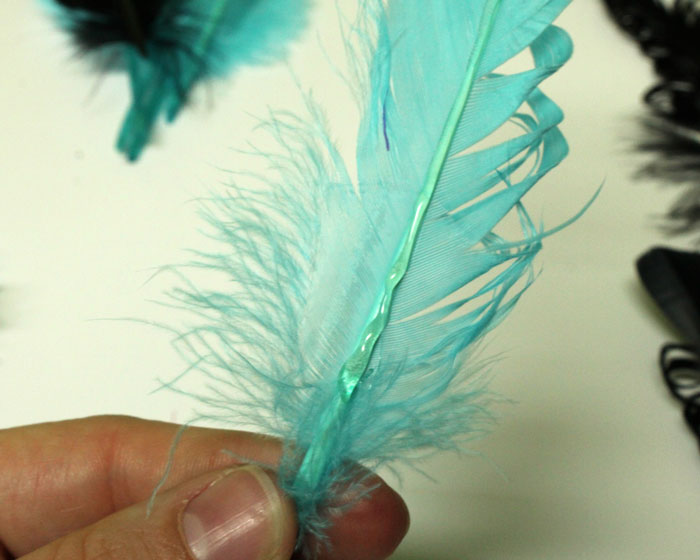
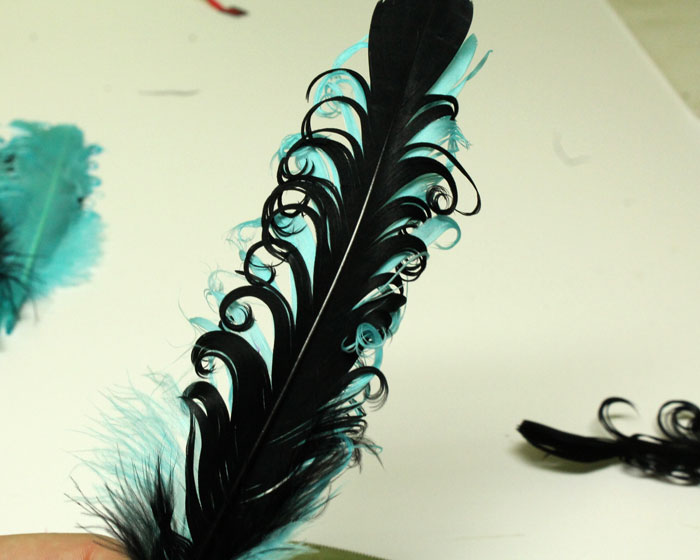
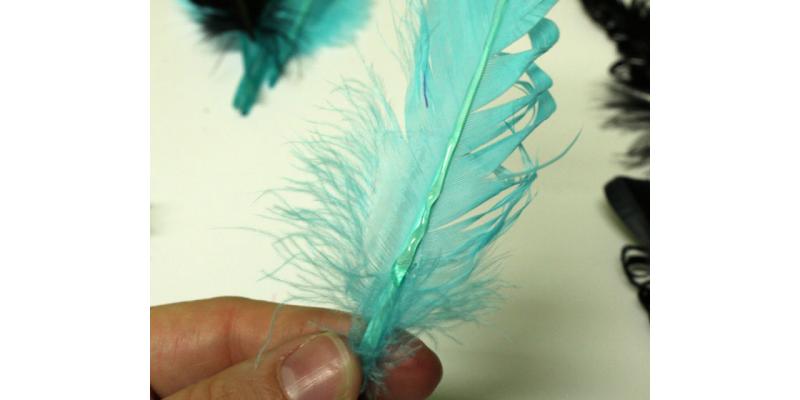
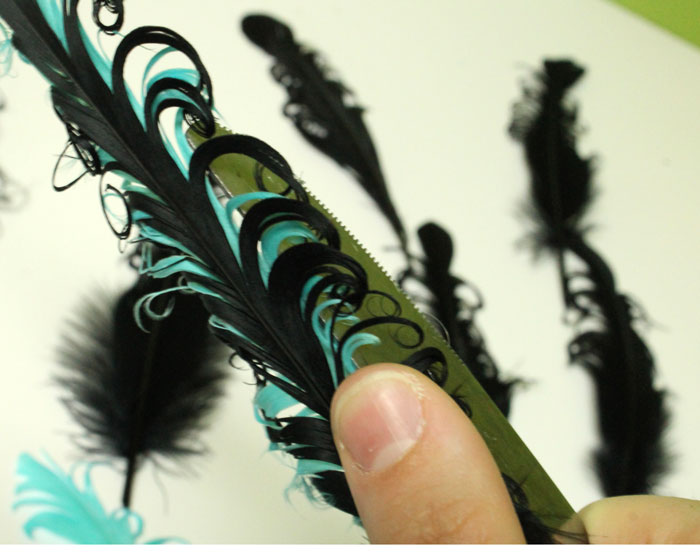
After you have glued all of your feathers, take a butter knife and using the blunt end go over your feathers and re-curl them. This will cause the two colors to curl together so that you will be able to see your base feathers. We also have a video on how to use a butter knife to curl your feathers.
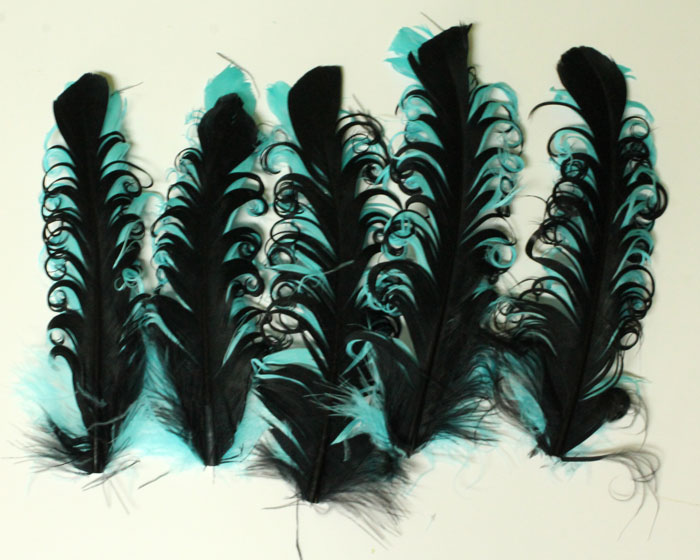
Here is what all of my feathers looked like after I finished curling them. I also took and cut the ends off of the feathers. This gives it a more uniform look and it's easier to trim them now than when you have them glued to the felt pad.
Now we are going to take the 4.25" black felt pad and start gluing the feathers to it. There is not a specific way to glue them on other than keeping the glue on the shaft, this will keep the feathers looking fuller. This is what the feather piece looks like when you are finished.

The next step is to glue the feathers to your top hat. This part requires some patience, because the glue takes a little bit to stick to the hat. Just hold the feathers to the hat with pressure until the glue starts drying.

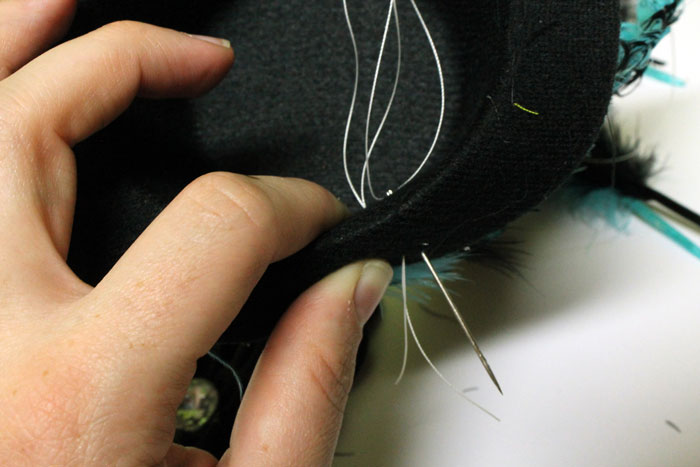
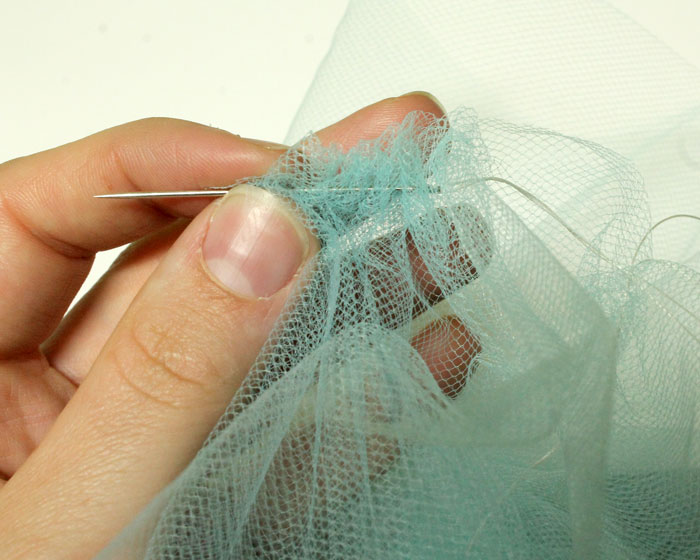
Take the brim by where you glued the feathers and fold it up, then take your needle and thread and sew through the brim, feathers, and the hat. This process is somewhat difficult, only because you have to sew through so many layers. I used my butter knife as a solid surface to push my needle through.
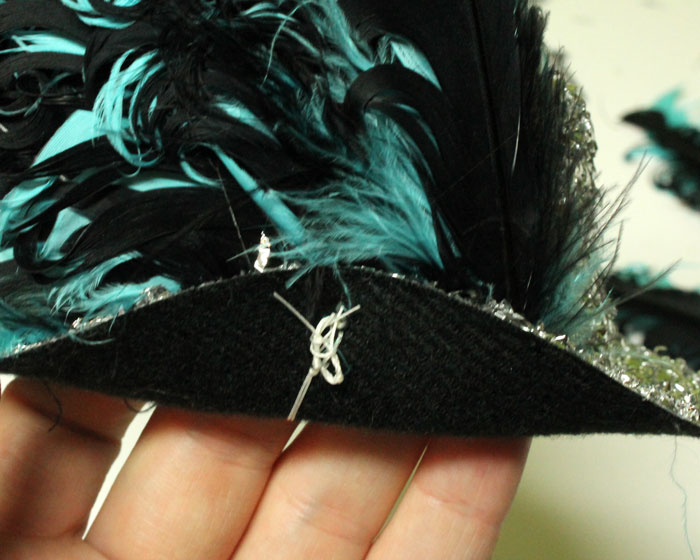
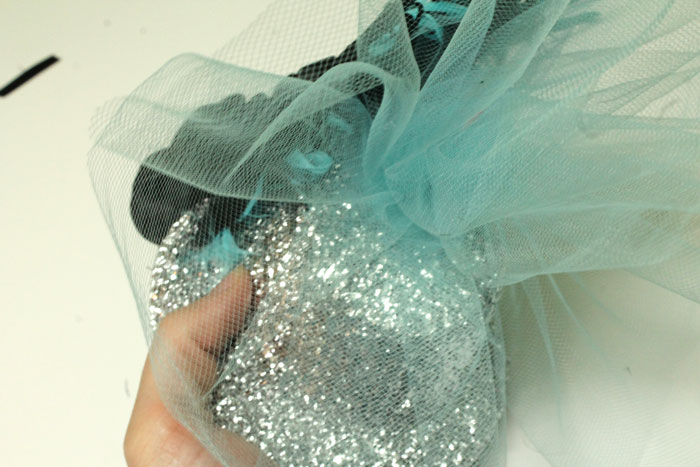
Place glue along the brim where you sewed and attach your cascading flower.
Measure out 72" of aqua tulle. Then using a simple weaving process, weave your needle and thread along the bottom portion of the tulle length wise. This does not have to be perfect, so don't worry about having the stitches perfect or the same width apart. This will give more character to the finished product.
Don't worry about cutting your thread, go ahead and situate the tulle where you want it at on top of the hat and sew through the hat and tack your tulle on.
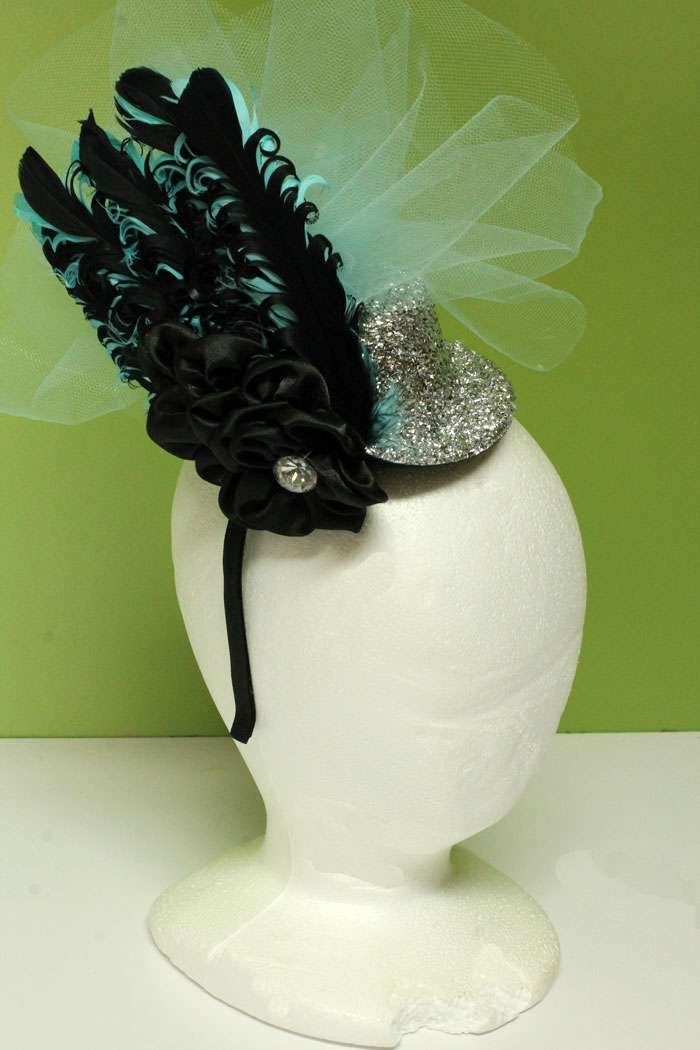
Take your 3/8" black ribbon and cut out two 1.5" strips. We will be using this to hold the headband on the hat. Apply glue to each end of one piece of ribbon, and attach it to the bottom of the hat. Run one end through the loop in that piece of ribbon after the glue has dried. You can then position the hat where you want it to sit on the headband and glue the other piece of ribbon to the hat. You could also use a clip instead of a headband if you want. If you use a clip the small pieces of ribbon won't be necessary, you can just glue the clip directly to the hat.

And that's it!! Now you have a super fun hat to wear! I hope you enjoyed this tutorial, thanks for reading! :)
Visit the rest of our blog for more Crafting Tutorials and DIY Instructions!
Loading...

