
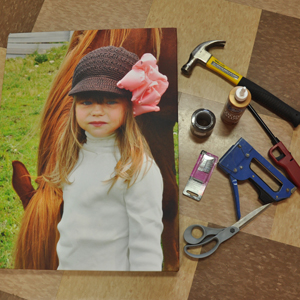
 Materials: wall art, ribbon, staple gun, sharp scissors, craft glue, lighter, saw-tooth picture hangers, small nails, hammer
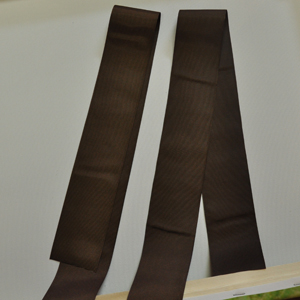 Cut 2 ribbon strips leaving enough length for the bow as well.
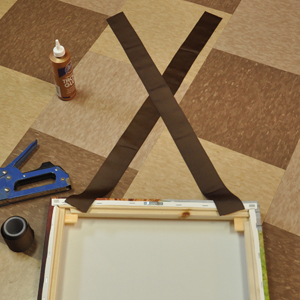 Arrange the strips so that they lay at the same angle as you want them once hung. To be exact, you may want to measure the distance from the edges.
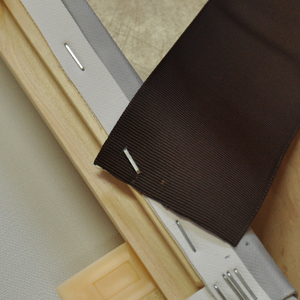 Use a heavy-duty staple gun to place a staple in the corner of each ribbon.
 Place a small line of glue under the edge of the ribbon so that it is secured along a line instead of at a couple of staple points as using only staples can cause the ribbon to pull and stretch when hung.
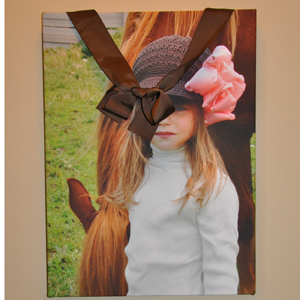
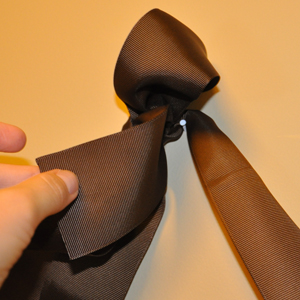
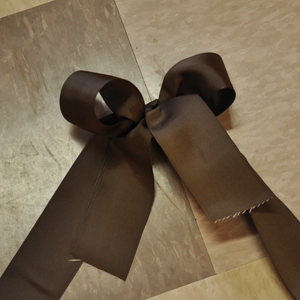 Tie the two ribbon strips together in desired bow shape. Our example used the bow described in this method shown in another post. You can tie the bow so that it is centered or slightly off to one side. To make it easier to perfectly center the bow, you can also tie the bow before attaching the ribbon pieces to the wall art so the bow can be positioned exactly where you want it.
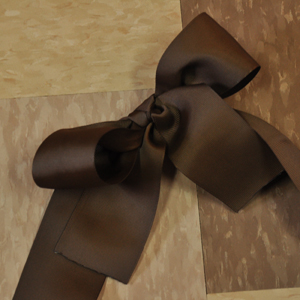 Cut the ribbon tails using whatever style you prefer. This bow has a straight cut but you can also cut at an angle or use a decorative v-cut. You will need to use a lighter or other method of sealing the edge of the ribbon ends. To help secure the bow shape, we recommend using a small drop of glue inserted inside the knot to keep it from slipping later.
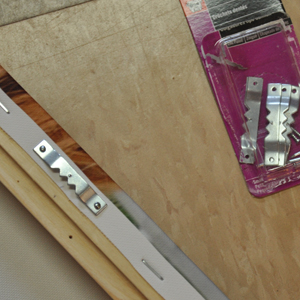 Attach either one or two hangers to your frame depending on the size of the wall art. We used two.
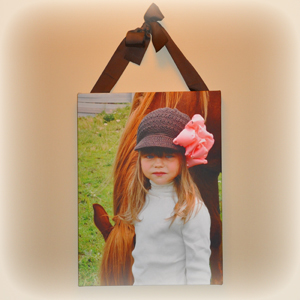
 Hang your artwork on the wall using the picture hangers.
 Stretch the ribbon until it is taught (if there is any slack it will be obvious it is not actually hanging from the ribbon) and then tap a small nail into the wall to hold up the ribbon. Use a small nail that can be covered up by the bow.
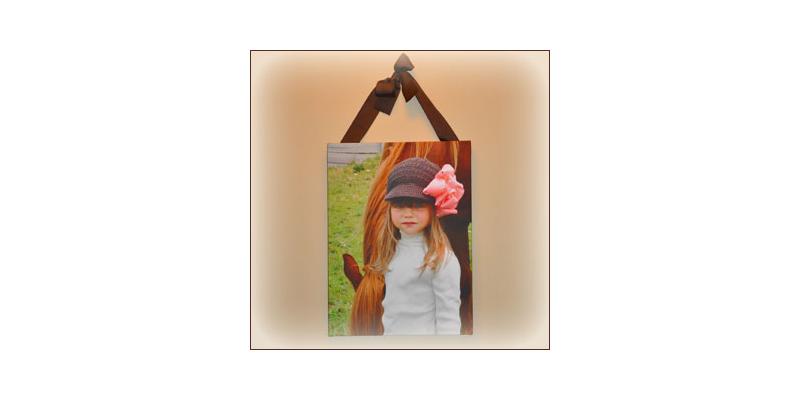
That's it! Enjoy your artwork!
Stretch the ribbon until it is taught (if there is any slack it will be obvious it is not actually hanging from the ribbon) and then tap a small nail into the wall to hold up the ribbon. Use a small nail that can be covered up by the bow.
That's it! Enjoy your artwork!
Visit the rest of our blog for more Crafting Tutorials and DIY Instructions!
Loading...

