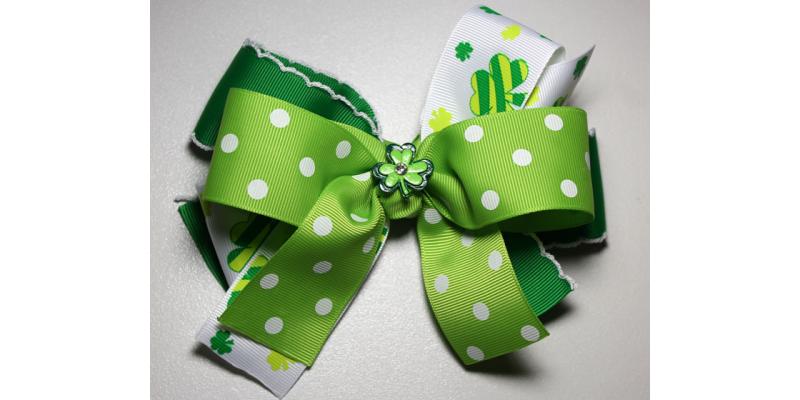
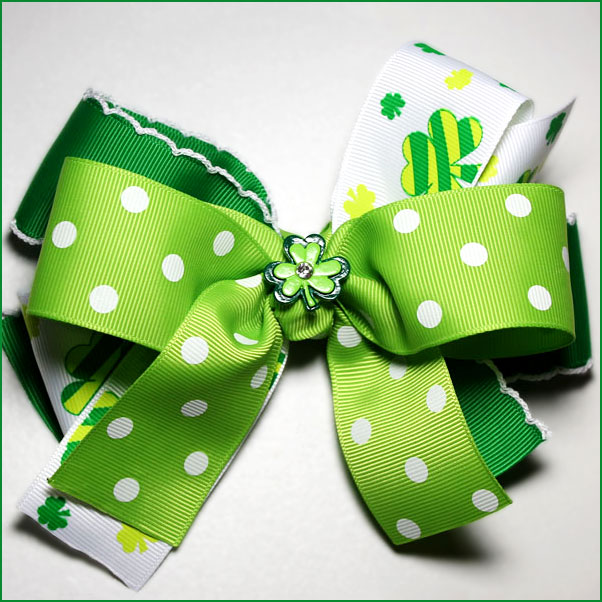
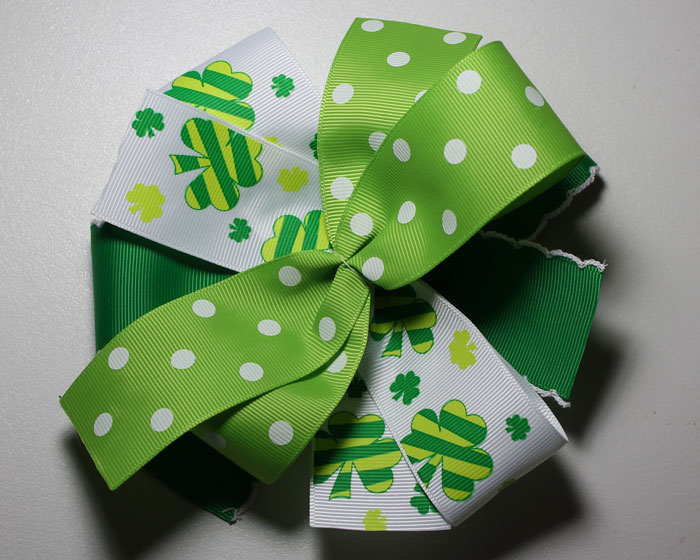
 Looking for a fun and easy hair-bow for your little girl this St. Patrick's Day? Well this tutorial is just for you! This fun and cute bow measures about 5 1/2 inches and is the perfect accessory to add to your outfit to make sure you don't get pinched for not wearing green!
For this hair-bow I used the following items:
Looking for a fun and easy hair-bow for your little girl this St. Patrick's Day? Well this tutorial is just for you! This fun and cute bow measures about 5 1/2 inches and is the perfect accessory to add to your outfit to make sure you don't get pinched for not wearing green!
For this hair-bow I used the following items:
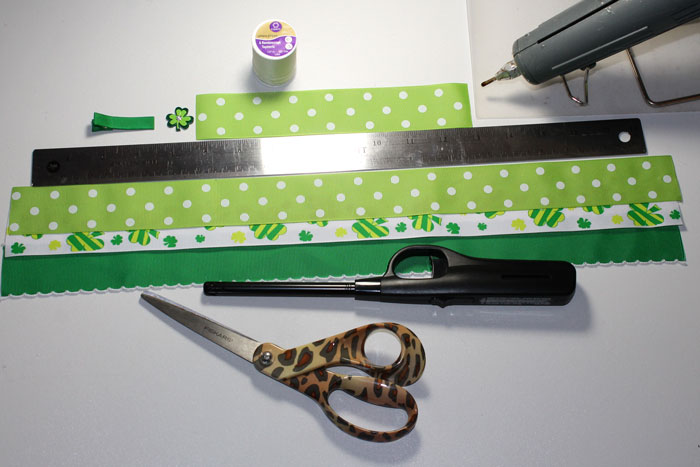
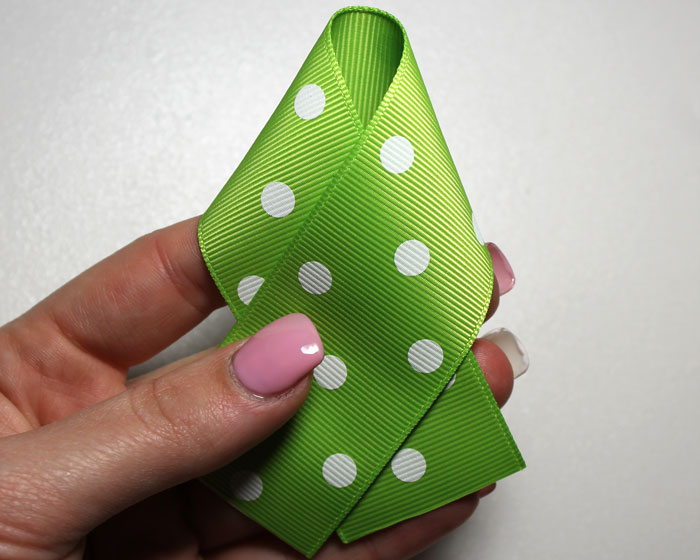
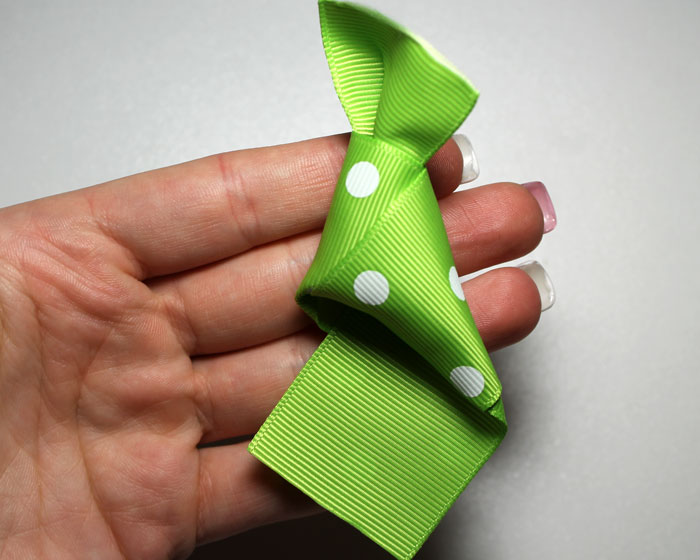
- 1 1/2" grosgrain ribbon apple green with white dots
- 1 1/2" emerald with white moonstitch
- 1 1/2" Lucky Shamrock grosgrain
- one shamrock resin
- hot glue gun
- scissors
- string
- ruler
- ribbon lined hair clip
- lighter to heat seal ribbon

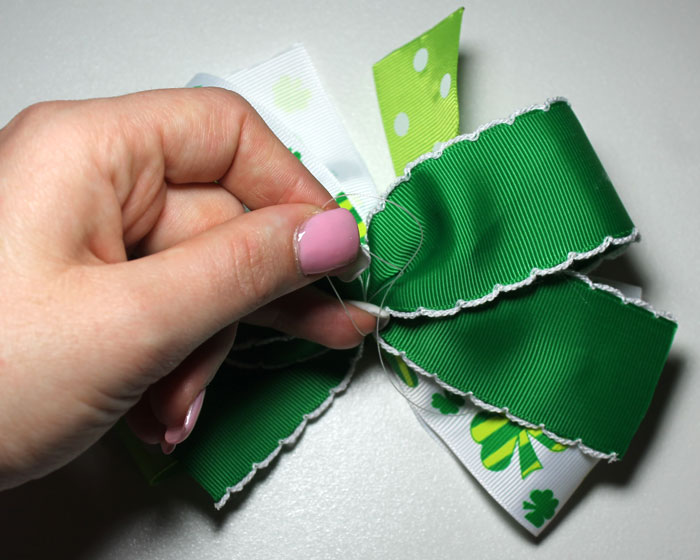
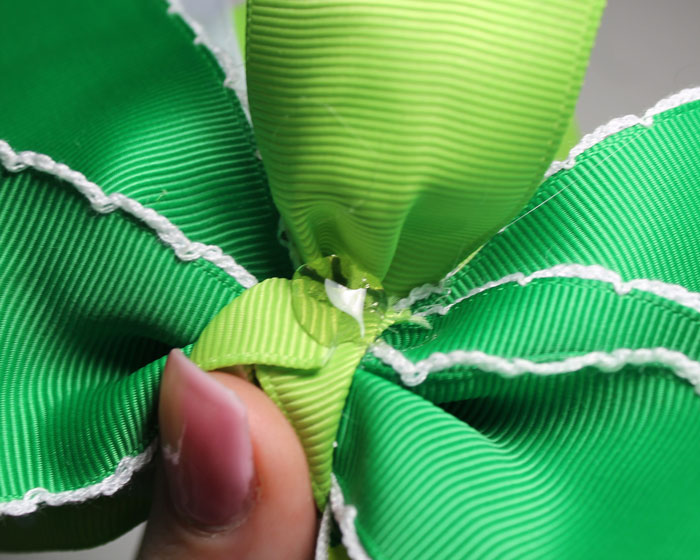
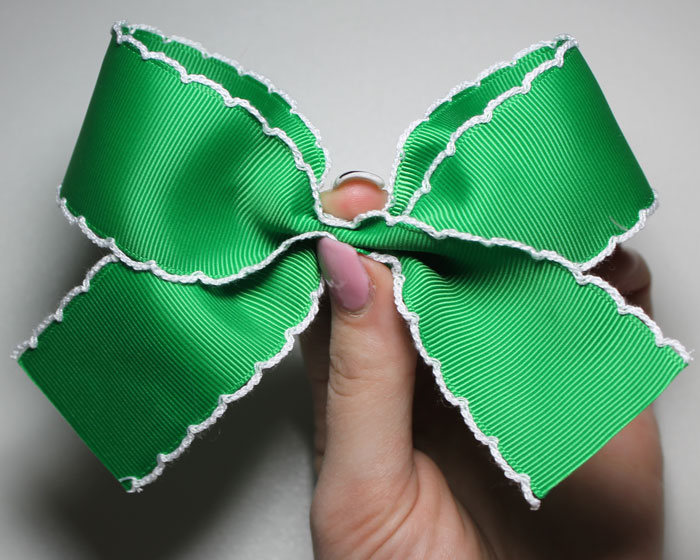 Now you will take the three bows and stack them in a way that they don't lay directly on top of each other. Then take some string and tie all three bows securely in the middle.
 To make the knot for the center take your eight inch piece of ribbon and fold it in half to create a loop. Then take the end that is facing you and pull it through the center to create the knot. Take and pull the ends tightly, you may need to shape it somewhat to get the knot you desire.
 Take the knot and place it in the center of the bows. Start by gluing one end to the back and then pull the last end tightly around and glue that also. Cut off extra ribbon.
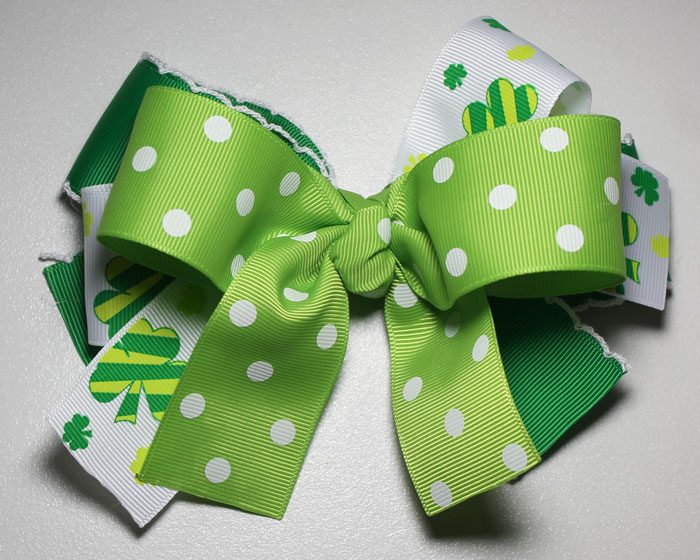 Once the knot is in place you can glue your shamrock resin to the center. The shamrock could be optional, the knot in the center looks great also. I just added the resin to give it a more festive look.
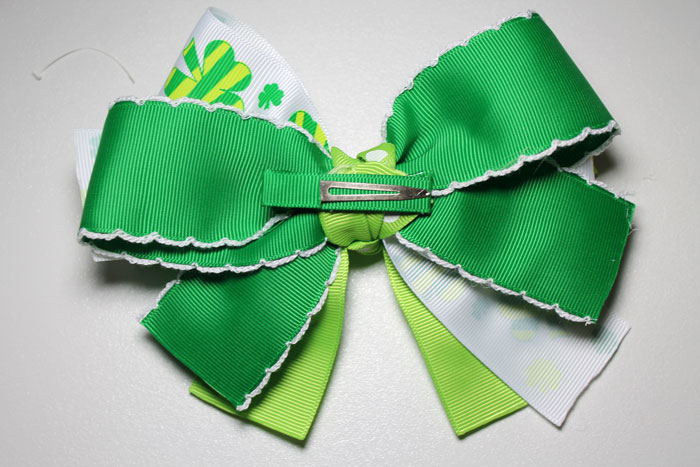
And last but not least, it's time to glue the ribbon lined clip to the back and you're finished!
Once the knot is in place you can glue your shamrock resin to the center. The shamrock could be optional, the knot in the center looks great also. I just added the resin to give it a more festive look.
And last but not least, it's time to glue the ribbon lined clip to the back and you're finished!
 Thanks so much for reading! :)
Visit the rest of our blog for more Crafting Tutorials and DIY Instructions!
Loading...

