 Contributor post by Brittany
There is something absolutely adorable about a little girl with pigtails! It is one of my personal favorites for my 2 year old, blonde hair, blue eyed princess! With warm weather and lots of fun outdoor activities ahead, it's time to expand my pigtail bow collection with perfectly matched colors & prints for her sweet Spring/Summer wardrobe! Creating a perfect set of piggies doesn't have to take a lot of time or require expert skills, so gather up your supplies and join me in making this classic hot pink polka-dot set!
Contributor post by Brittany
There is something absolutely adorable about a little girl with pigtails! It is one of my personal favorites for my 2 year old, blonde hair, blue eyed princess! With warm weather and lots of fun outdoor activities ahead, it's time to expand my pigtail bow collection with perfectly matched colors & prints for her sweet Spring/Summer wardrobe! Creating a perfect set of piggies doesn't have to take a lot of time or require expert skills, so gather up your supplies and join me in making this classic hot pink polka-dot set!
 Listed below are the supplies you will need:
•7/8" Hot Pink w/white dots grosgrain ribbon
•3/8" White solid grosgrain ribbon
•1.35" single pronged alligator clips (x2)
•2.25" single pronged alligator clip (optional)
•Scissors
•Wire (or material of your choice for securing center of bows)
•Lighter (or woodburning tool) for heatsealing ribbon ends
•Hot glue gun
•Measuring tape (or ruler)
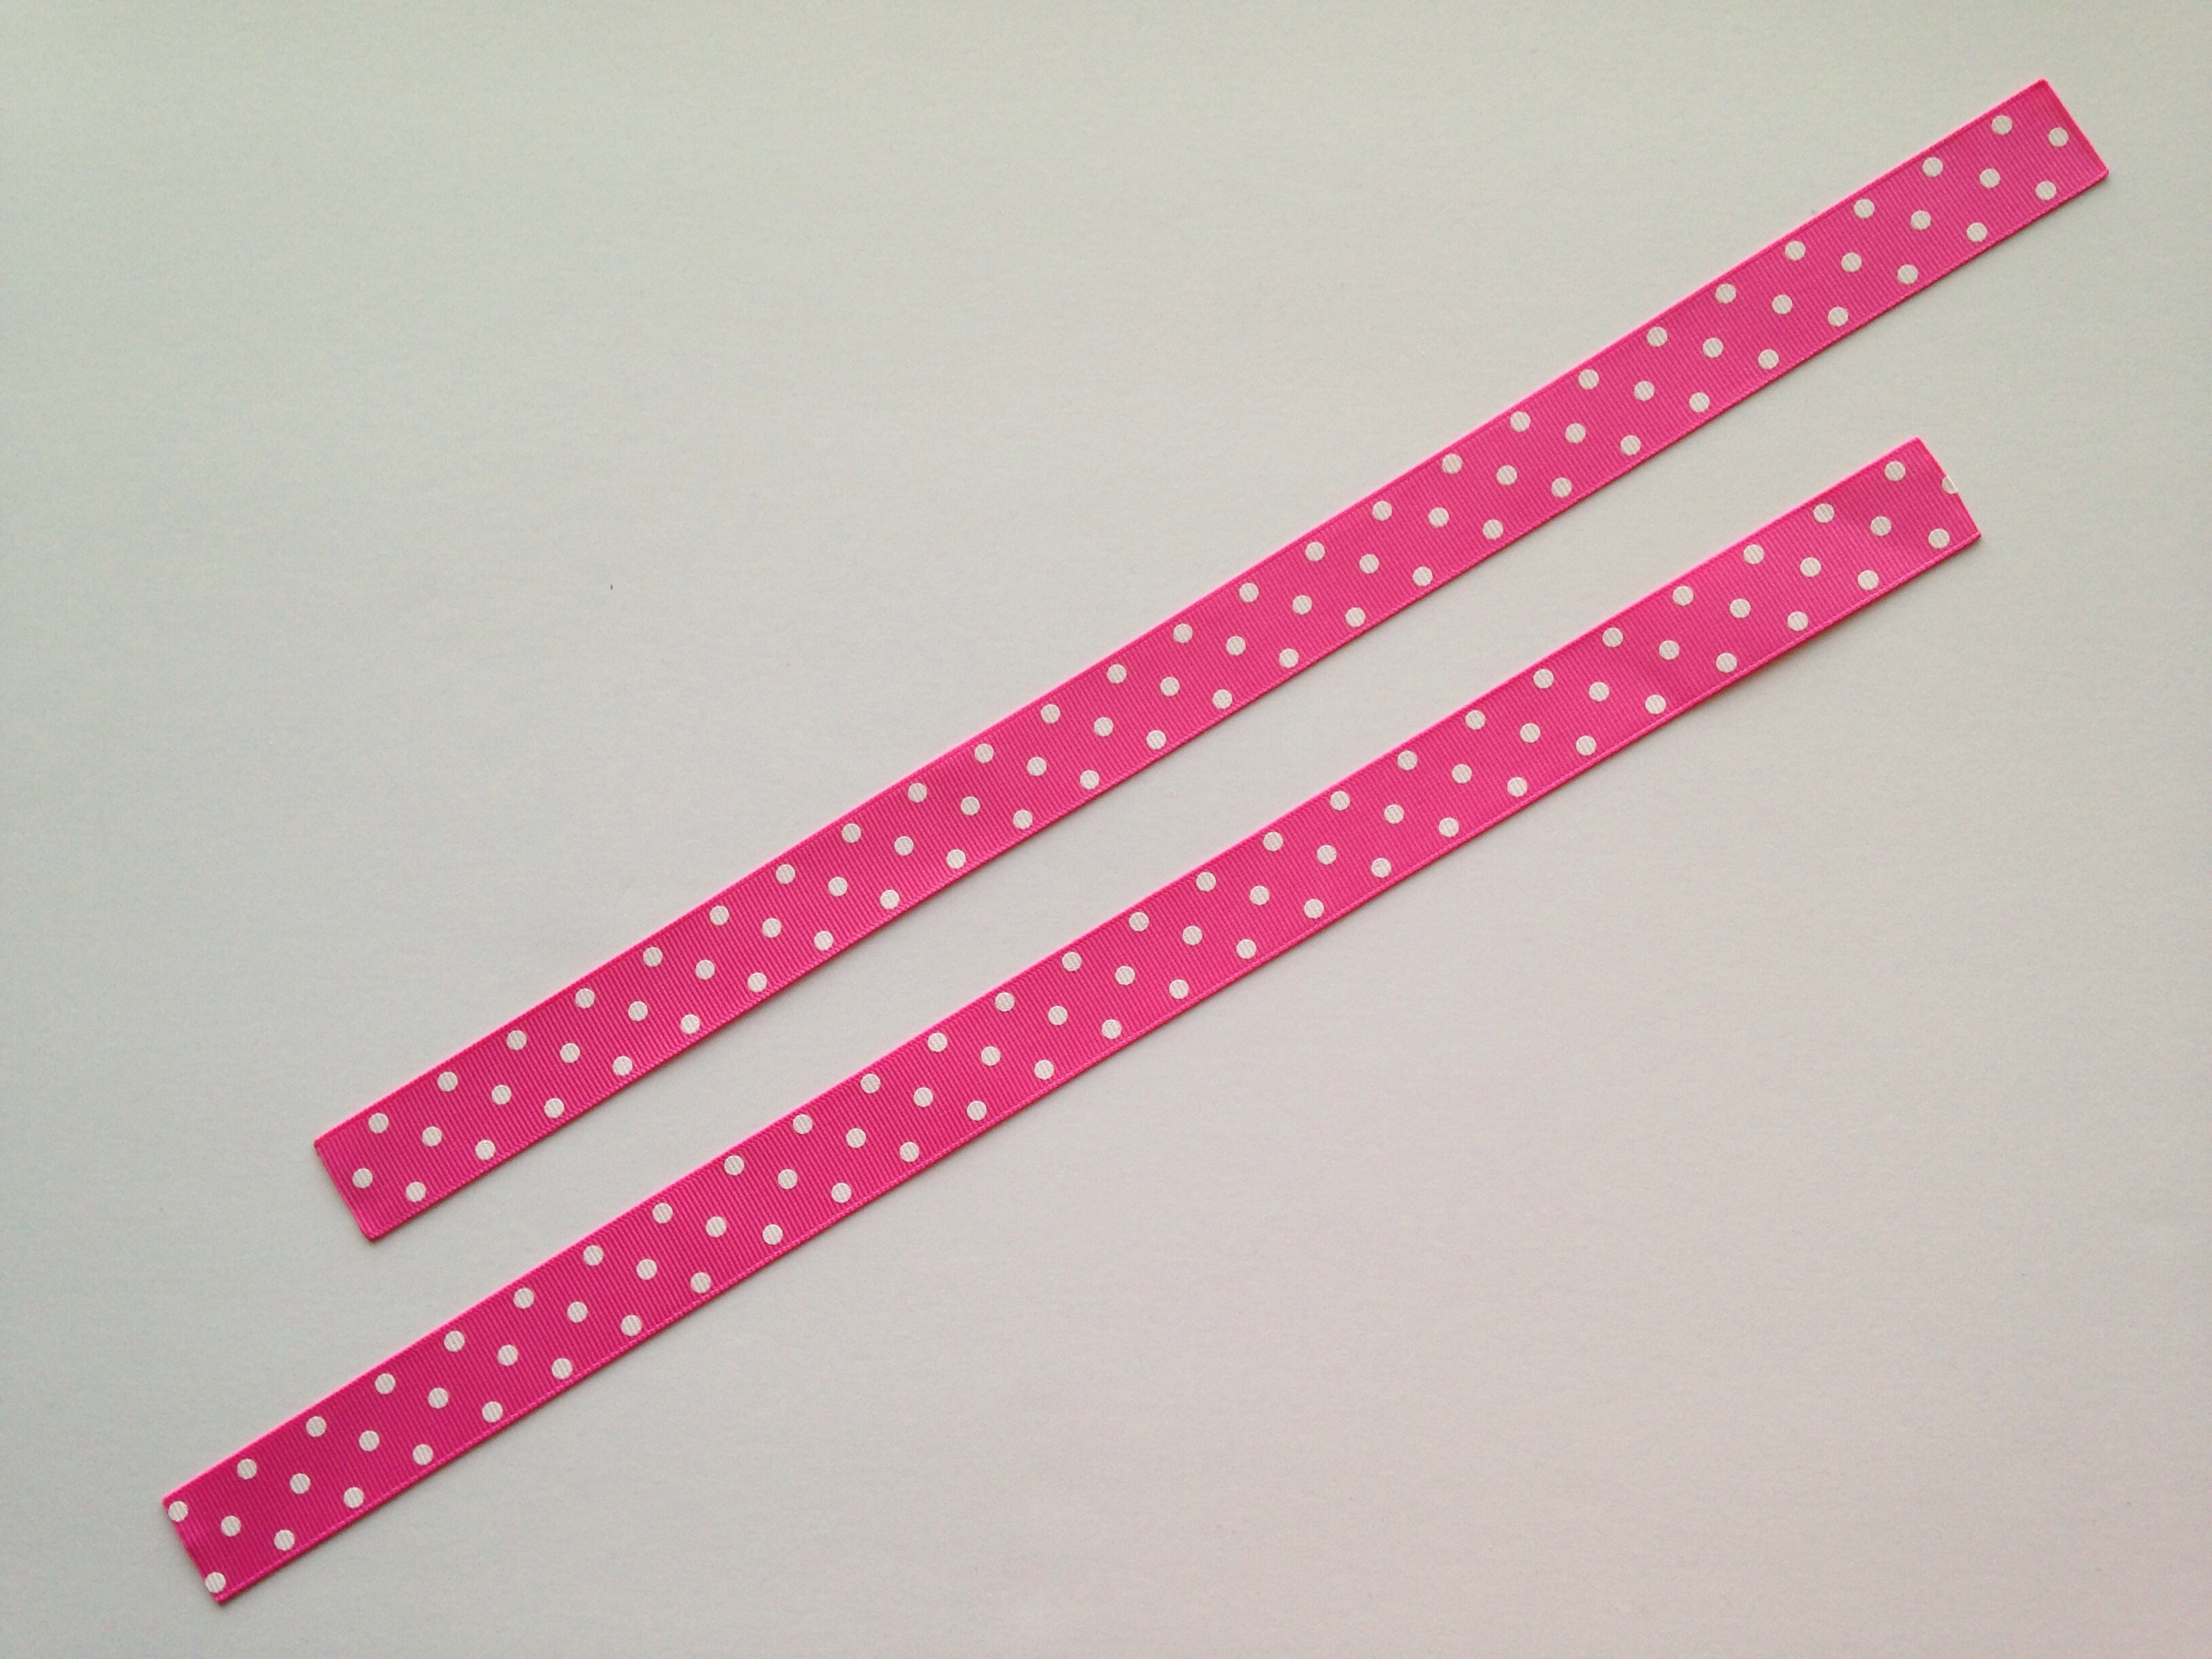
Now that we have our supplies gathered we are ready to get busy! For each pigtail bow you will need approx 15" of ribbon. (This length of ribbon creates a finished loopy bow approx 2.5", so if you prefer a smaller or larger set you may need to adjust the amount of ribbon used.) I measured a total of 30" of hot pink w/white dots grosgrain ribbon, folded the ribbon in half and cut to make 2 even 15" strips of ribbon. Heat seal all ribbon ends using your lighter or woodburning tool.
Listed below are the supplies you will need:
•7/8" Hot Pink w/white dots grosgrain ribbon
•3/8" White solid grosgrain ribbon
•1.35" single pronged alligator clips (x2)
•2.25" single pronged alligator clip (optional)
•Scissors
•Wire (or material of your choice for securing center of bows)
•Lighter (or woodburning tool) for heatsealing ribbon ends
•Hot glue gun
•Measuring tape (or ruler)
Now that we have our supplies gathered we are ready to get busy! For each pigtail bow you will need approx 15" of ribbon. (This length of ribbon creates a finished loopy bow approx 2.5", so if you prefer a smaller or larger set you may need to adjust the amount of ribbon used.) I measured a total of 30" of hot pink w/white dots grosgrain ribbon, folded the ribbon in half and cut to make 2 even 15" strips of ribbon. Heat seal all ribbon ends using your lighter or woodburning tool.
 To form your first bow, start by taking one of your 15" strips of ribbon and follow these simple steps:
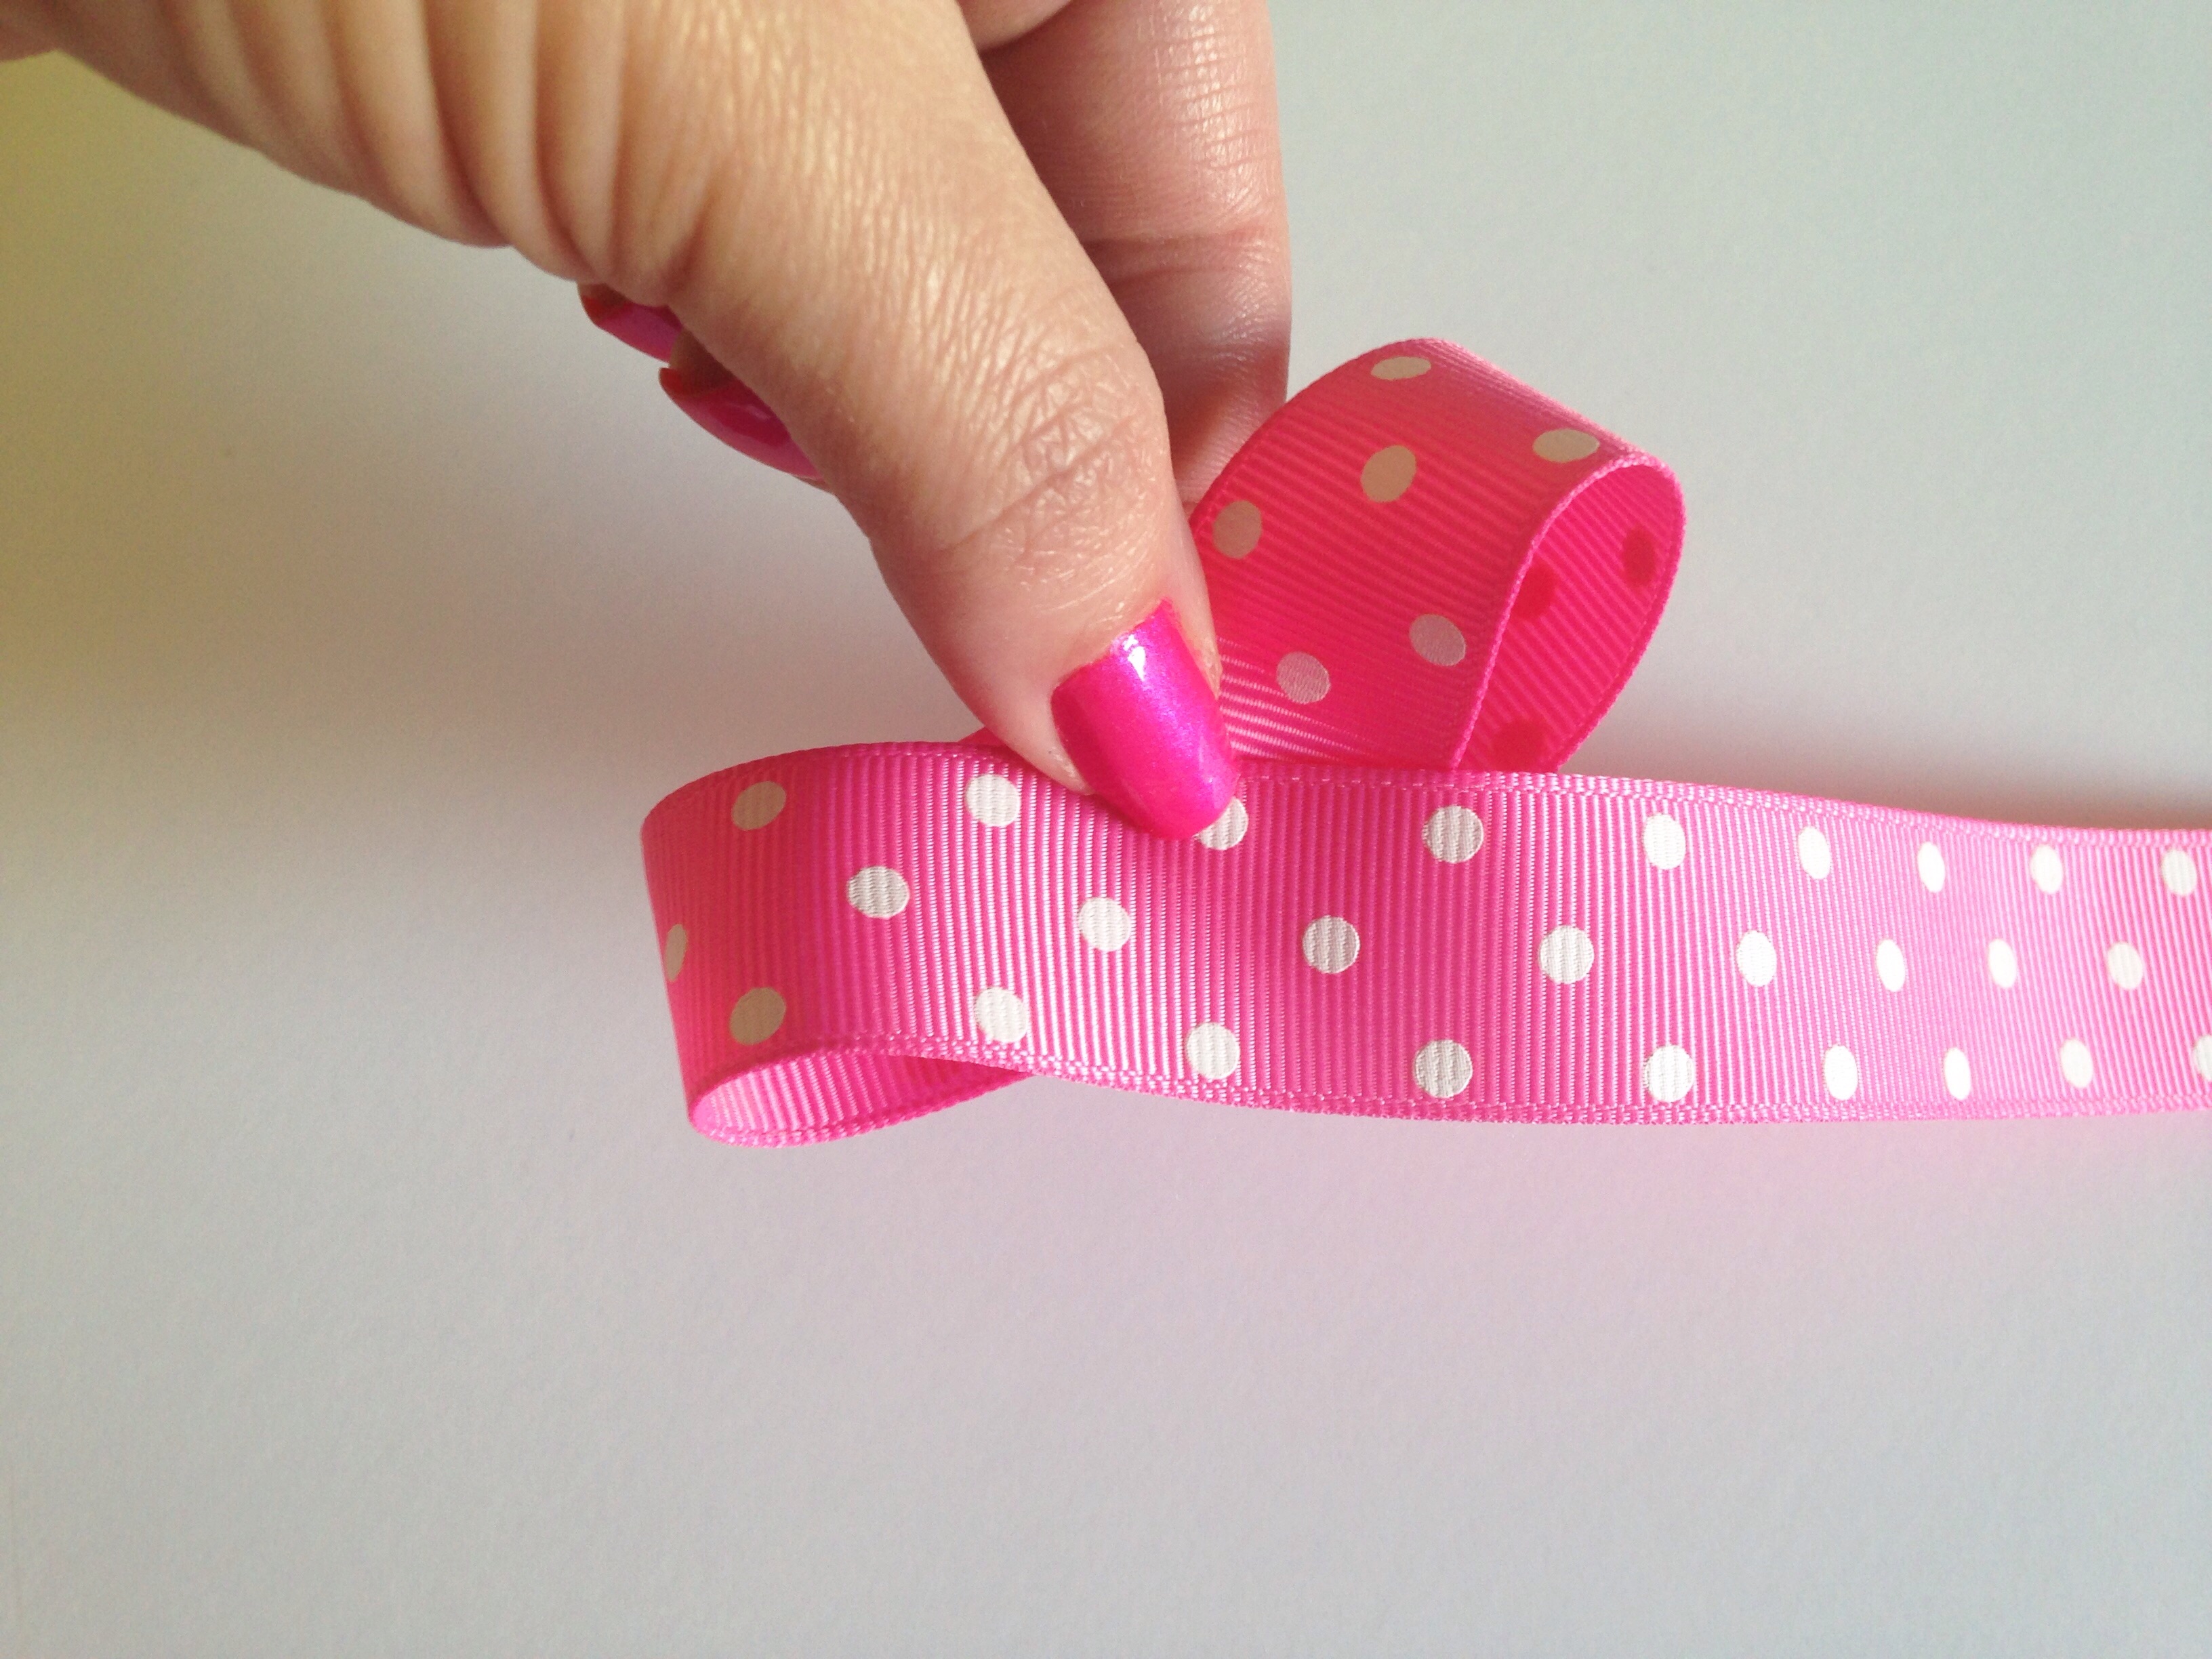
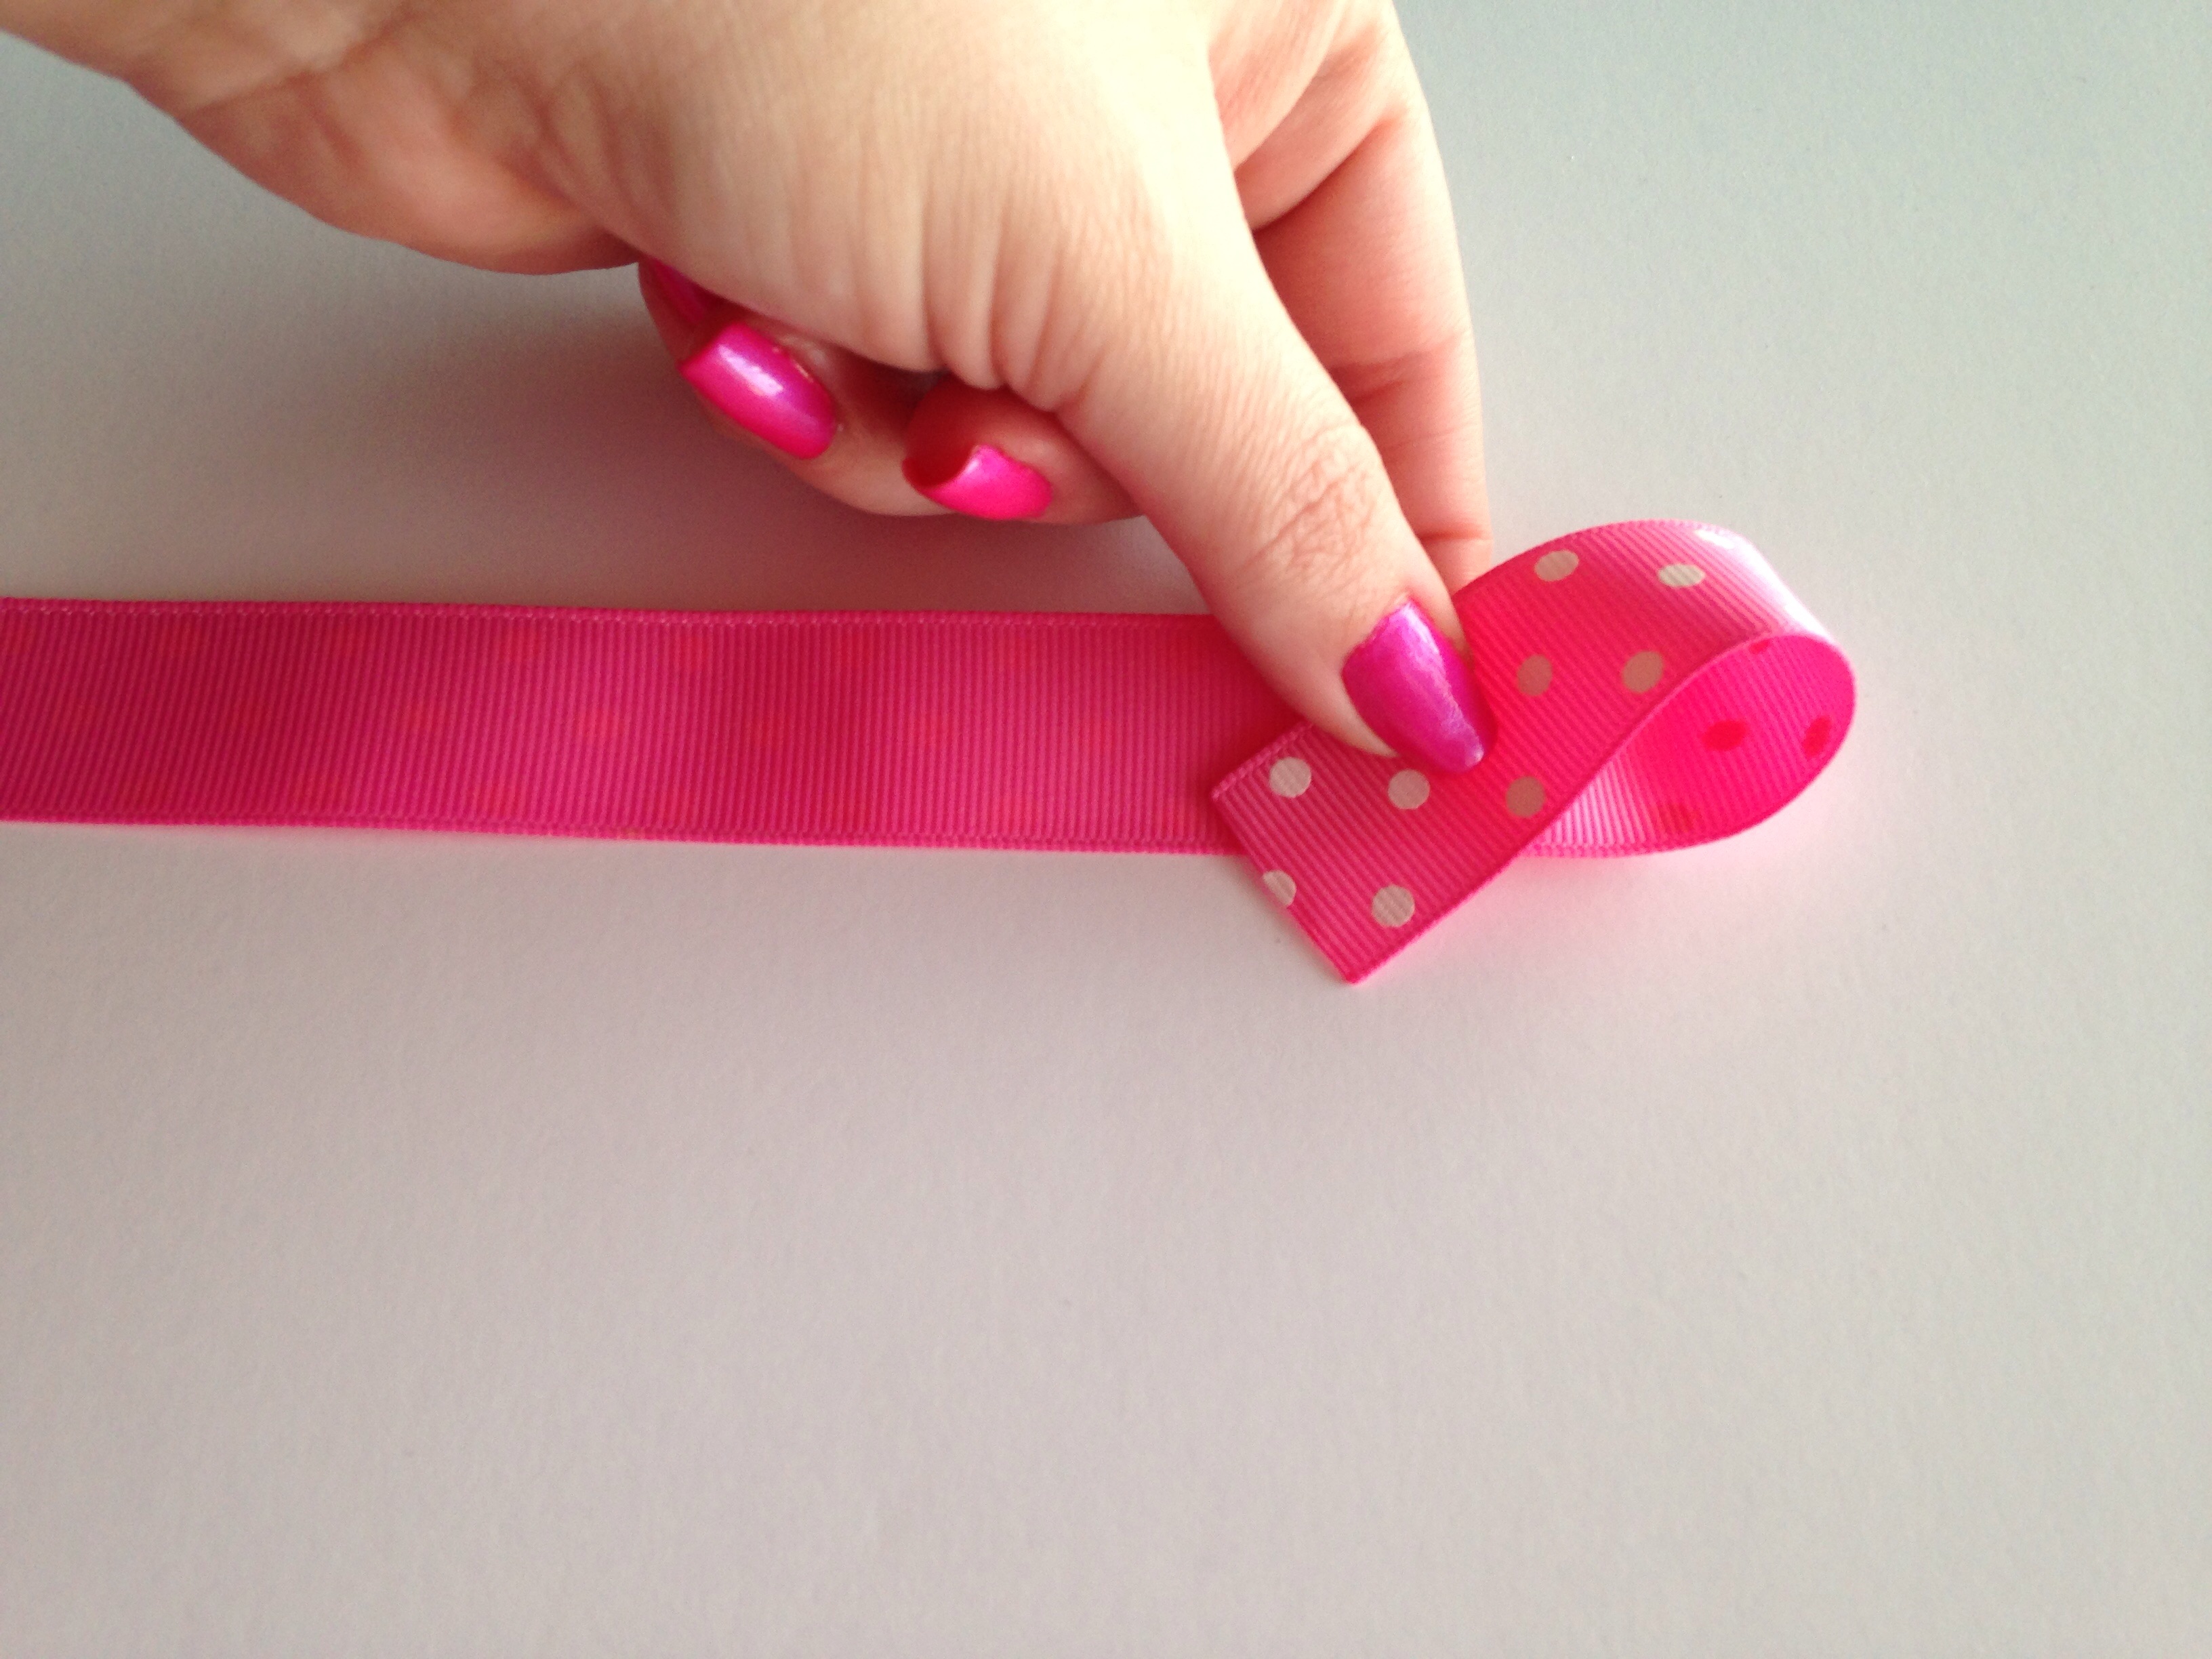 With your dots facing down, start on either end of ribbon and create your first loop. Make sure to leave a little excess ribbon to allow a nicely folded & secure center of your bow.
 With the opposite end of ribbon, fold over to create your second loop. Make sure they are equal in size. You have just created the top loops of your bow!
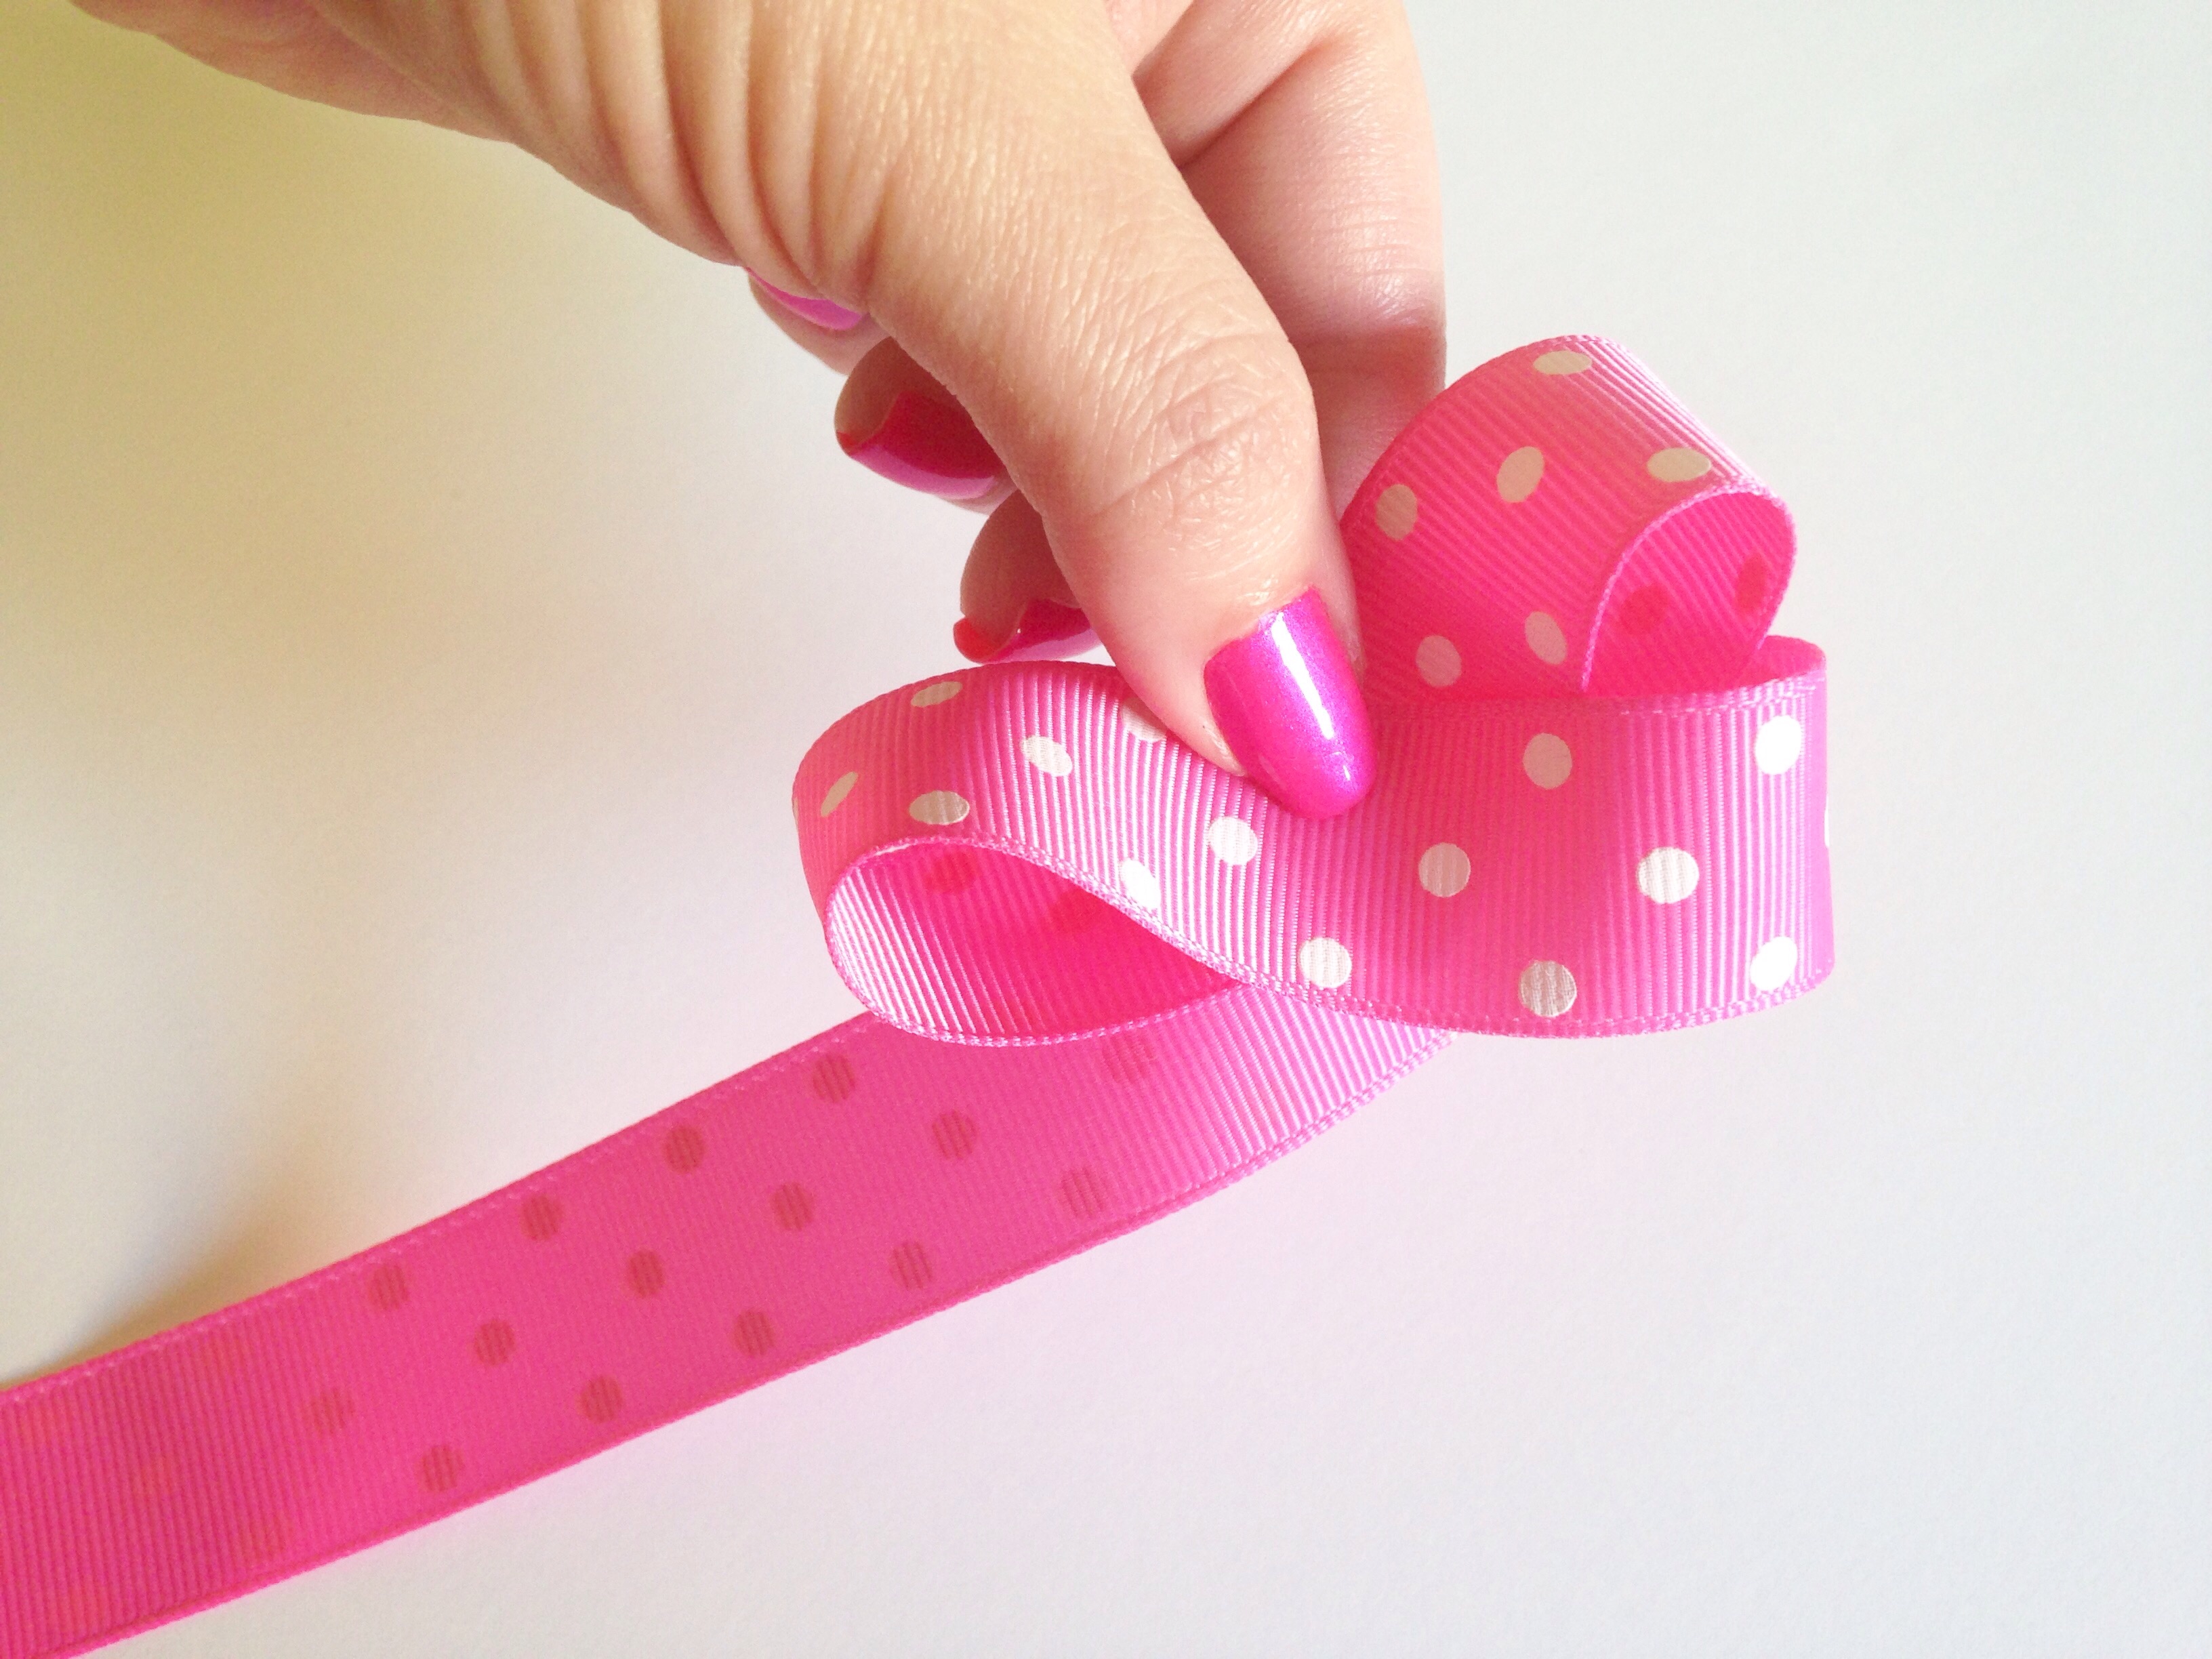 Your first bottom loop is almost formed for you already, so all you need to do is bring it around and tuck it behind your top loops
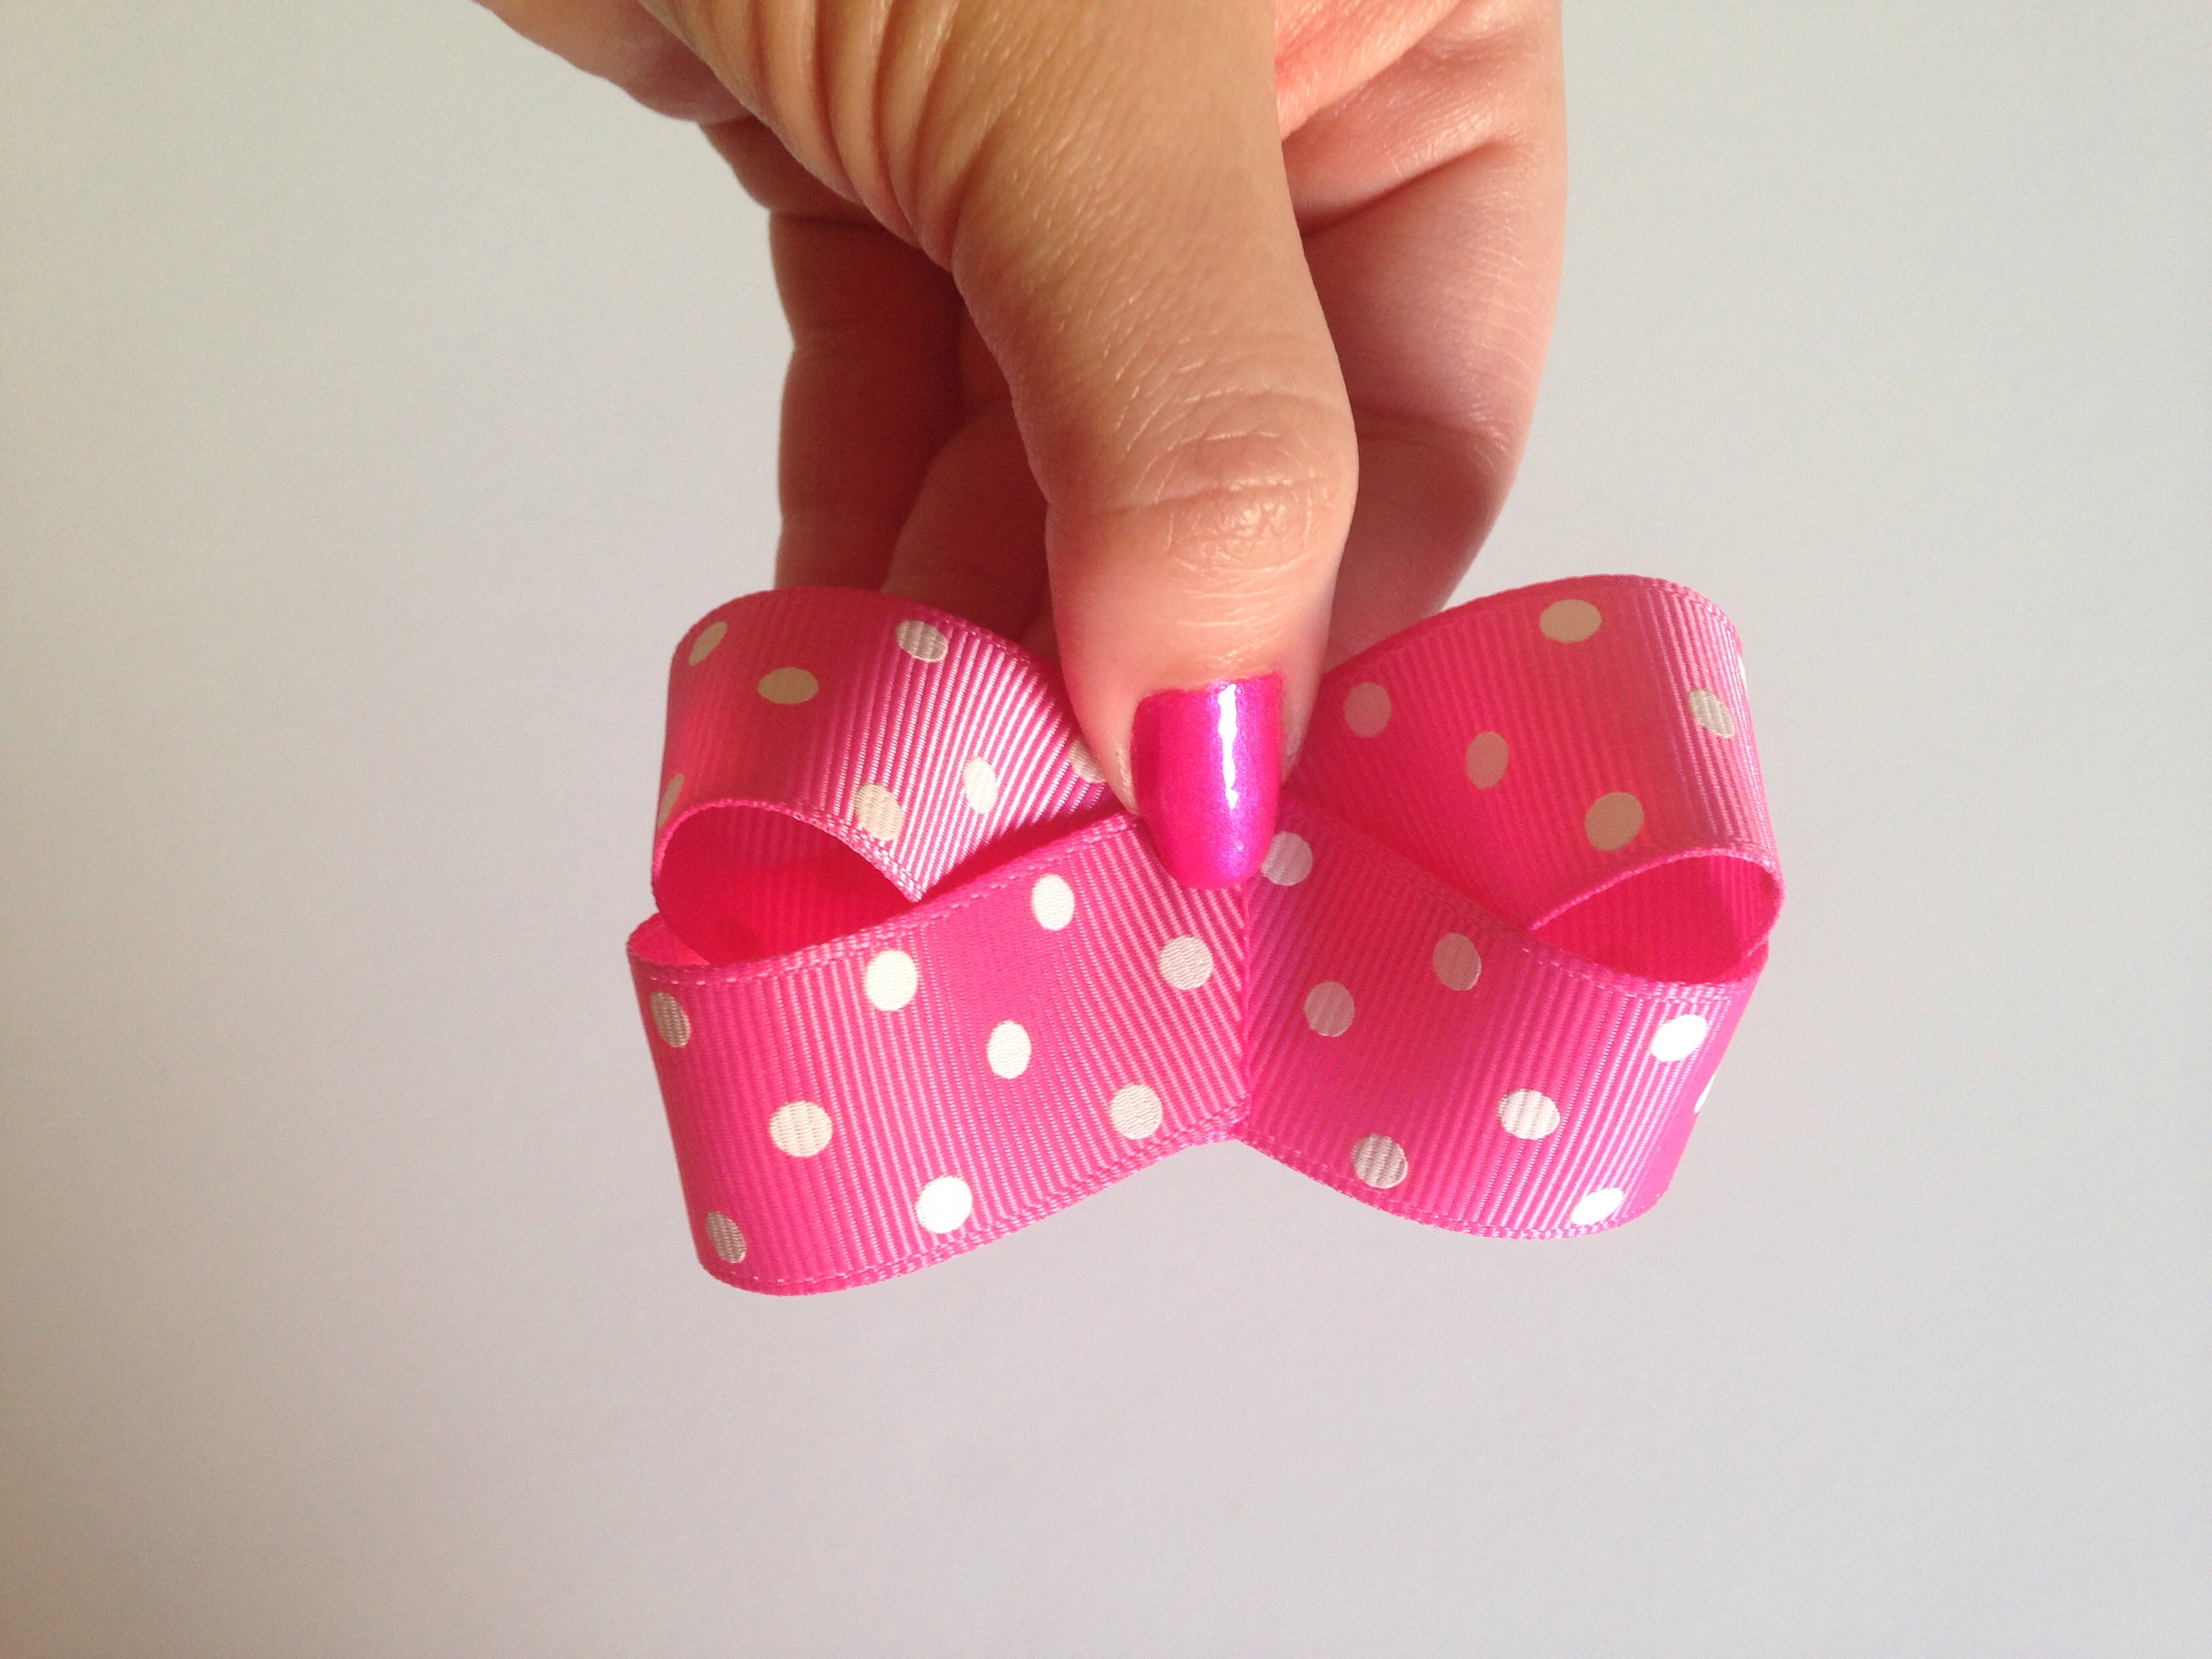
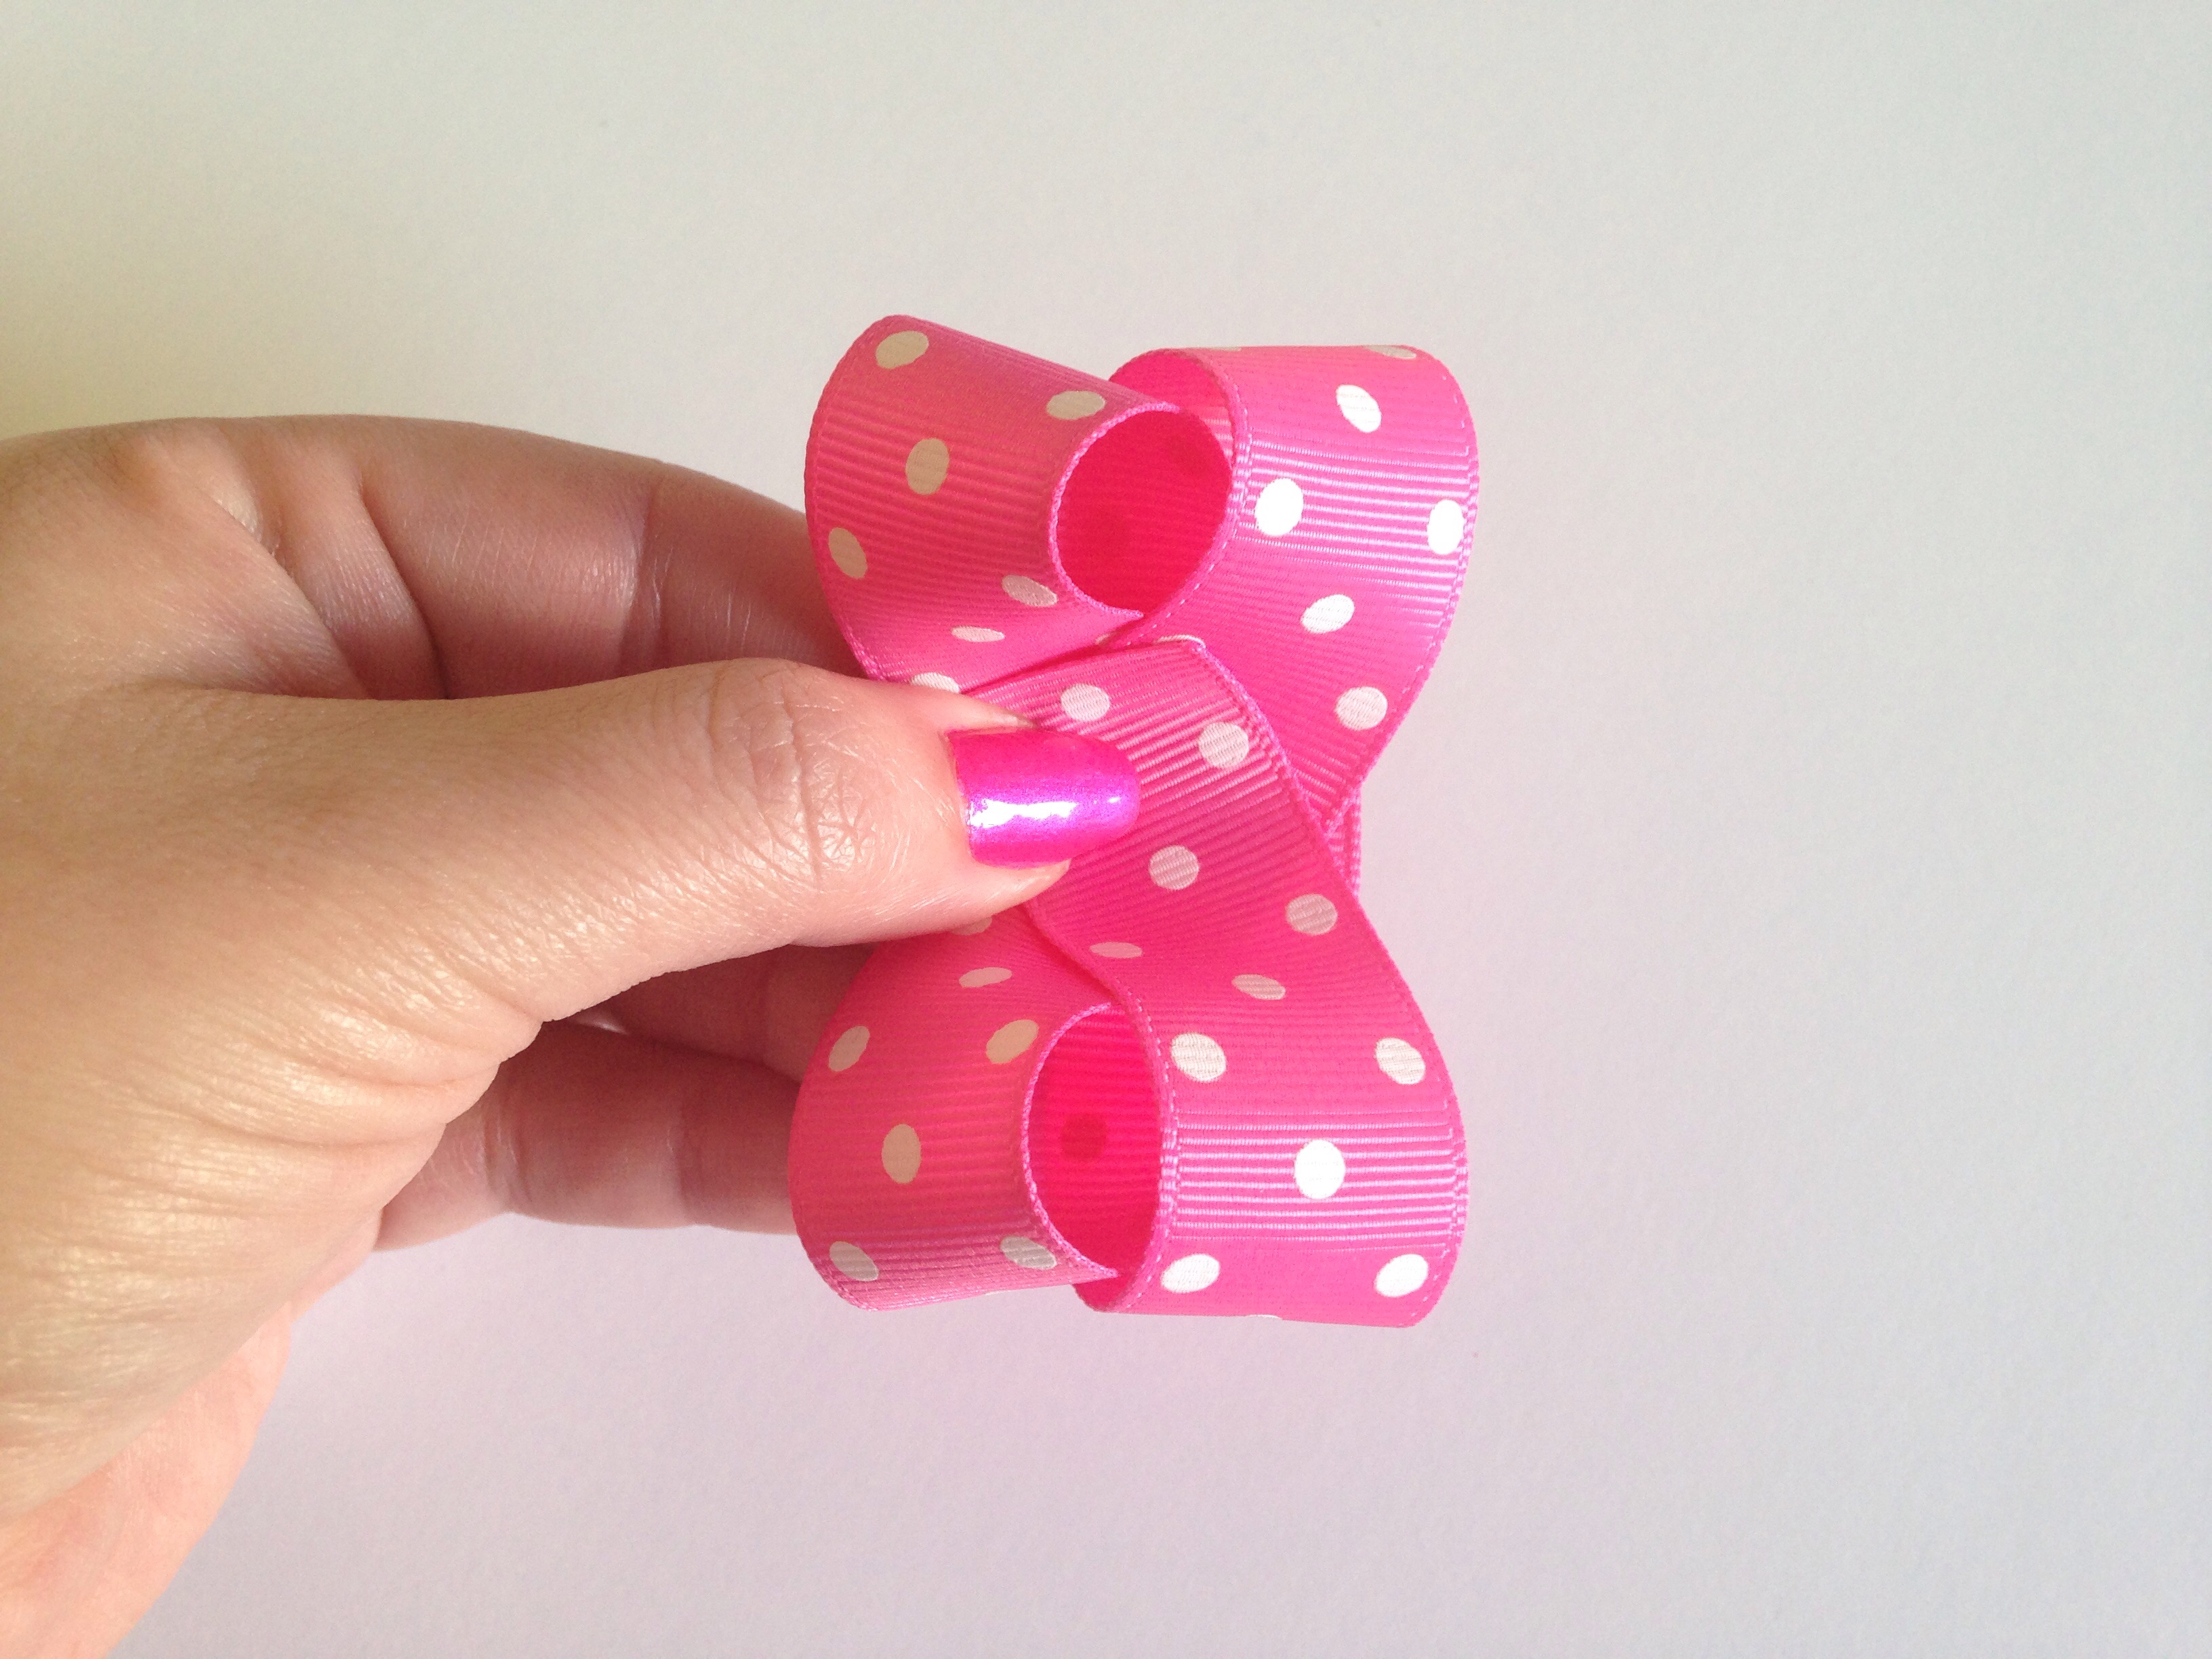 To create your final loop, line up the end of the remaining ribbon with the very first loop you created. Check all 4 loops to make sure they are equal in size and adjust if necessary.
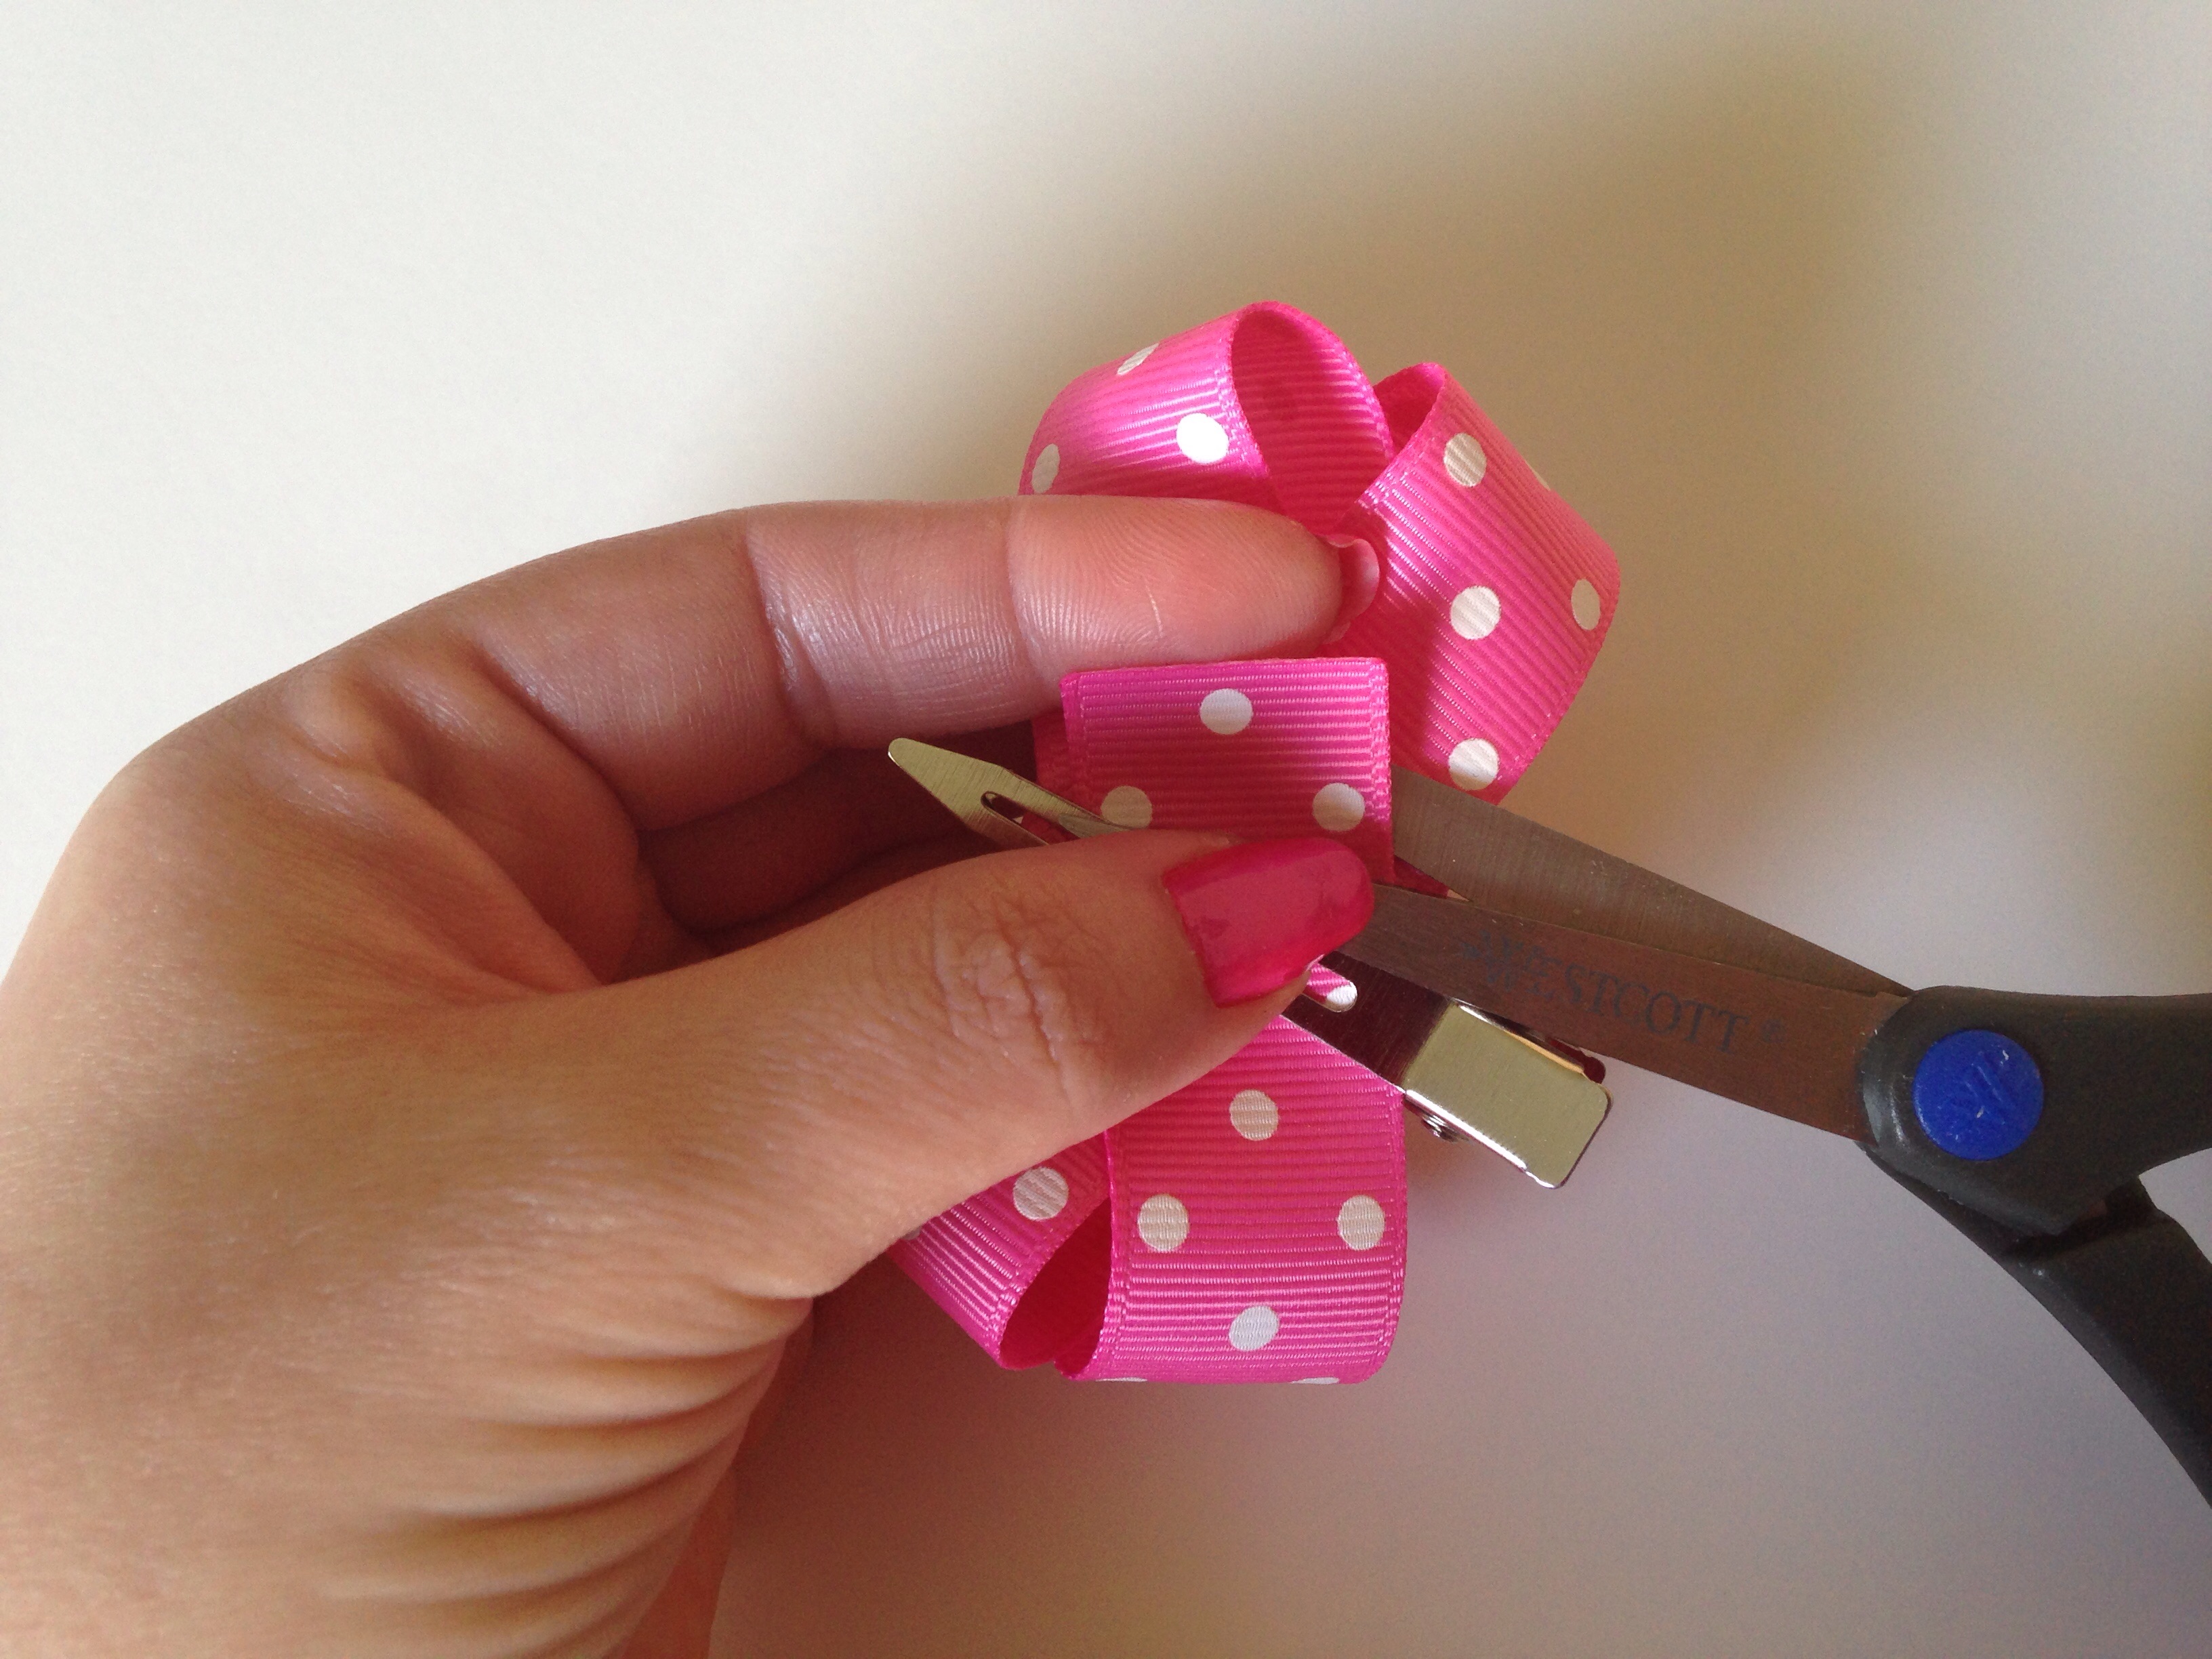 To create a beautiful seamless appearance I like to trim the very end of my ribbon even with the center of my bow. You must still tightly hold the center of your bow into place, so I like to use the largest 2.25" alligator clip to allow a tight hold while freeing my hands to make a straight cut down the center. Don't forget to heat seal your new ribbon end.
 Carefully slide your alligator clip off your bow as you tightly hold the center of your bow once again.
 Next we are making a simple accordian fold. I like to start by folding the center of my bow down with the edges facing up.
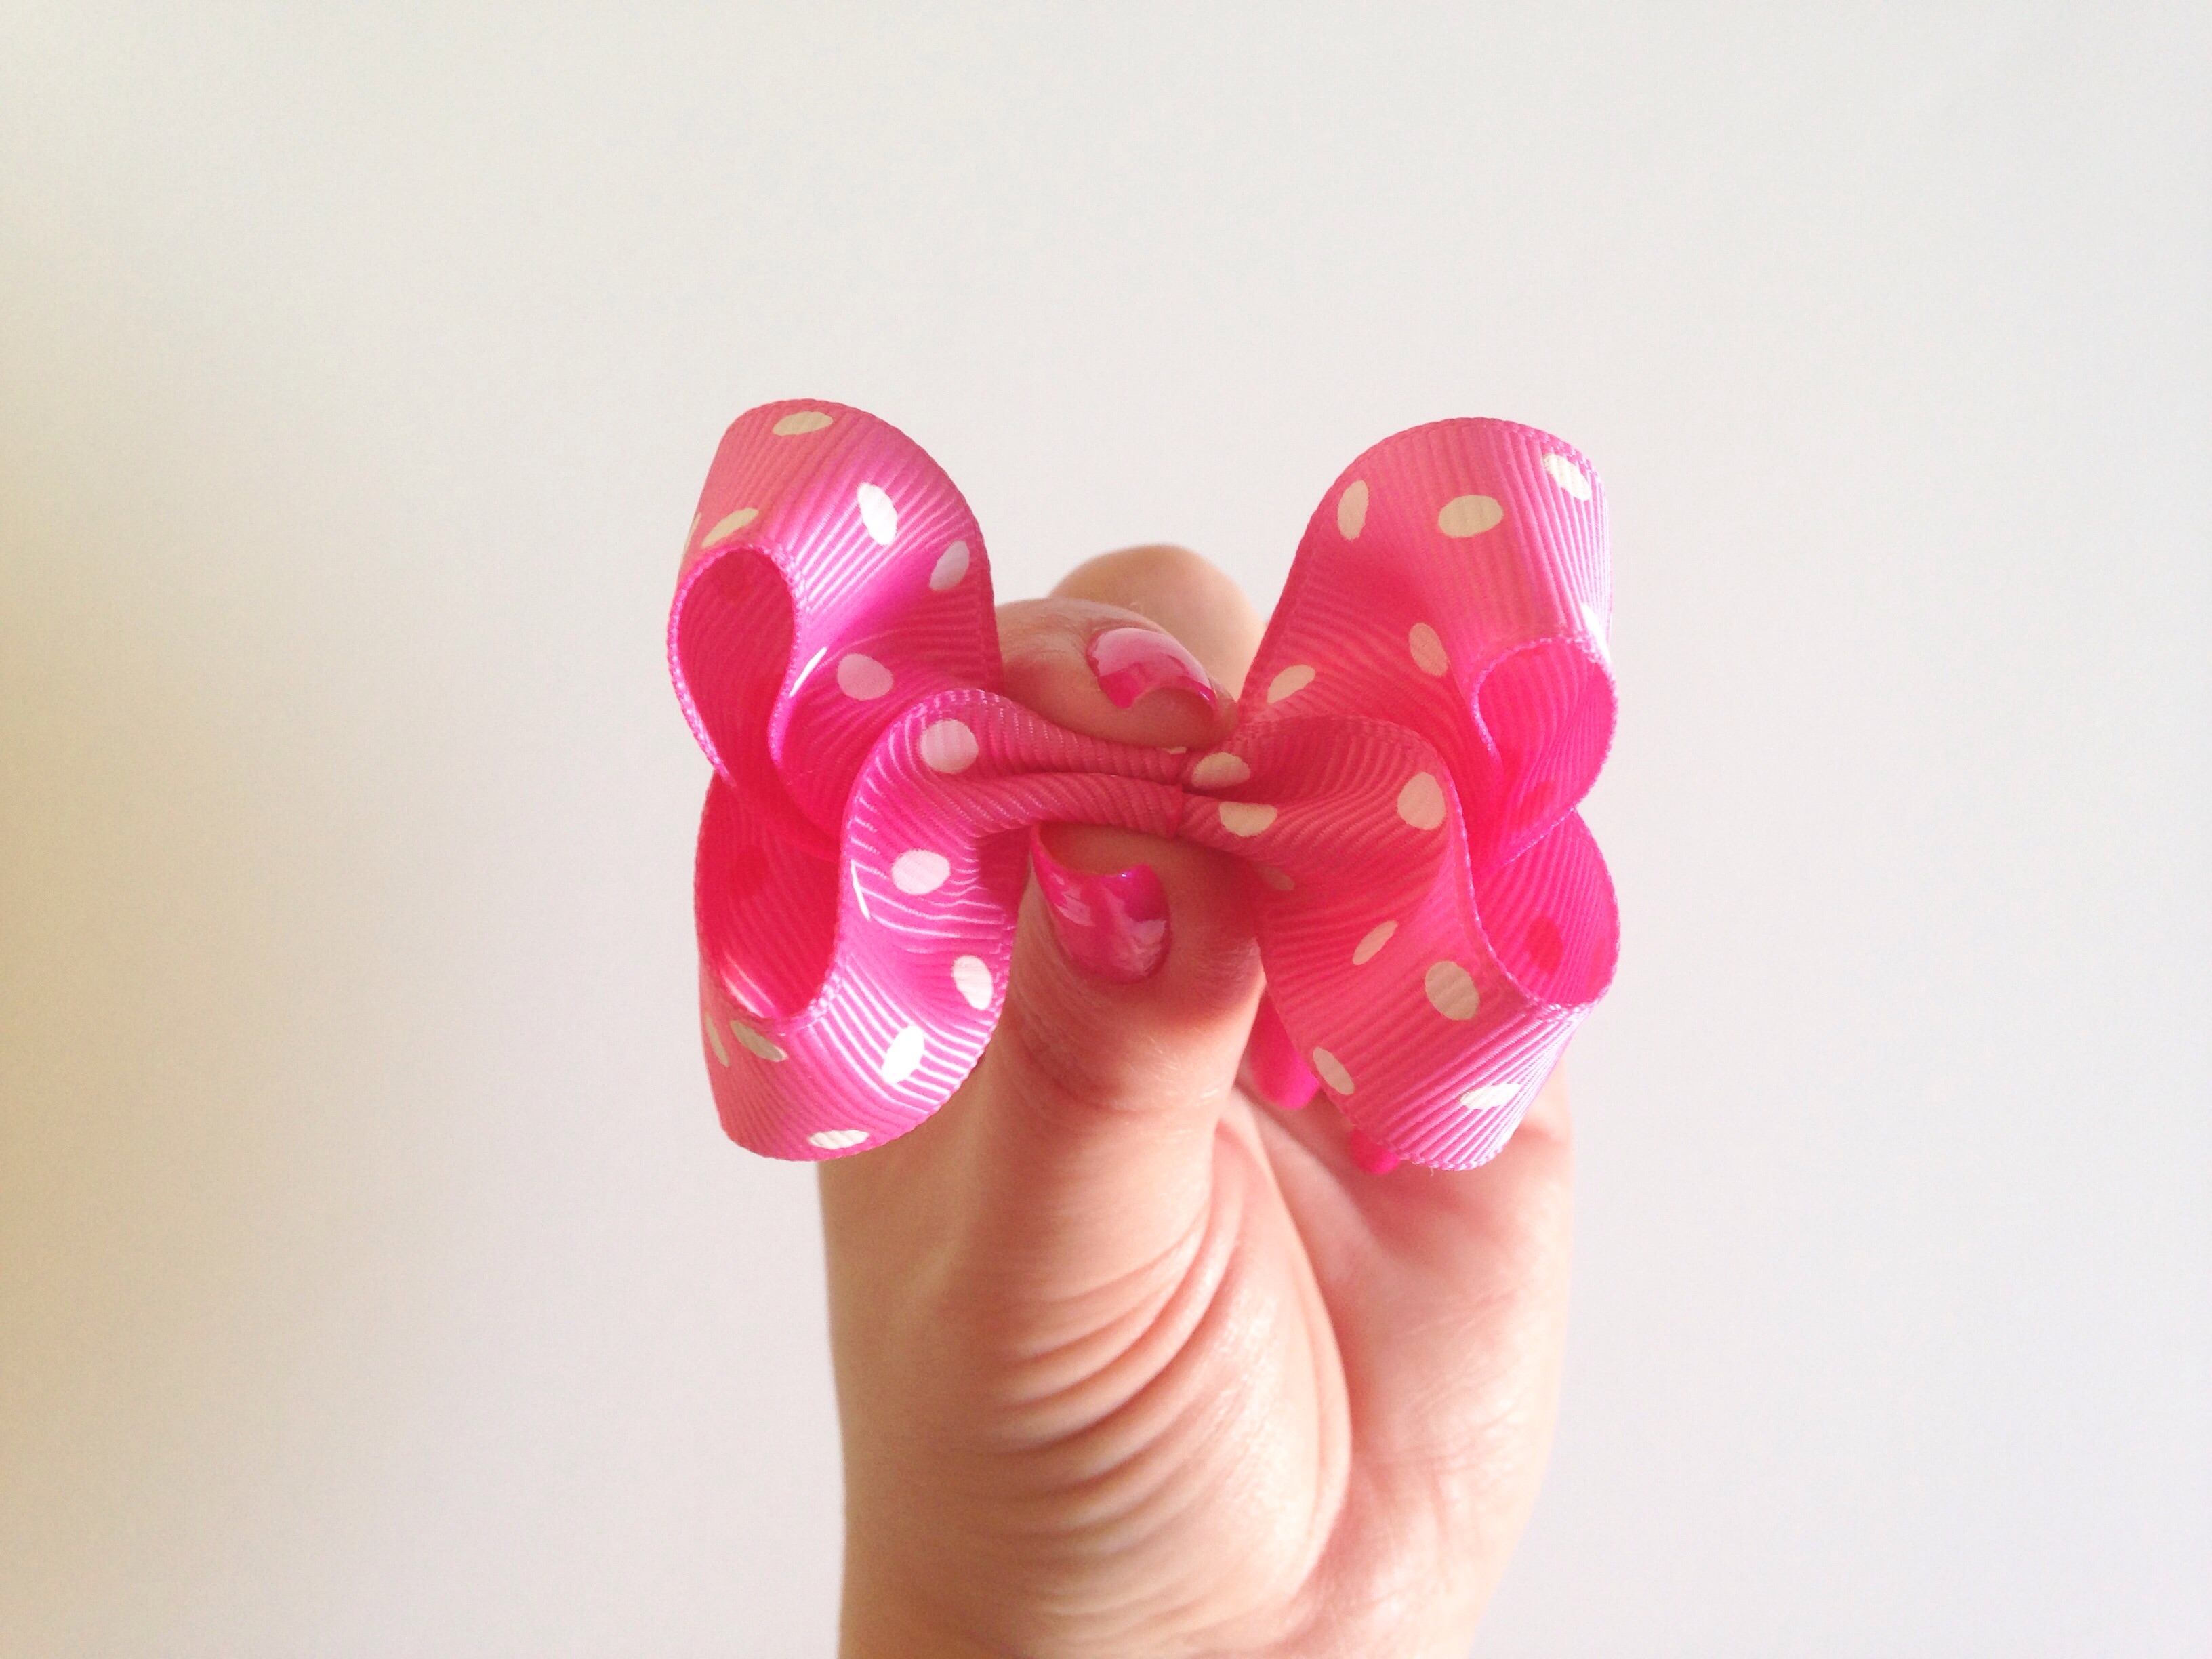 Now fold your edges back down. If you have continued to hold the center of your bow tightly into place during all steps your bow should be perfectly even with a nice accordian fold in the center. Nice job!
 Wrap the center of your bow with wire or whatever you prefer to achieve a secure hold. You have just constructed the first pigtail bow of your set!
 Now just repeat all steps to create your second bow!
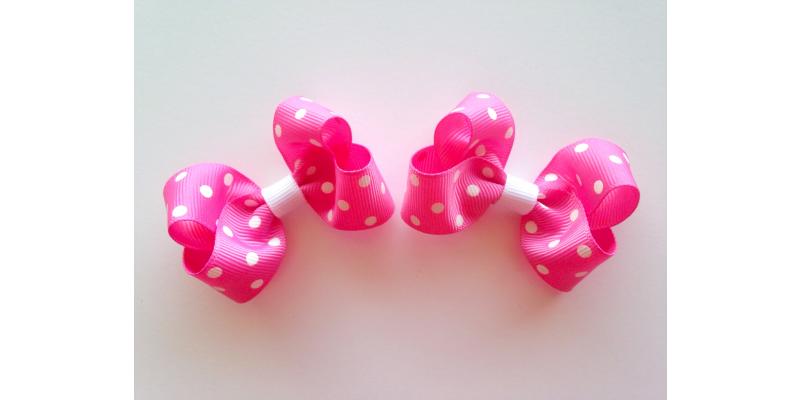
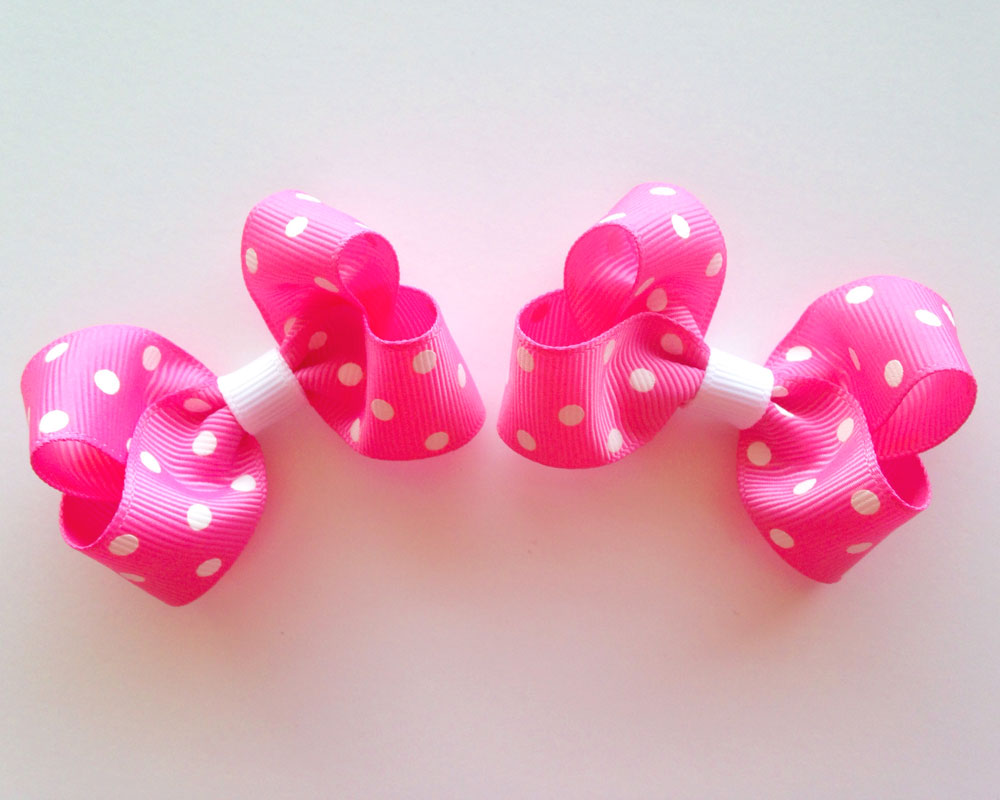
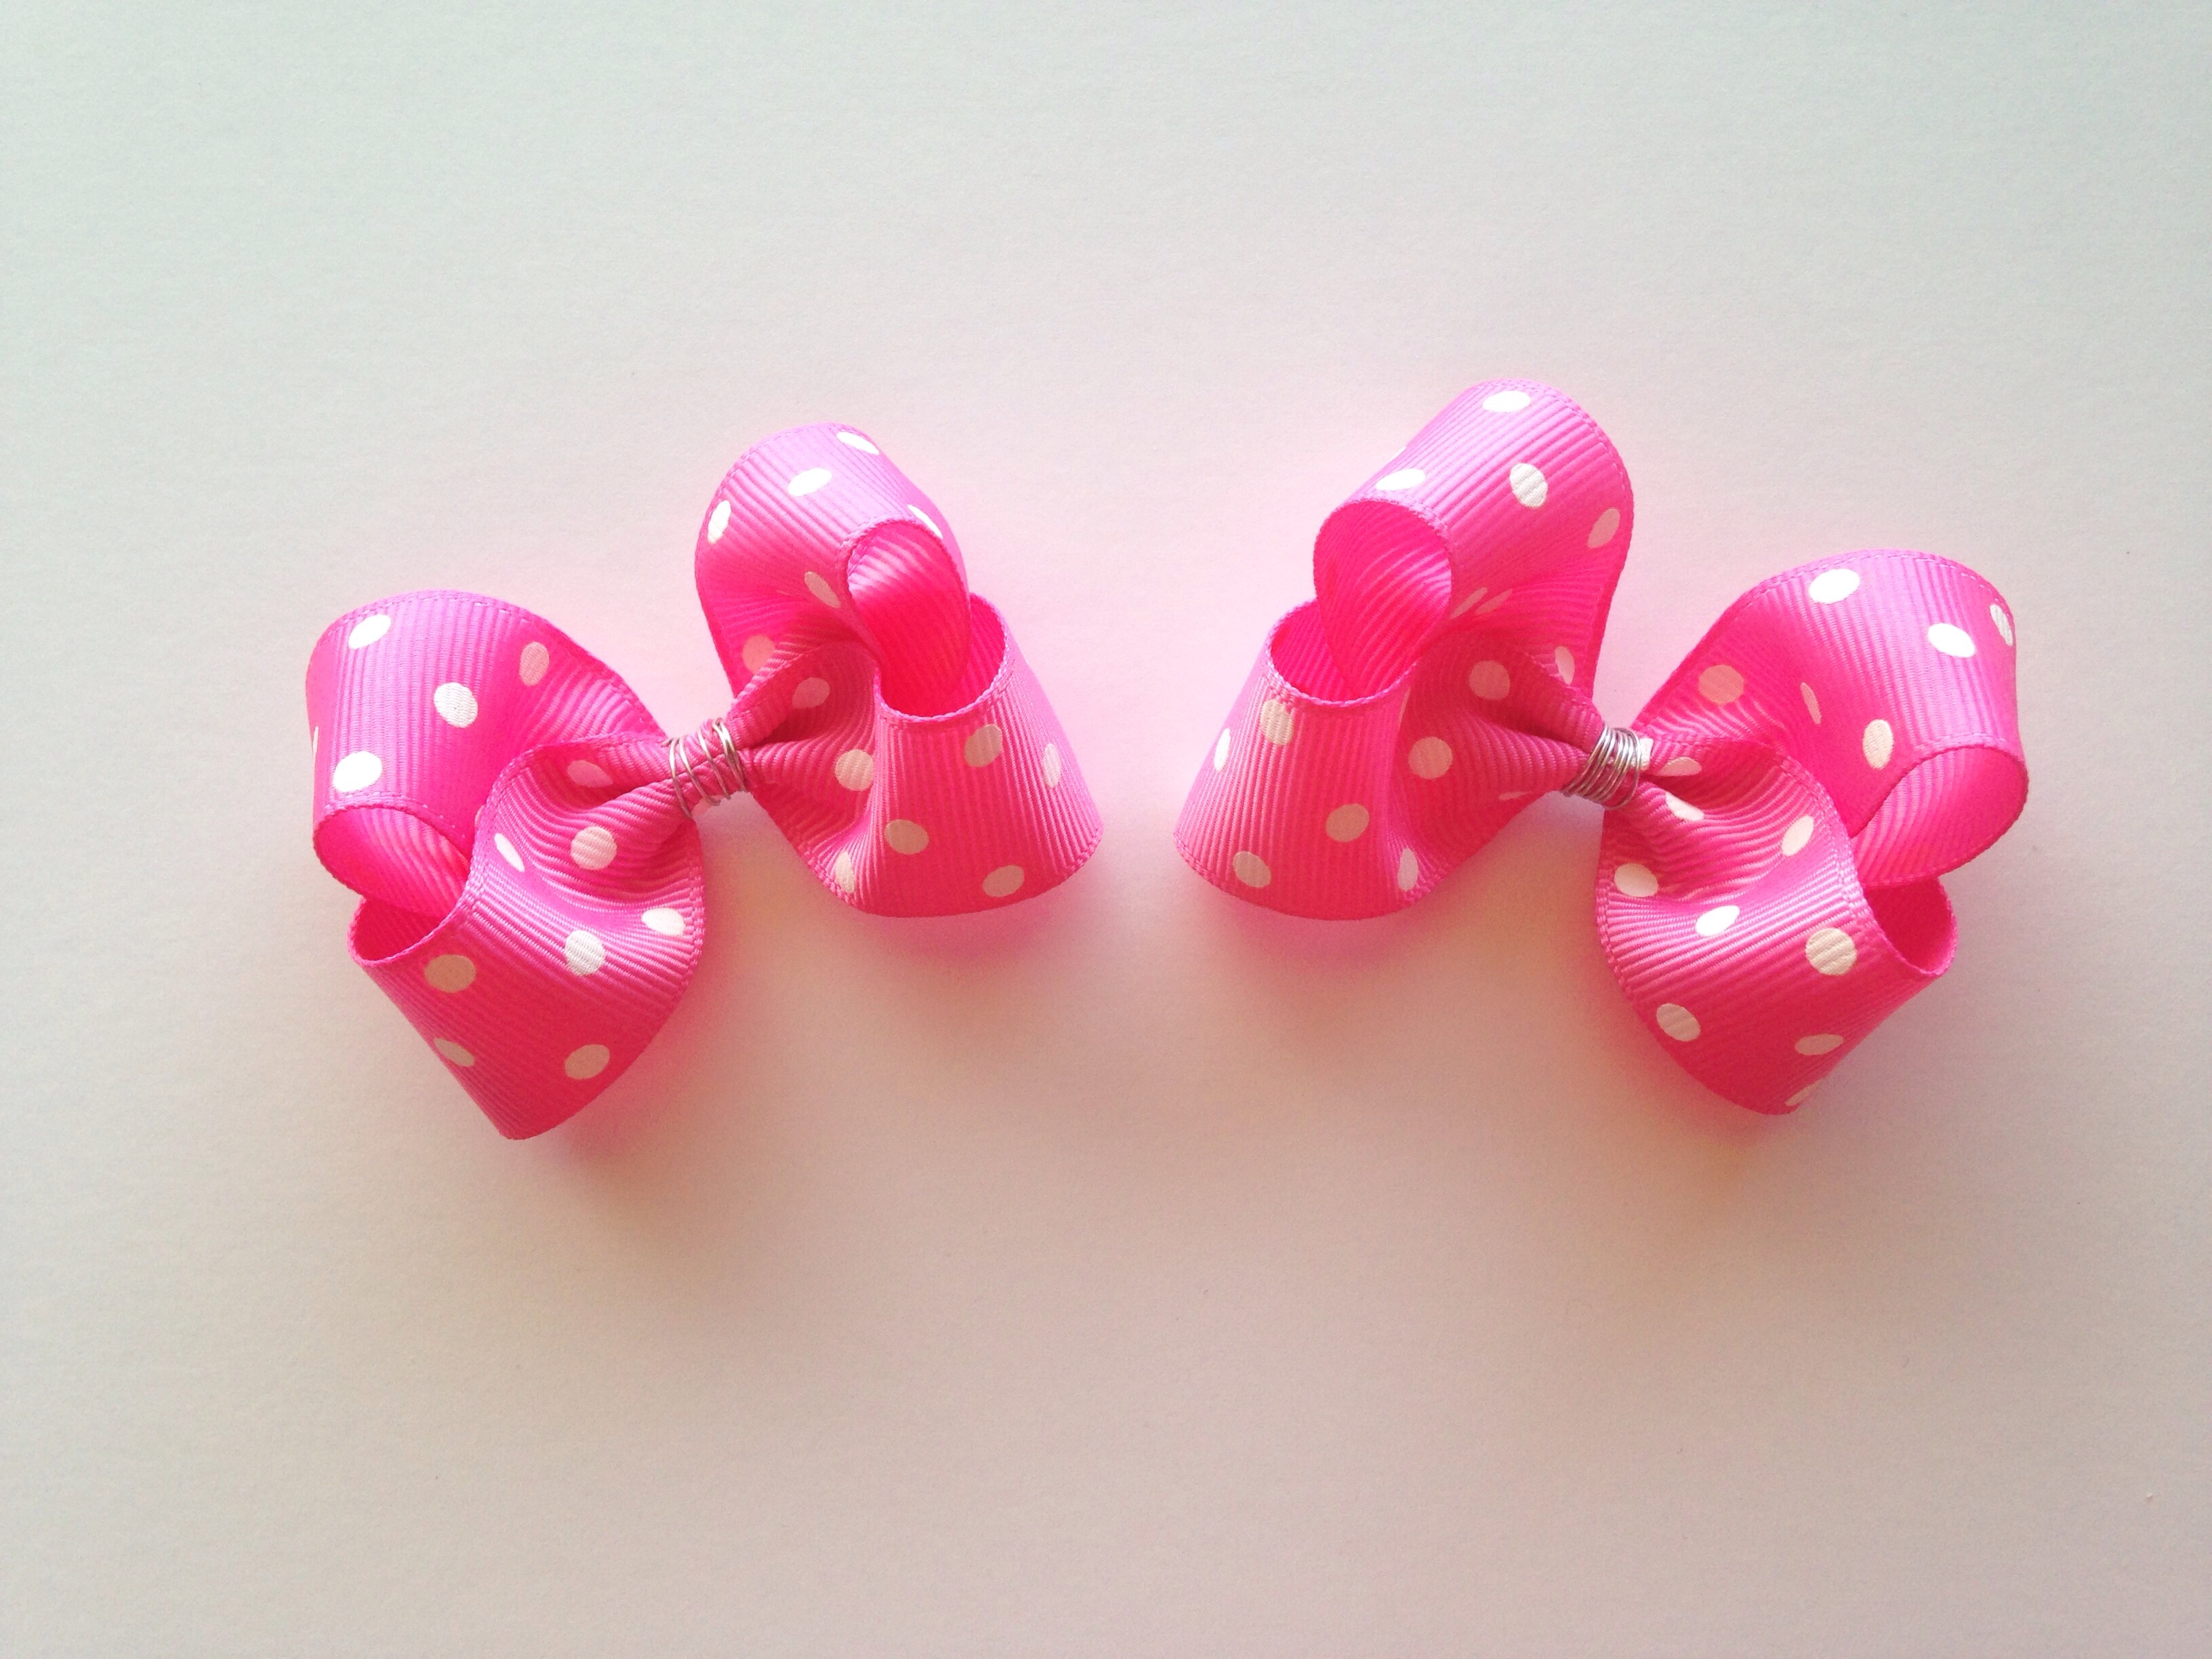
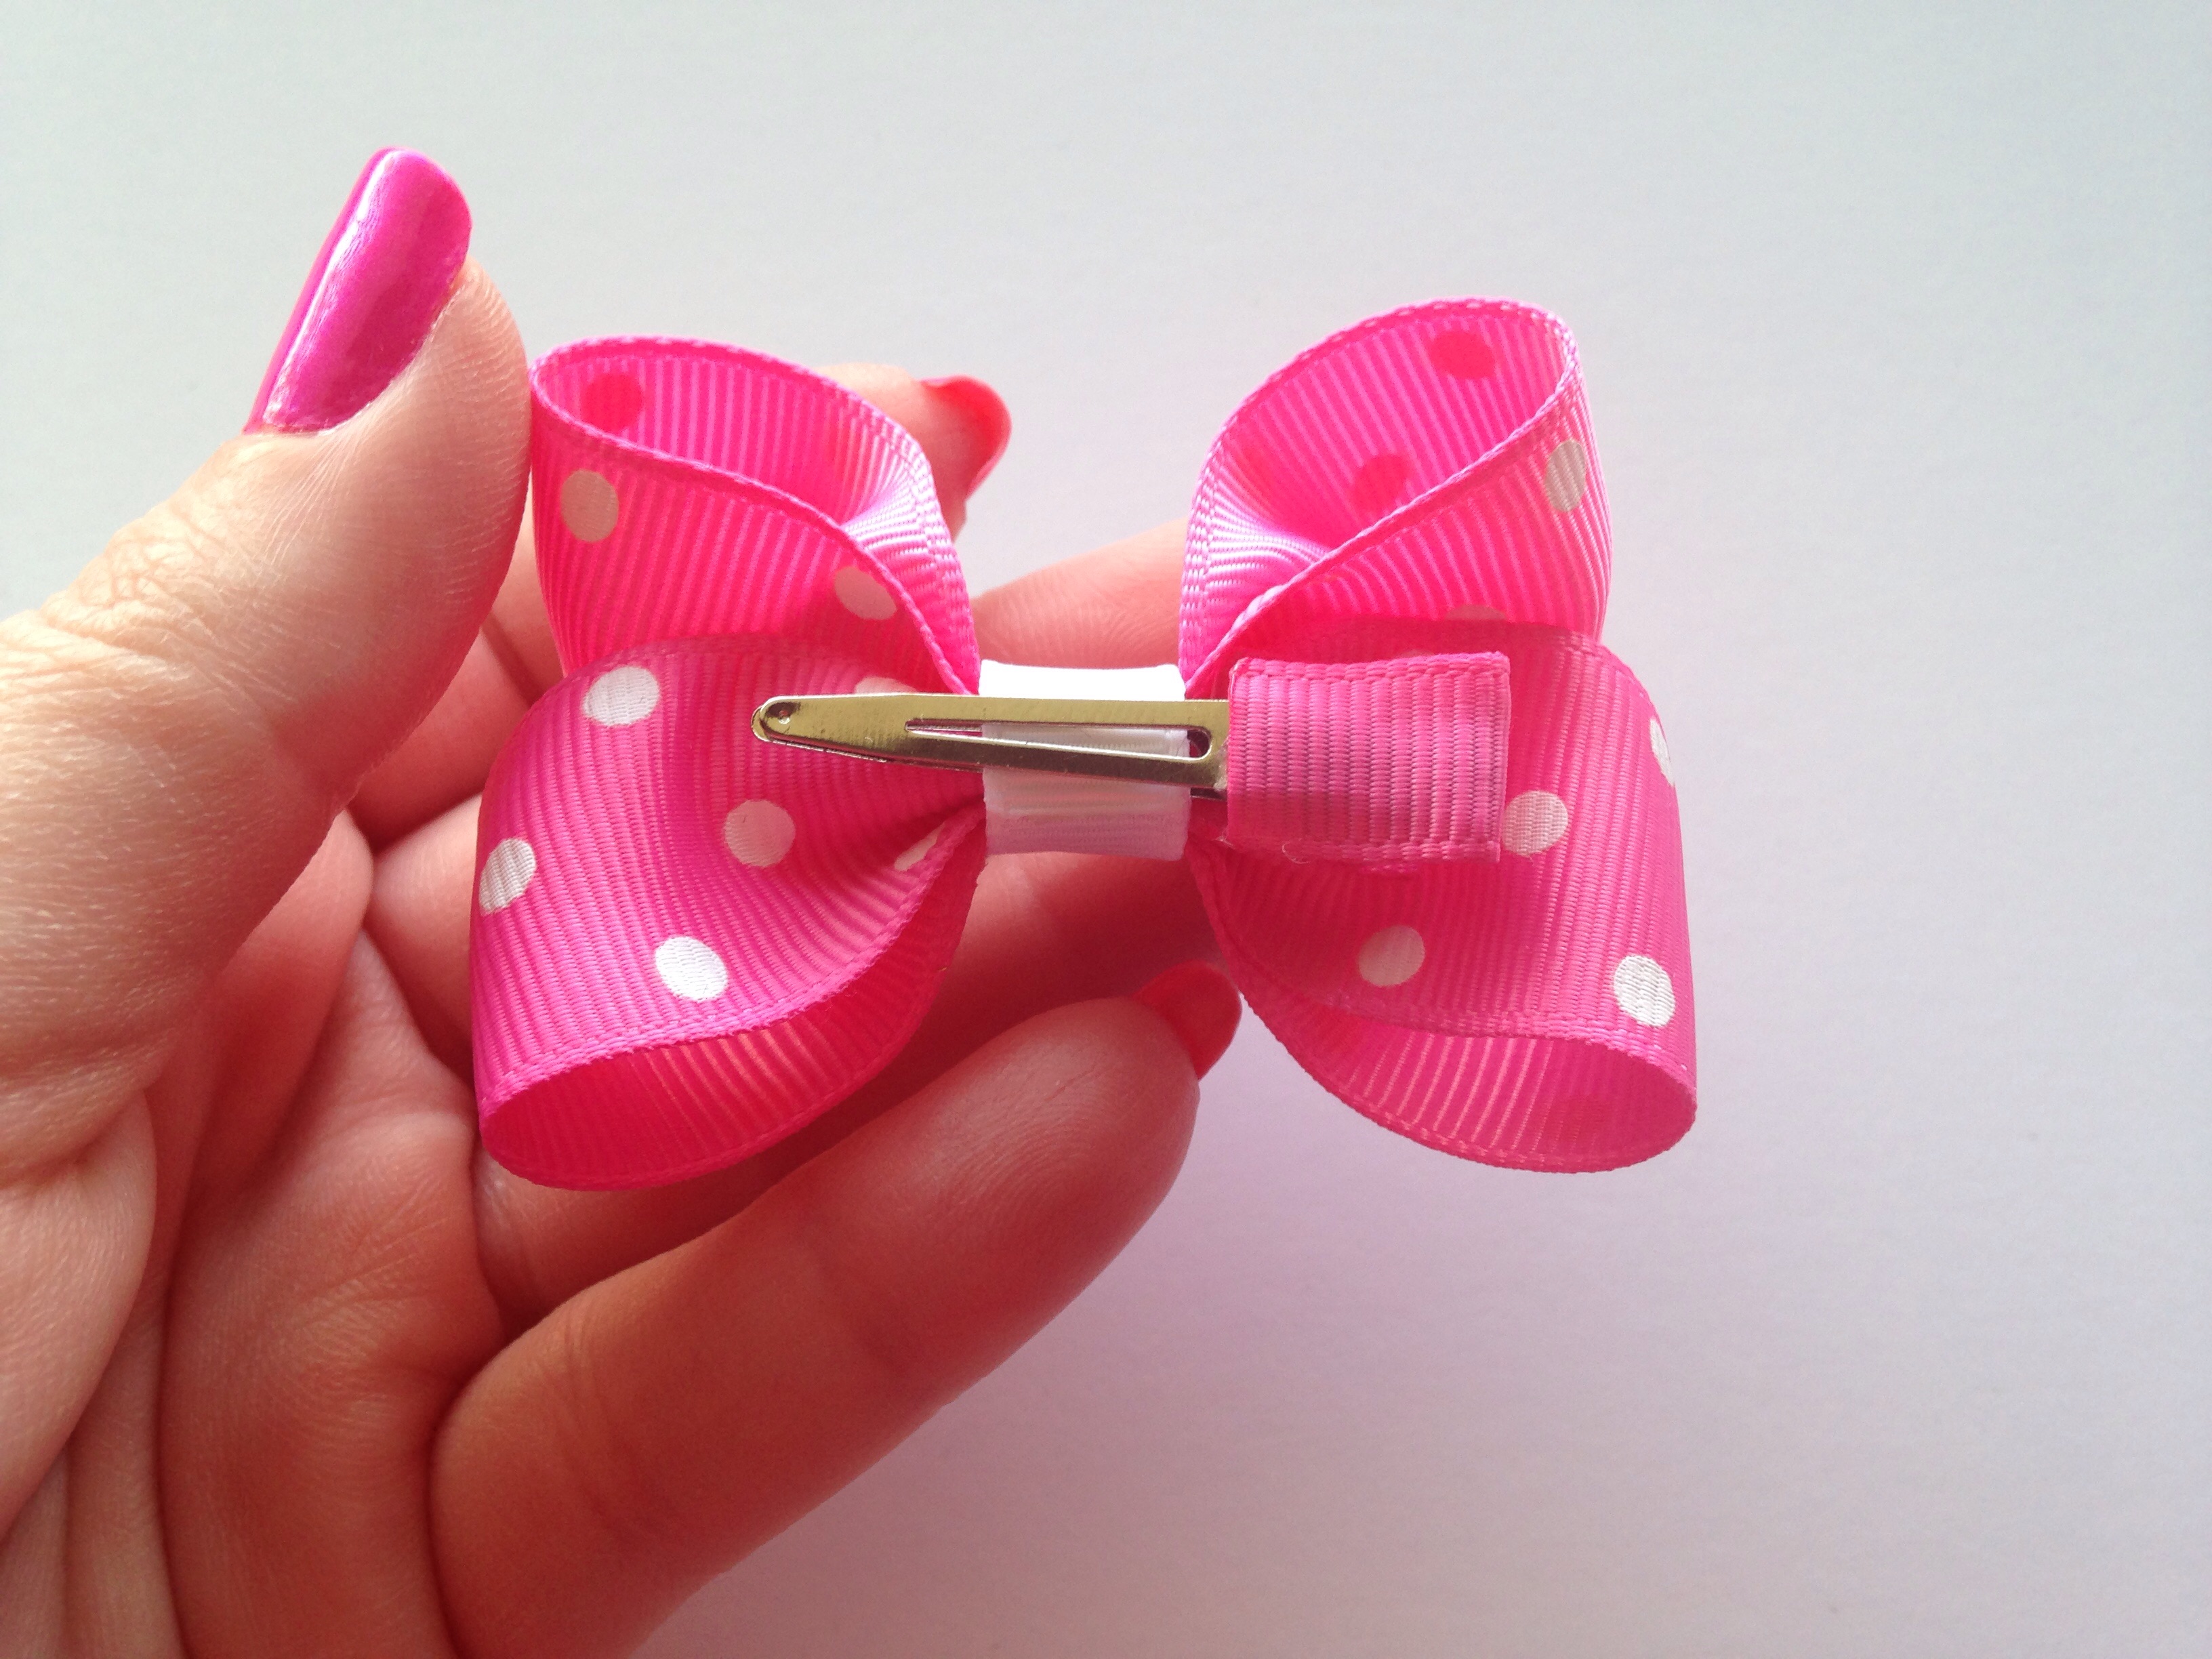 Now its time to finish up this adorable set and get them ready to be worn by that special little darling! I decided to cover the ends of my clips with matching hot pink solid grosgrain ribbon in 3/8" just to keep my clip hidden. I only used about an inch or less per clip. To accent my white dots on my bows I chose to wrap my centers with solid white 3/8" ribbon. I always wrap my centers at least twice to make a sturdier bow and a clip that will forever stay into place! Make sure your hot glue gun is plugged in and ready to go, and glue your center ribbon down and attach your alligator clips to the back! If you prefer something other than a clip on the back of your pigtail bows, try HBC's new Ponytail hair bands!
 You are finished! Now those perky pigtails can be nicely accessorized with these fun pigtail bows that every little lady will be excited to wear! Have fun and make as many different designs as you can dream up!
Visit the rest of our blog for more Crafting Tutorials and DIY Instructions!
Loading...

