
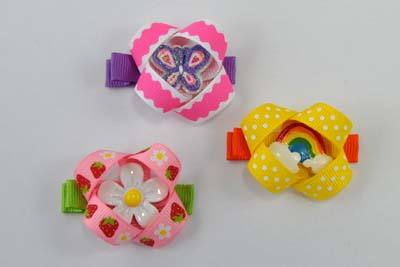
 These clippies are super easy and fast to make! This is a great craft project that even beginning bow makers can tackle with ease.
Items needed to create the clippies: Ribbon-lined Single Prong Alligator Clip, 10" of Coordinating Grosgrain Ribbon, Resin Embellishment
Step 1: Heat seal the grosgrain ribbon ends. I used a lighter but you can also use a hot knife or a specialty tool for made for this purpose.
These clippies are super easy and fast to make! This is a great craft project that even beginning bow makers can tackle with ease.
Items needed to create the clippies: Ribbon-lined Single Prong Alligator Clip, 10" of Coordinating Grosgrain Ribbon, Resin Embellishment
Step 1: Heat seal the grosgrain ribbon ends. I used a lighter but you can also use a hot knife or a specialty tool for made for this purpose.
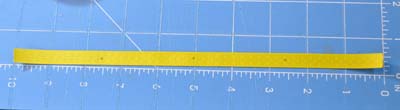
 Step 2: Measure off and mark intervals of 2.5" on the back of the ribbon.
 Step 3: Take end of ribbon and fold around to make a 90 deg. angle. I used a dot of hot glue placed on the first mark to secure.
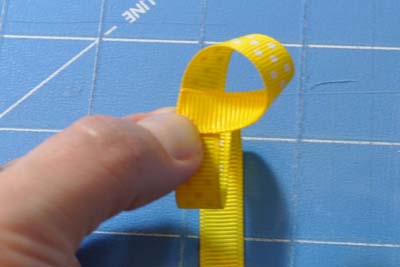 Step 4: Create second loop and glue down to create a figure 8.
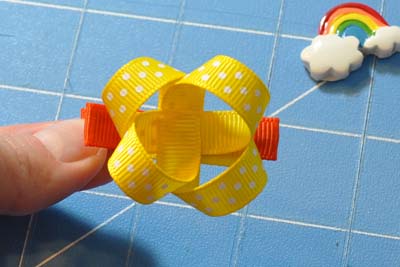
 Step 5: Continue creating the loops until finished.
 Step 6: Glue loops to the ribbon-lined clip.
 Step 7: Glue the resin embellishment to the hair-bow center!
How easy was that!? No tying/folding/sewing required! In just a few minutes you can create this cute clippy that any girl will love to wear.
Step 7: Glue the resin embellishment to the hair-bow center!
How easy was that!? No tying/folding/sewing required! In just a few minutes you can create this cute clippy that any girl will love to wear.

Visit the rest of our blog for more Crafting Tutorials and DIY Instructions!
Loading...

