

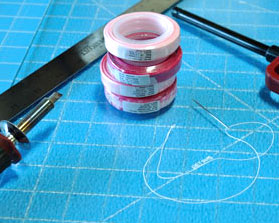
- 3/8" grosgrain ribbon (I used hot pink camo, powder pink, pink, and fuchsia)
- Needle and thread (don't worry, only a small amount of sewing is required)
- Scissors
- Heat-sealing device (hot-knife or lighter)
- Ruler
- Hot Glue Gun
- Alligator Clip or hardware of your choice
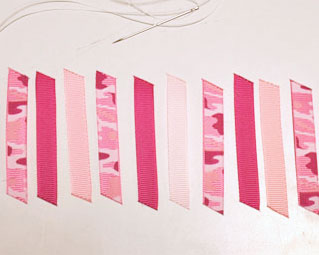
 Step 1: Cut the ribbon strips. I used 4 camo pieces, 3 fuchsia, 2 pink, and 1 powder pink. My ribbon pieces are approx. 2.75" in length and I used one of the angles on my cutting mat to angle all the ends. I used a hot-knife with a metal cutting edge and a glass cutting board over my mat to cut my ribbon pieces. You can also use a scissors or a rotary cutter but you will then need to heat-seal the ends of your ribbons with a lighter to prevent fraying.
 Step 2: Arrange the pieces in the order you want them.
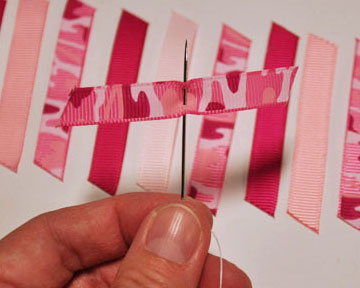
 Step 3: Thread your pieces starting from and ending on the back of the ribbon. Be sure to keep the pieces in the correct order.
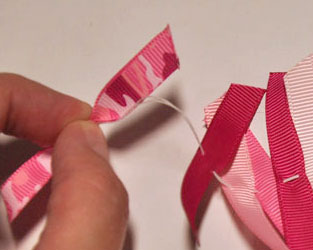
 Step 4: Starting with the piece at the end, push it against the knot at the end of the thread and pinch it so that the ends of the ribbon are facing you.
 Step 5: Continue sliding the pieces down and gathering them together the same way. Be sure to check that the ribbon angles are all going the same direction. If one has turned, simply flip it around to correct it. You may wish you had a third thumb for this part as you need to keep holding the pieces pinched together with one hand while trying to add the other pieces to the group.
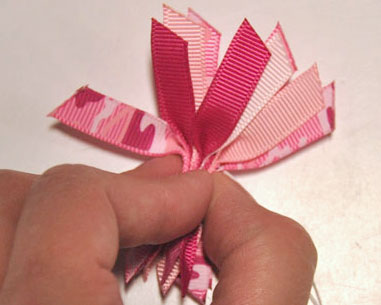
 Step 6: After the pieces are all gathered together, wrap the thread around the center of the bow tightly a couple of times and then knot on back. Be sure to keep the thread in the middle of the bow so it looks symmetrical.
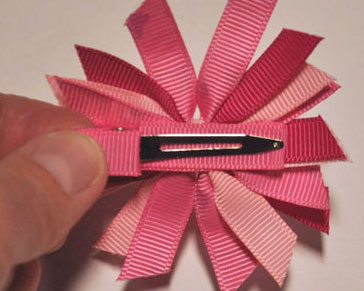
 Step 7: Use glue to adhere the clip of your choice to the back of the bow. I used a hot pink ribbon-lined single prong alligator clip, which is available on our site.
 Step 8: We now need to create the bow-knot center. Cut a piece of ribbon around 6-8" in length. I am using the camo print. Fold it around to create an "awareness ribbon" type of loop.
 Step 9: Continue looping an end back inside the loop you just made and rotate a half turn so that it is face-up.
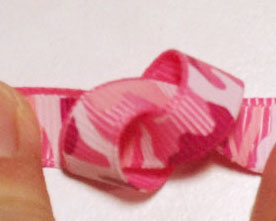
 Step 10: Pull on the ends to form a loose knot.
 Step 11: Use your fingers to push the knot together while gently tightening further until desired look is achieved. You can keep it in a peak like I did here, or continue to tighten into a flatter knot. With narrower ribbons such as 3/8" or less, it looks diminutive to tighten into a knot, but with wider ribbons, a peak can stand out too far and look odd so the flatter knot may look better.
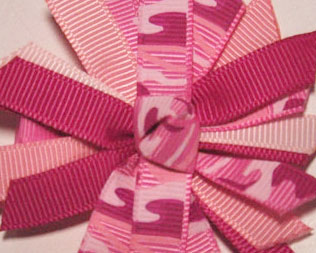
 Step 12: Put a dab of glue on the back of the knot and press to the center of the bow.
 Step 13: Wrap the ends of the knotted center piece around to the back of the clip and trim the pieces so that they will be large enough to glue down but not protrude past the edge of the clip. Heat-seal the ends and then glue them down for a finished bow.

Visit the rest of our blog for more Crafting Tutorials and DIY Instructions!
Loading...

