My 7th-grade son completely floored me last week when he offhandedly mentioned that if I was out shopping, he wouldn't mind having a bow-tie for Thur. dress-up days at school. He then admitted that there were some high school boys who had started wearing them. I stand amazed {and in fear} in the power of "cool kids" to sway younger minds. Had I suggested the bow tie, I can only imagine the ensuing monologue of how crazy, out-of-touch, un-stylish, un-cool, {insert un-everything else} of a mom I am. Thankfully, I love bow-ties, so this is a win-win! I had to giggle when I read Brittany's "Bow Tie" post she recently submitted, and now I am off to match some ribbon colors to my sons' dress shirts...
 Contributor post by Brittany
Today I am bringing you something totally different... this post is for BOYS! That's right, I am momentarily stepping away from the sparkles to show you how to create this absolutely ADORABLE bow tie for sweet little boys! So for all of you mommies out there that are eager to make your son something super special and creative (and not to mention super easy!) this one's for you!
Contributor post by Brittany
Today I am bringing you something totally different... this post is for BOYS! That's right, I am momentarily stepping away from the sparkles to show you how to create this absolutely ADORABLE bow tie for sweet little boys! So for all of you mommies out there that are eager to make your son something super special and creative (and not to mention super easy!) this one's for you!
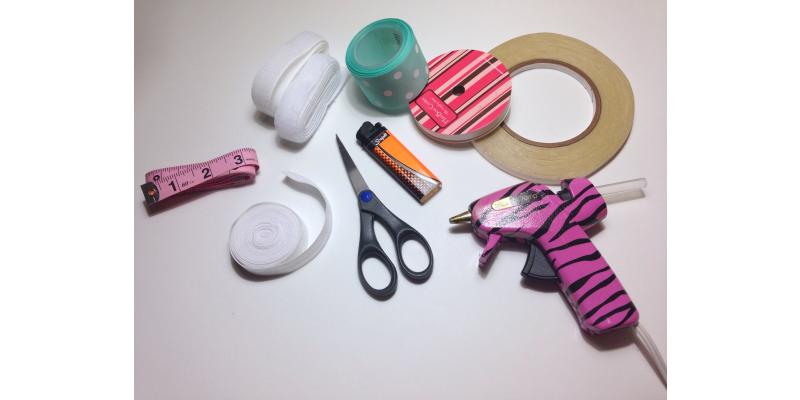
 Listed below are the supplies you will need:
•1.5" ribbon of your choice (I am using HBC's Aqua w/white dots grosgrain ribbon)
•3/8" coordinating ribbon (I am using white grosgrain ribbon)
•1/4" double sided fillet tape
•Velcro
•3/8" or 5/8" white fold over elastic
•measuring tape
•scissors
•lighter
•hot glue gun
Now let's begin! You will need 8 inches of your chosen 1.5" ribbon with heat sealed ends. This will create a finished rounded/fluffy bow tie that is approx. 3" or a flat bow tie that measures 4".
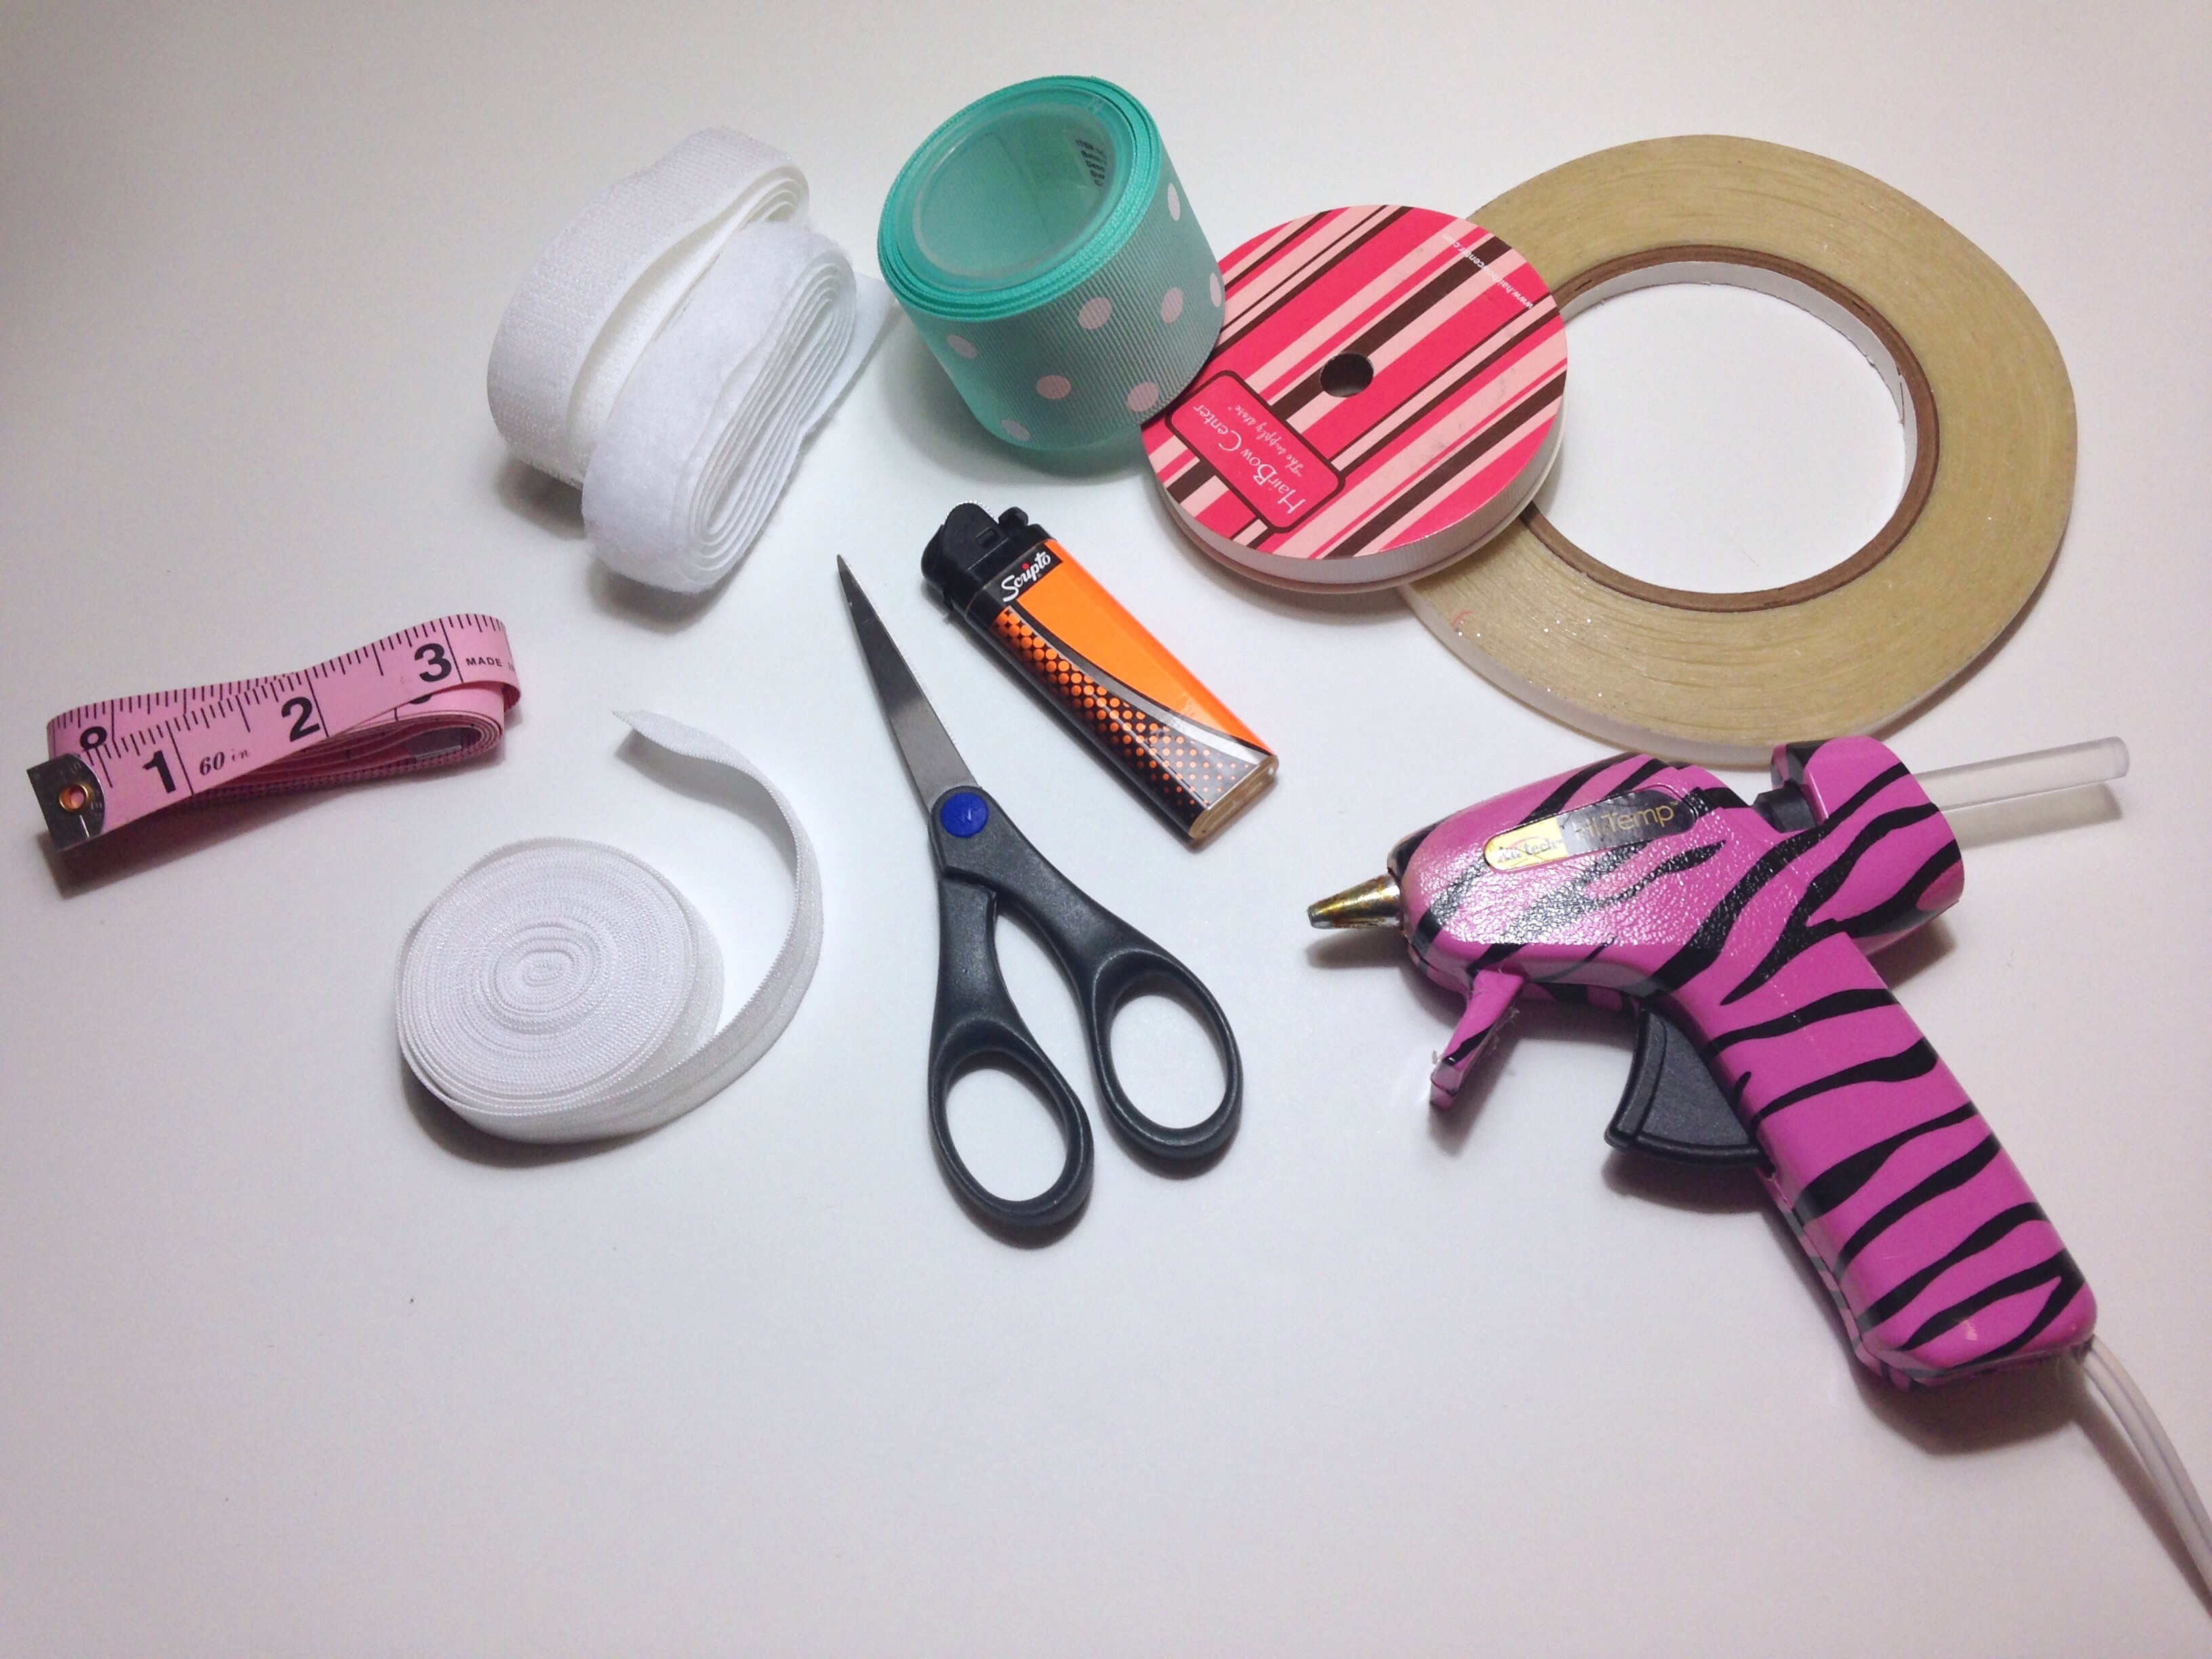
Listed below are the supplies you will need:
•1.5" ribbon of your choice (I am using HBC's Aqua w/white dots grosgrain ribbon)
•3/8" coordinating ribbon (I am using white grosgrain ribbon)
•1/4" double sided fillet tape
•Velcro
•3/8" or 5/8" white fold over elastic
•measuring tape
•scissors
•lighter
•hot glue gun
Now let's begin! You will need 8 inches of your chosen 1.5" ribbon with heat sealed ends. This will create a finished rounded/fluffy bow tie that is approx. 3" or a flat bow tie that measures 4".
 As shown above in the first picture fold your ribbon in half and make a crease. Next you need to open your ribbon with the backside facing up. Cut 2 small pieces of double sided tape, placing one on each end of your ribbon. As shown in the second picture above, peel off the paper backing of one end. Bring your end to the center crease of your ribbon. Now you will bring your other end to the center as shown in the last pic above. After your ribbon is secured in place it's time to fold!
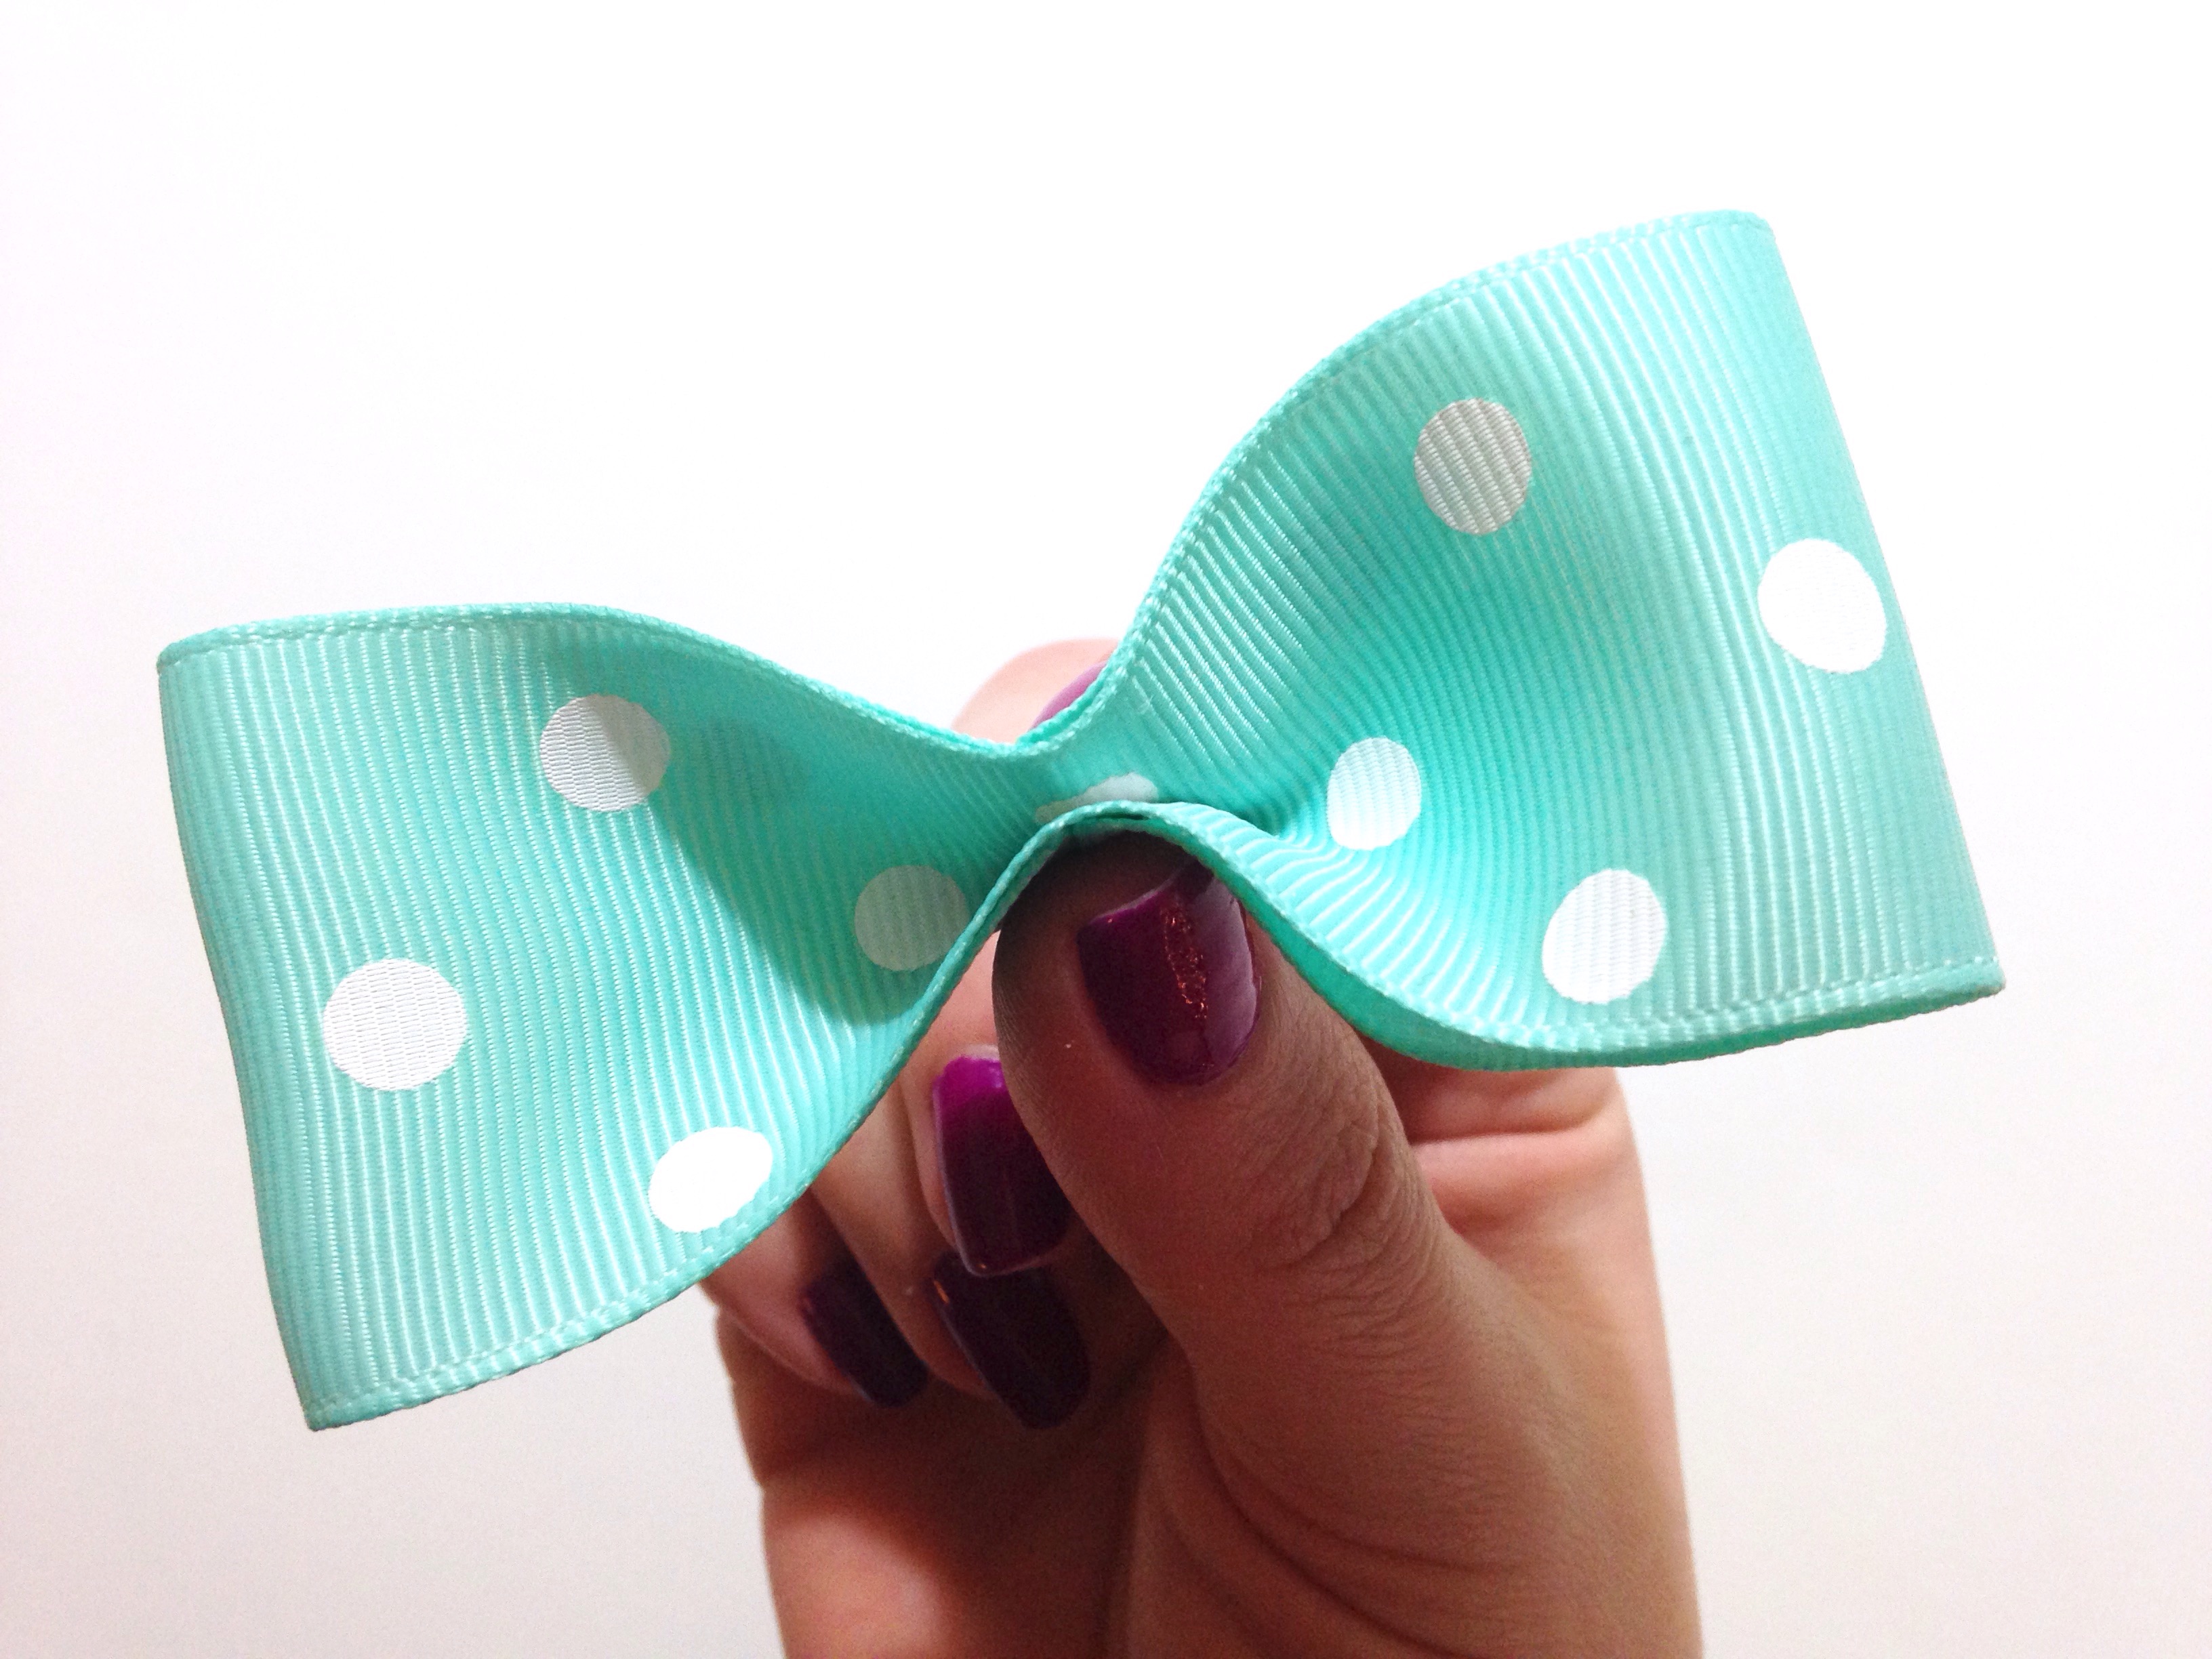 Flip your ribbon back over so that the ends you just put into place are on the backside. Find the center of your ribbon and fold in half as shown above.
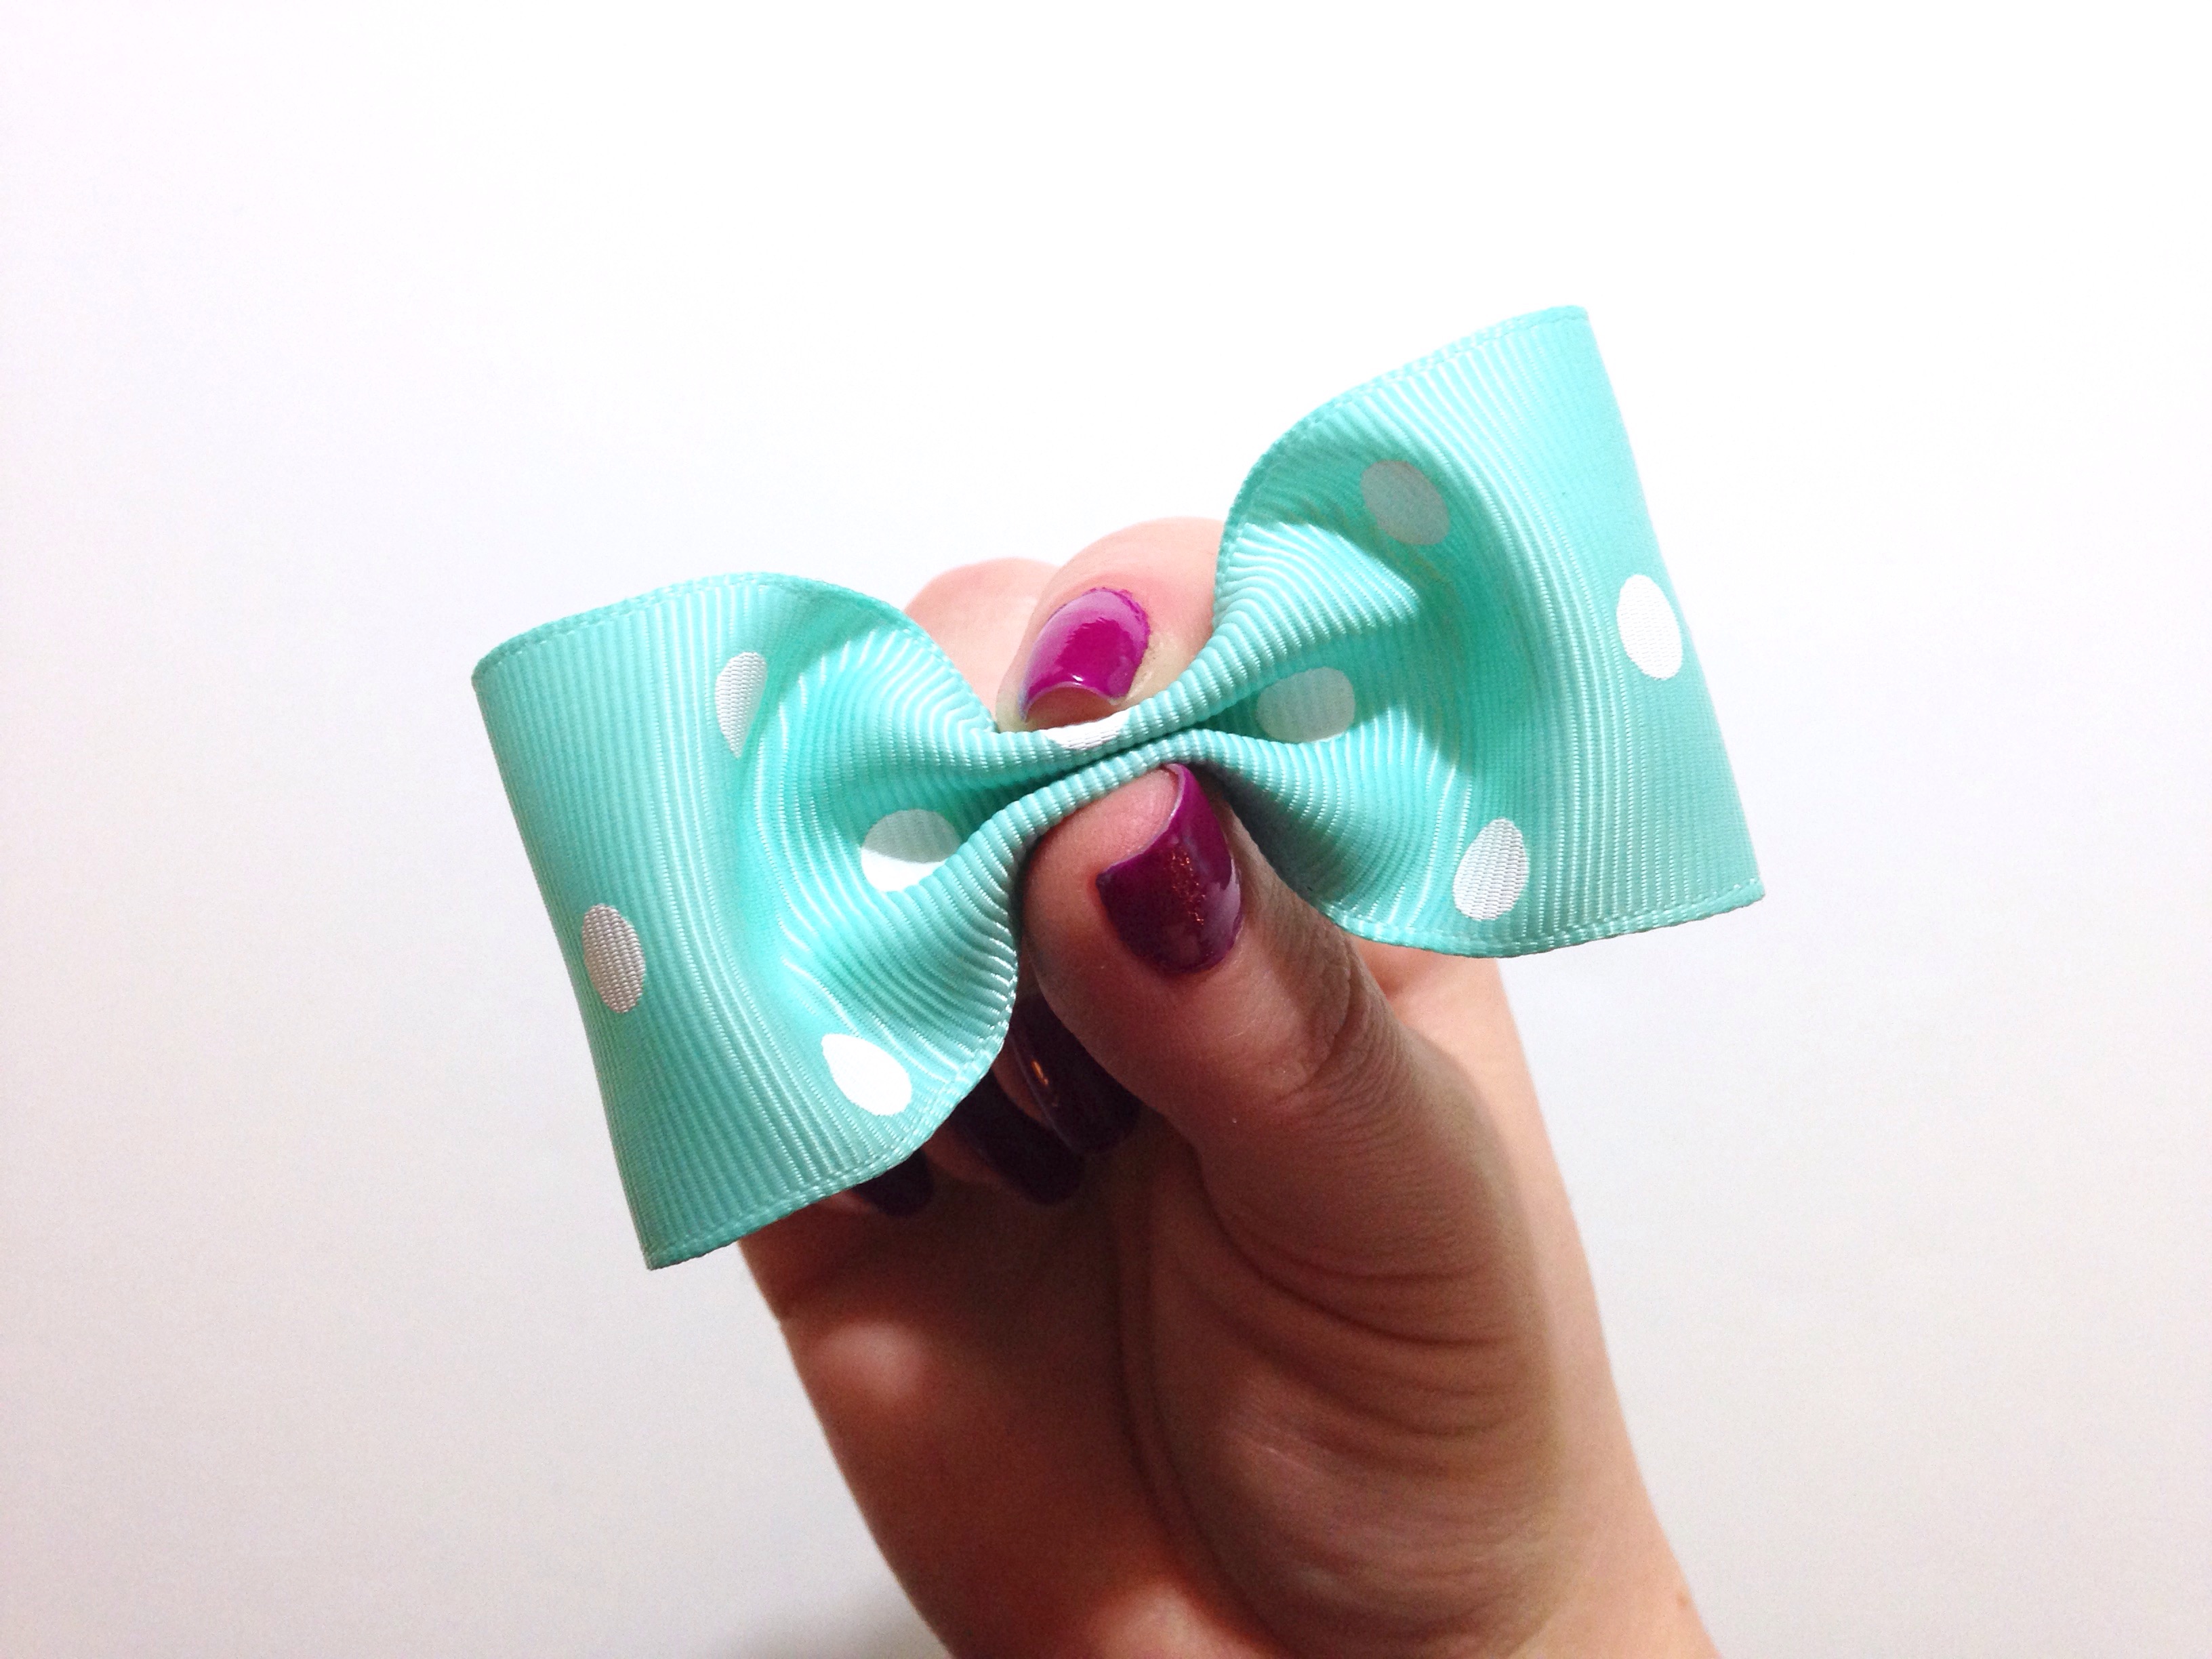 Fold your ribbon ends down as shown above and press tightly together. What a cute little bow we have!
 Instead of tying the center like I normally would I find it easier to use a bit of hot glue between each fold. Press your ribbon together for a few seconds to allow the glue to dry.
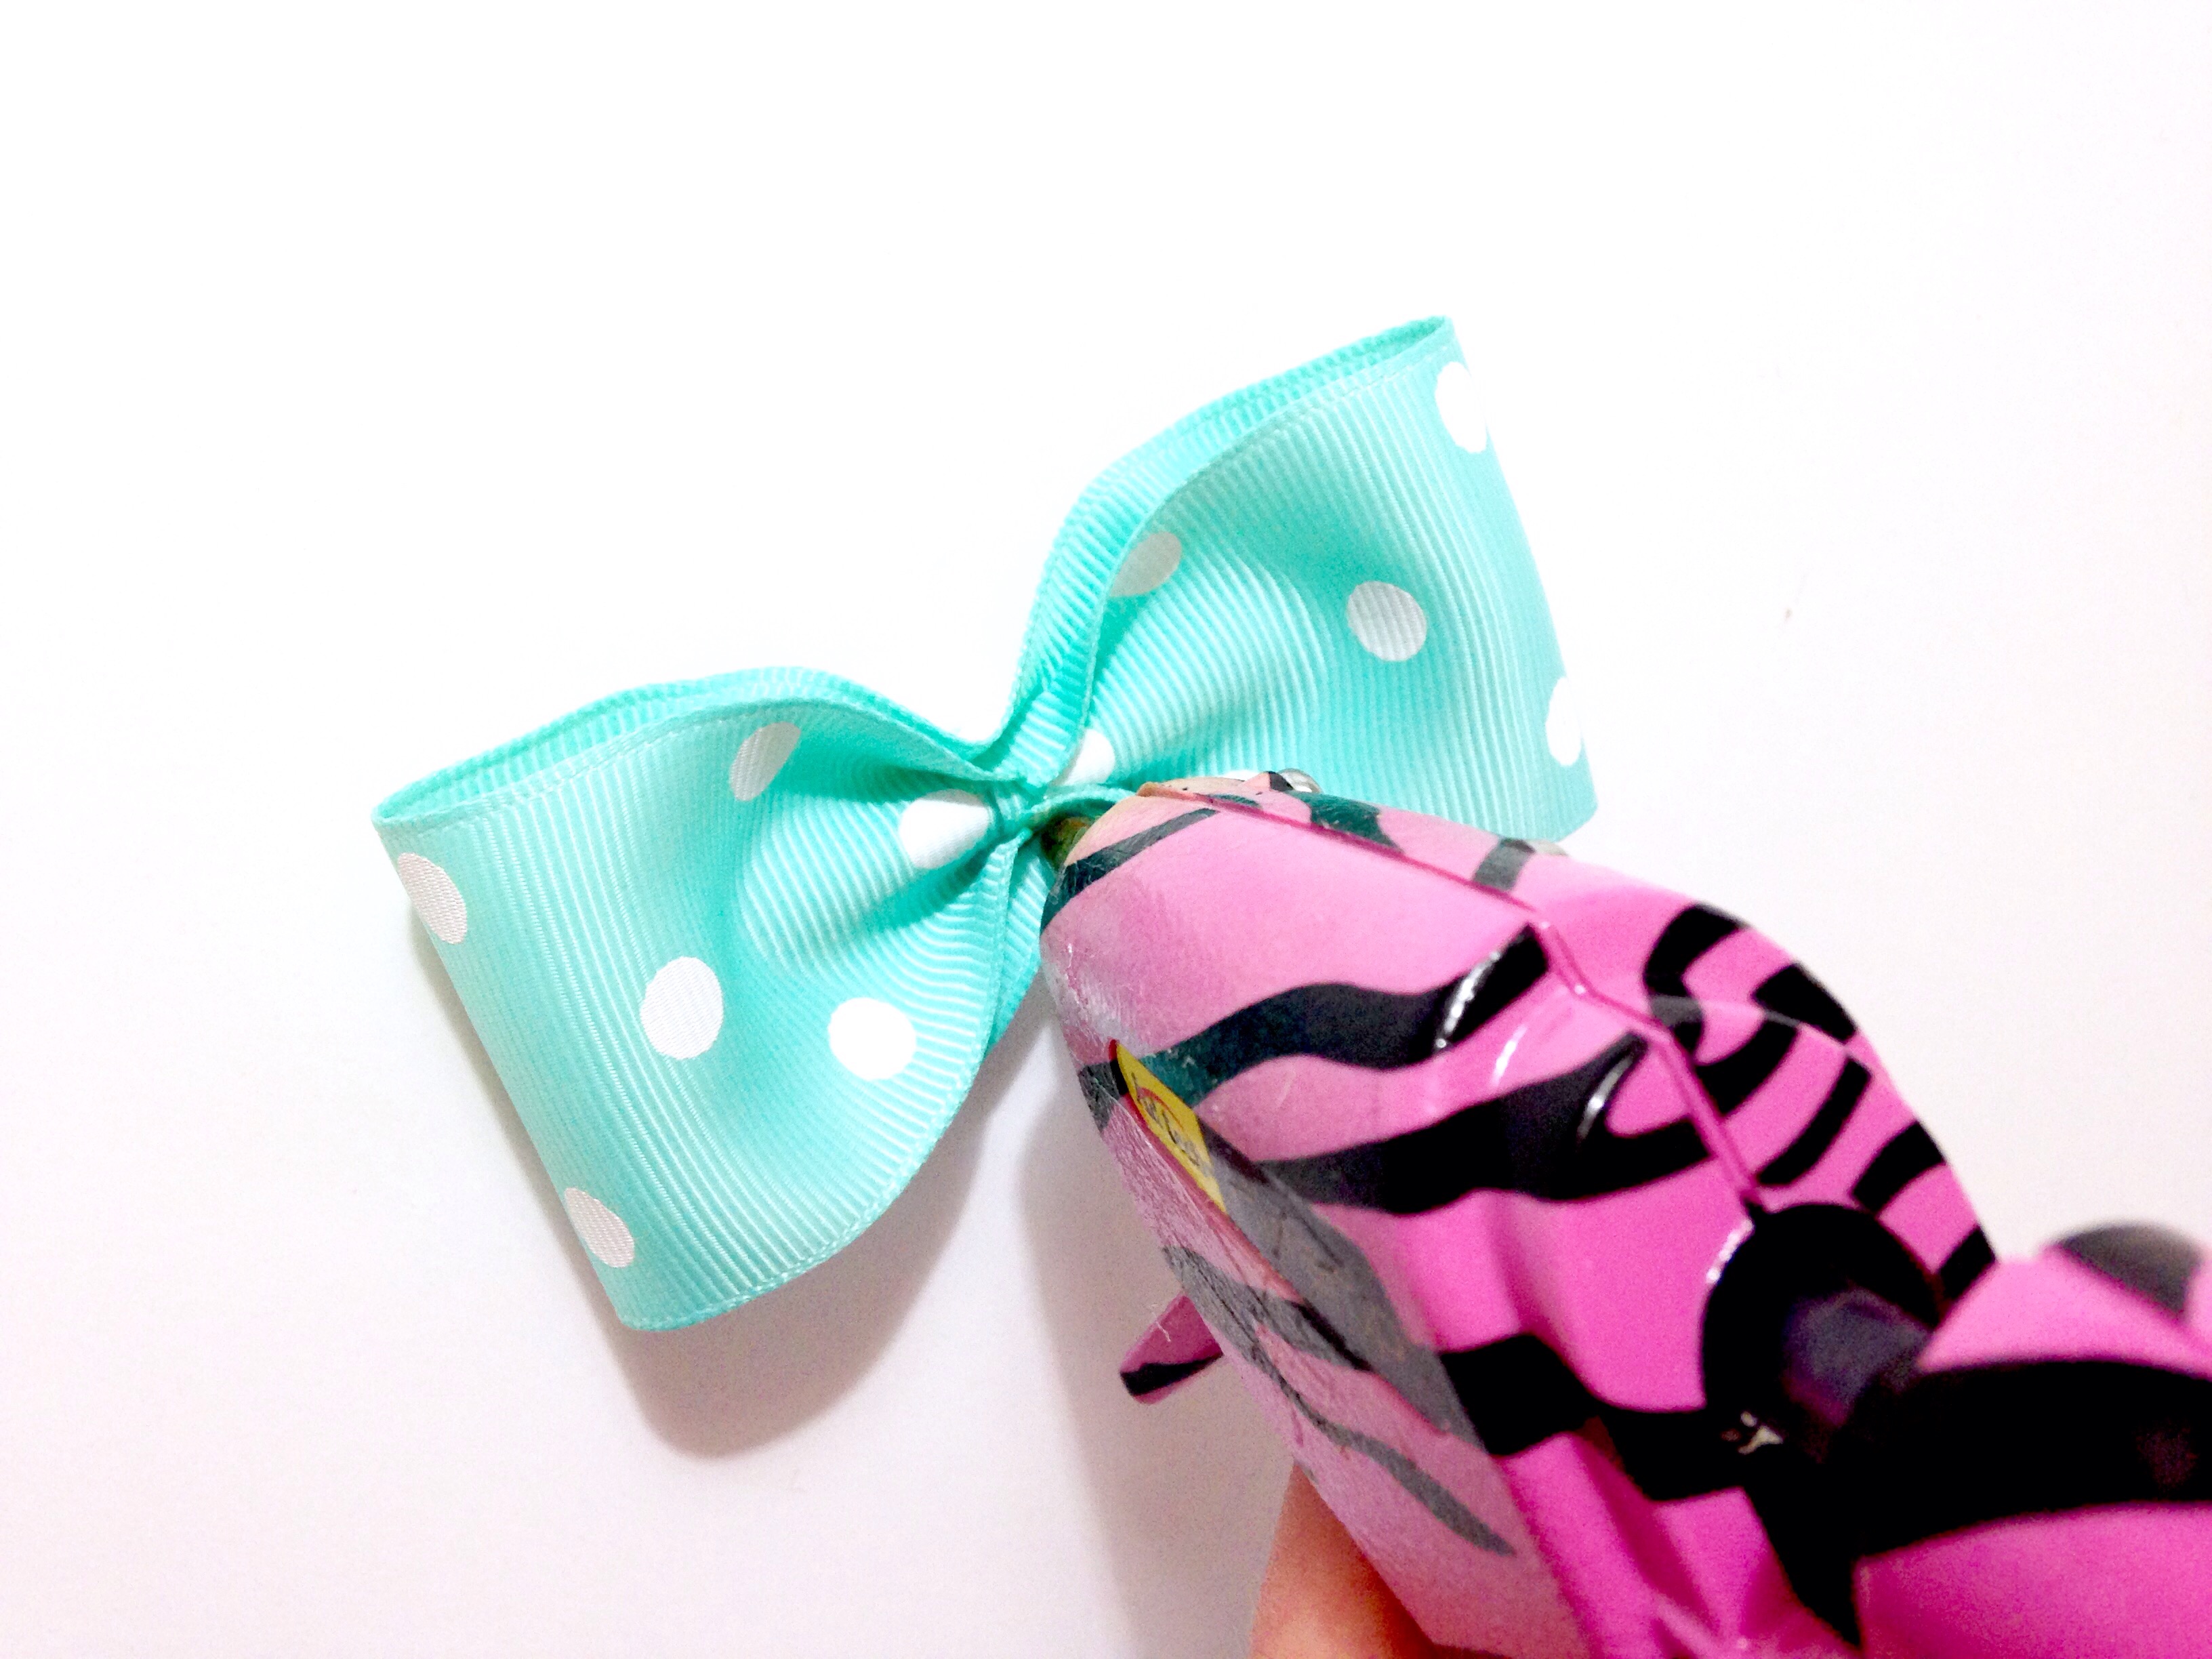 Don't forget to glue your folds from the backside too.
 Next we are making an adjustable band to hold our bow tie in place around our sweet baby bows neck. I always opt for white elastic since many shirts worn with bow ties are white therefore the band stays hidden. If you are making this for your own son or can get your own measurements for the child's neck this will ensure a proper fit. However, my inspiration today comes from 4 month old sweet baby Kingstan who is the son of one of my very best friends! This is a surprise so I am guessing at my measurement with the help of a size chart. Here are my findings for baby neck measurements in case you need help with your measurement as well:
- Newborn: 5.5-9"
- 0-3 months: 7-10"
- 3-6 months: 8-11"
- 6-12 months: 9-12"
- 12-18 months: 10-13"
- 18-24 months: 11-14"
- 2 years: 11-14.5"
- 3 years: 12-16"
- 4 years: 13-17"
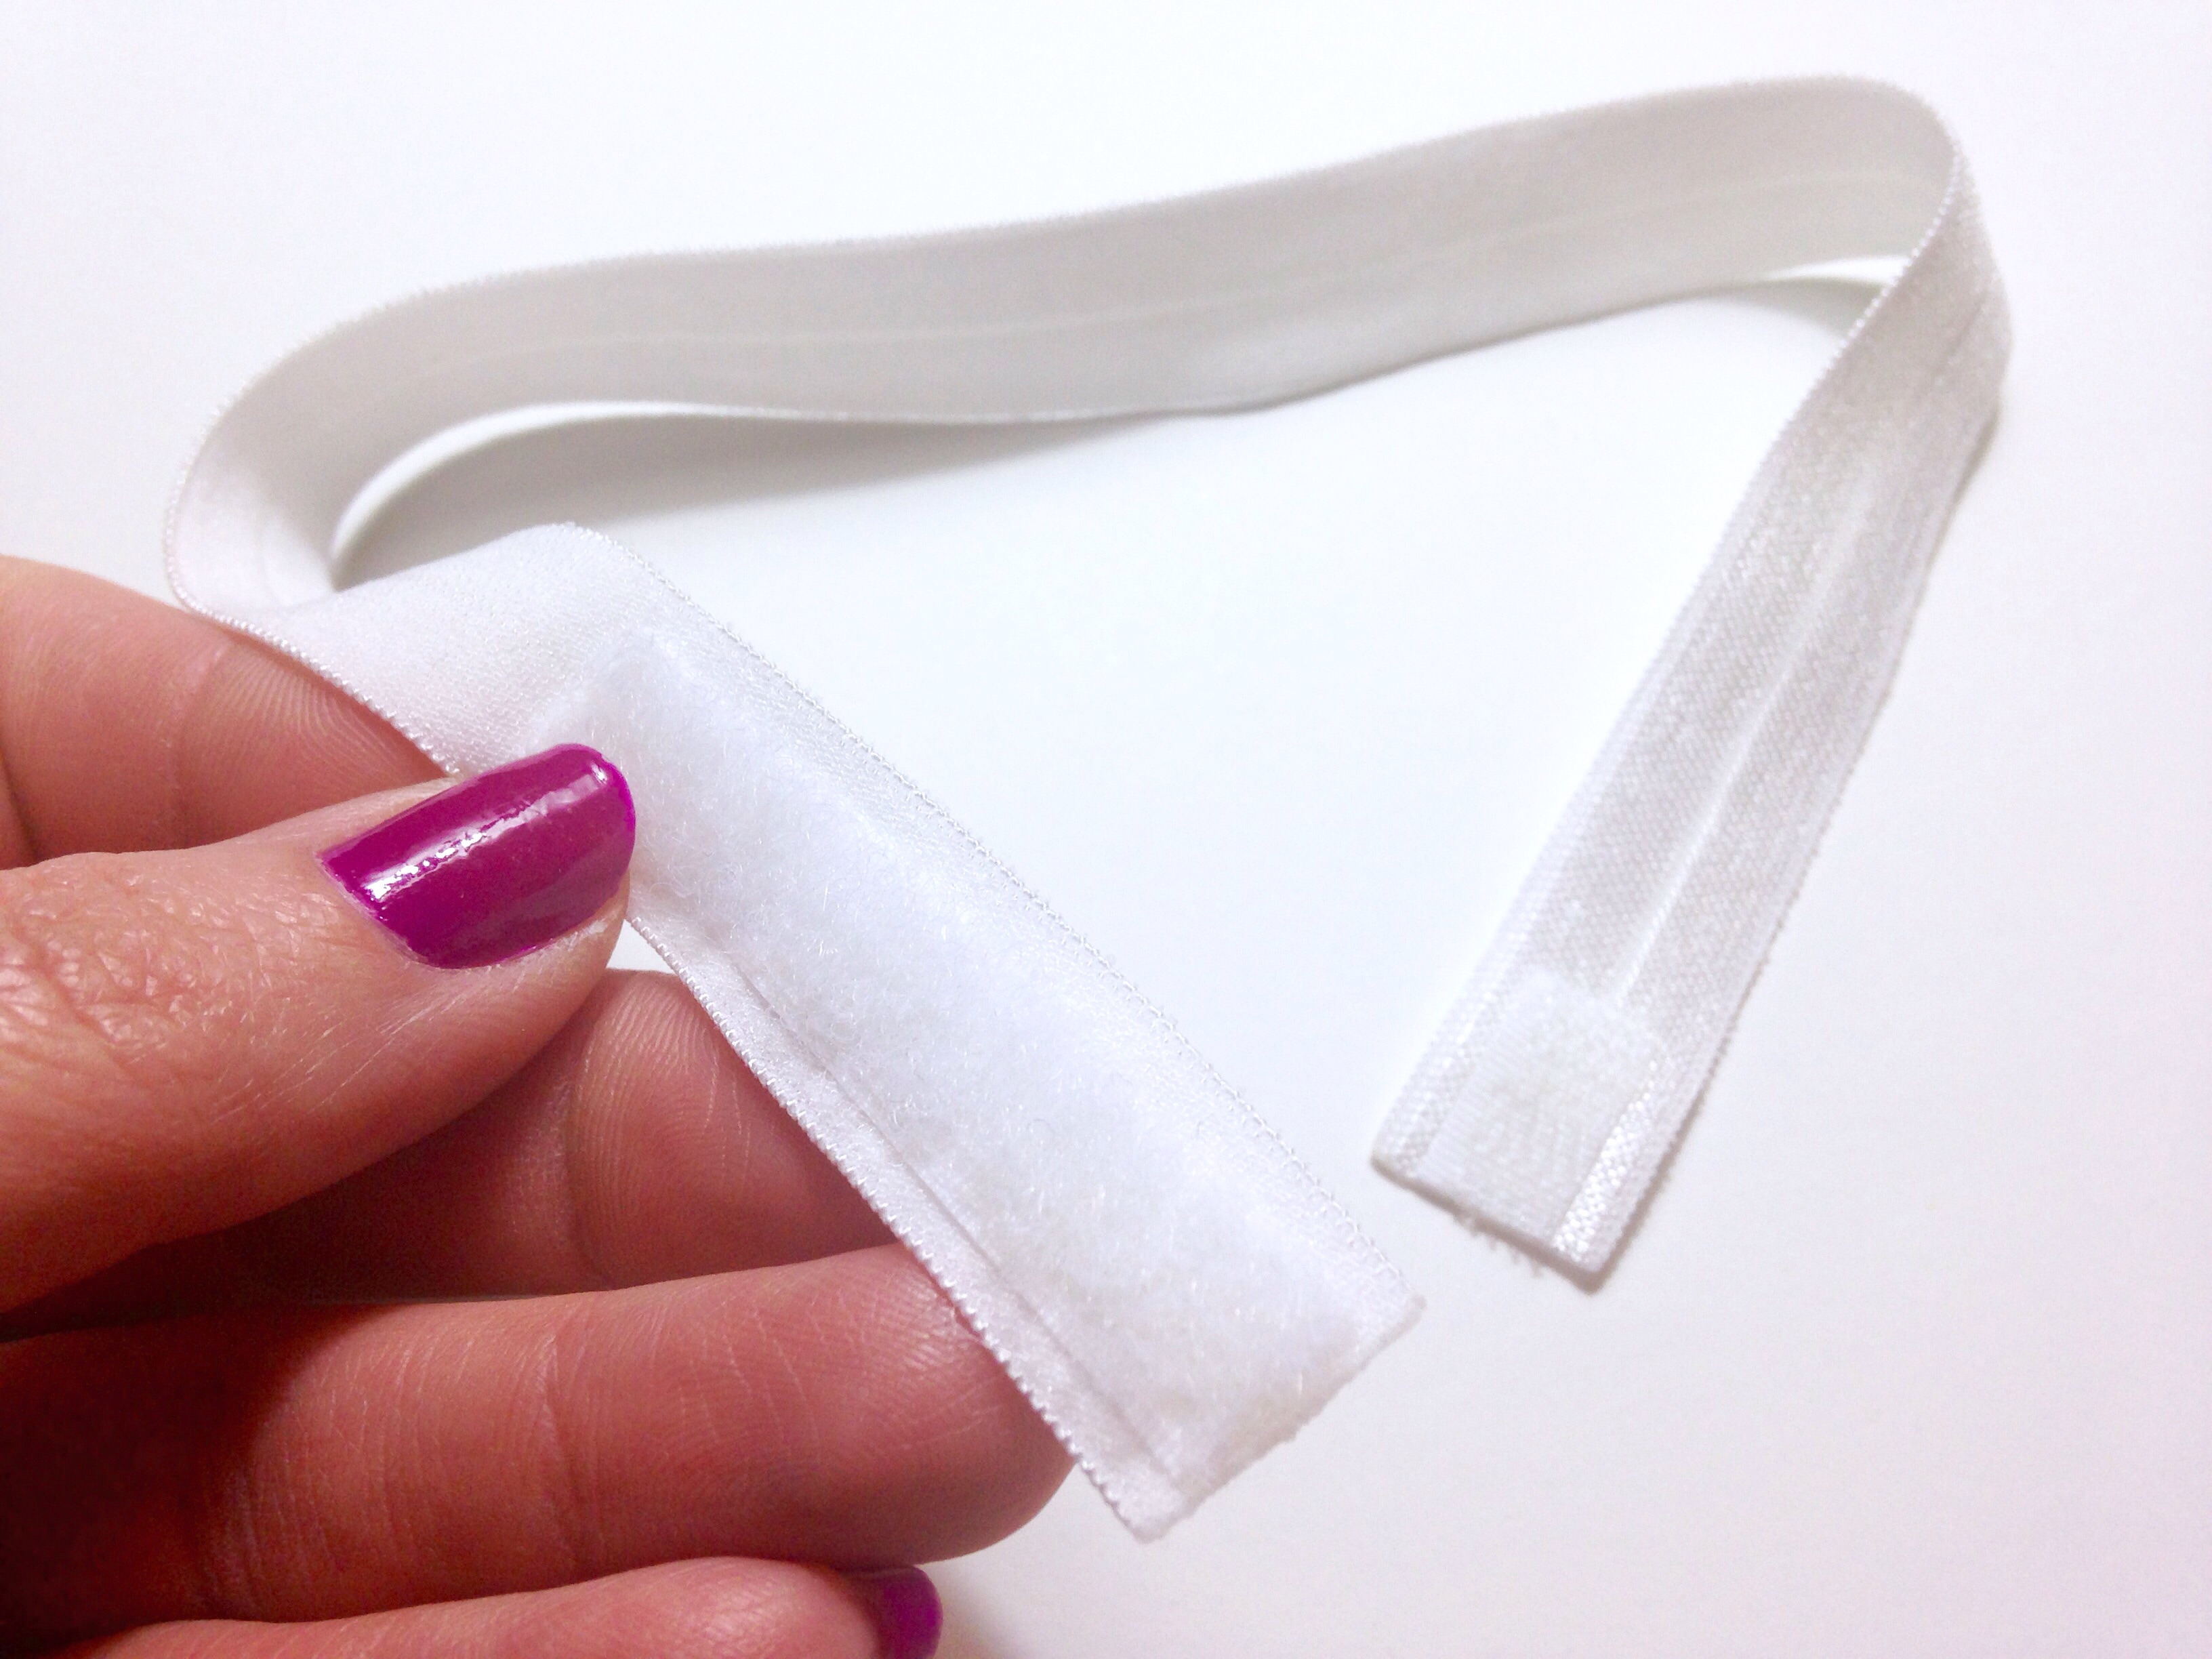
 Since the middle of my bow is smaller than my 5/8" elastic used, I made the elastic a bit skinnier by folding the edges onto double sided tape as shown in the first 2 pics above. Next attach your bow tie to your elastic using your 3/8" grosgrain ribbon and hot glue.
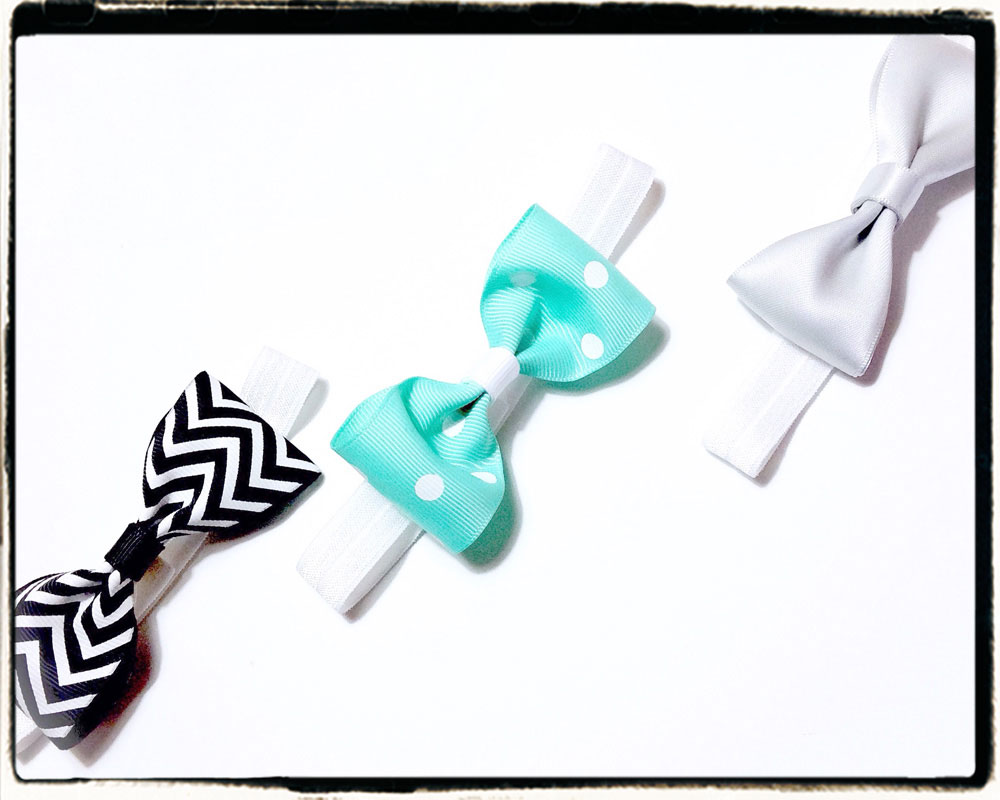
 Look at this super sweet bow tie we've just created! Perfect for boys of all ages and super fun to make! These are just precious for pictures, holidays, church, pageants, you name it! I hope you've enjoyed learning how to make your own bow ties today!

Visit the rest of our blog for more Crafting Tutorials and DIY Instructions!
Loading...

