 Contributor post by Brittany
Who can resist a sweet, sugary, colorful treat?! Well today we are going to make an adorable little lollipop ribbon sculpture for your candy crazed princess!
Contributor post by Brittany
Who can resist a sweet, sugary, colorful treat?! Well today we are going to make an adorable little lollipop ribbon sculpture for your candy crazed princess!
 Listed below are the items I am using for my lollipop creation:
•3/8" Hot Pink, Purple, and Aqua grosgrain ribbons
•3/8" Hot Pink w/white dots ribbon
•1/4" double sided fillet tape
•hot glue gun
•scissors
•lighter
•measuring tape
•1.25" alligator clip
•small embellishment (optional)
Listed below are the items I am using for my lollipop creation:
•3/8" Hot Pink, Purple, and Aqua grosgrain ribbons
•3/8" Hot Pink w/white dots ribbon
•1/4" double sided fillet tape
•hot glue gun
•scissors
•lighter
•measuring tape
•1.25" alligator clip
•small embellishment (optional)
 To create our colorful lollipop you will need approx 75" of 3/8" ribbon. You may choose 2, 3, or even 4 different colors to create the perfect color combination for your sweet treat. Since I have chosen 3 different colors I am using 25" of each color to equal a total of 75". Measure, cut & heat seal your ribbon as shown in the first picture above. Line up the ends of your ribbon and stack all 3 colors neatly on top of one another. Next fold your ribbons in half as shown in the second pic above. Starting from the fold of your ribbon, begin to roll into a circle as shown in the third pic. Make sure to keep ribbons in line as you tightly roll to create a nicely shaped and perfectly swirled candy!
 Continue to roll until there is no ribbon left. As you see in the pics above the ribbon ends do not end evenly as they started. I like to trim the ends down into "stair steps" making the bottom layer of ribbon the longest and the top ribbon the shortest. I trim these to be about 1/4" apart and apply a small dot of hot glue to secure each ribbon into place. This creates a perfectly rounded circle.
 Now you will need to choose one of your ribbon colors to be wrapped around the circle once more. Prepare your circle by wrapping it with 1/4" double sided tape. You will want to leave about 1/2" extra tape at the end (do not attach yet) as shown above to overlap the ribbon.
 Remove the paper backing from the double sided tape and apply your 3/8" ribbon. Use the additional tape to overlap your ribbon at the end.
 Now it's time to give our lollipop a "stick". I am making a half-lined alligator clip using 4 1/2" of 3/8" Aqua ribbon. Apply double sided tape to one side of your ribbon for the fastest & simplest way to line your clip. No messy hot glue!
 For a cute embellishment to add to our lollipop we are going to make a mini bow using 3/8" hot pink polka dot ribbon. I am using approx 5" of ribbon to make this bow. Because the bow will be so tiny it can get hard to hold so I like to keep an extra alligator clip handy to hold my ribbon in place. The pics above show the very simple steps to making this bow. As seen in the first pic make an awareness symbol with your ribbon. In the second pic you will see the top of the loop being slid down to form a bow. If you are using an alligator clip, hold the center of the bow while you slide the clip off and then back on to hold all layers in place. If you are not adding an embellishment to the center of your bow, or you are adding a very small one, you will probably want to use the hollow spaces in the alligator clip to thread your string through and easily tie off the center. However, my embellishment is slightly larger so I am keeping the center completely flat and using a tiny amount of hot glue in the center between each layer. Now I am going to trim the tails of my mini bow and heat seal the ends once again.
 Now we have these 3 colorful pieces that need to be attached to finish our creation! I am using hot glue to attach the half-lined alligator clip to the backside of the lollipop. I am also using hot glue to attach my super cute polka dotted mini bow to the front for the finishing touch!
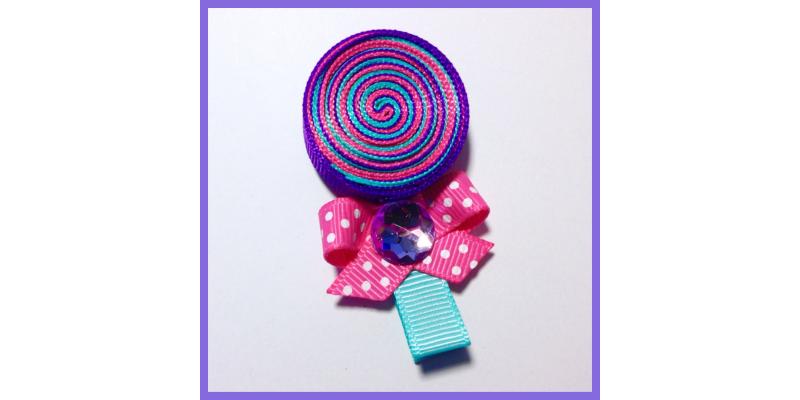
 How sweet!! Girls of all ages adore these colorful candy creations! Thanks for joining me and I hope you've enjoyed making our super cute lollipop hair clip!

Loading...

