Contributor post by Danielle at Korker Krazy
Woven ribbon wreaths are a great holiday Christmas ribbon craft project perfect for getting older children involved! There are SO many ways to use these festive little embellishments and they are completely adaptable to any color scheme as any combinations of ribbons can be used!
This tutorial demonstrates how to turn the wreath into a playful girl's hair-clip, but we are also envisioning tree ornaments, fridge magnets, and so on. Tie on a festive ribbon loop to create a tree ornament and then secure the wreath to a gift as a dual-purpose packaging decoration/gift!
Supplies Needed: 3/8" Grosgrain Ribbon Emerald Swiss Dots and Emerald 7/8" Grosgrain Ribbon Red 1/4" Grosgrain Ribbon Emerald Alligator clips Hot Glue and Glue Gun Needle and Thread
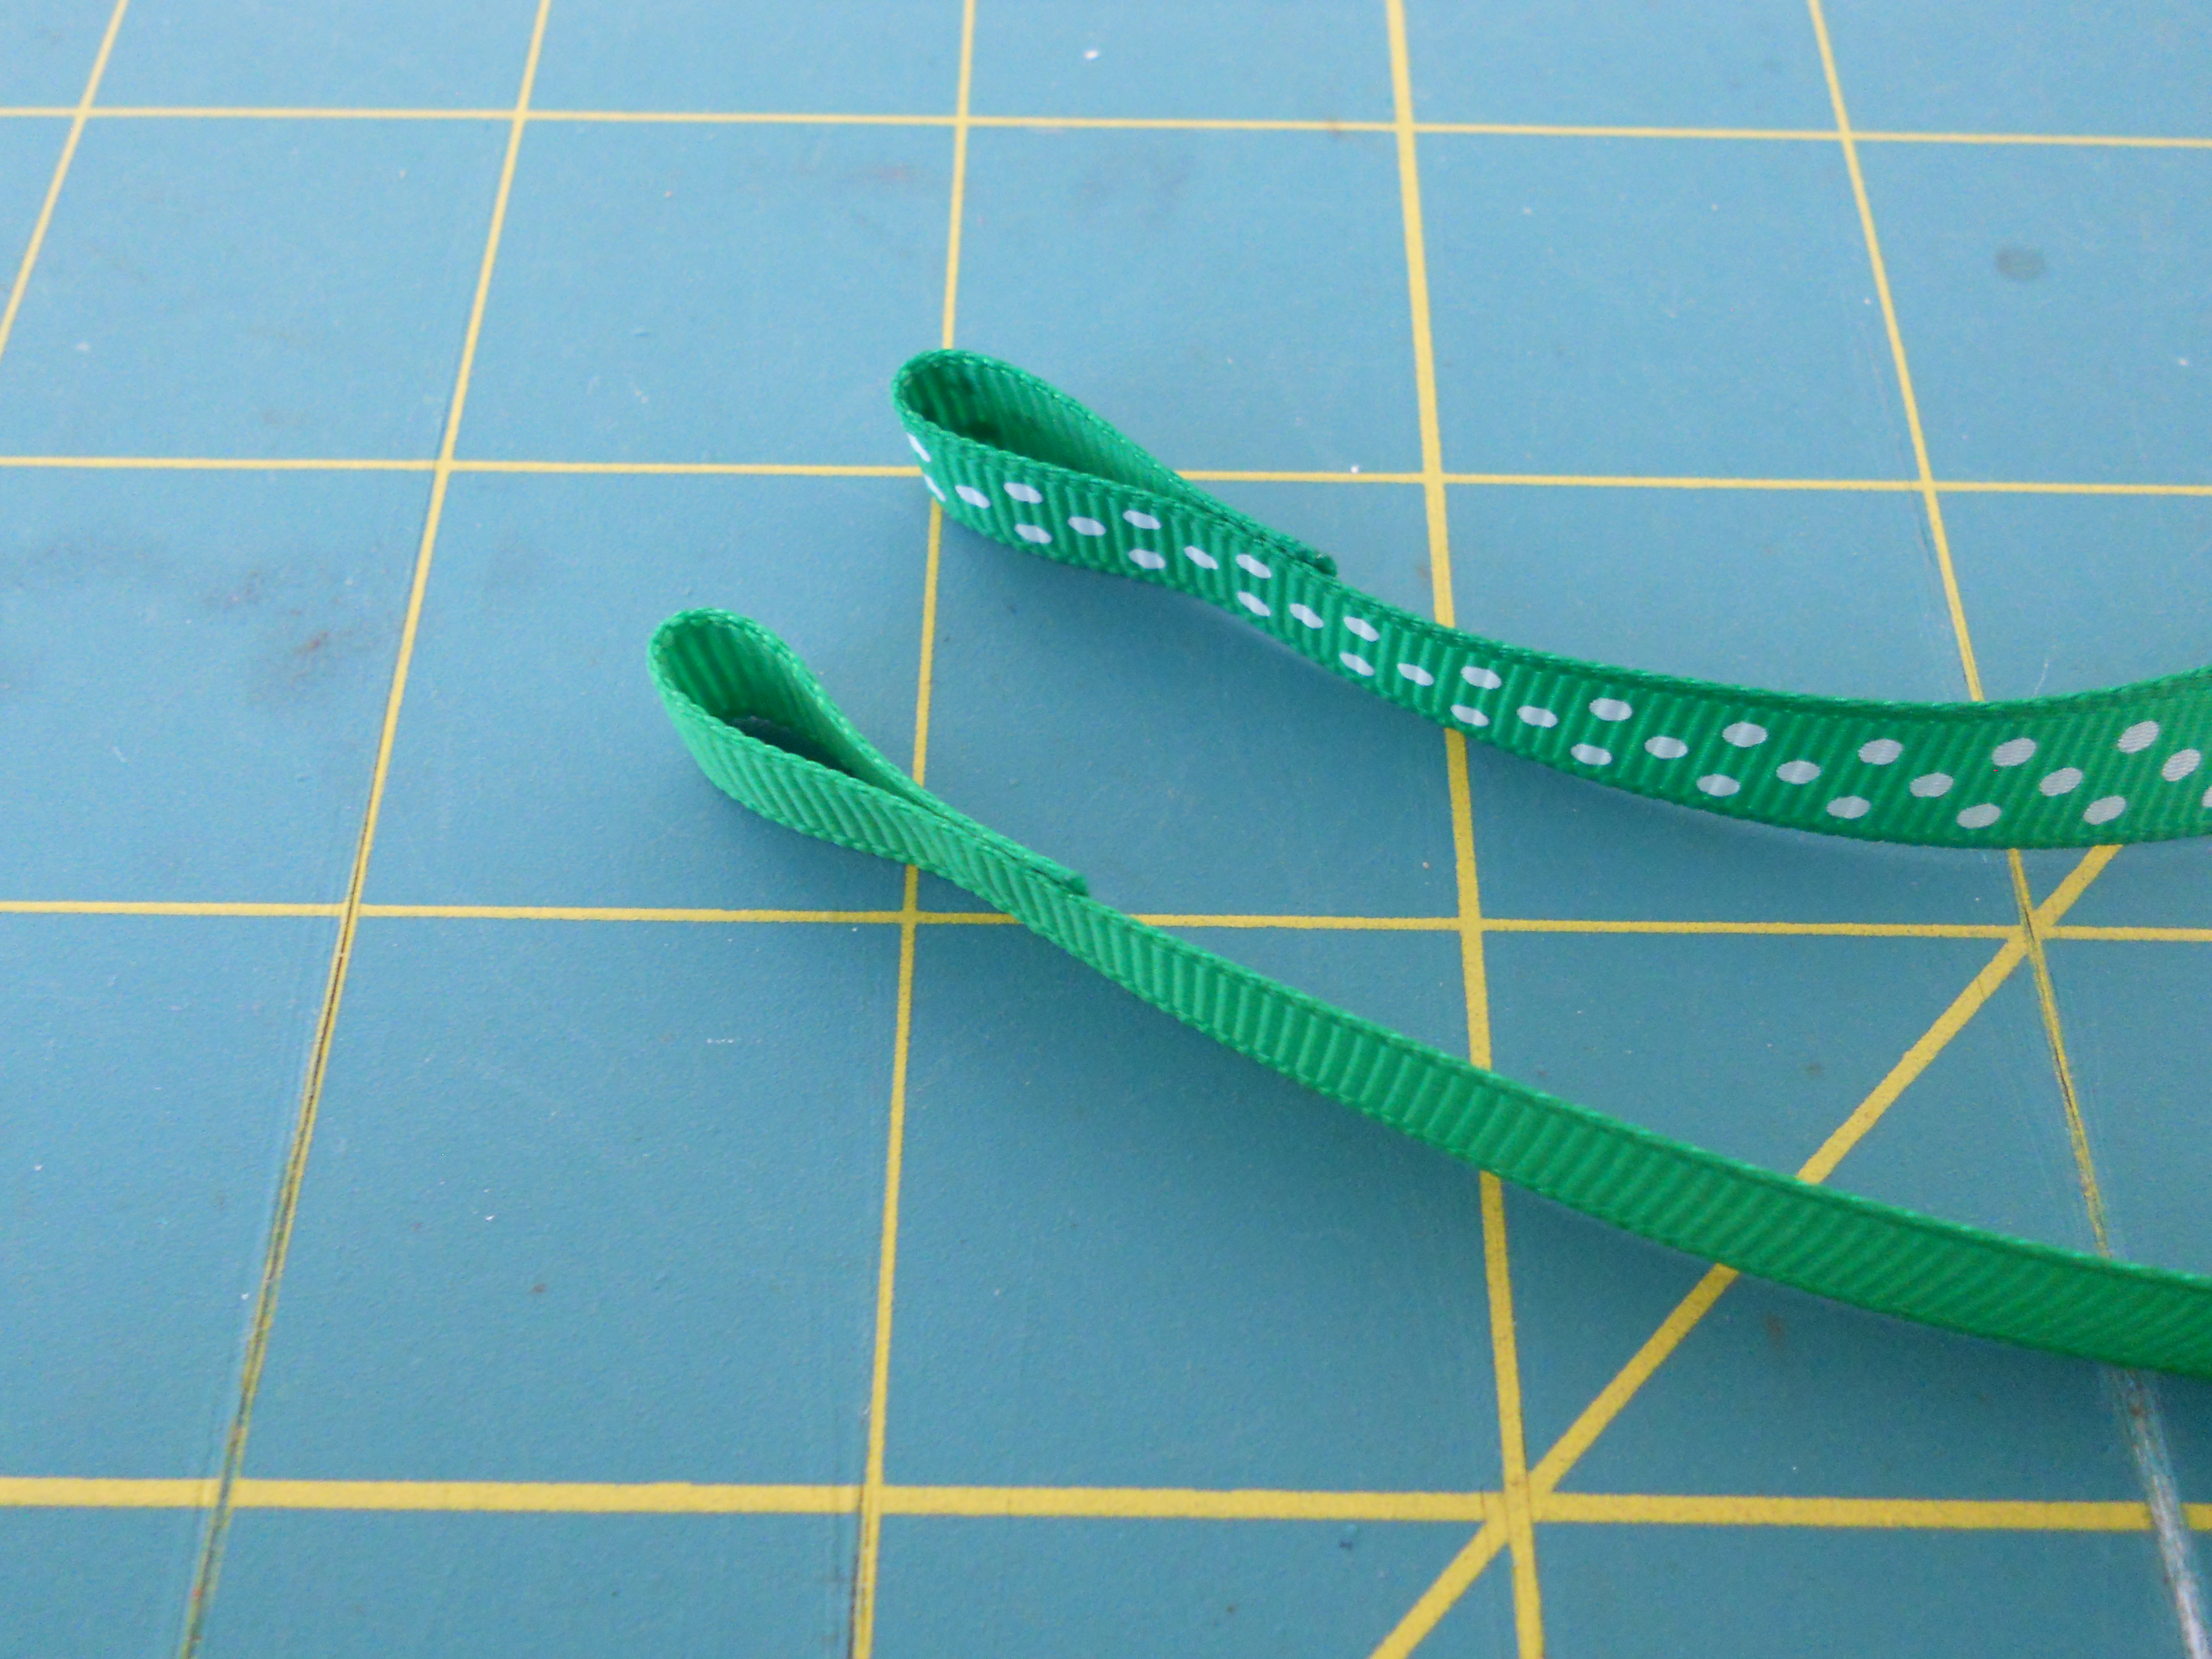
Step 1: Cut 40" of each color and form loops on one end of each ribbon. Take the end of your ribbon and fold it over approximately 3/4". Place a small amount of hot glue on the very end and glue it down. We want the ribbon to have an open loop so don't glue the entire piece down. Do the same thing with your other ribbon color.
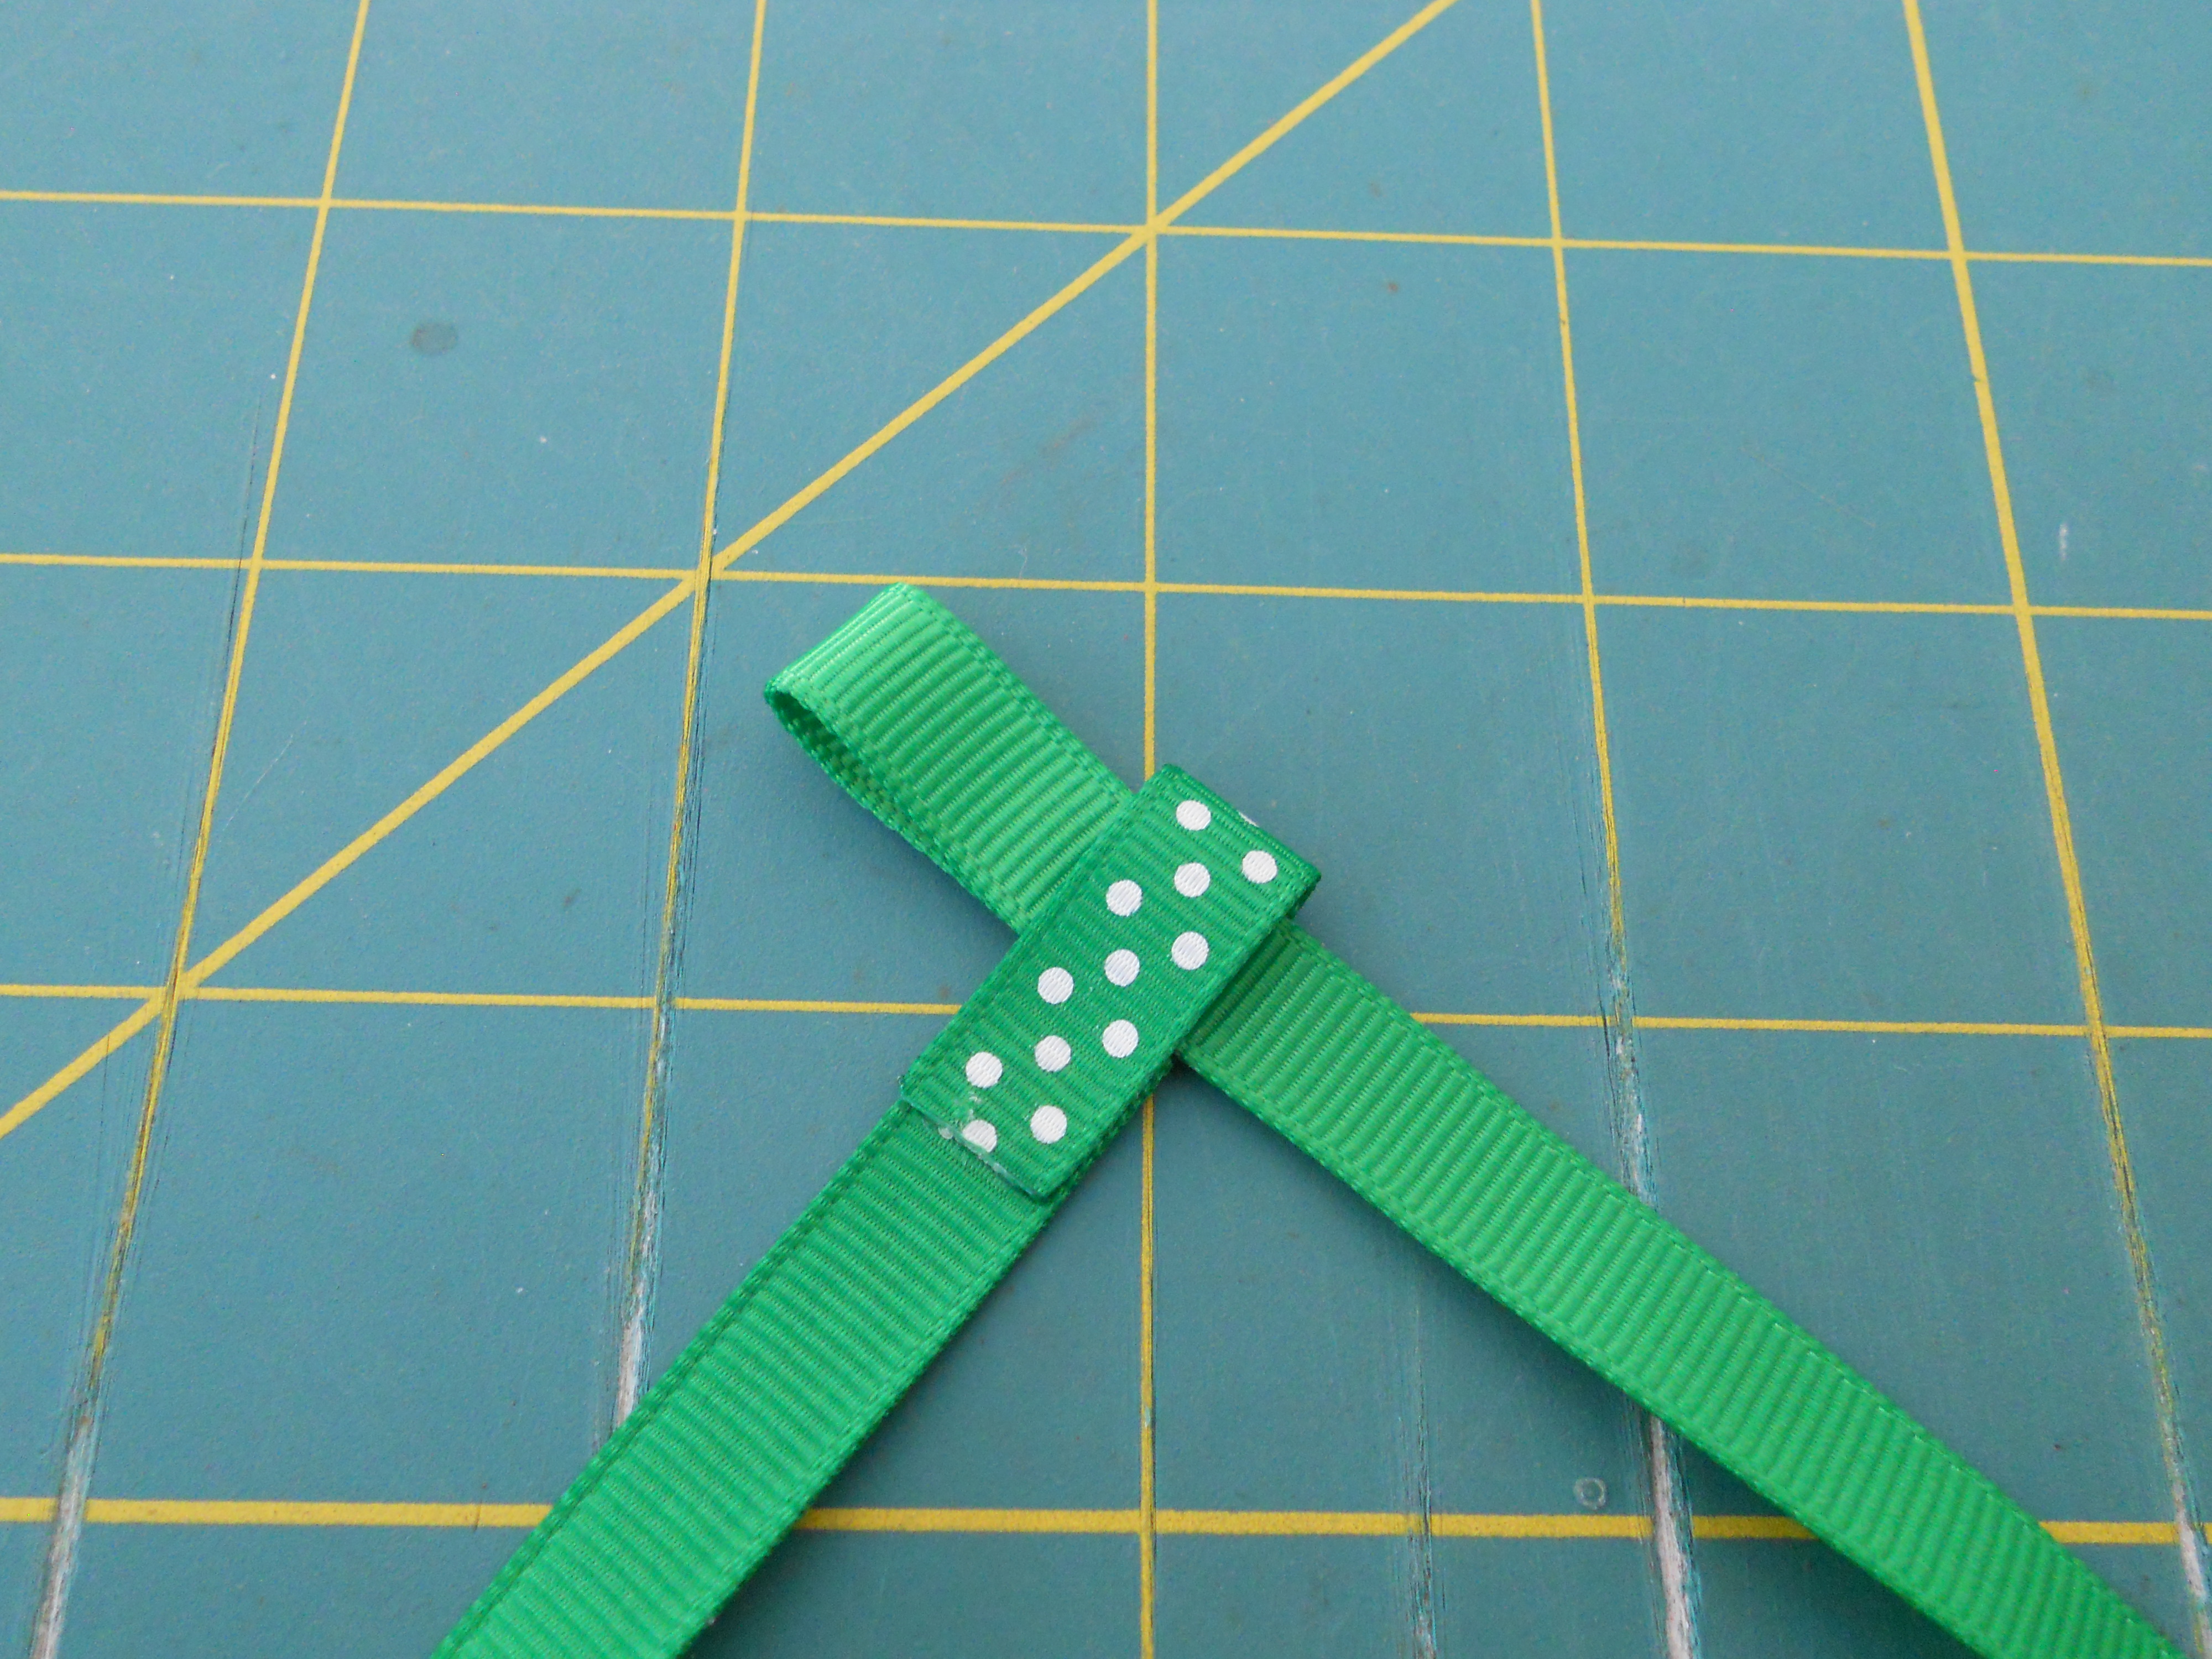
Step 2: Start with the side you glued facing up towards you. Since we are using a ribbon that has a print on one side make sure the printed side is facing down. My right ribbon is solid emerald and my left ribbon is swiss dots emerald. Place your right ribbon through the loop of the left ribbon.
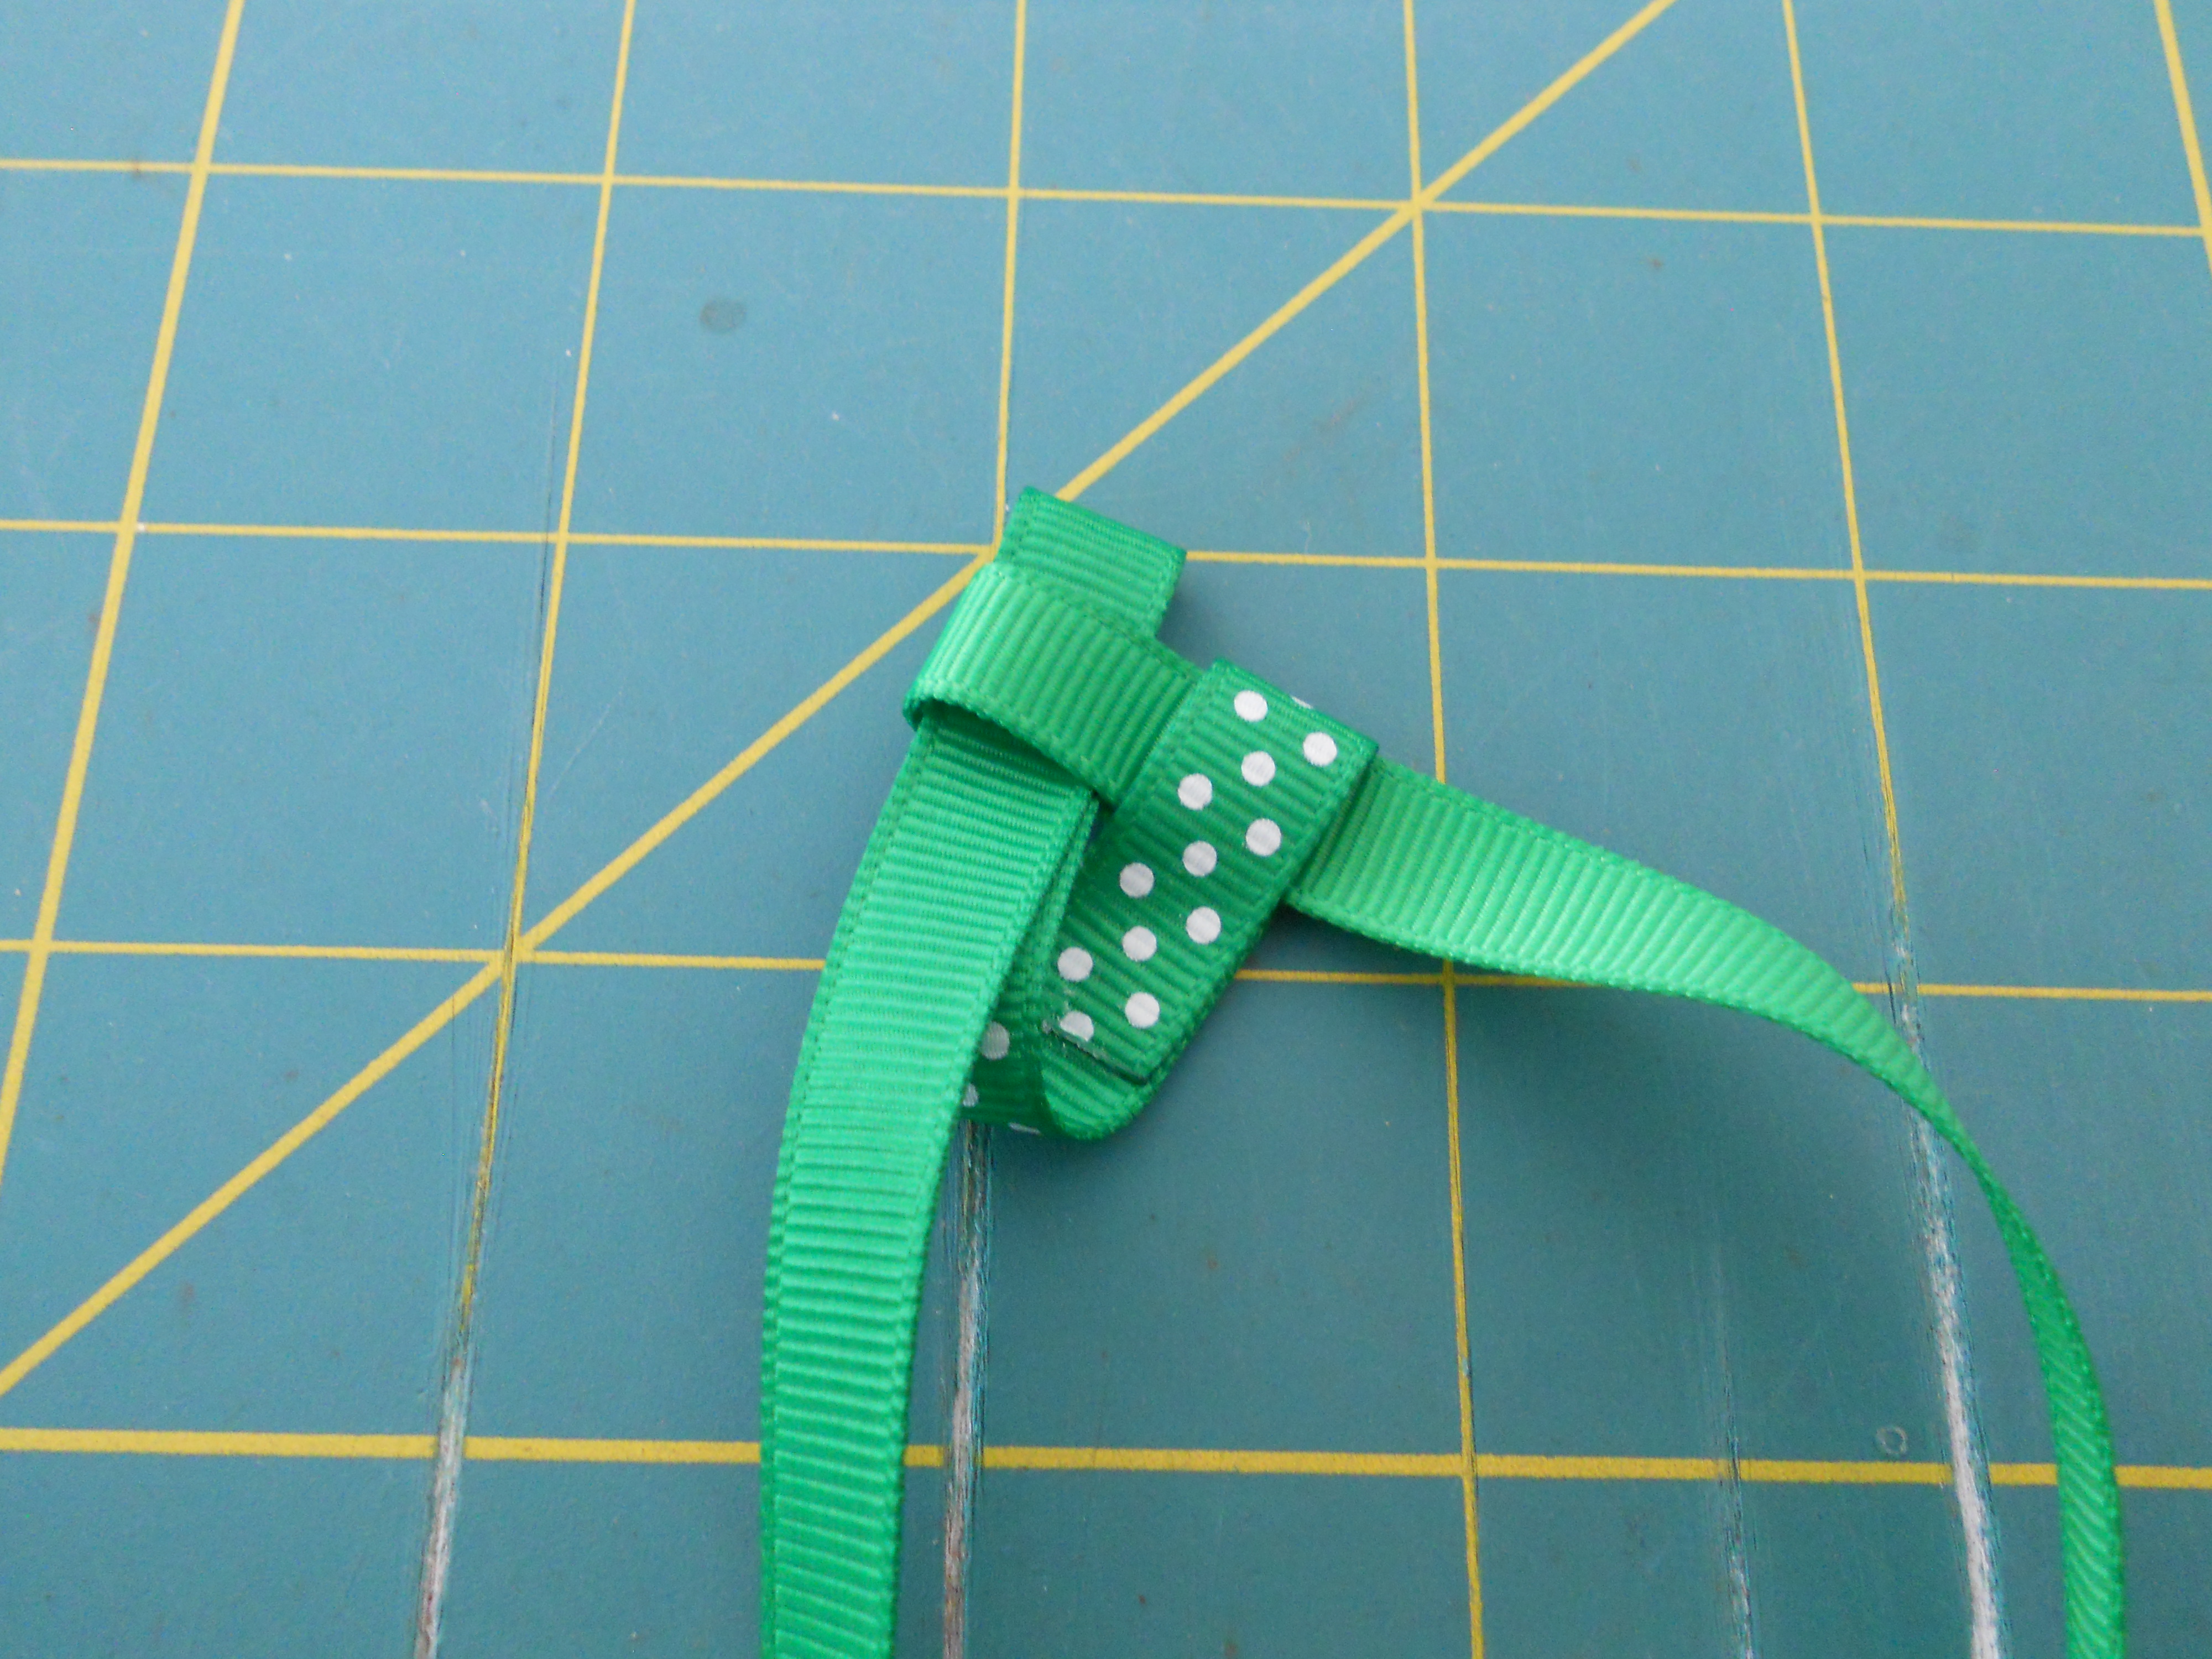
Step 3: Form a loop with your left ribbon and slide it through the loop of your right ribbon.

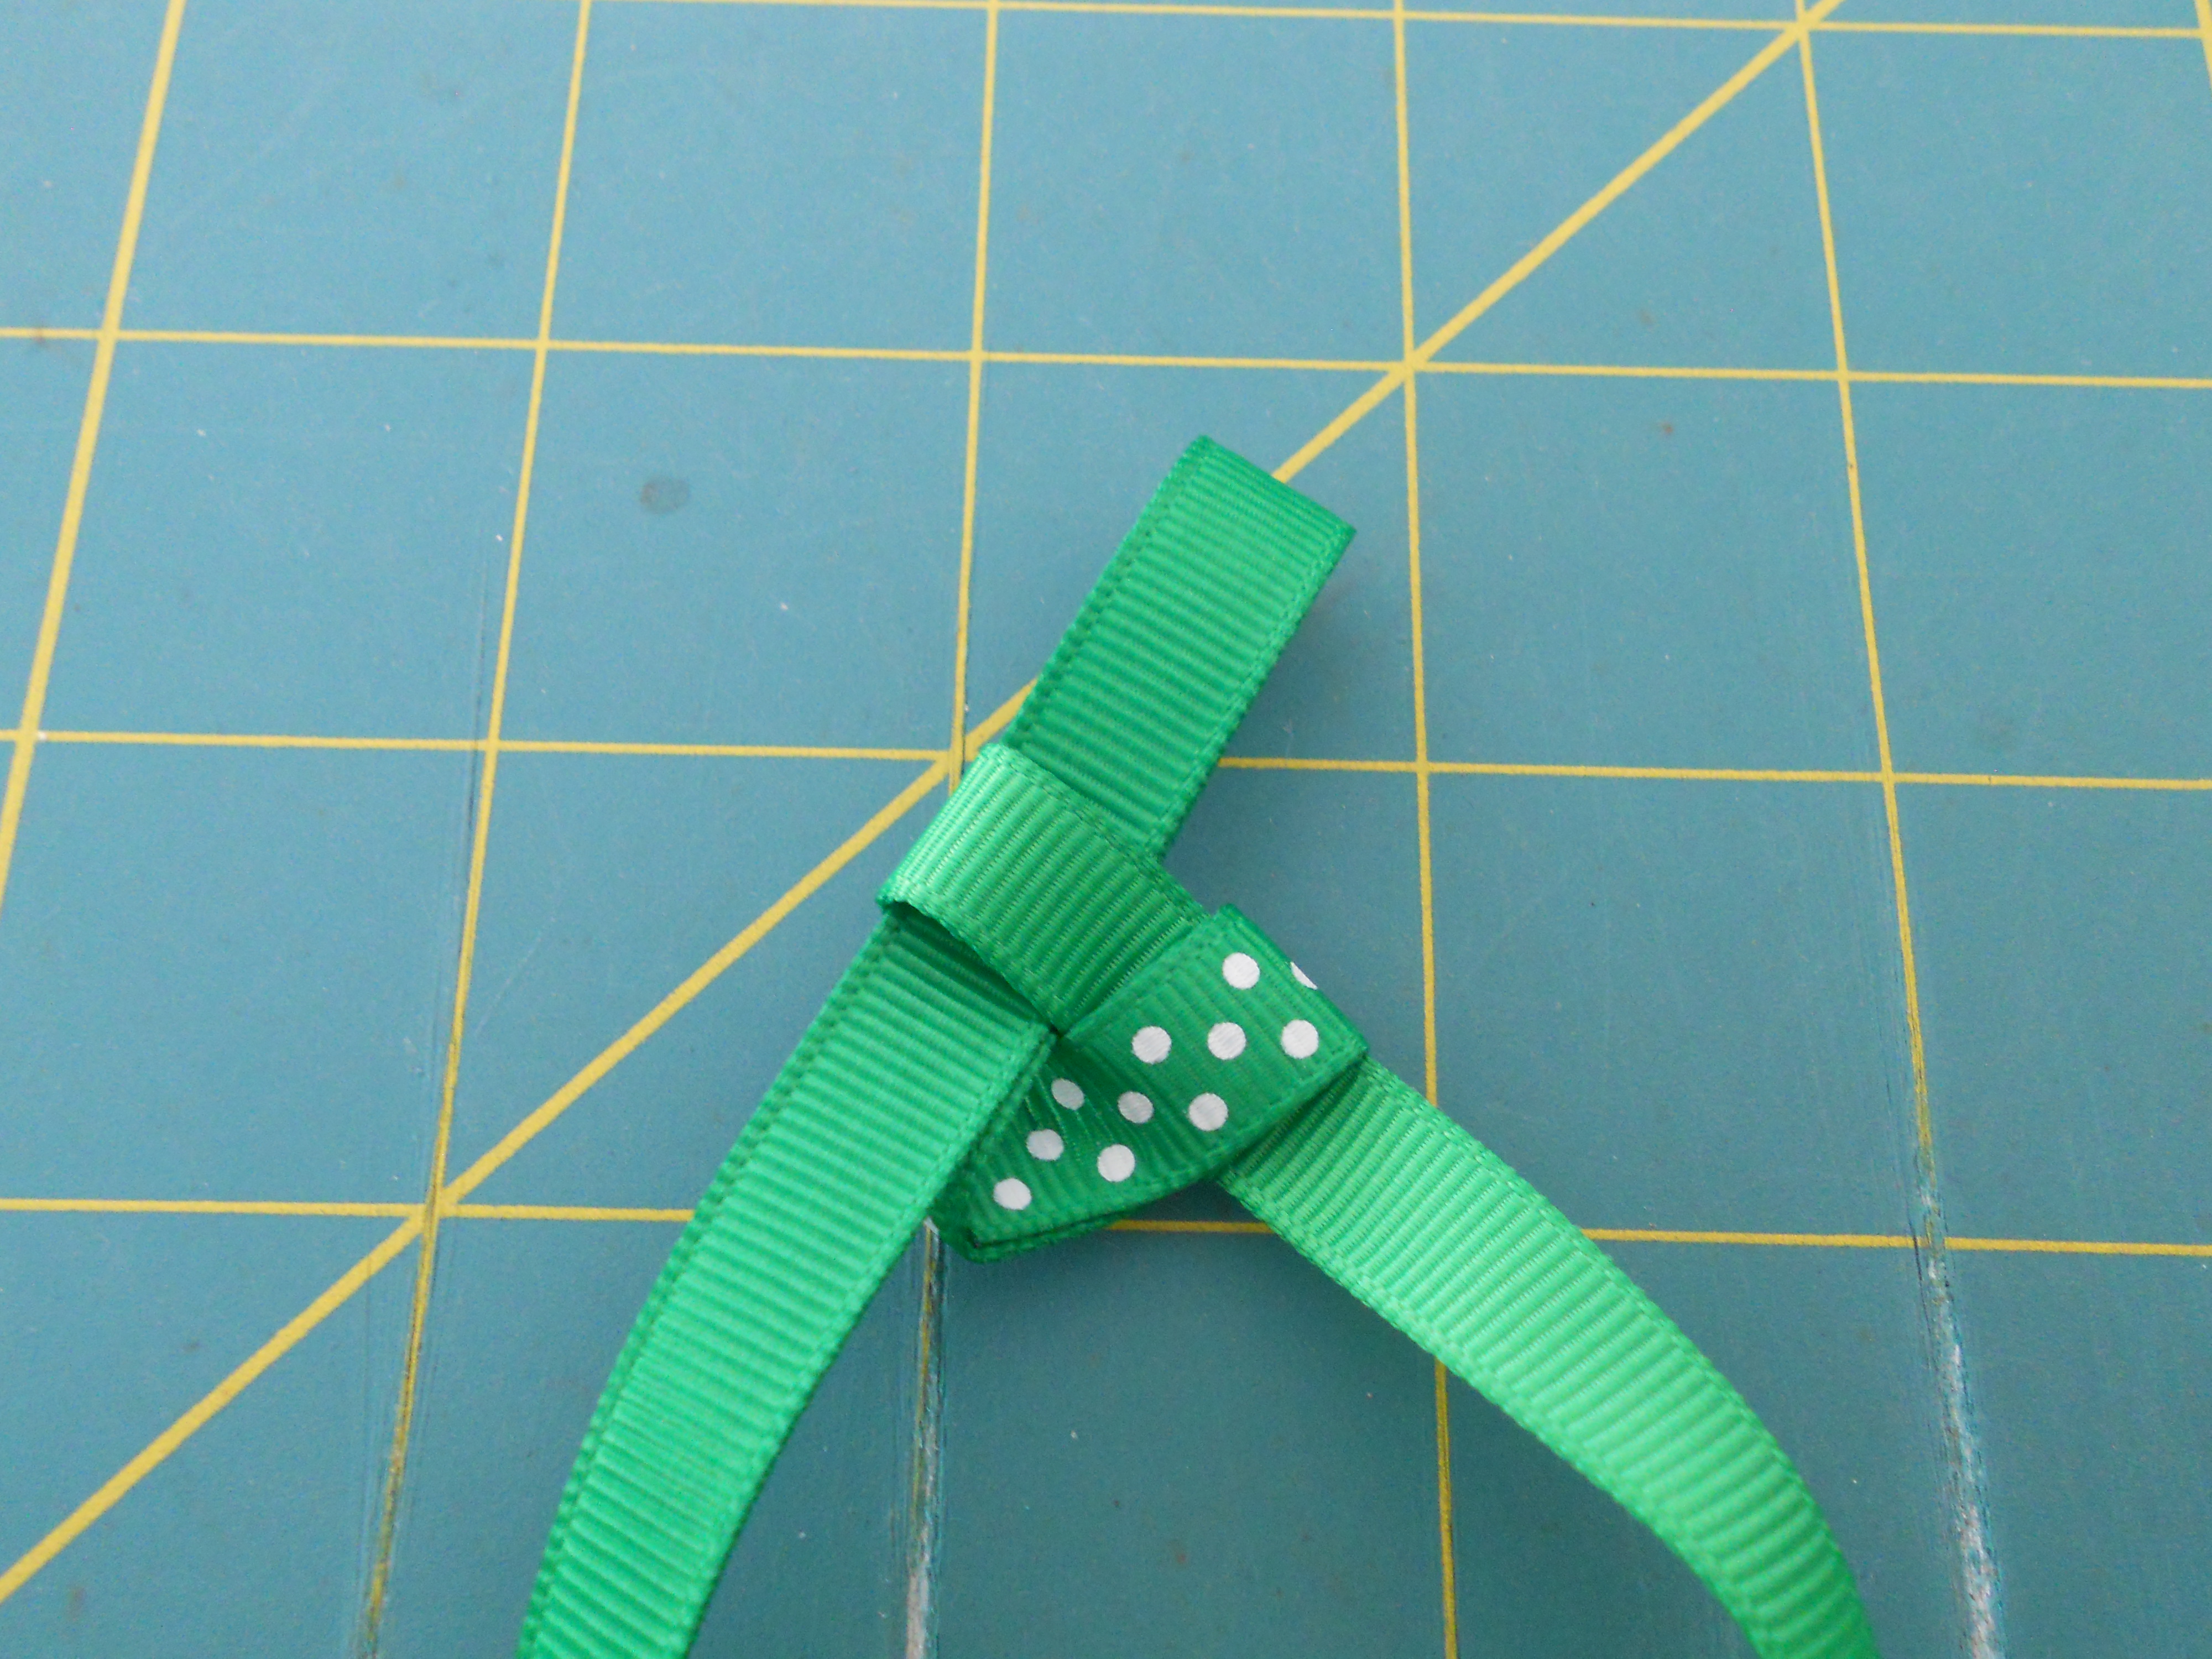
Step 4: Form a loop with your right ribbon and slide it through the loop of your left ribbon. After each loop is made pull the ribbon gently to "tighten" up the braid. You don't want the ribbon really tight but it shouldn't be loose either.
After you slide each loop through make sure the piece is big enough for the next loop.

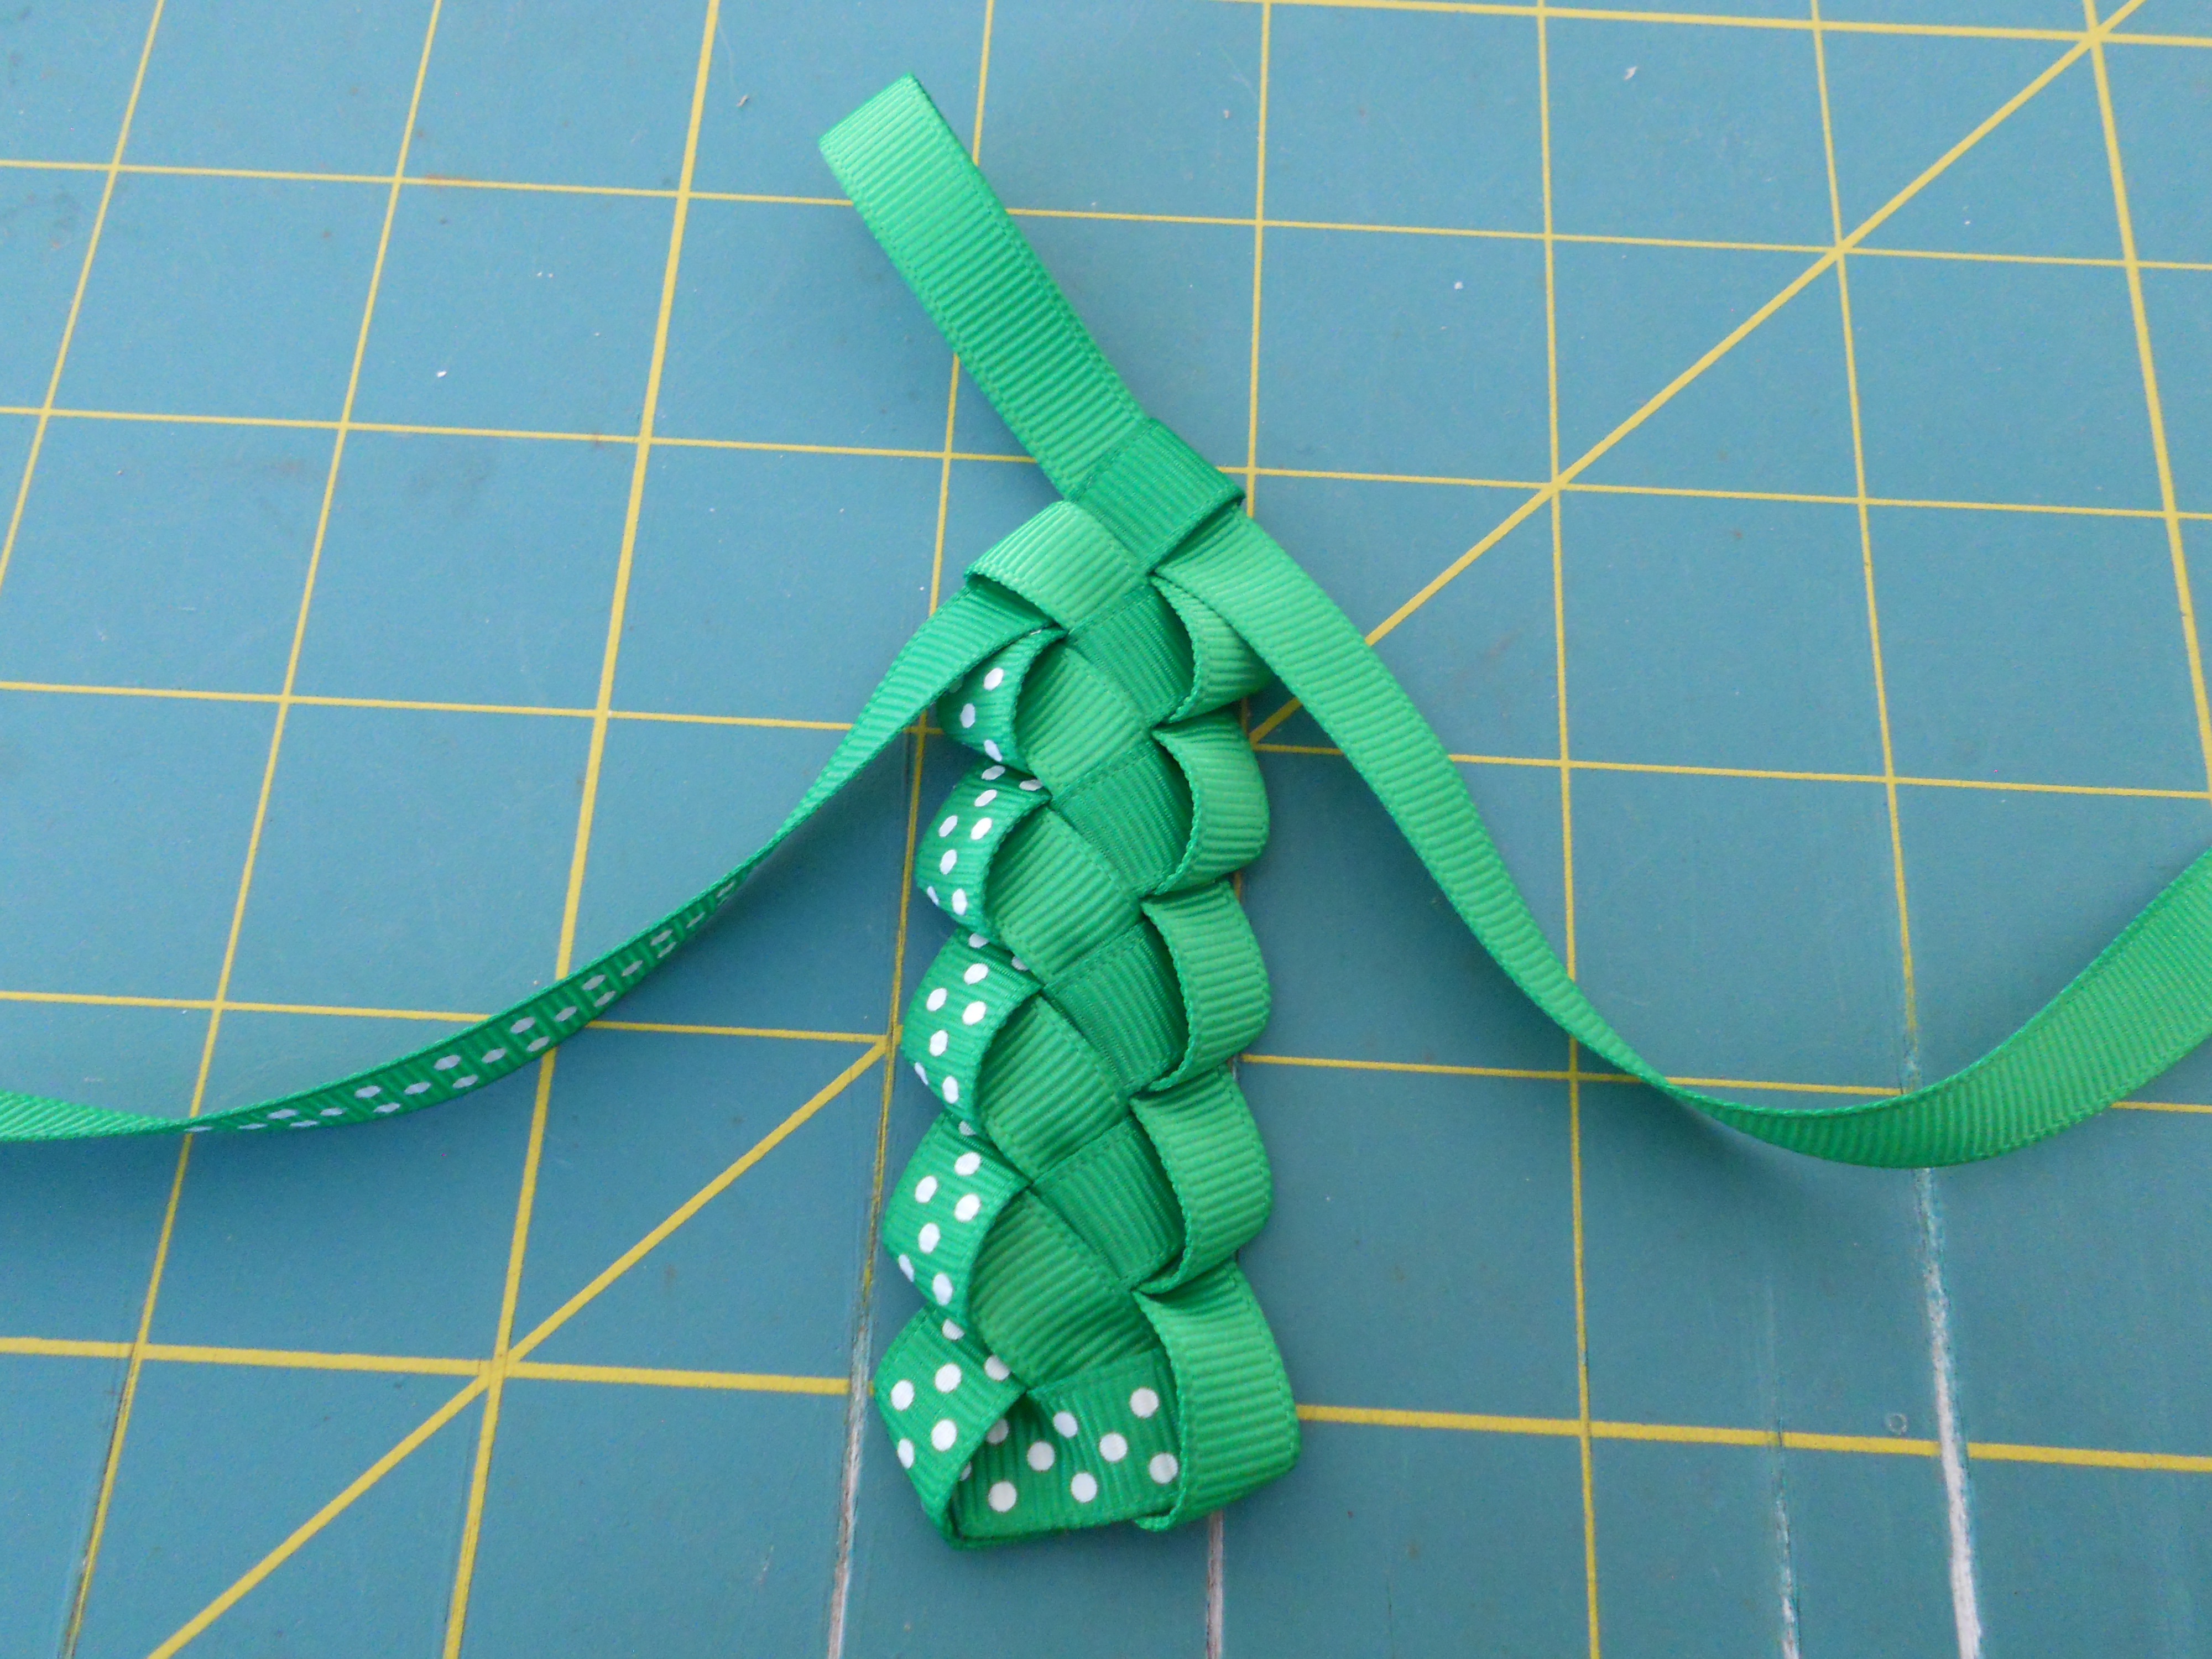
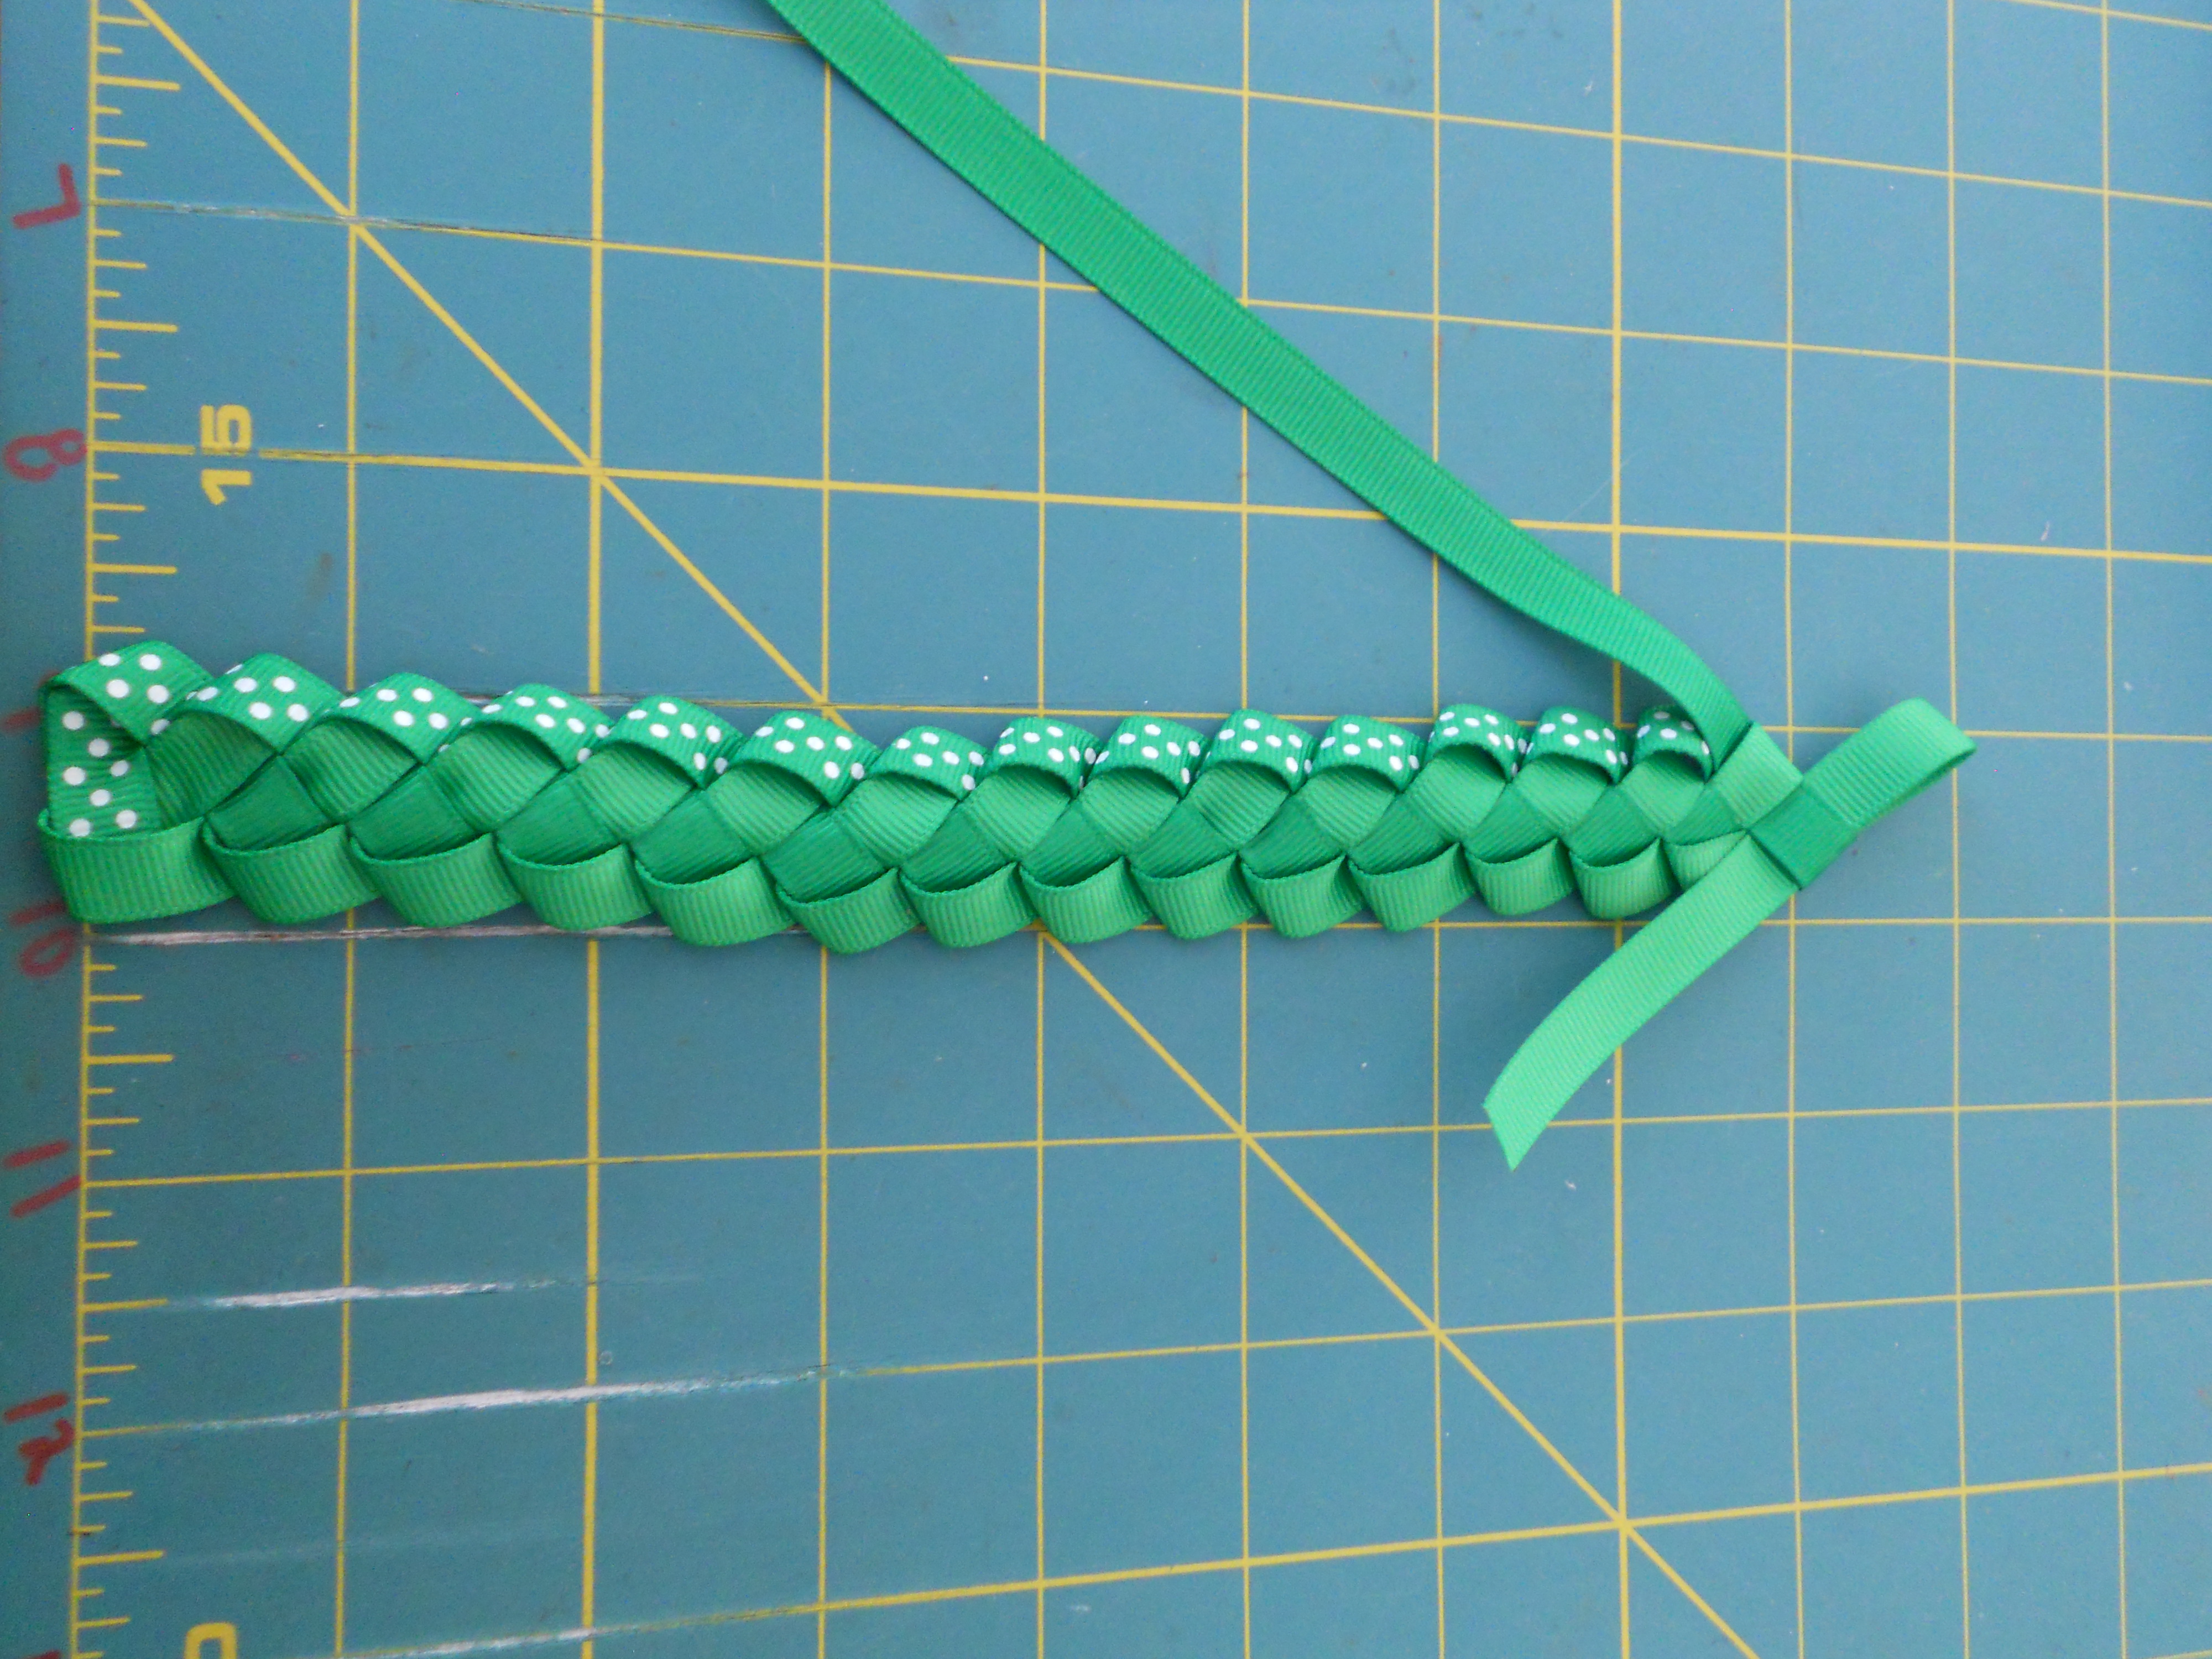
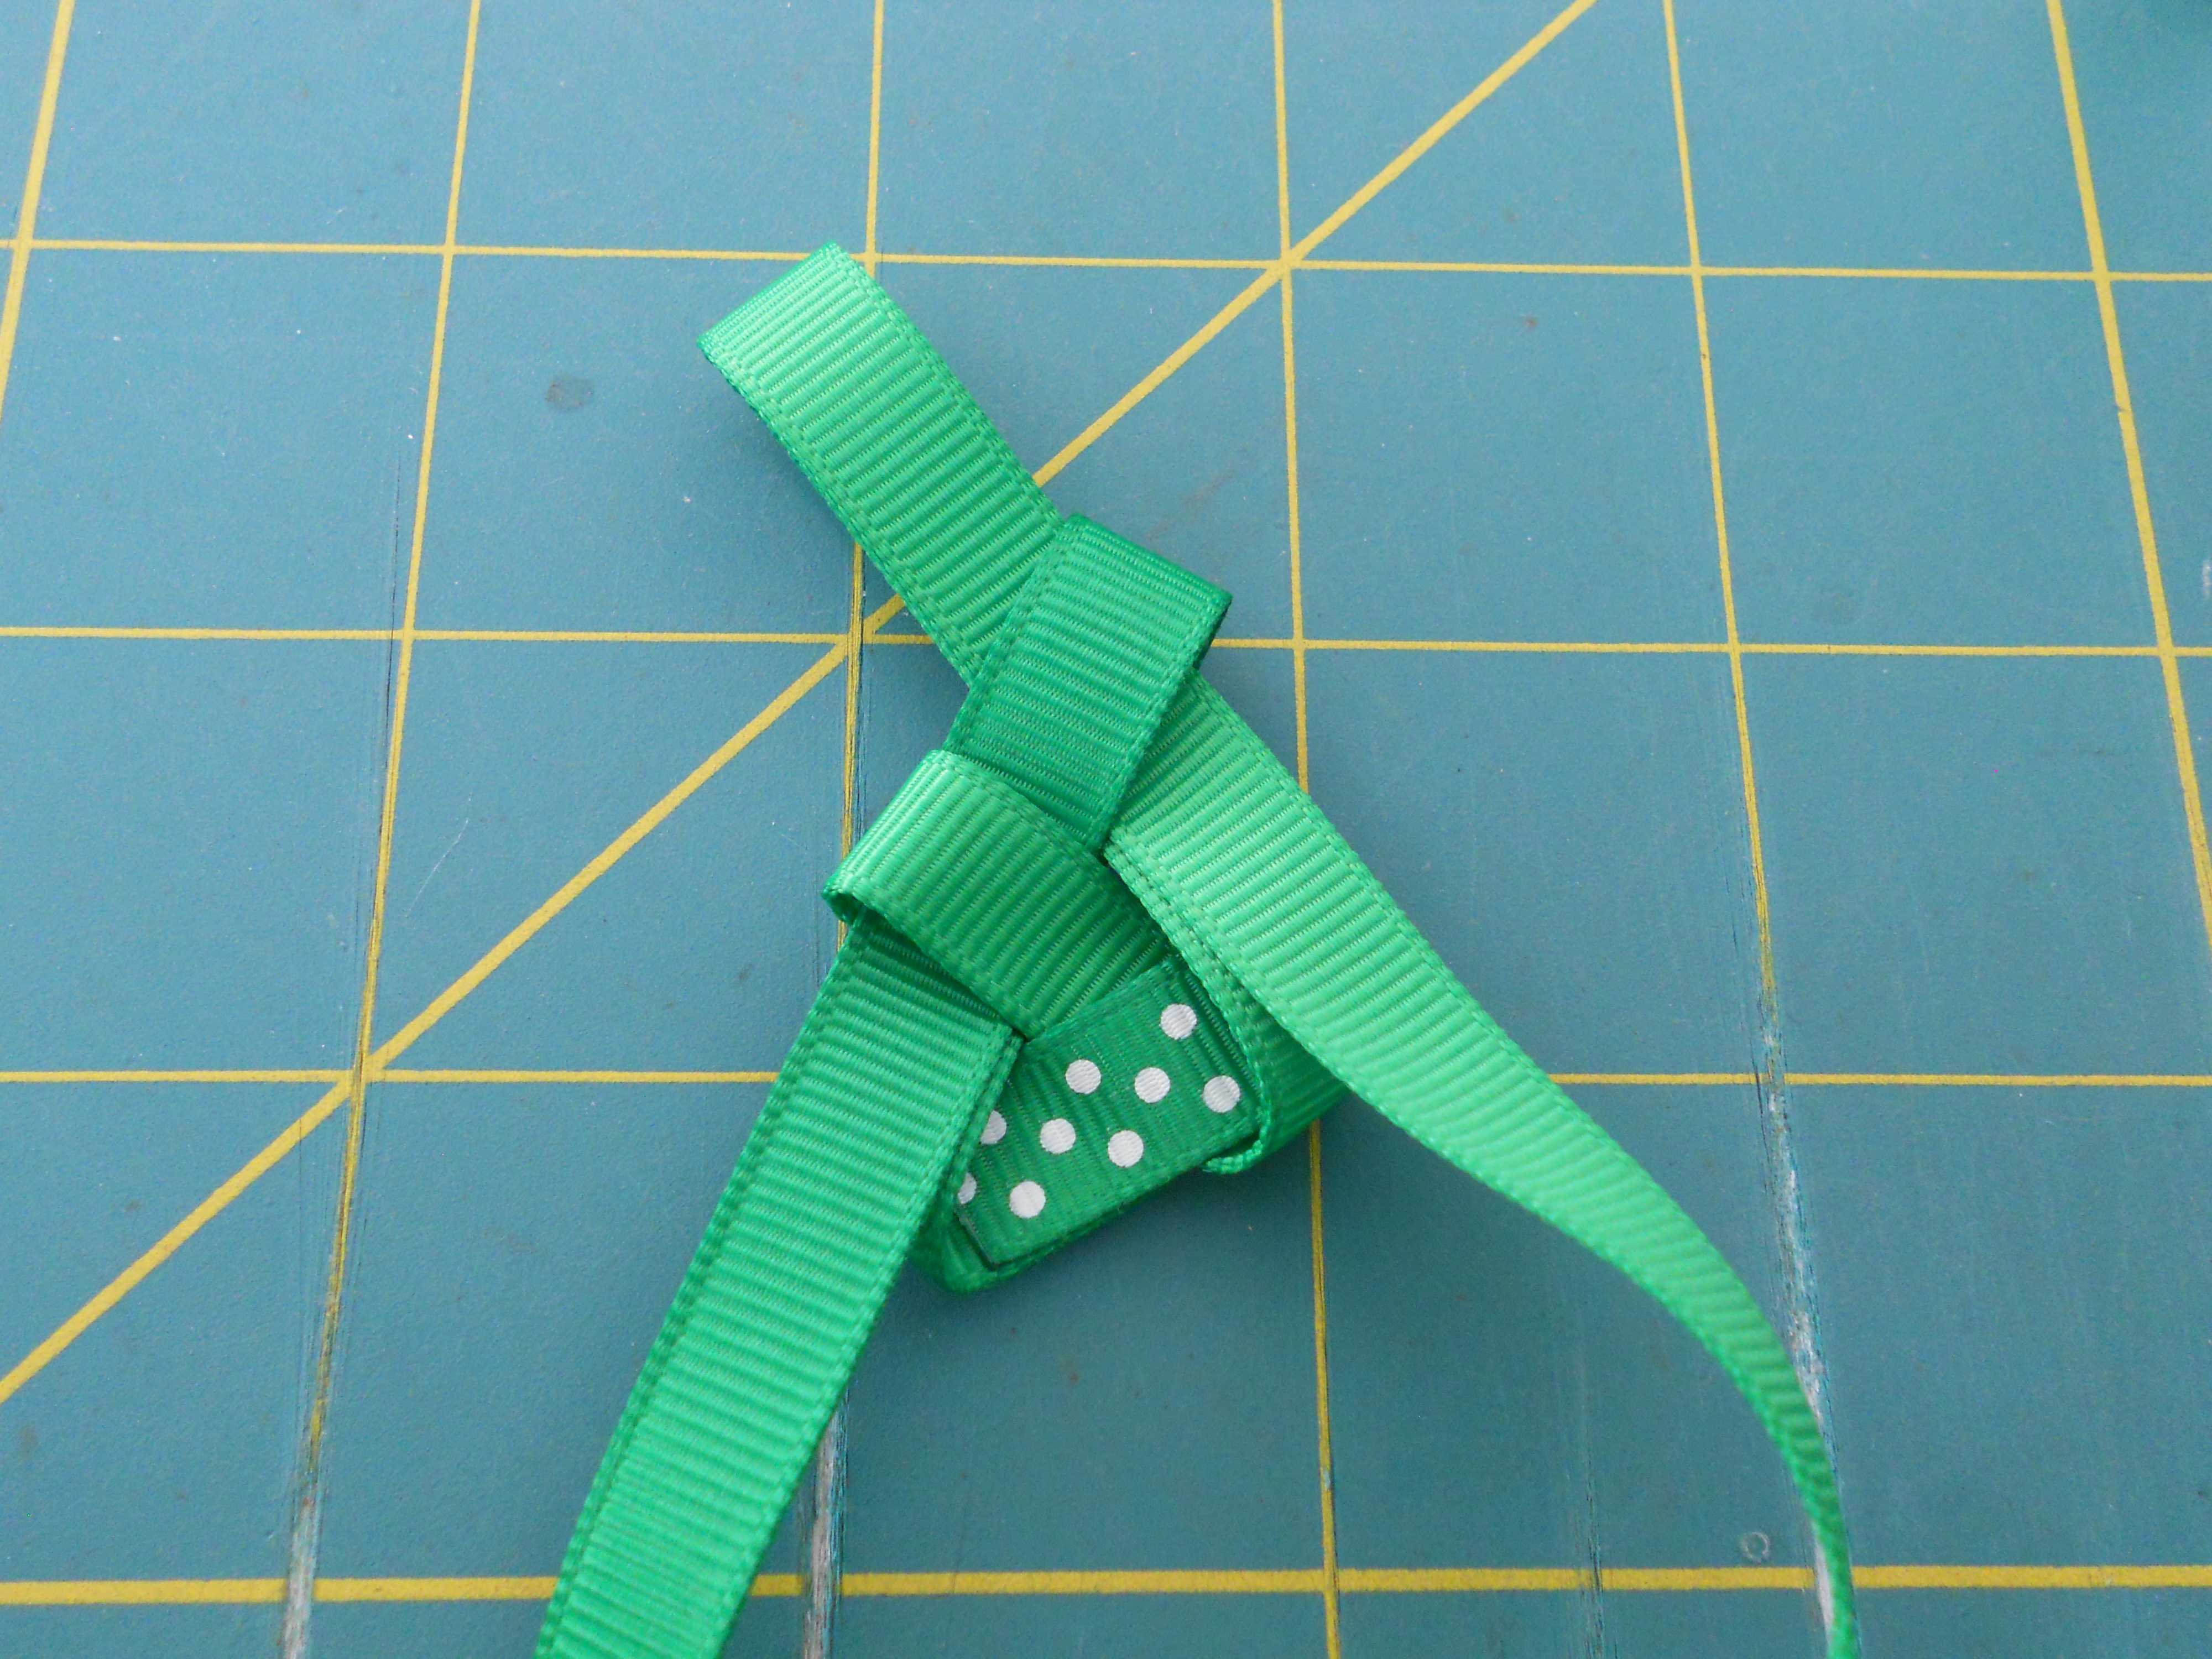
Step 5: Continue the same pattern until your wrap is approximately 8" long.

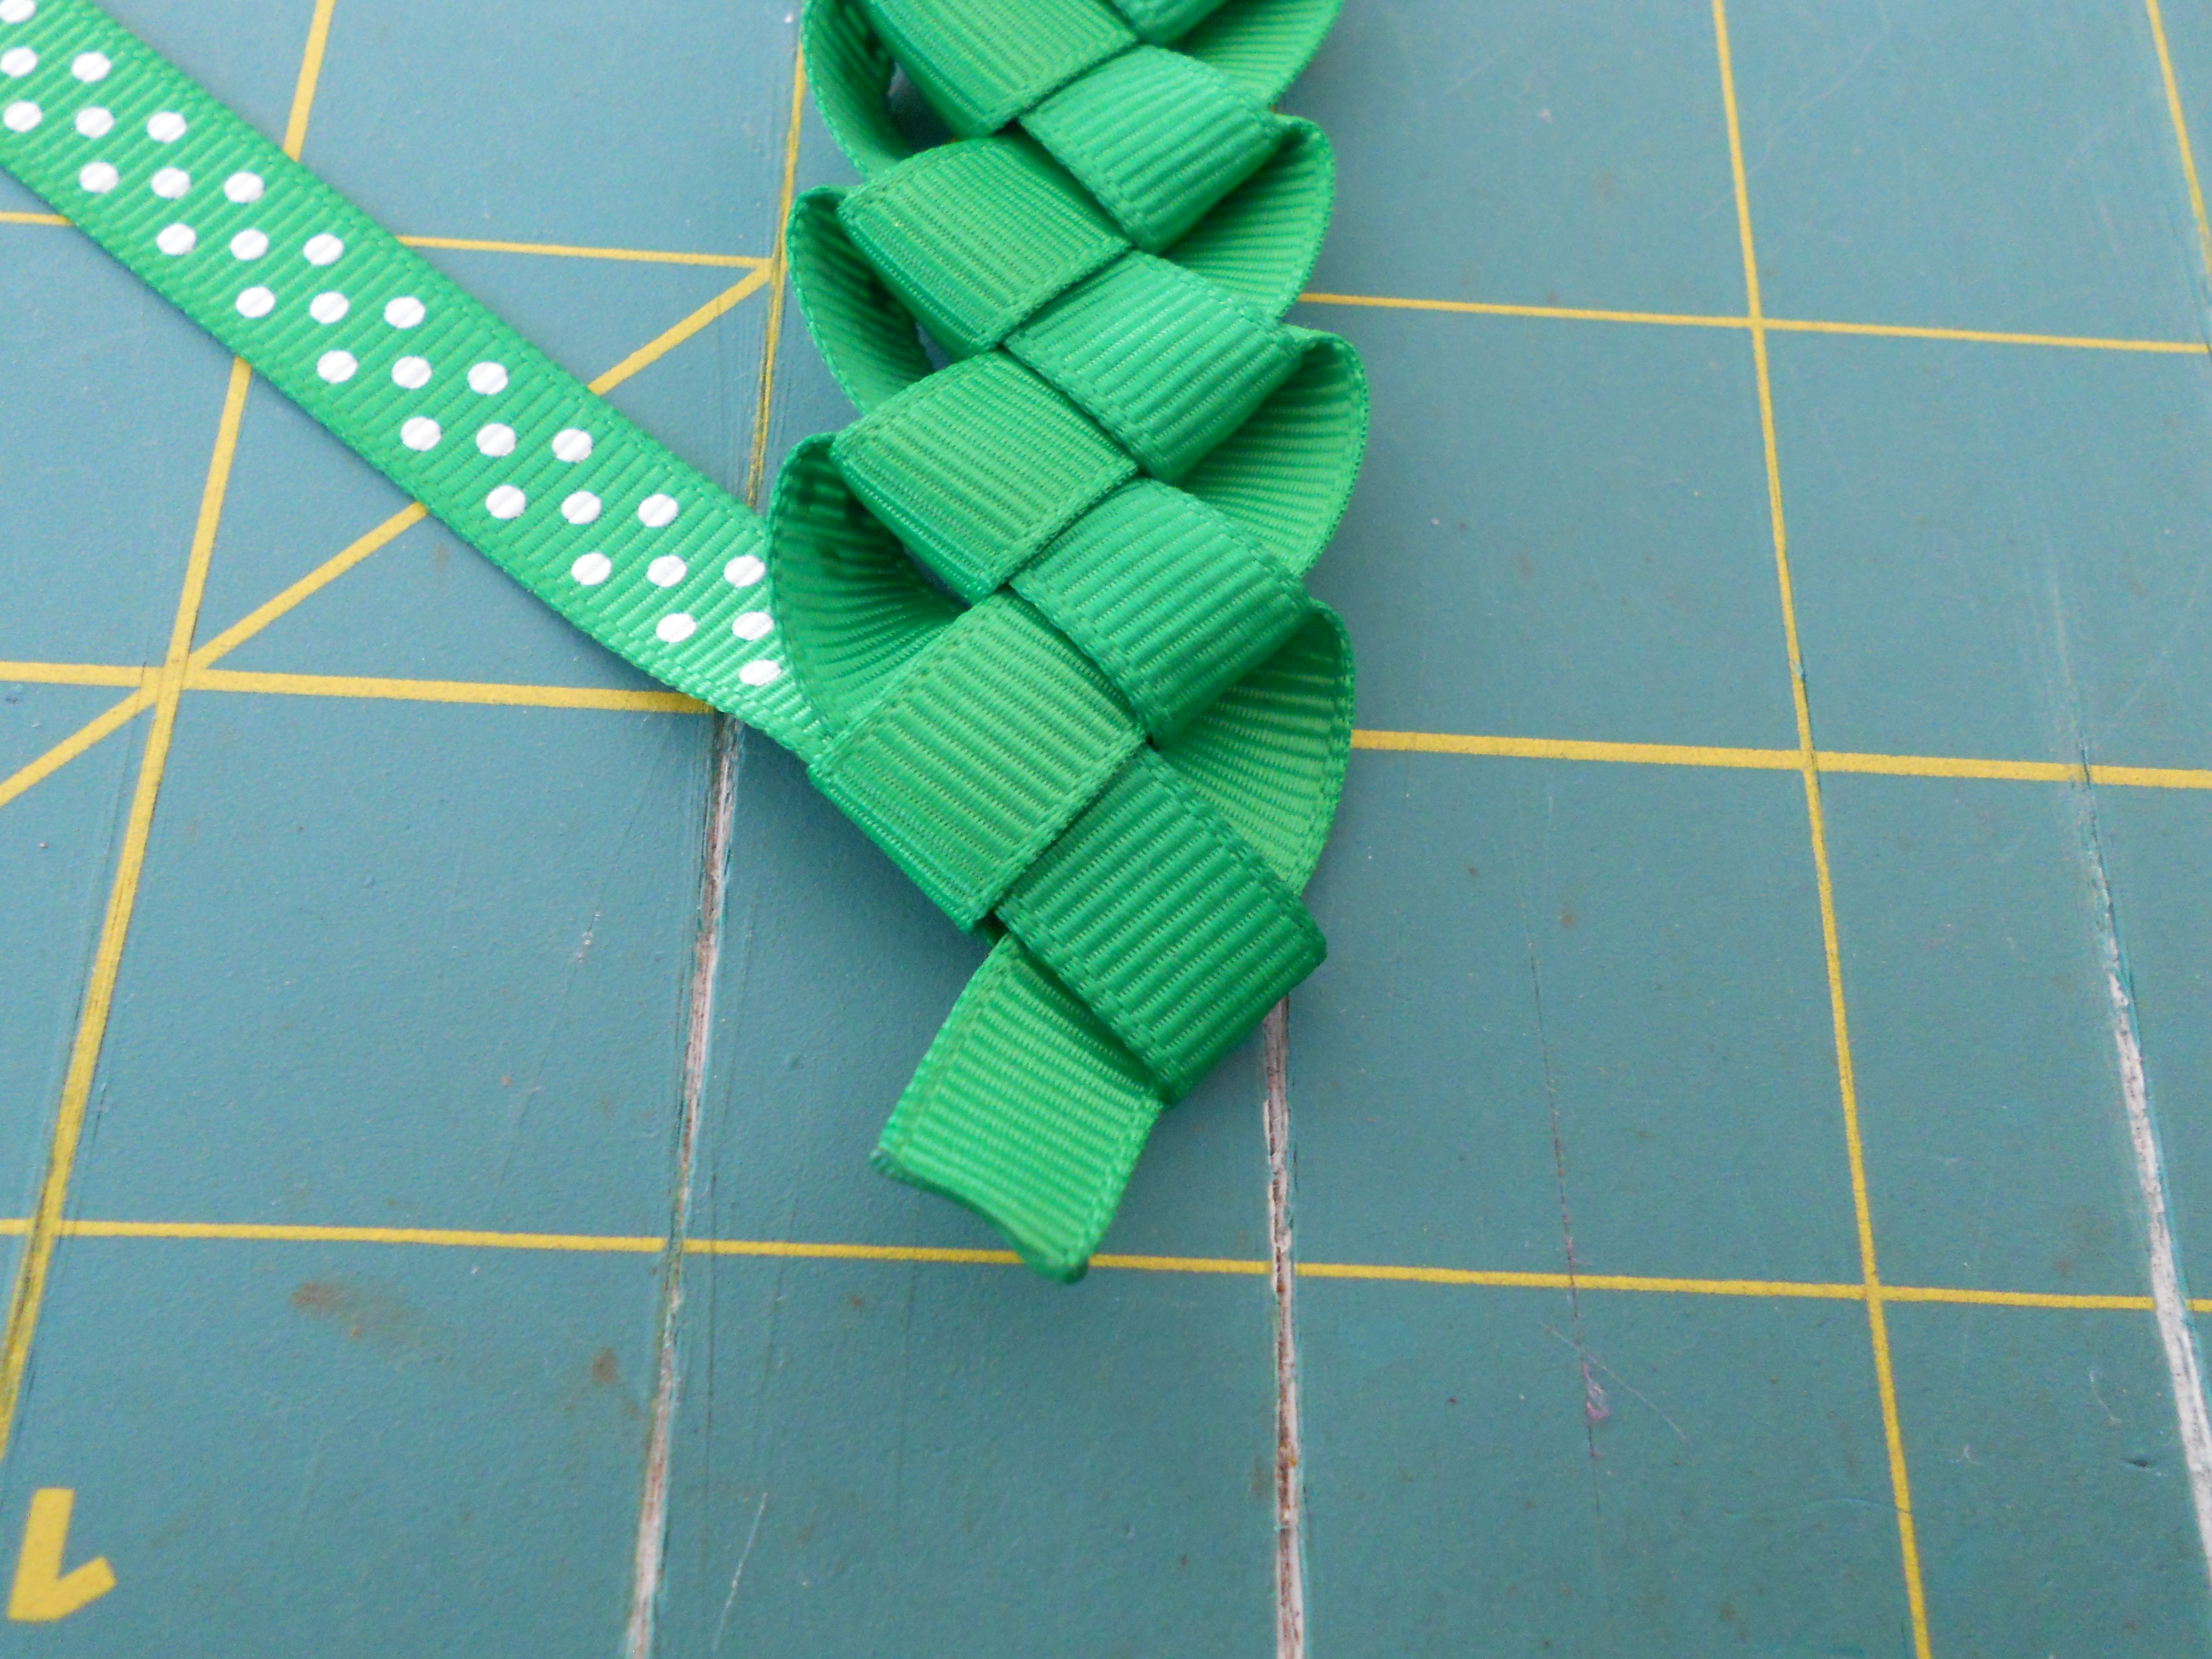

Step 6: Pull your last right loop all the way through. This should be your solid emerald ribbon. Flip the wrap over, cut the end, heat seal and hot glue to the back.

Step 7: Cut your left ribbon to be even with the end of the wrap. This should be your swiss dots emerald ribbon. Heat seal the end and hot glue it down.
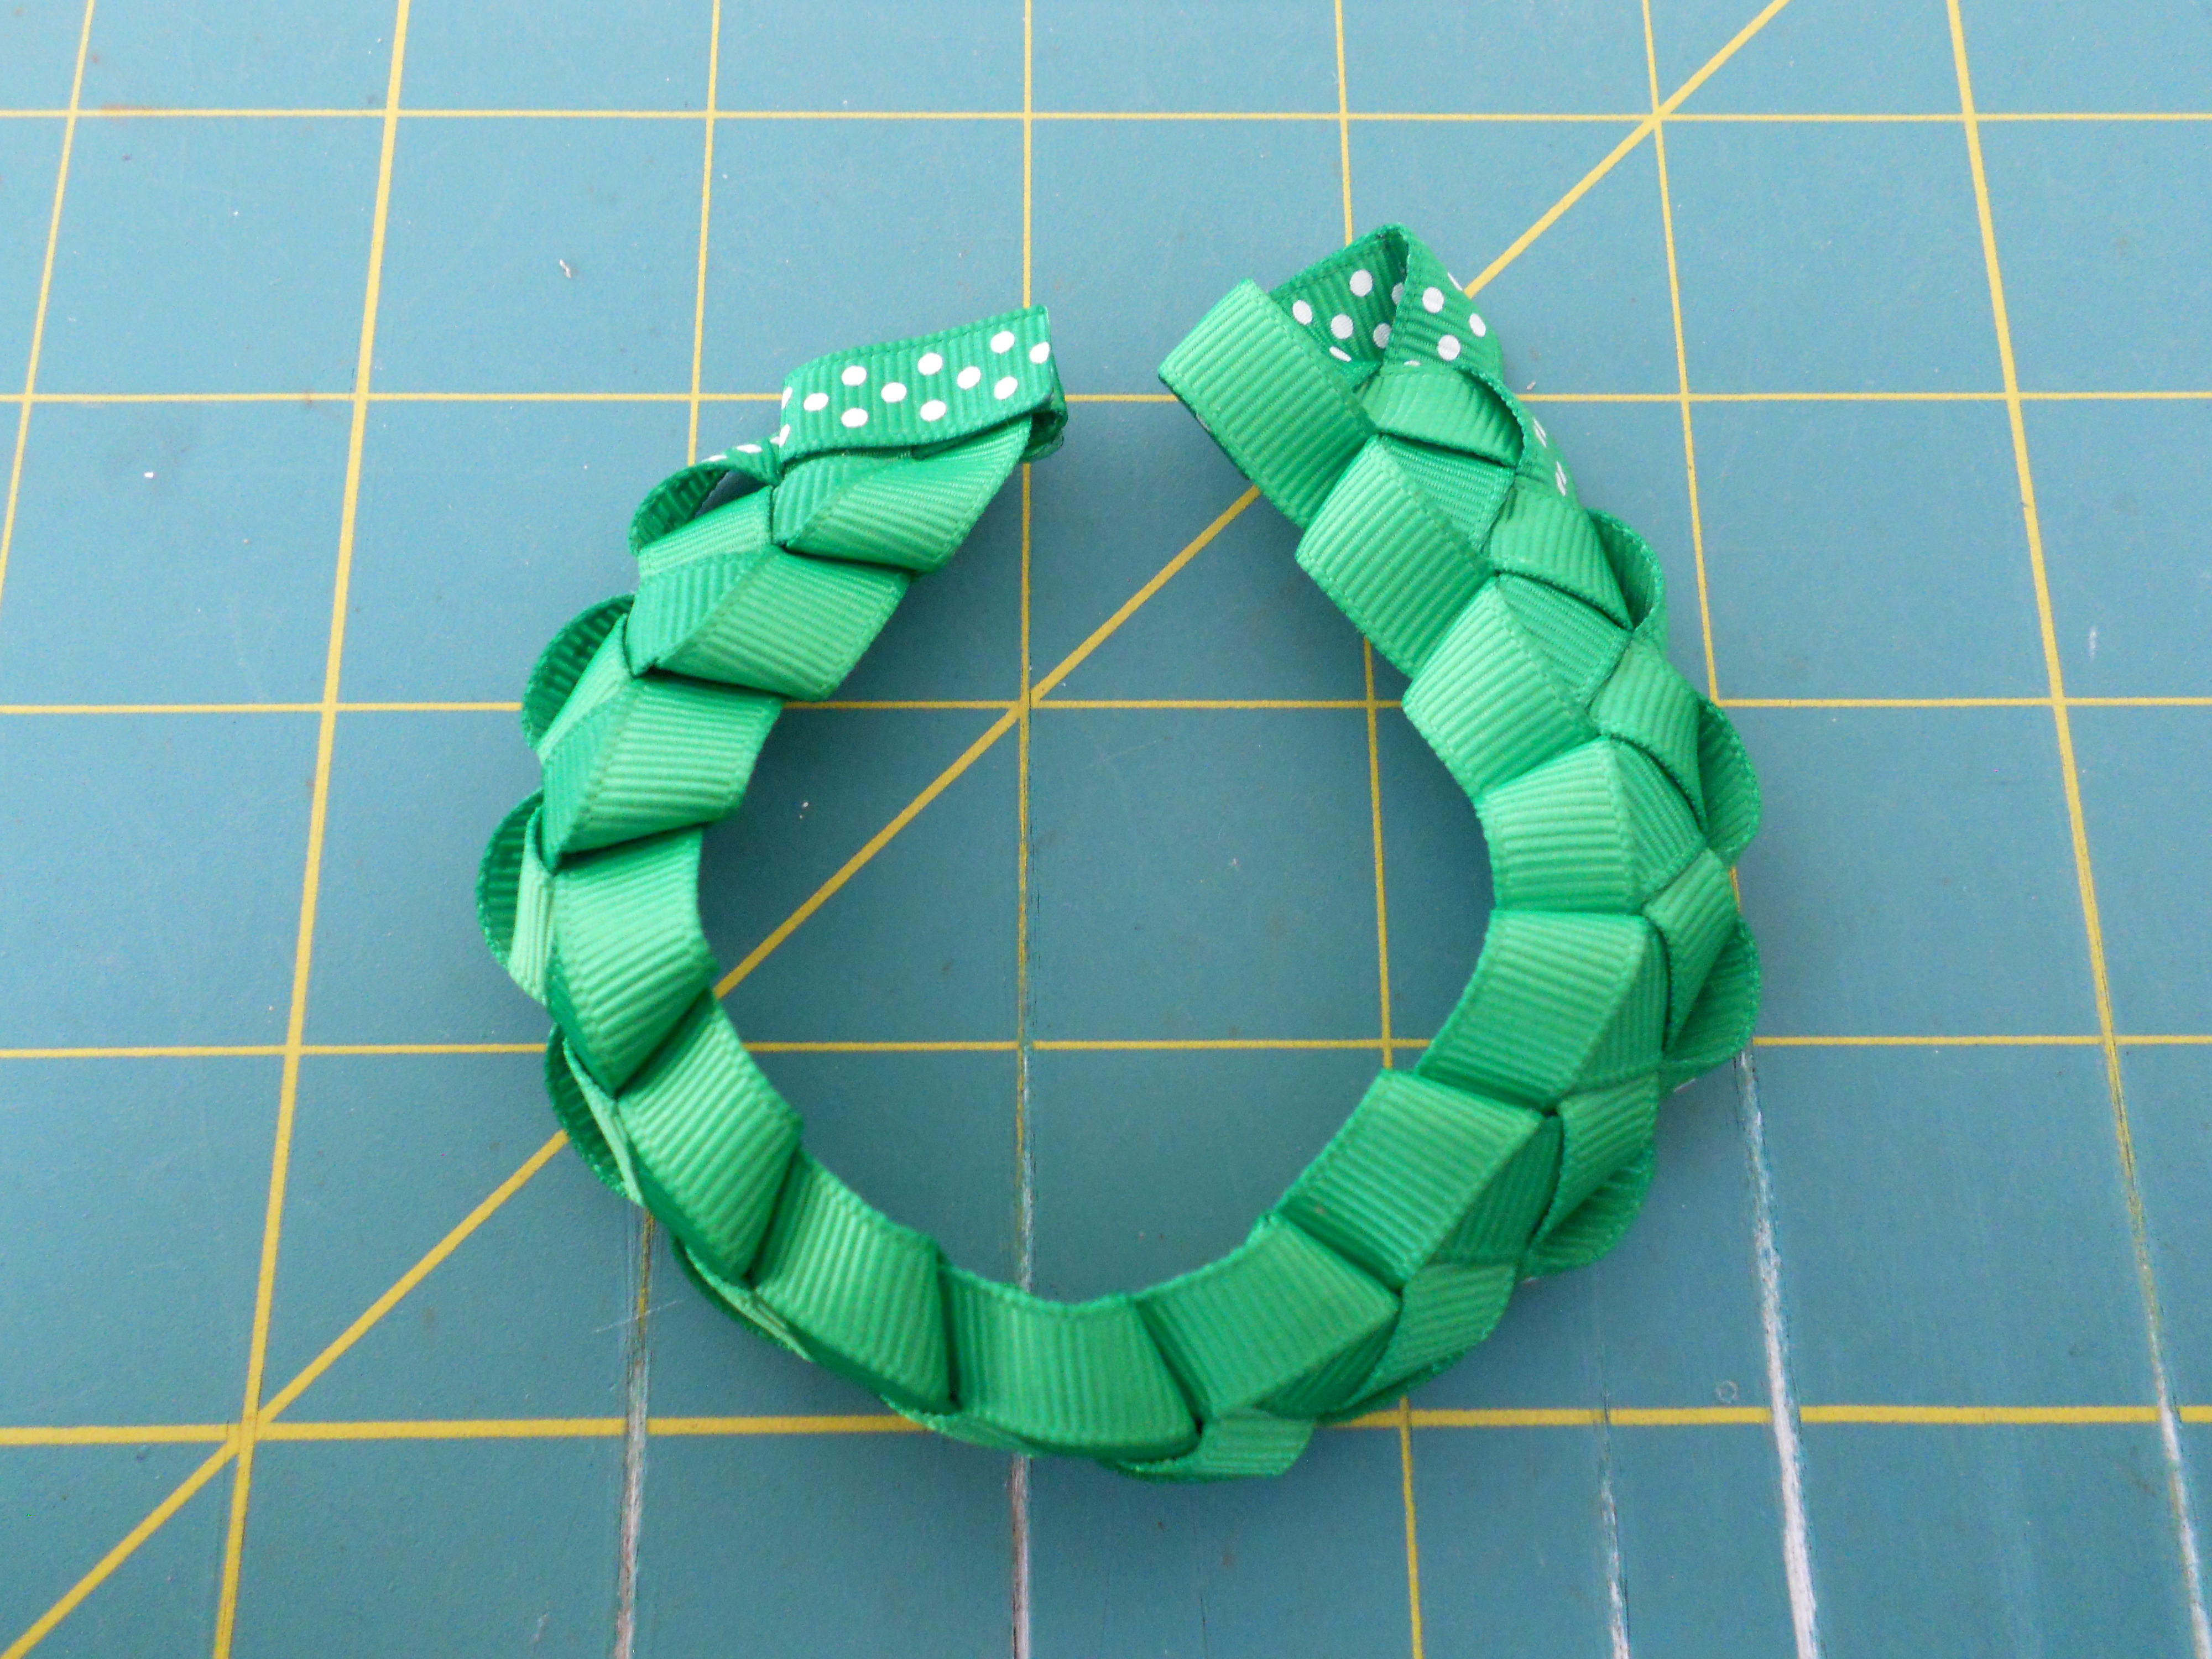

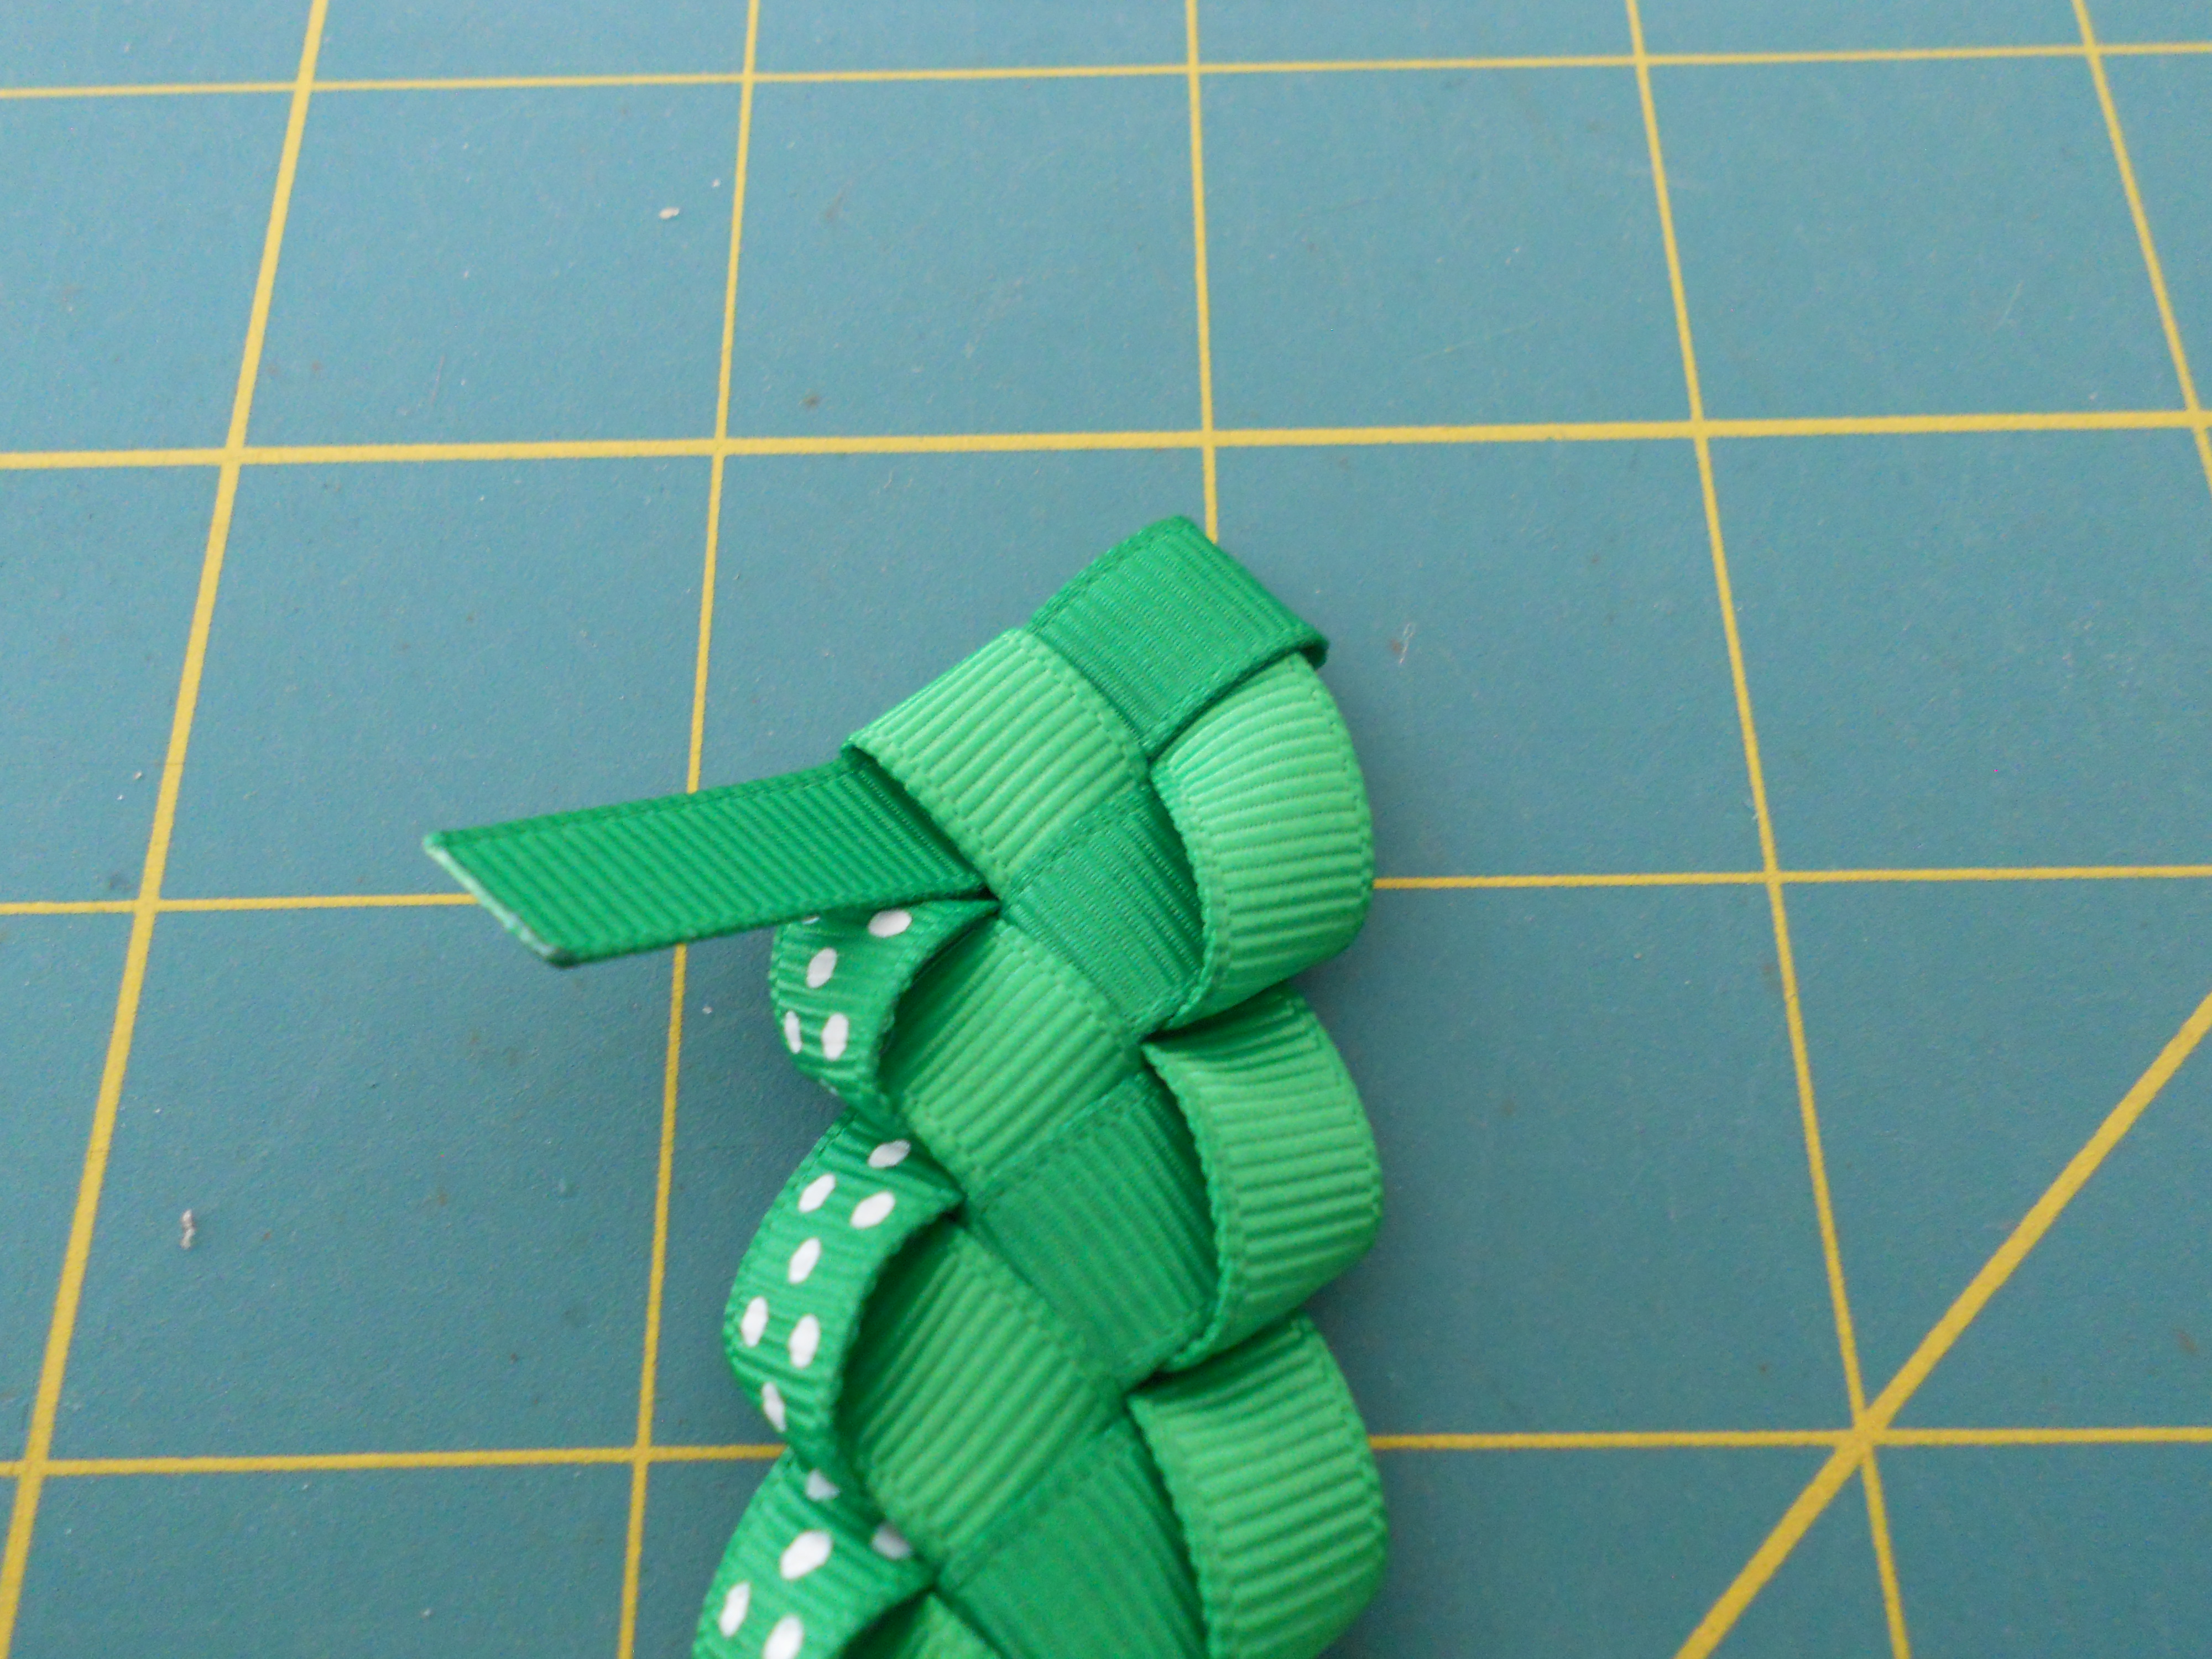
Step 8: Your wrap is finished. Place one end on top of the other. Shape your wreath how you would like it to look and glue the overlapping ends together.

Step 9: Cut 2 strips of your 7/8" Grosgrain ribbon measuring 4" and 3". Heat seal the ends.
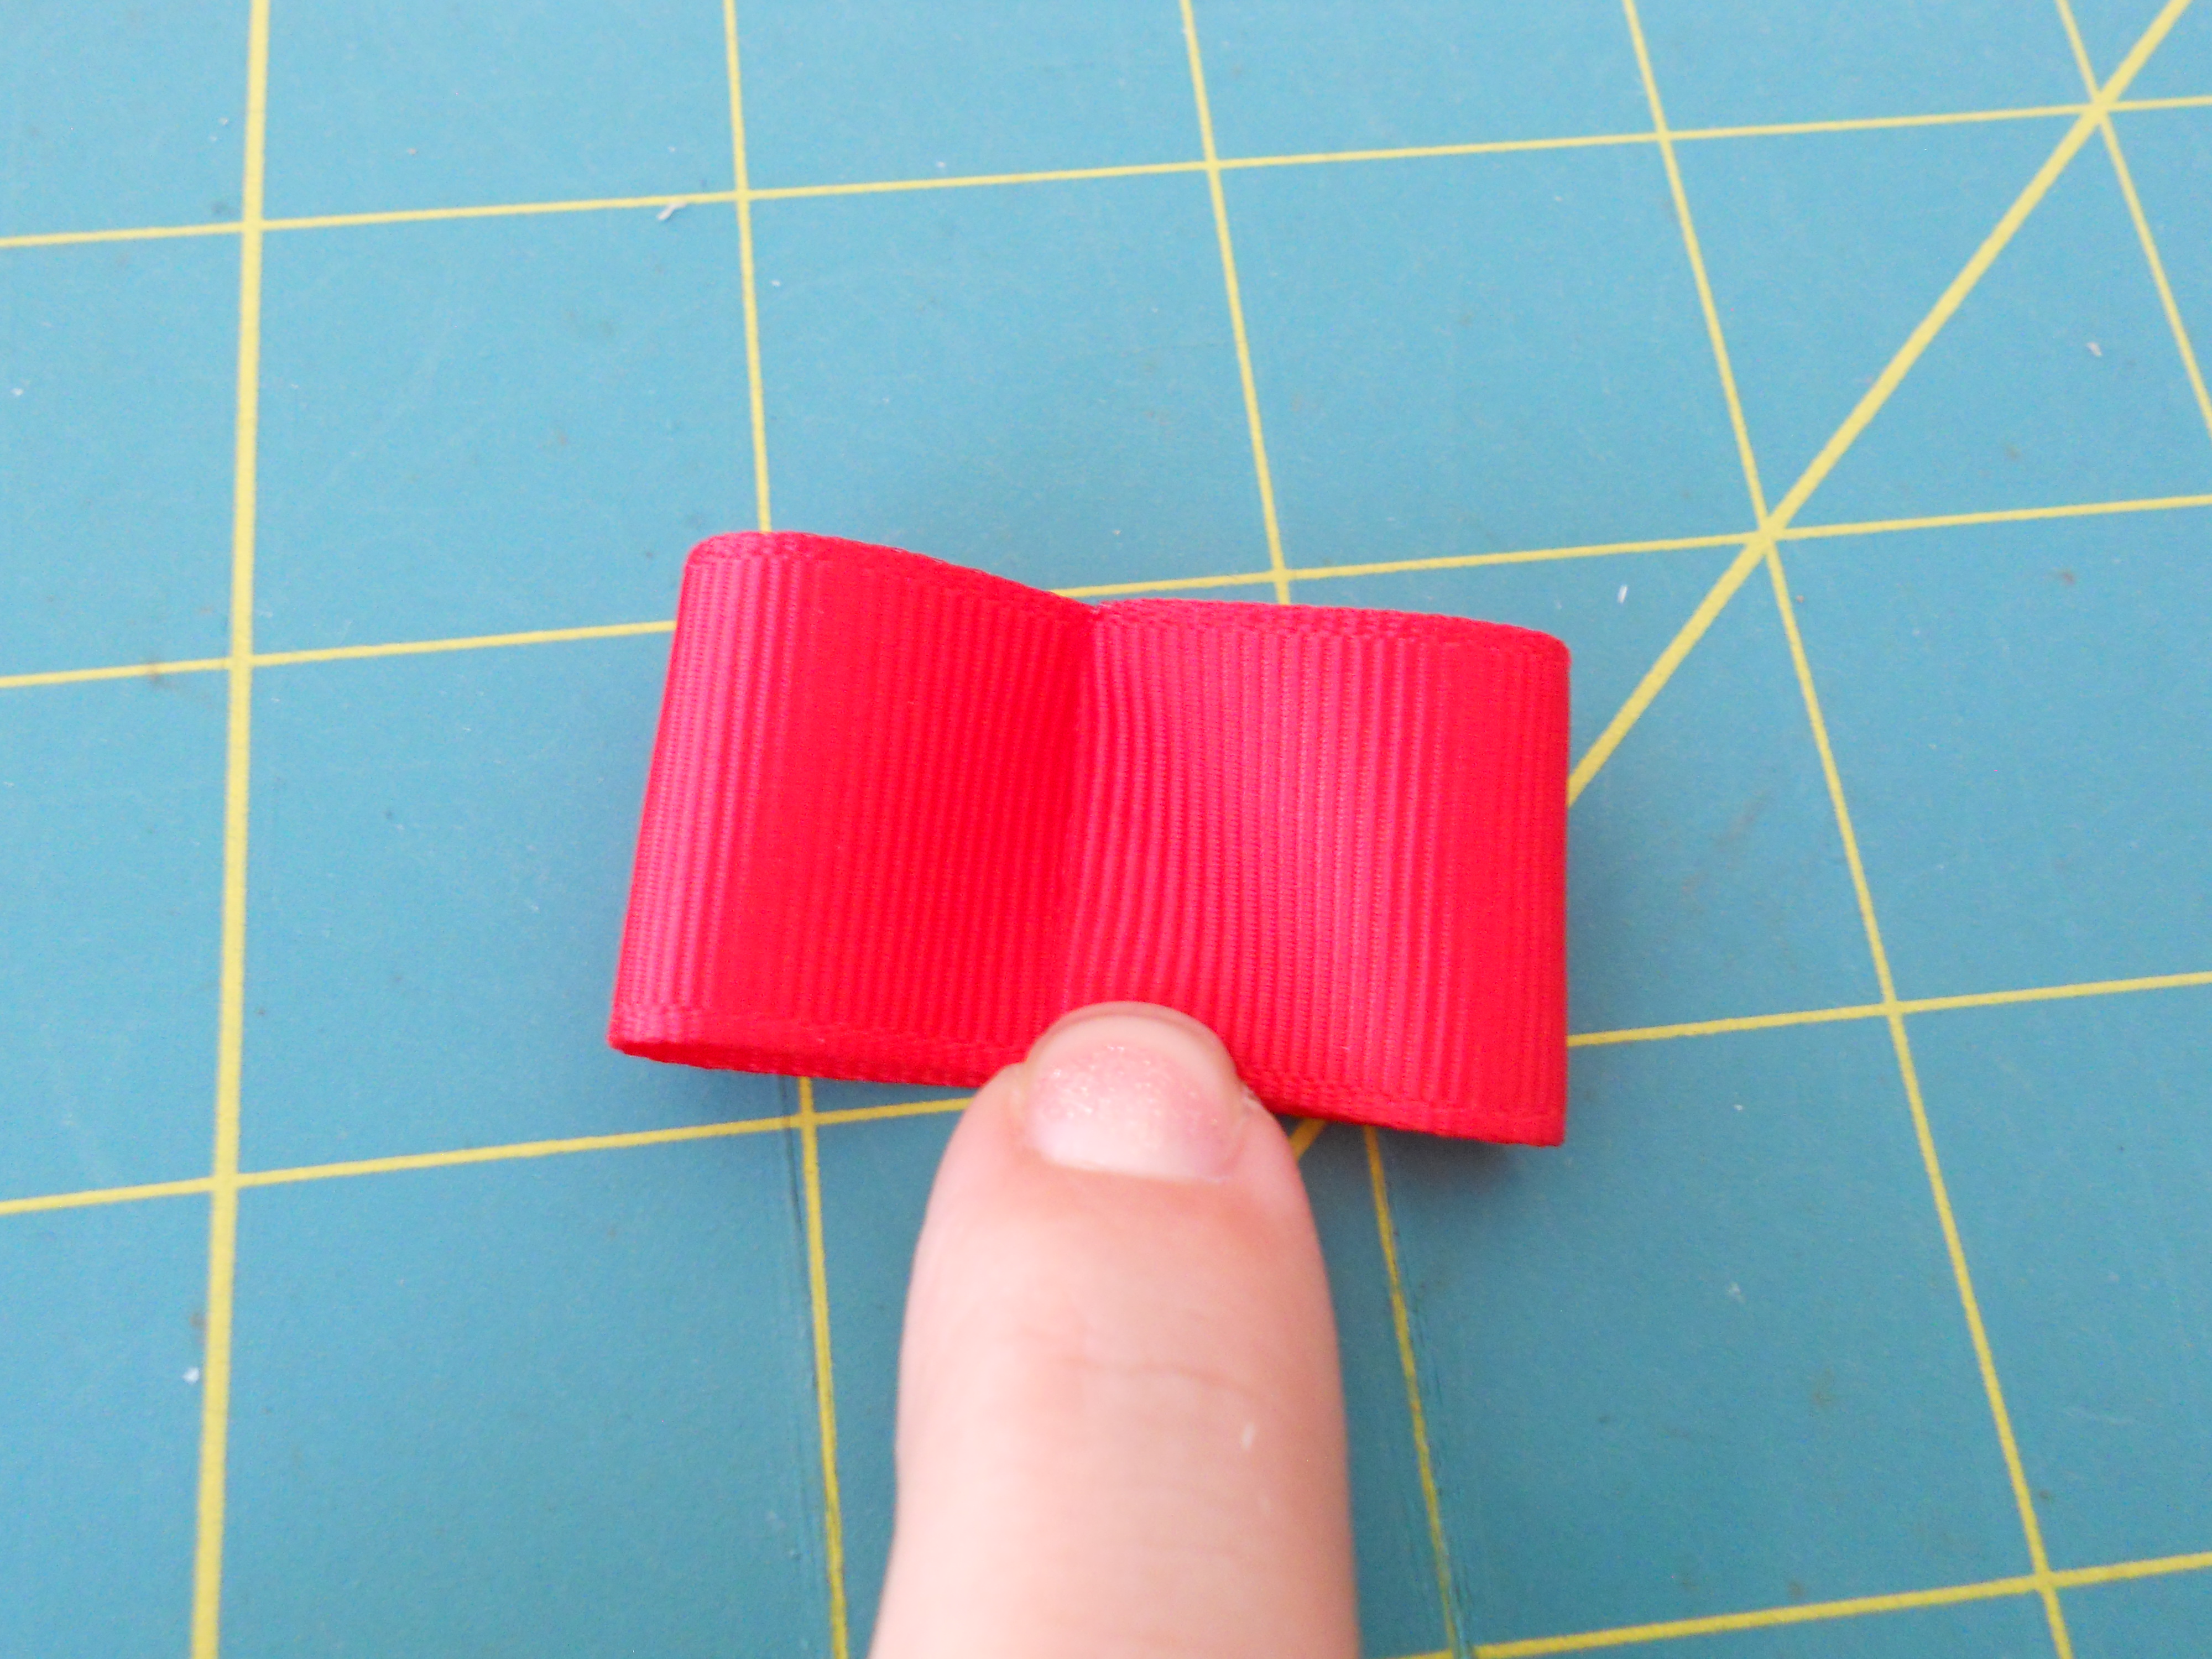
Step 10: Fold your 4" piece into a loop, overlapping the ends by 1/4". Glue the ends together to form the loop.
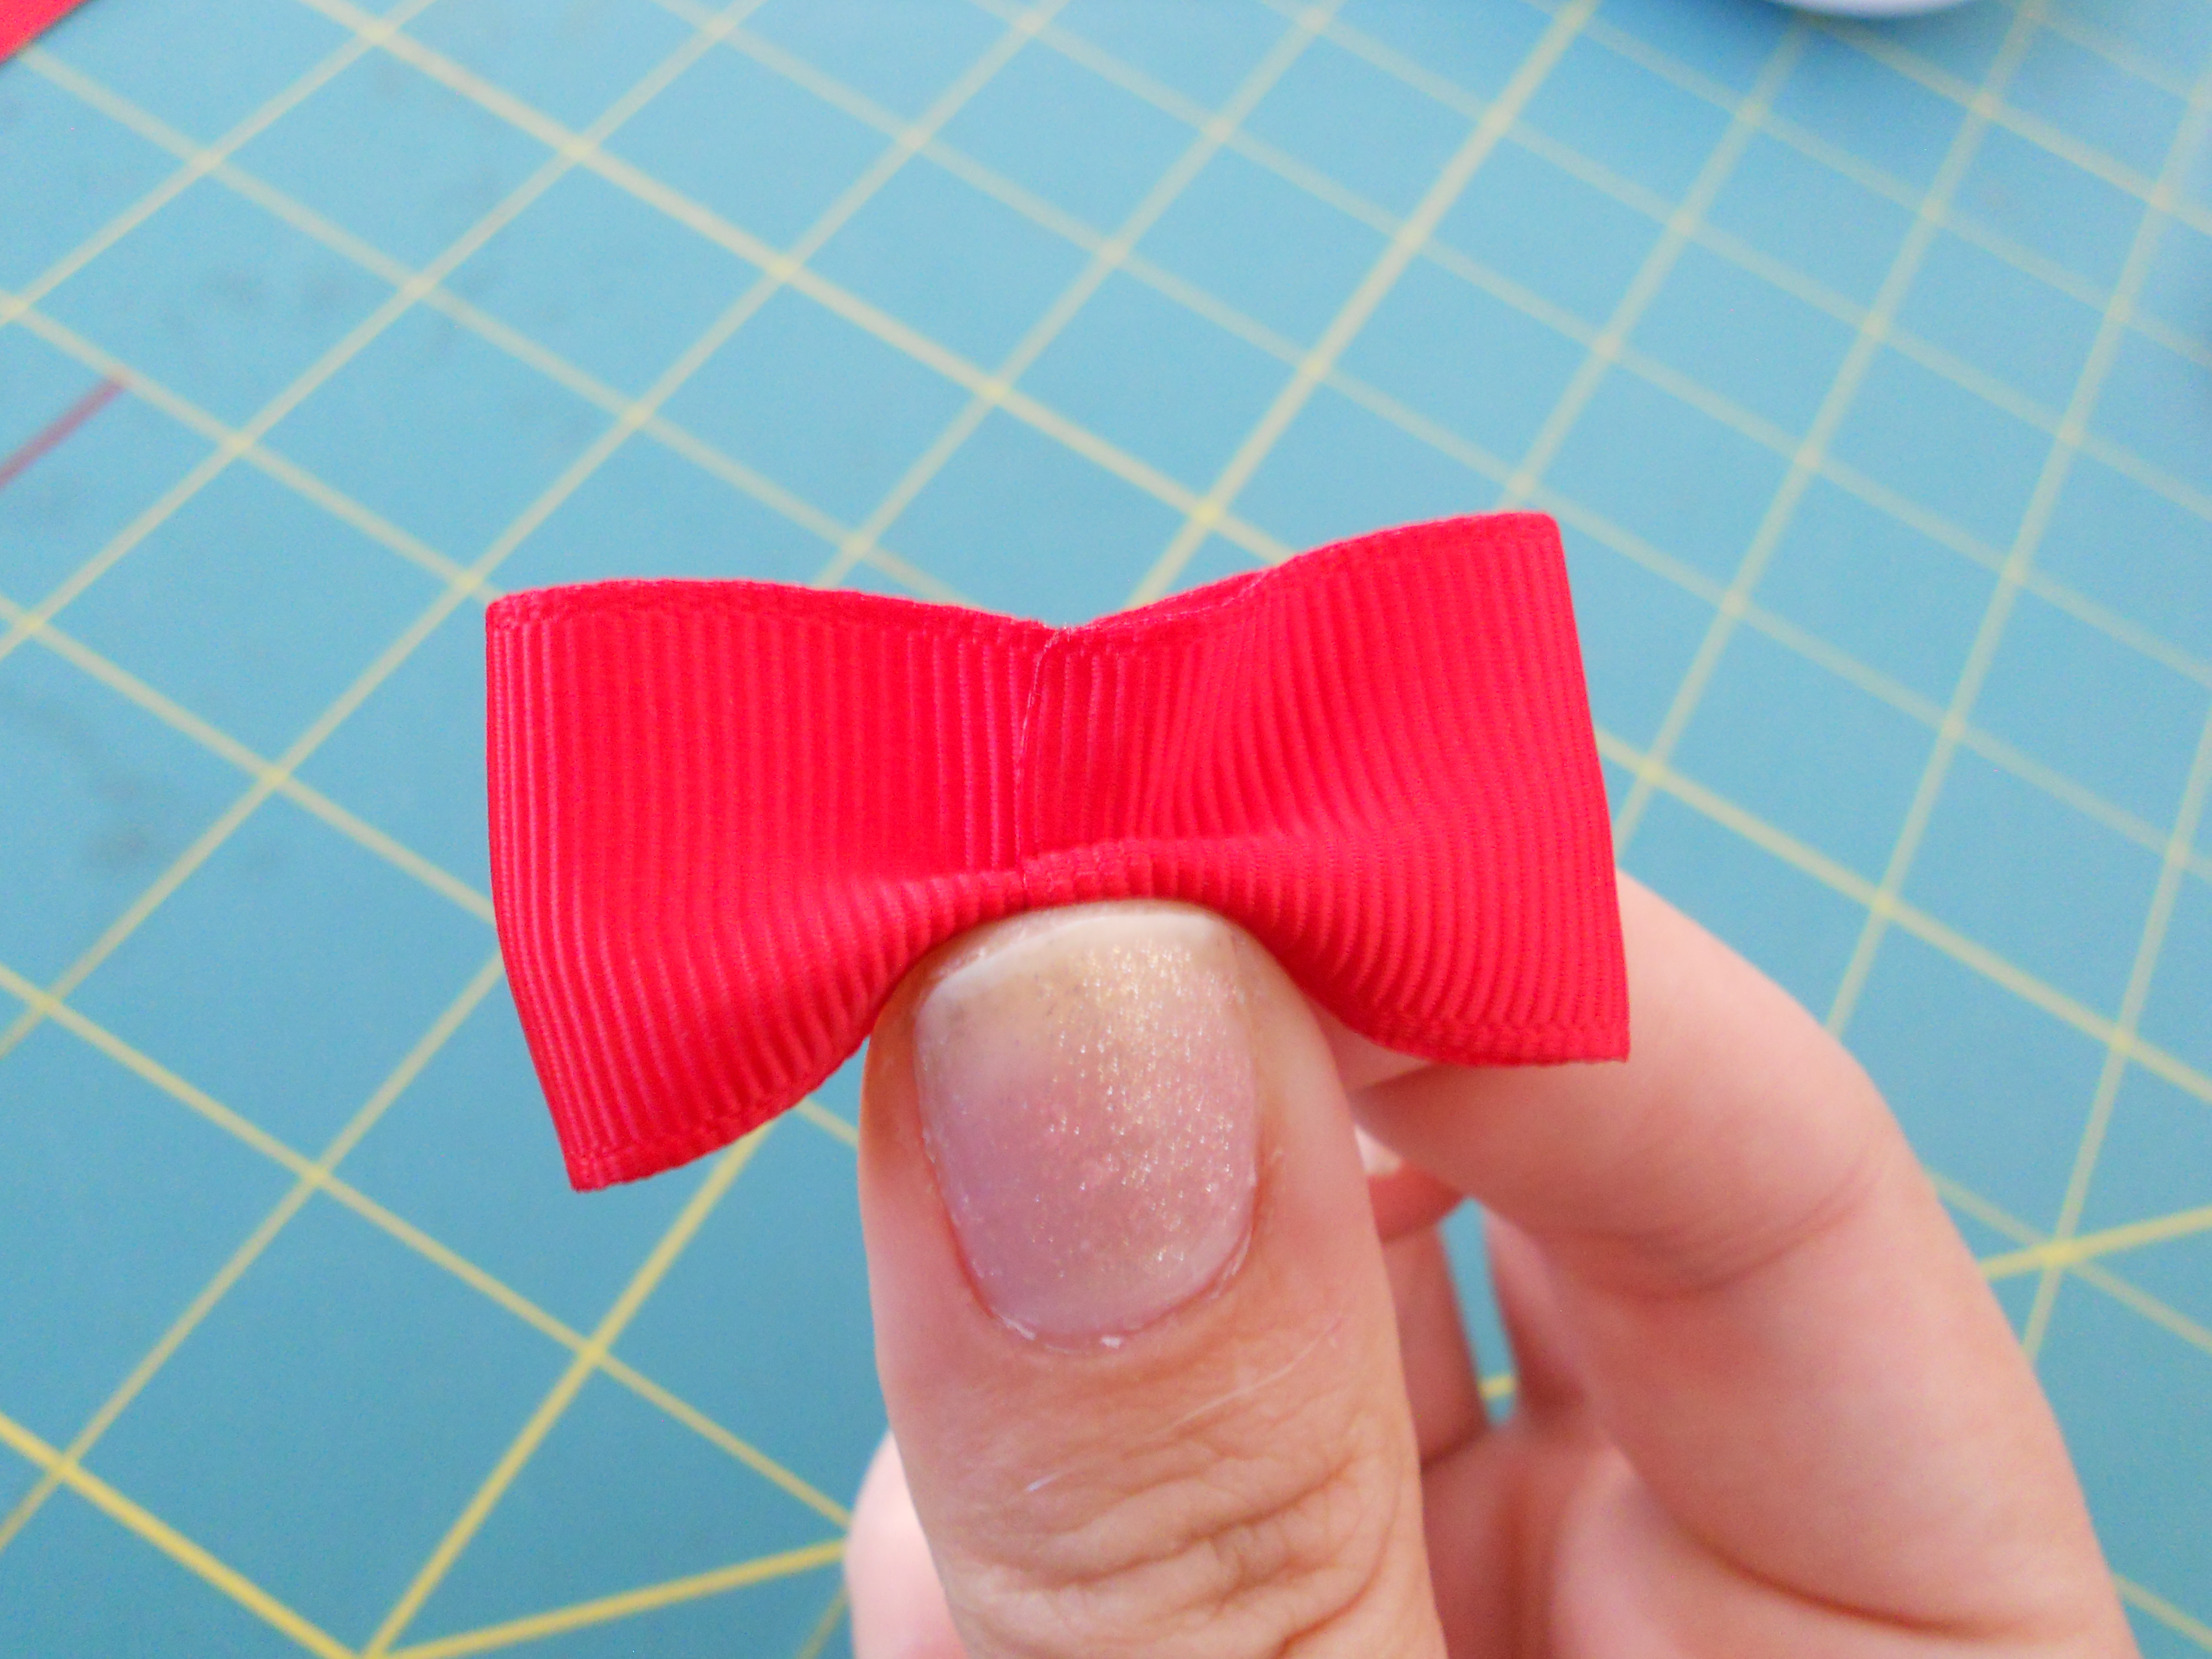
Step 11: Form a two fold crease to create a bow. Start by creasing the bottom, then crease the top, pushing them together in the center. Using your needle and thread securely sew the center of the bow.

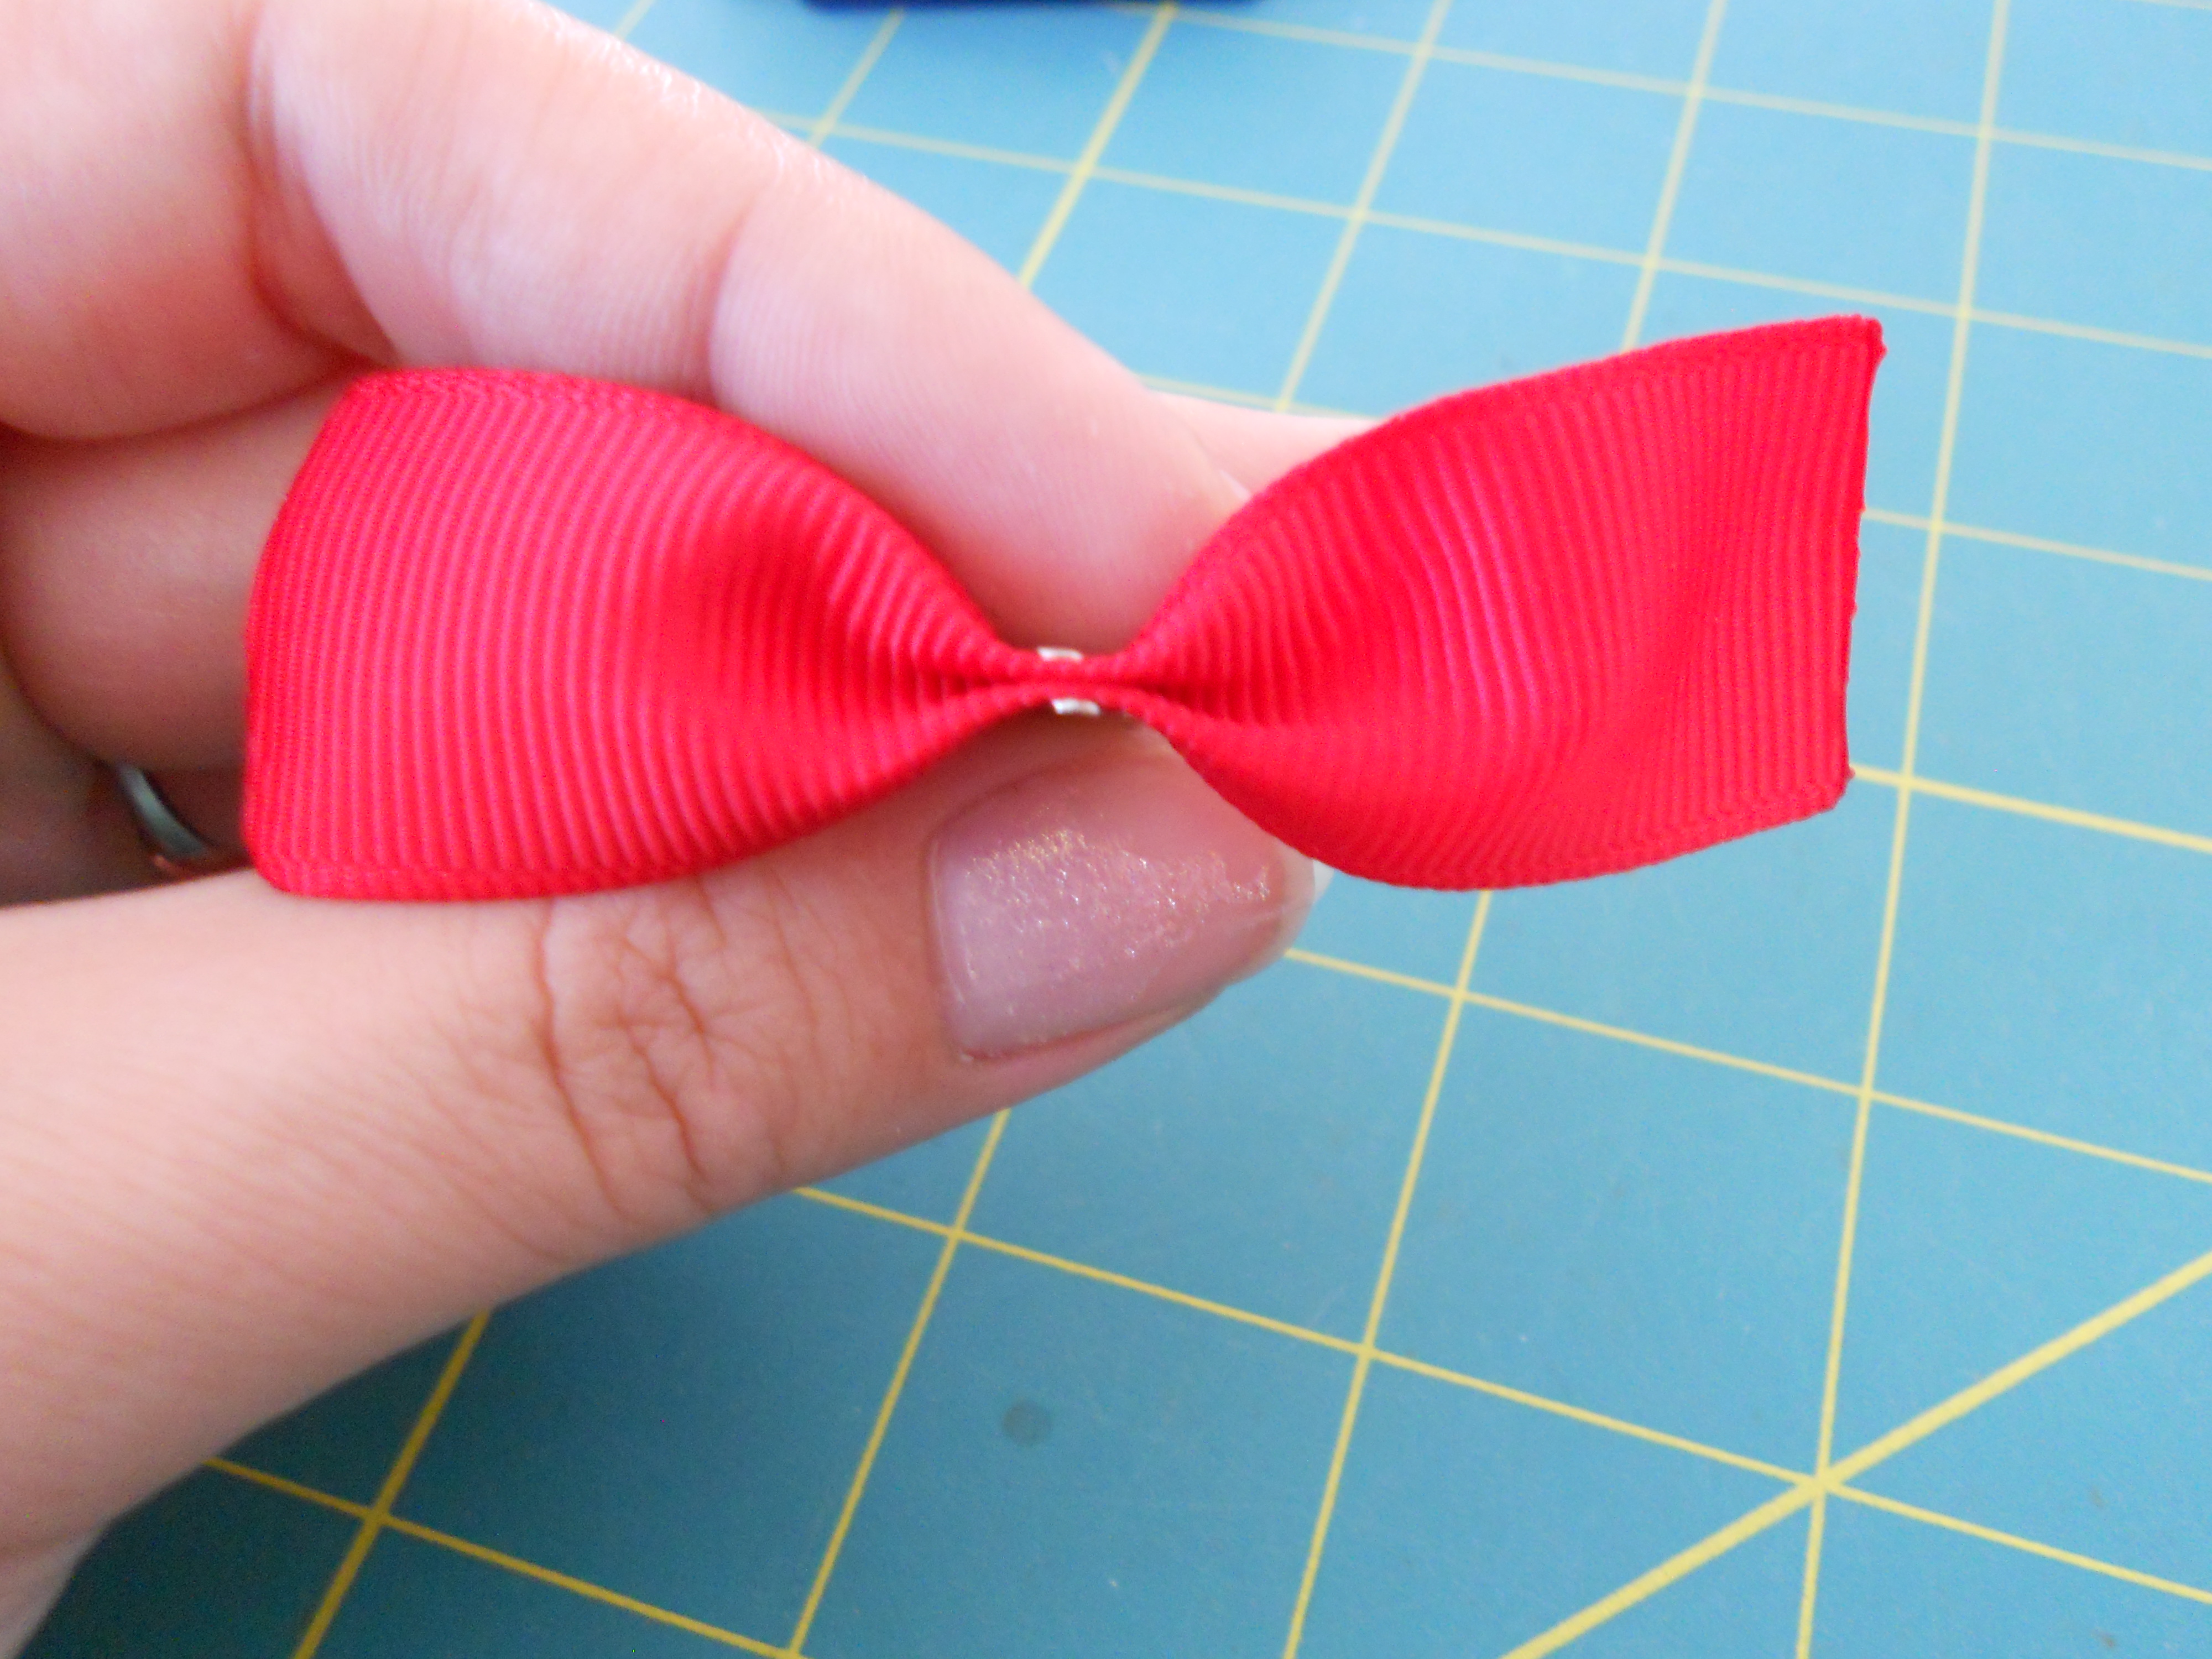
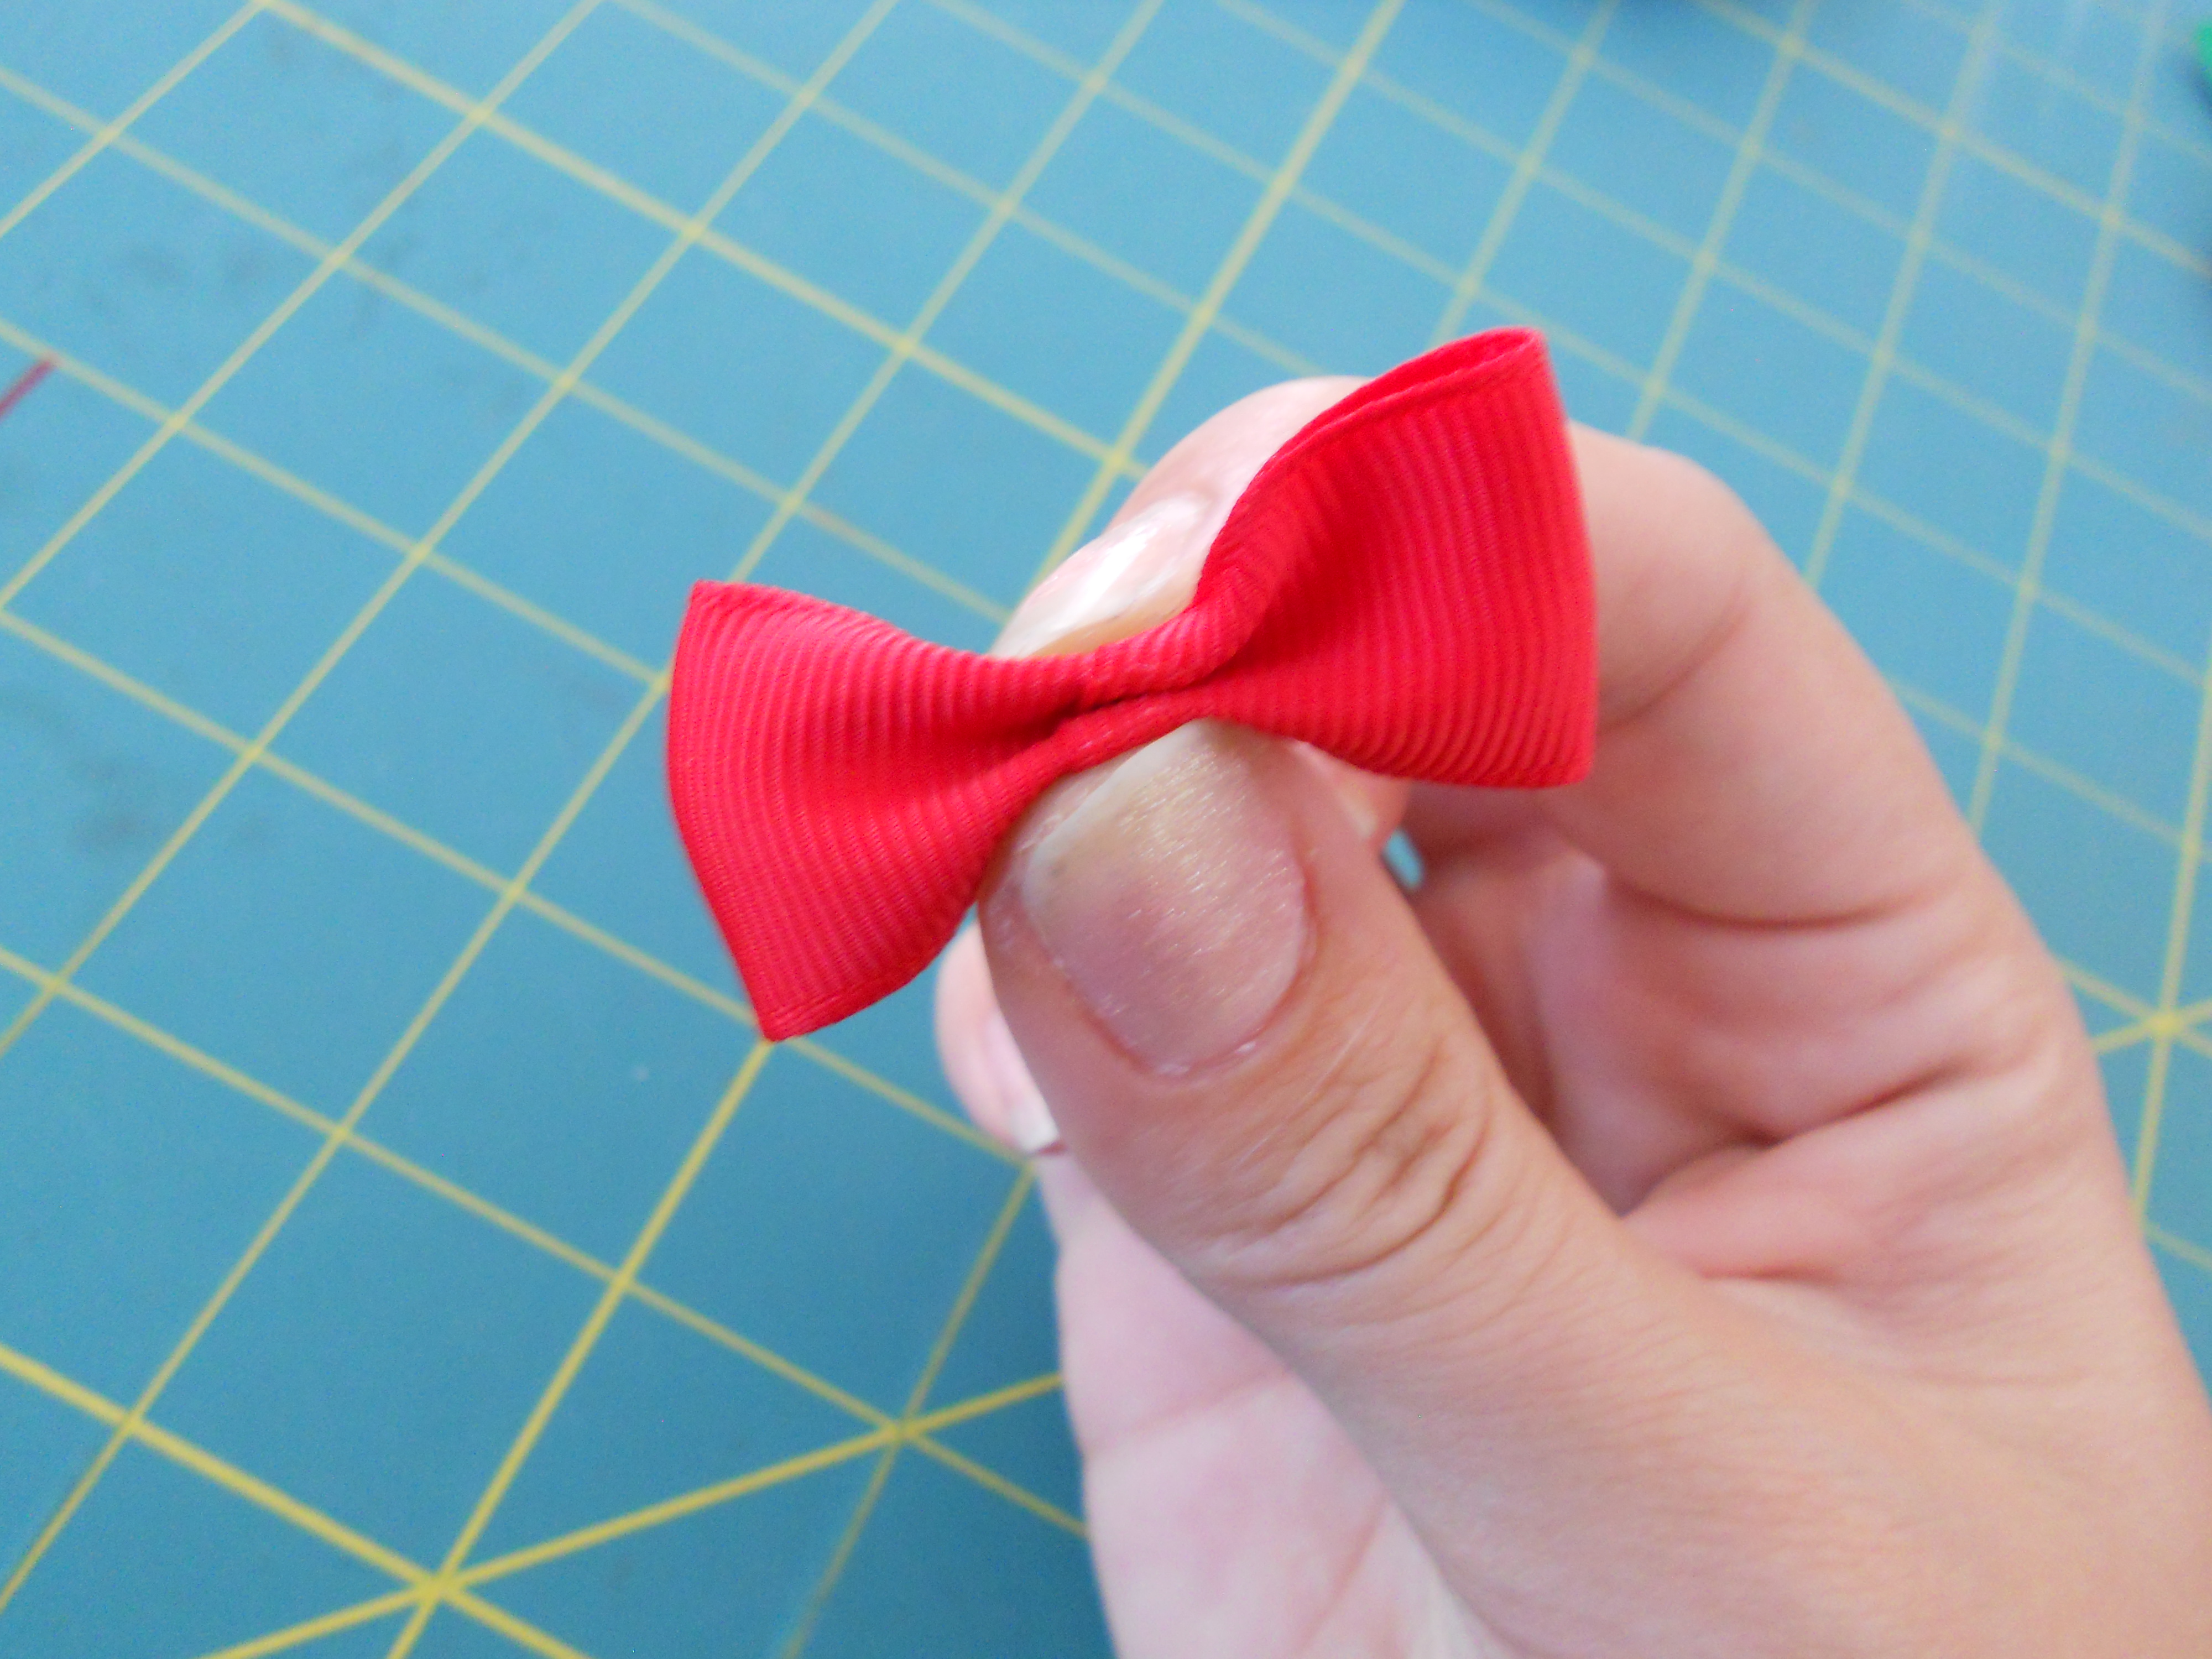
Step 12: Crease the center of your 3" piece of red ribbon. Form a two fold crease and securely sew the center.
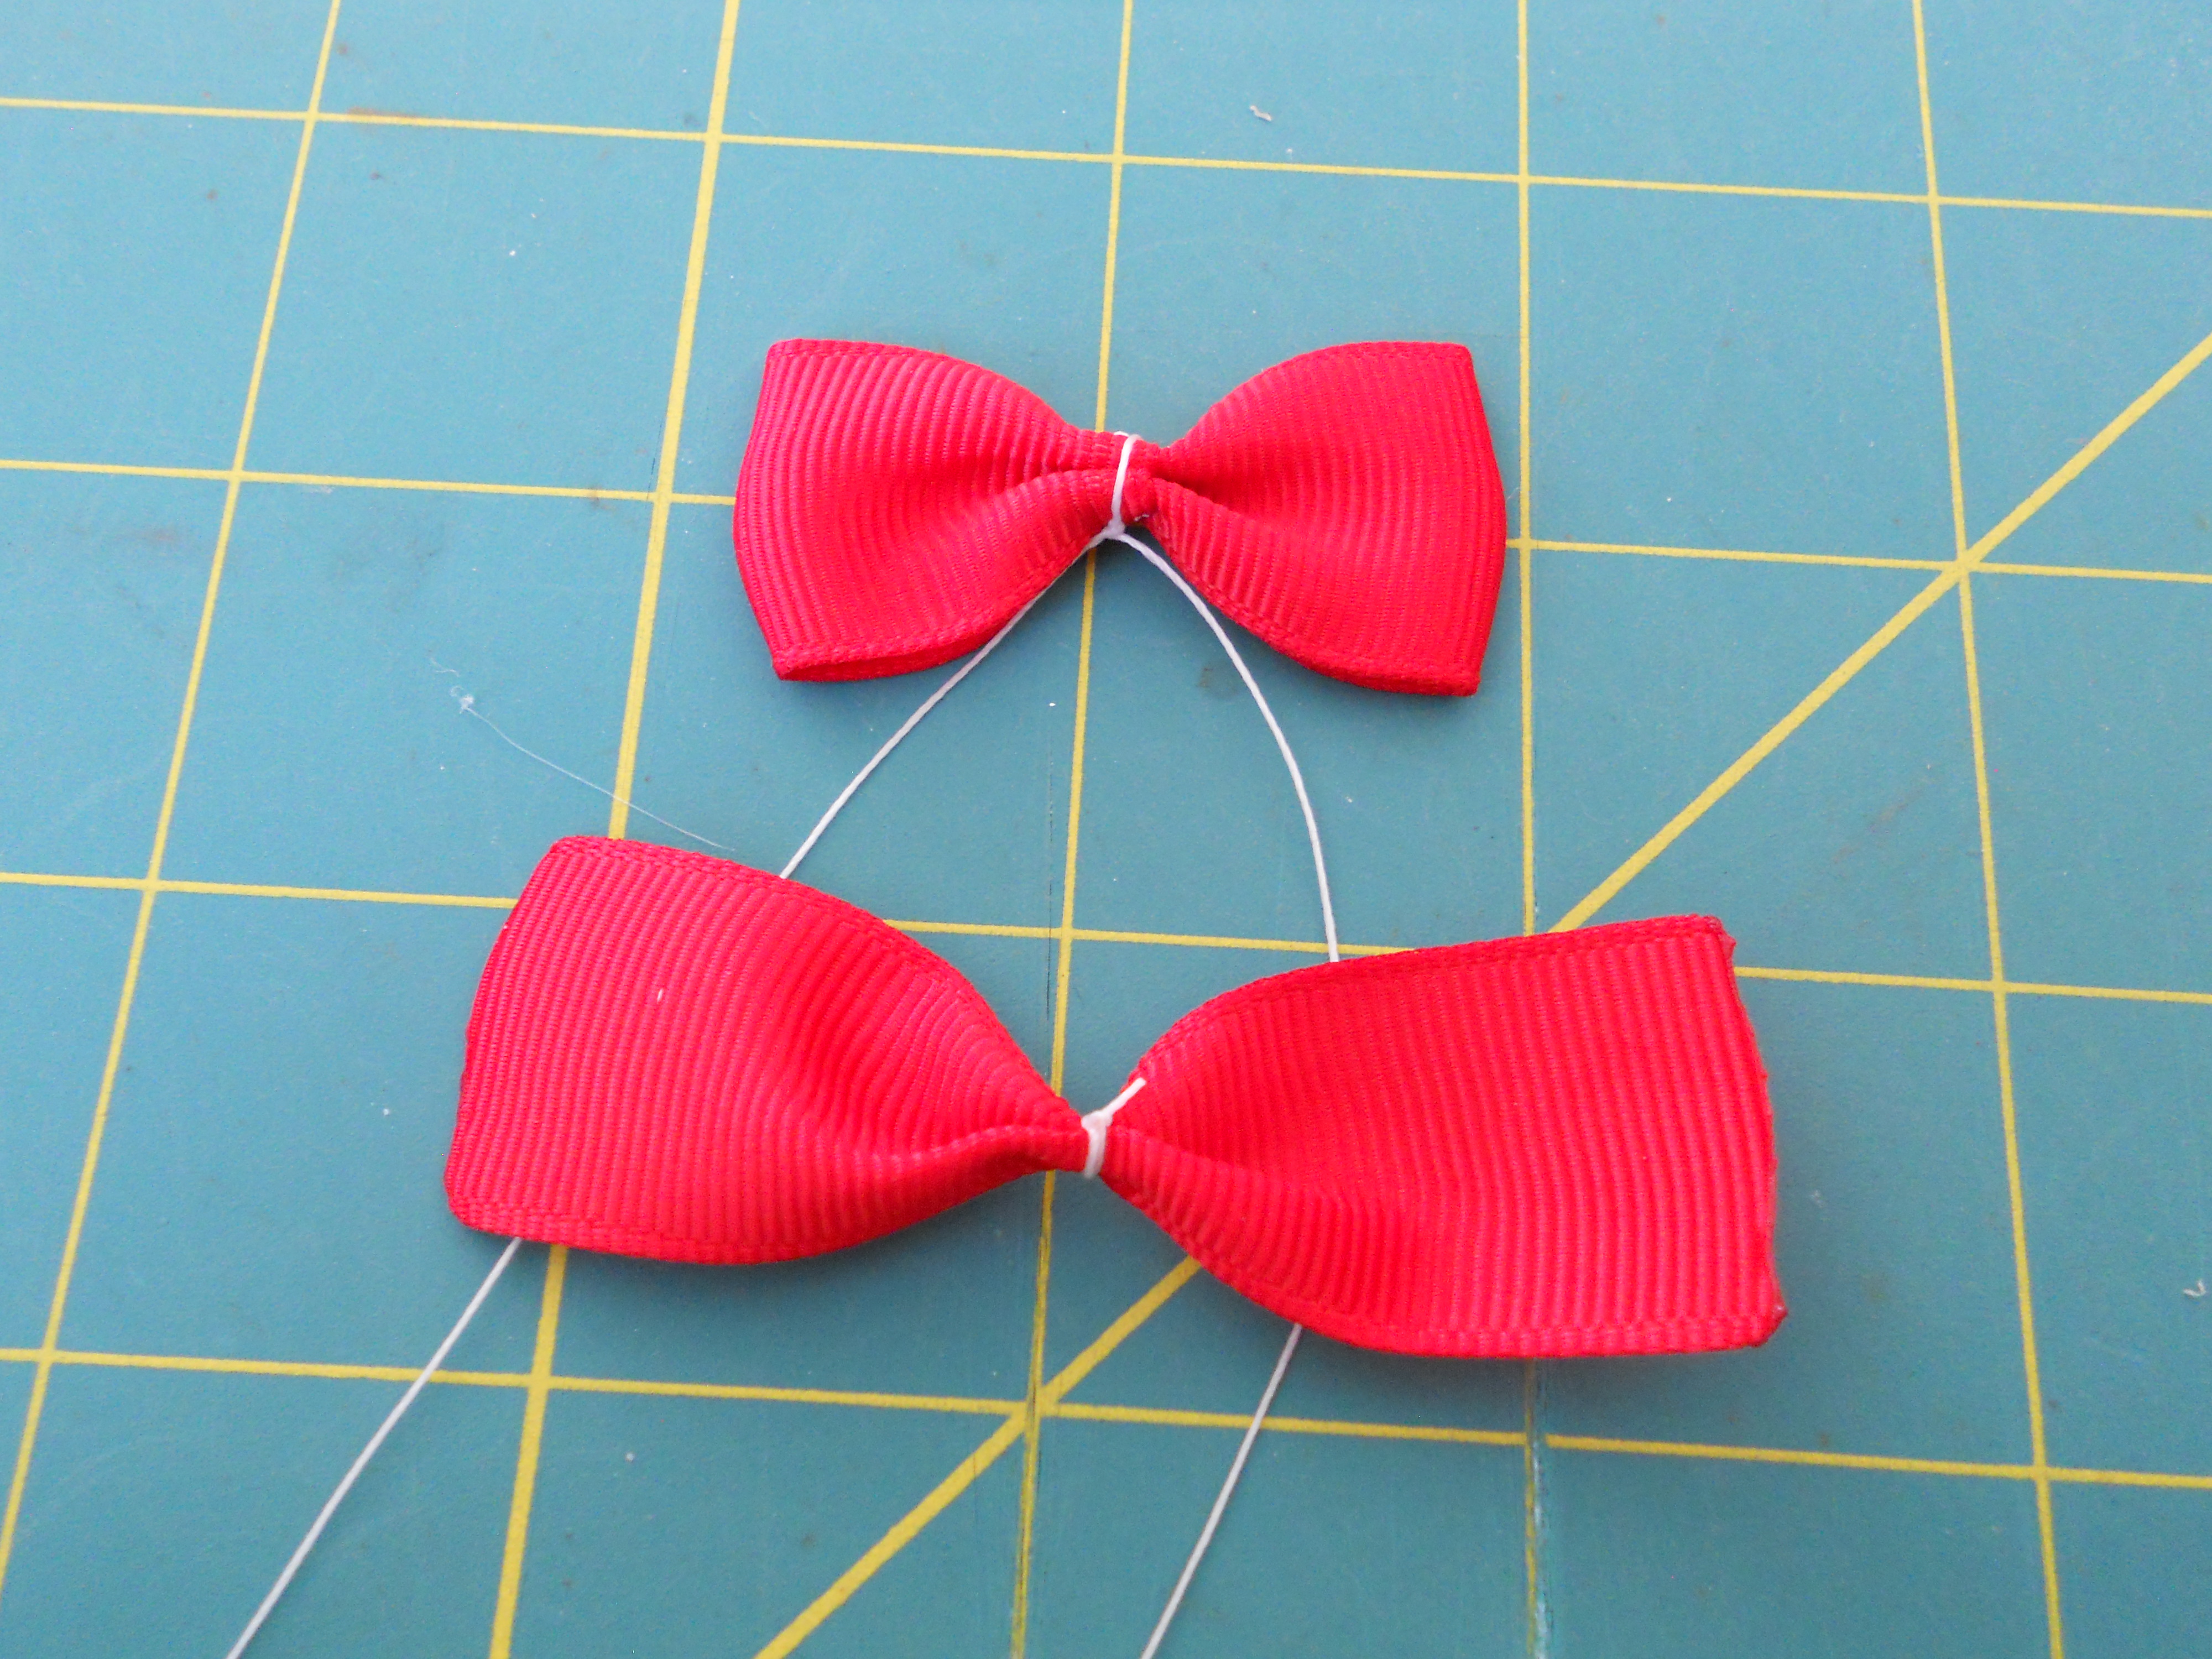
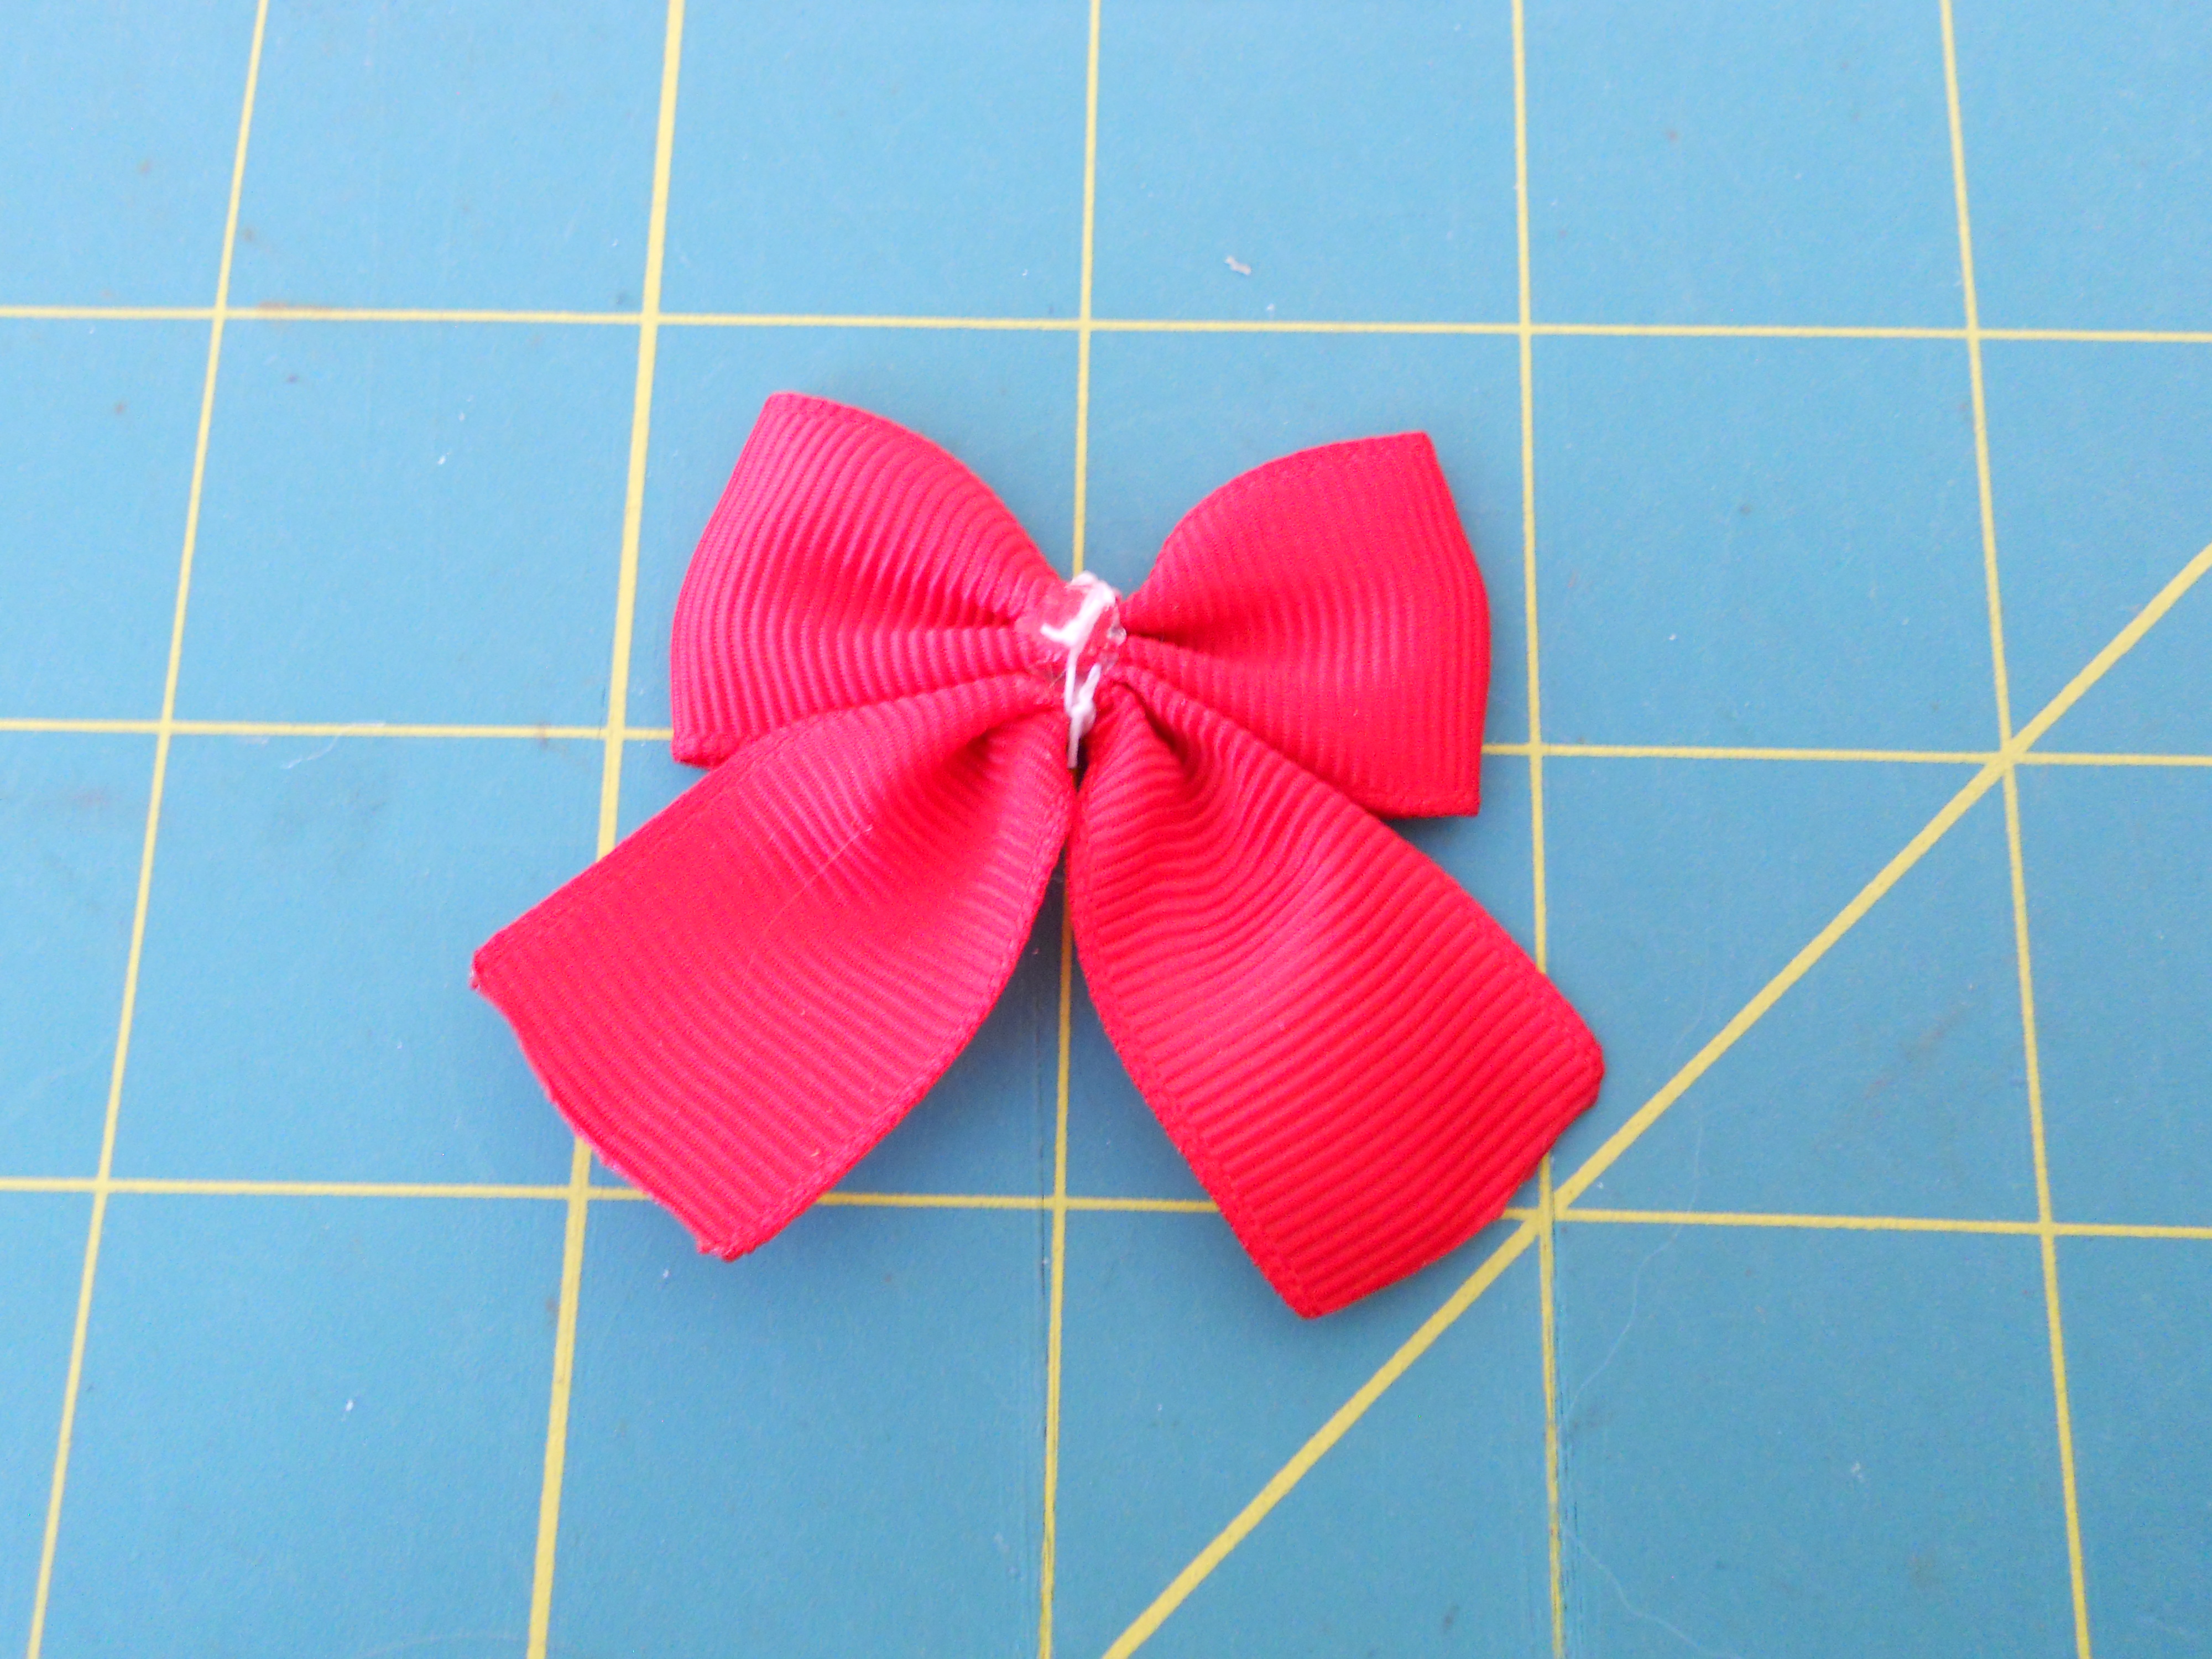
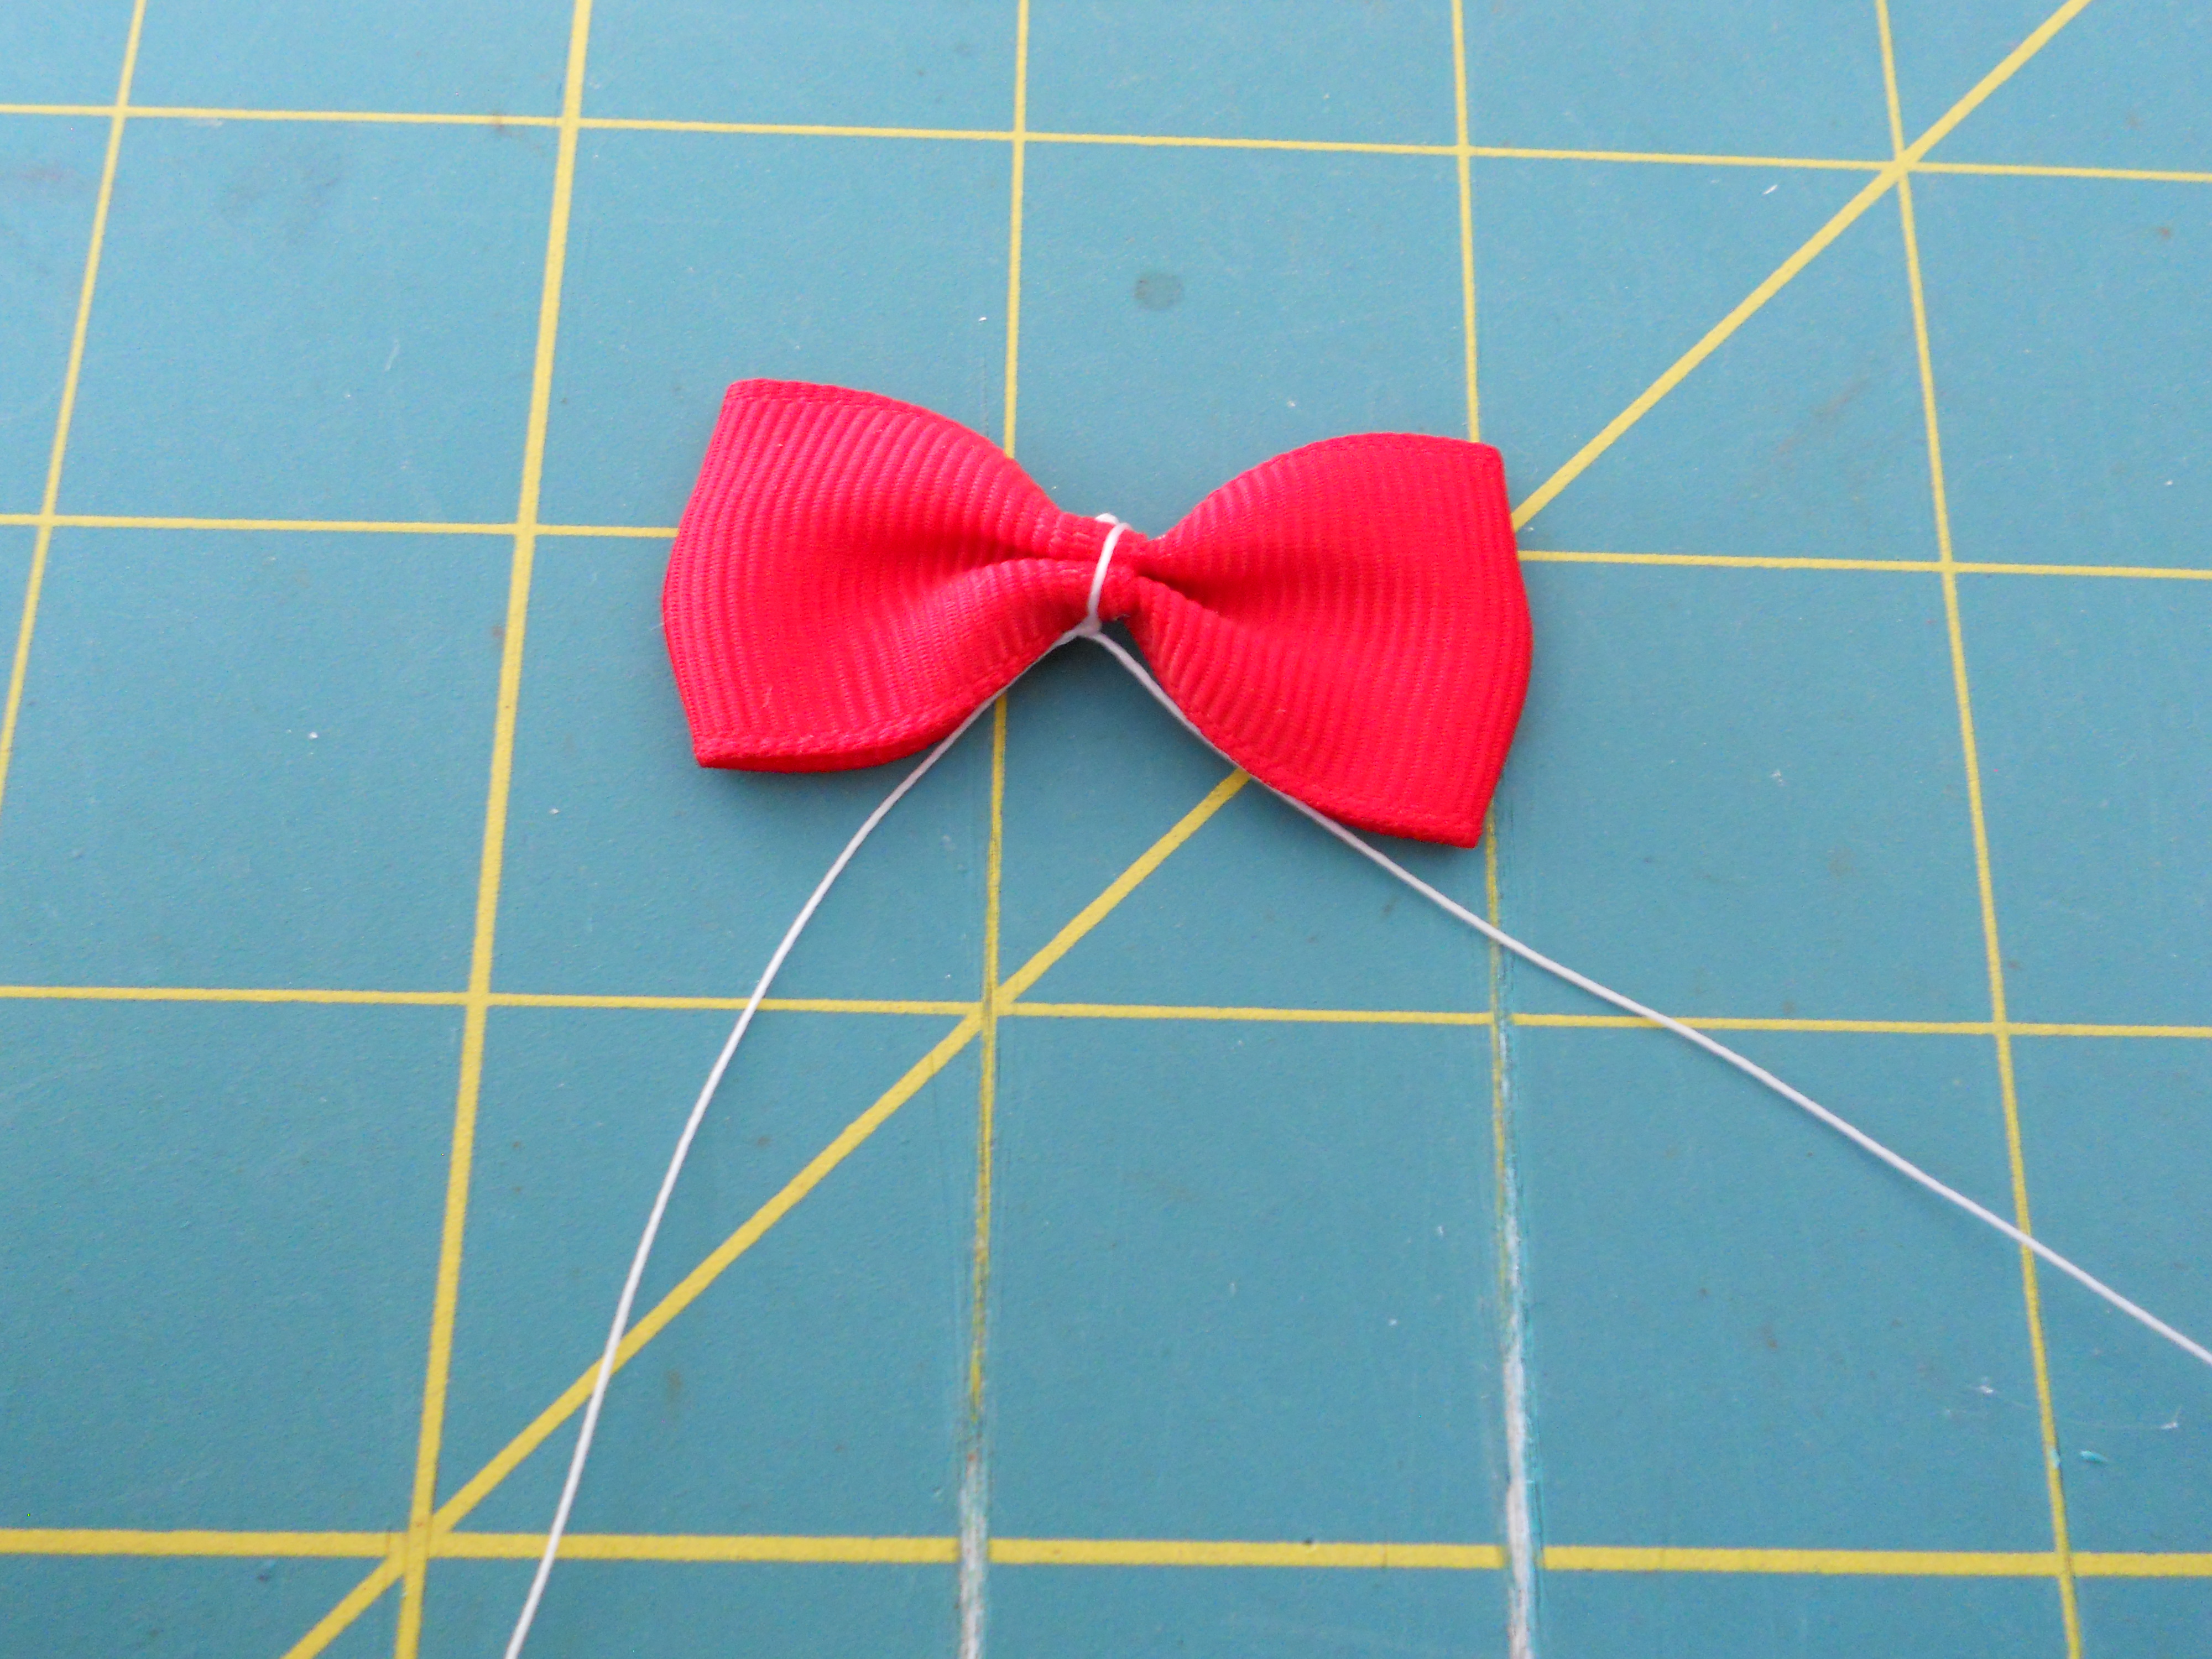
Step 13: Glue the tail onto the bow. I like to leave the thread on my bow so after I glue the tail I can also tie them together for a secure hold. Wrap the center of your bow with your 1/4" Grosgrain ribbon. Trim the tails of your bow and heat seal them.
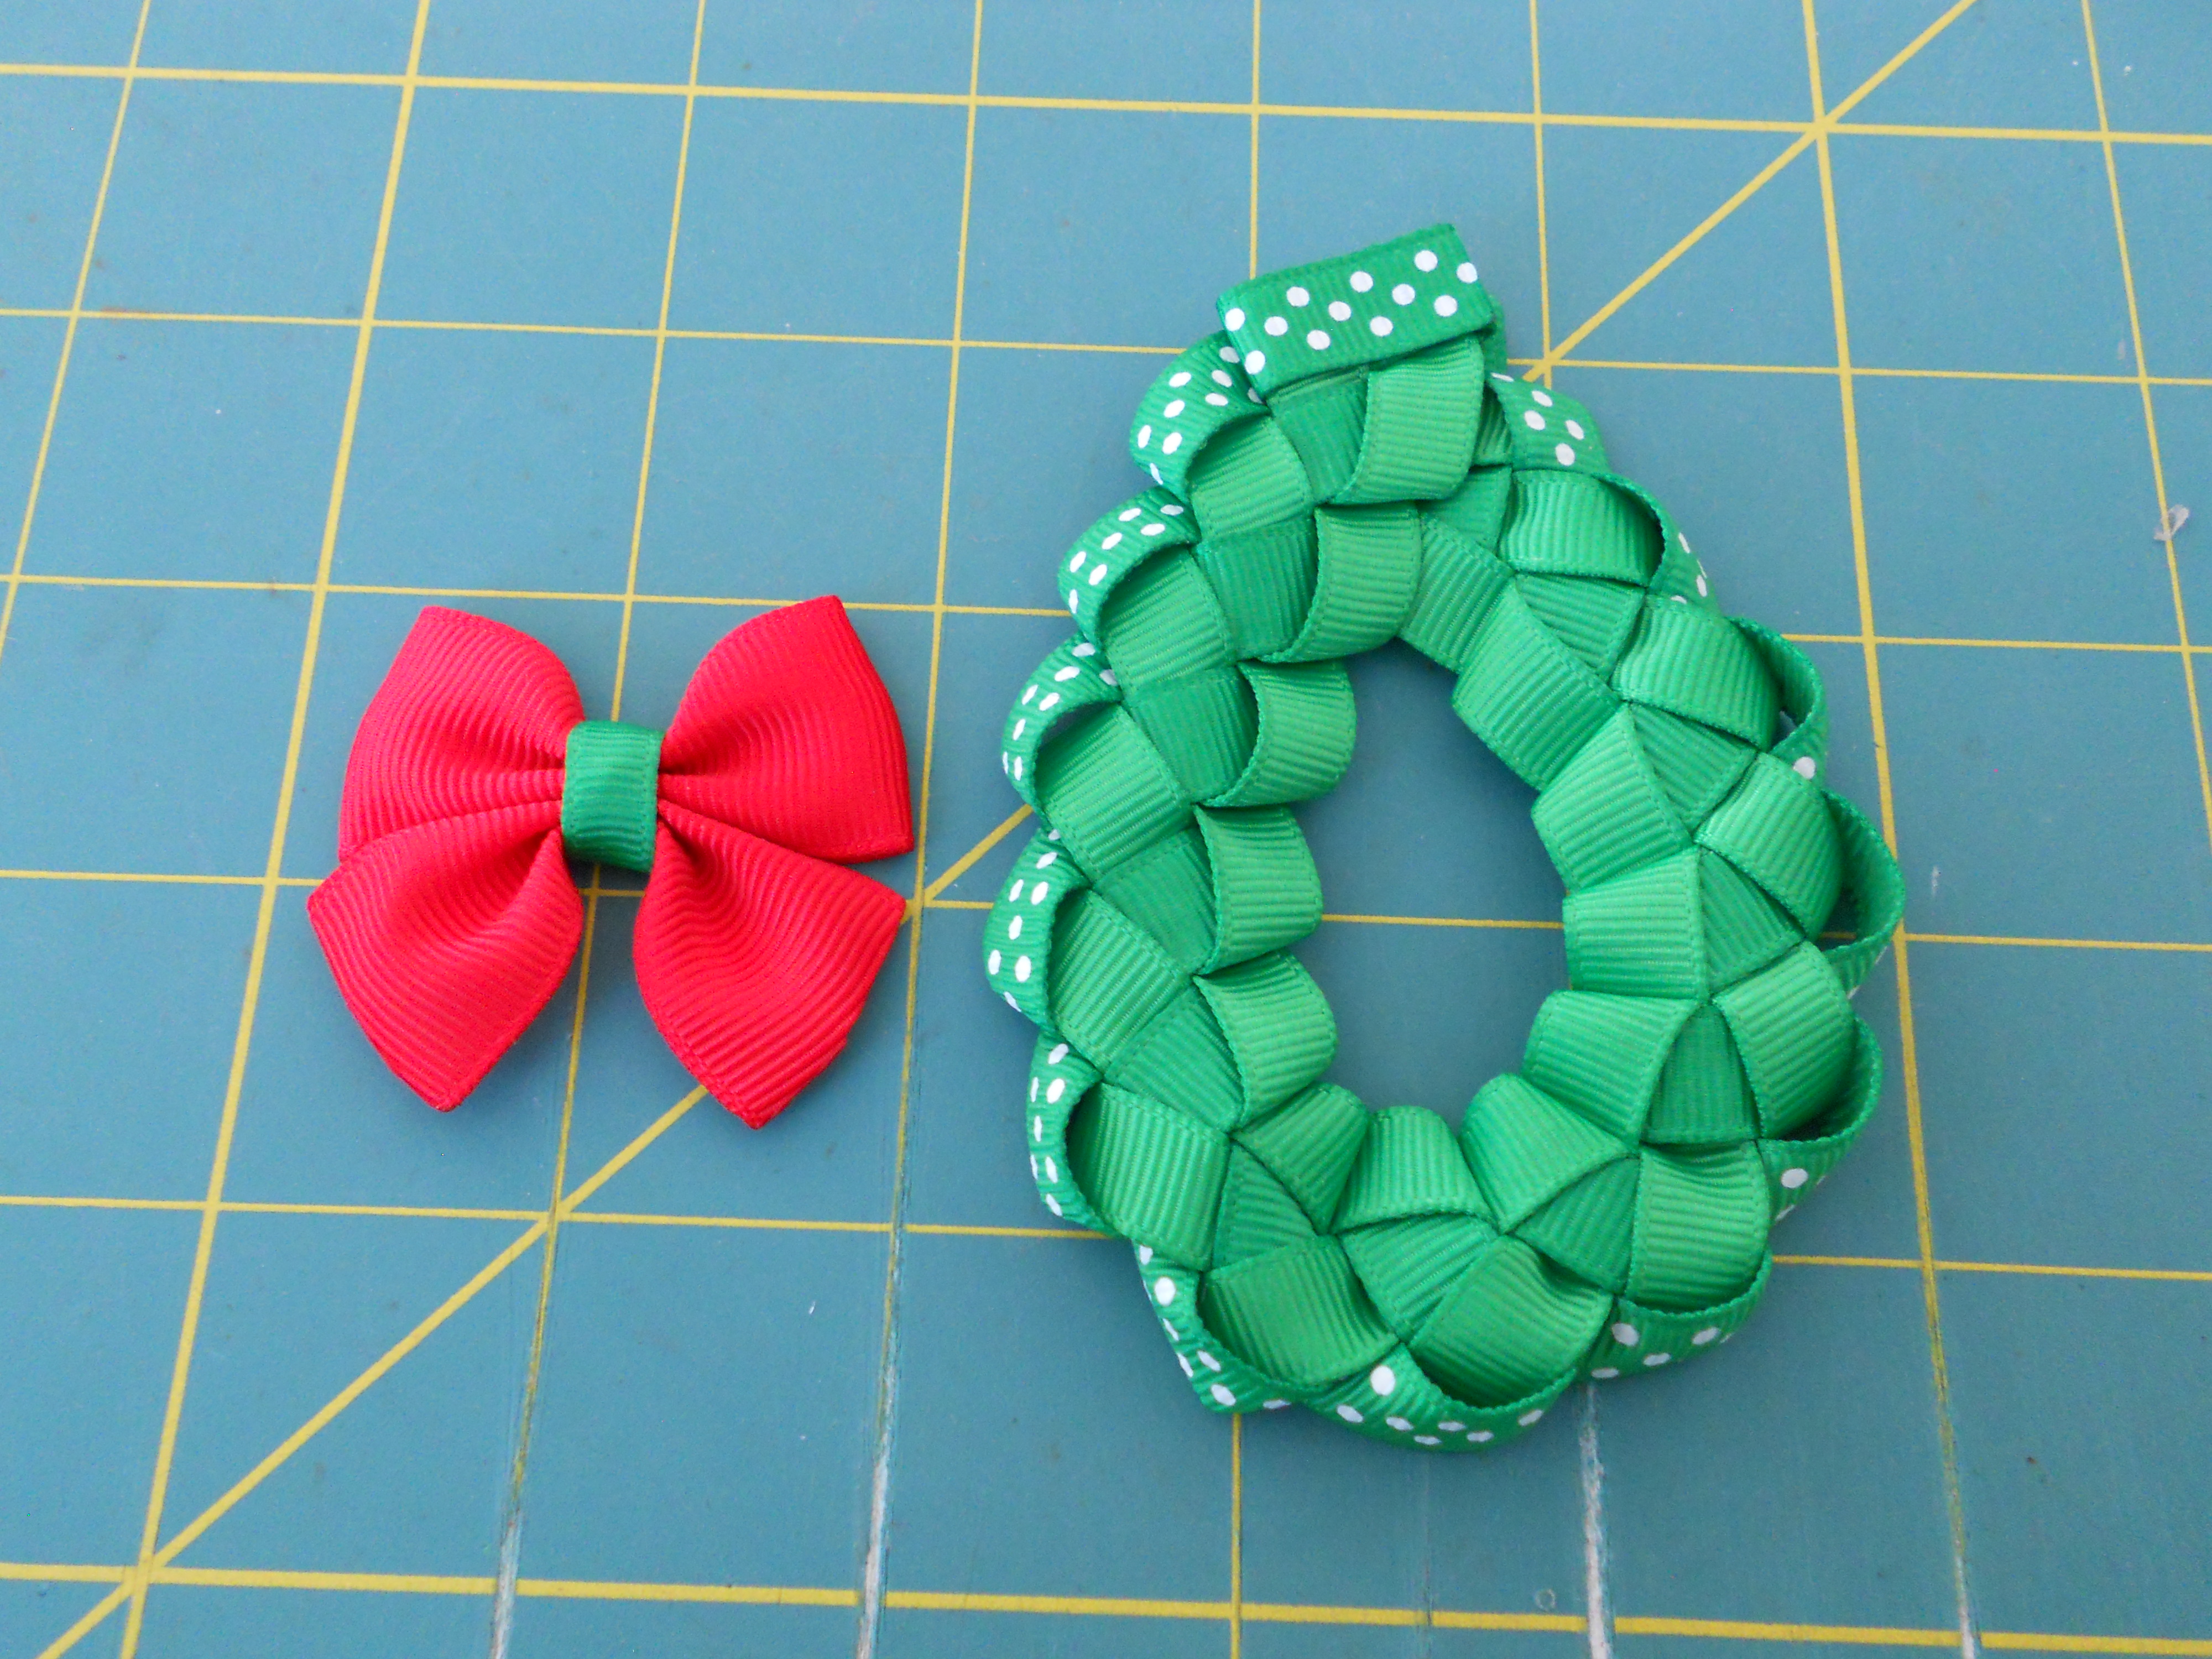
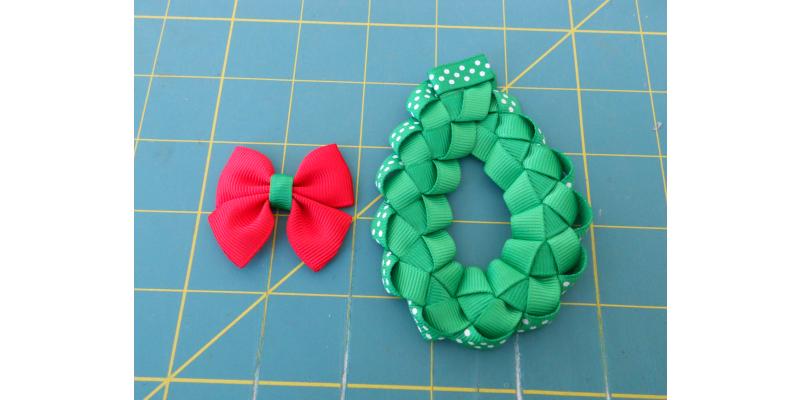
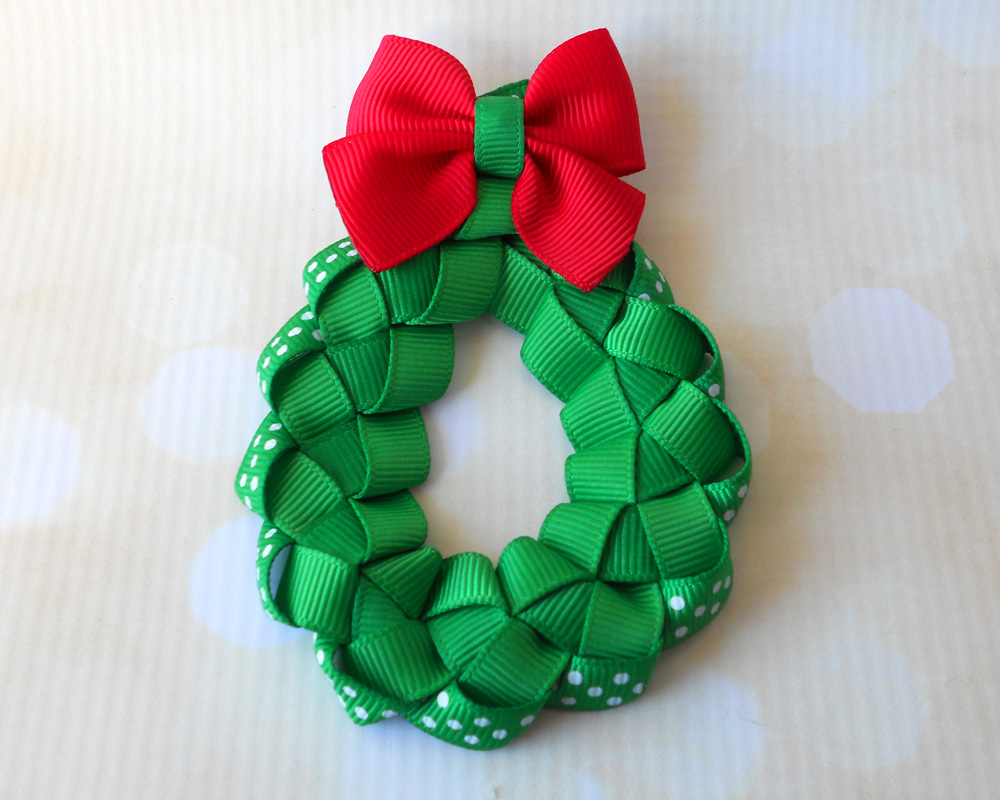
Step 14: Glue the bow at the top of your wreath where it overlaps.
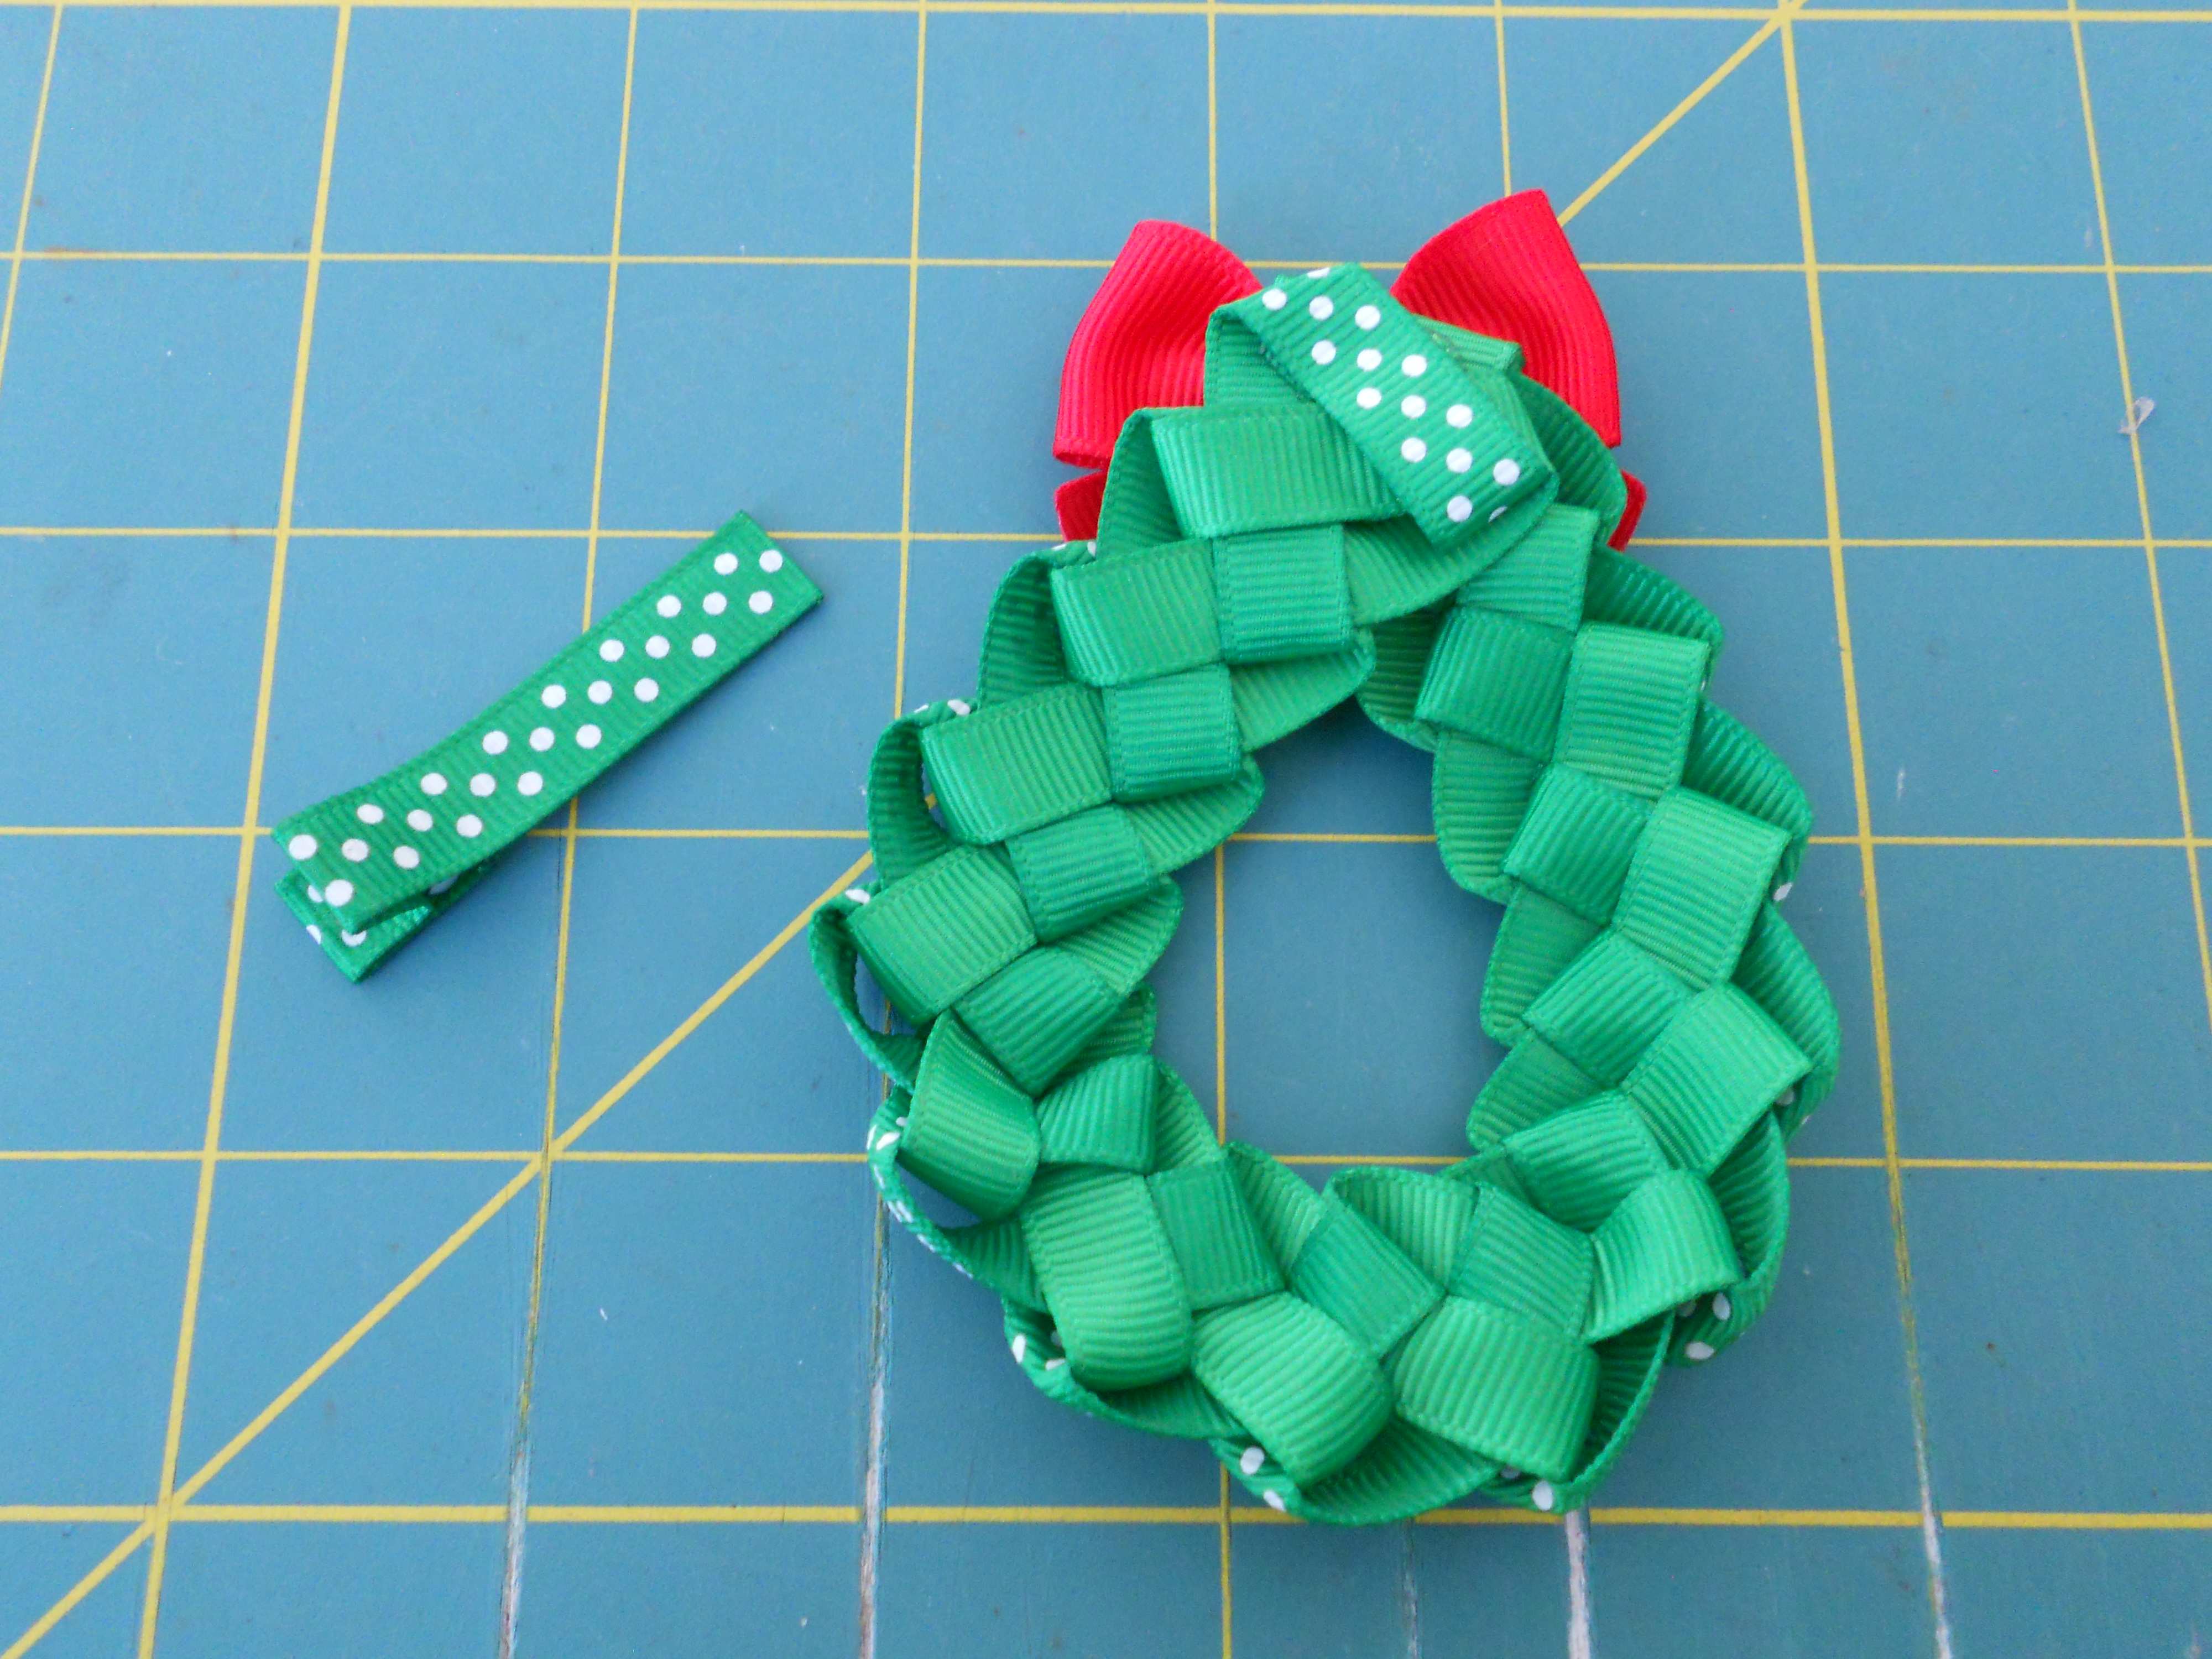
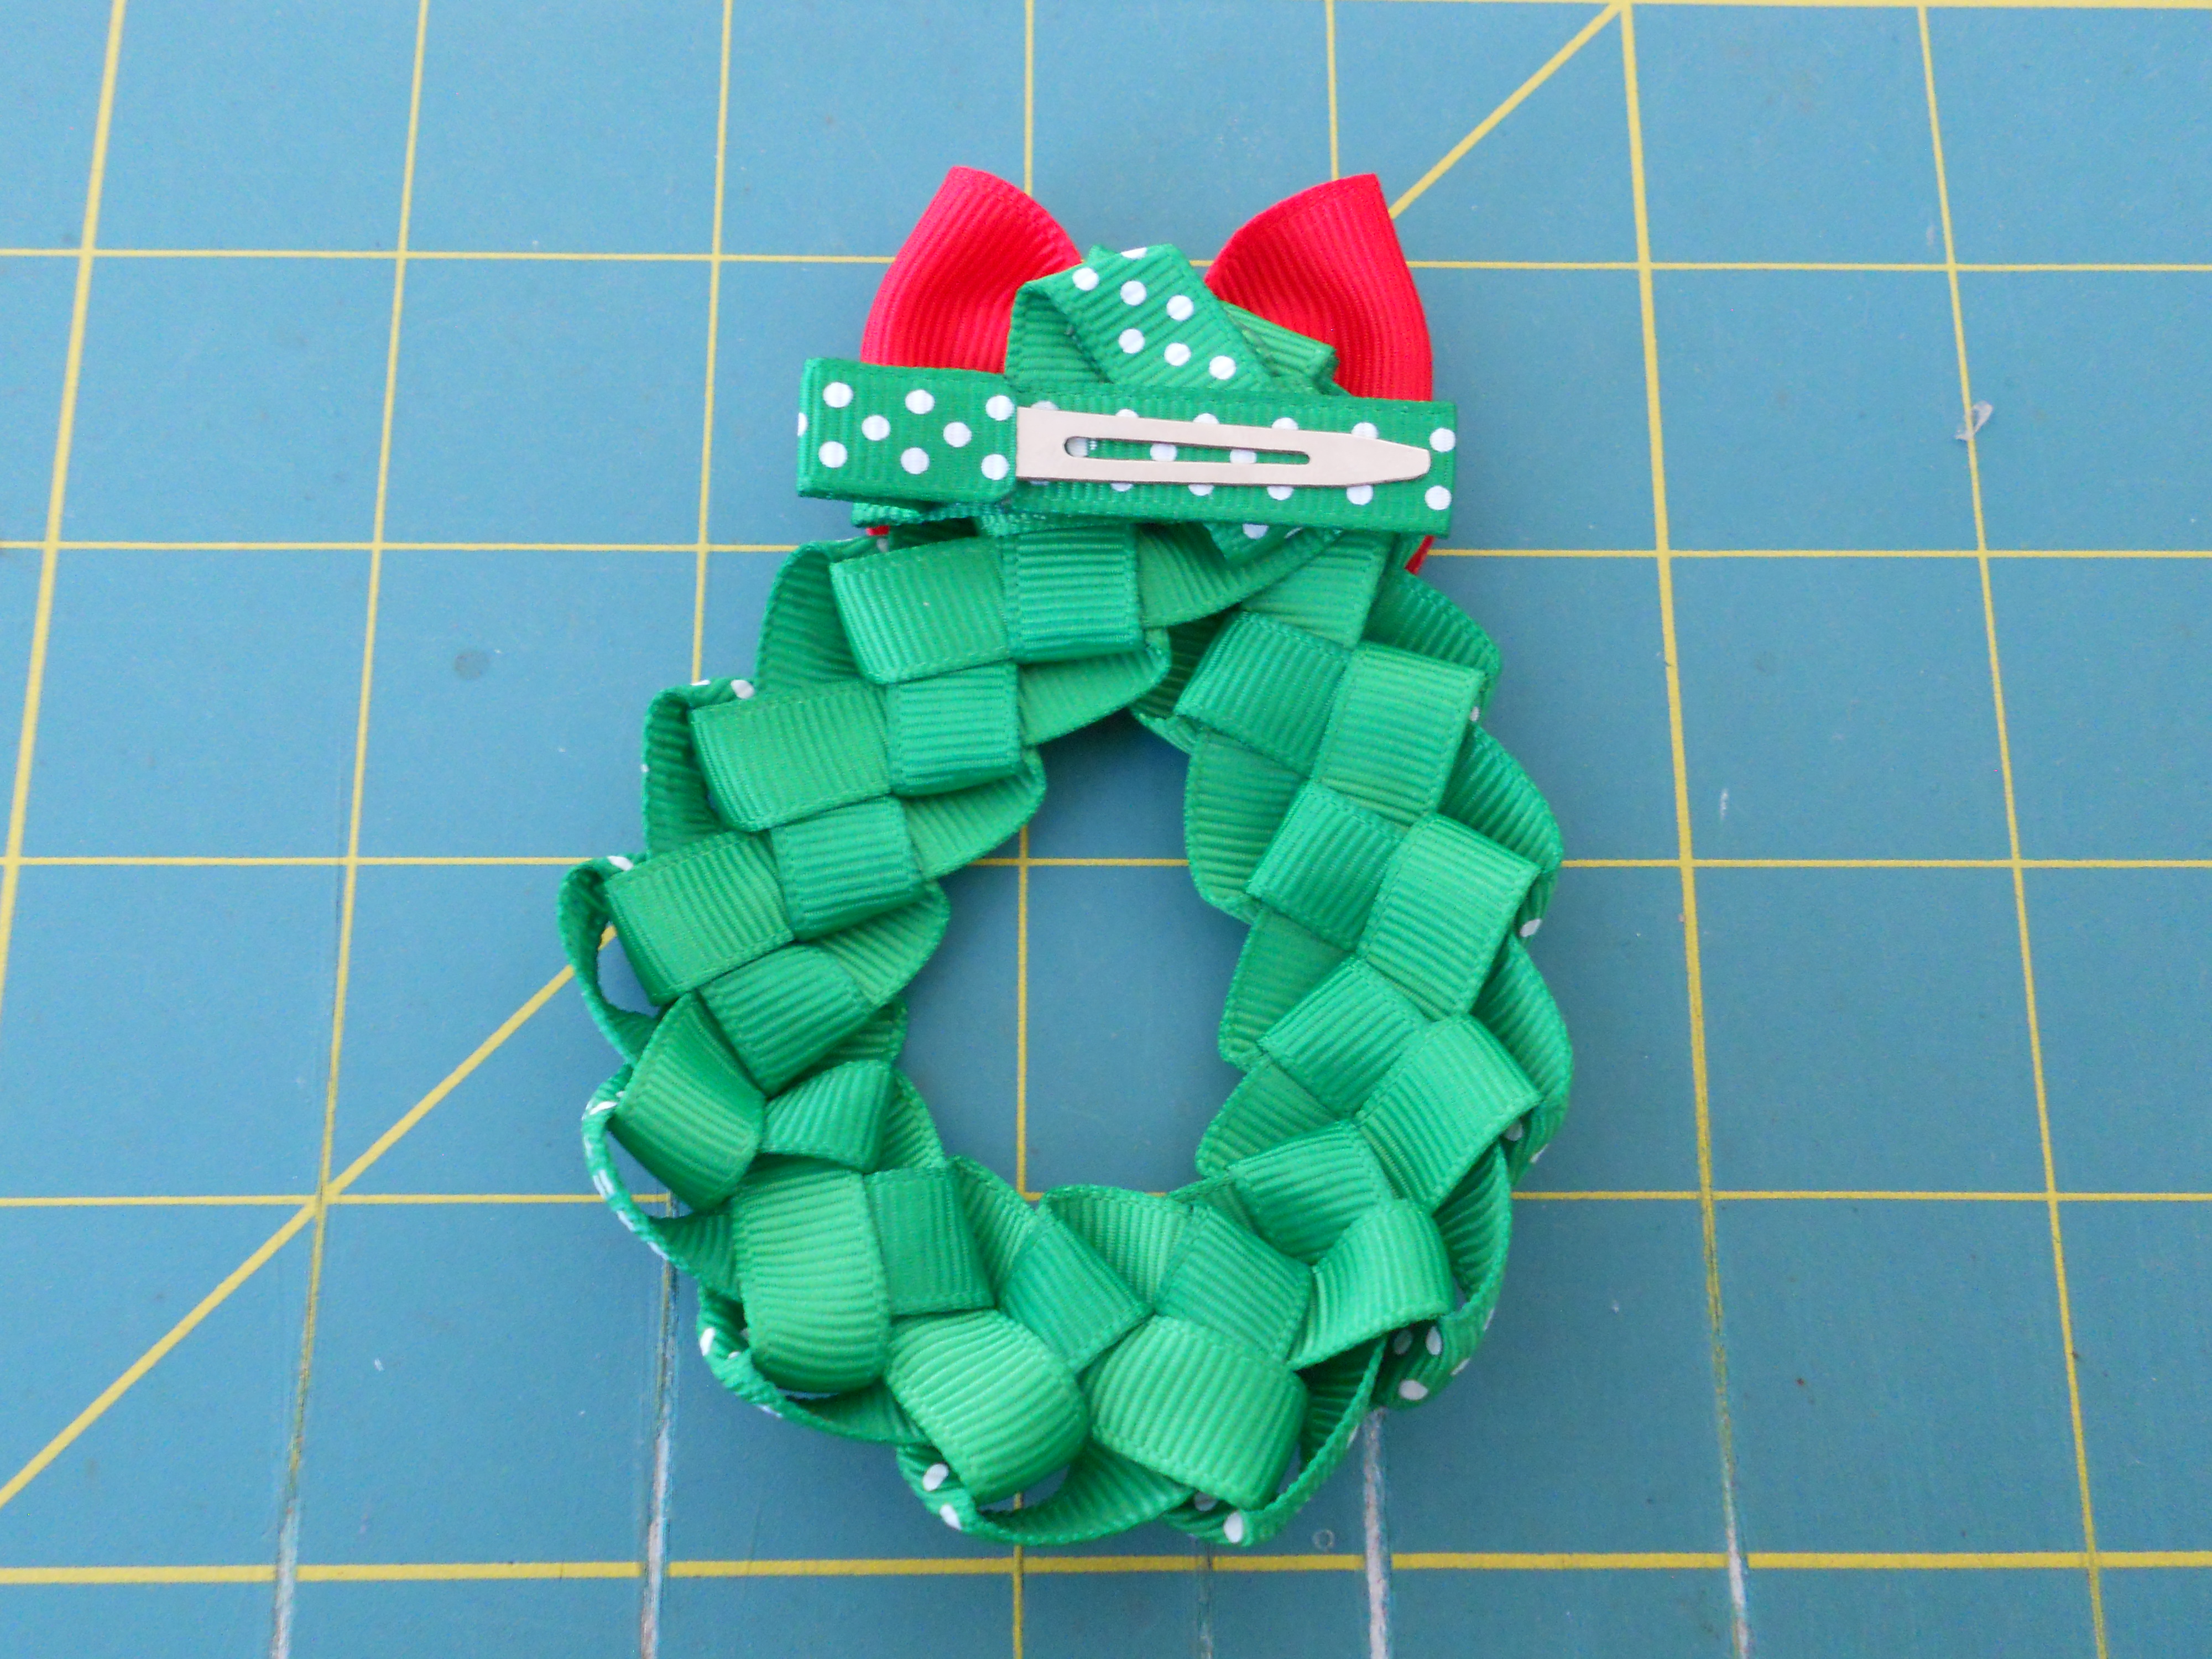
Step 15: Line your clip and hot glue it to the back of the wreath.
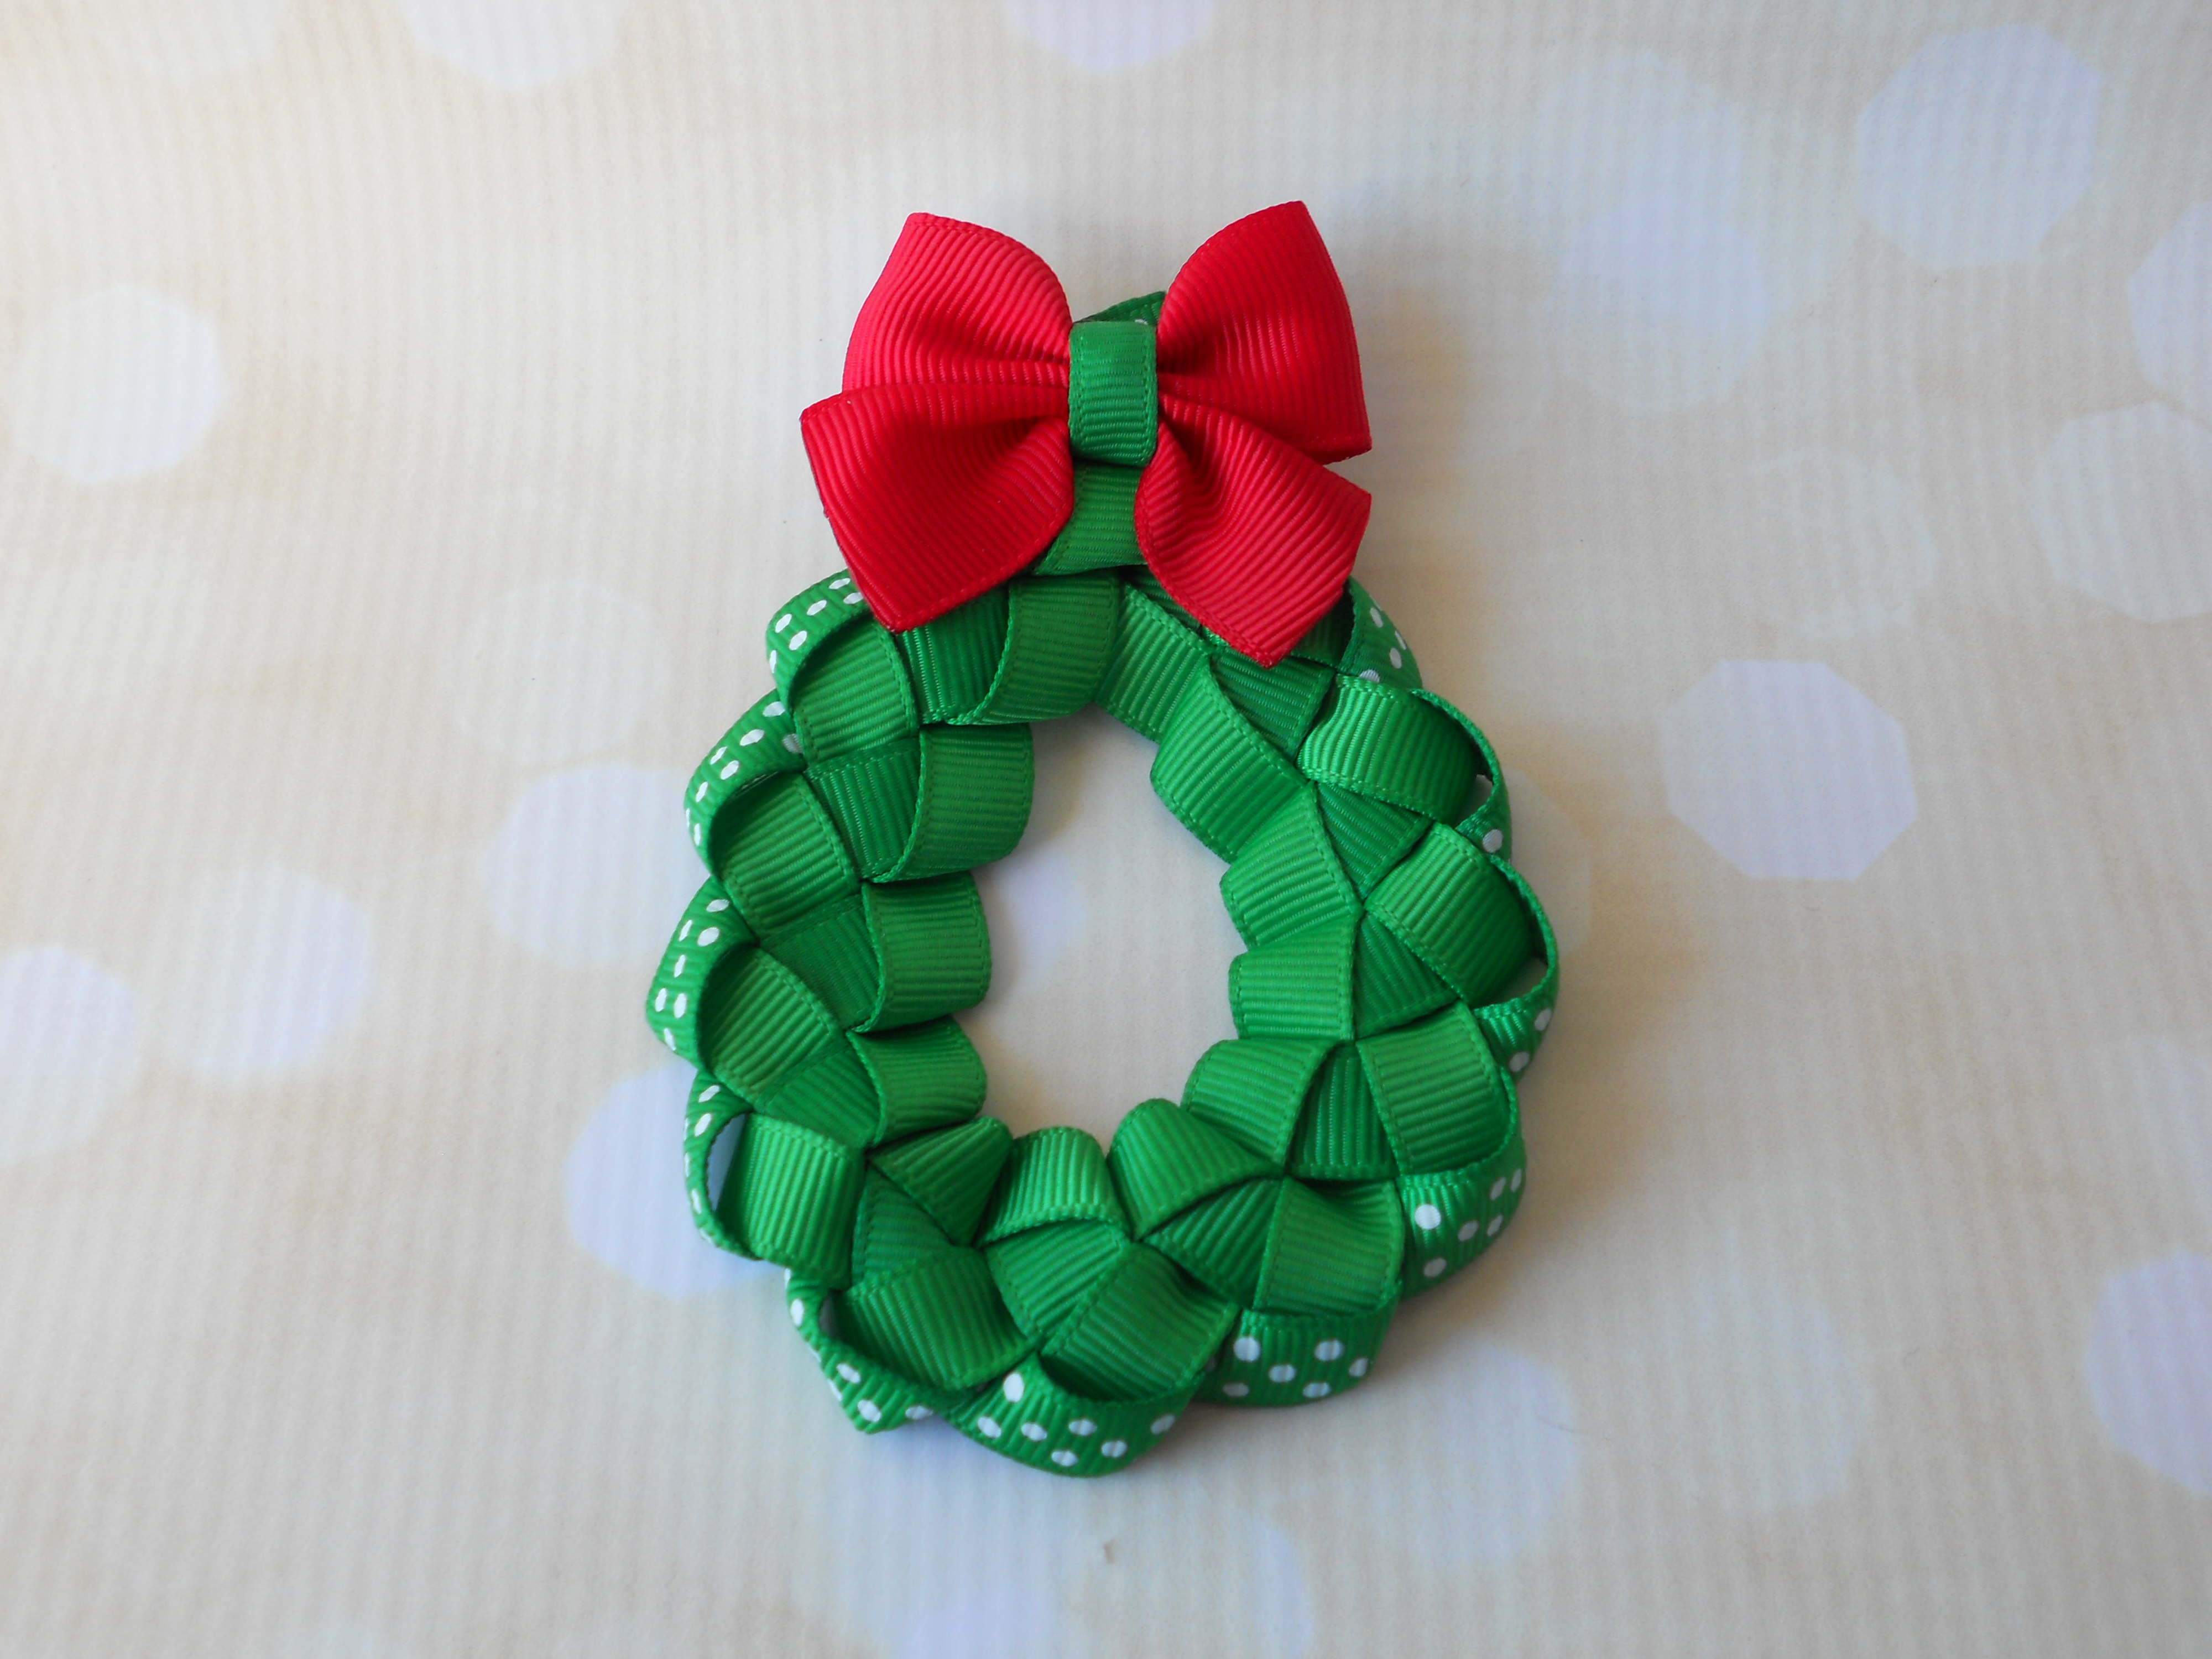
Your wreath is finished! To keep your wreath in place you can spray the final product with starch or hairspray. Get creative - add some embellishments to the front as ornaments!
Visit the rest of our blog for more Crafting Tutorials and DIY Instructions!
Loading...

