
Nothing softens up a hair-bow like adding a piece of fluffy marabou into the mix!
These bows were featured on the home-page of our site and we are sharing how we put them together.
 Twisted Boutique Bow w/ Marabou Behind
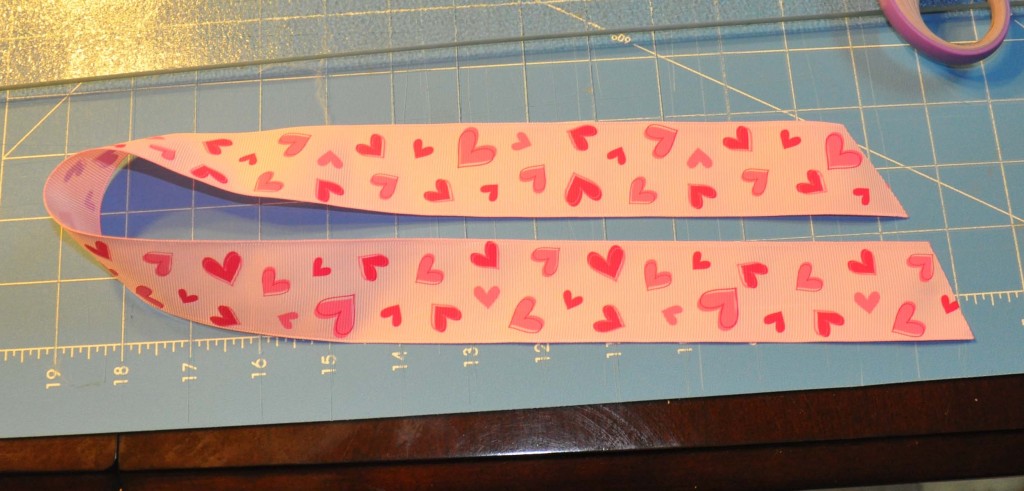
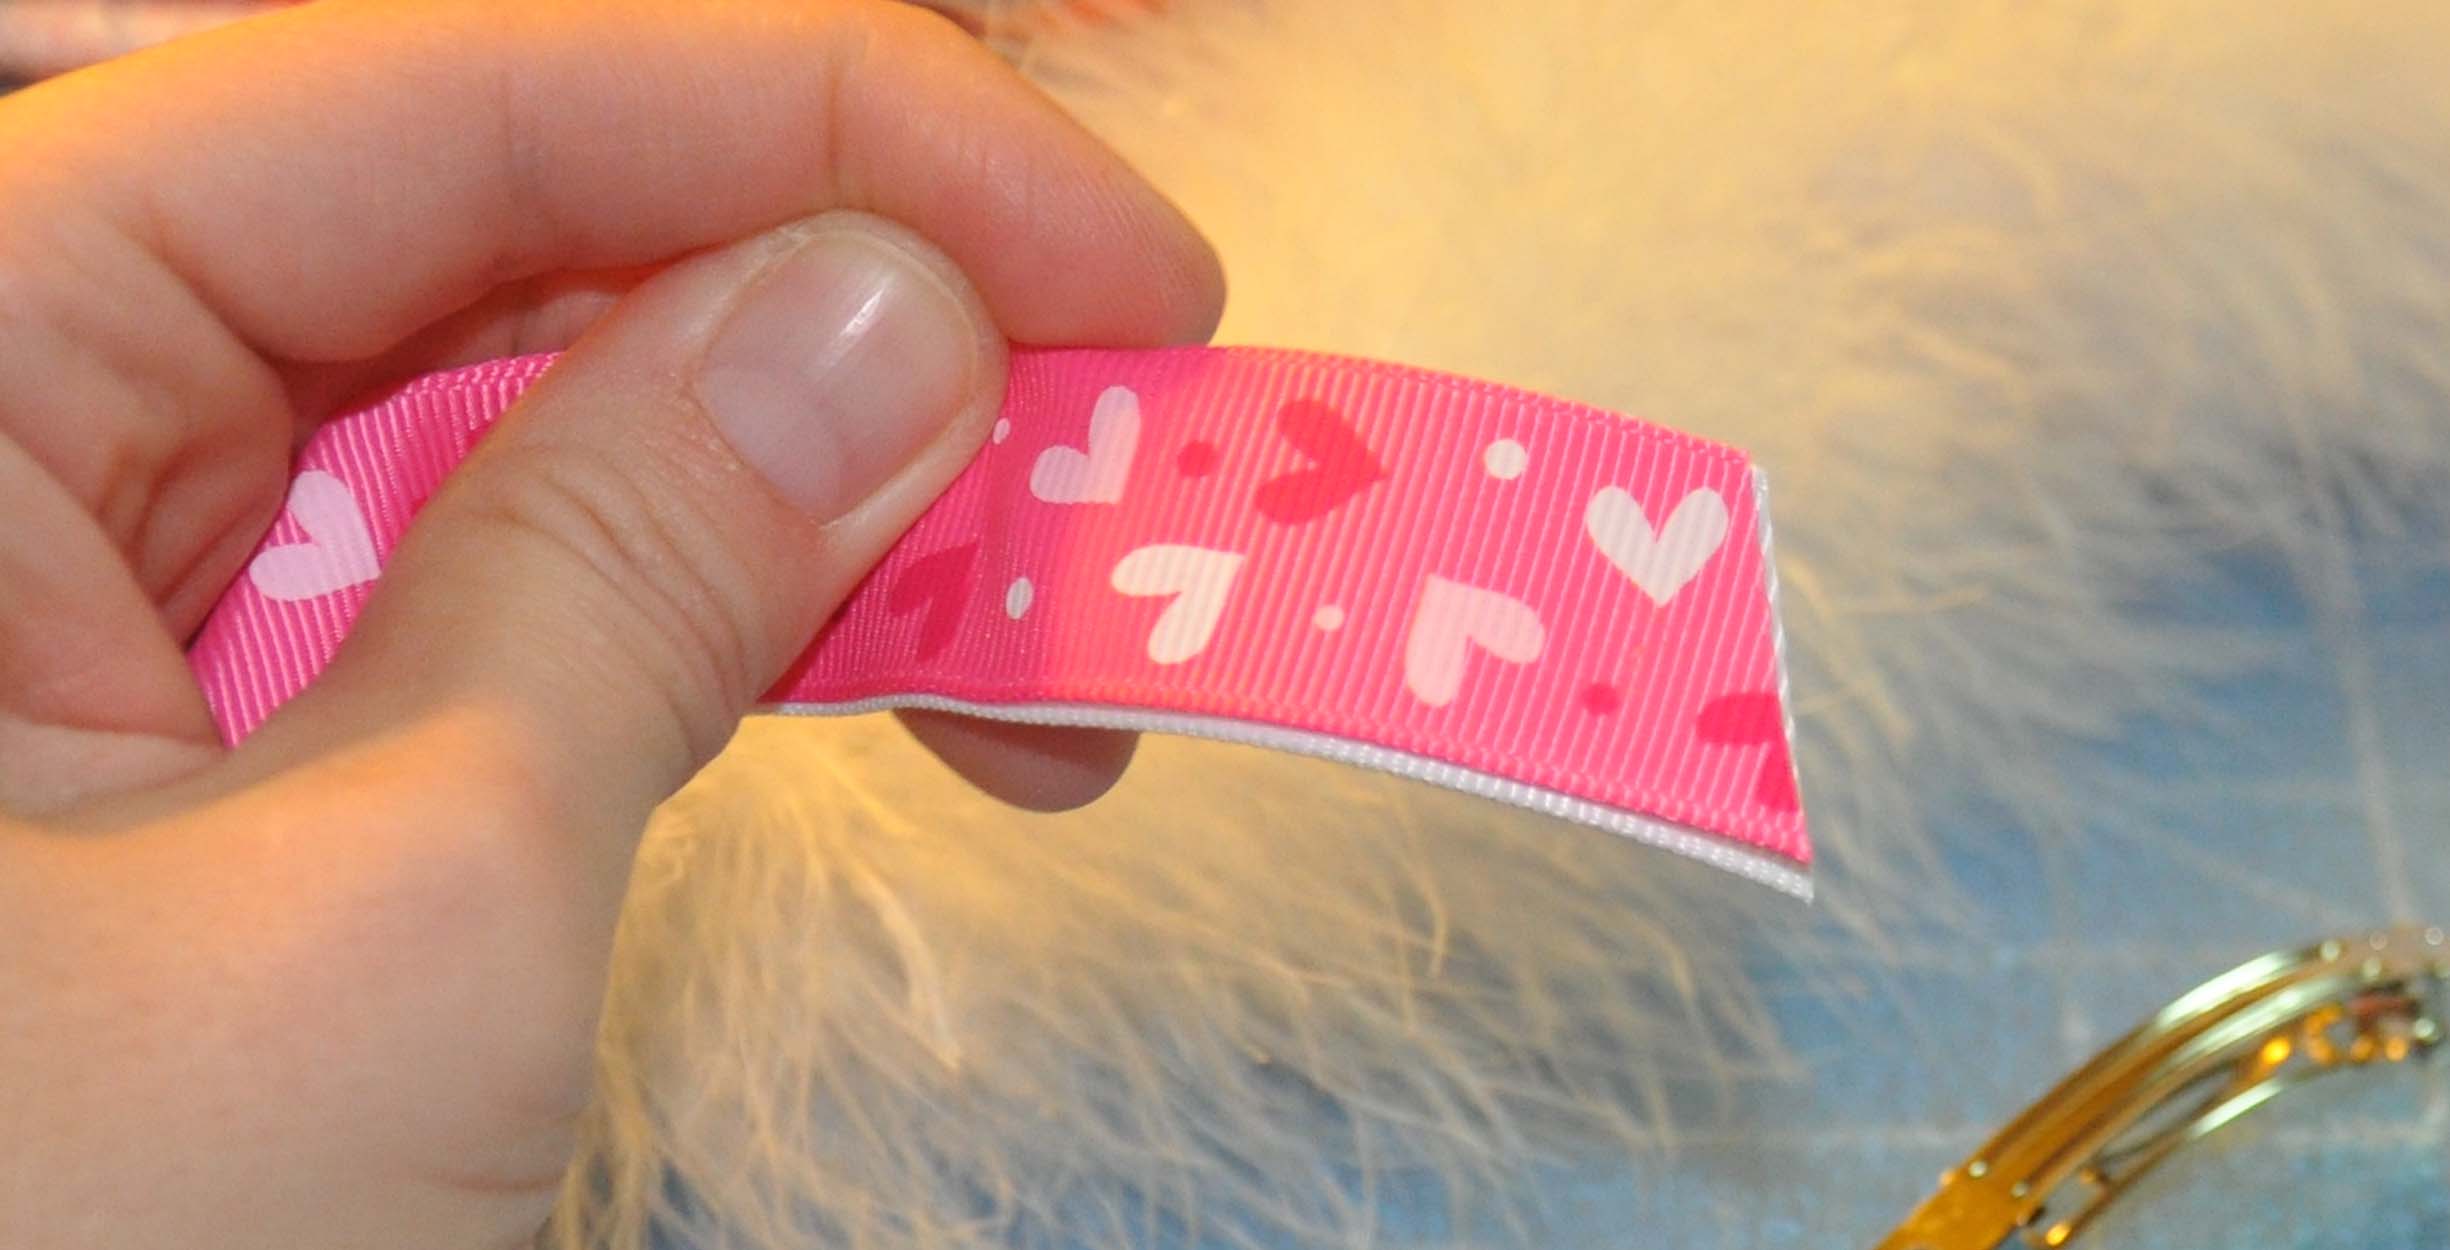
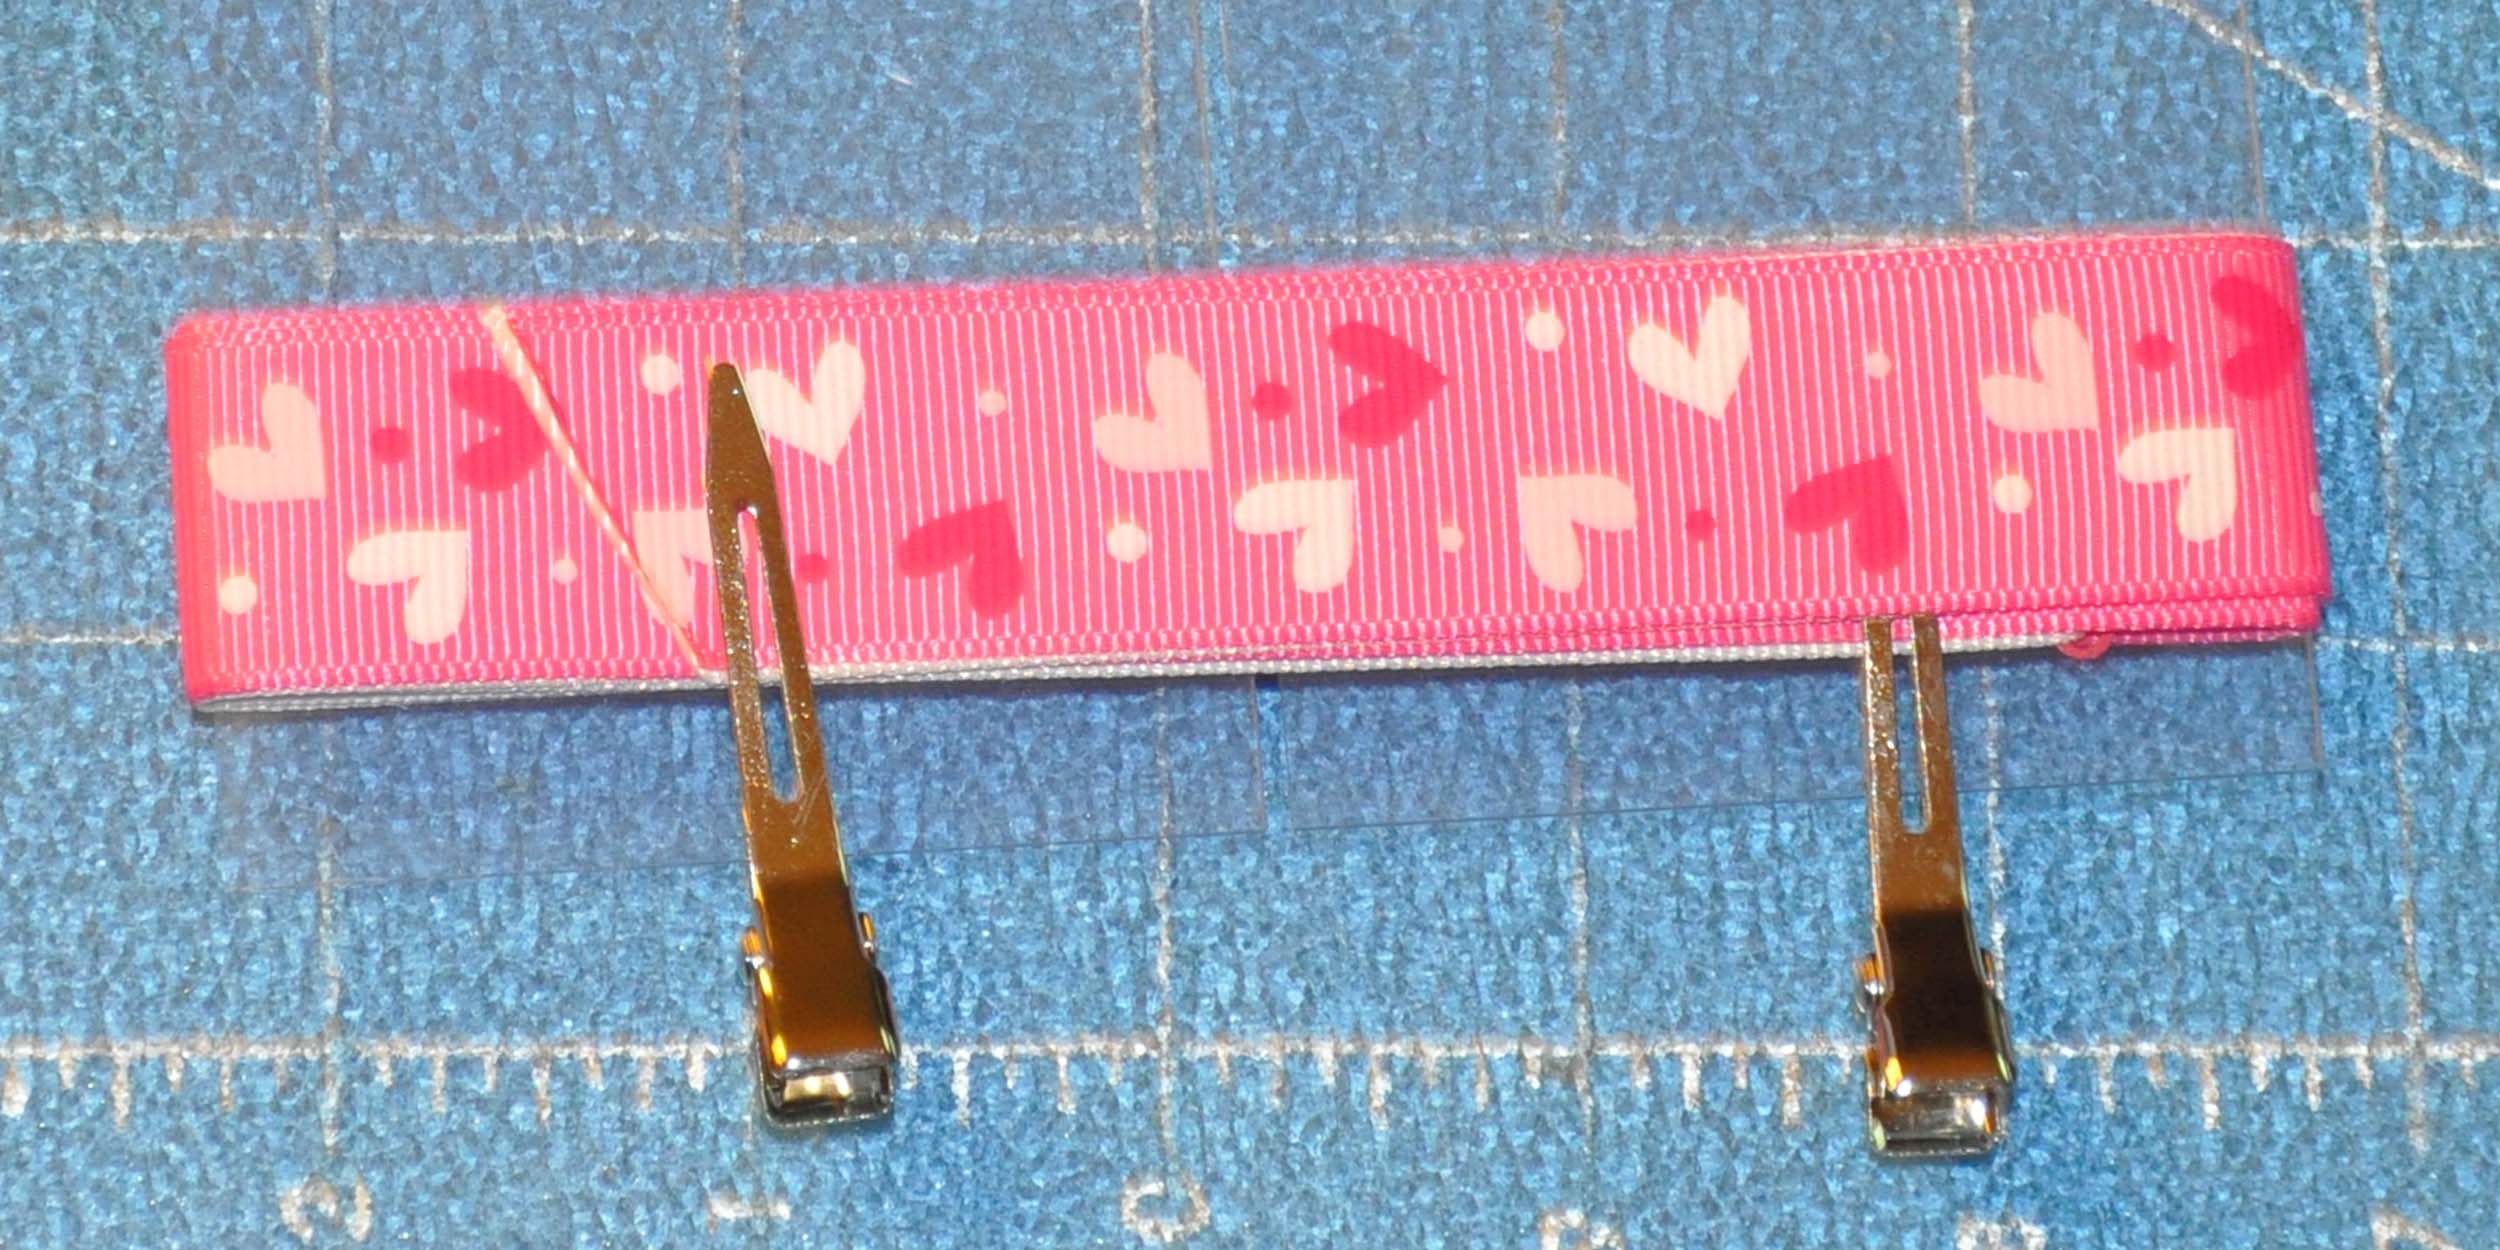
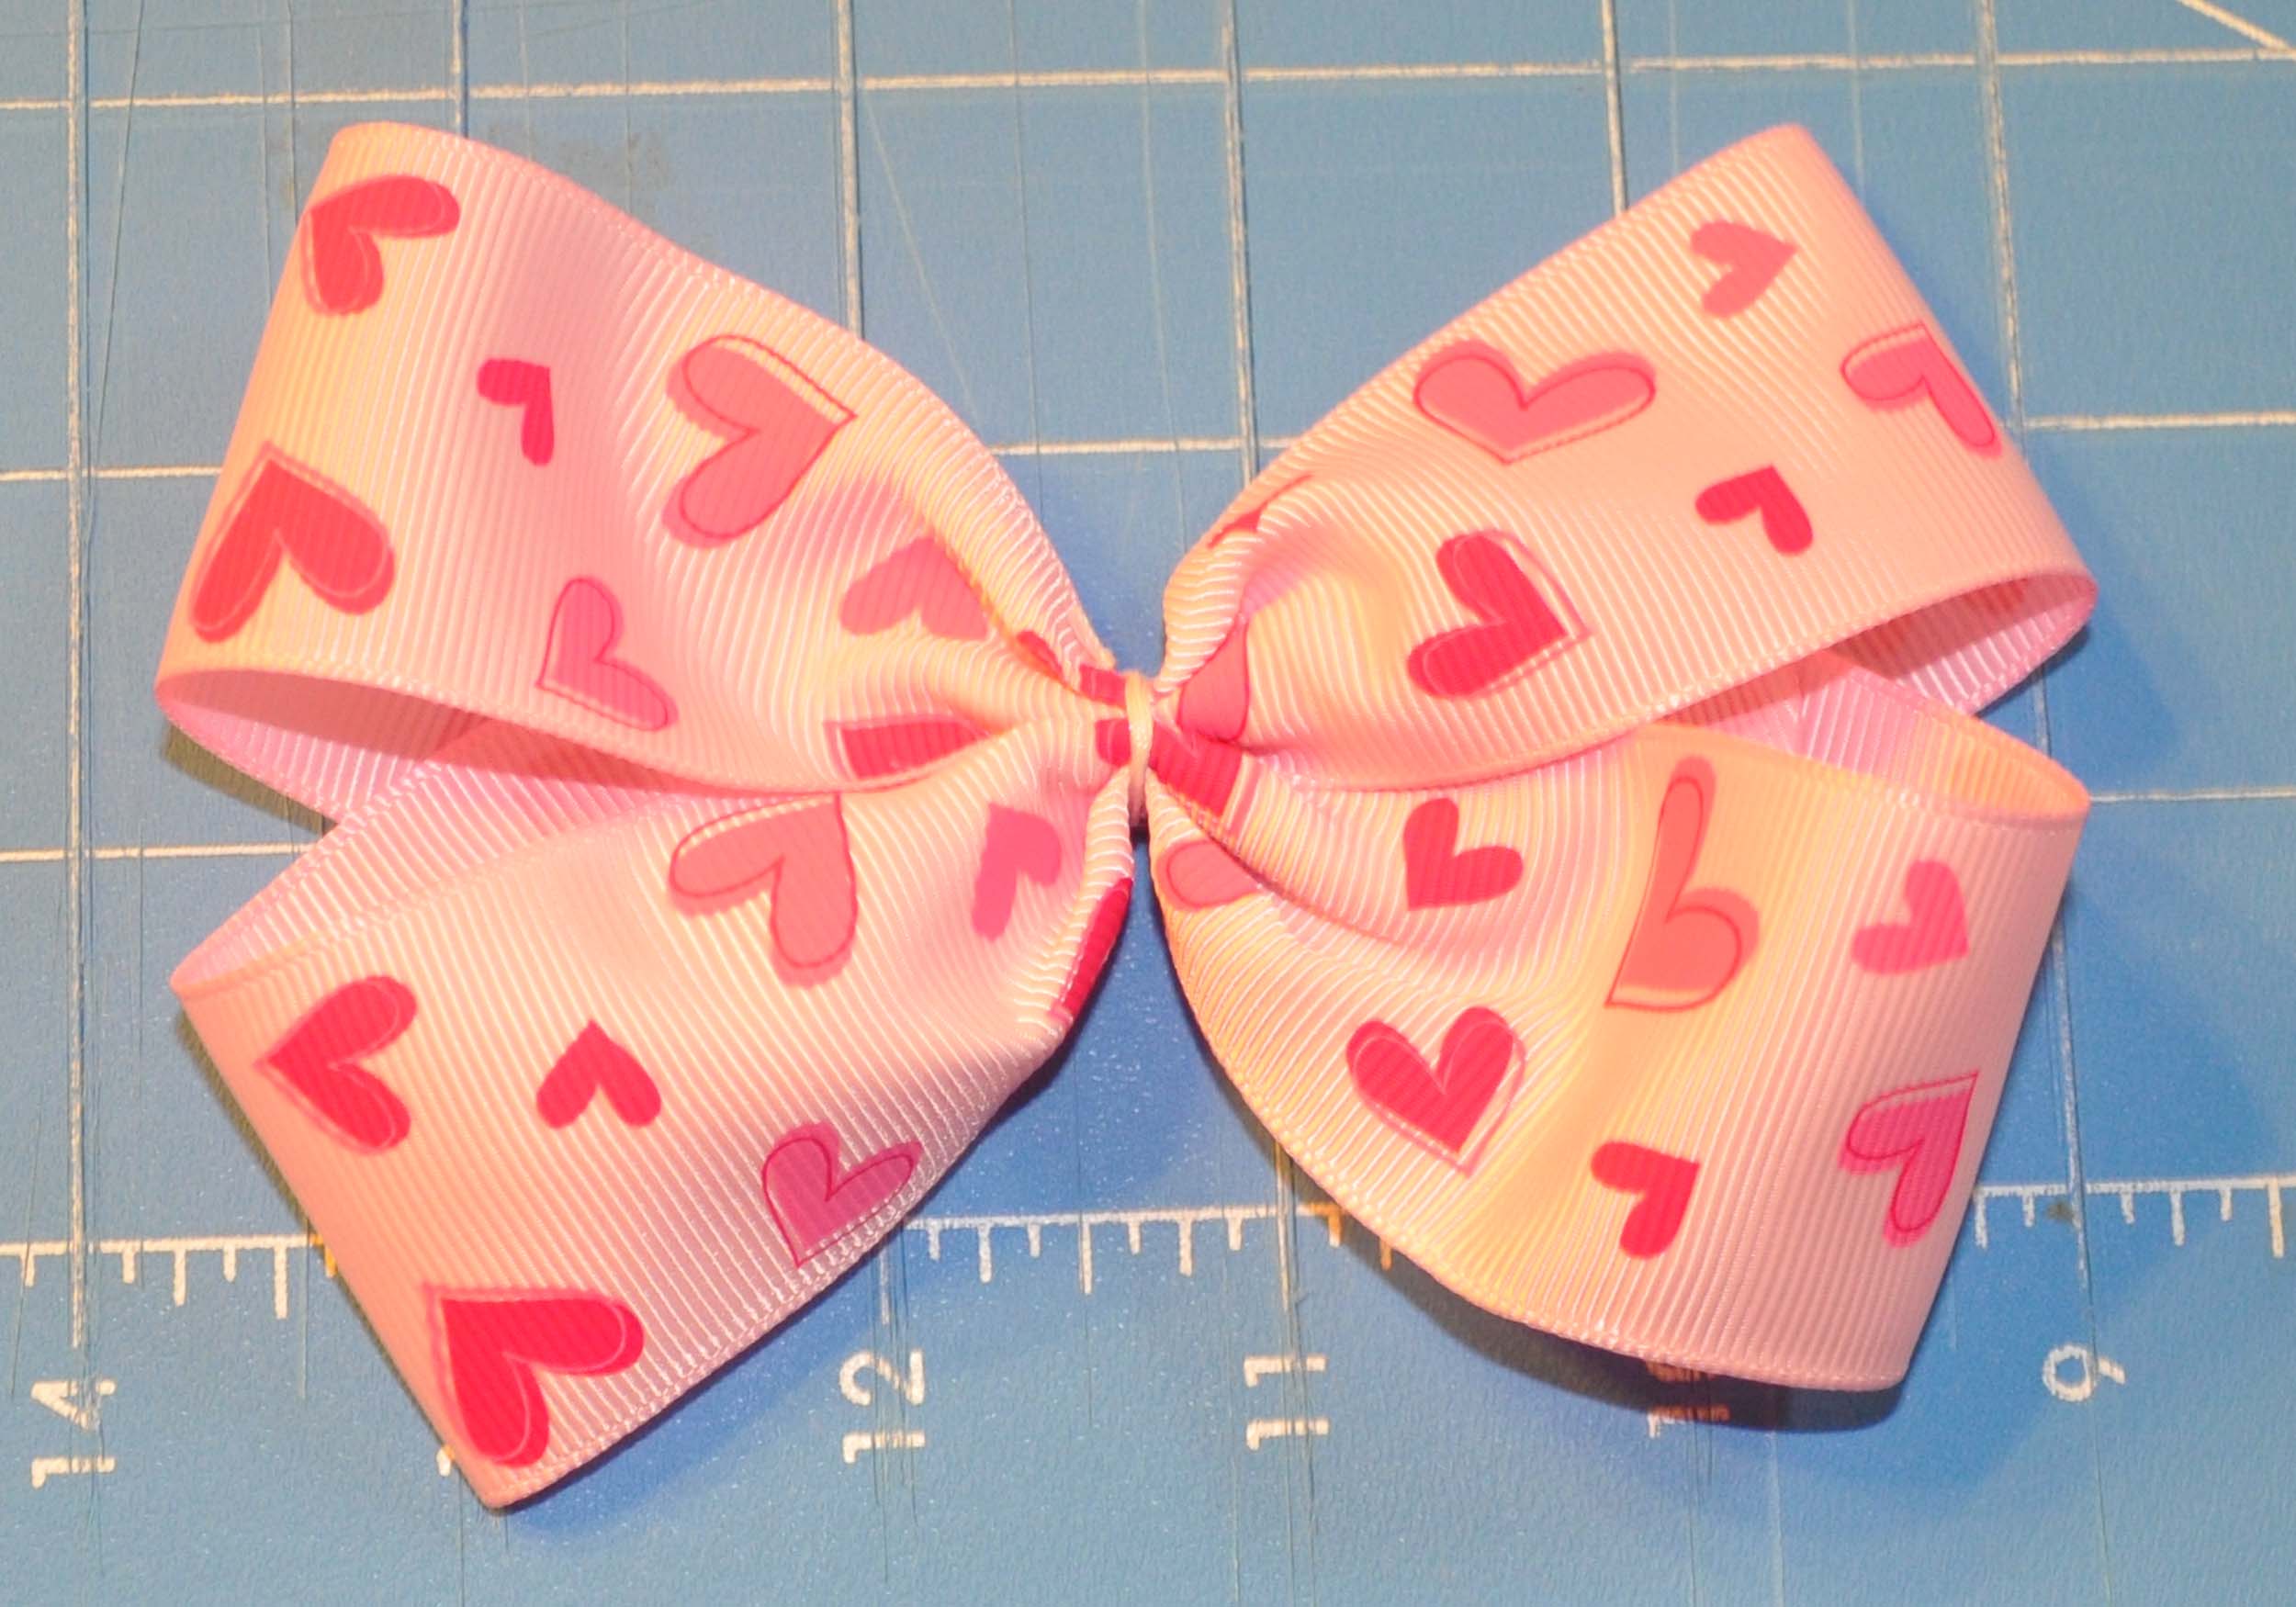
 This hair-bow was created using the NBNG Template #5. The ribbon is our 7/8" Multi-Pink Hearts Grosgrain
I decided to use a solid white ribbon as a backing to add interest, so the pieces were layed on top of each other and were measured and cut at the same time. The ends were both cut at a slight angle. Heat-seal each ribbon end.
This hair-bow was created using the NBNG Template #5. The ribbon is our 7/8" Multi-Pink Hearts Grosgrain
I decided to use a solid white ribbon as a backing to add interest, so the pieces were layed on top of each other and were measured and cut at the same time. The ends were both cut at a slight angle. Heat-seal each ribbon end.
 Wrap the ribbon on the template and clip according to the template directions. This step can also be completed with alternative ways to fold the bow without a template.
 Stick a pin through the center of the bow and pull off of the template.
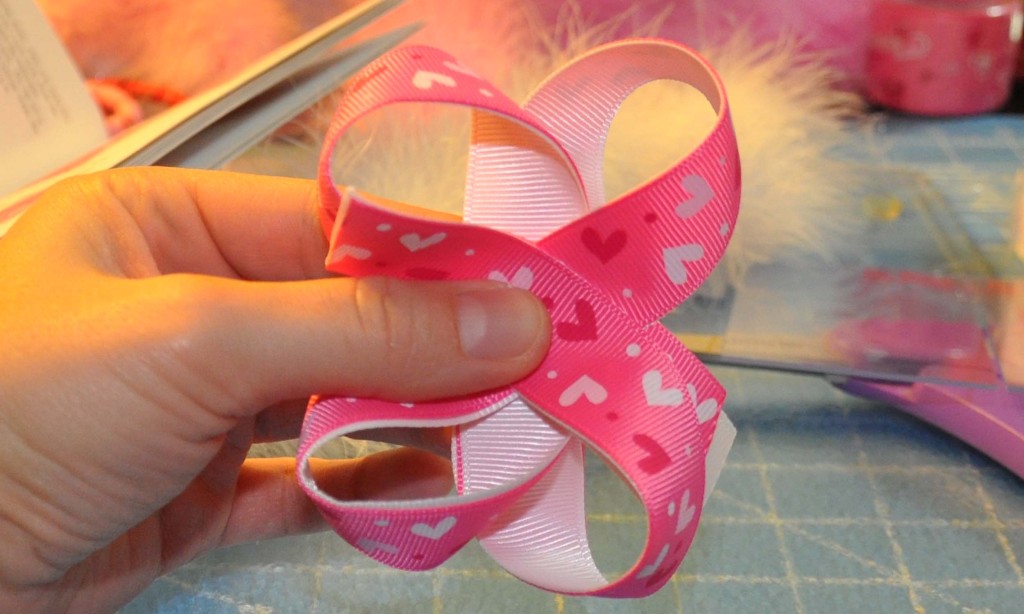
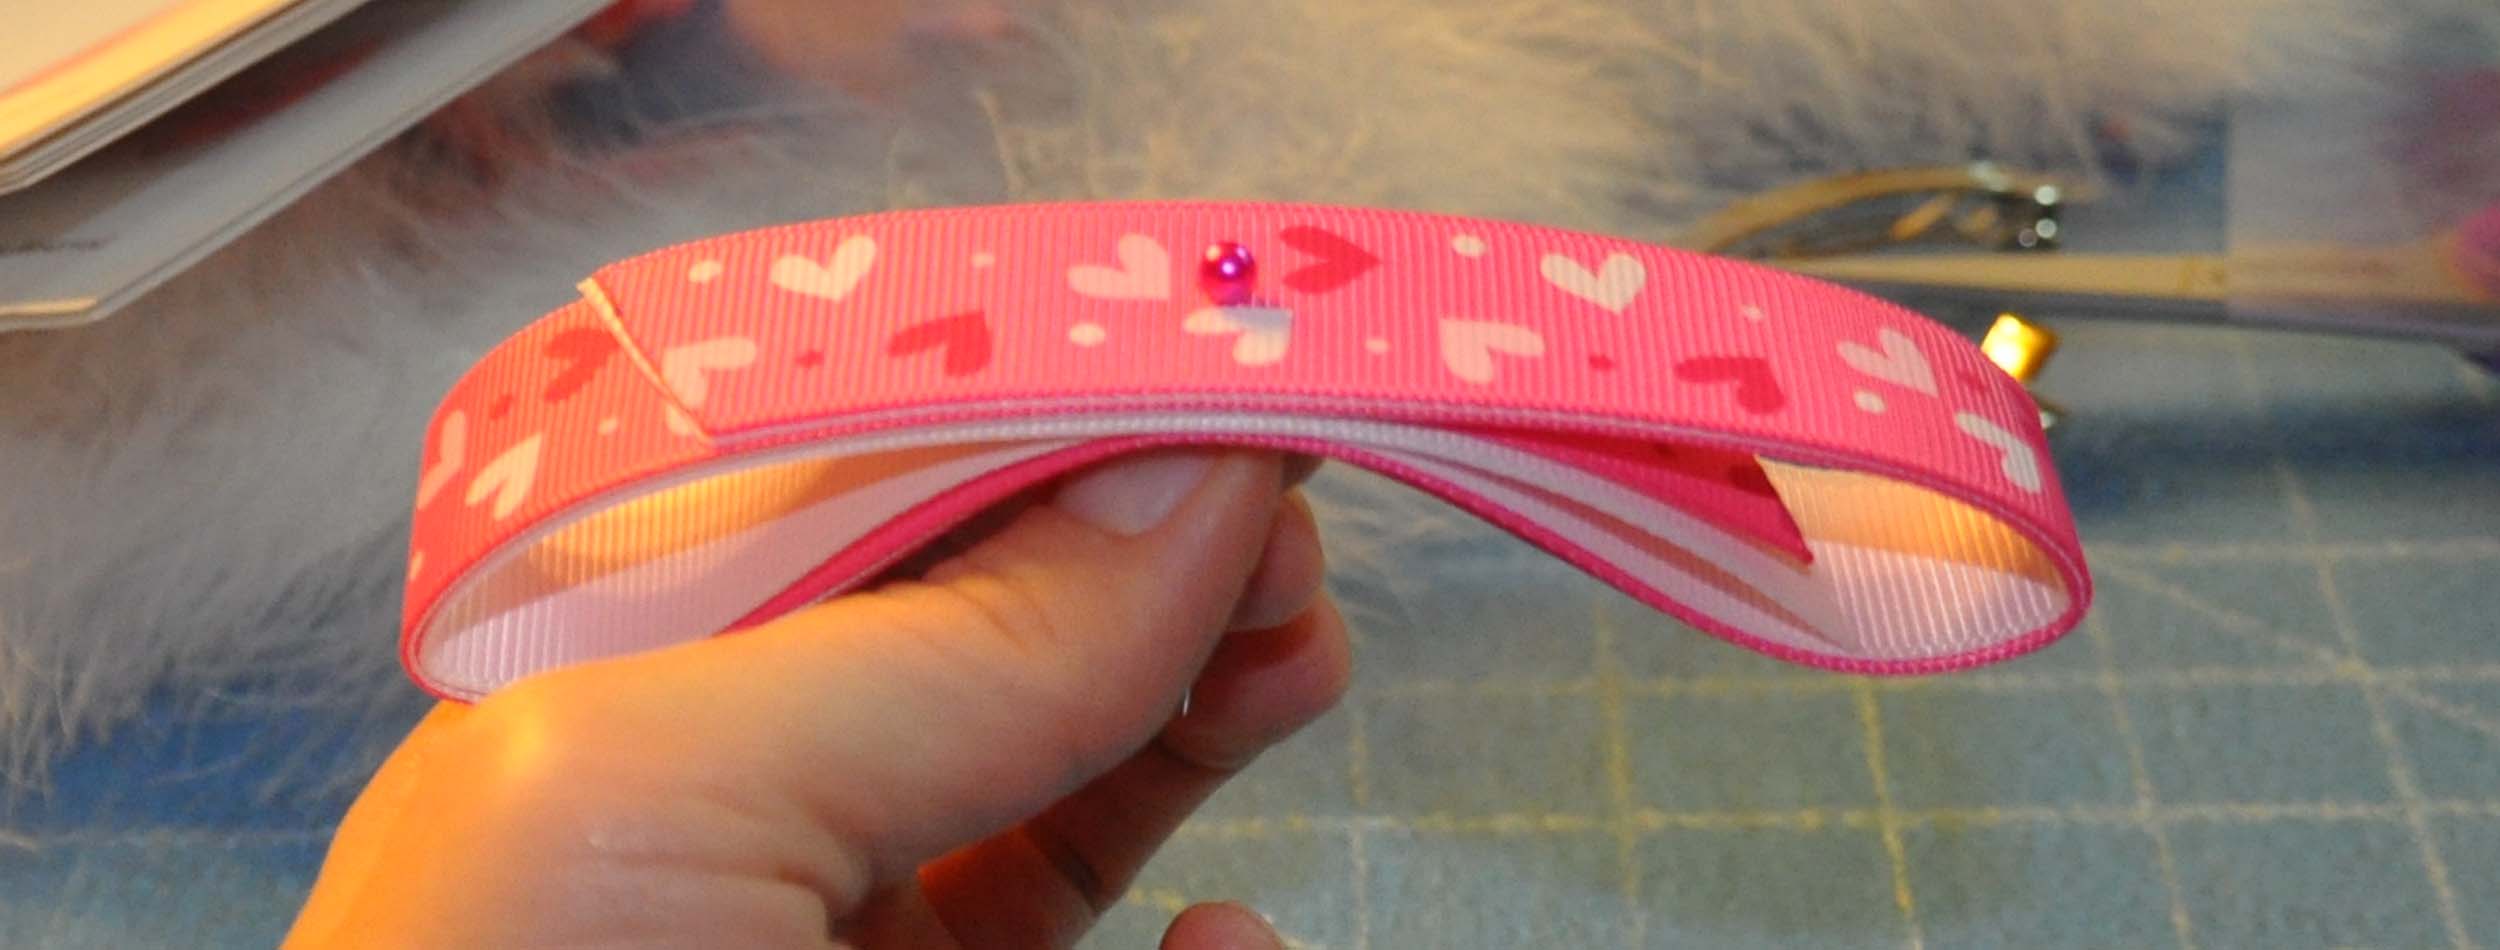
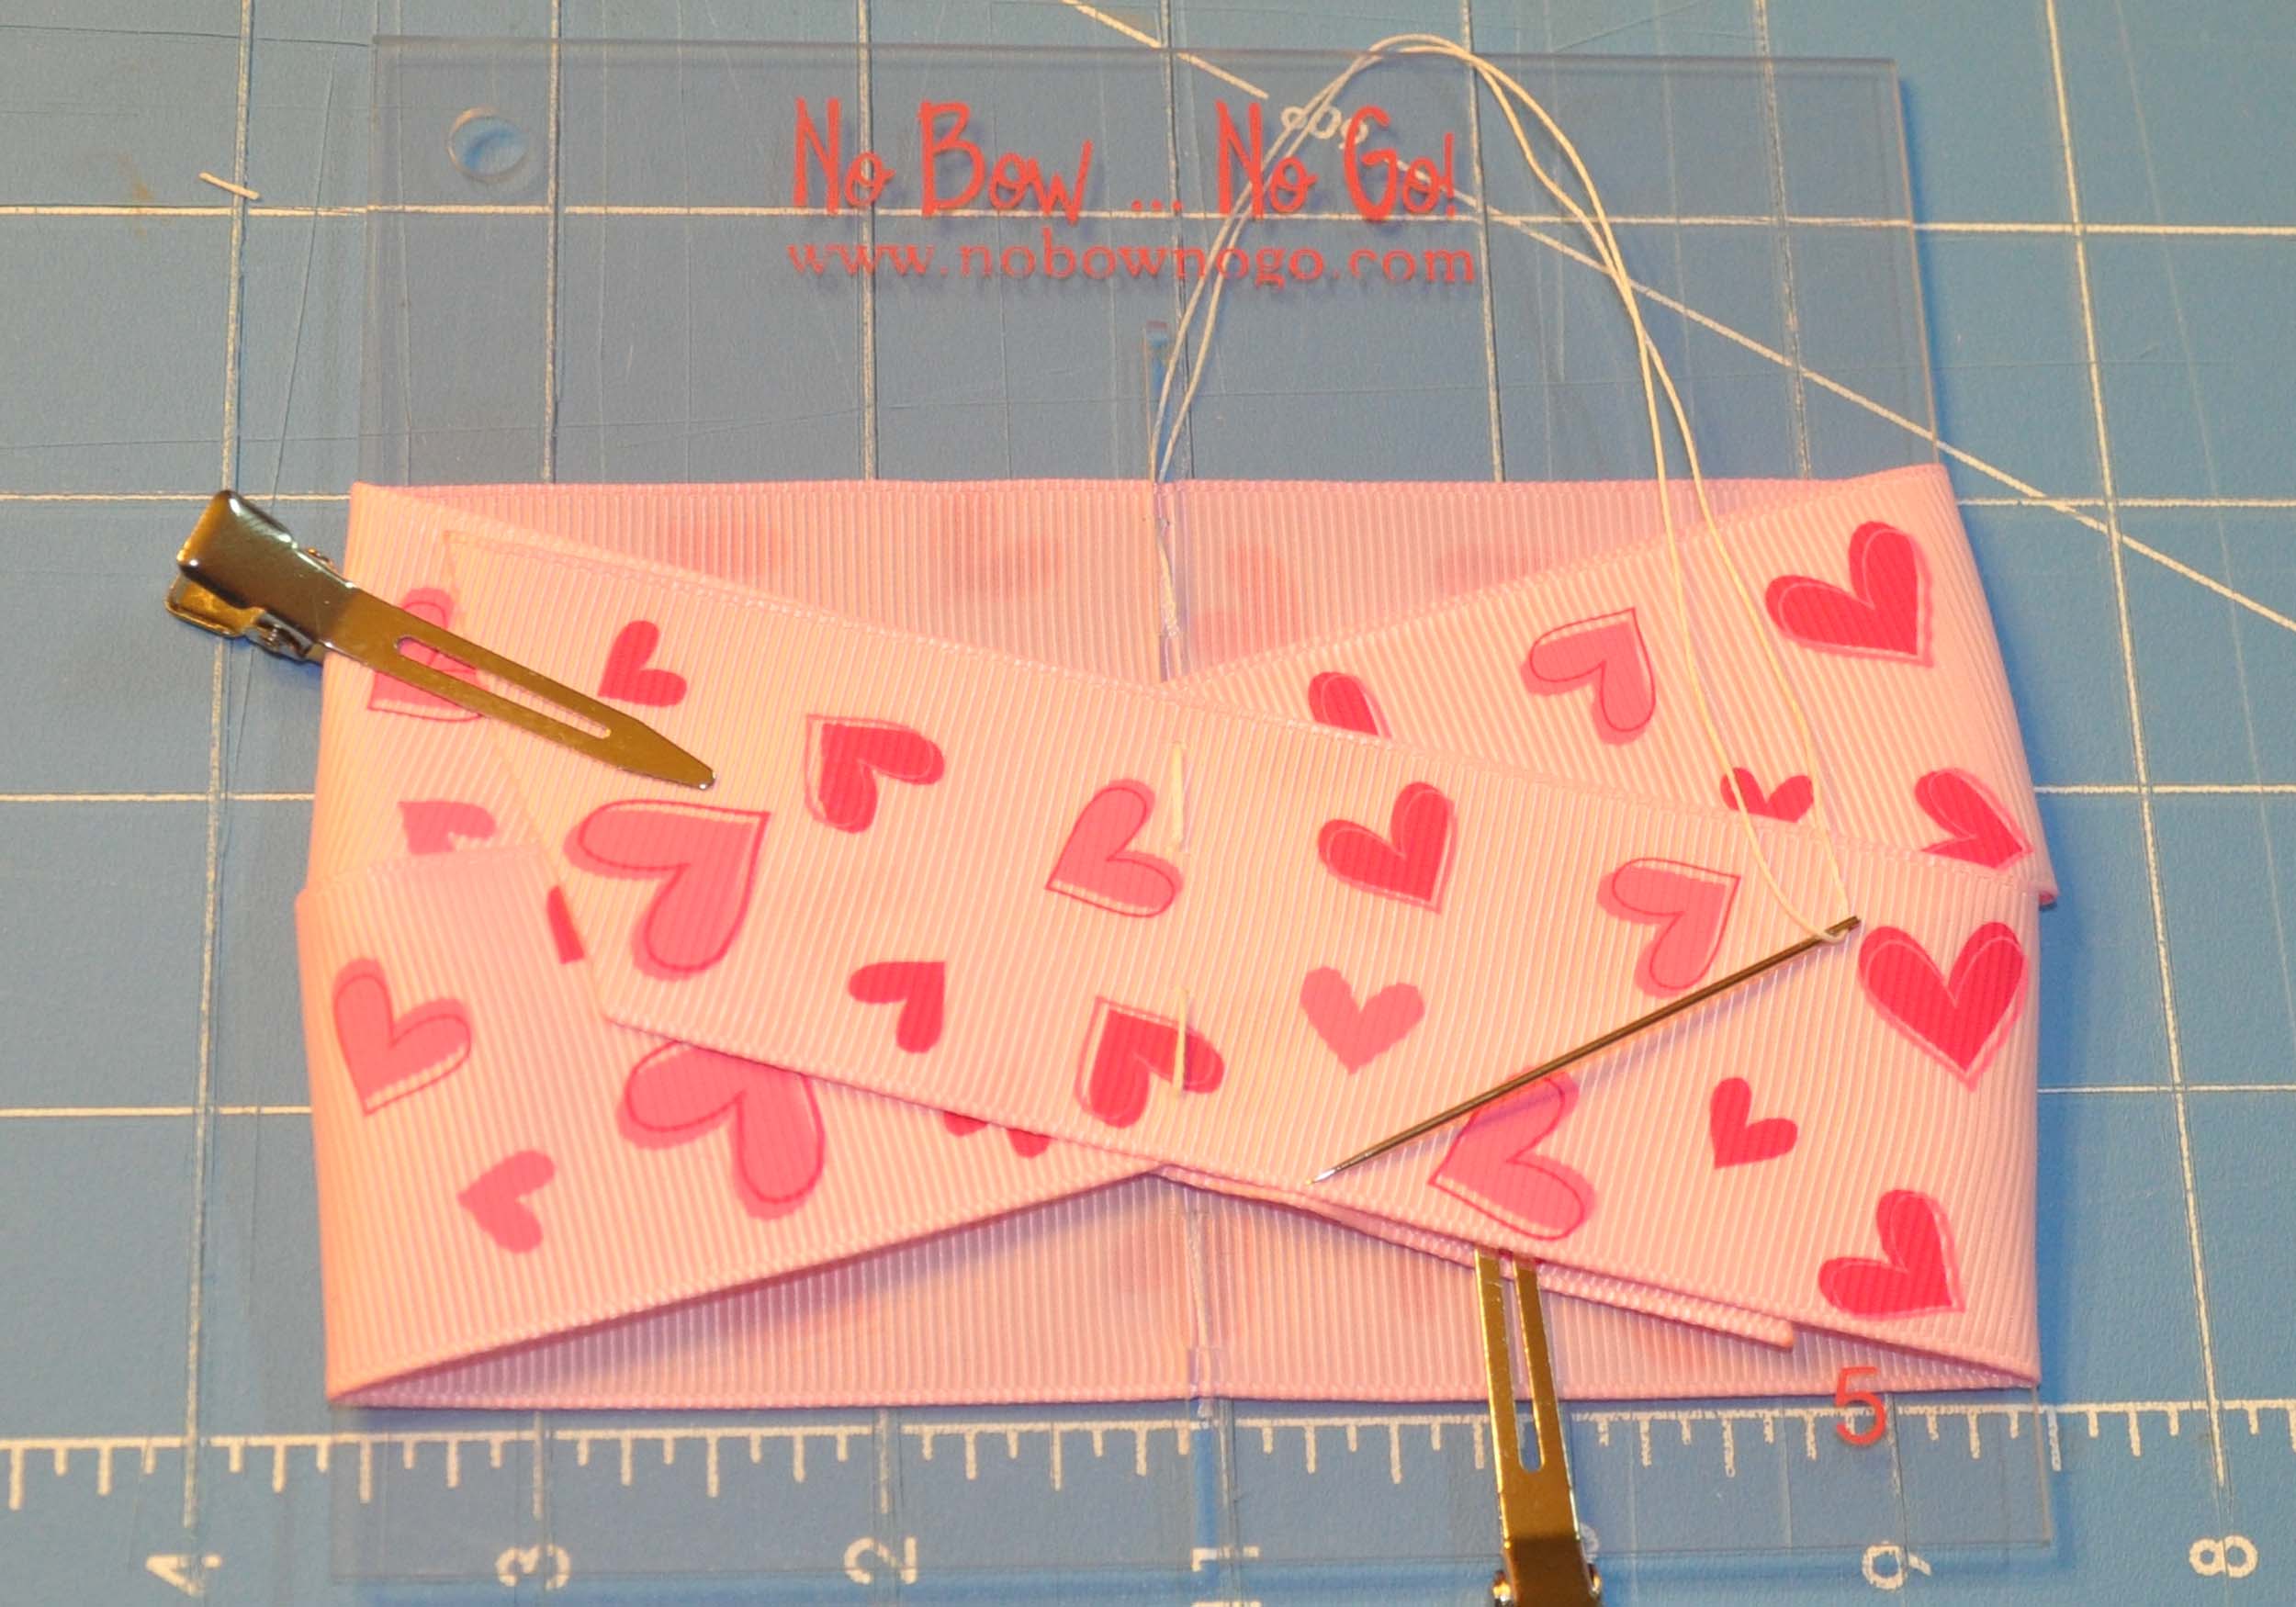
 Pull the top tail and the bottom layer to the left and the middle layer to the right, which will create an "x" on the front of the bow. When looking at the back of the bow, the ribbons should be in a straight line together.
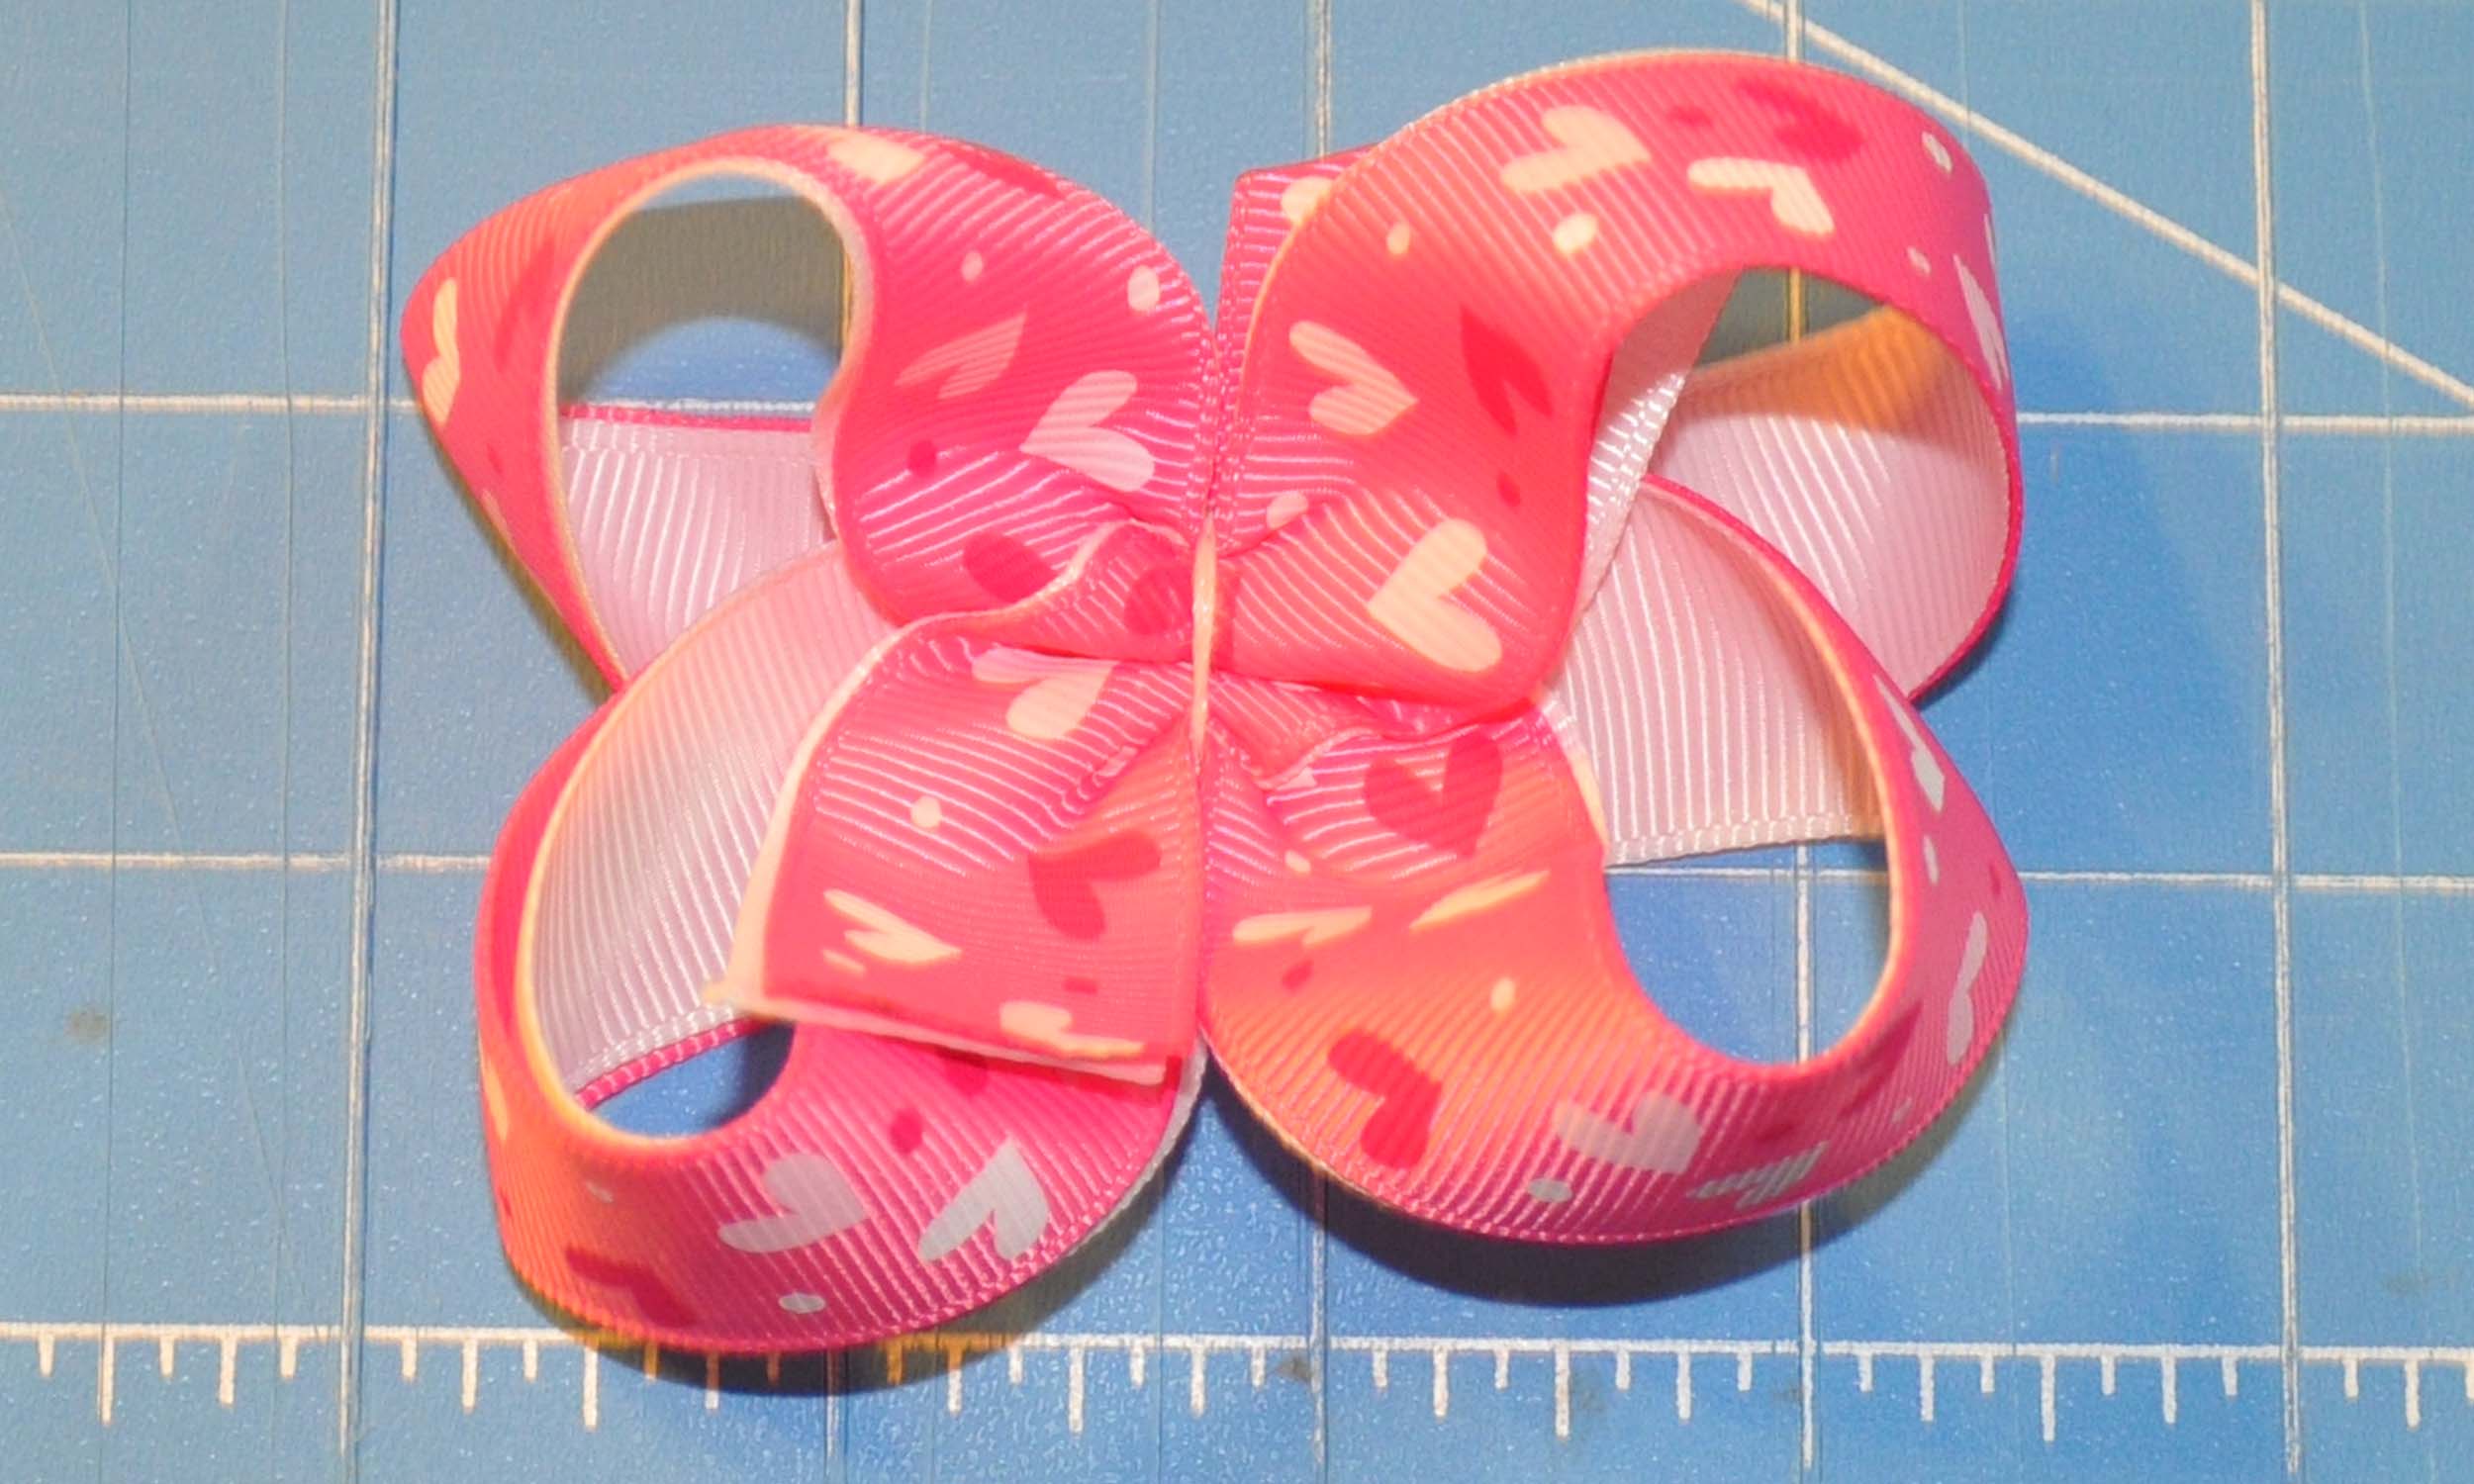
 Sew through the center of the bow, always starting and ending from the back of the bow. With the 7/8" bow, you will want to create two "peaks" when it is gathered. I always knot the end of my string so that it can be pulled up tight and gives a secure end for gathering. Gather the bow tightly and then wrap the string several times around the bow center, keeping the thread as tight as possible. Flip the bow over and complete with knot on the back. Clip the thread tails.
Measure the desired length of marabou (I used a 3" piece) and try to part the marabou down to the cord before cutting. Have a trash can handy as it can be messy. After cutting, be sure to pull the loose marabou feathers from the cut end.
Sew through the center of the bow, always starting and ending from the back of the bow. With the 7/8" bow, you will want to create two "peaks" when it is gathered. I always knot the end of my string so that it can be pulled up tight and gives a secure end for gathering. Gather the bow tightly and then wrap the string several times around the bow center, keeping the thread as tight as possible. Flip the bow over and complete with knot on the back. Clip the thread tails.
Measure the desired length of marabou (I used a 3" piece) and try to part the marabou down to the cord before cutting. Have a trash can handy as it can be messy. After cutting, be sure to pull the loose marabou feathers from the cut end.
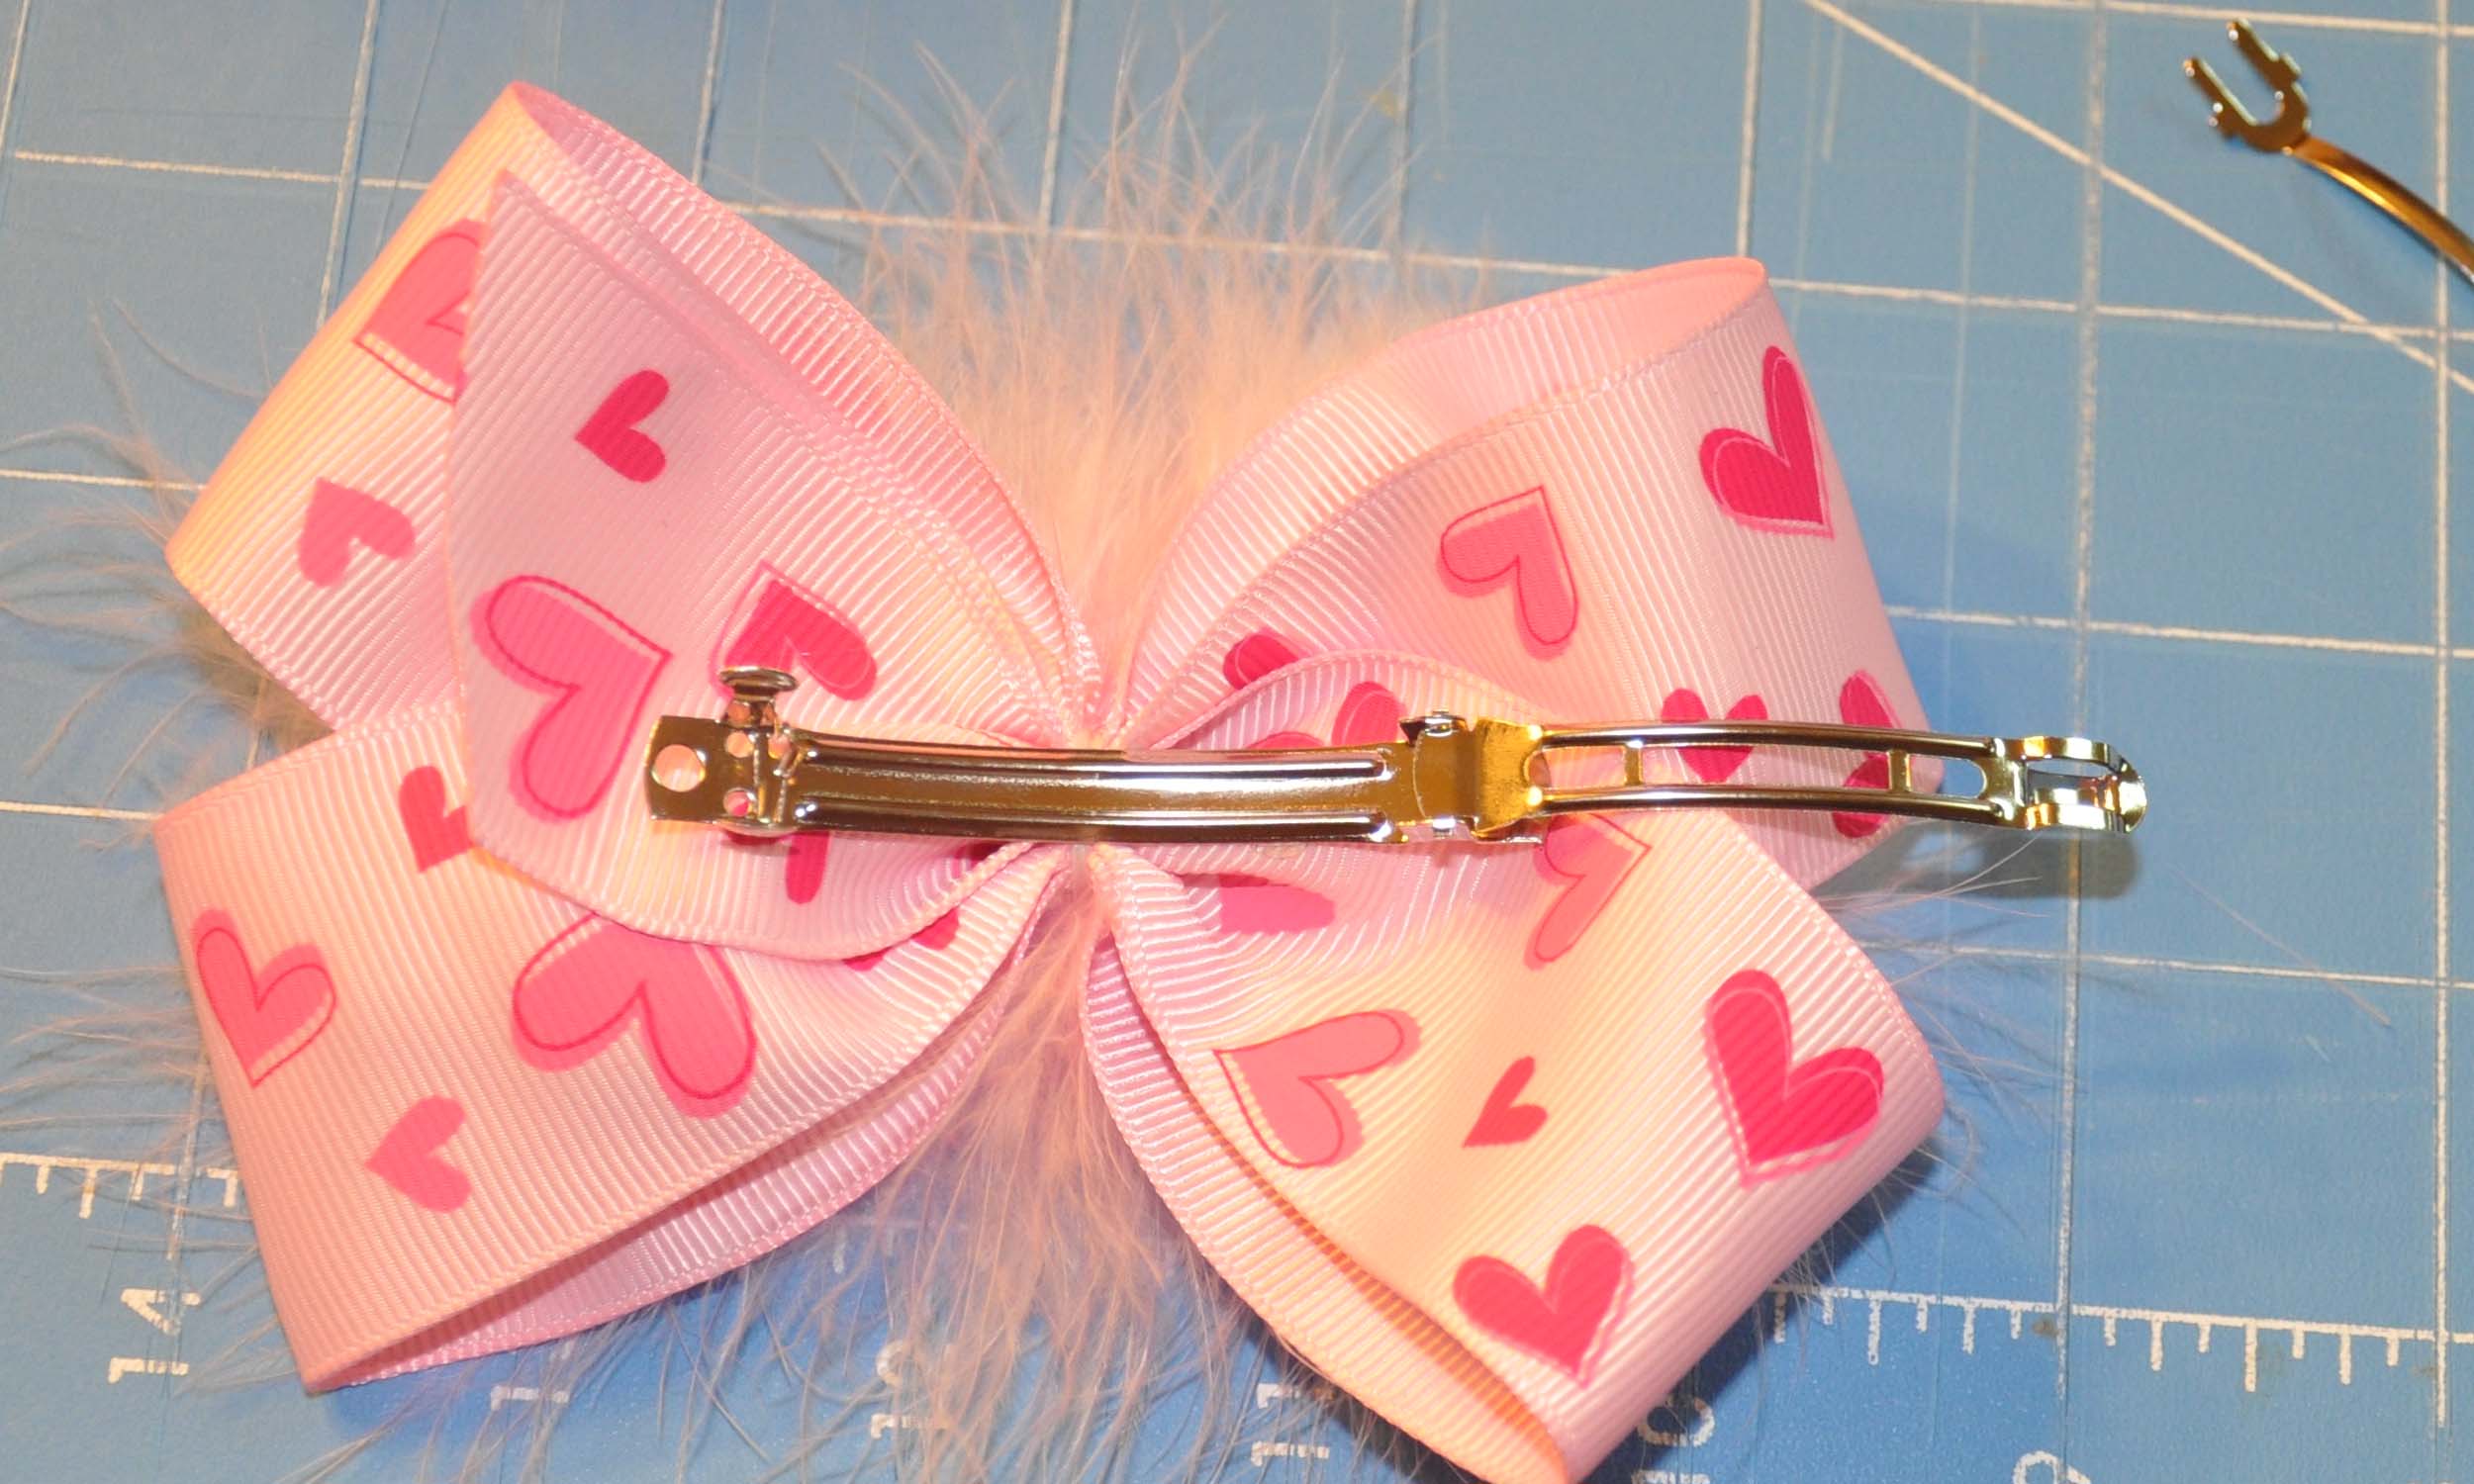
 Separate the marabou (click here to view available colors and styles) at the center of the piece so that equal parts of "fluff" go each direction. Apply a dot of hot glue to the back of the hair-bow and firmly press the marabou center into the glue. I always wrap several times with thread as well for a better hold.
 Remove the center bar from a french barrette (60mm size used). Run a strip of glue along the barrette and press to the back of the marabou. I used a narrow 1/4" white grosgrain ribbon as the center to help retain the fluffiness of the marabou and not mash it down with a larger ribbon. Glue one end of the ribbon to the back of the barrette, wrap snugly around the center of the bow pulling the marabou out from underneath it, and then cut the ribbon leaving enough to glue the end to the back of the bow. Hear-seal the ribbon end and glue it down on top of the other ribbon end. Insert the center bar back into the clip and you're finished.
 Basic Boutique Bow w/ Marabou On Top
This bow was created using the NBNG Template #5 and instructions for the Basic Boutique Bow. The ribbon is our 1.5" Pink with Multi-Pink Hearts Grosgrain. Cut ribbon ends at a slight angle and heat-seal.
Basic Boutique Bow w/ Marabou On Top
This bow was created using the NBNG Template #5 and instructions for the Basic Boutique Bow. The ribbon is our 1.5" Pink with Multi-Pink Hearts Grosgrain. Cut ribbon ends at a slight angle and heat-seal.
 Wrap on the template and clip according to instructions. Sew through the center of the bow starting from the back and ending on the back.
 Gather tightly and tie off in back of bow. Clip thread ends.
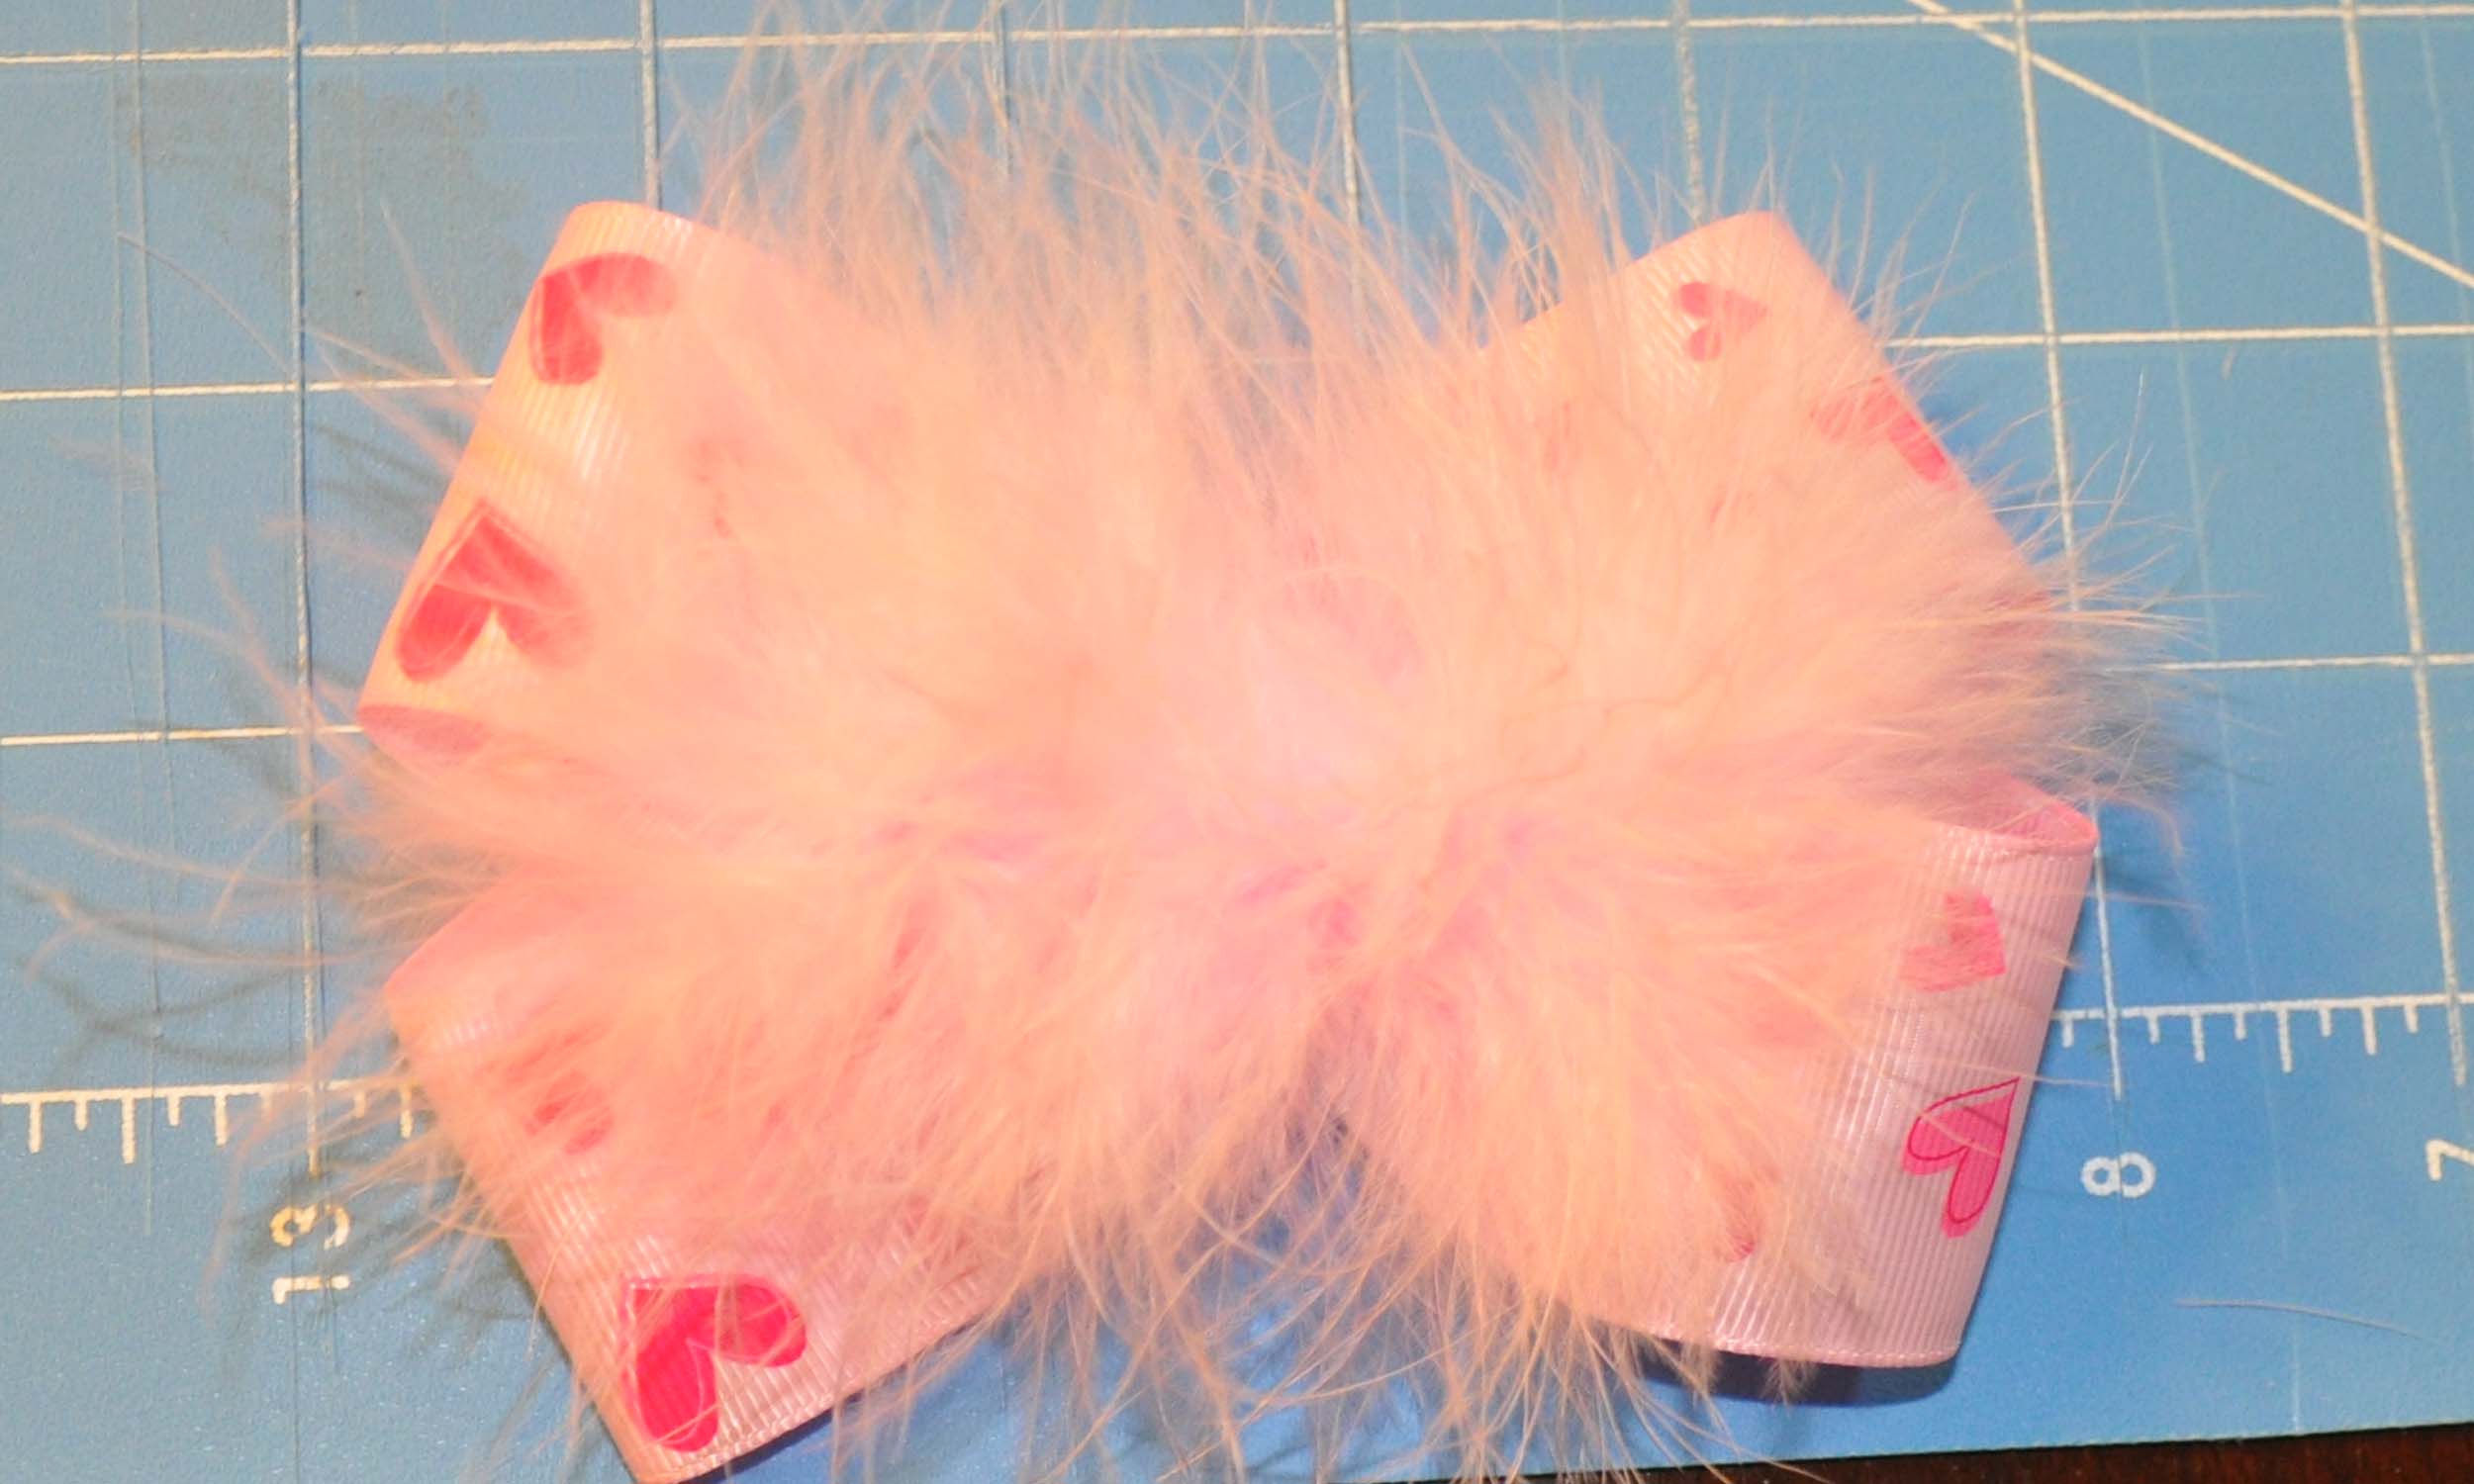
 Cut marabou according to instructions on bow above. I used a 2.5" piece. Pull the fluff forward and then hot glue the marabou to the bow. Use a decently long strip of glue as it will be all that's holding them together.
 Run a strip of glue along the back of a french barrette and press firmly to the back of the bow. We will not use a center on this bow as it would ruin the round "poof" effect of the marabou.

 Twisted Boutique Bow w/ Marabou Behind
 This hair-bow was created using the NBNG Template #5. The ribbon is our 7/8" Multi-Pink Hearts Grosgrain
I decided to use a solid white ribbon as a backing to add interest, so the pieces were layed on top of each other and were measured and cut at the same time. The ends were both cut at a slight angle. Heat-seal each ribbon end.
This hair-bow was created using the NBNG Template #5. The ribbon is our 7/8" Multi-Pink Hearts Grosgrain
I decided to use a solid white ribbon as a backing to add interest, so the pieces were layed on top of each other and were measured and cut at the same time. The ends were both cut at a slight angle. Heat-seal each ribbon end.
 Wrap the ribbon on the template and clip according to the template directions. This step can also be completed with alternative ways to fold the bow without a template.
 Stick a pin through the center of the bow and pull off of the template.
 Pull the top tail and the bottom layer to the left and the middle layer to the right, which will create an "x" on the front of the bow. When looking at the back of the bow, the ribbons should be in a straight line together.
 Sew through the center of the bow, always starting and ending from the back of the bow. With the 7/8" bow, you will want to create two "peaks" when it is gathered. I always knot the end of my string so that it can be pulled up tight and gives a secure end for gathering. Gather the bow tightly and then wrap the string several times around the bow center, keeping the thread as tight as possible. Flip the bow over and complete with knot on the back. Clip the thread tails.
Measure the desired length of marabou (I used a 3" piece) and try to part the marabou down to the cord before cutting. Have a trash can handy as it can be messy. After cutting, be sure to pull the loose marabou feathers from the cut end.
Sew through the center of the bow, always starting and ending from the back of the bow. With the 7/8" bow, you will want to create two "peaks" when it is gathered. I always knot the end of my string so that it can be pulled up tight and gives a secure end for gathering. Gather the bow tightly and then wrap the string several times around the bow center, keeping the thread as tight as possible. Flip the bow over and complete with knot on the back. Clip the thread tails.
Measure the desired length of marabou (I used a 3" piece) and try to part the marabou down to the cord before cutting. Have a trash can handy as it can be messy. After cutting, be sure to pull the loose marabou feathers from the cut end.
 Separate the marabou (click here to view available colors and styles) at the center of the piece so that equal parts of "fluff" go each direction. Apply a dot of hot glue to the back of the hair-bow and firmly press the marabou center into the glue. I always wrap several times with thread as well for a better hold.
 Remove the center bar from a french barrette (60mm size used). Run a strip of glue along the barrette and press to the back of the marabou. I used a narrow 1/4" white grosgrain ribbon as the center to help retain the fluffiness of the marabou and not mash it down with a larger ribbon. Glue one end of the ribbon to the back of the barrette, wrap snugly around the center of the bow pulling the marabou out from underneath it, and then cut the ribbon leaving enough to glue the end to the back of the bow. Hear-seal the ribbon end and glue it down on top of the other ribbon end. Insert the center bar back into the clip and you're finished.
 Basic Boutique Bow w/ Marabou On Top
This bow was created using the NBNG Template #5 and instructions for the Basic Boutique Bow. The ribbon is our 1.5" Pink with Multi-Pink Hearts Grosgrain. Cut ribbon ends at a slight angle and heat-seal.
Basic Boutique Bow w/ Marabou On Top
This bow was created using the NBNG Template #5 and instructions for the Basic Boutique Bow. The ribbon is our 1.5" Pink with Multi-Pink Hearts Grosgrain. Cut ribbon ends at a slight angle and heat-seal.
 Wrap on the template and clip according to instructions. Sew through the center of the bow starting from the back and ending on the back.
 Gather tightly and tie off in back of bow. Clip thread ends.
 Cut marabou according to instructions on bow above. I used a 2.5" piece. Pull the fluff forward and then hot glue the marabou to the bow. Use a decently long strip of glue as it will be all that's holding them together.
 Run a strip of glue along the back of a french barrette and press firmly to the back of the bow. We will not use a center on this bow as it would ruin the round "poof" effect of the marabou.
Visit the rest of our blog for more Crafting Tutorials and DIY Instructions!
Loading...

