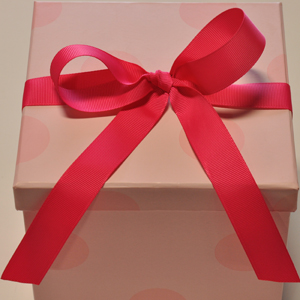
 Most ribbons whether it be grosgrain, satin, organza, glitter, or even double ruffle ribbon can make a gift or package look so much better. Wrapping a gift and completing it with a ribbon bow is not difficult and this post will go through step by step instructions how to get the best results. I assume most readers of this blog will already know how to tie a hair-bow, but some of you bow-masters may be stumped when it comes to tying a decorative bow on the gift you are needing to take to a party.
This classic bow also has many uses beyond gift packaging! It is perfect for tying a dress sash (no more lopsided bows on the back-side of your daughter's elegant holiday dresses), tying decorative ribbon around a flower vase, tying a chair sash, hanging a picture frame, and the list goes on and on...
Most ribbons whether it be grosgrain, satin, organza, glitter, or even double ruffle ribbon can make a gift or package look so much better. Wrapping a gift and completing it with a ribbon bow is not difficult and this post will go through step by step instructions how to get the best results. I assume most readers of this blog will already know how to tie a hair-bow, but some of you bow-masters may be stumped when it comes to tying a decorative bow on the gift you are needing to take to a party.
This classic bow also has many uses beyond gift packaging! It is perfect for tying a dress sash (no more lopsided bows on the back-side of your daughter's elegant holiday dresses), tying decorative ribbon around a flower vase, tying a chair sash, hanging a picture frame, and the list goes on and on...
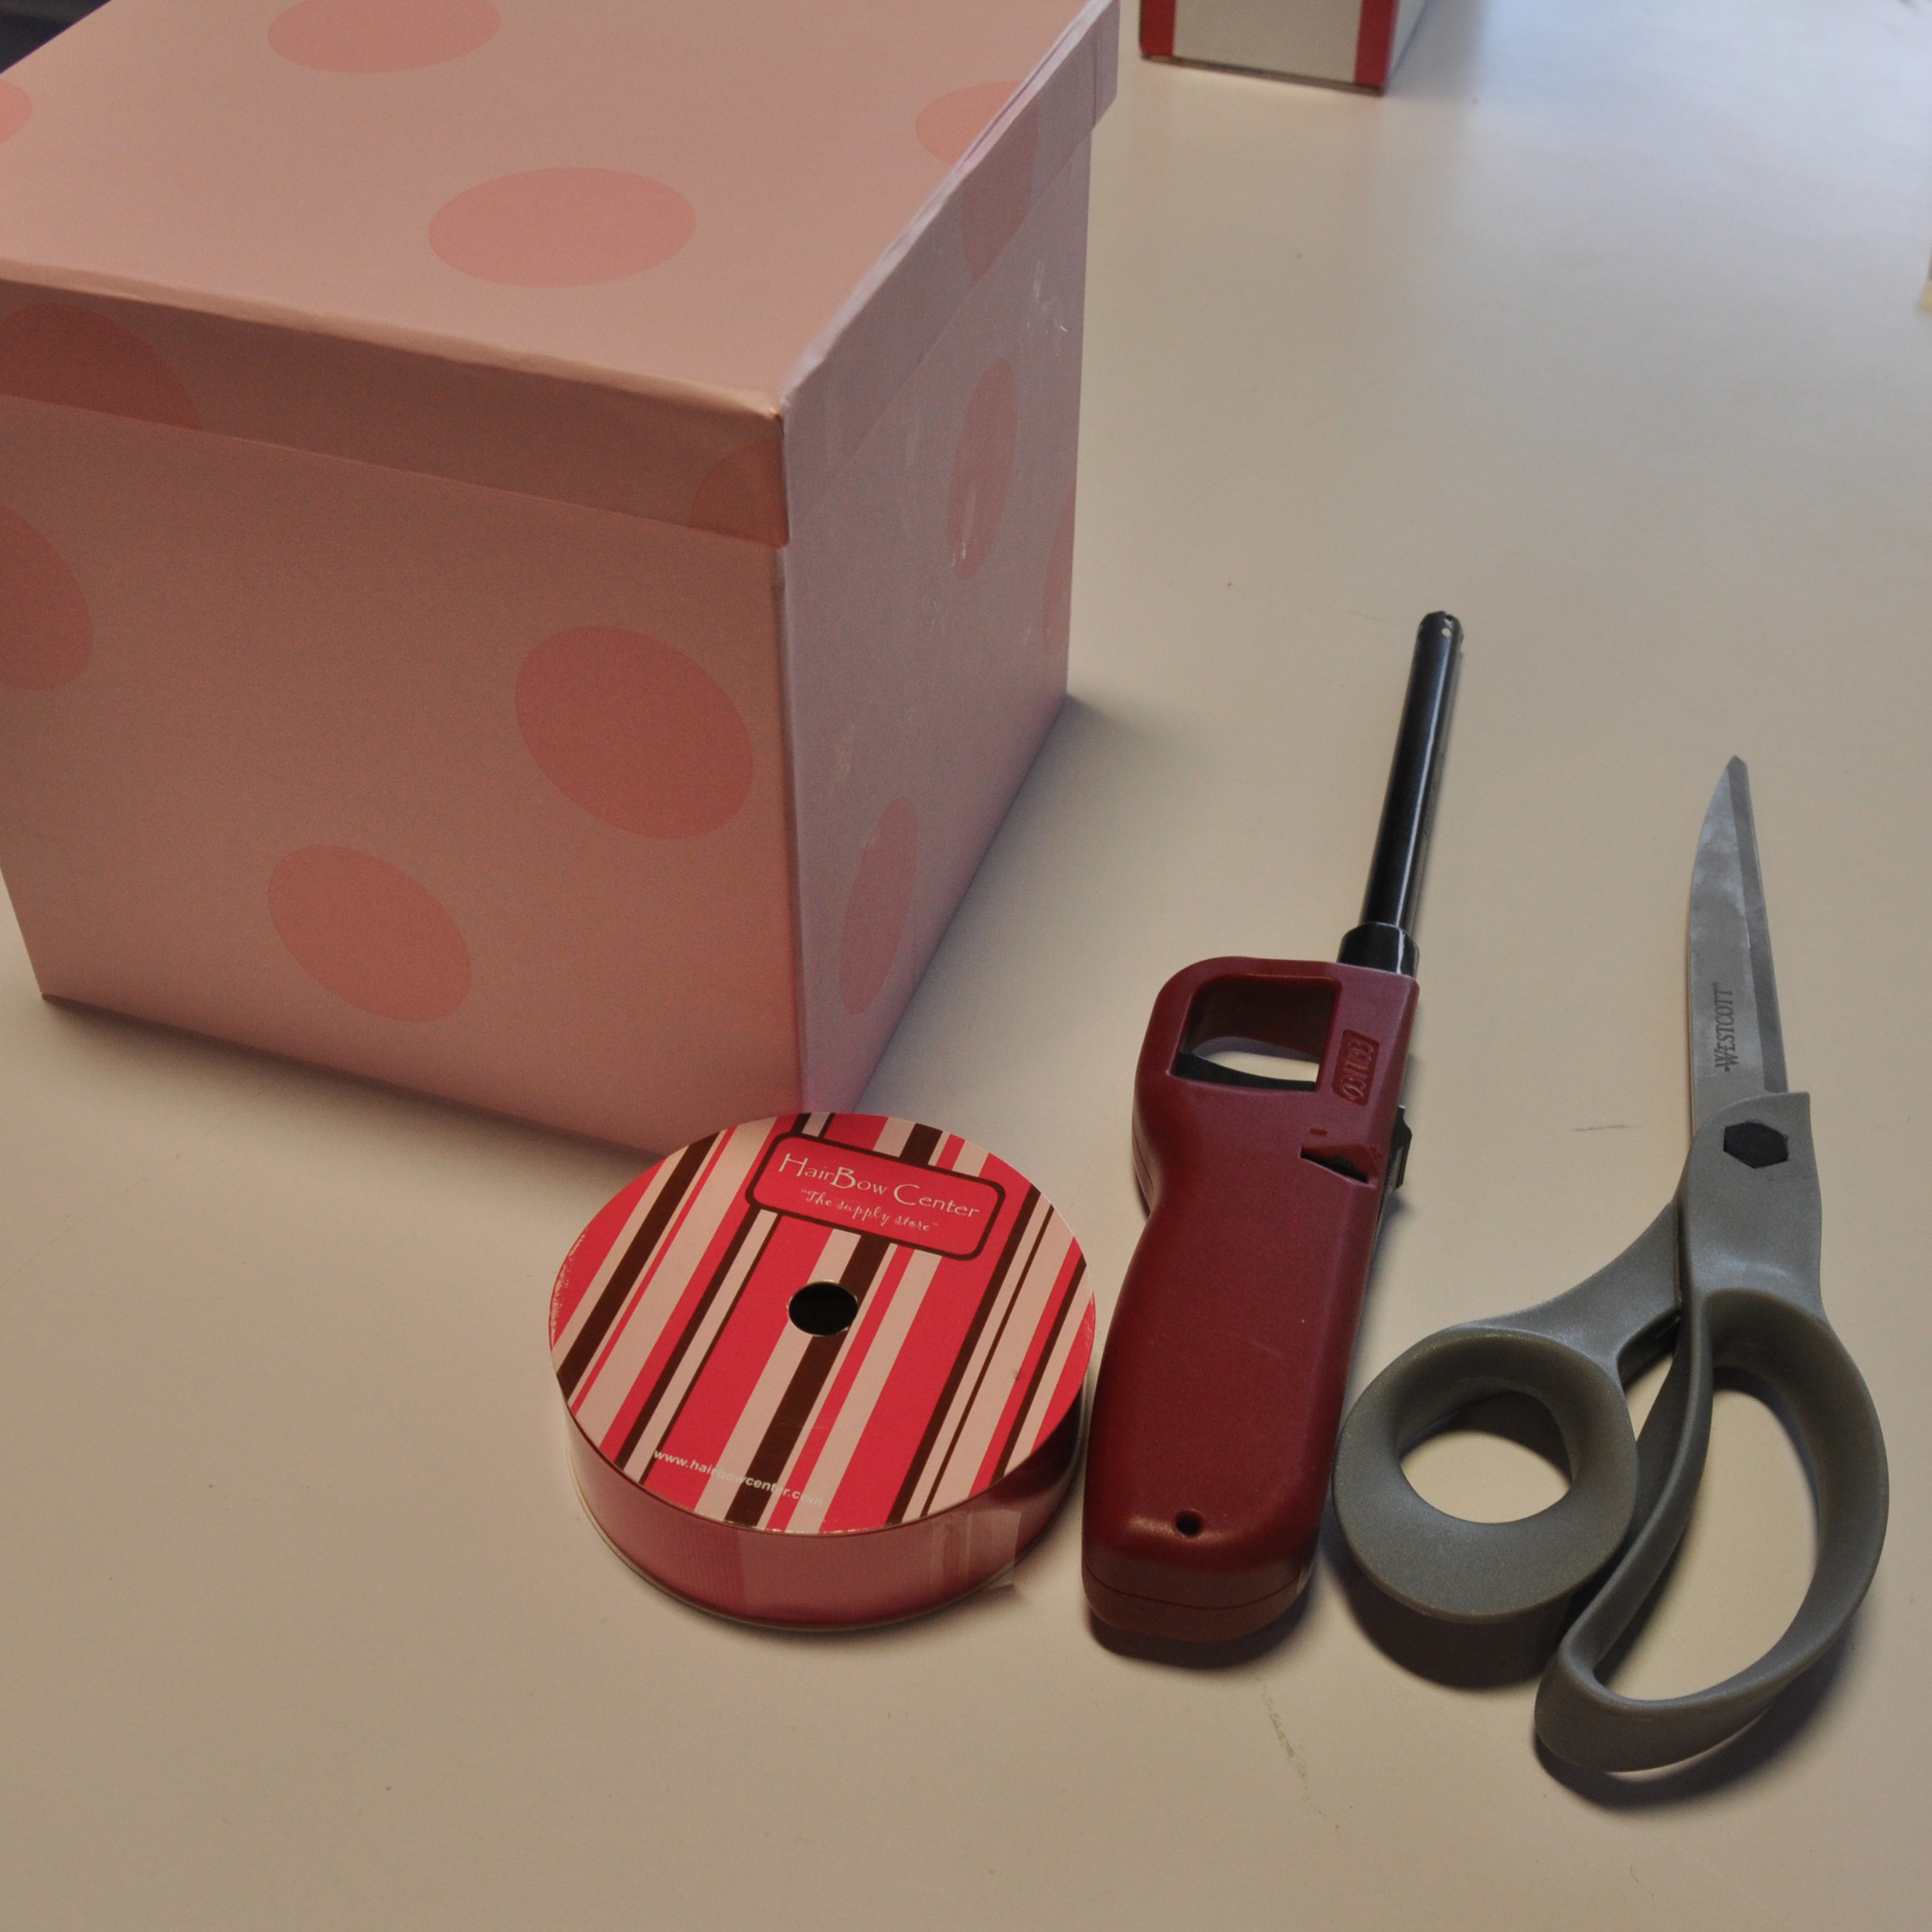 Materials:
- Pair of sharp scissors
- Ribbon (7/8" Shocking Pink grosgrain ribbon used)
- Lighter or other heat-sealing tool
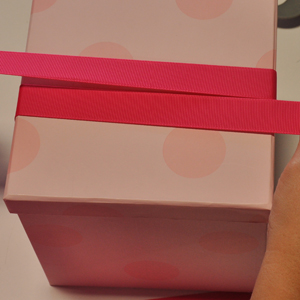 Wrap the left ribbon over and under the right ribbon.
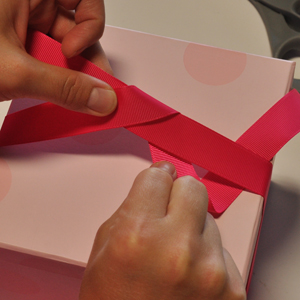 It produces the same half-knot used when tying a shoe.
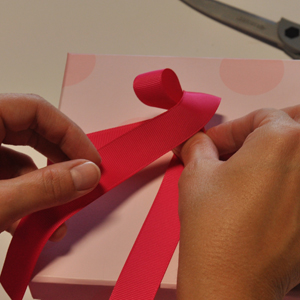
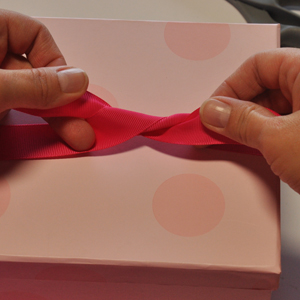 Create a loop with the ribbon now on the right. Make it a little larger than the desired final size.
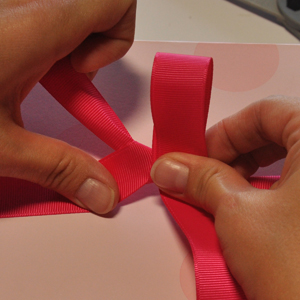 Move the ribbon on the left behind and around to the other side of the ribbon loop.
 Continue to bring the same ribbon around the front of the loop.
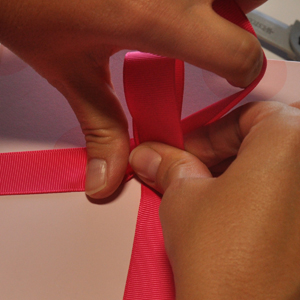
 With the same ribbon piece, continue to wrap it back around the back-side of the loop. To do this, you will need to push it with your thumb between the back of the original loop and the first part of the same piece you are using. This will create a new loop.
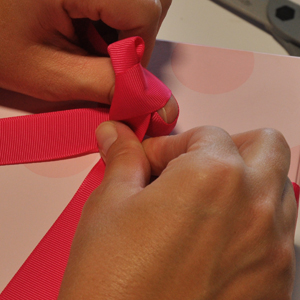 Pull on the loops of the bow and/or the tails to adjust the bow to your desired size and shape and to tighten the knot.
 Line the tails up together to make your desired finish cut so that the cut is the same on both pieces as made at the same time.
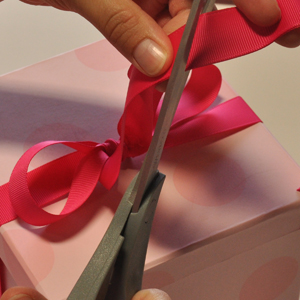 Use a lighter to run along the edge of the ribbon or your preferred method of heat-sealing. Some different types of ribbons do not require heat-sealing to prevent fraying, but the grosgrain ribbon used in our demonstration will need to be sealed.
 Congratulations on your Finished Bow
Visit the rest of our blog for more Crafting Tutorials and DIY Instructions!
Loading...

