
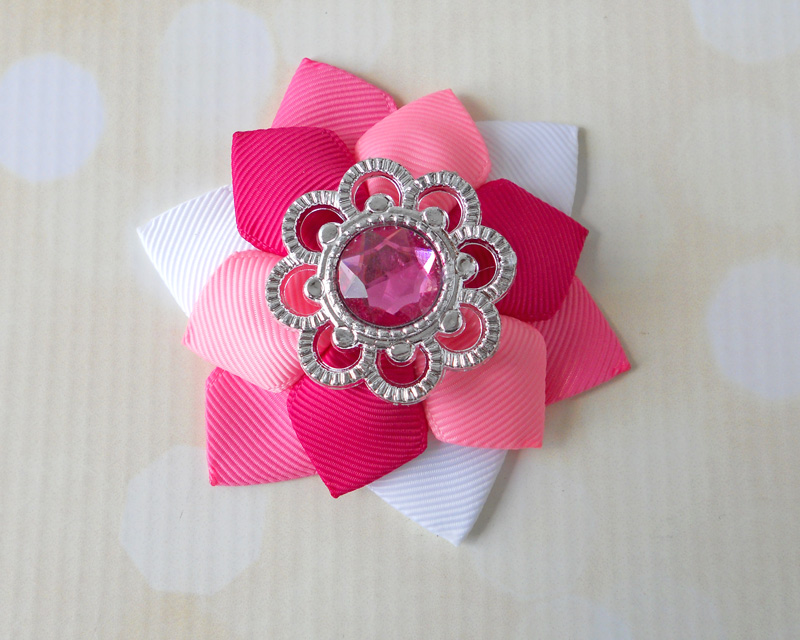
Hair flowers are SO popular right now, and I am especially loving this one made with ribbon, because, well, I love ribbon, too! This flower can take on so many unique looks as it can be made with a couple layers, lots of layers, just one layer, different types of ribbons, printed and solids mixed, small and dainty or big and bold, and of course a vast array of styles of center embellishments from cute buttons to classy rhinestone or pearl centers. Thanks for sharing with us, Danielle!
Contributor post by Danielle at Korker Krazy
Valentine's Day is almost here! This is the perfect flower to make for your little sweetie!
Supplies Needed:
7/8" Grosgrain Ribbon (I'm using White, Hot Pink, Bubble Gum and Fuchsia.) Needle & Upholstery Thread Hot Glue Gun & Glue Scissors & Lighter Wood Burner Rhinestone Center
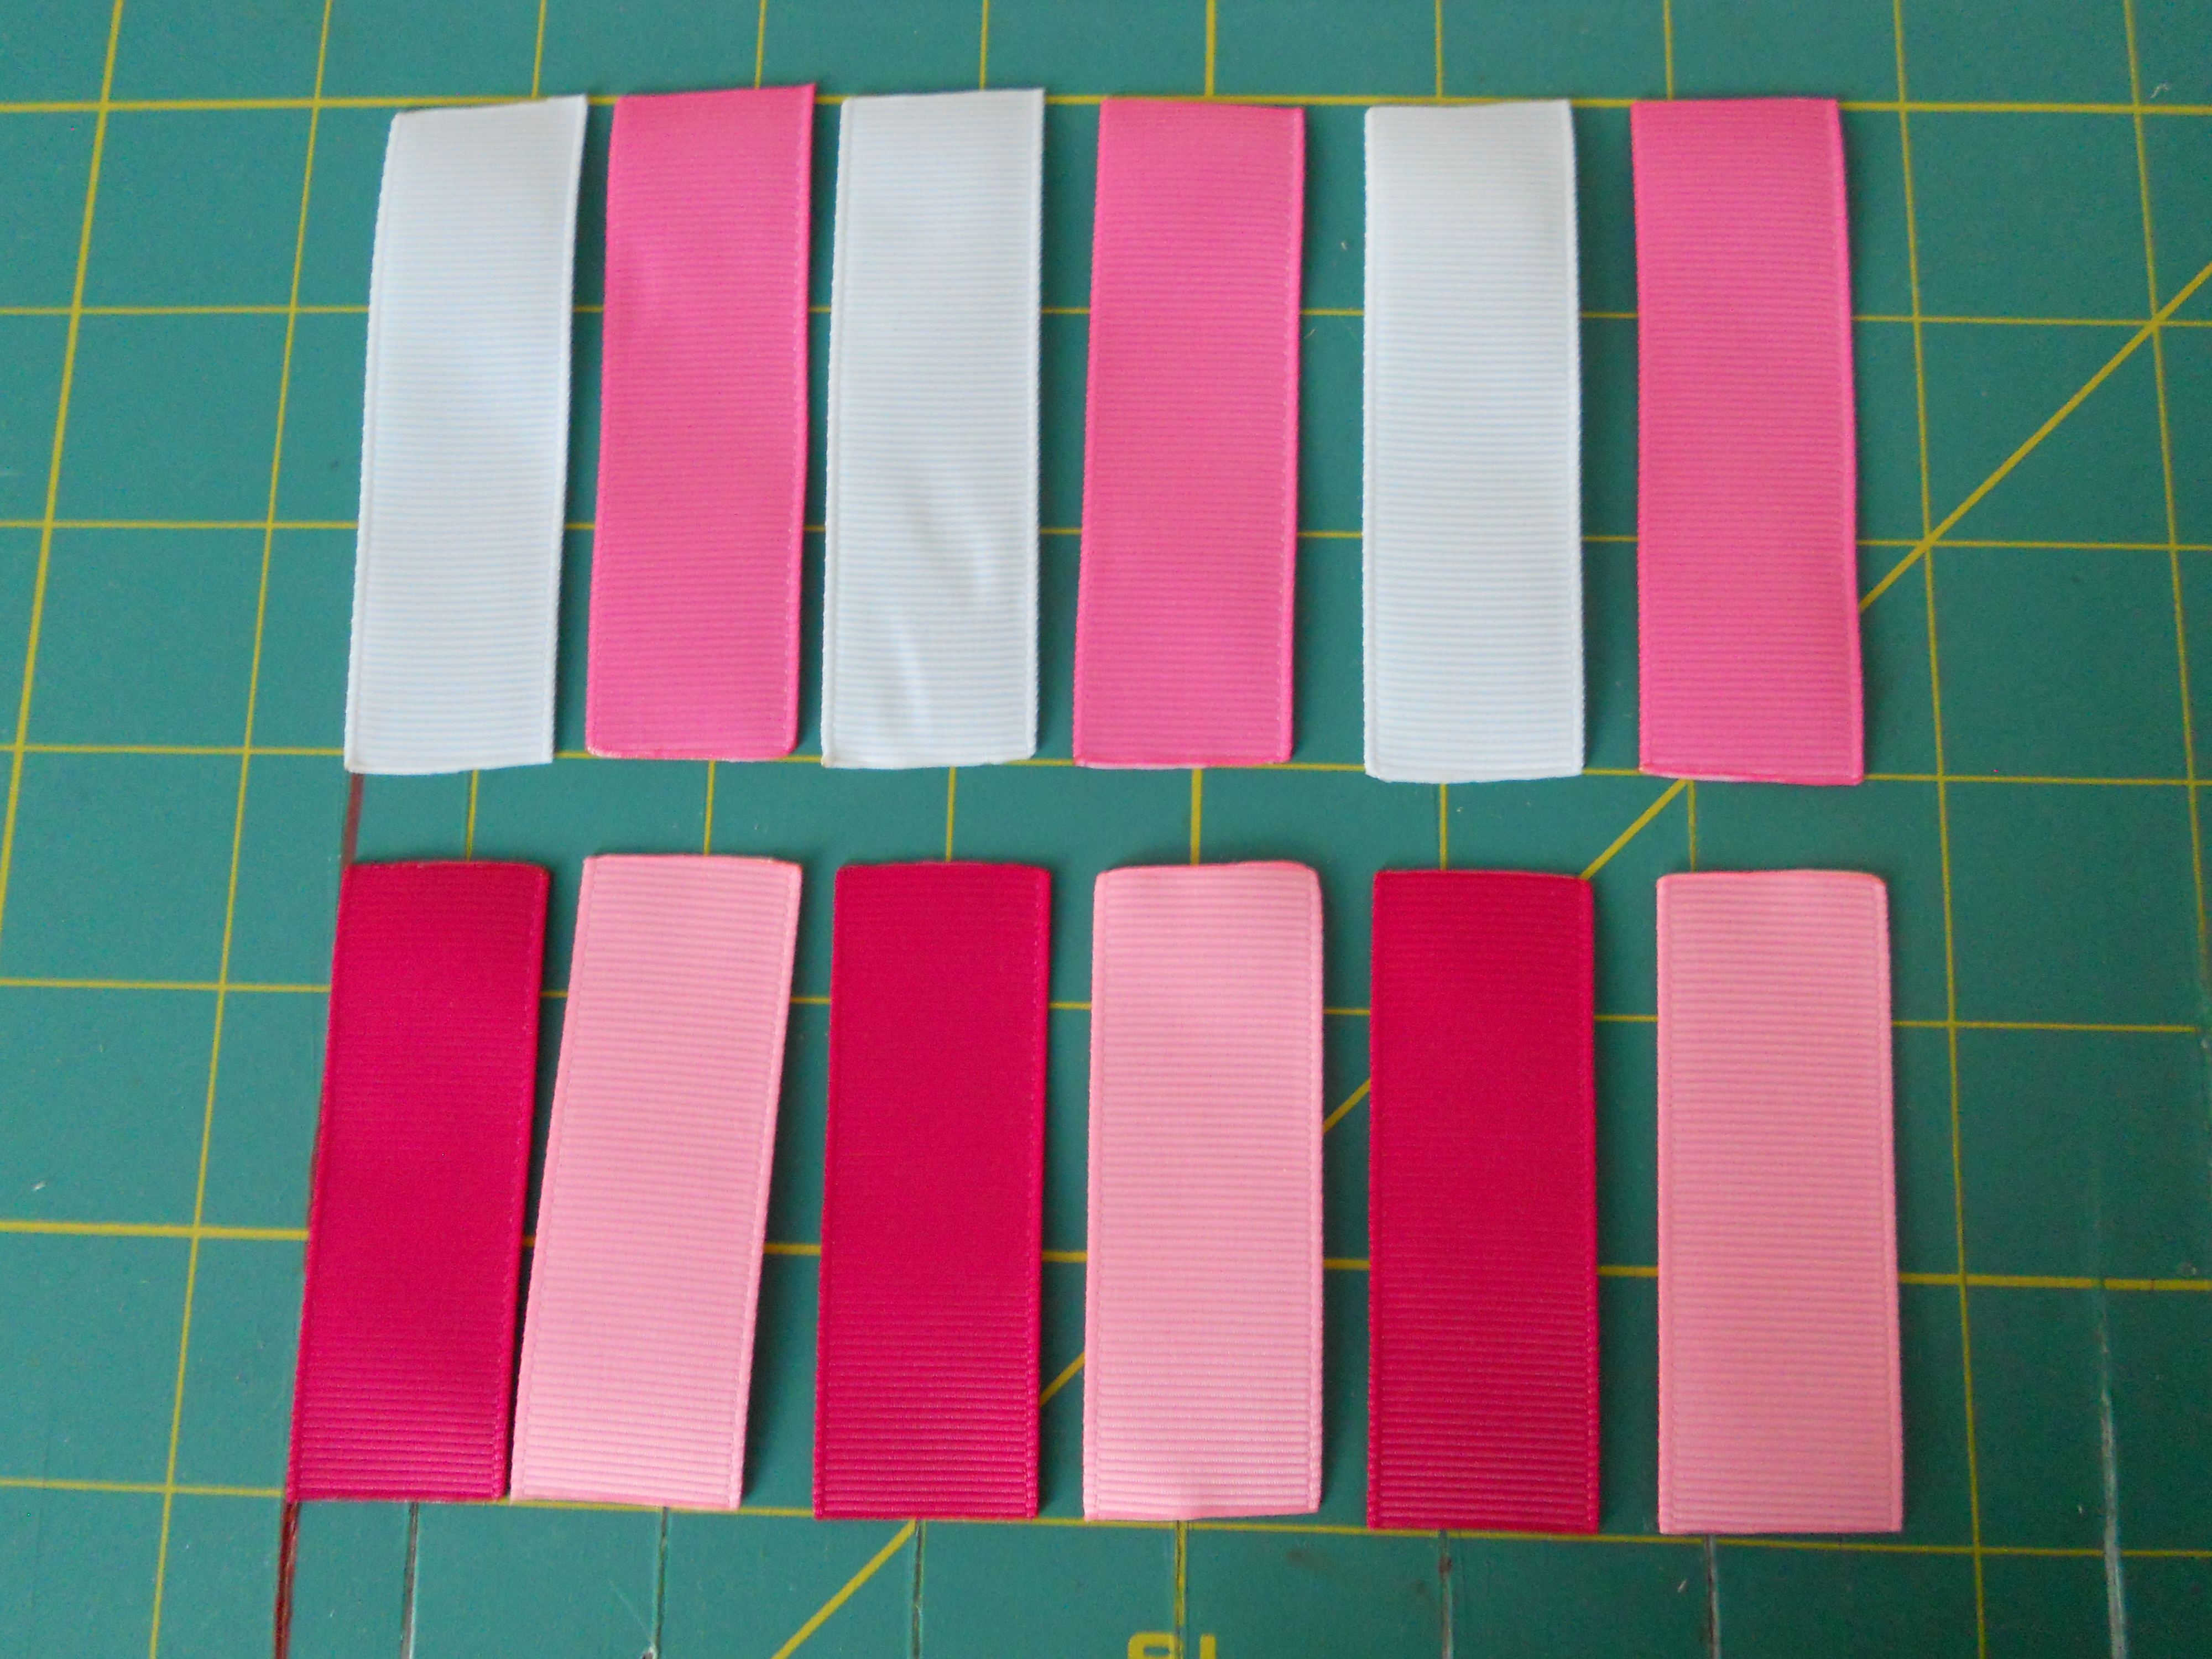
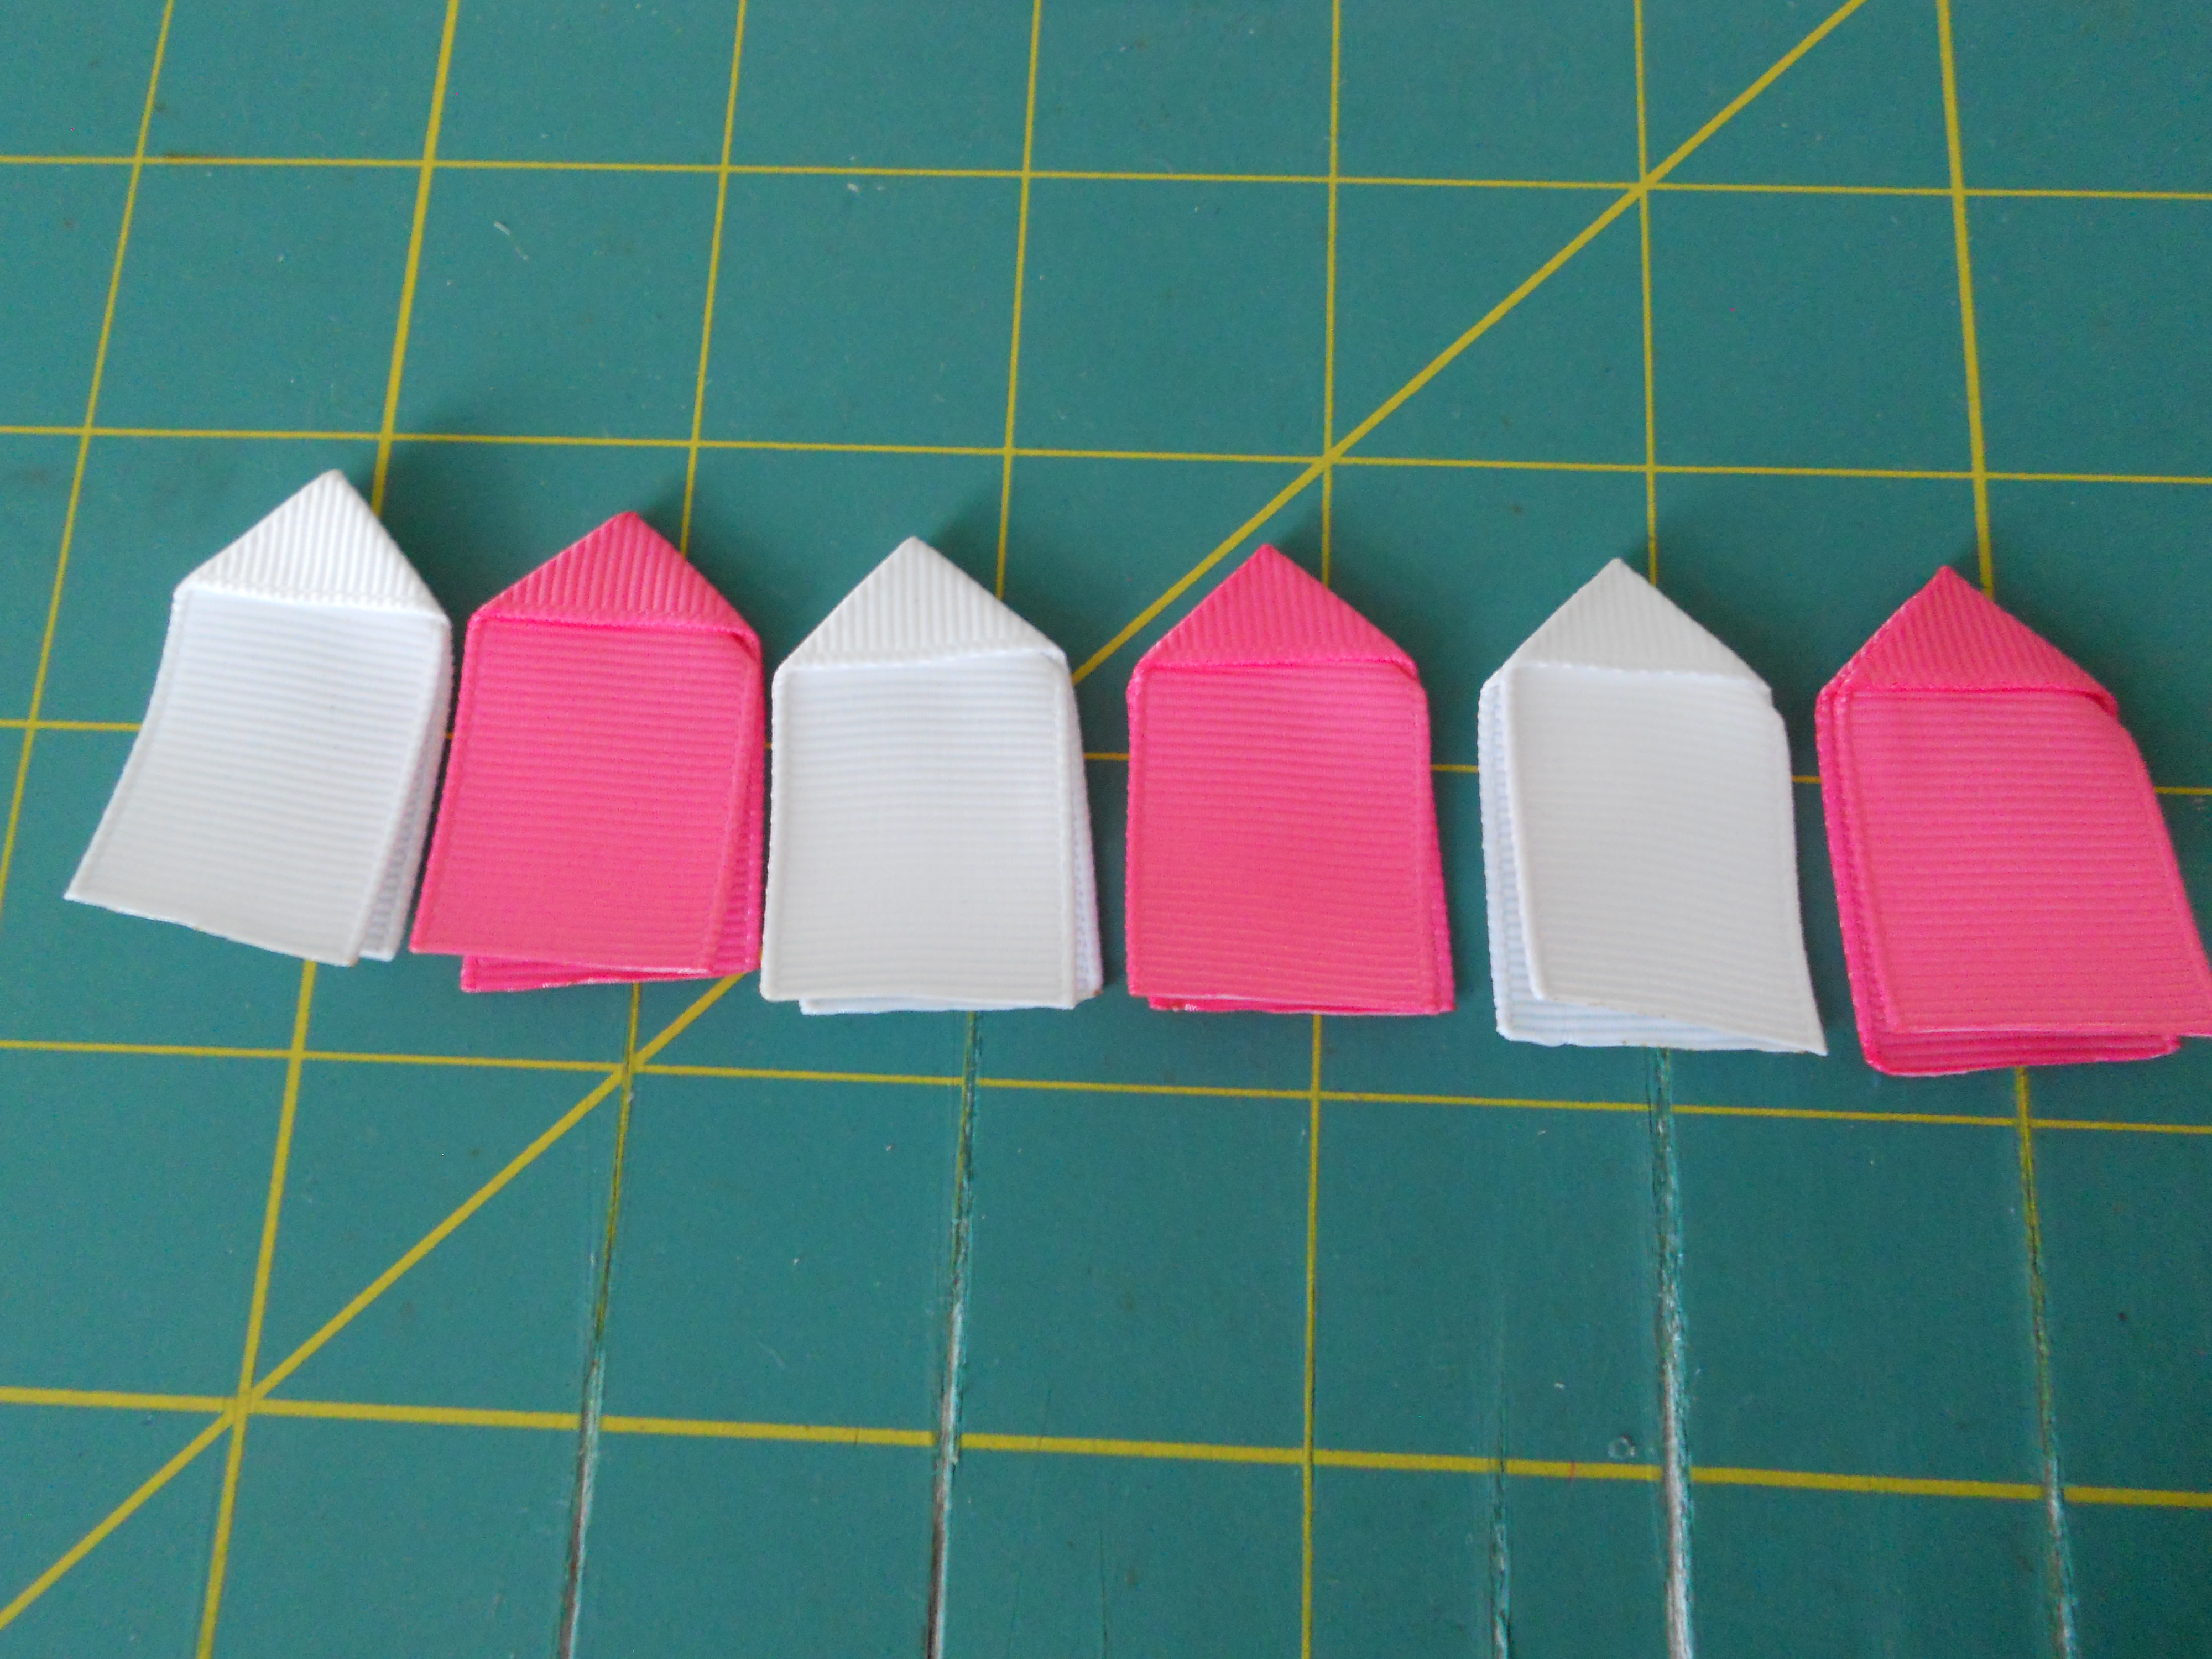
Step 1: Cut your ribbon pieces. You need six 2.5" pieces and six 3" pieces. I cut three pieces each of fuschia and bubble gum at 2.5" - these will be my top layer. I cut three pieces each of white and hot pink at 3" - these will be my bottom layer. If you did not cut your ribbon with a wood burner, heat seal your ends.

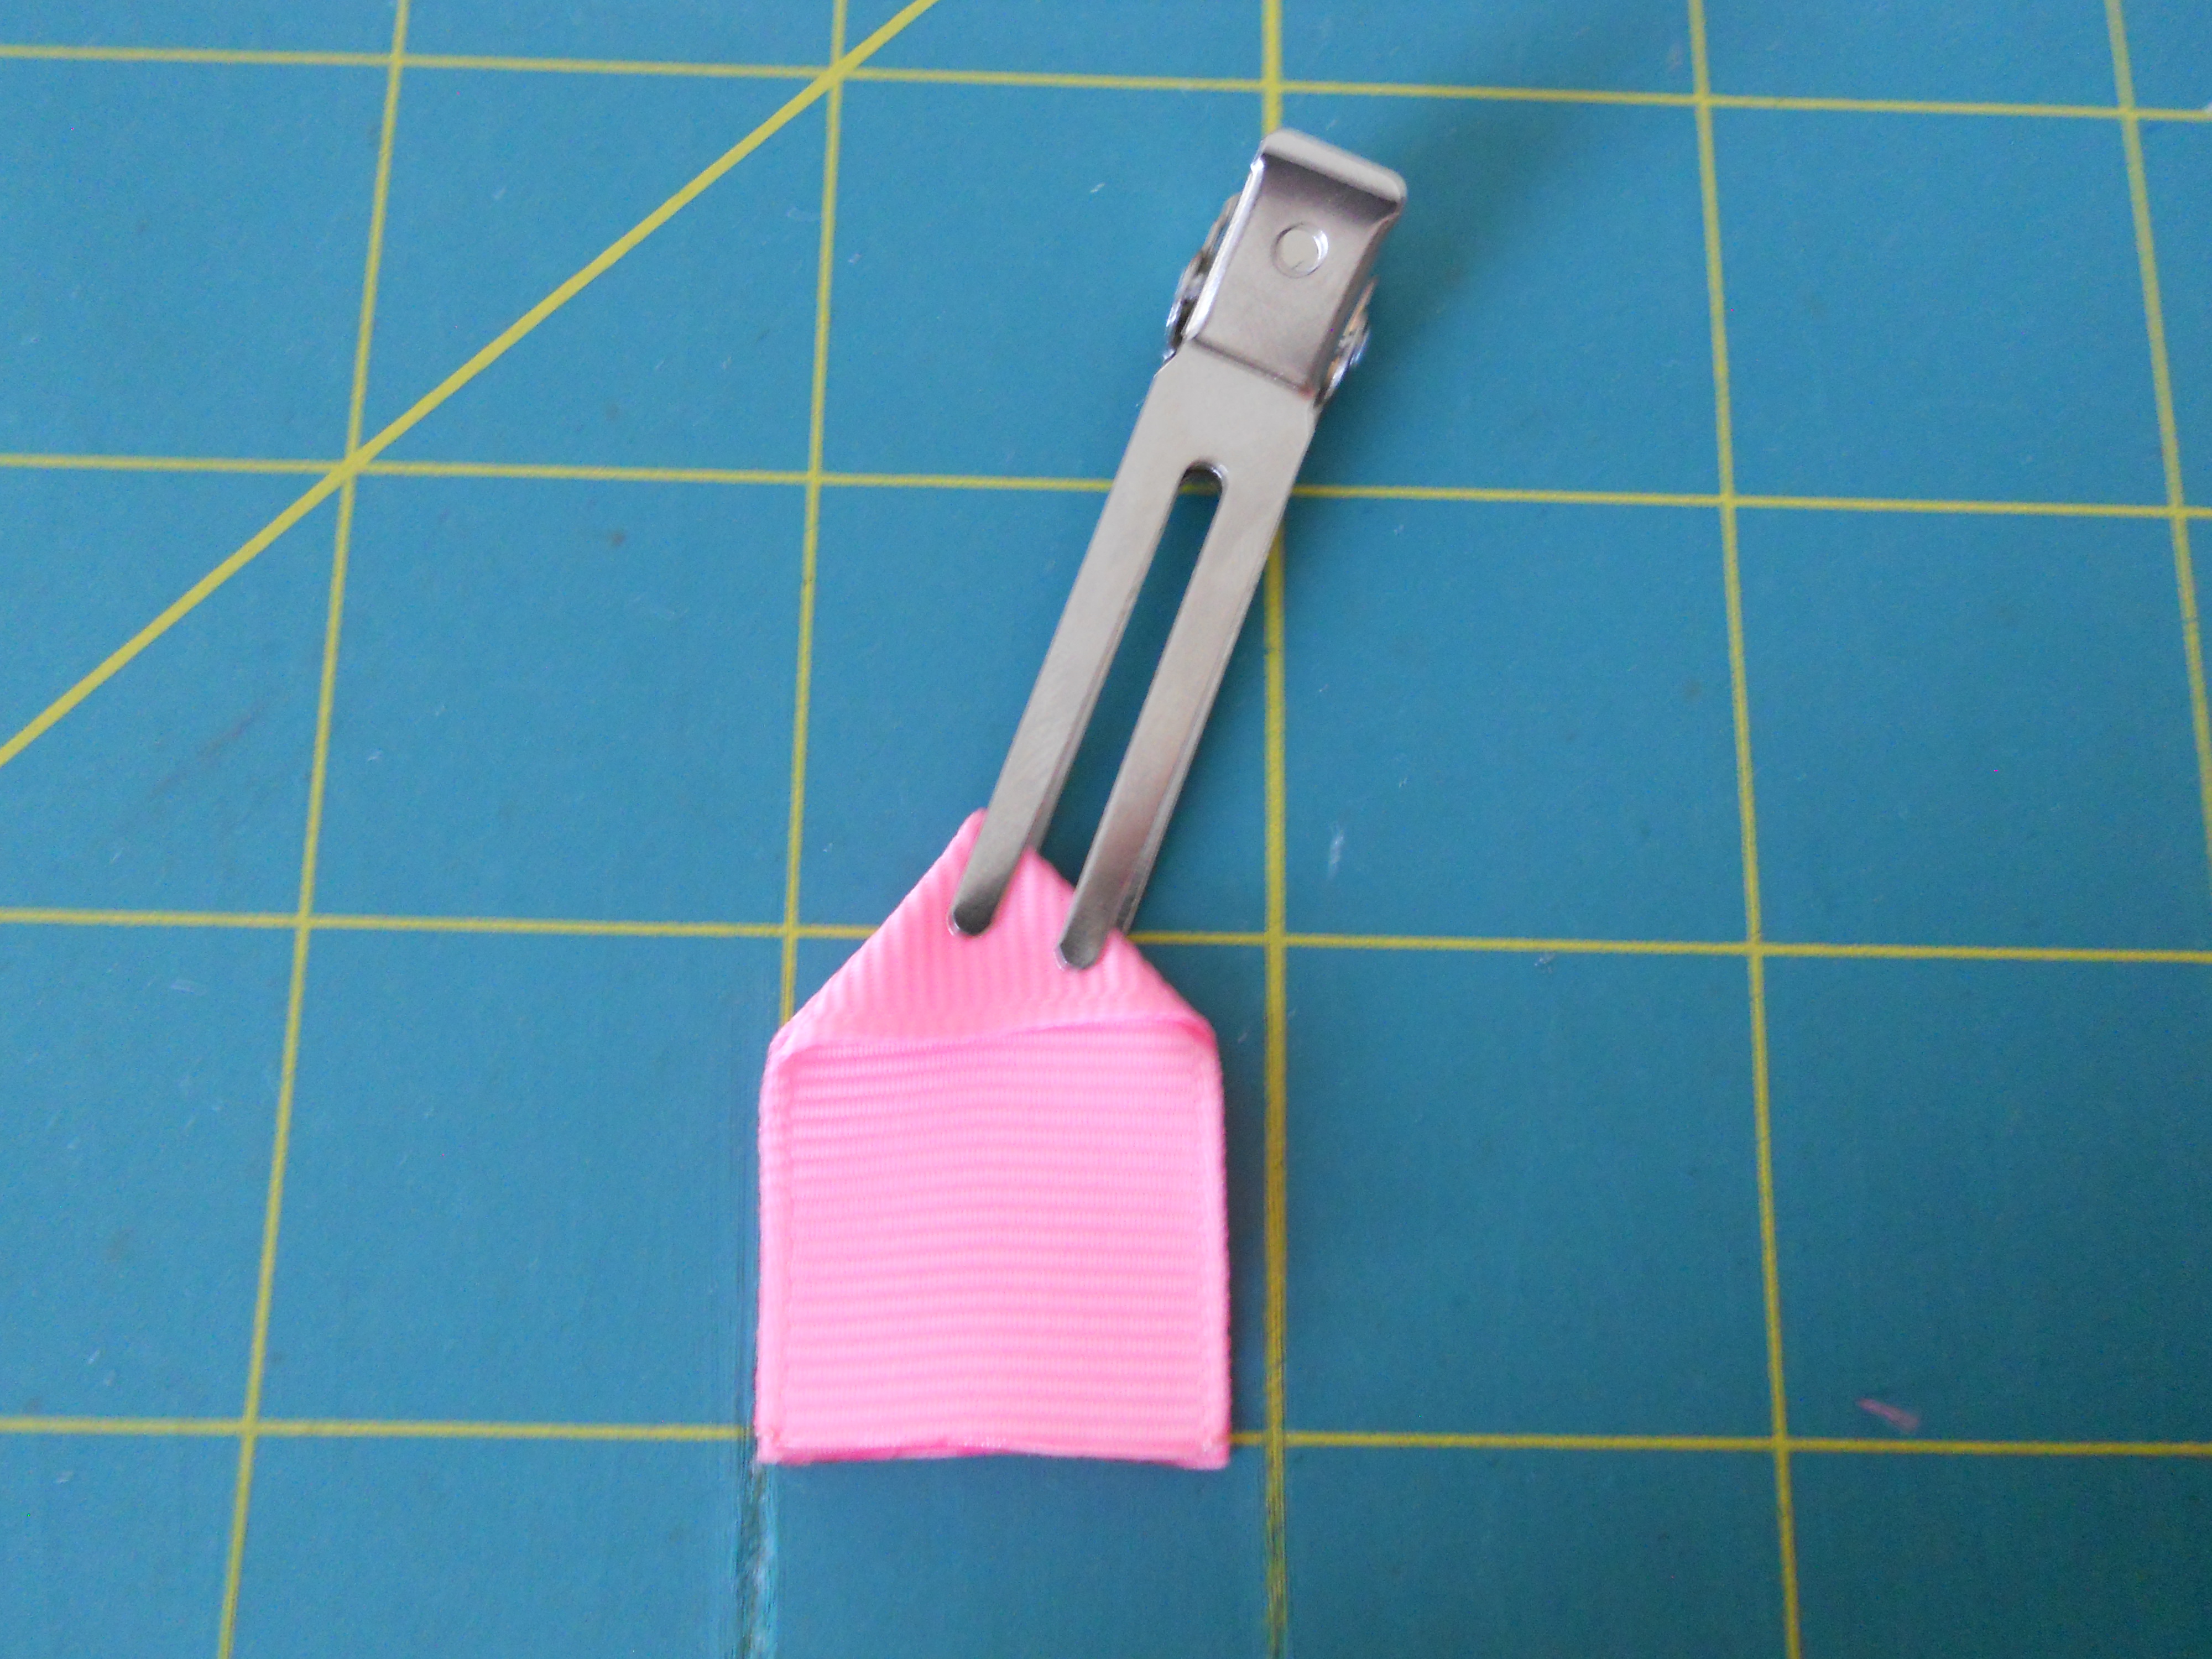
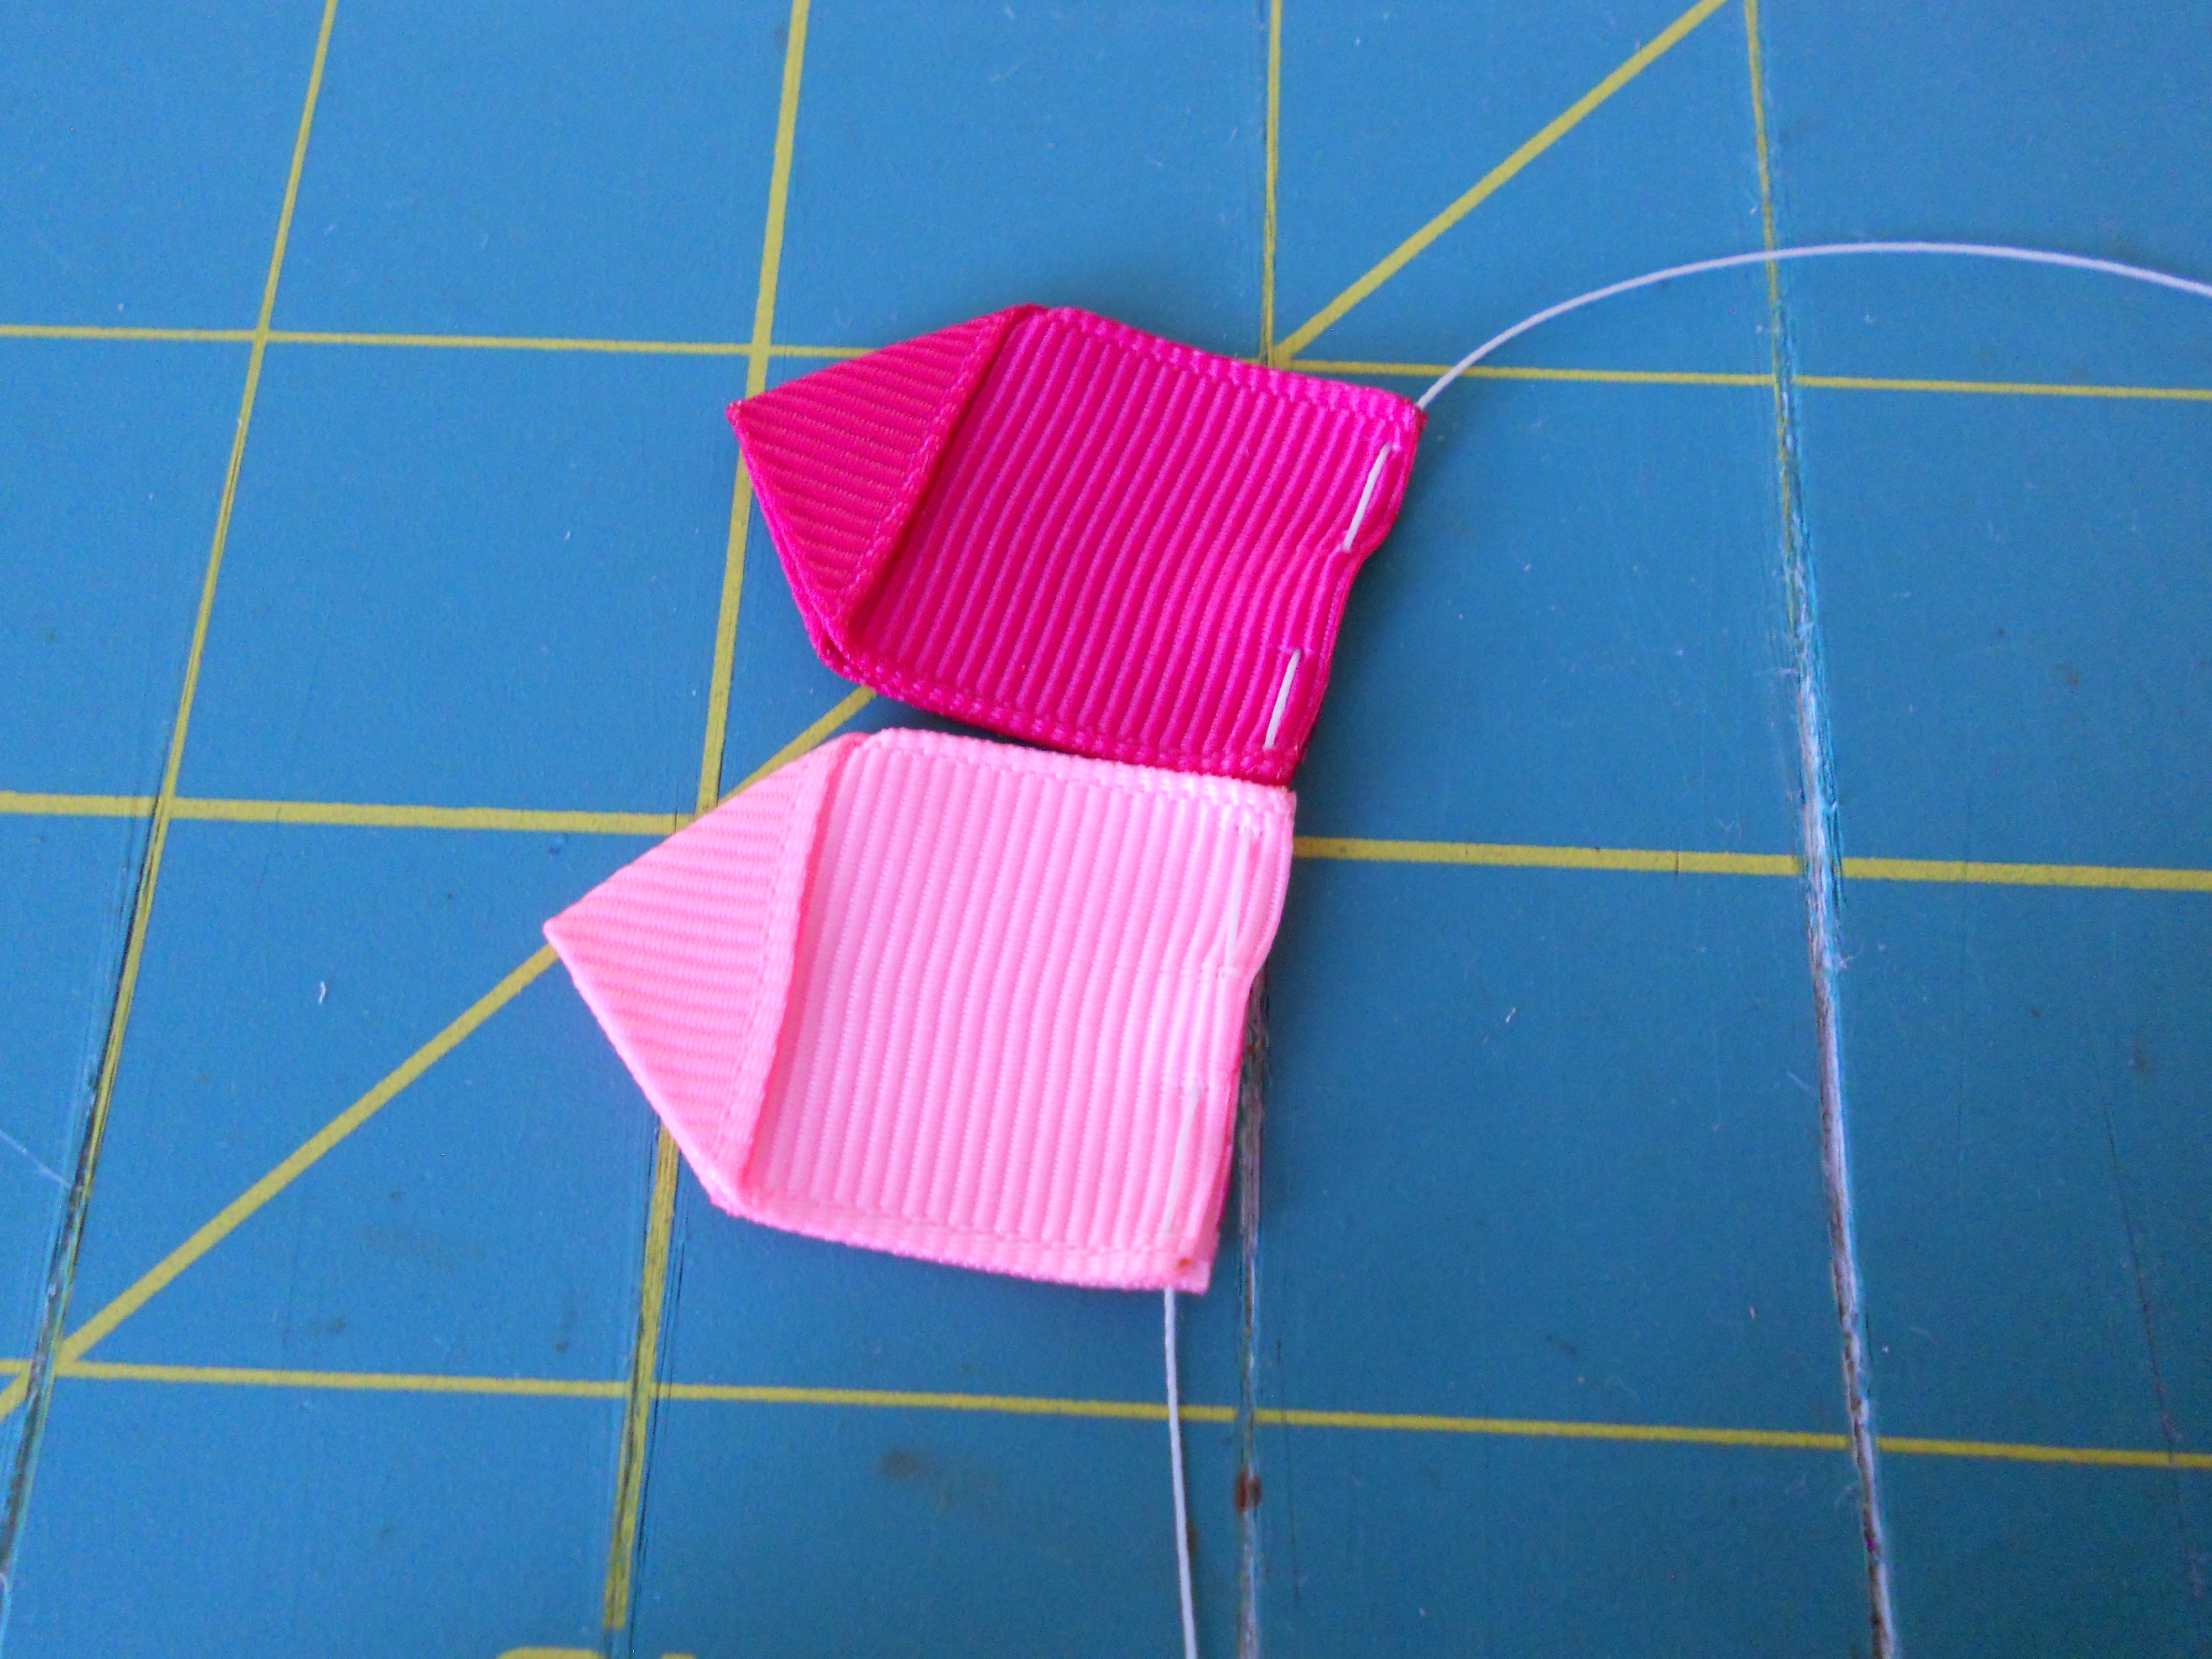
Step 2: Make your flower petals. I'm starting with my top ribbon flower. Take one piece and fold the top over to the left at a 90 degree angle. Next, fold that same piece back down on top of the other side of the ribbon, make sure your ends are lined up evenly.
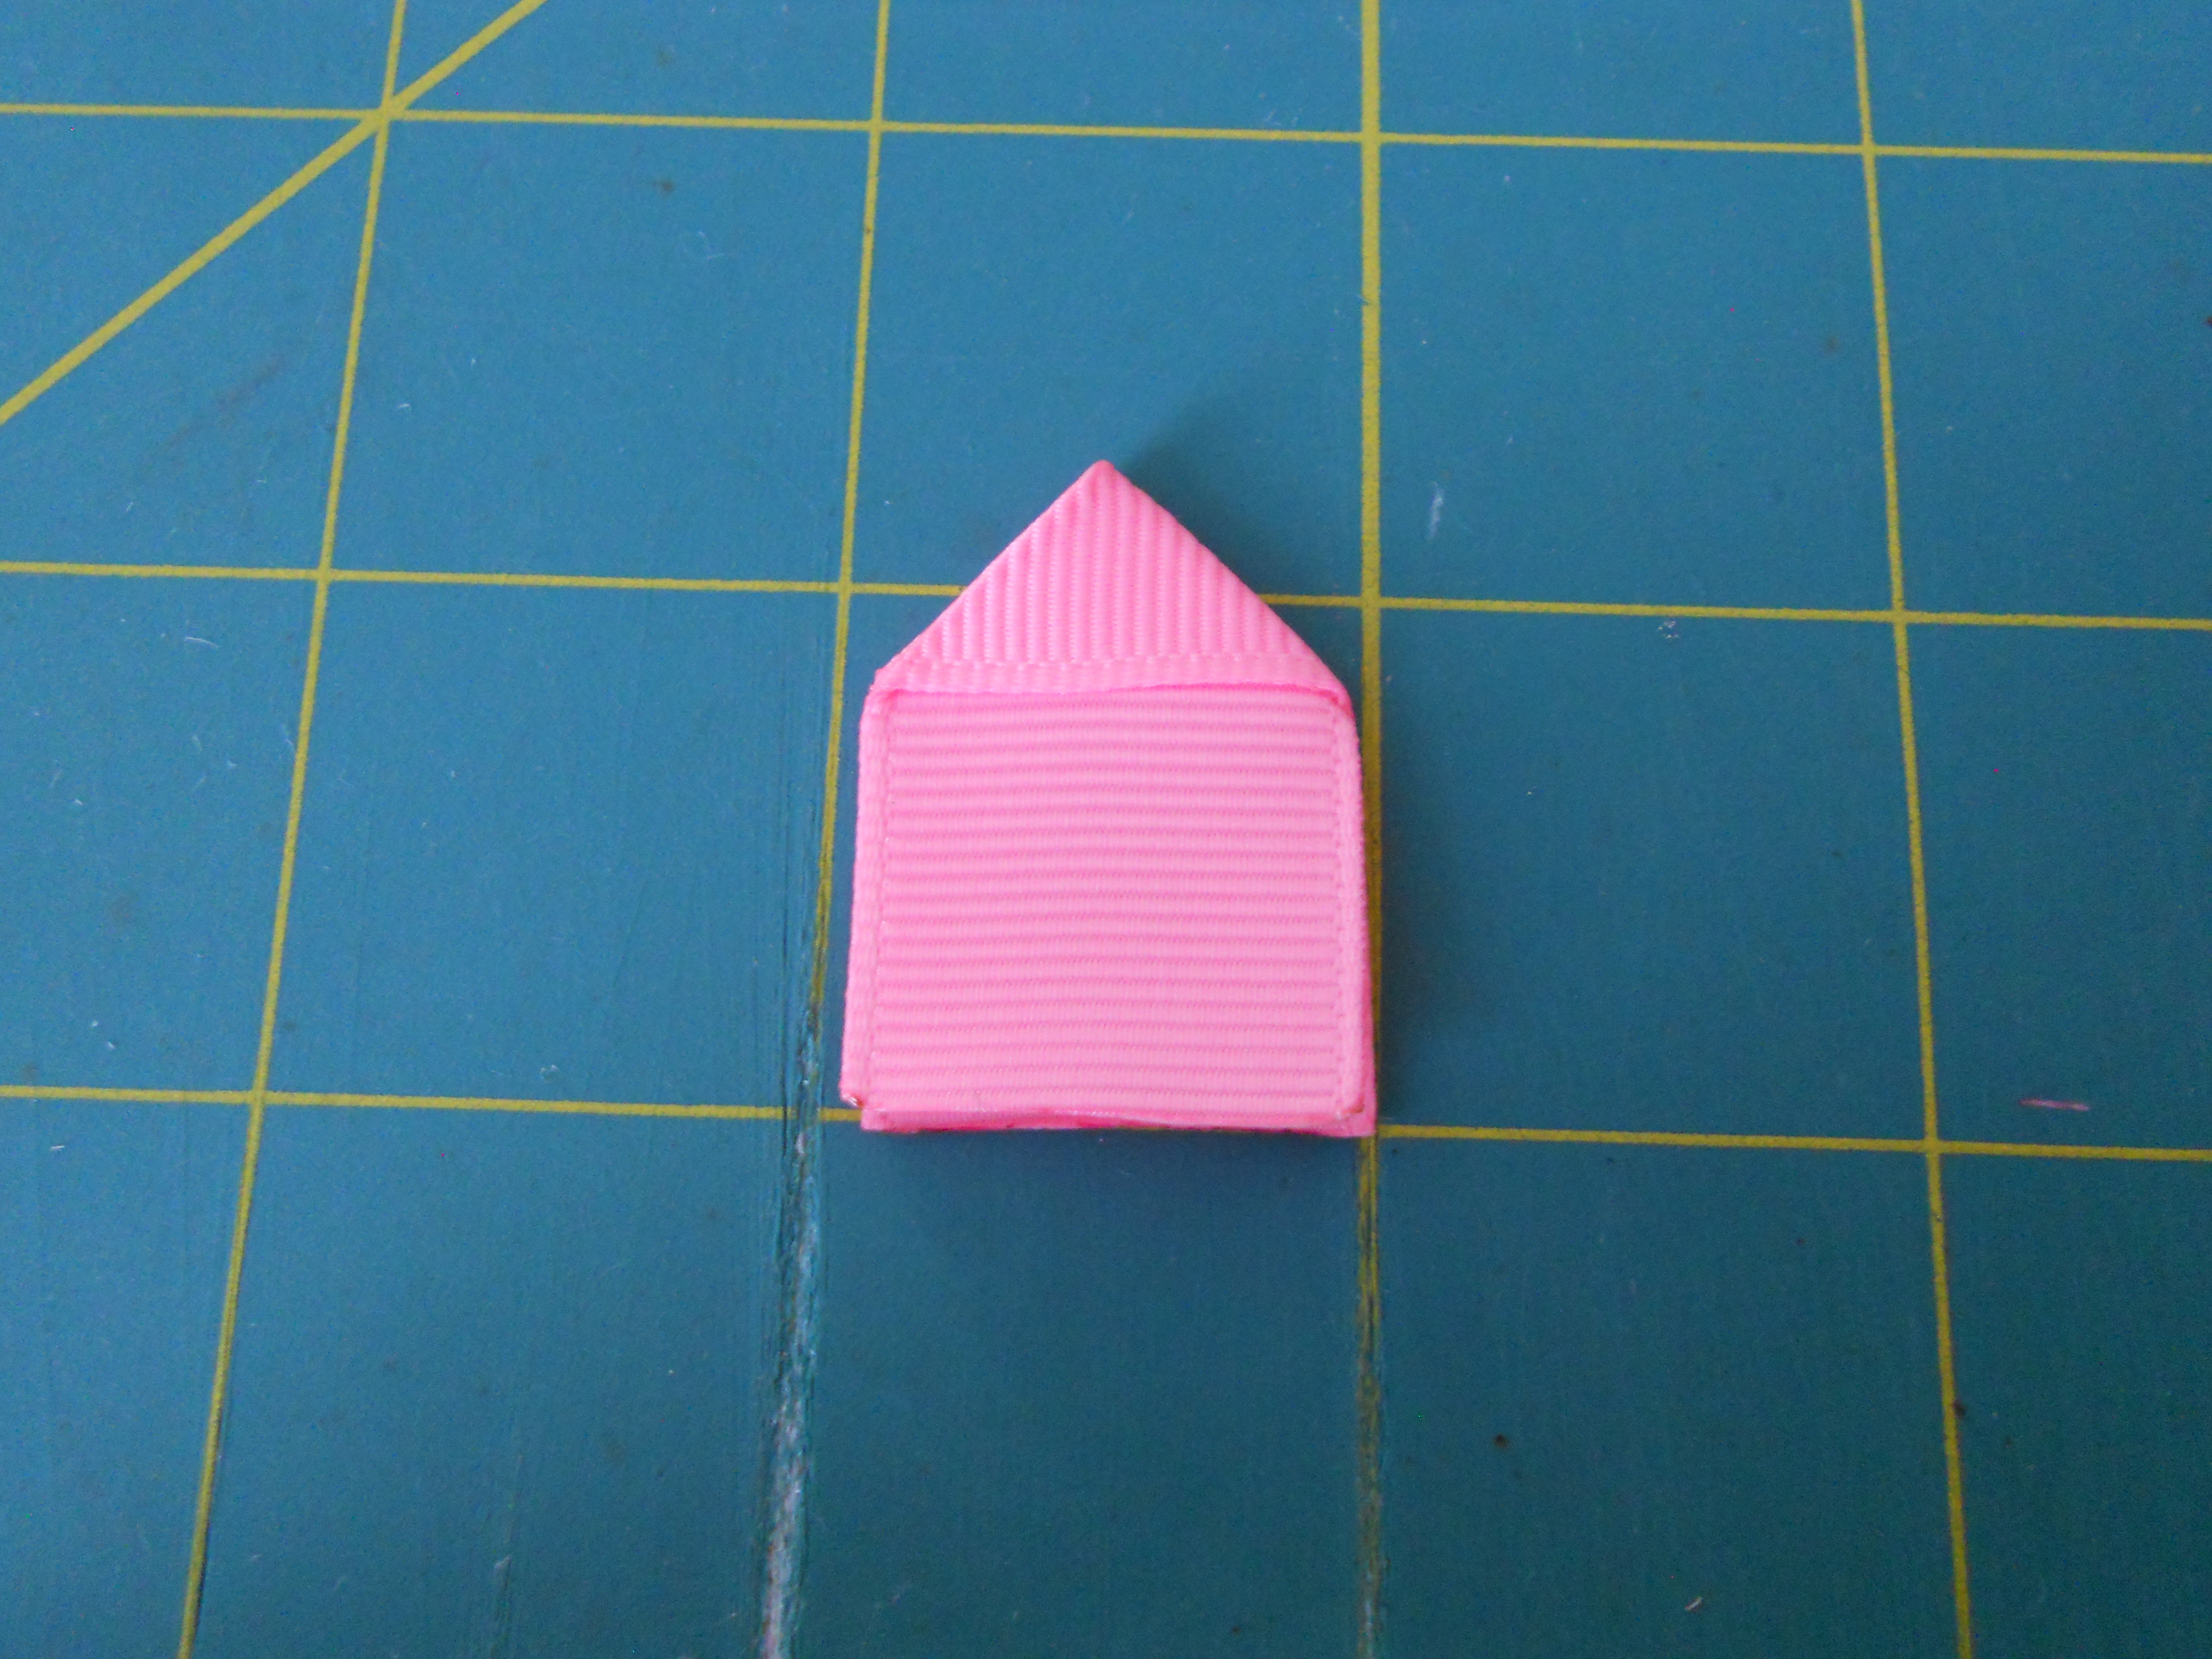
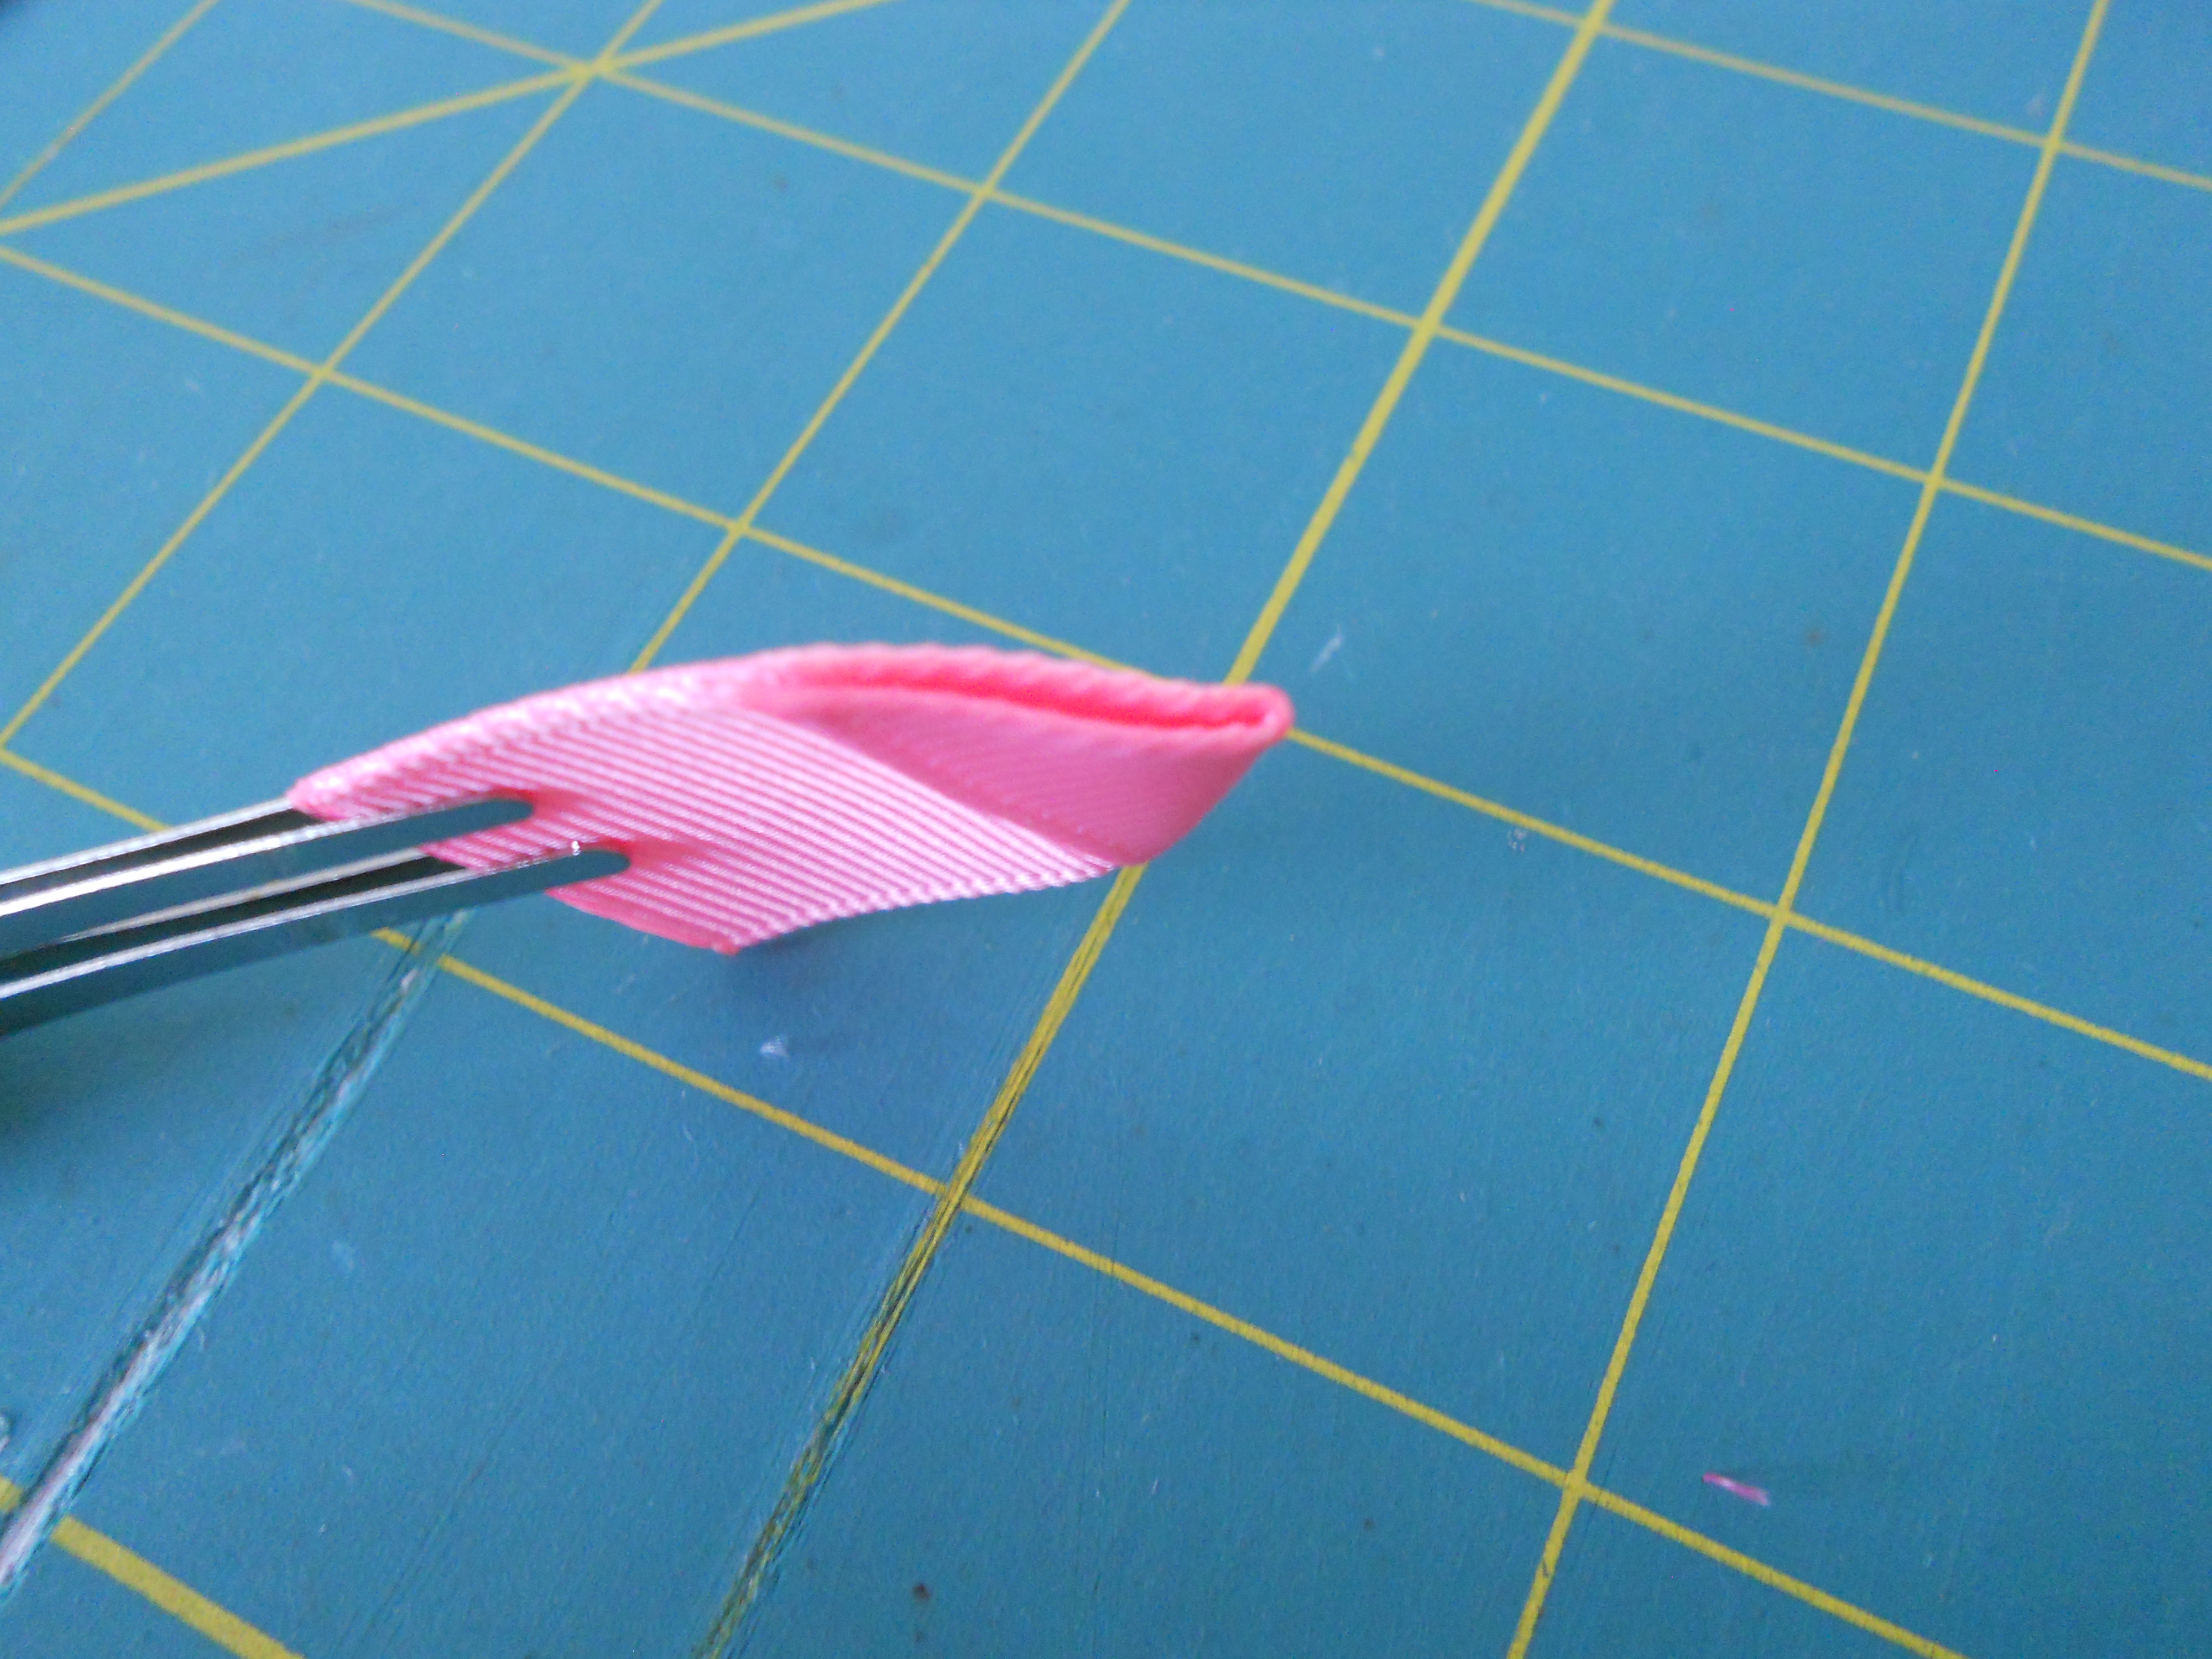
Step 3: Run your lighter gently along the edges of the triangle and press the ribbon together. This will allow your ribbon petal to have crisp edges that stay together. Be careful not to hold the lighter on the ribbon too long because it will melt or turn brown.
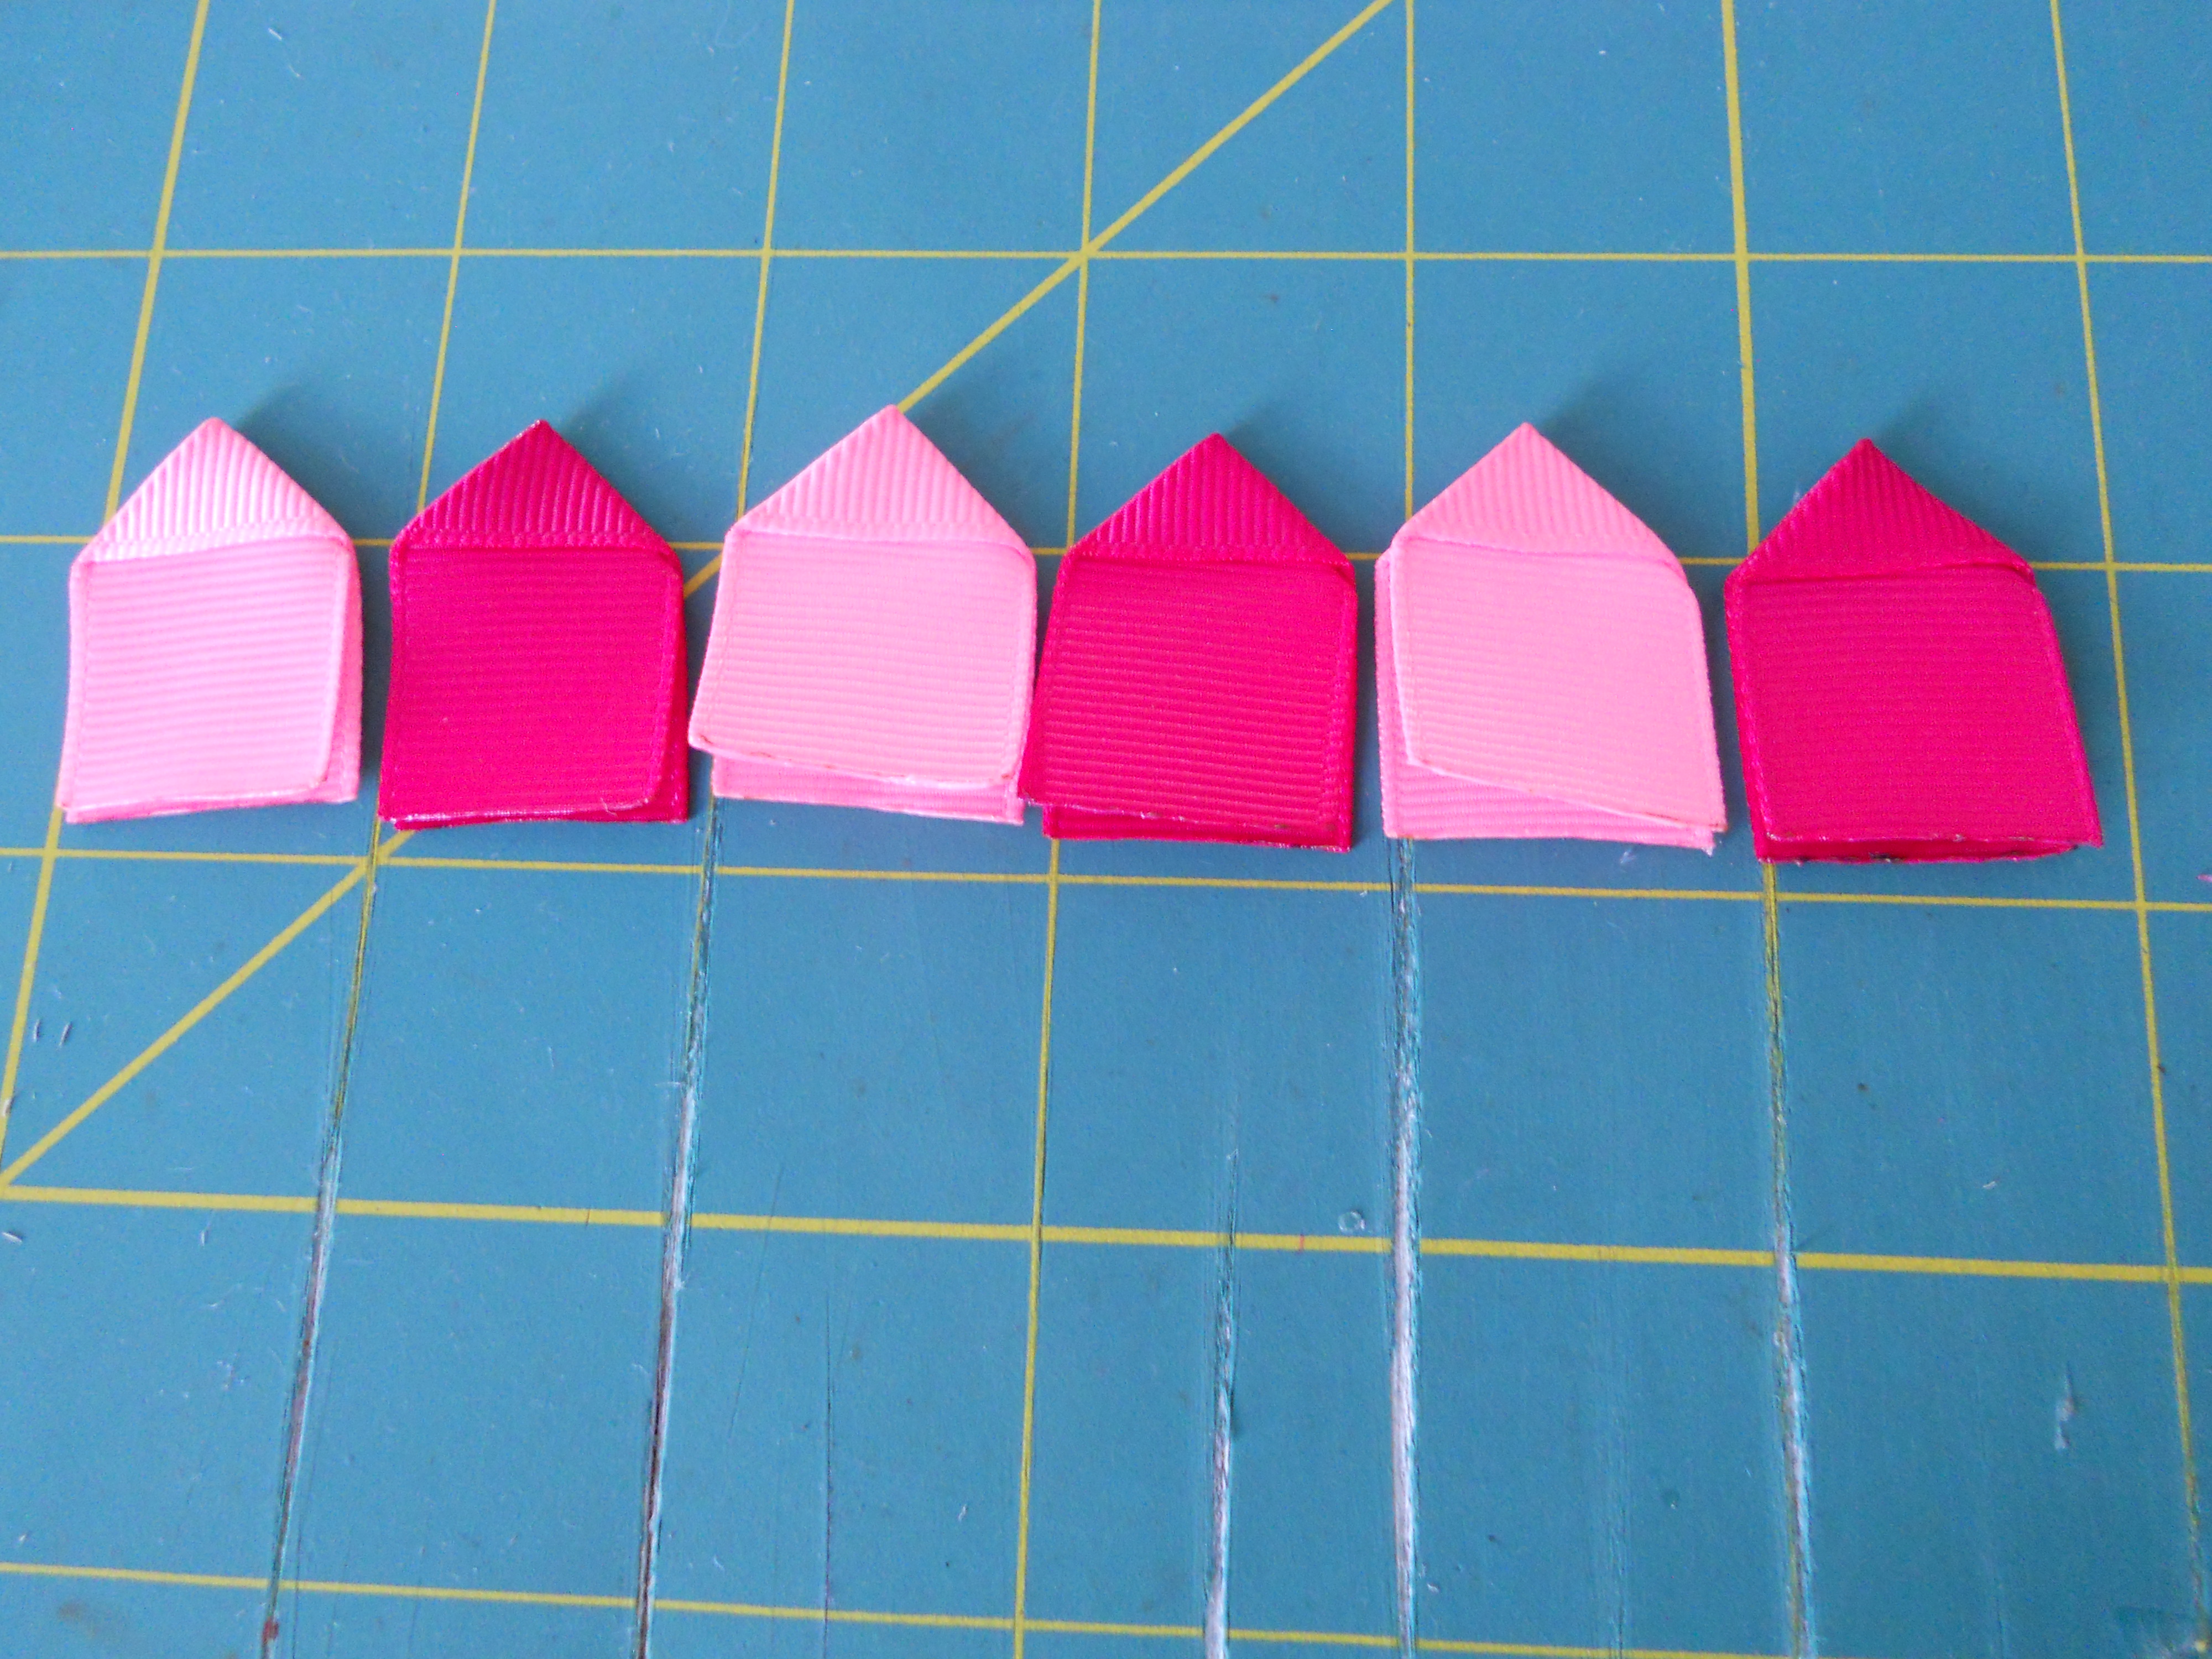
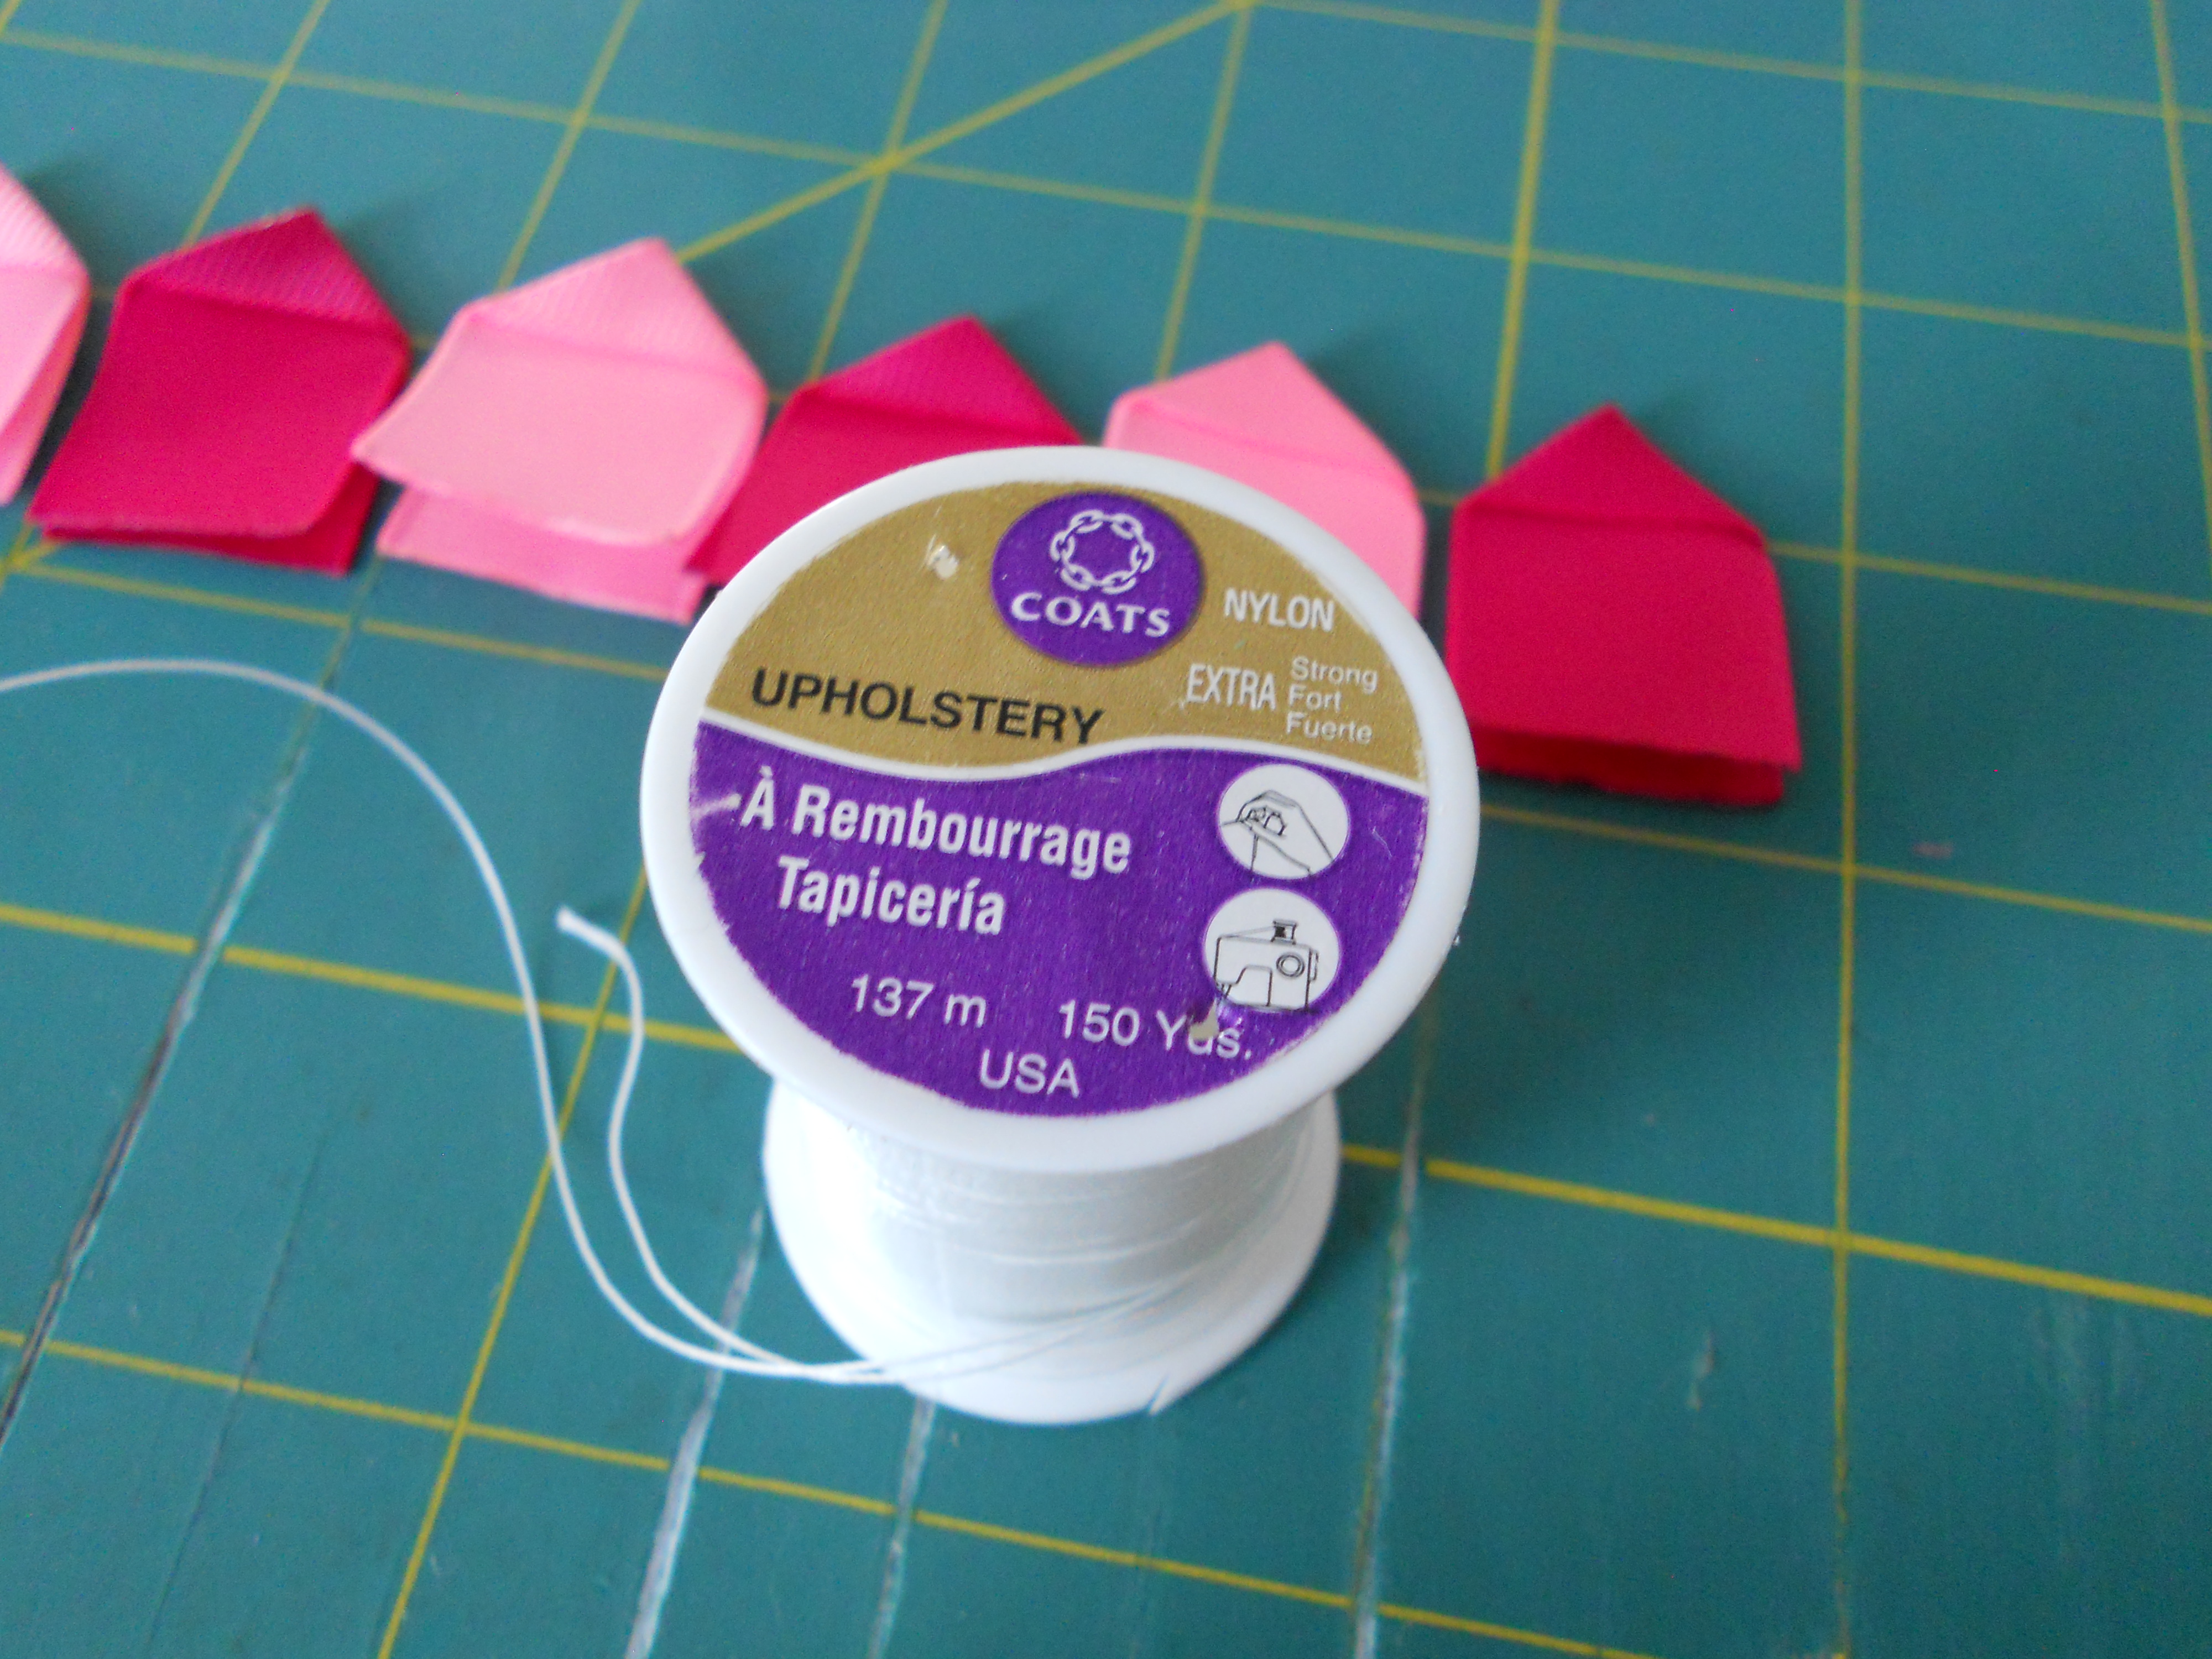
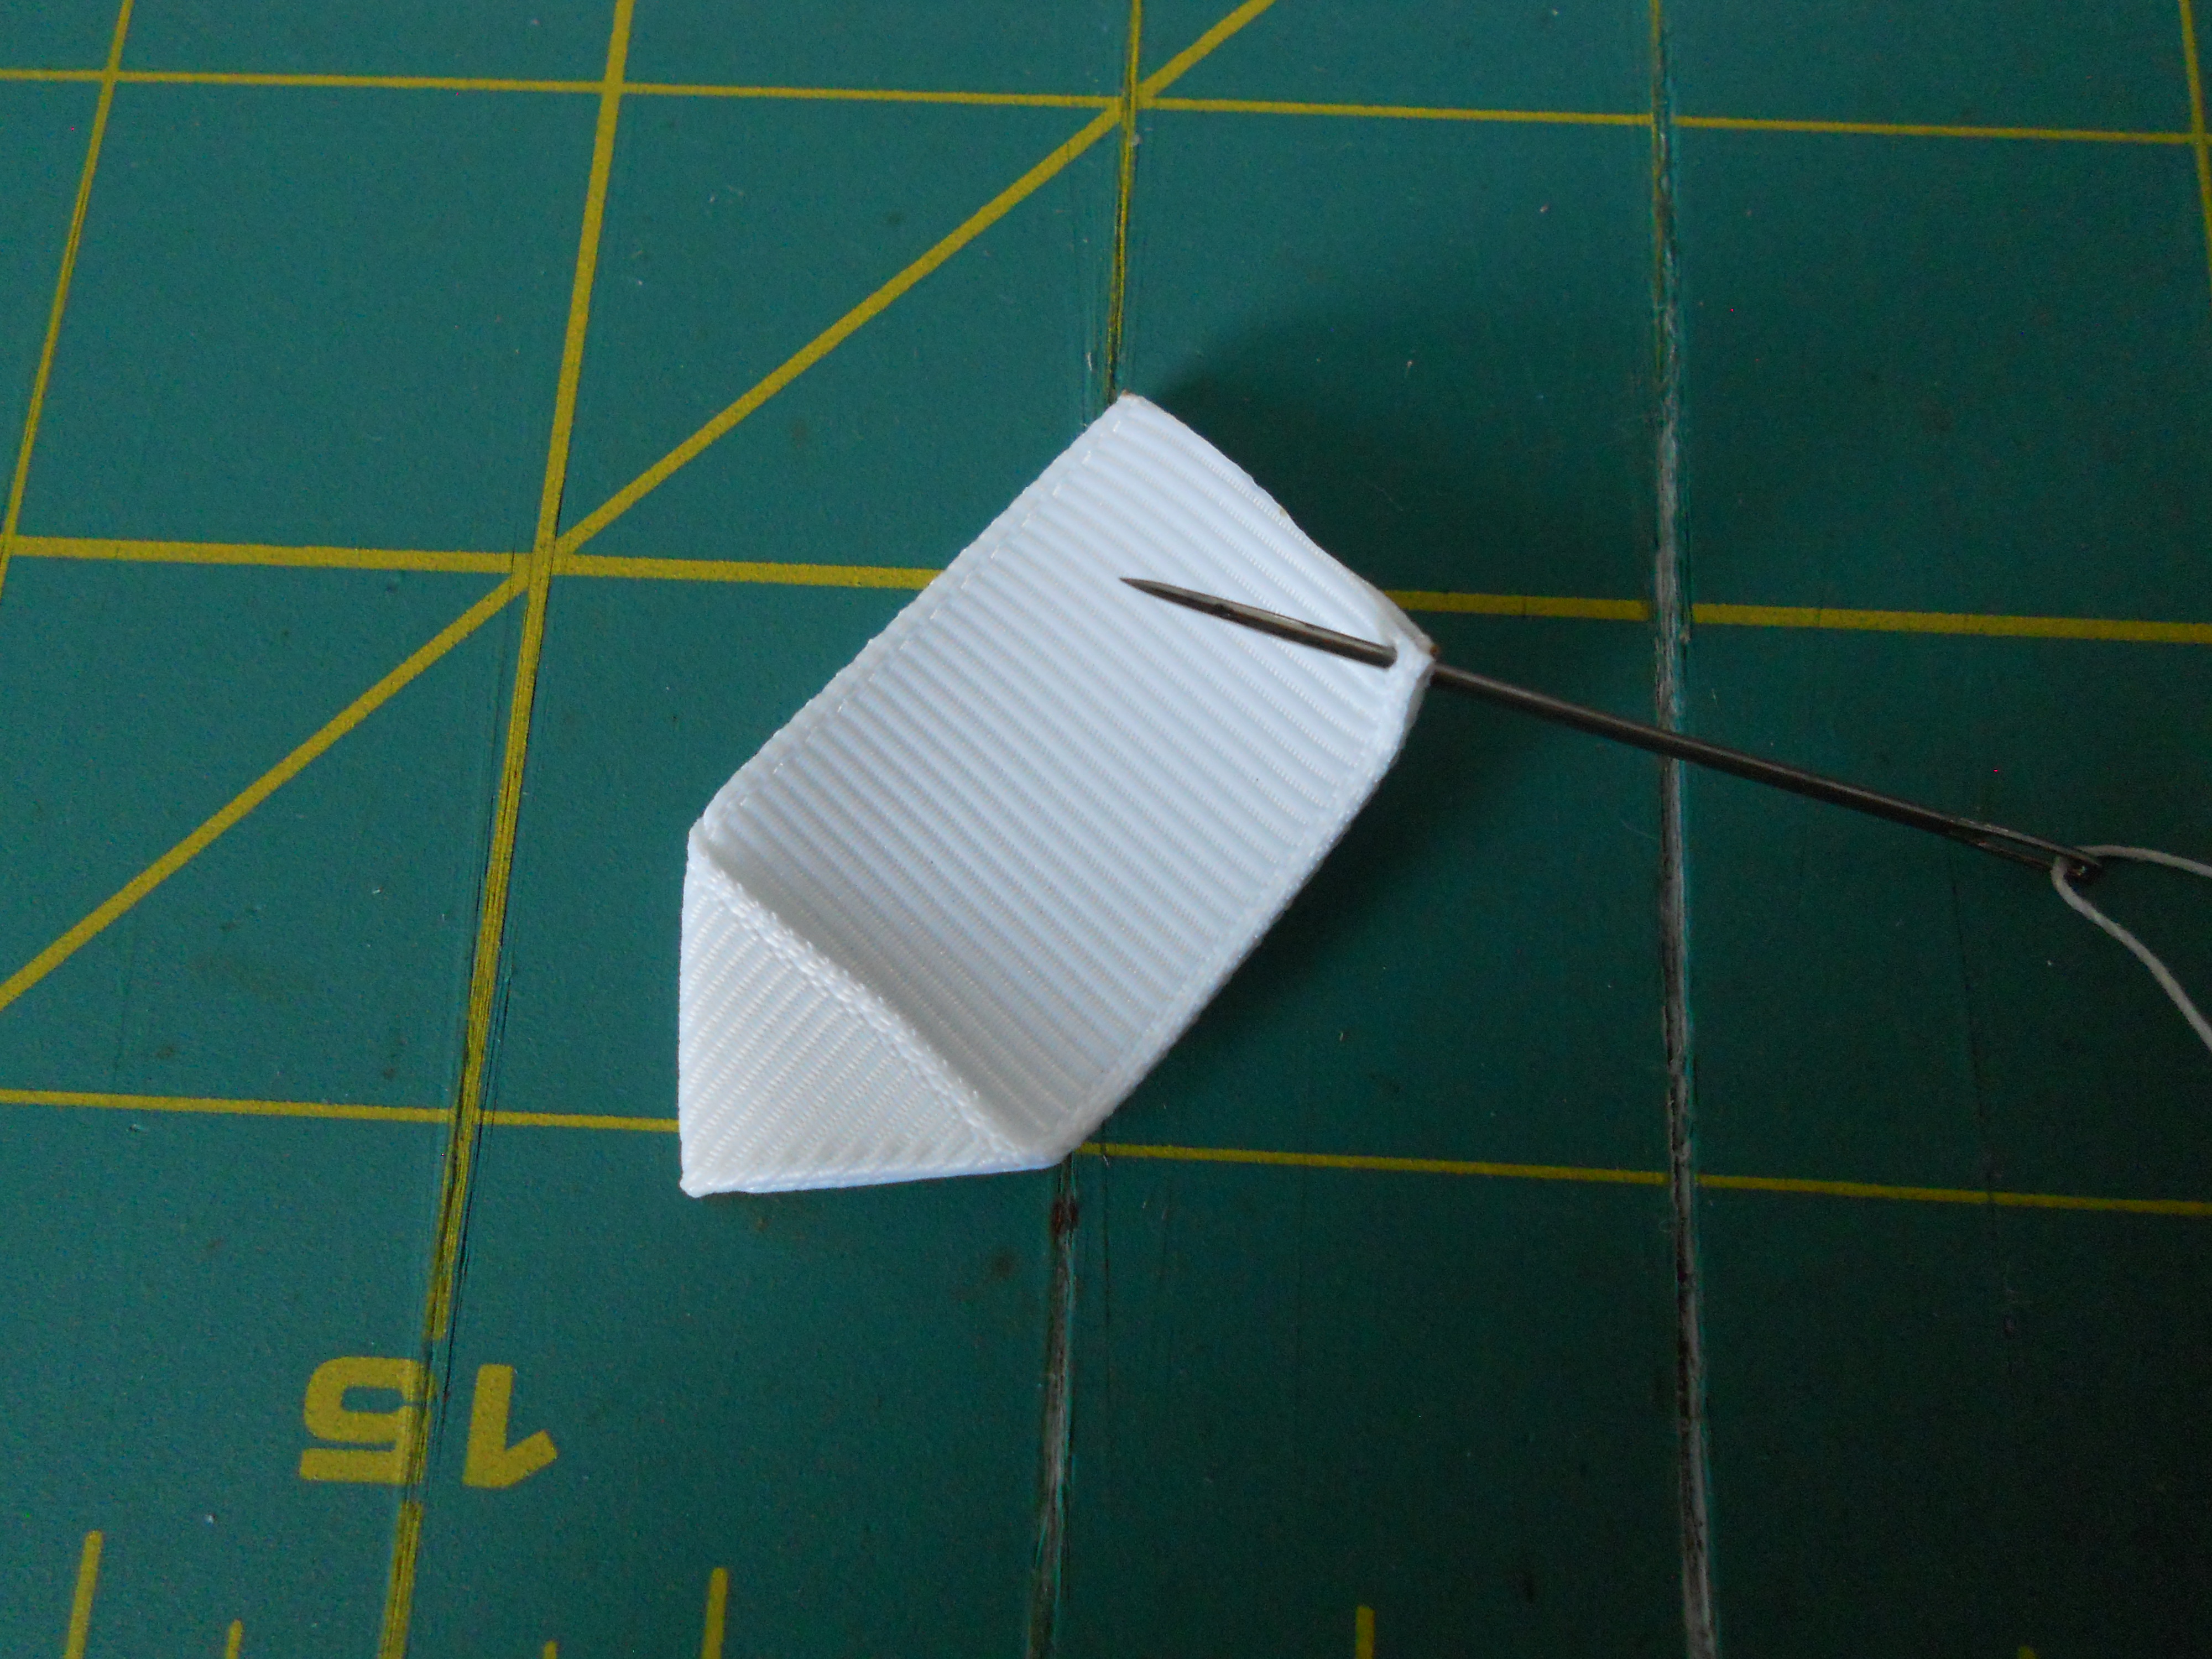
Step 4: Repeat steps 2 and 3 for your 5 remaining 2.5" ribbon pieces. Cut a strand of your upholstery thread and tie 3-4 knots at the end. Thread your needle and get ready to make your flower!
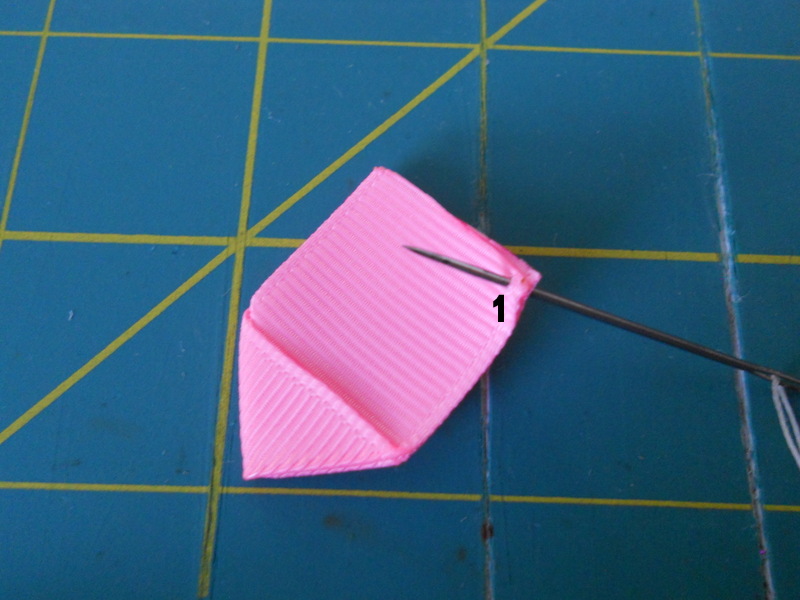

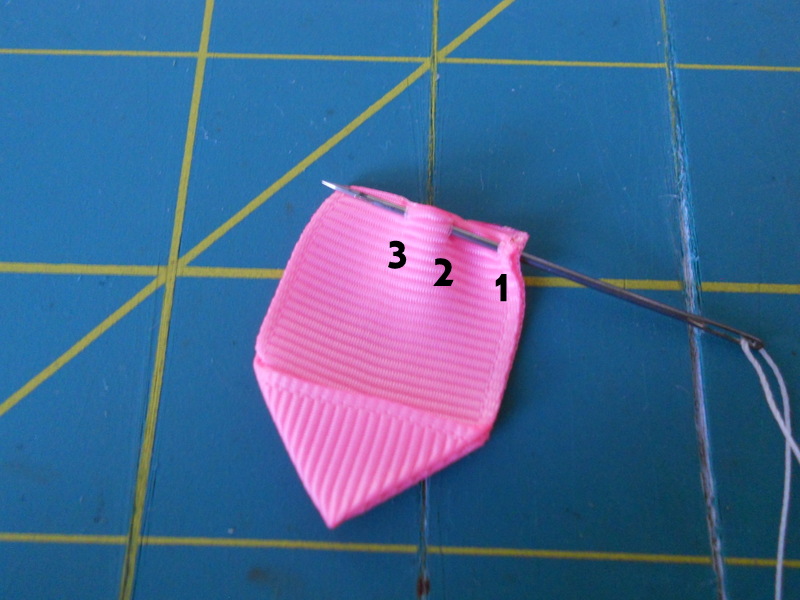
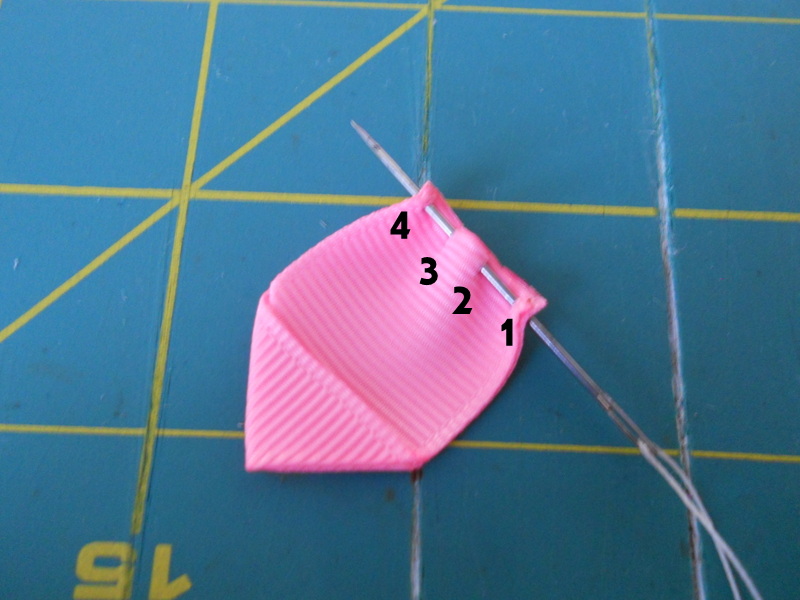
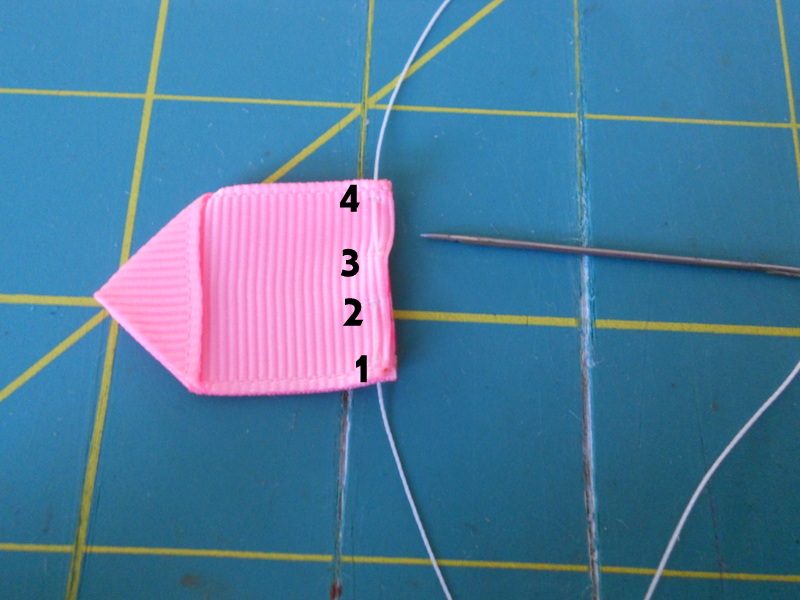
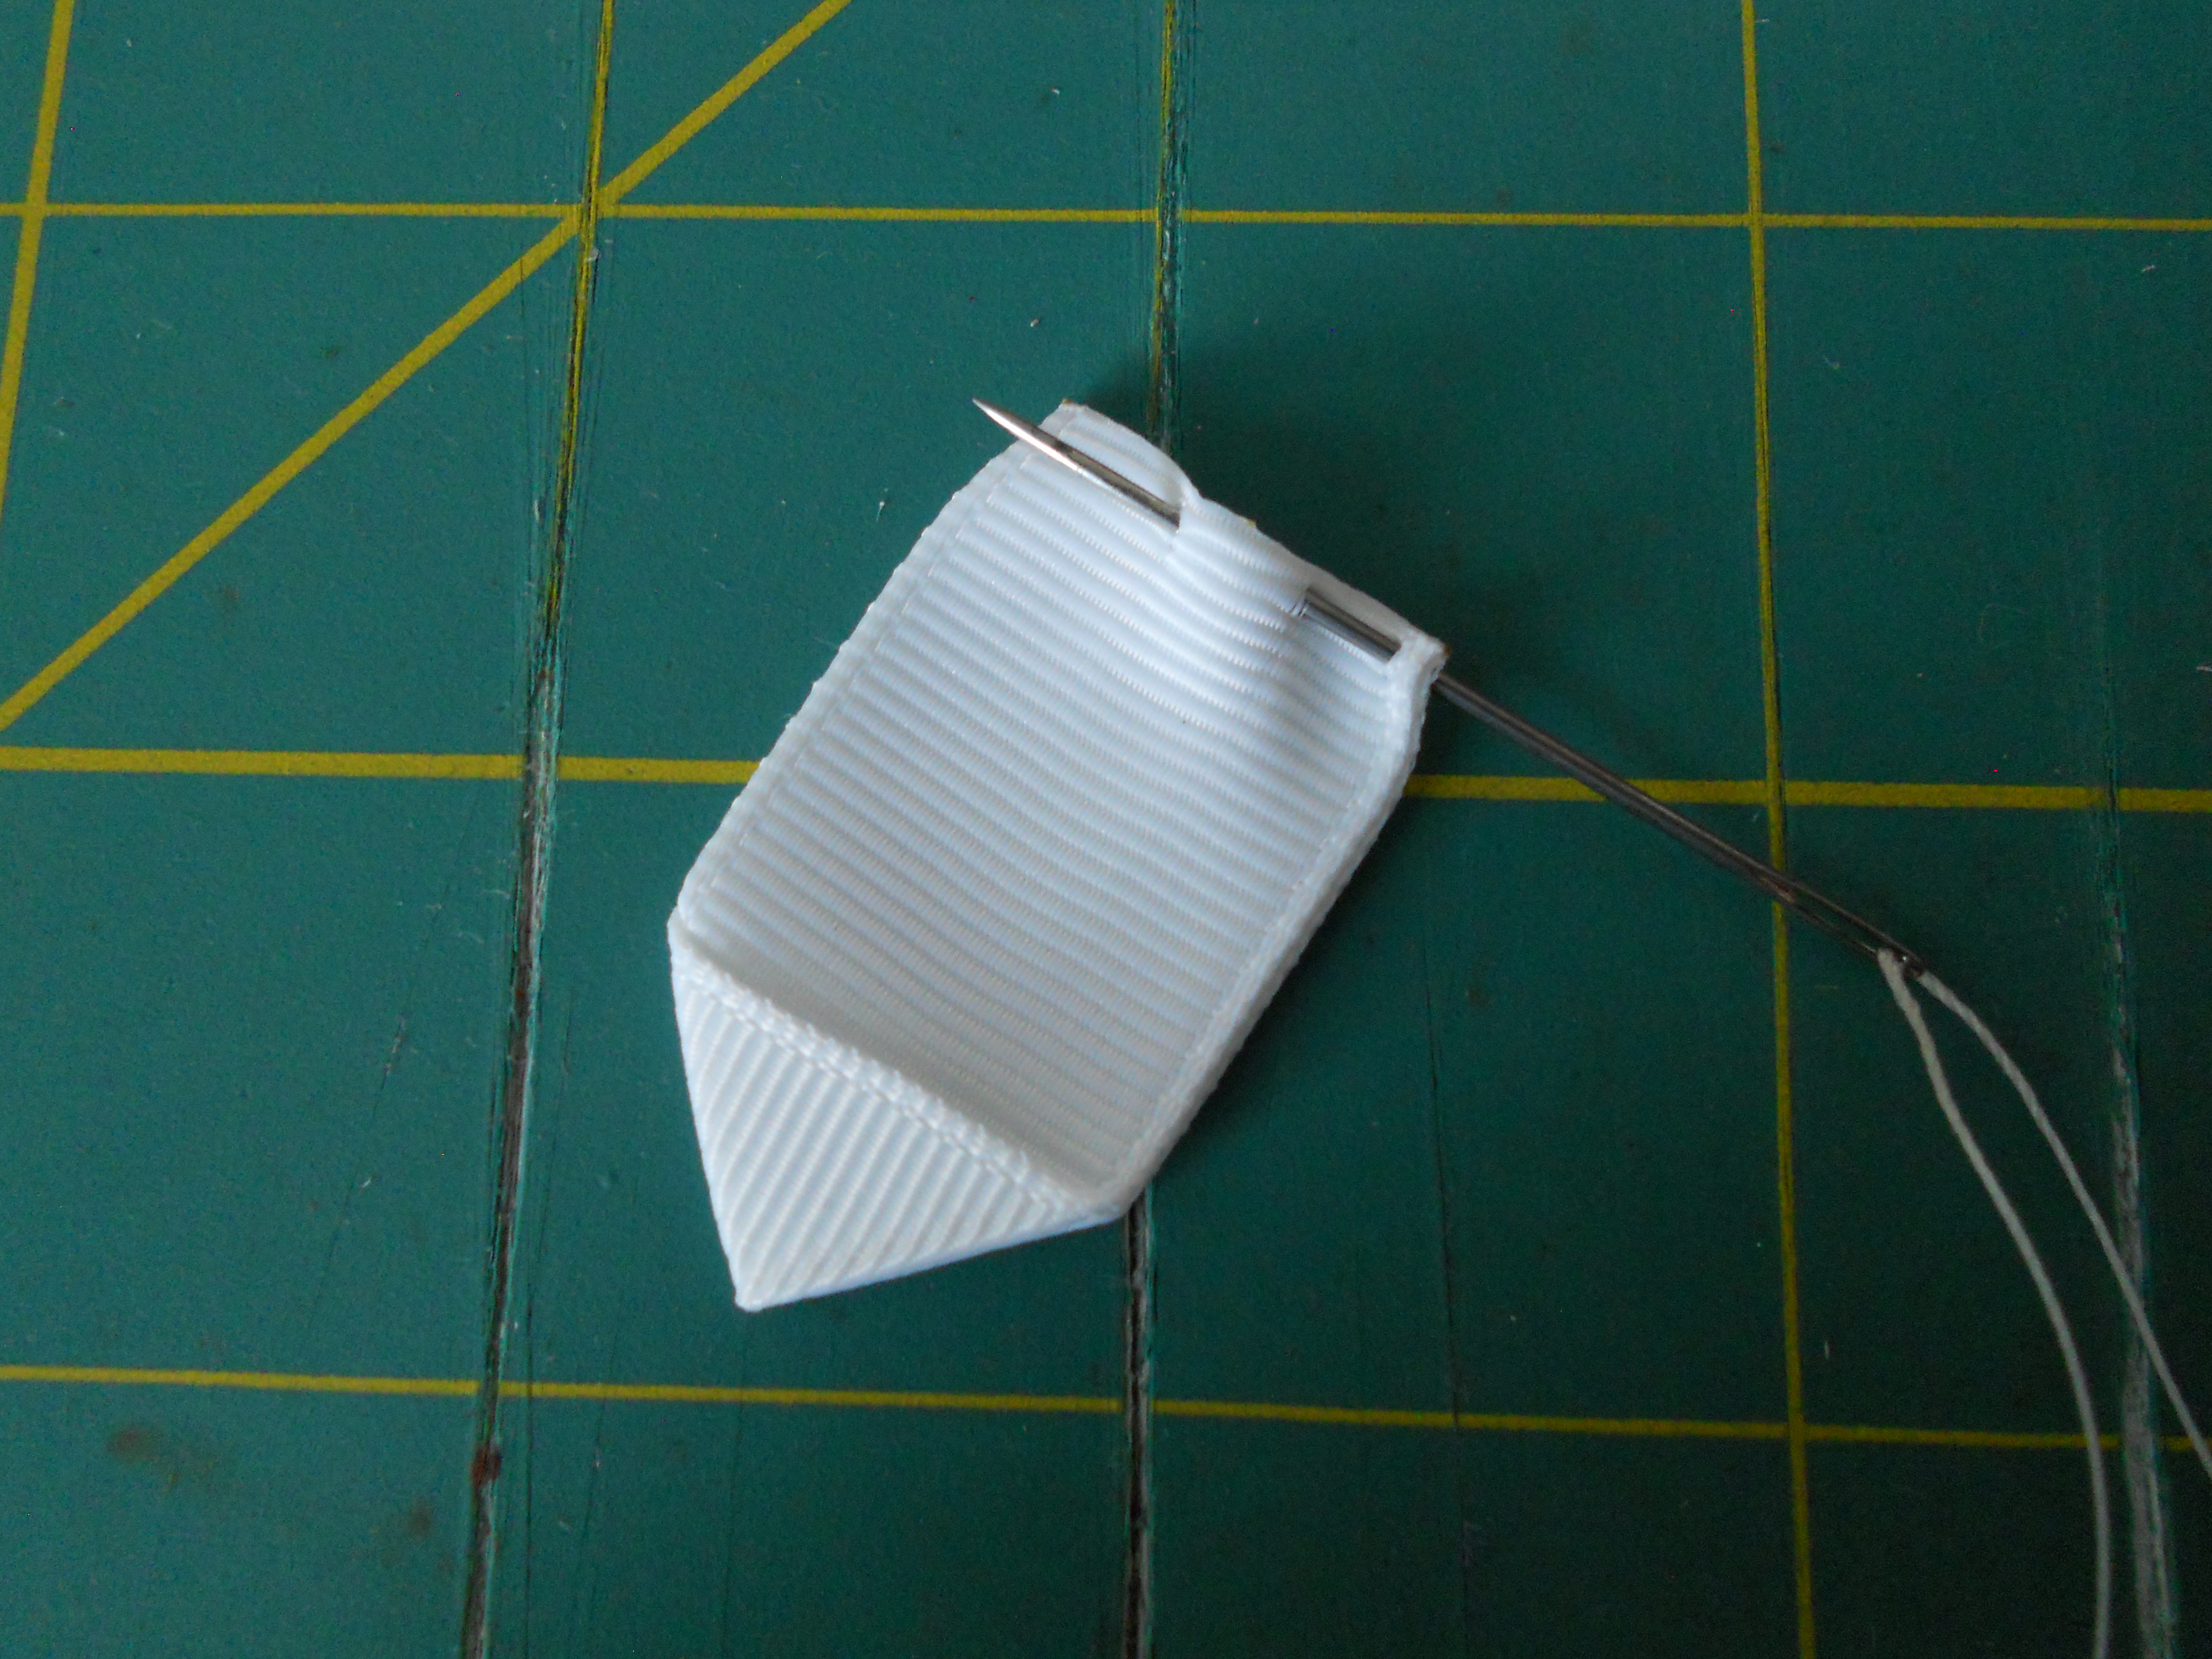
Step 5: Thread your needle through your first ribbon petal. I have numbered the pictures above to show you how to thread each petal. It is important to thread your needle through the 4 spots to achieve the desired look for your flower.
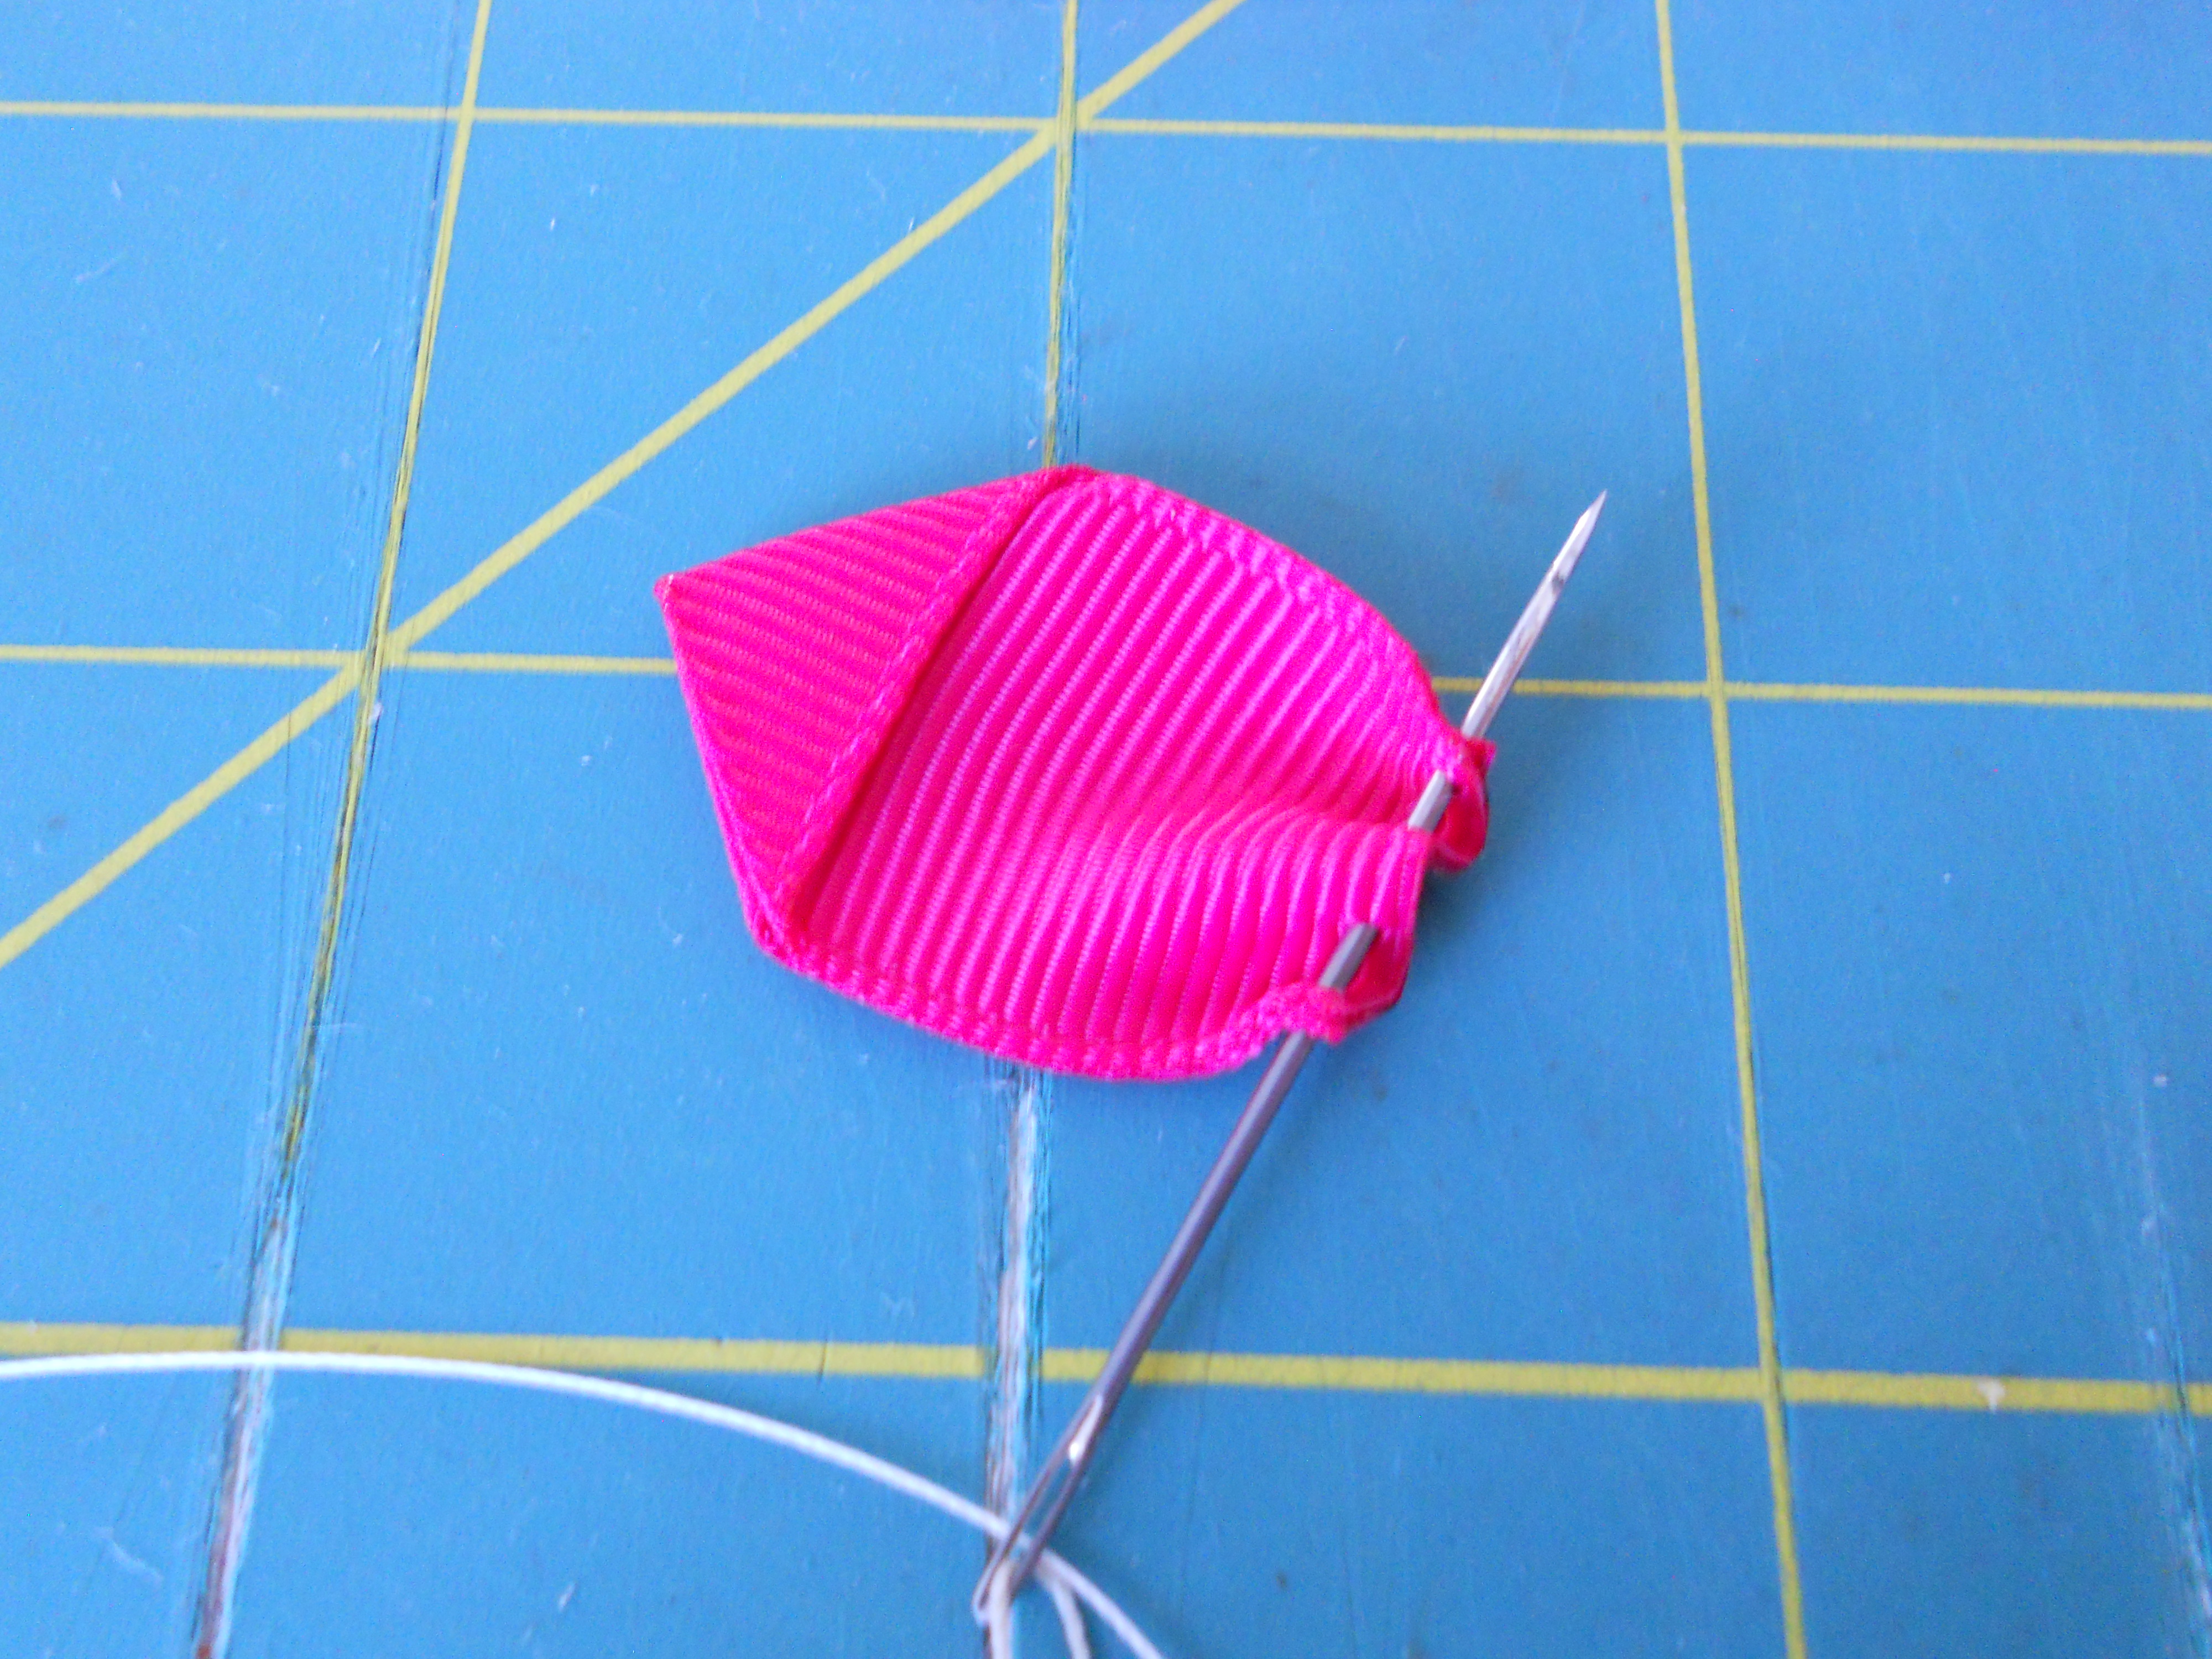
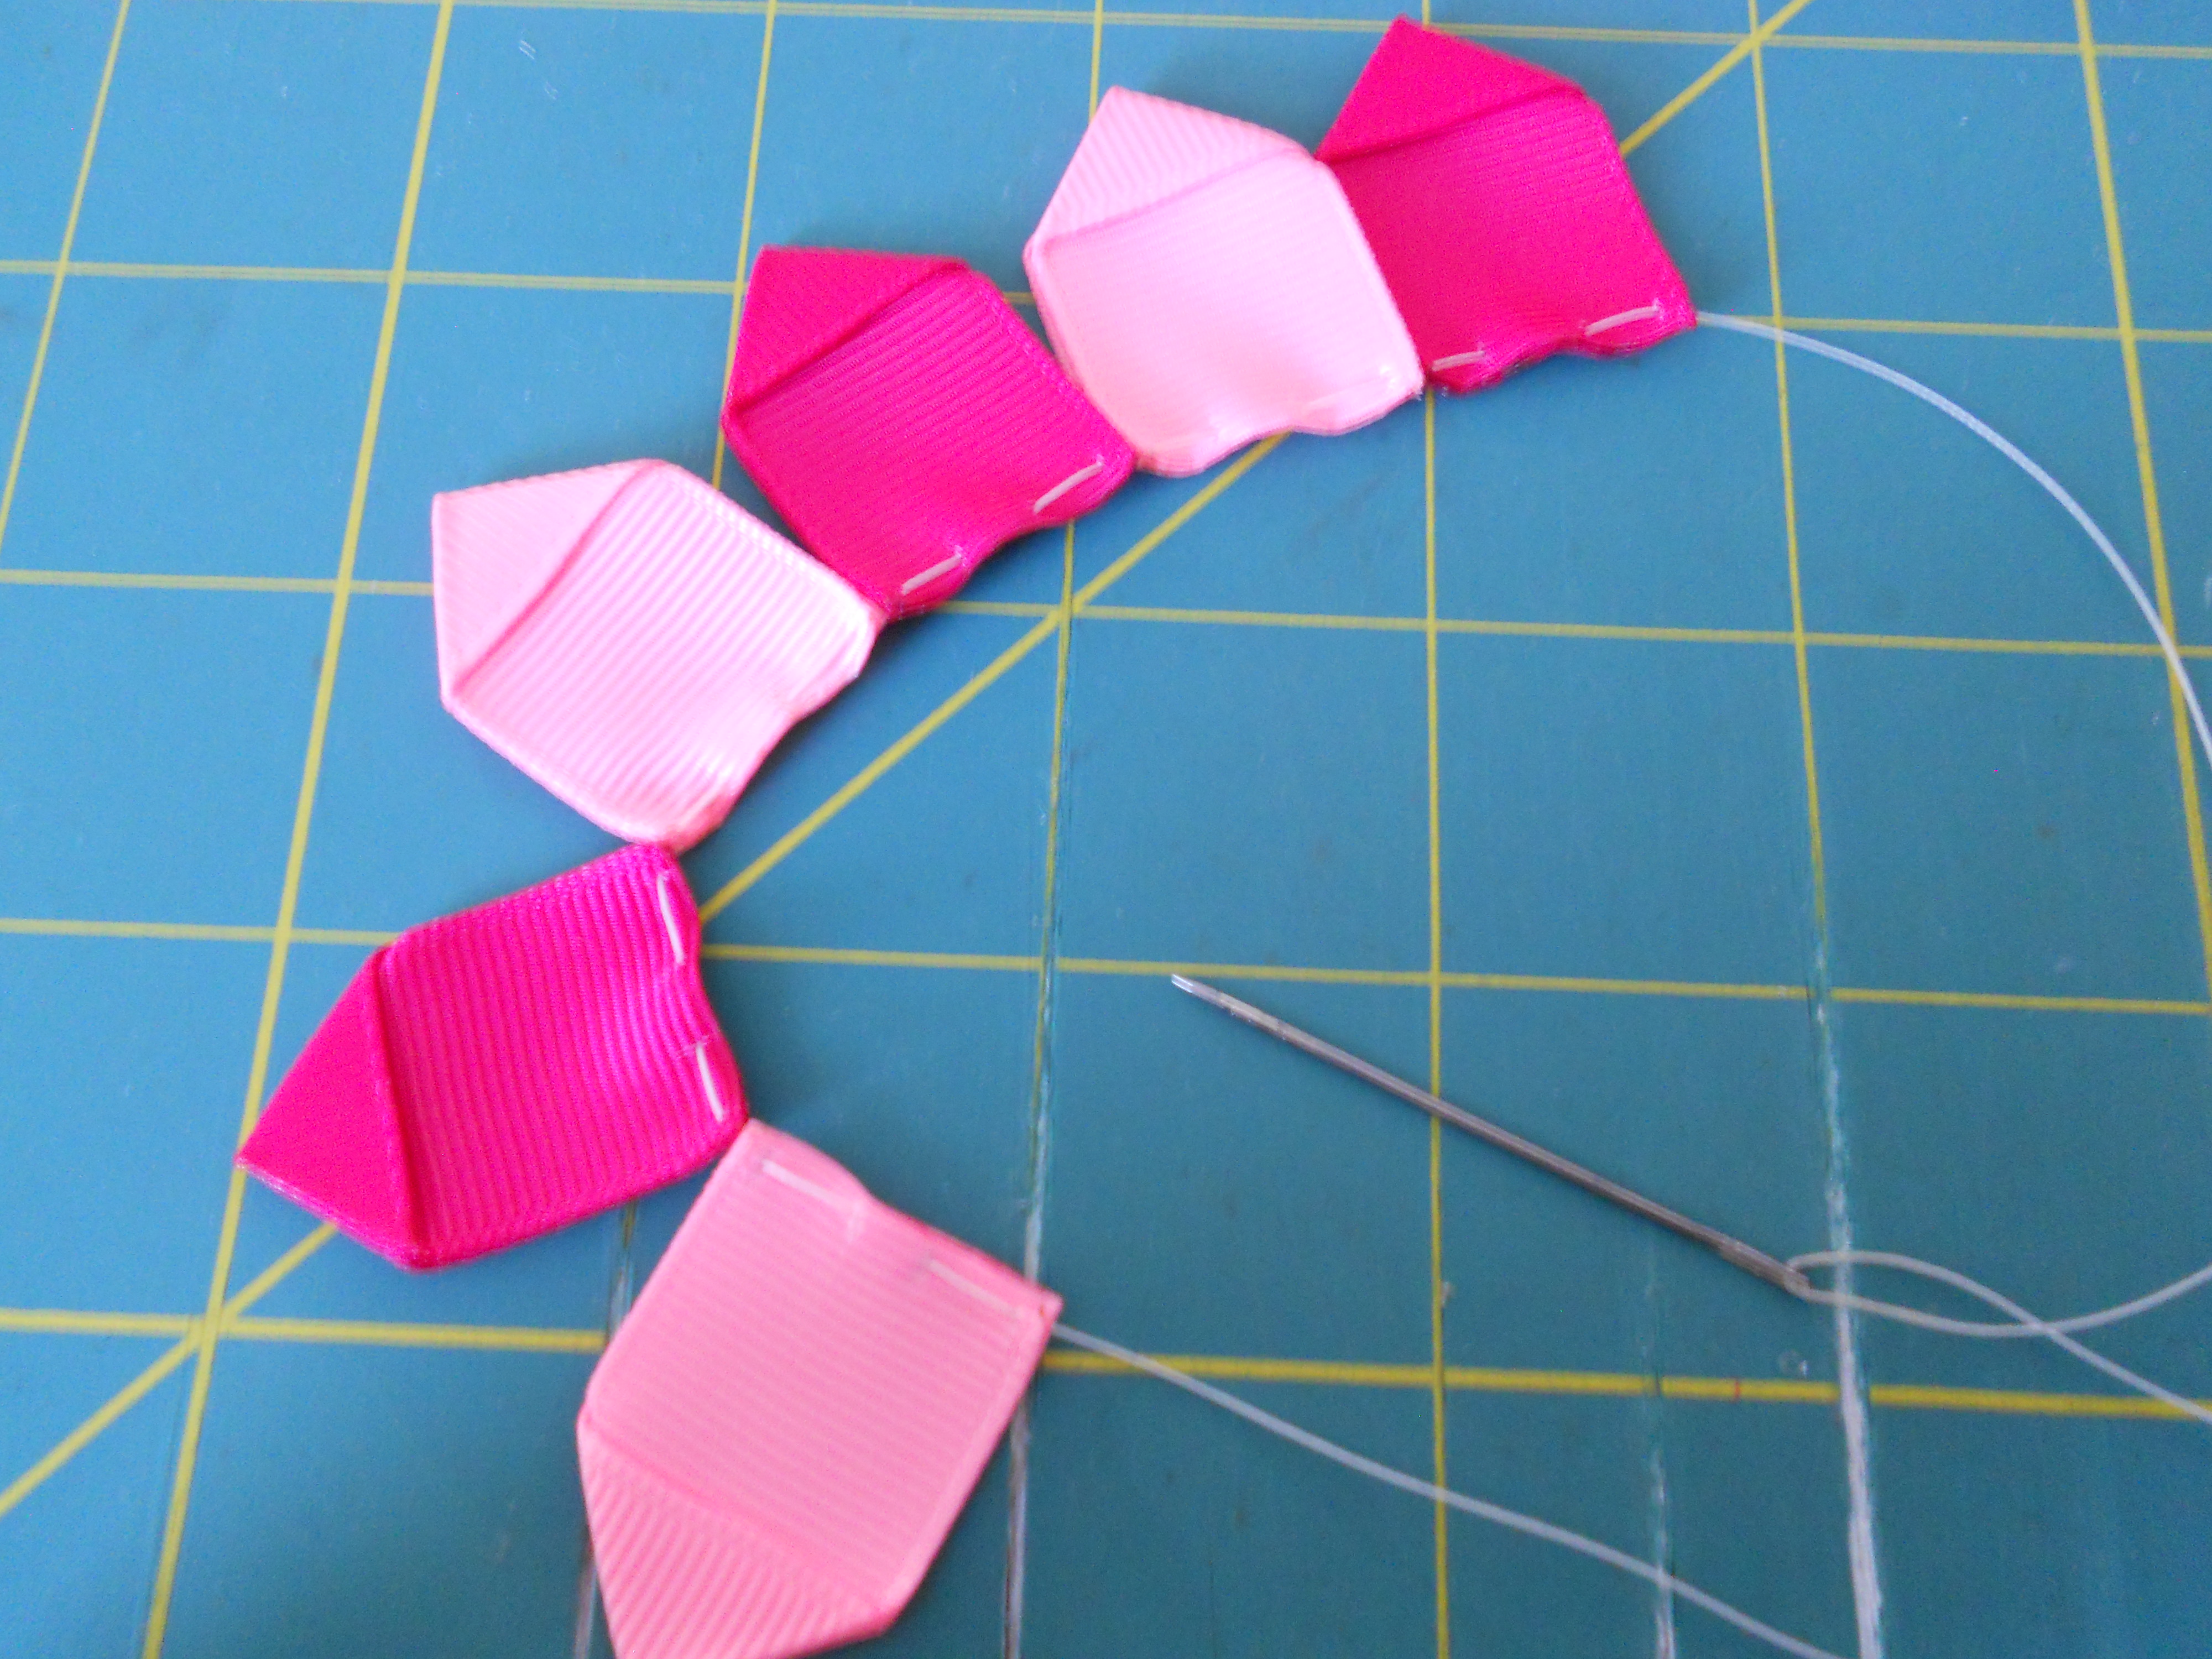
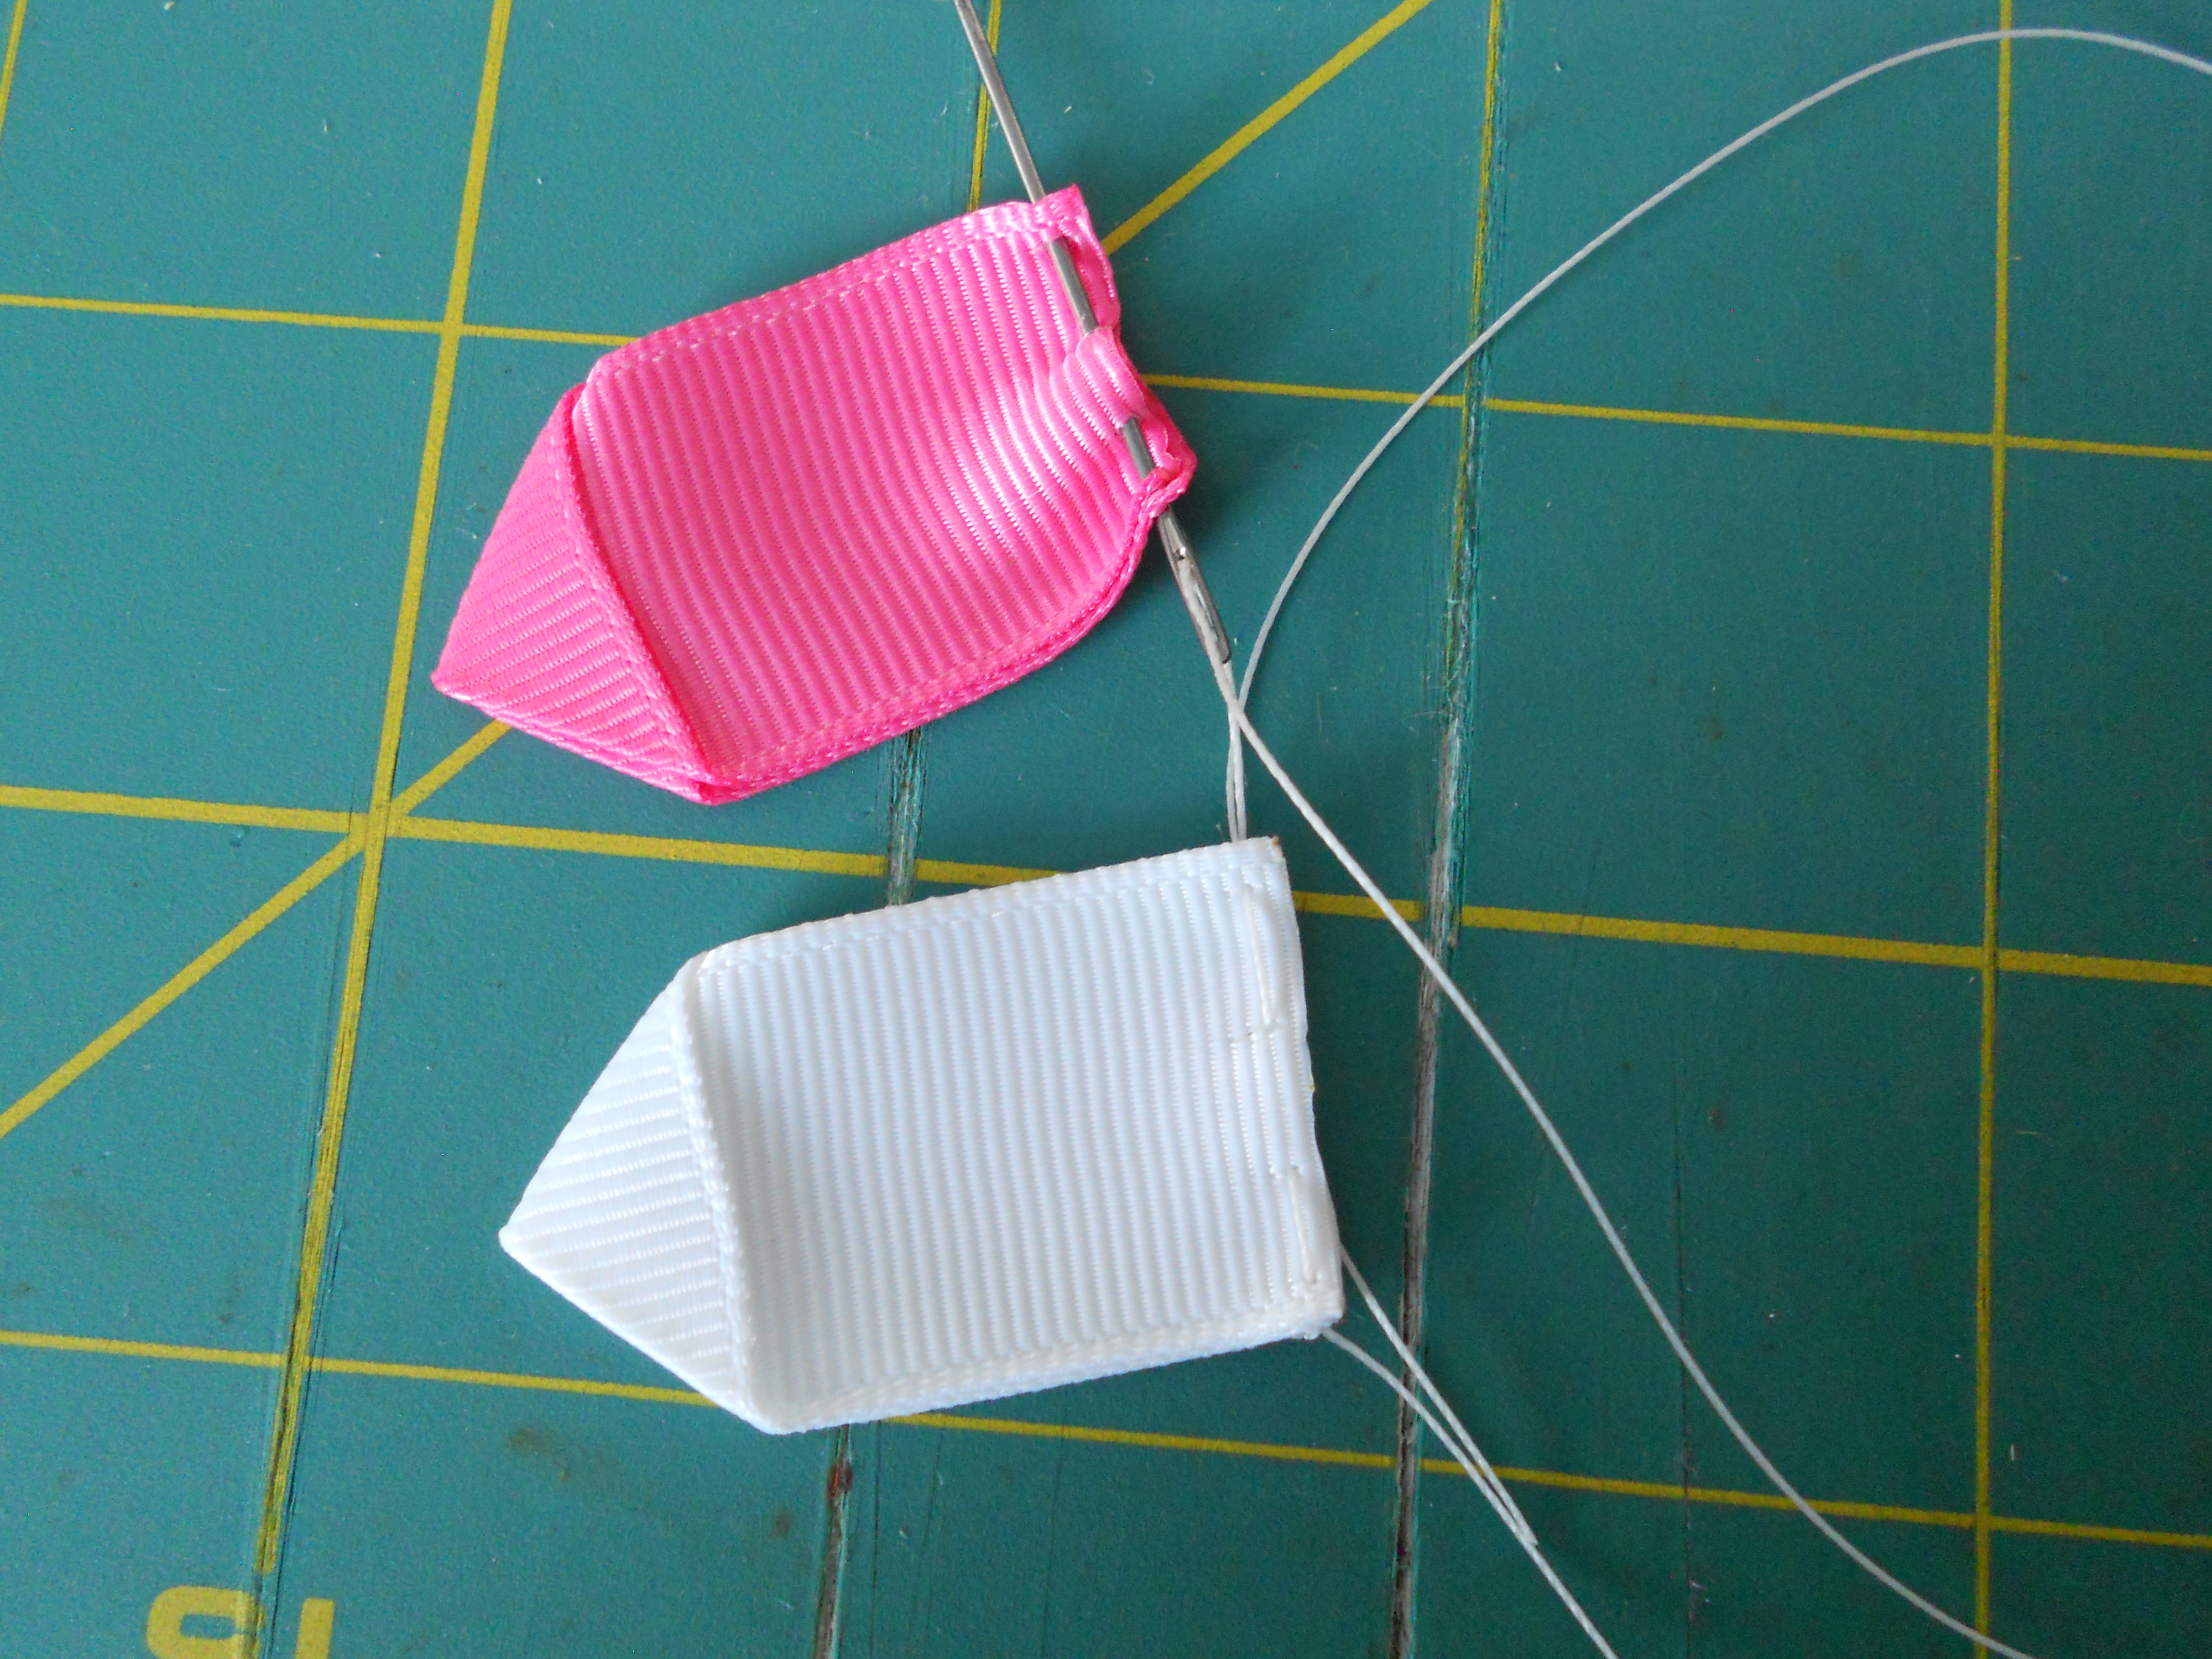
Step 6: Pull your needle and thread all the way through, brining your petal down to the knotted end of the thread. Continue threading your petals in the pattern you want.
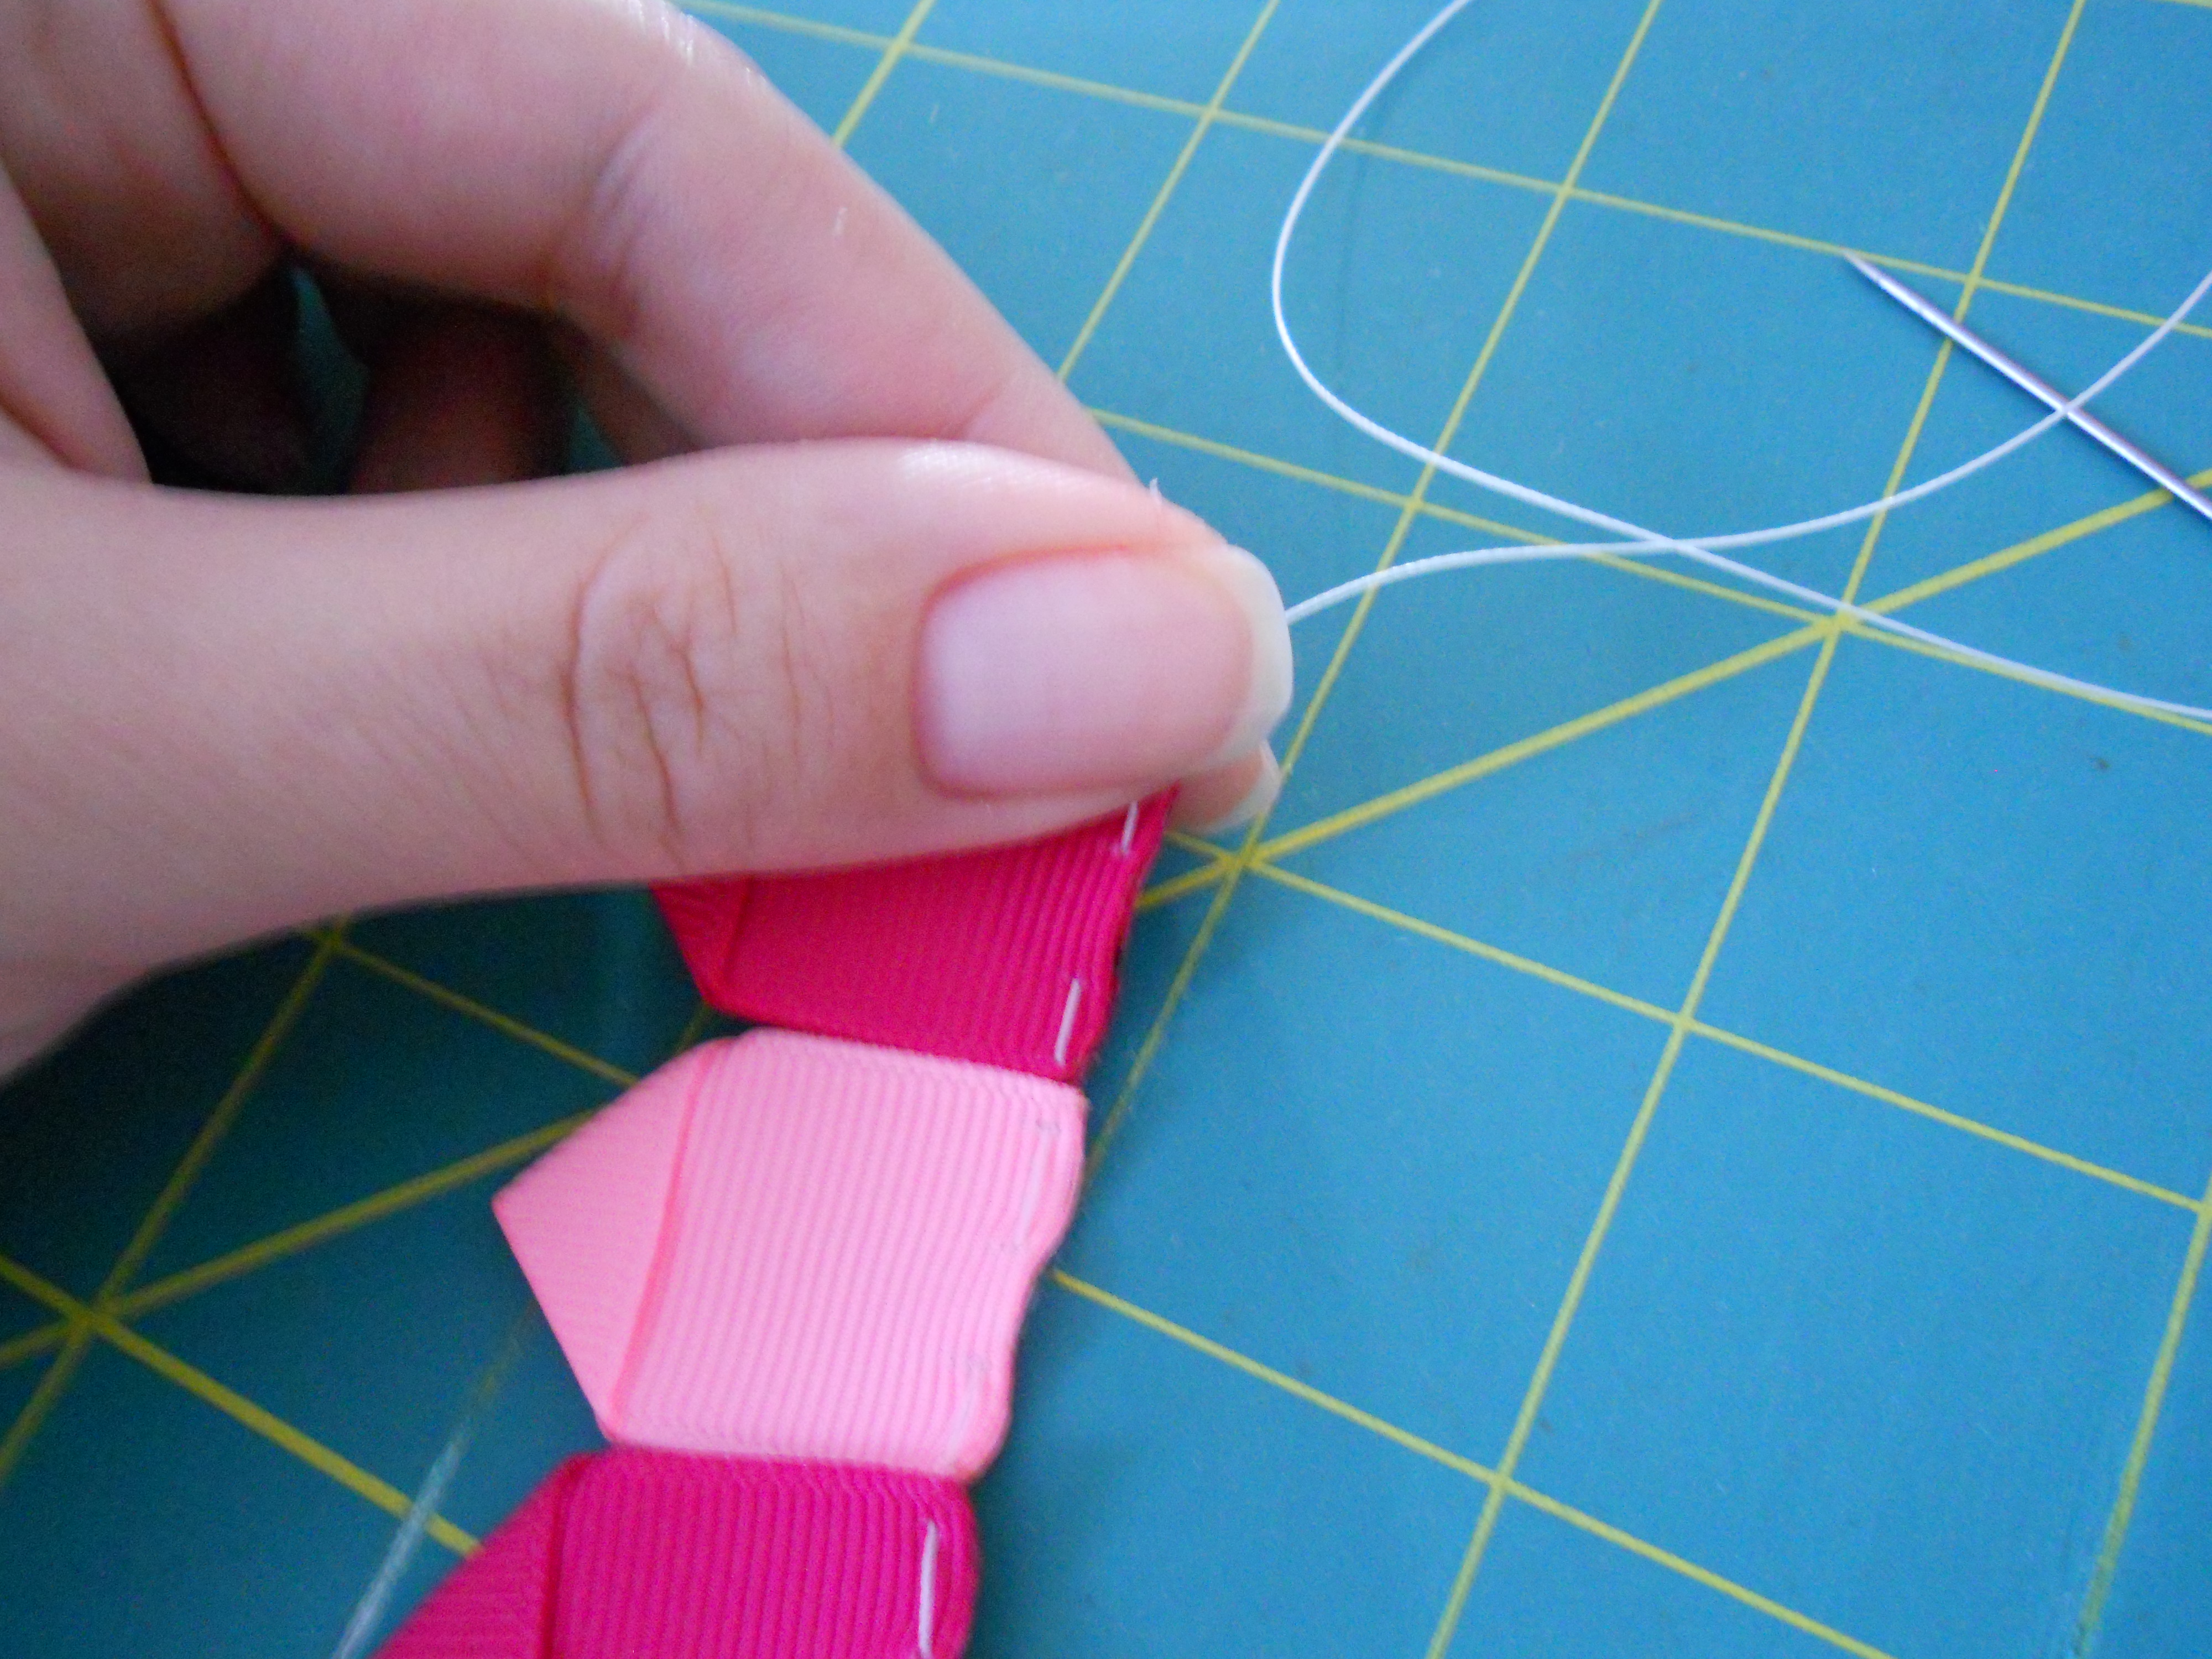
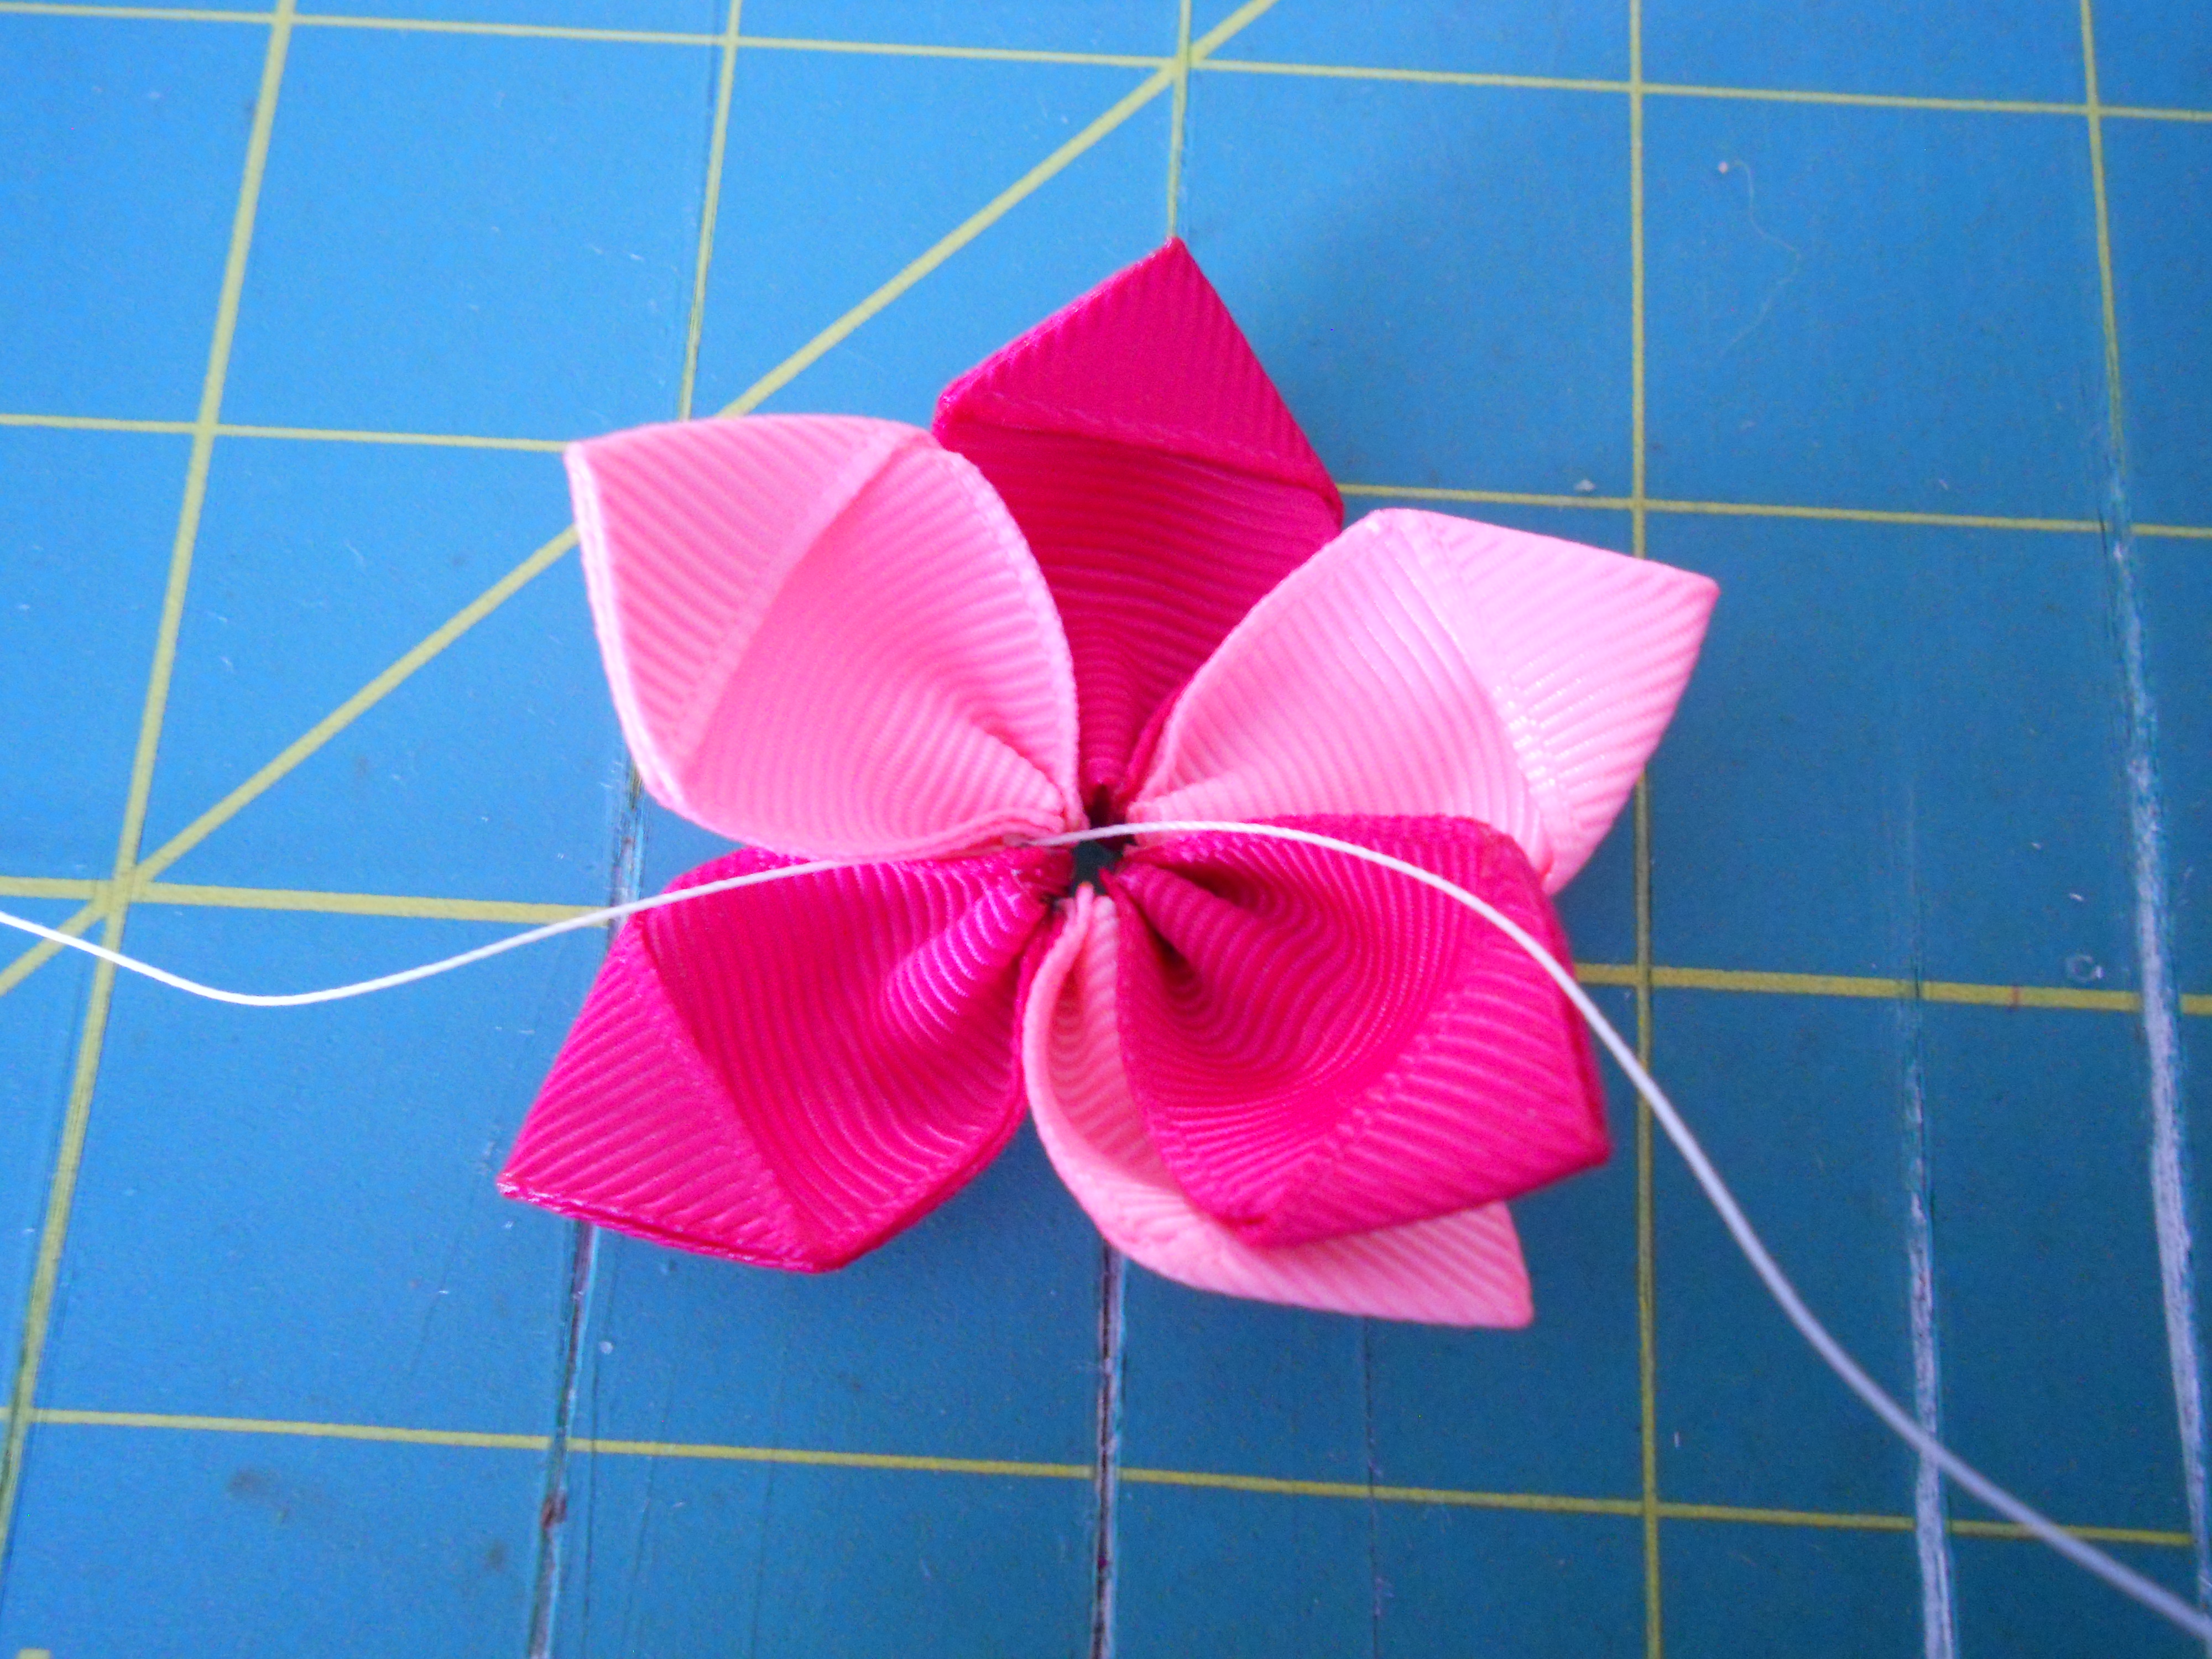
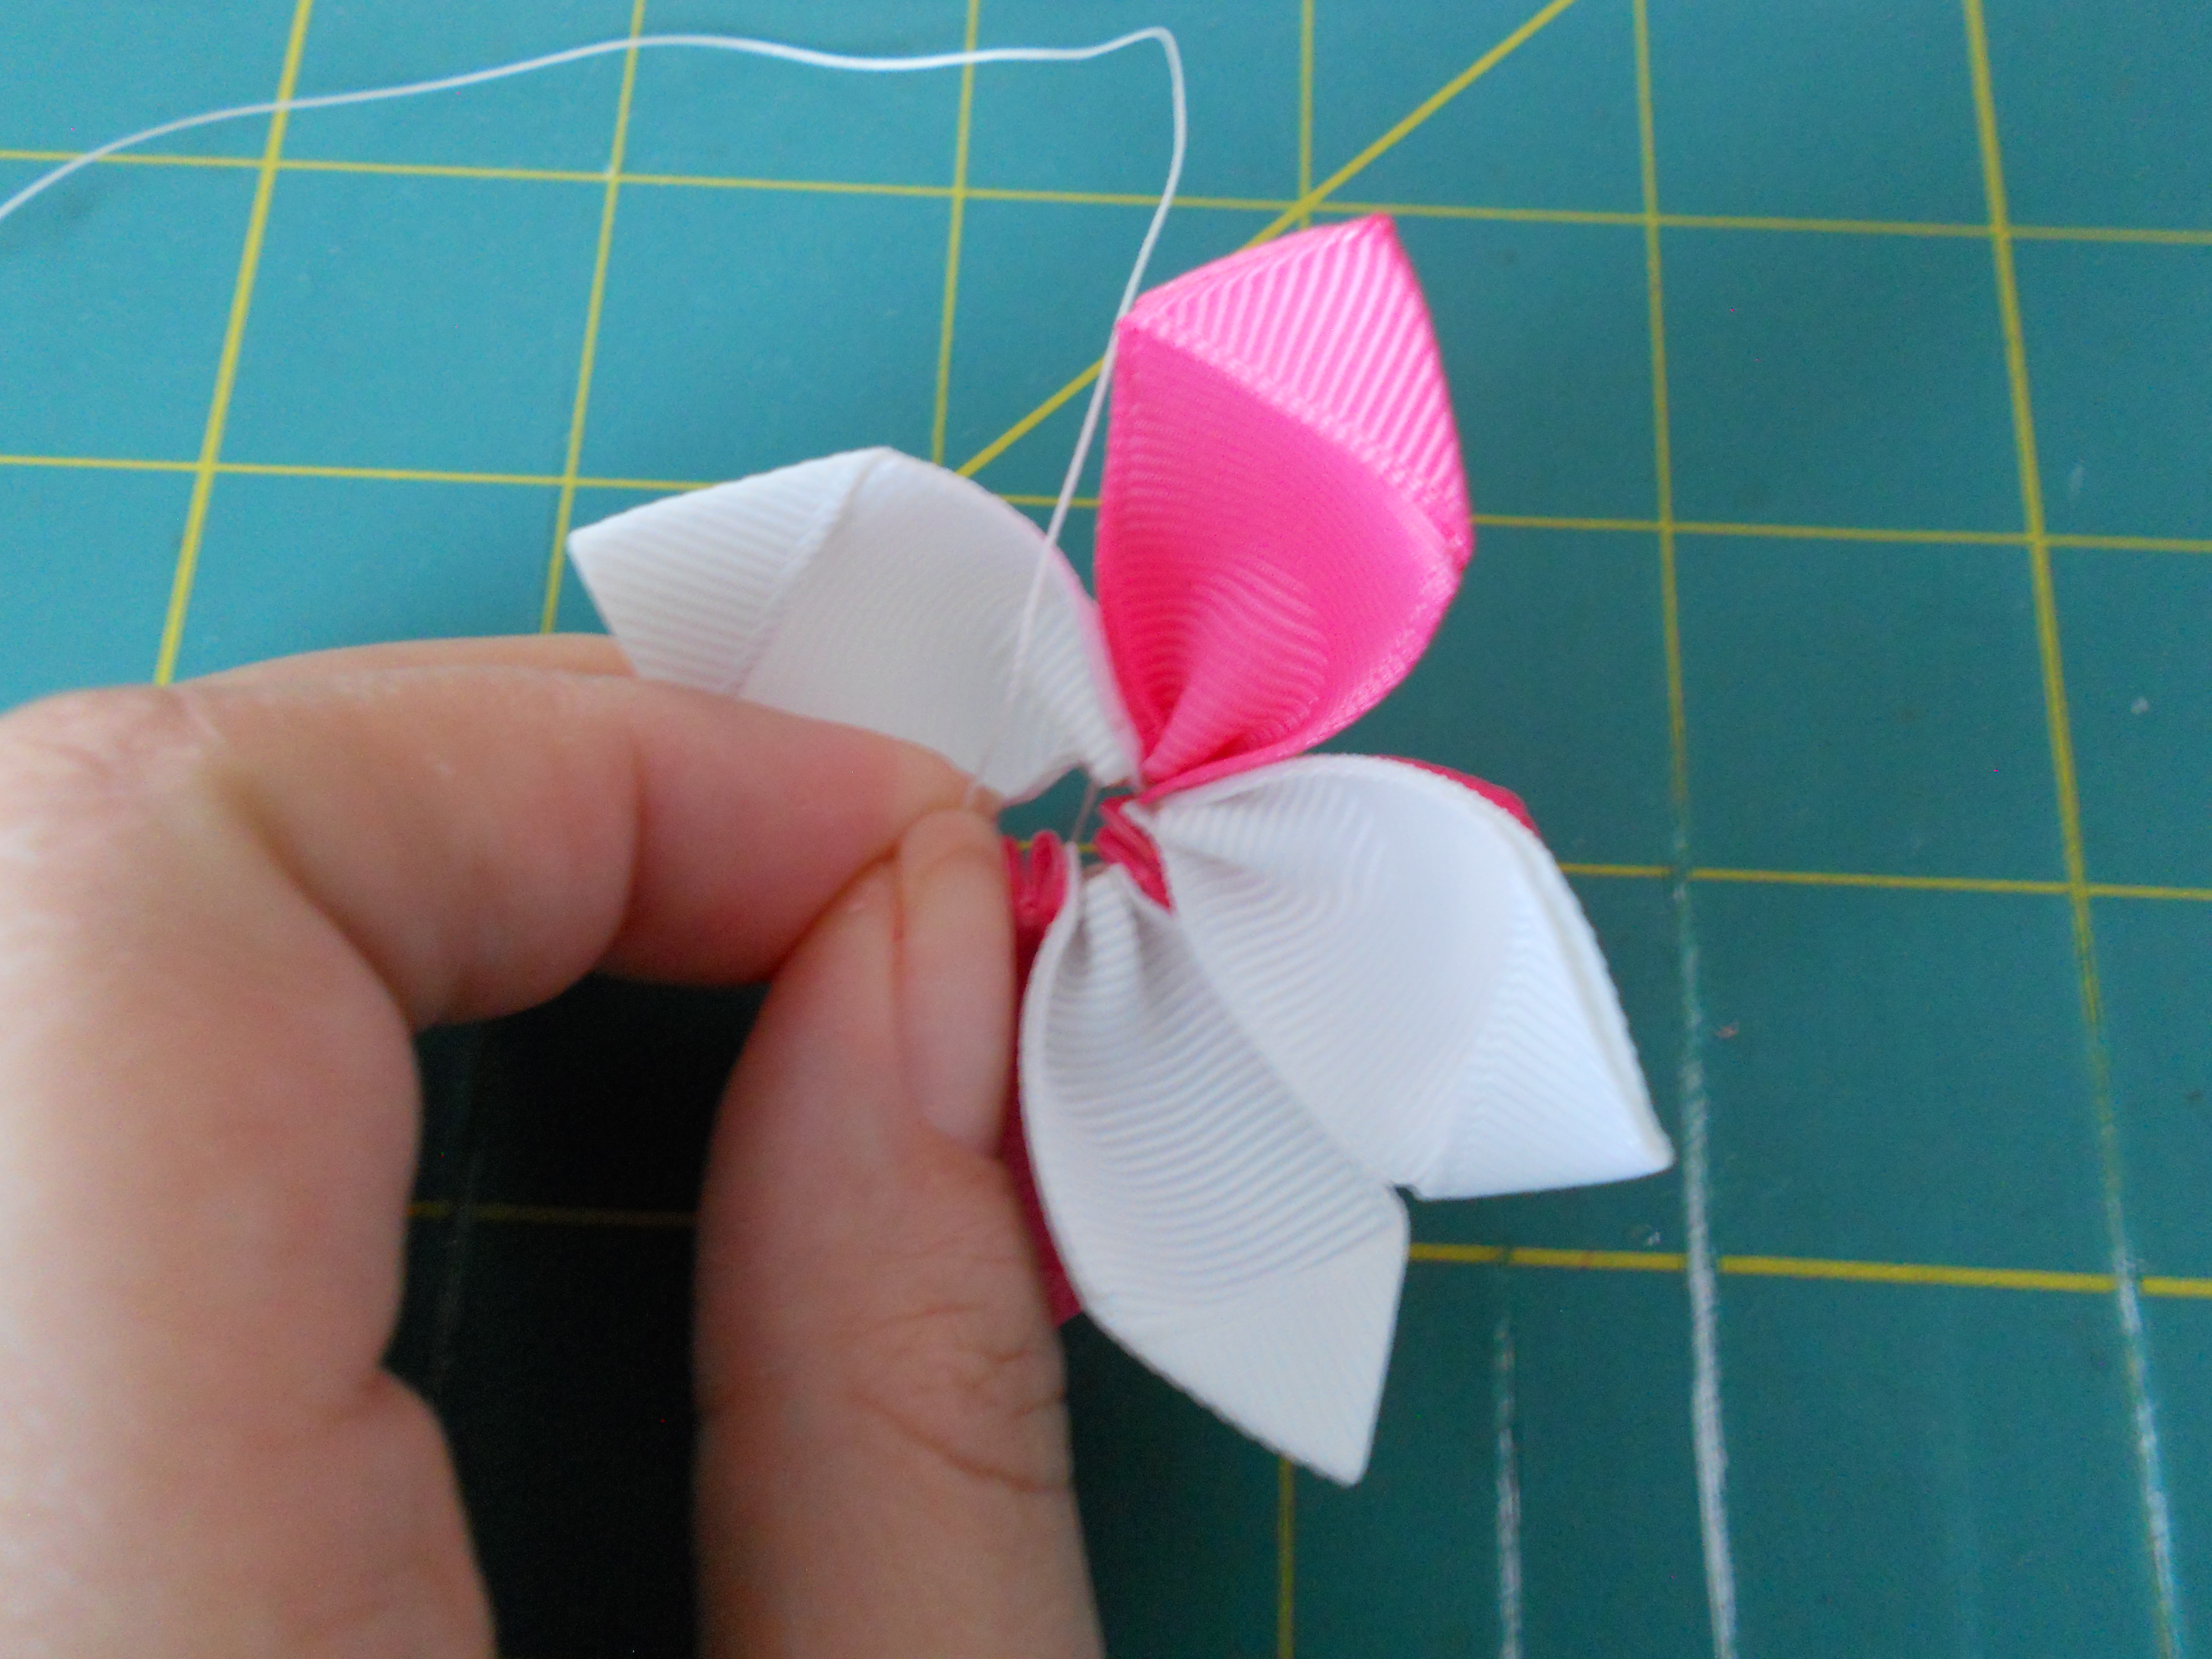
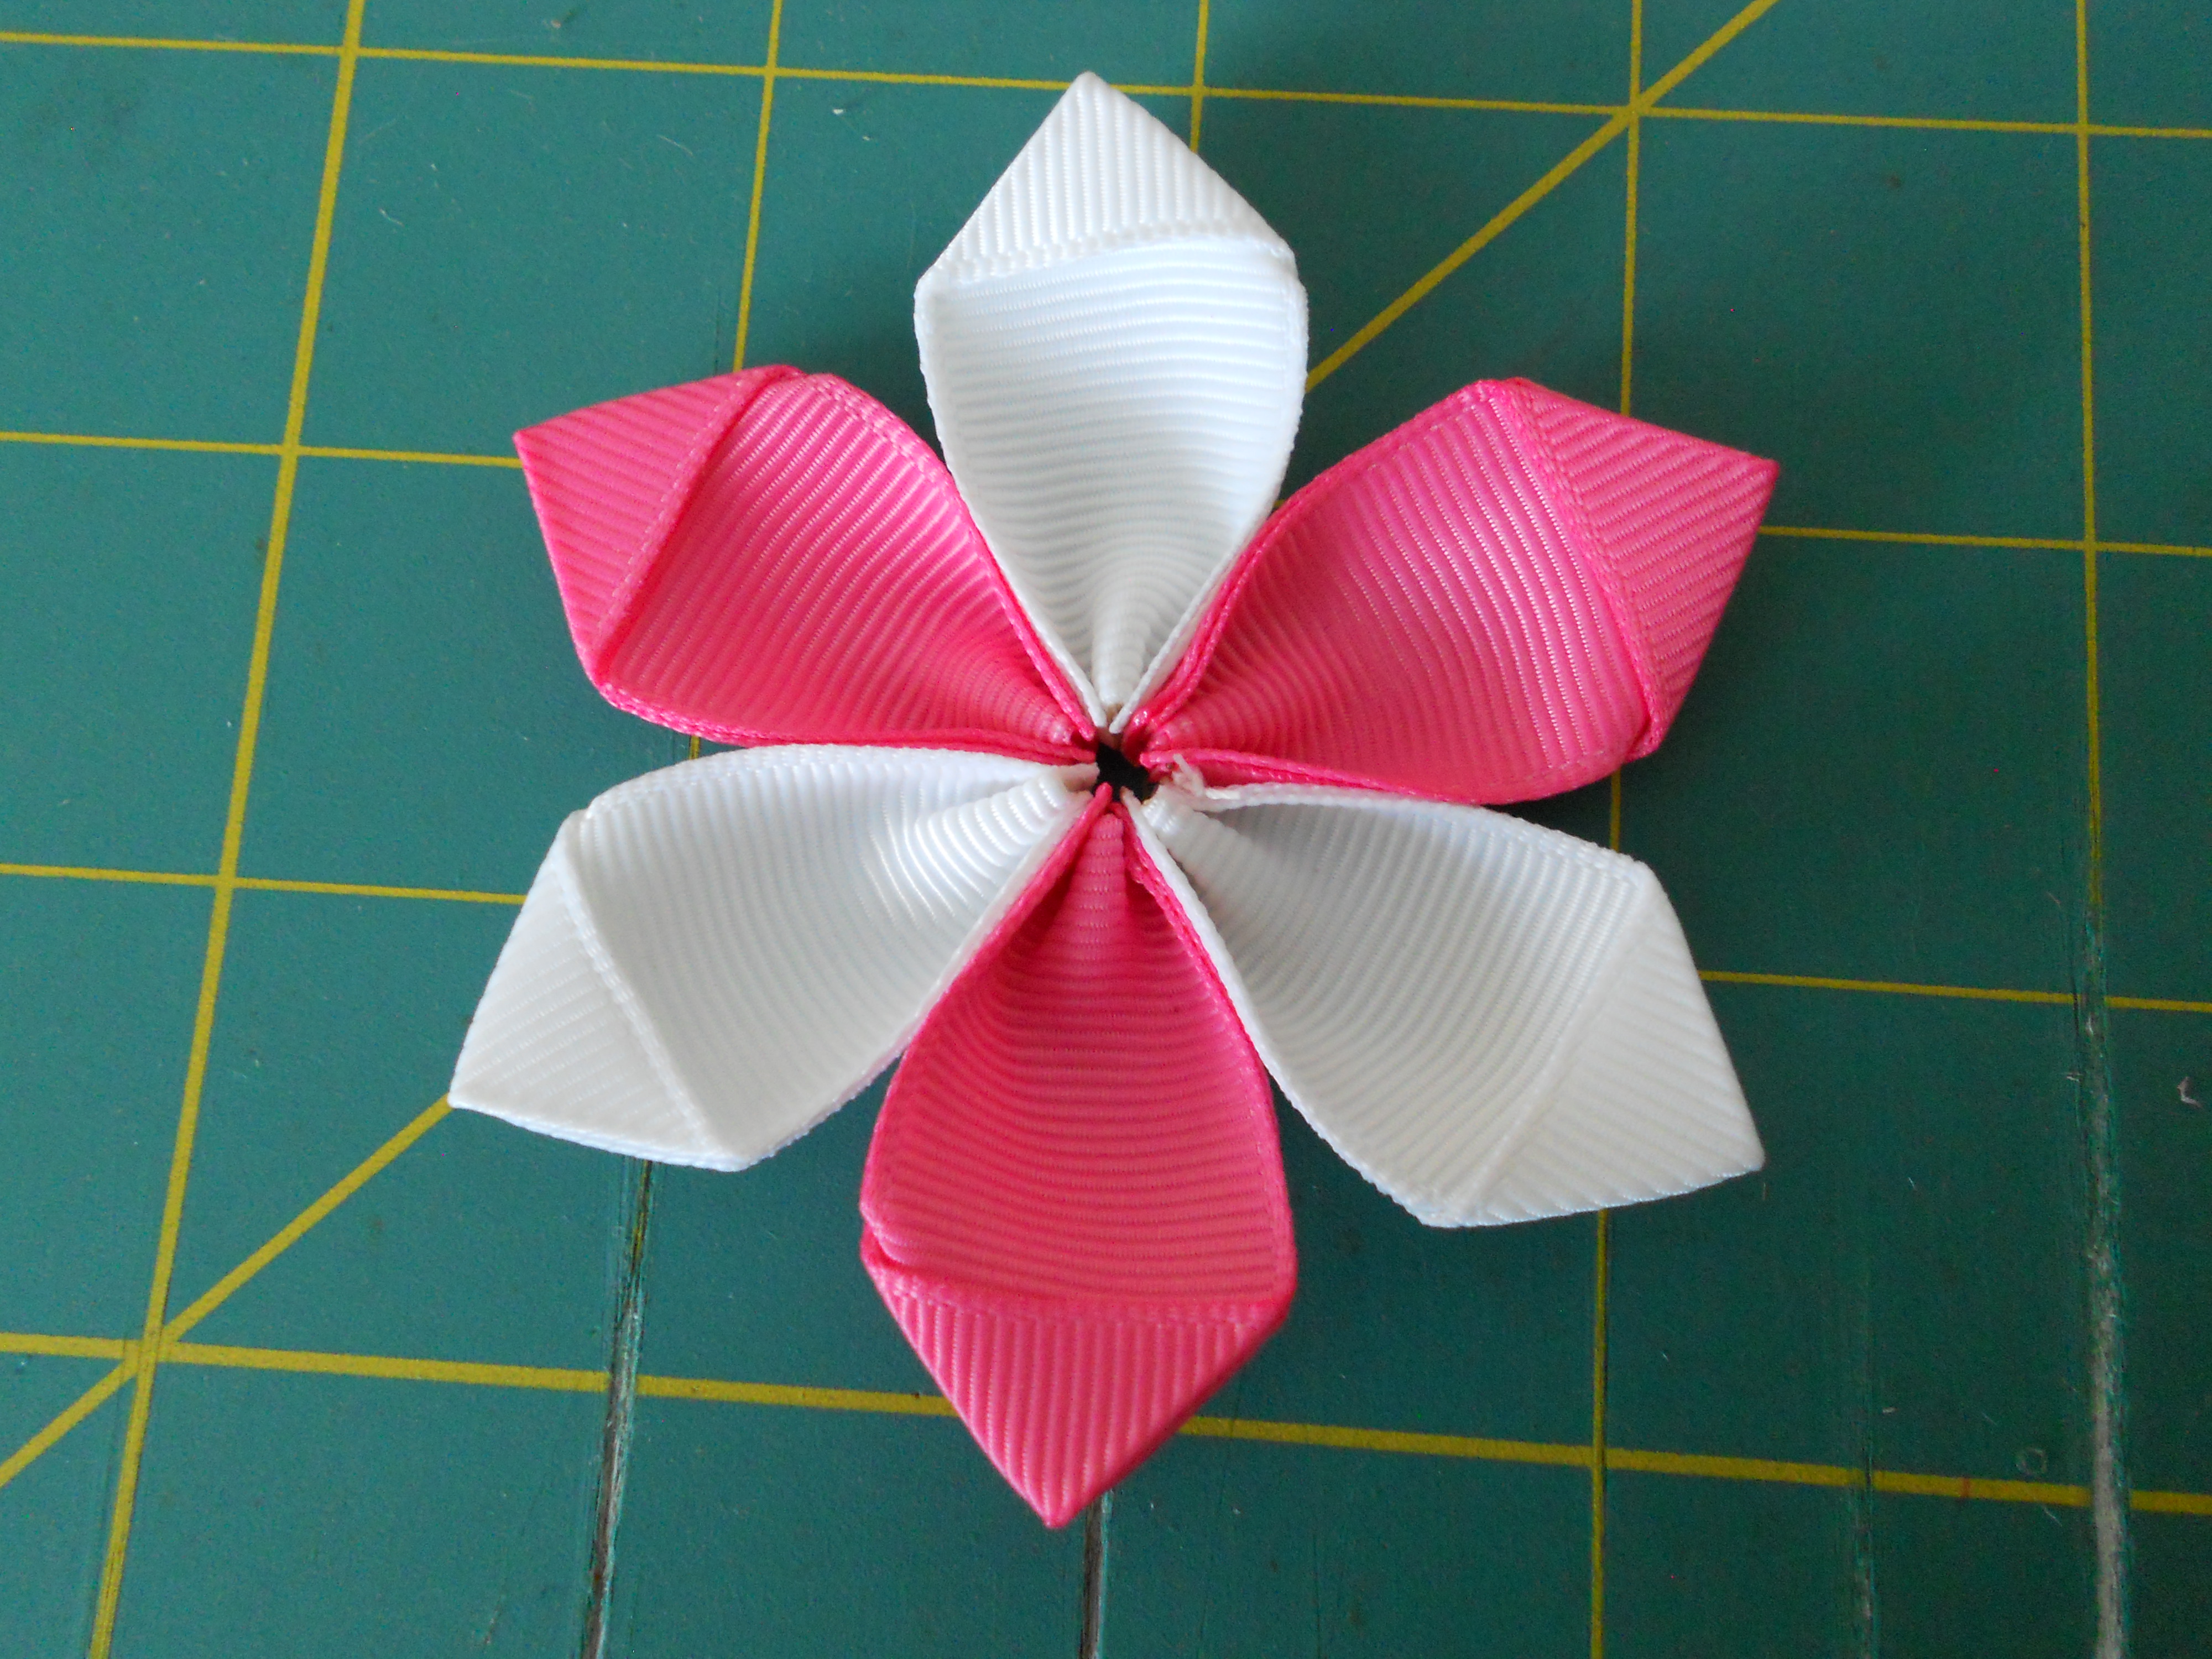
Step 7: Gather your ribbon petals to form your flower. Start with your thumb at the last ribbon petals and your other hand on the thread. Pull the thread while pushing the petals together with your thumb. They should now be all bunched together. Pull the thread tightly, you want a very small center, and tie several knots.

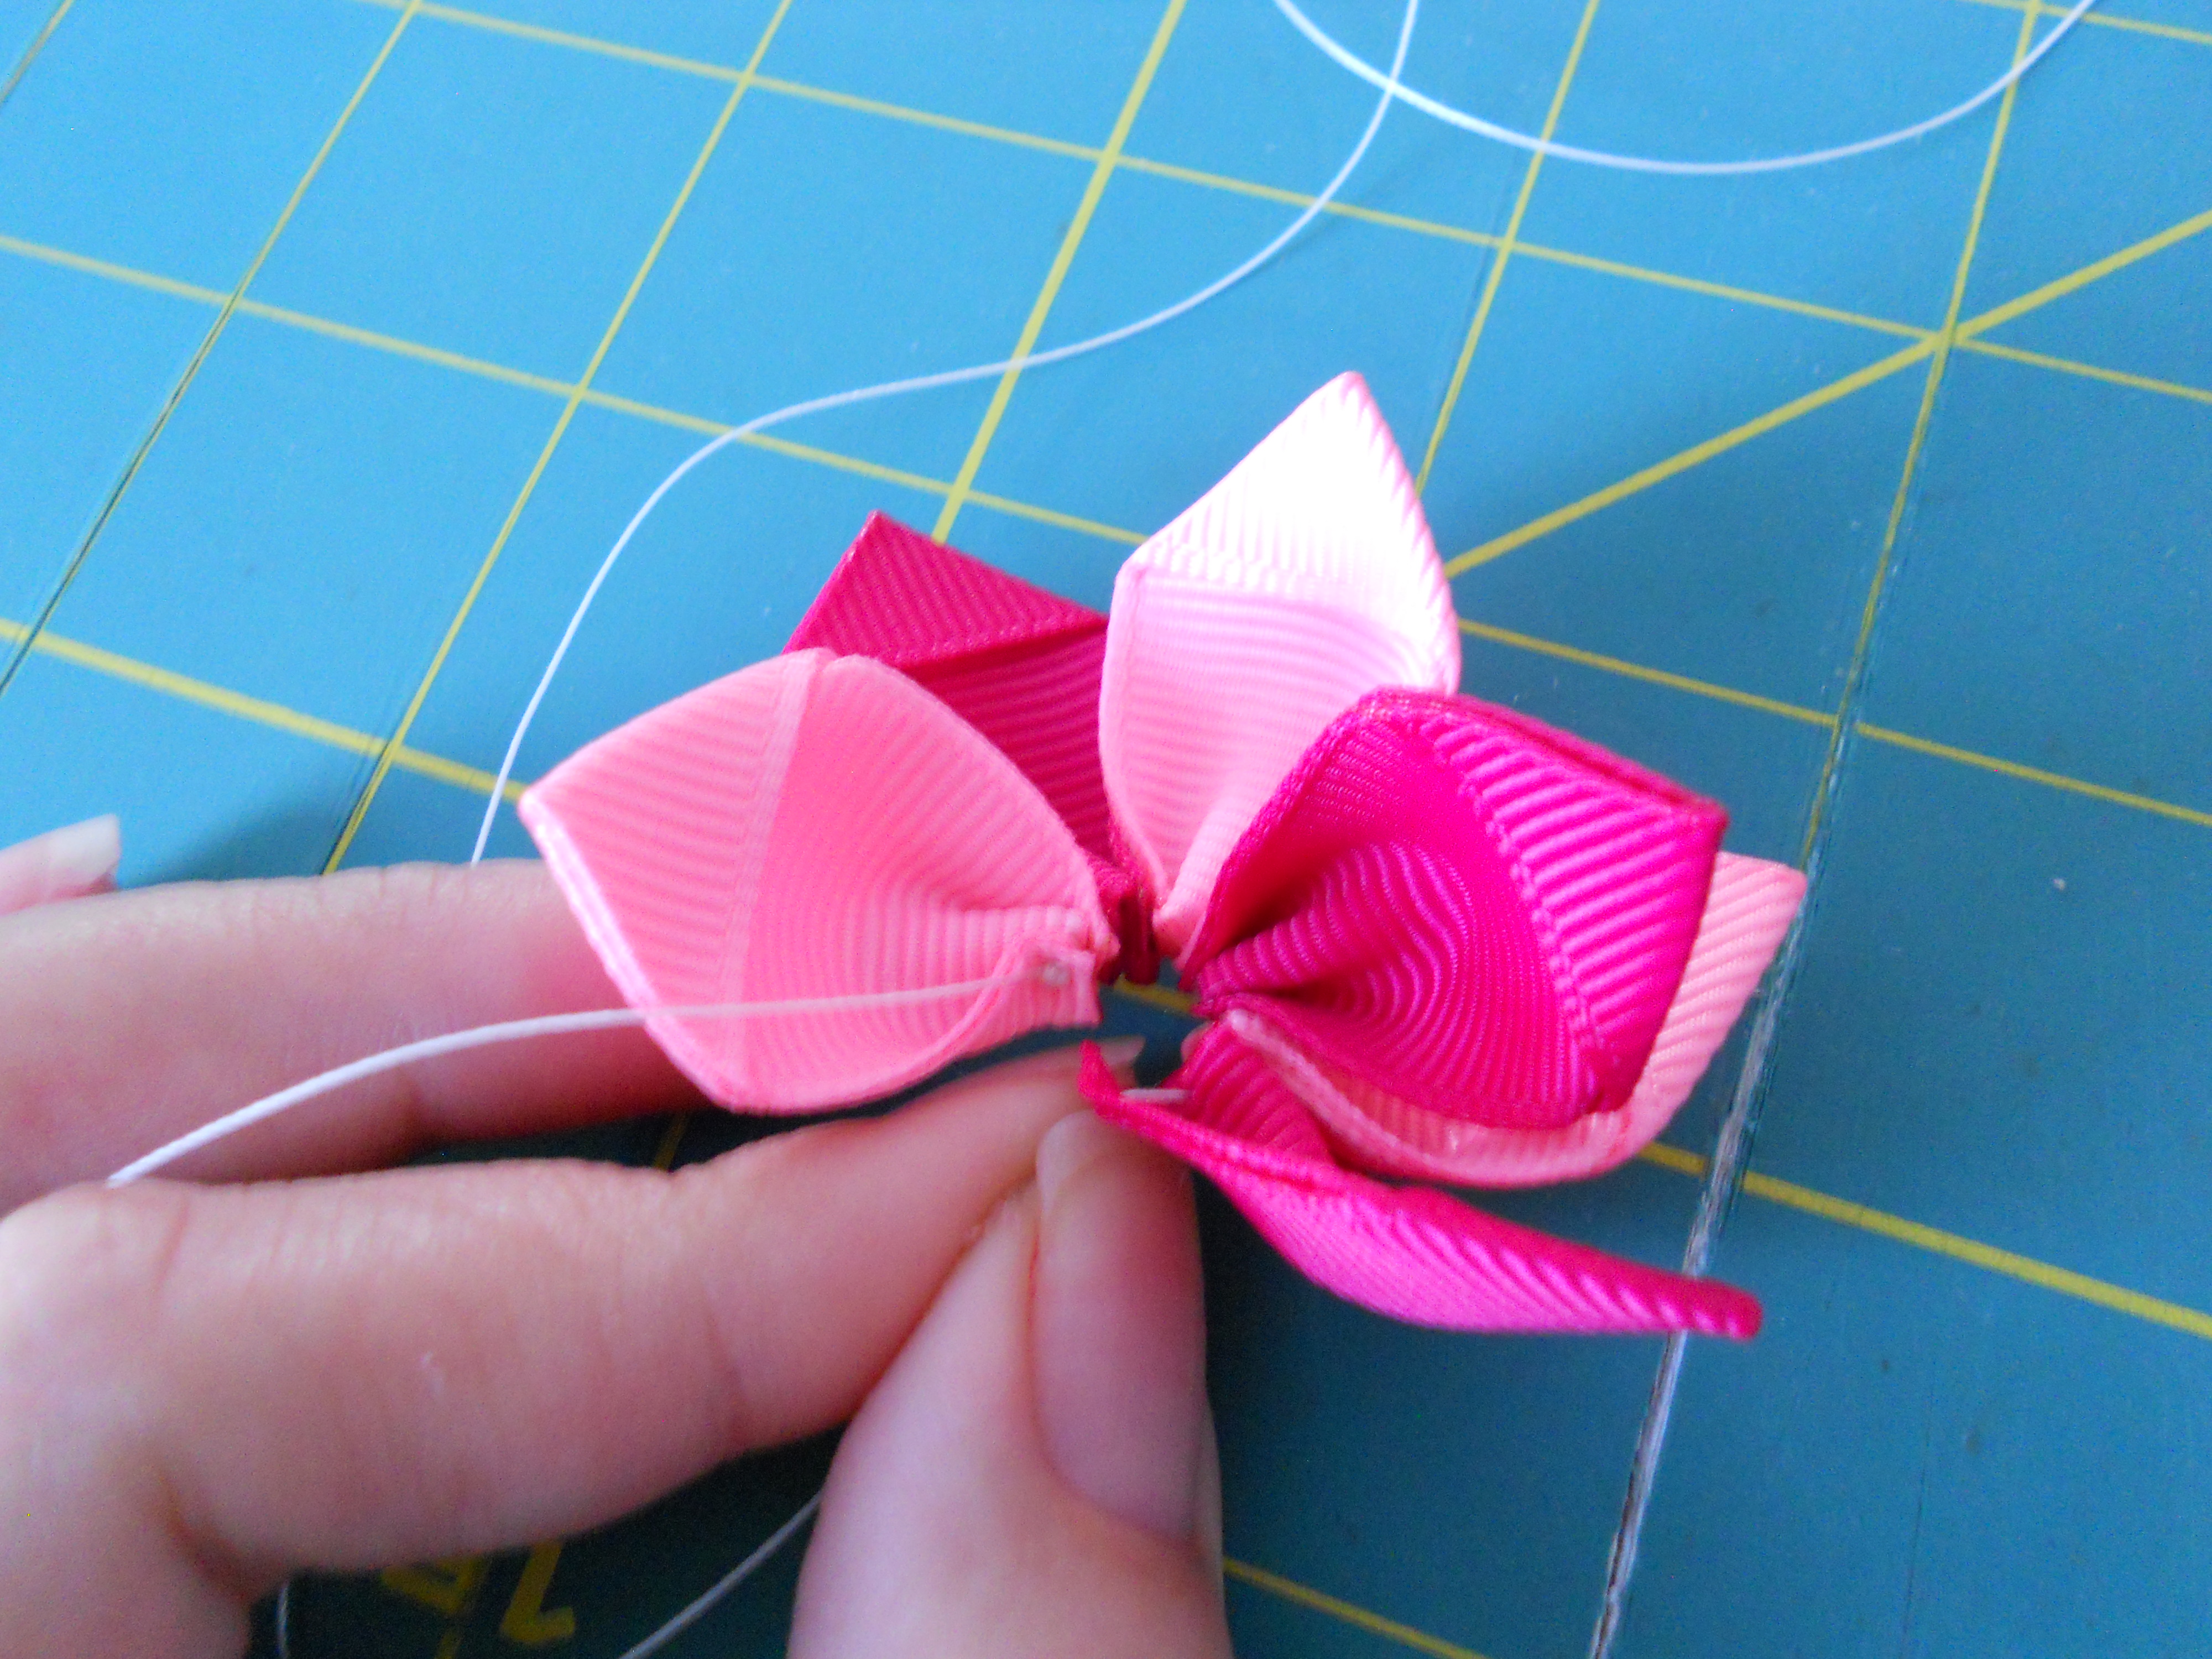
Step 8: Adjust your petals to get the desired look. Some of your ribbon petals may be overlapping or bunched up - that's okay. You can adjust the petals to line them up evenly. Just remember not to pull too hard!

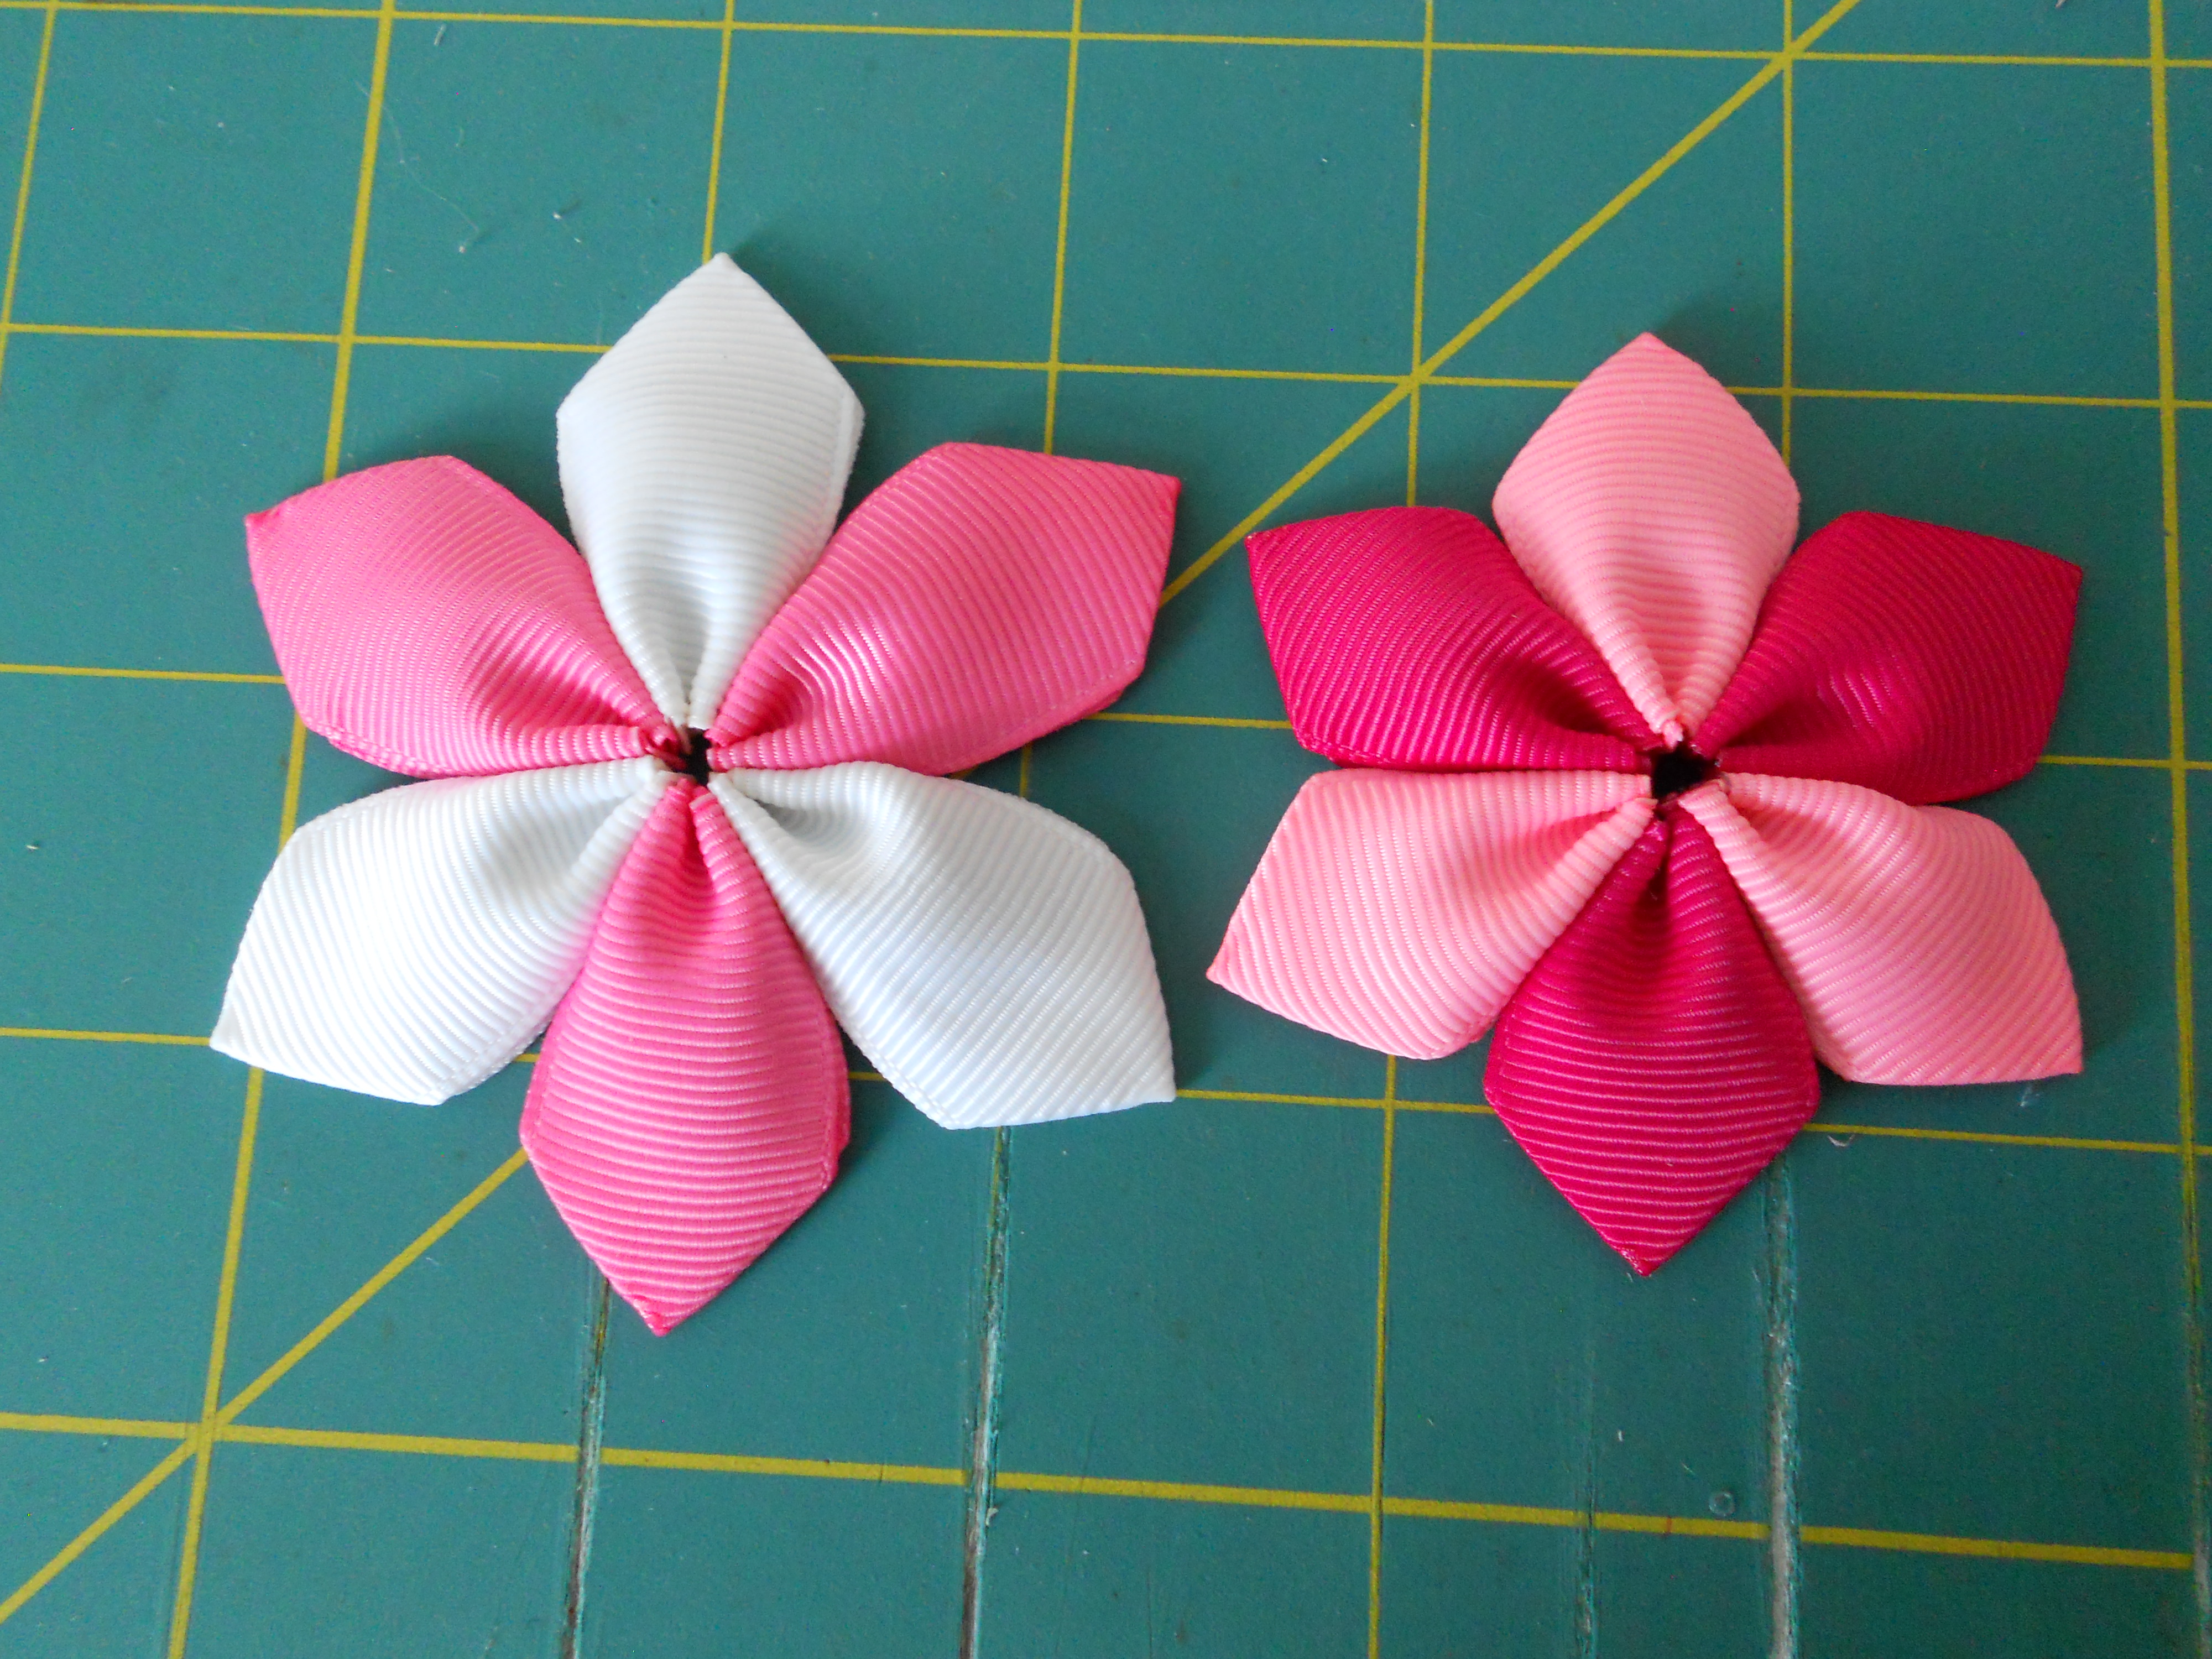
 Step 9: Repeat steps 2 and 3 to form your ribbon petals for the bottom layer of your flower.


Step 10: Repeat step 5 to thread your ribbon petals.

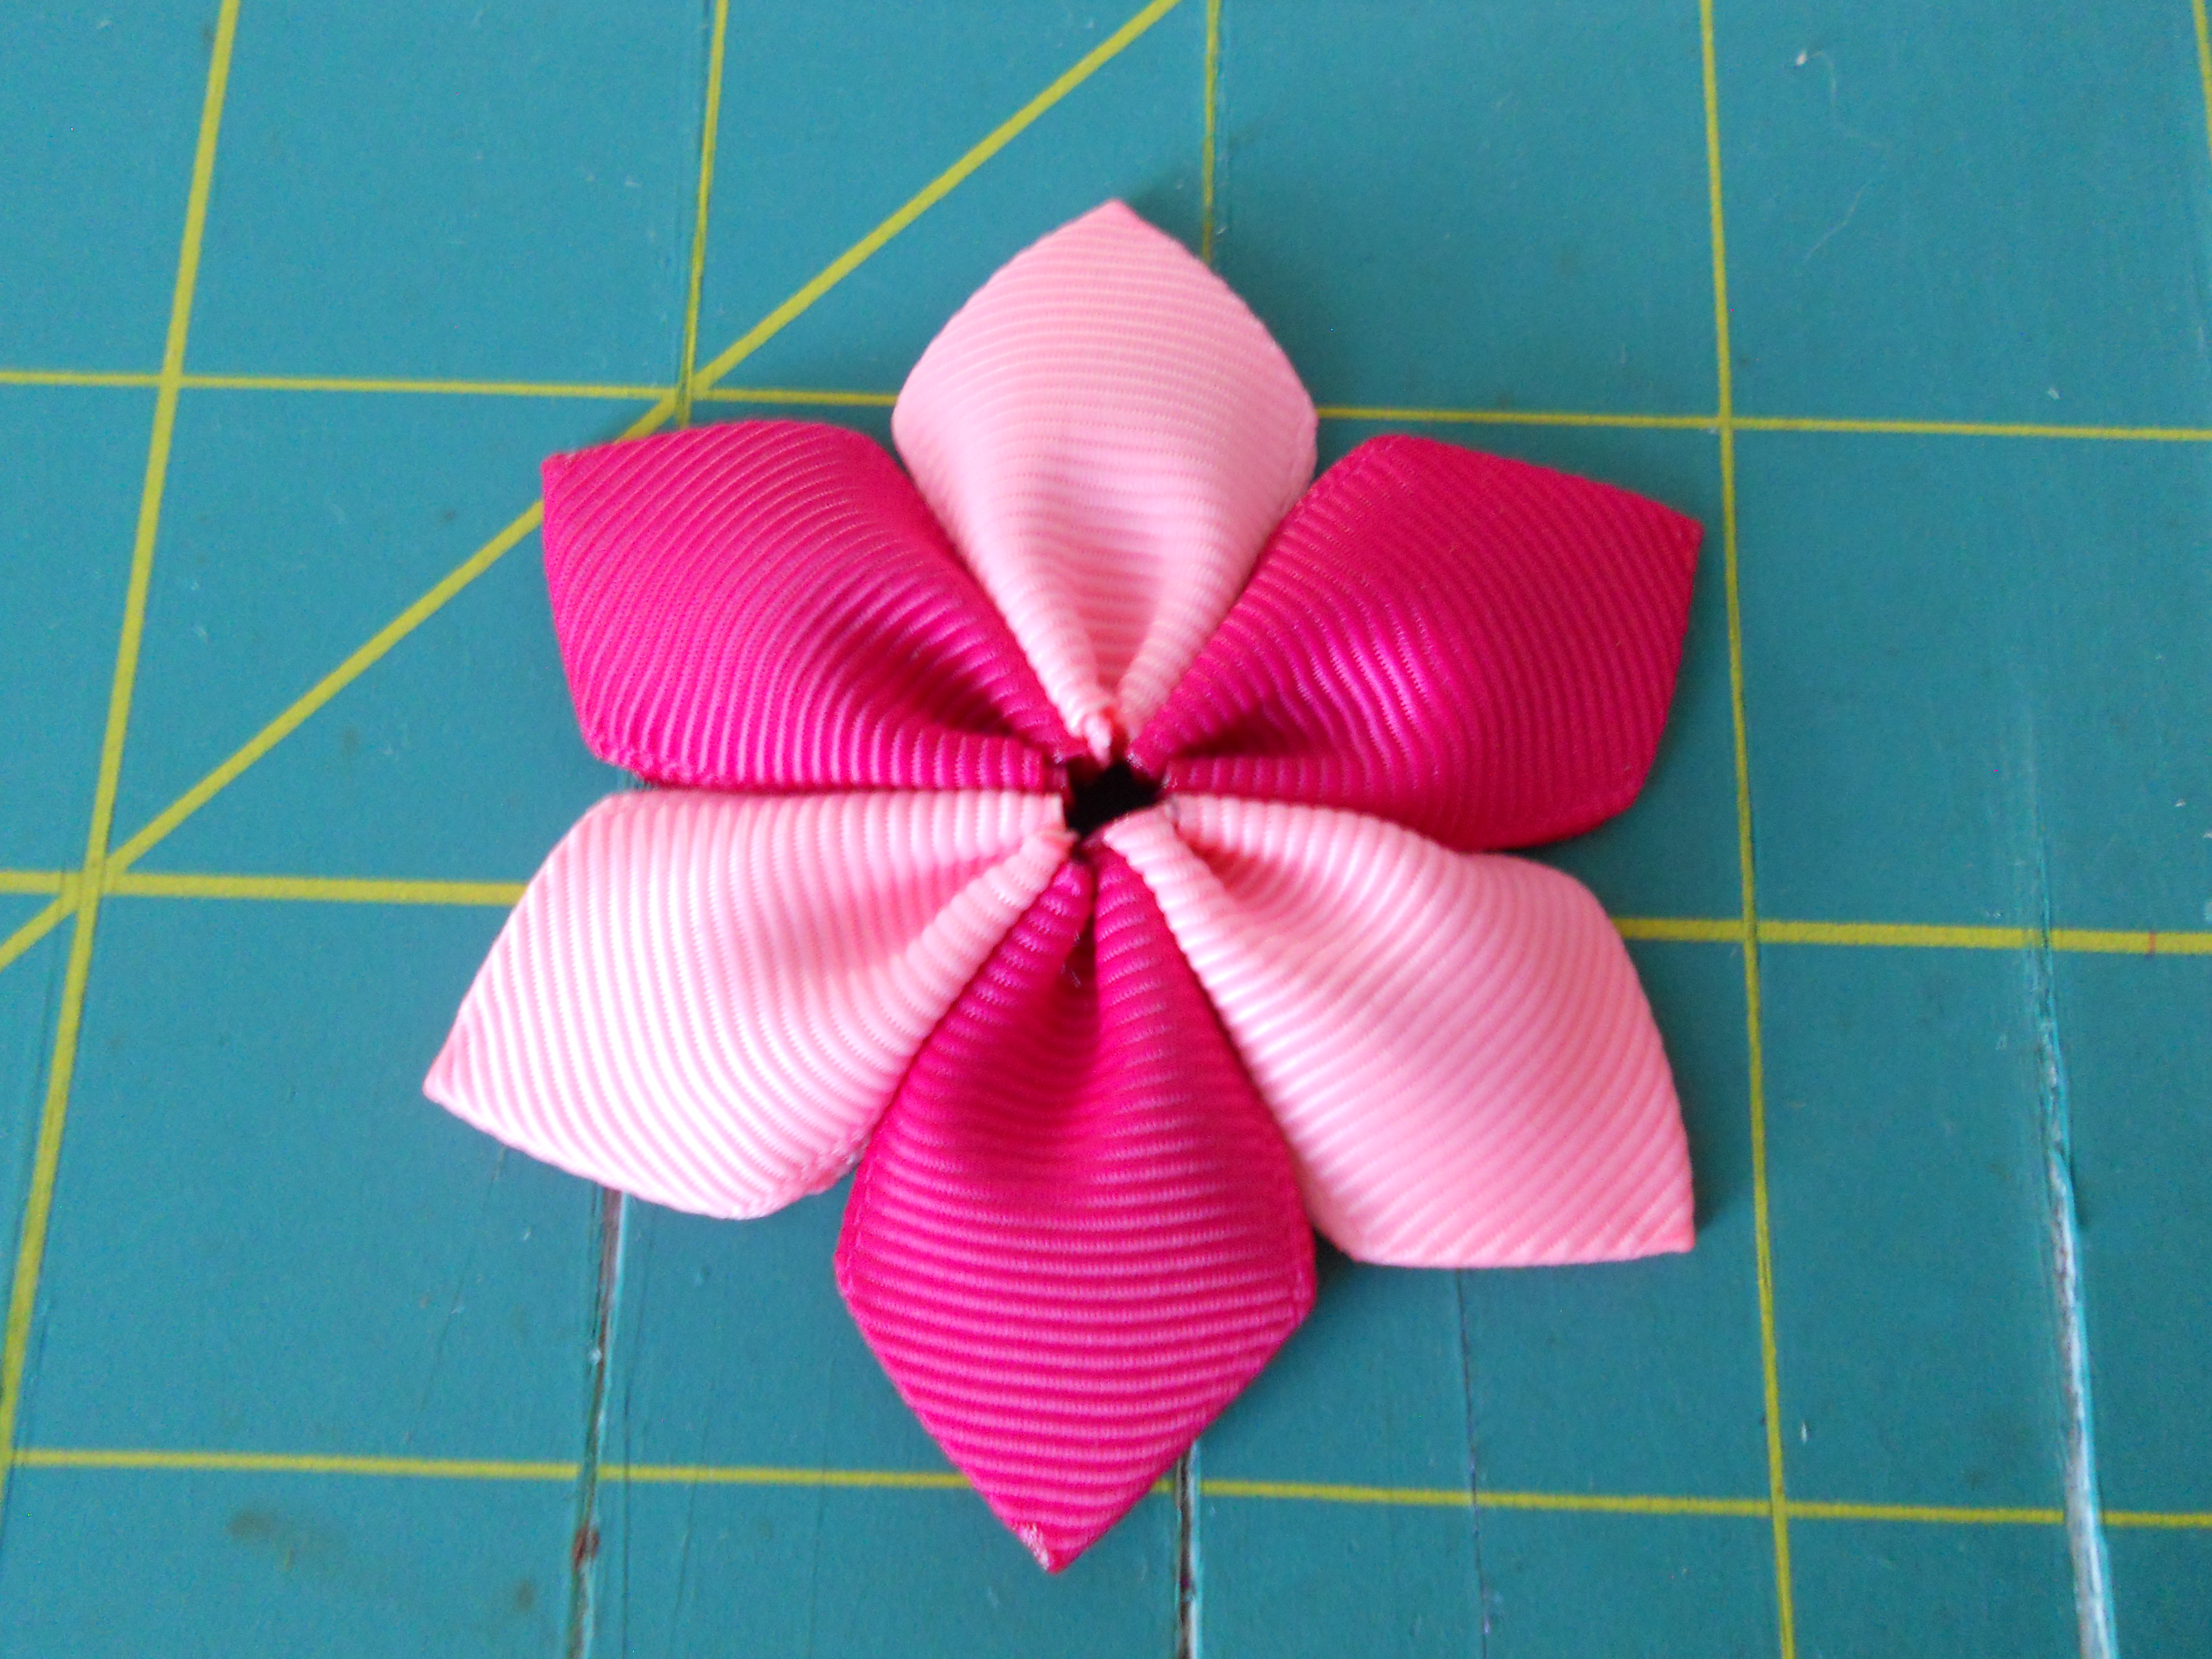
Step 11: Repeat step 6 to thread all of your ribbon petals and form your flower.
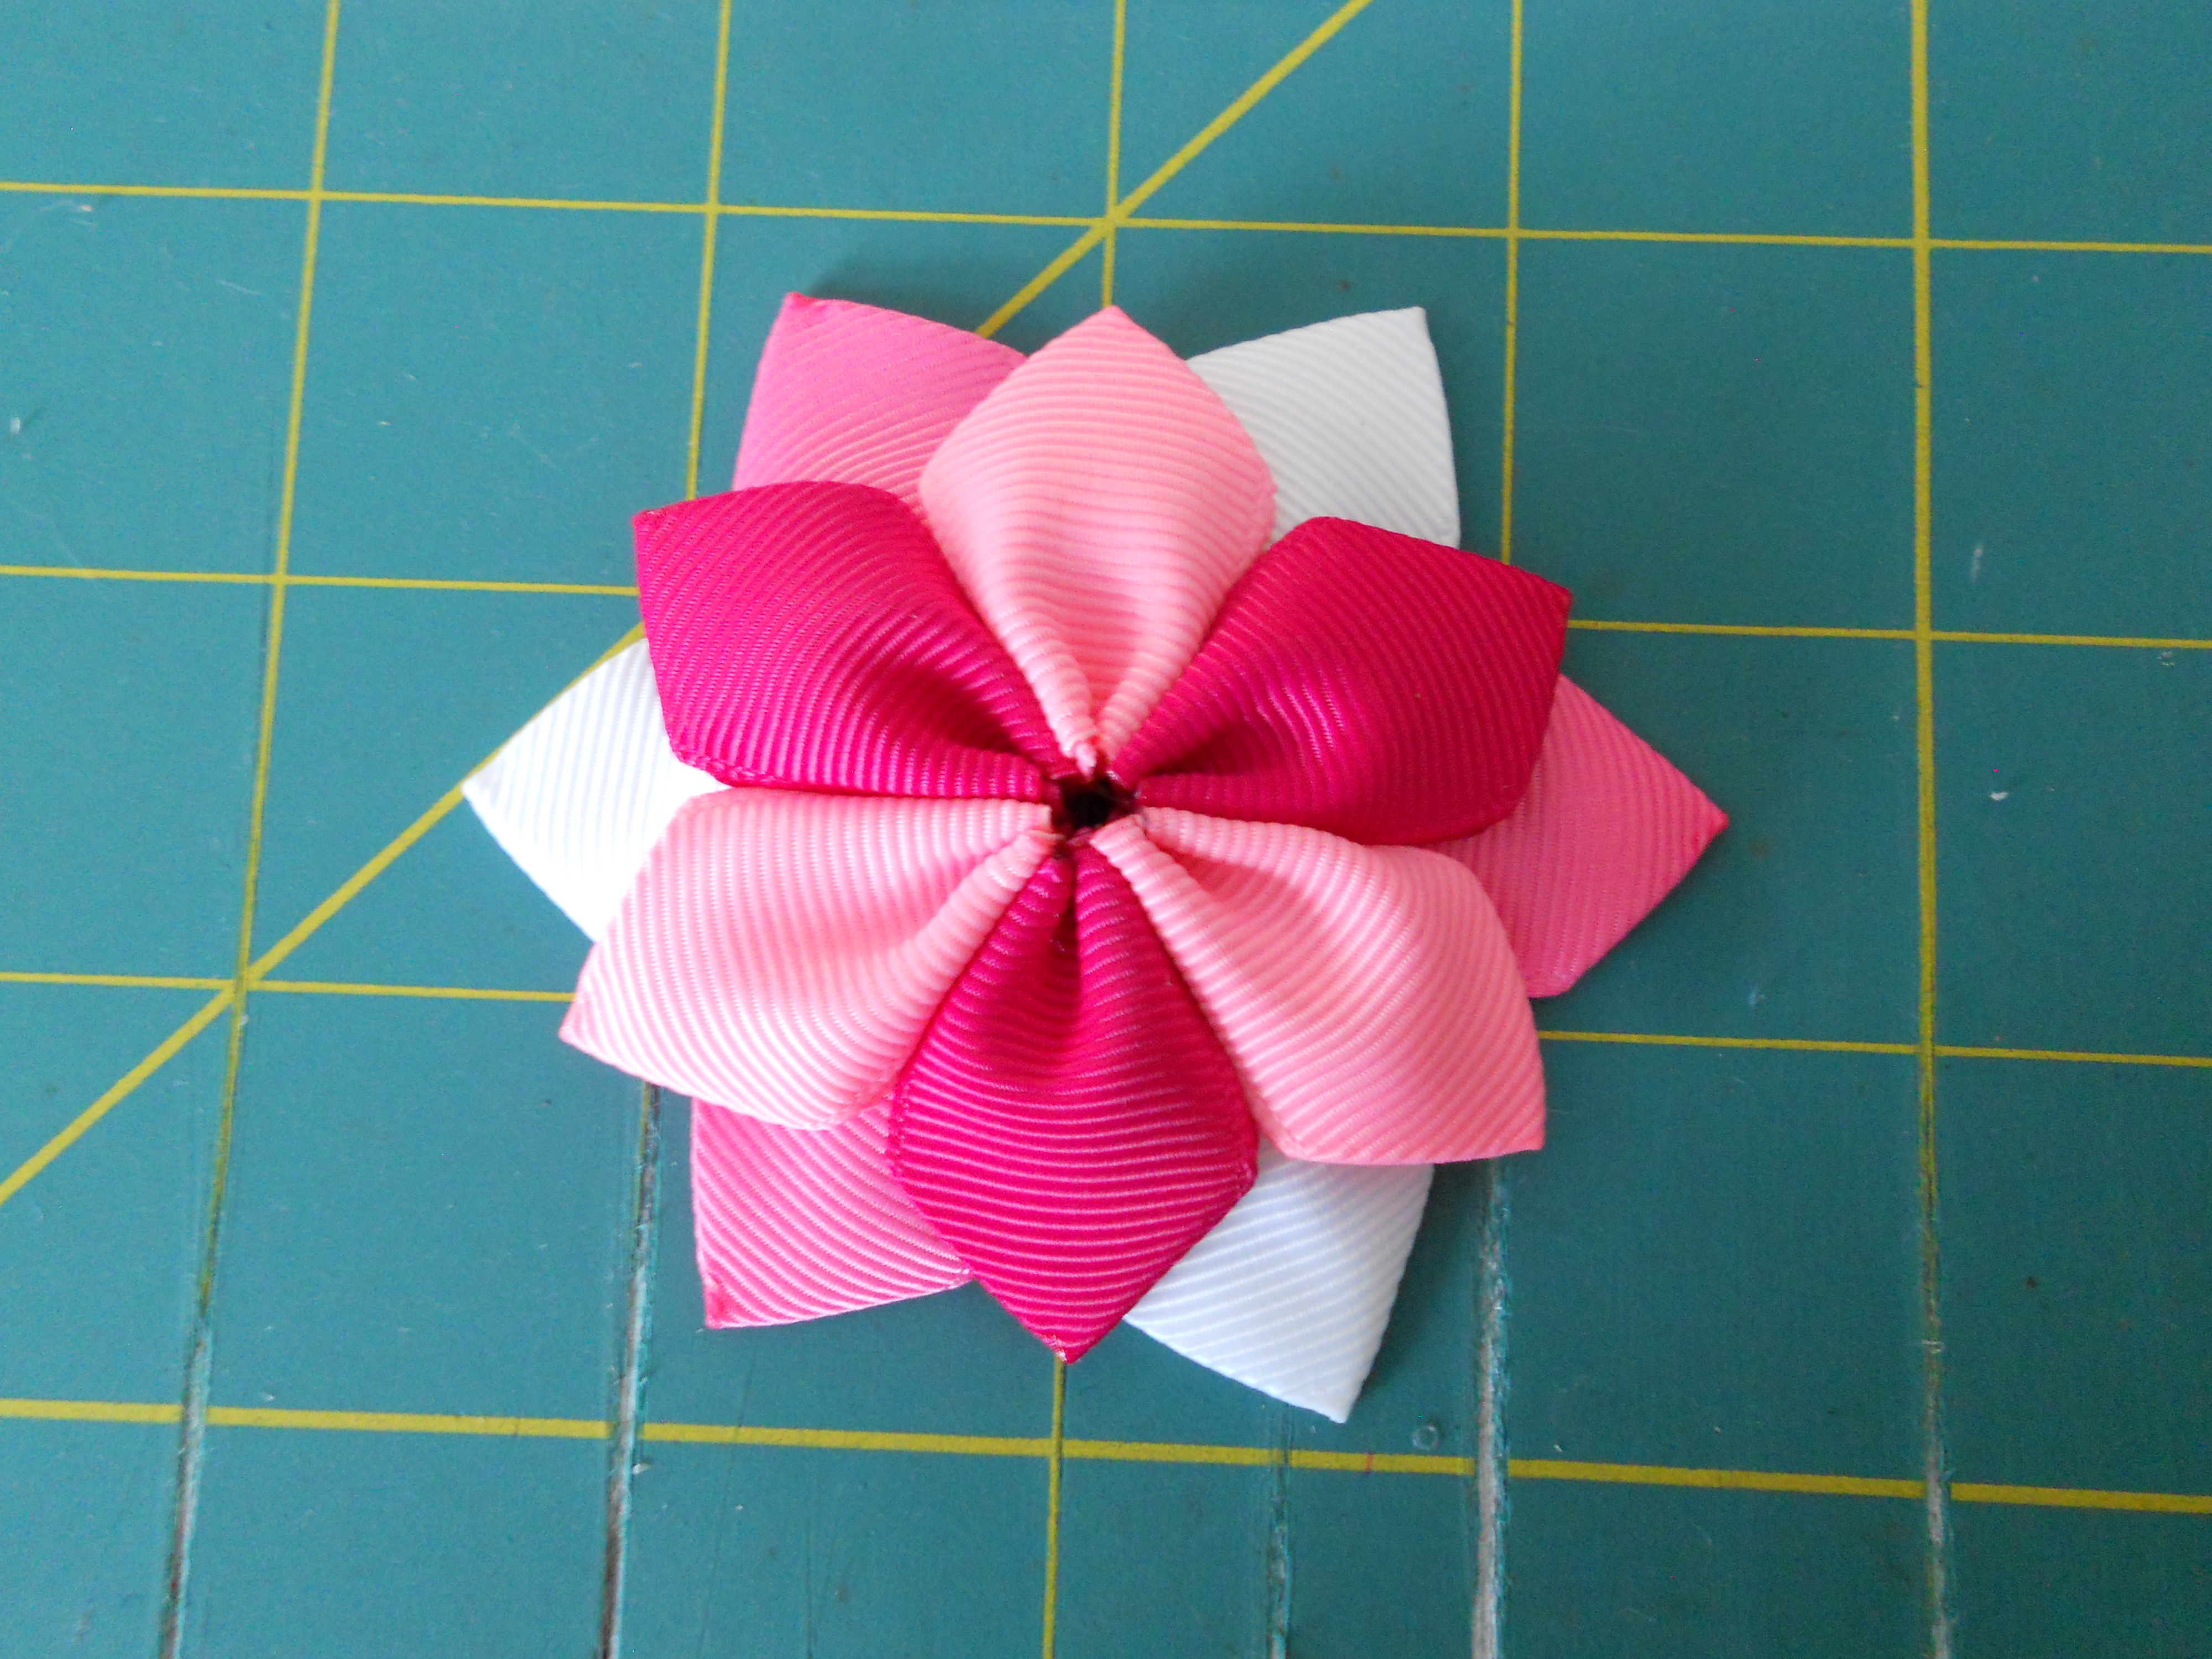
Step 12: Now that both of your flowers are completed we are going to glue them together. Your large flower will be the bottom layer. Put a circle of hot glue around the center of your large flower and glue your small flower on top. I prefer to have my flower petals staggered.
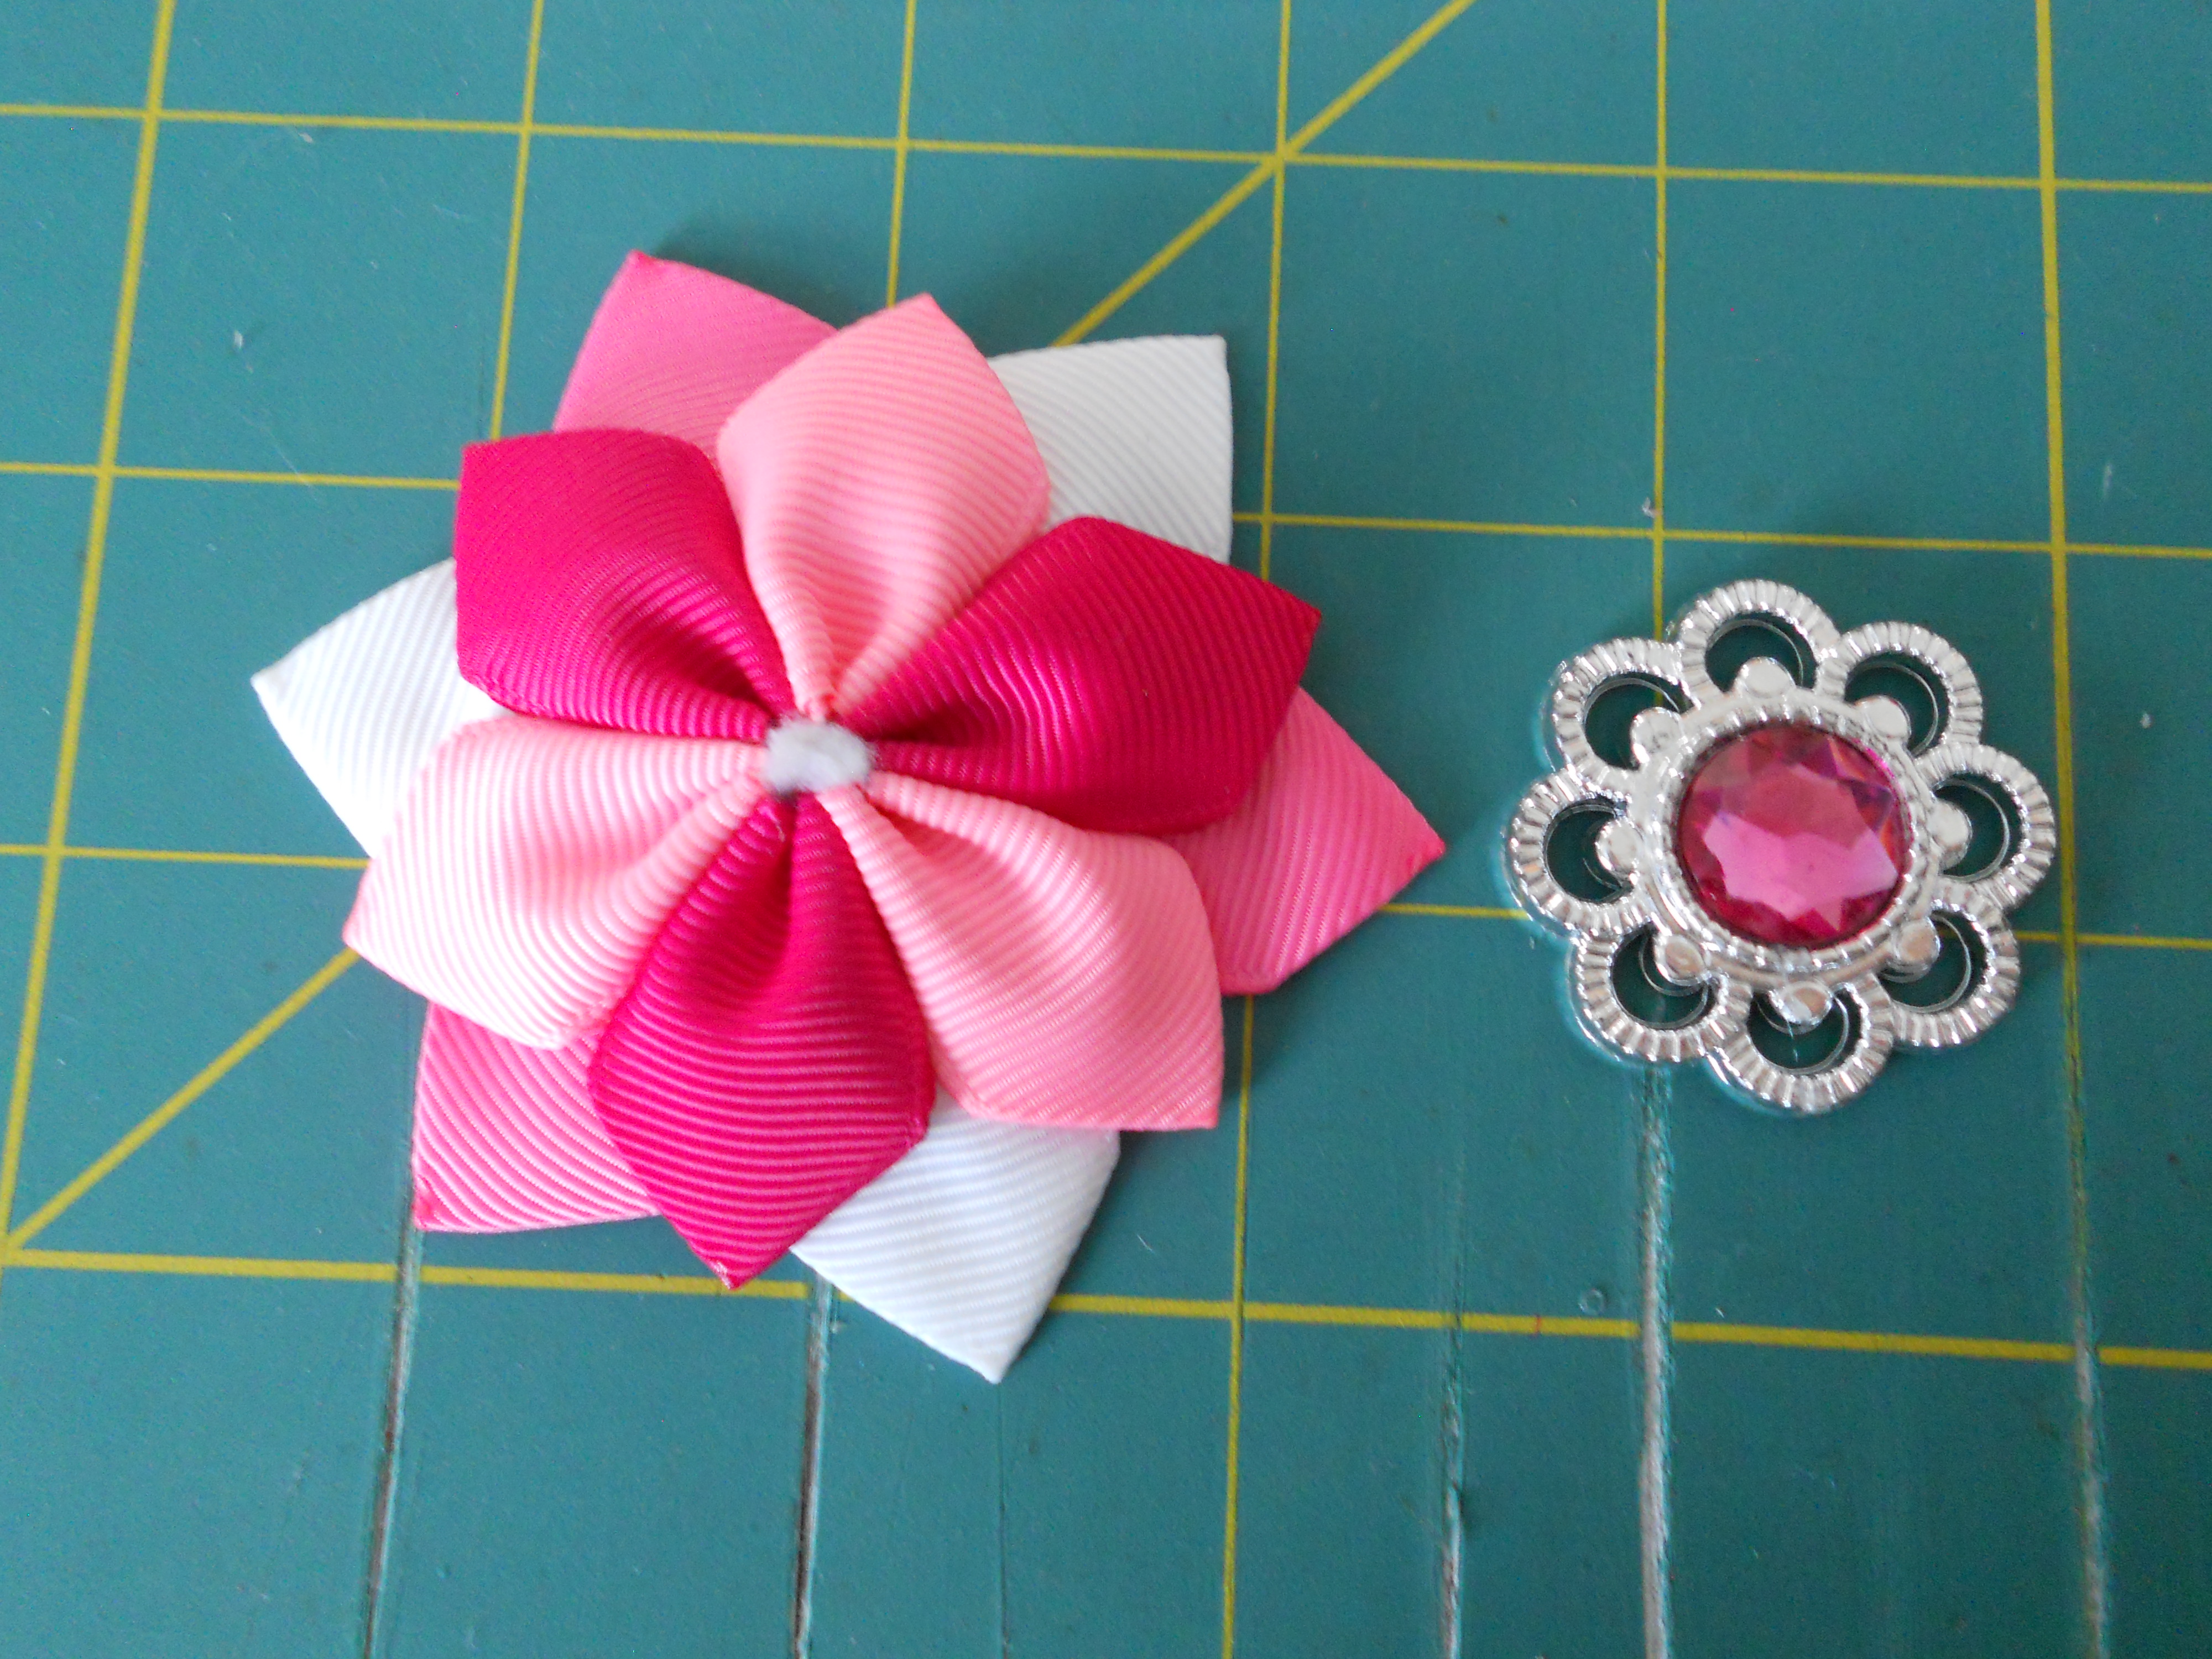
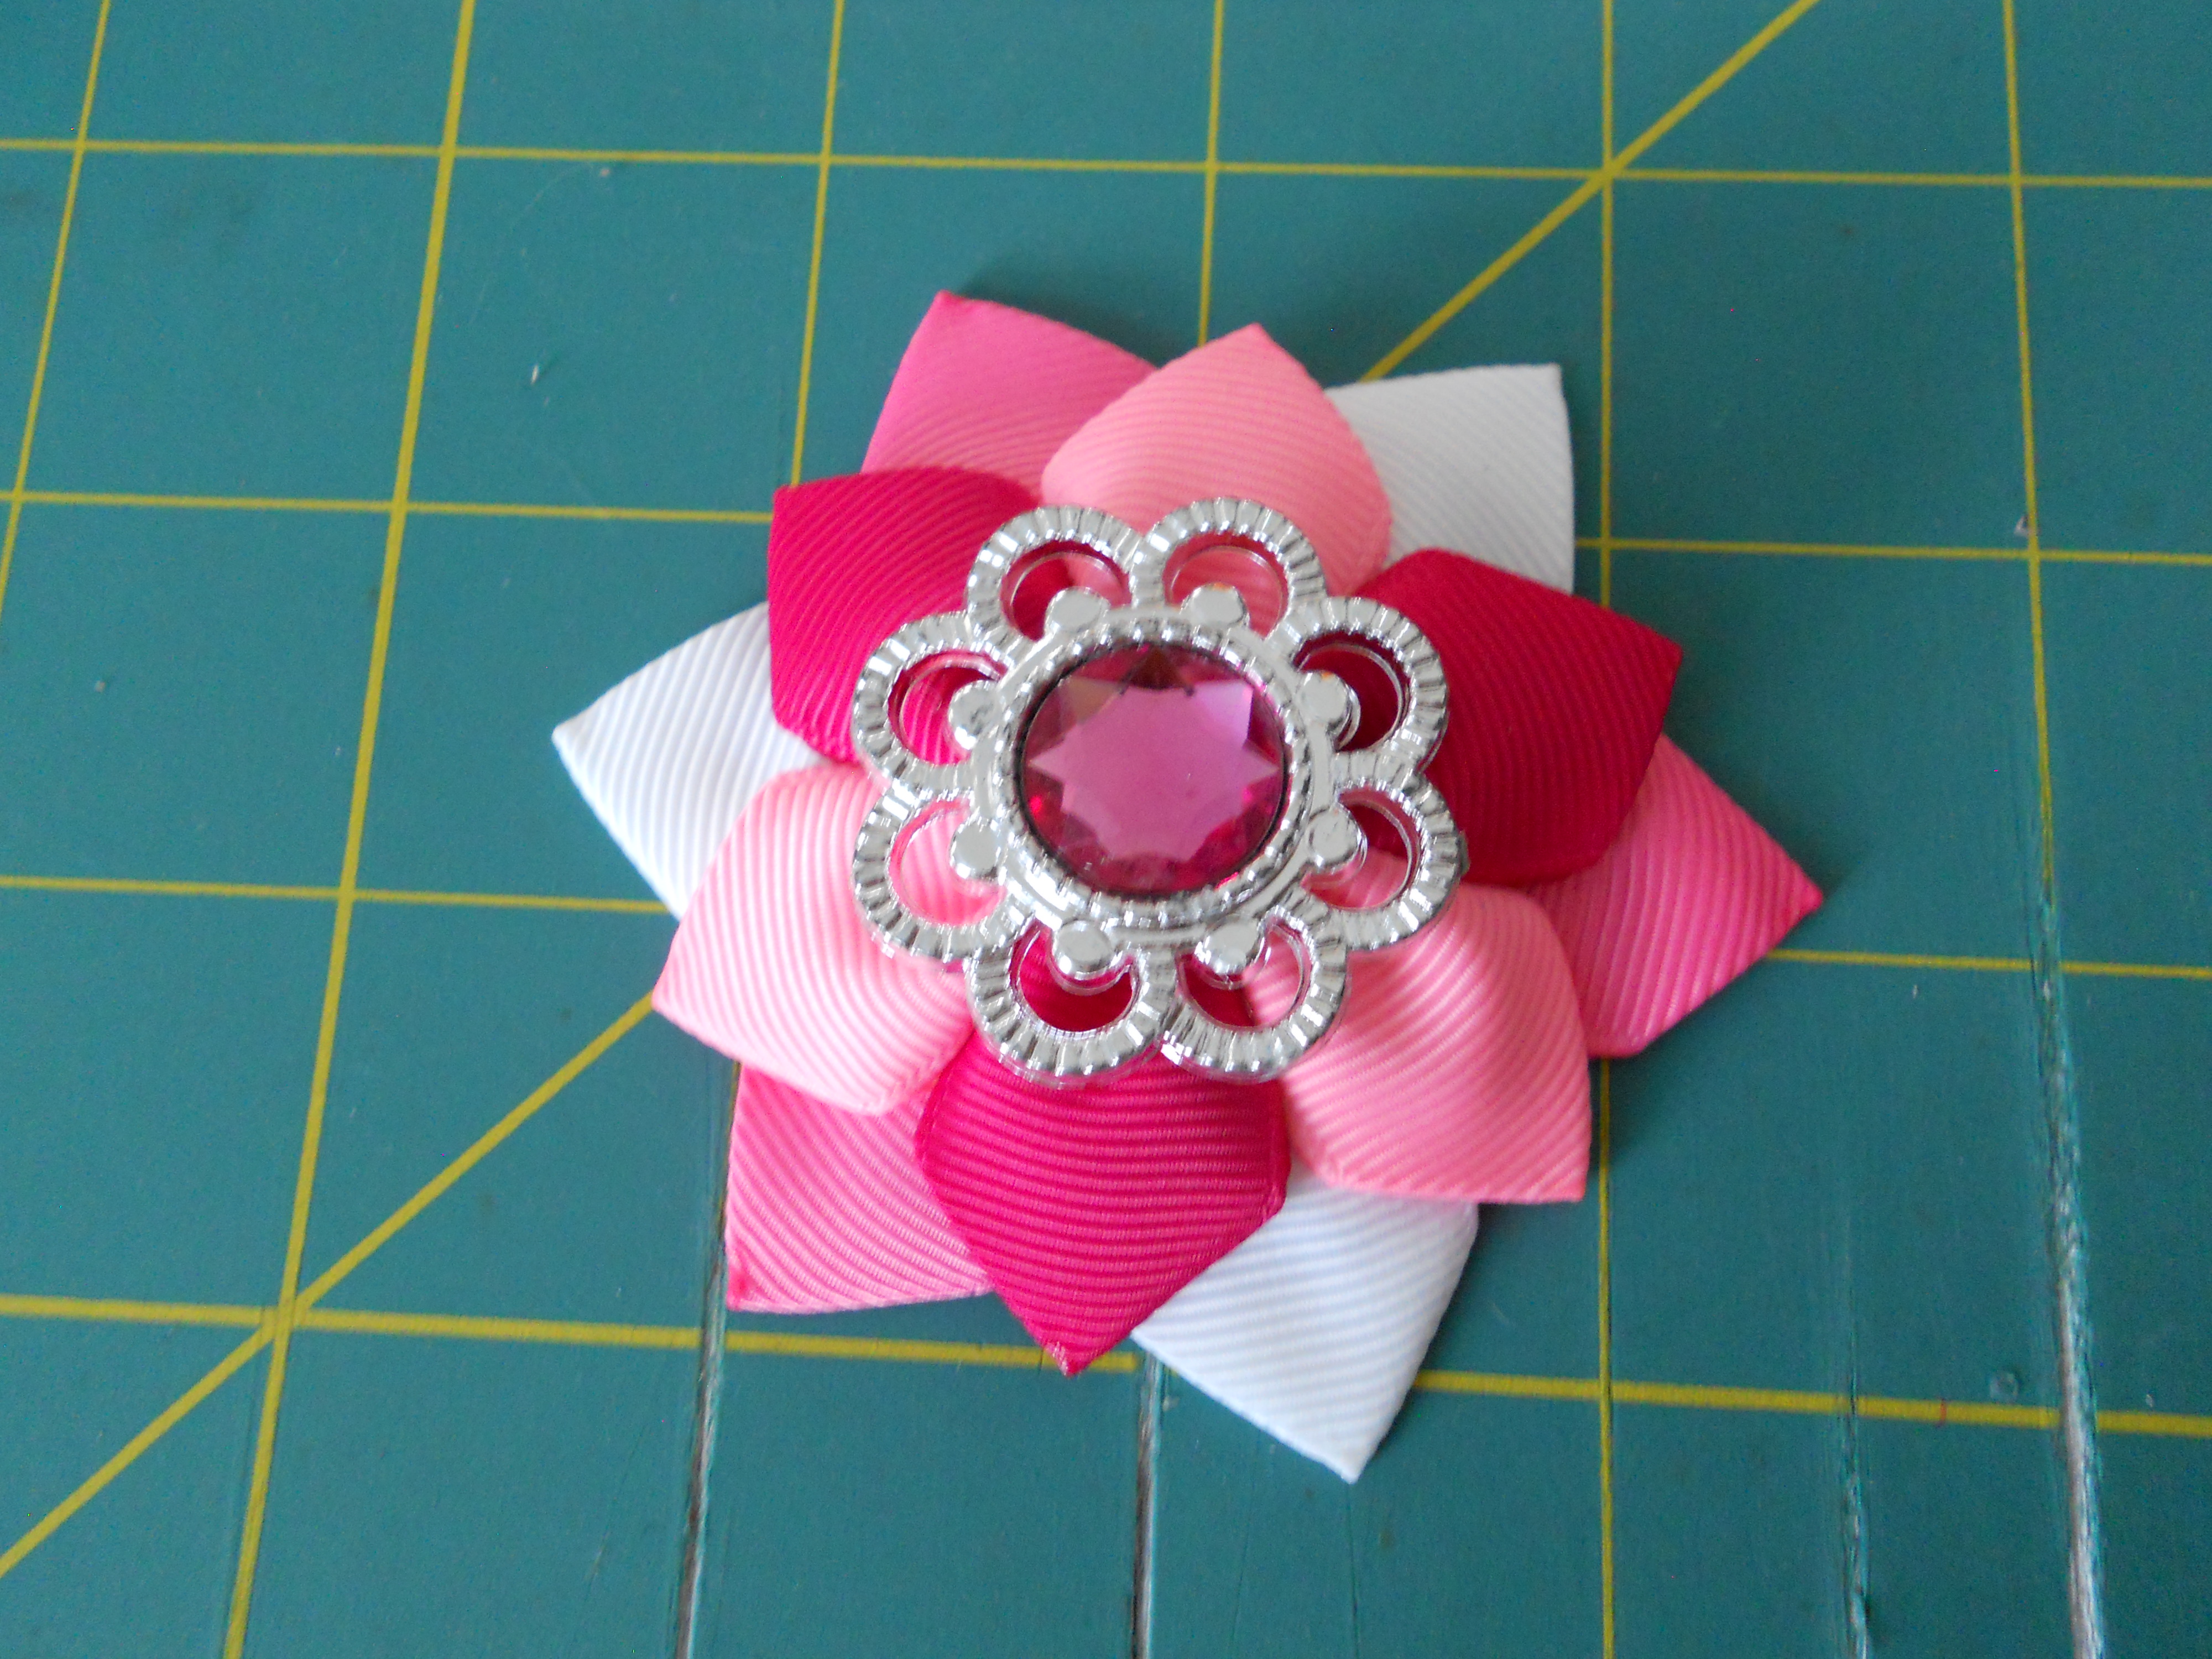
Step 13: Glue a small piece of felt down in the center of your flower. This is optional but I feel it makes my center sturdy. Glue your rhinestone in the center. I just love these flower rhinestones from HBC they are the perfect size for these flowers.
Visit the rest of our blog for more Crafting Tutorials and DIY Instructions!
Loading...

