 Contributor post by Brittany
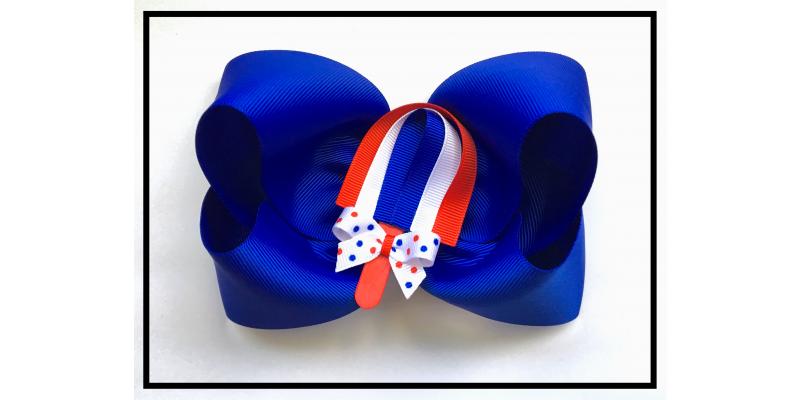
HBC has me thrilled once again about a newly offered item! LACE!! Seven different kinds of lace to be exact (including 3 stretch elastic lace trim options!) that range from 3/8" to 6.5"! Check out the beautiful variety of colors and the gorgeous details of each style of lace trim! With so many amazing options it's easy to take your crafting projects to the next level! Whether you want to make simple lace headbands, use as accents in your over-the-top hair bow creations, make a festive table runner for the holidays, or use in scrapbooks or picture frames, the possibilities are endless! Today we are going to use lace to show you how to create a simple yet beautiful vintage ruffled lace flower. And best of all? We are making this with NO sewing! Everyone knows sewing just isn't my favorite thing to do, so for all my fellow needle & thread haters, this is for you!
Contributor post by Brittany
HBC has me thrilled once again about a newly offered item! LACE!! Seven different kinds of lace to be exact (including 3 stretch elastic lace trim options!) that range from 3/8" to 6.5"! Check out the beautiful variety of colors and the gorgeous details of each style of lace trim! With so many amazing options it's easy to take your crafting projects to the next level! Whether you want to make simple lace headbands, use as accents in your over-the-top hair bow creations, make a festive table runner for the holidays, or use in scrapbooks or picture frames, the possibilities are endless! Today we are going to use lace to show you how to create a simple yet beautiful vintage ruffled lace flower. And best of all? We are making this with NO sewing! Everyone knows sewing just isn't my favorite thing to do, so for all my fellow needle & thread haters, this is for you!
 Listed below are the supplies you will need:
•7/8" ribbon hole French lace trim-- Red (click to view)
•1.75" circle felt pad (click to view)
•white pearl w/rhinestone surround embellishment center (click to view)
•silver sparkle fold over elastic headband (click to view)
•scissors
•hot glue gun (click to view)
Listed below are the supplies you will need:
•7/8" ribbon hole French lace trim-- Red (click to view)
•1.75" circle felt pad (click to view)
•white pearl w/rhinestone surround embellishment center (click to view)
•silver sparkle fold over elastic headband (click to view)
•scissors
•hot glue gun (click to view)
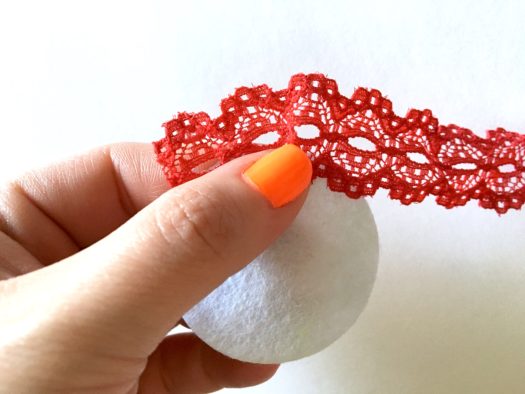
 To begin creating your ruffled lace flower, you will need your circle felt pad and your choice of lace. Each type of lace, it's size, and color will create completely different looks. So play around with each until you find just the right look you're going for. I wanted a thick, strong lace in a bold color, so I chose the ribbon hole French lace trim in red. This ribbon is very unique not only for its strong durability, but the holes that run down the center of the lace. You can thread small ribbon through its holes to create an awesome, unique look while adding an additional pop of color to your project as well! Now that you know a little more about the ribbon we're using today, let's get busy! In the pic shown above I have simply used hot glue to secure the first 2 sections of lace (1 section= 1 circle of lace with ribbon hole in center) onto the circle felt pad. I highly recommend using hot glue finger guards to keep from burning your fingers. If you don't have any, be sure to wait a couple seconds before firmly pressing down into your hot glue to attach the lace to the felt pad so that you do not burn your fingers.
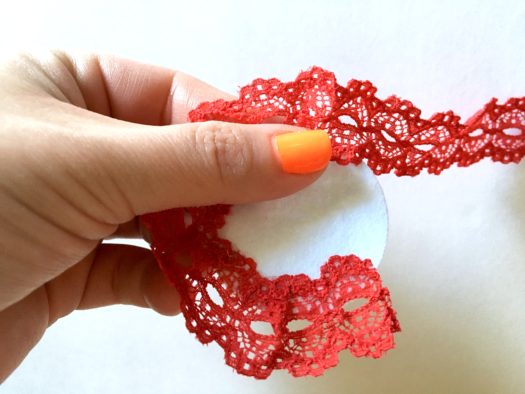
 With our first 2 sections of lace attached, now we can make our first ruffle. Apply a generous dot of hot glue on the front side of your lace in the bottom right corner that was just attached. Fold lace over onto the glue from the next section of lace as you see in the pic above. You can fold over a little for a smaller ruffle, or fold over a lot more for a bigger, more dramatic ruffle.
 Continue gluing down 2 sections of lace followed by a ruffle, over & over...
 Once you have made a complete circle as shown above, drop down gradually with your lace and continue attaching. I am bringing my second layer of lace down just far enough where it will cover the ribbon holes from my outermost layer.
 Continue applying more lace and ruffles... You will make 4-5 complete circles and watch the white center of your felt pad get smaller and smaller. Once the remainder of felt shown is about half the size or less of the embellishment you're using (see last pic in collage above) you can cut your lace off from its spool. For an attractive finish I rolled the cut edge of my lace backwards and secured so it disappears into the layers and blends perfectly.
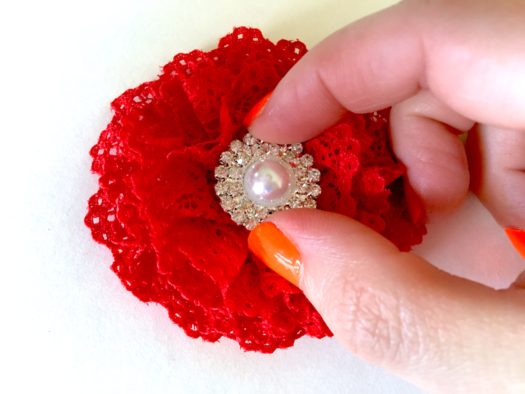 Now to top off this gorgeous flower, I am using one of my favorite embellishment centers from HBC! This beautiful white pearl w/rhinestone surround embellishment center is absolutely perfect for this project! I love the rows of sparkly diamonds that surround the perfect white pearl! Now that's a knockout!
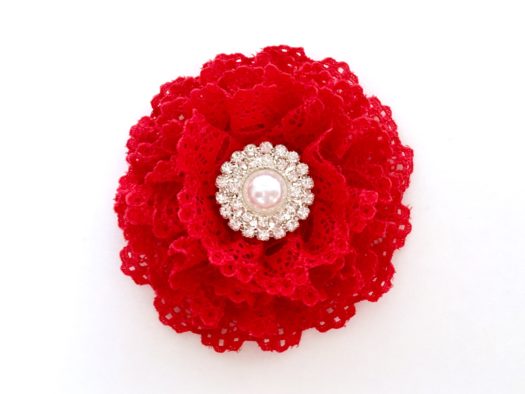 This vintage ruffled lace flower is complete and can now be used in numerous ways. You could attach an alligator clip to the back and use as a simple but elegant small hair clip, or you could add to a collection of other flowers and small bows and create an eye catching maternity sash for a special friend's maternity photo shoot, or even add some flair to a plain shirt for an adorable accent that your little love will adore! I have decided to attach this flower to a silver sparkle fold over elastic headband to give this accessory the perfect balance of modern & vintage. Check out how these shimmery silver sparkles compliment our bold, deep red flower! Just gorgeous!

Visit the rest of our blog for more Lace and Flower Tutorials, Crafting Tutorials and DIY Instructions like this hand-made ruffled flower!
Loading...

