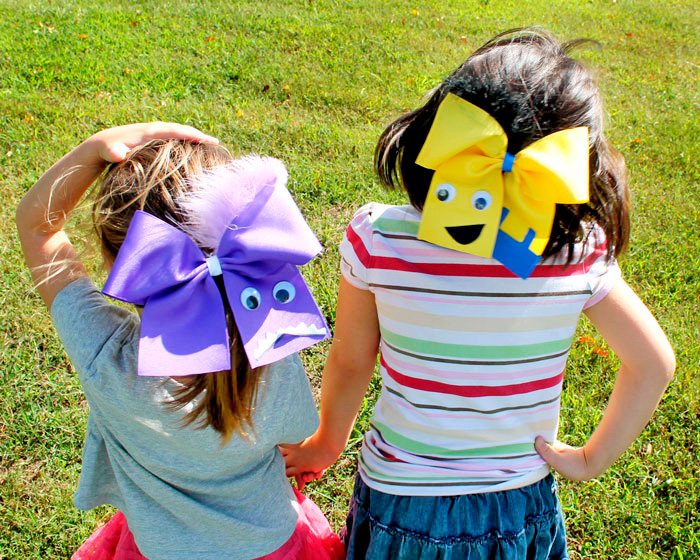
Have you noticed the minion craze lately? Not only are these little guys cute and funny, I'm pretty sure every child LOVES them! So these cute simple bows are a win-win for your little girl(s)! So if you have the basics of making a cheer bow down, then this tutorial will be a breeze. If you don't know how to make a cheer bow don't sweat it; They are easy to make and HBC has a few tutorials to show you how, and of course I will show you in this tutorial, also. :)
Evil Minion
To create the Evil Minion (purple minion) you will need the following items:
- 28" of 3" Schiff Grosgrain in Periwinkle
- 2" of 3" Schiff Grosgrain in white
- 6" of 3/8" Schiff Grosgrain in white
- 3.5" of a Lavender Marabou Boa
- 2 of the 20mm Googly Wiggle Eyes
- 1 large black Premium Ponytail Hair Band
- E6000 or QuickHOLD Adhesive (I used QuickHOLD because it dries faster)
- Needle and thread
- Glue and Glue Gun
- Lighter (Heat Sealing)
- Ruler or a Measuring Board
- Scissors
- Permanent Marker (optional)

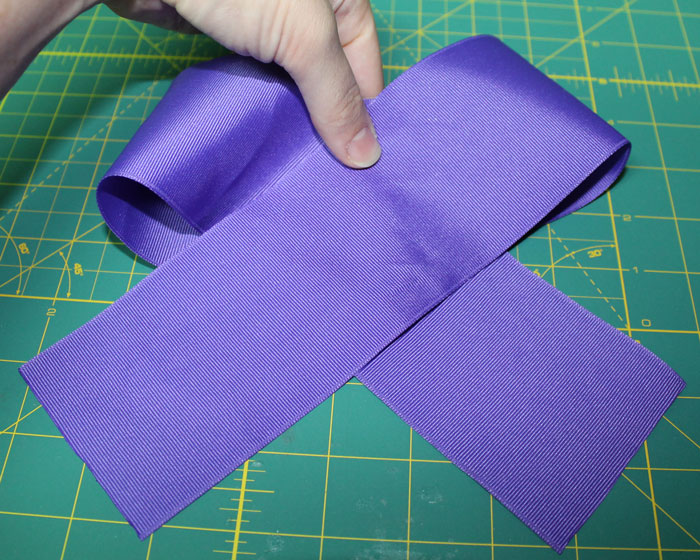
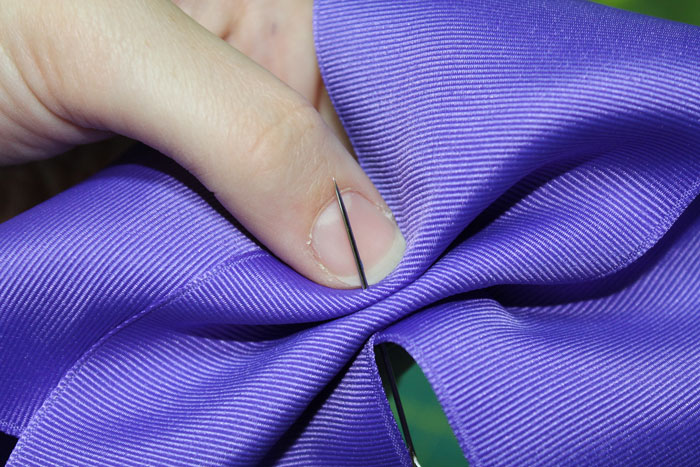
4. Now carefully take your ribbon and fold it in the center. If you used a clip for the last step you will need to remove it to fold the ribbon.
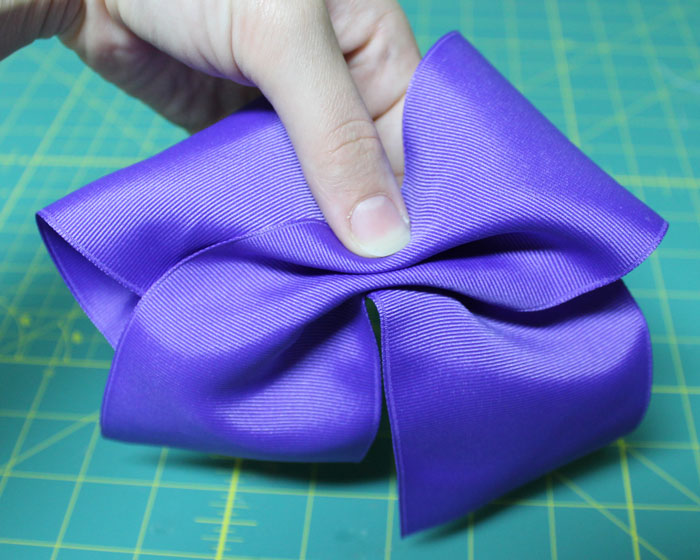
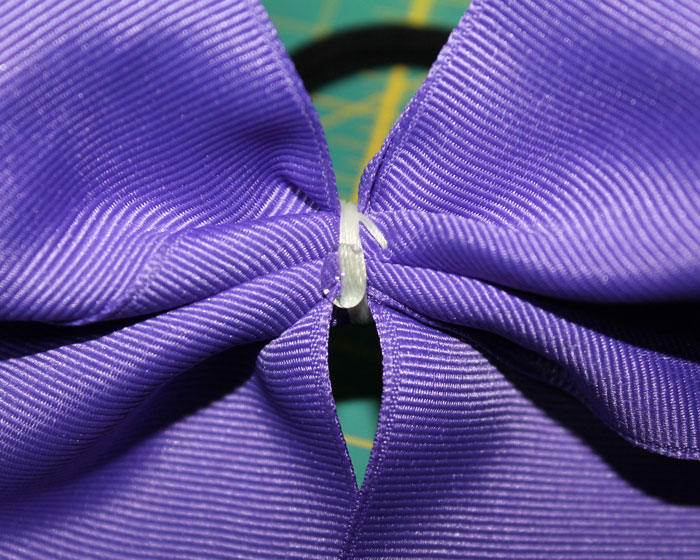
5. Once you have the ribbon folded you are going to take the needle and thread and push the needle through the center of the fold.
6. Pull the thread all the way through until you come to the knot at the end; then wrap the thread around the center and tie off.
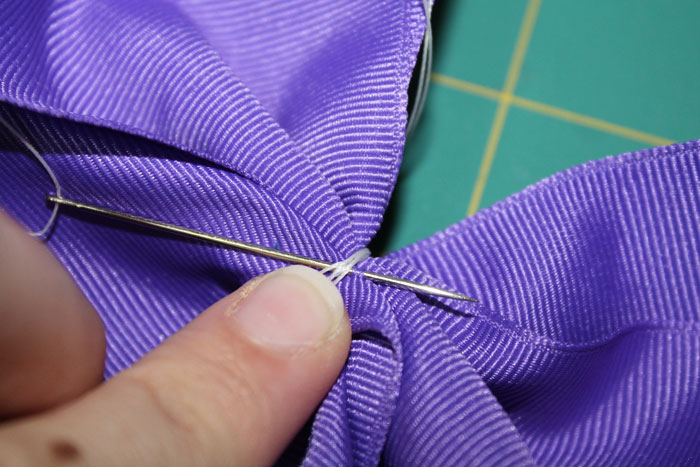
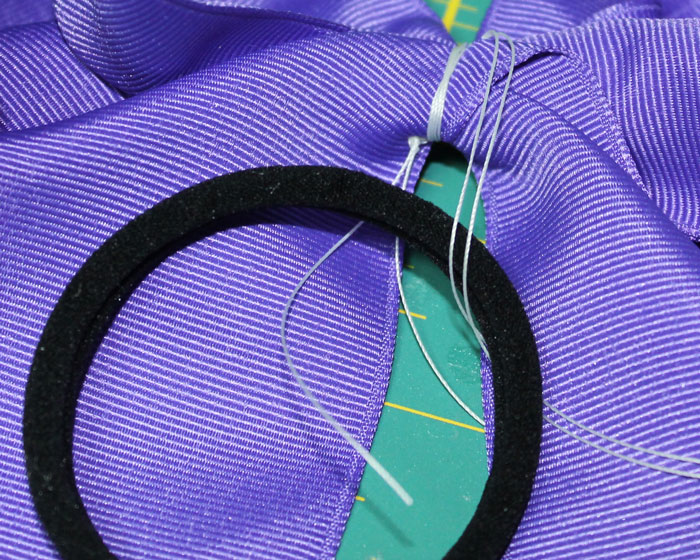
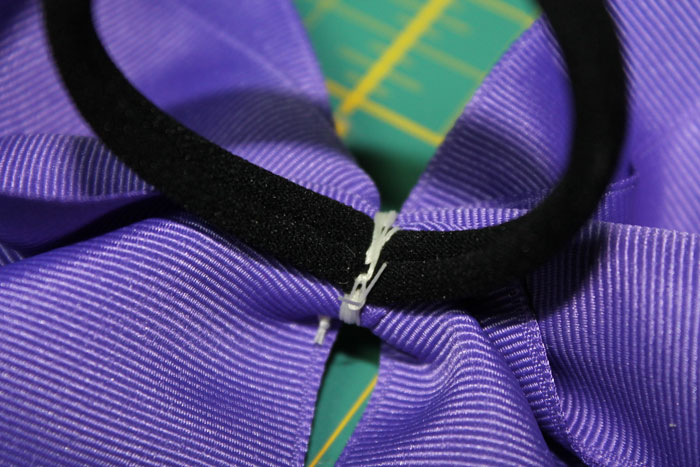
7. Take your ponytail holder and loop the thread through the center of the ponytail holder. Then wrap the thread around the ponytail holder like you did for the center of the bow.
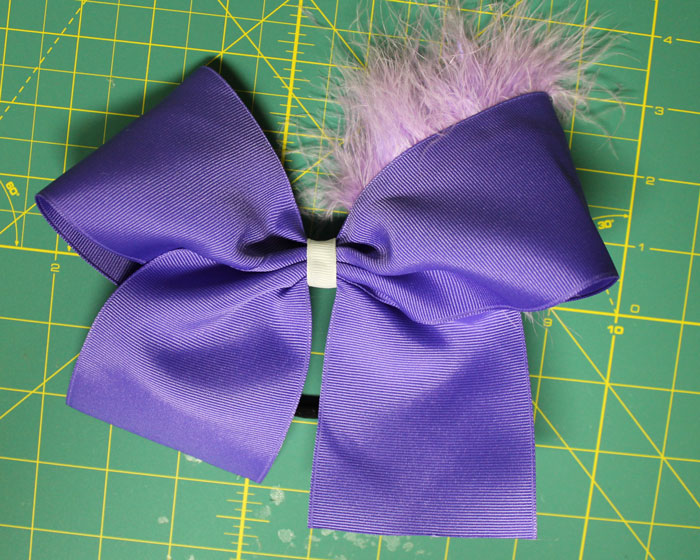
8. Now we are going to apply a small dot of glue to the front center of the bow. Place the 3/8" piece of white ribbon in the center and wrap the ribbon around to the back of the bow.

9. Now is when you will nee to trim the ribbon, you will only need enough to over lap each other by a small amount. You don't want to see the end of the ribbon from the front. After you have trimmed the ribbon use your lighter to heat seal the ends and then finish by gluing your ends down.

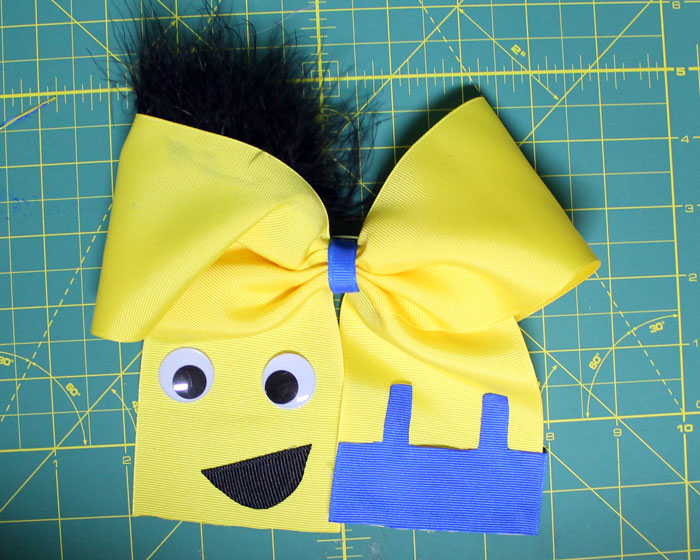
10. Now comes the decorating part! :) First we are going to glue the marabou into the center of the top right side of the bow. You will need to take and apply and line of glue across the inside of the front loop. Then place your marabou on the glue. In doing so you will want to make sure that you get the cord( hard rope-like center) of the marabou on the glue and not just the feathers.
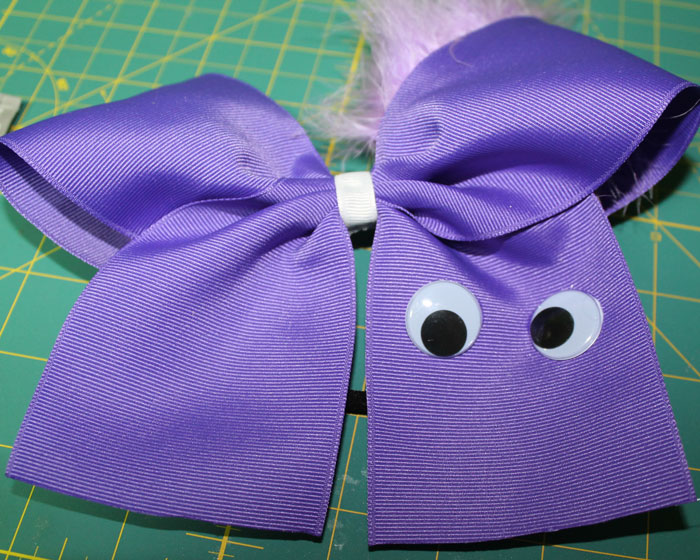
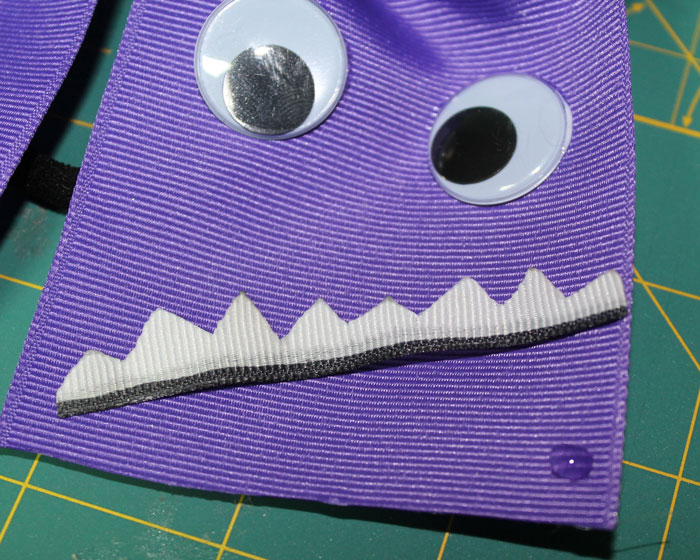
11. Once that is finished, grab your googly wiggle eyes and your adhesive. Place a small amount on the back of one eye and place it a little bit under the right loop of your bow. Do this with the second eye also.
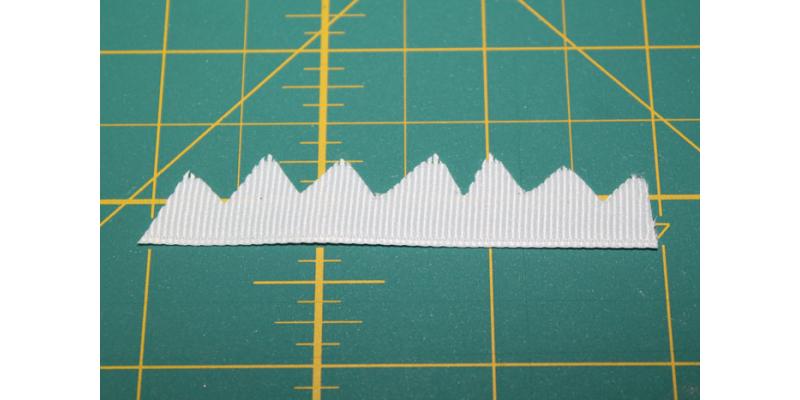
12. Grab your 2" piece of the three inch white schiff white ribbon and cut zigzags about a quarter of an inch in height. These don't have to be perfect because the evil minions have some pretty gnarly teeth. :) Use the lighter and carefully heat seal the 'teeth'.

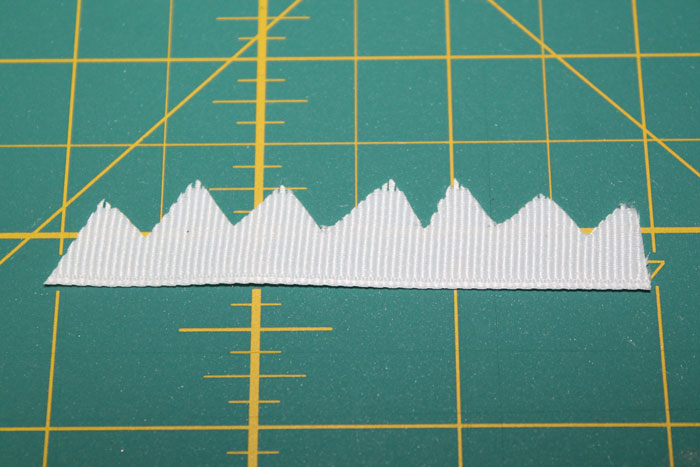
13. The next thing I did was to carefully run a black permanent marker across the bottom ridged part of the teeth. I did this to make them stand out more, but you don't have to do this if you don't want to. If you do the marker will bleed, but its not very dark and you can't tell unless you look closely.

14. Next, take a small amount of hot glue and place it on the left side of the hair bow towards the bottom of the bow. Place the left side of the teeth there, then place a small amount of glue on the right side and place the right side of the teeth there. I didn't have my glue spots in line with each other. Because of this I had a loop in the center of the teeth, so I took and placed a drop of glue about a third of the way up the teeth on both sides to hold it down. You will still have a ripply look but that's the look I wanted. If you want, you can just glue the teeth down flat on the bow.

That's it for the Evil Minion! Isn't he cute?! :)
Normal Minion

- 28" of 3" Schiff Grosgrain Ribbon in Yellow
- 2" of 3" Schiff Grosgrain Ribbon in Electric Blue
- 6" of 3/8" Schiff Grosgrain Ribbon in Electric Blue
- 3" of 7/8" Schiff Grosgrain Ribbon in Black
- 3.5" of Black Marabou
- 2 20mm Googly Wiggle Eyes
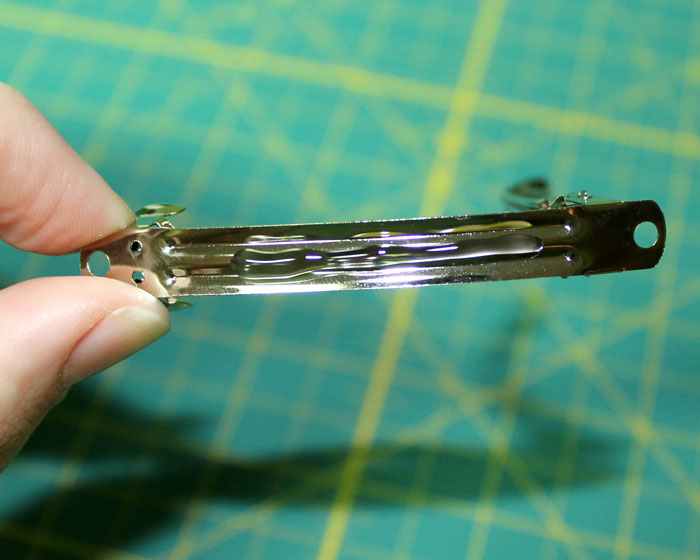
- 1 70mm French Barrette
- E6000 or QuickHOLD
- Needle and thread
- Glue and Glue Gun
- Lighter (Heat Sealing)
- Ruler or a Measuring Board
- Scissors
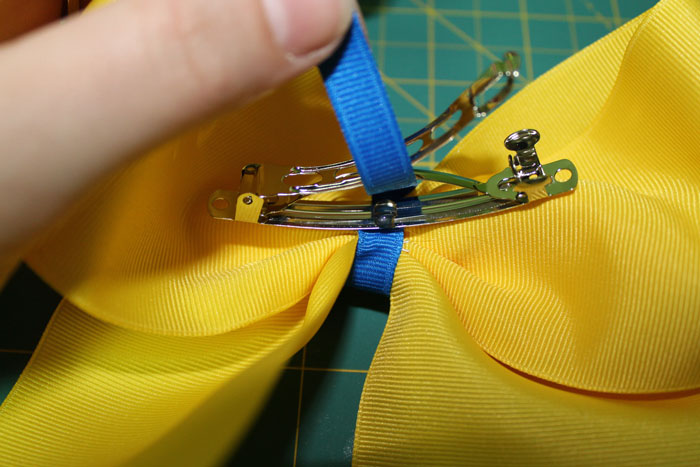
To create the normal minion you will do steps 1-6 as listed above. Instead of using a ponytail holder we are going to use a 70mm French Barrette.
Place a small amount of glue to the front of your bow, then place the 3/8" electric blue schiff ribbon on the front and bring the ends around the back. Place glue along the top of the barrette and attach it to the bow. Trim and heat seal the ends of the ribbon, and use the 3/8" ribbon to add extra hold to the barrette by gluing it around the barrette.
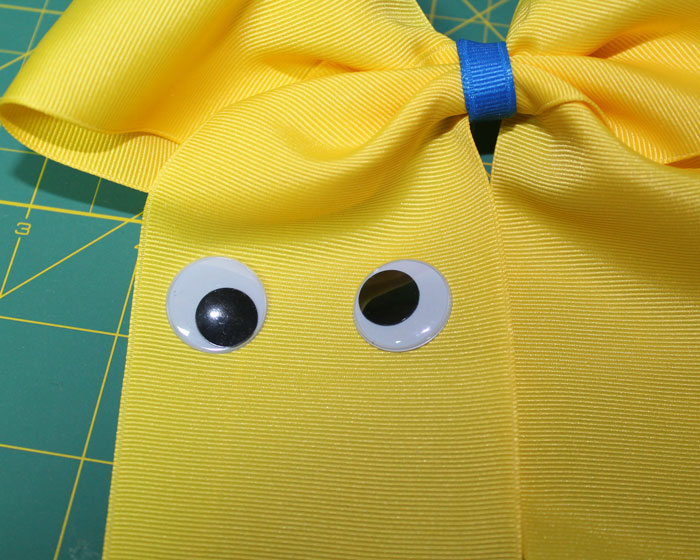
Next you will repeat steps 10 and 11, except you will be putting the marabou and the eyes on the LEFT side of the bow.
Now take your 7/8" piece of ribbon and cut a half circle out of it. This will be the smile for your happy yellow minion. Heat seal!

Now take your hot glue and apply some to the back of the smile then place it where you think looks best on the bow towards the bottom of the tail. I placed mine off center just to give him a cuter look. ( I apologize that he's bald, I apparently didn't put the marabou on this bow until after this step.)
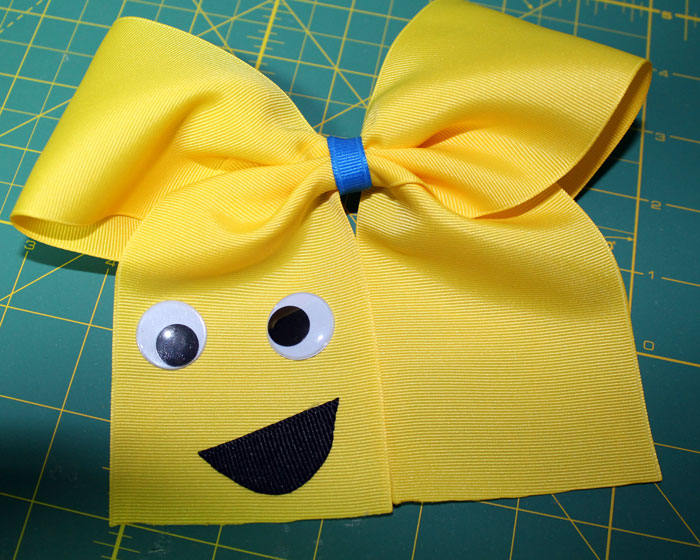
Now we are going to make his bib-overalls. Take your 2" piece of the 3" wide electric blue schiff and measure in 1/4 of an inch on the right side. Take your scissors and cut where you measured and then cut down from the top to meet your measurement. There should be an 'L' shape on the right side of the ribbon. Do this also to the left side. Then cut out half an inch between these two spots. Heat seal everything!

Apply glue to the back of this piece and place it on the RIGHT tail. That's it! Super easy and cute!

Loading...

