 Contributor post by Brittany
The 4th of July is almost here! Our festive summer outfits are not complete without the perfect accessories! So whether you're needing something sparkly & sweet for your little love or something fun yet functional for yourself, I have the perfect patriotic hair accessory for you! These sparkly glitter headbands require minimal skills & time to make. Let's get started!
Contributor post by Brittany
The 4th of July is almost here! Our festive summer outfits are not complete without the perfect accessories! So whether you're needing something sparkly & sweet for your little love or something fun yet functional for yourself, I have the perfect patriotic hair accessory for you! These sparkly glitter headbands require minimal skills & time to make. Let's get started!
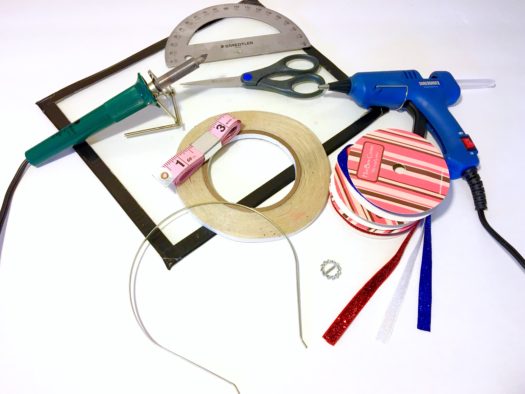 Listed below are the supplies needed:
•3/8" glitter ribbon in red, white & royal blue
•5mm metal headband blank
•1/4" double sided fillet tape
•small circle ribbon slide
•hot glue gun
•woodburning tool
•metal ruler
•glass sheet for cutting
•scissors
•measuring tape
Listed below are the supplies needed:
•3/8" glitter ribbon in red, white & royal blue
•5mm metal headband blank
•1/4" double sided fillet tape
•small circle ribbon slide
•hot glue gun
•woodburning tool
•metal ruler
•glass sheet for cutting
•scissors
•measuring tape
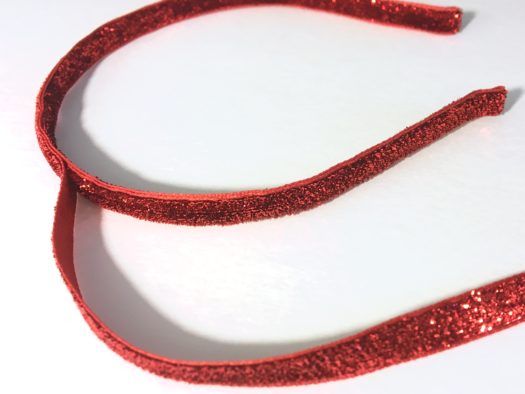
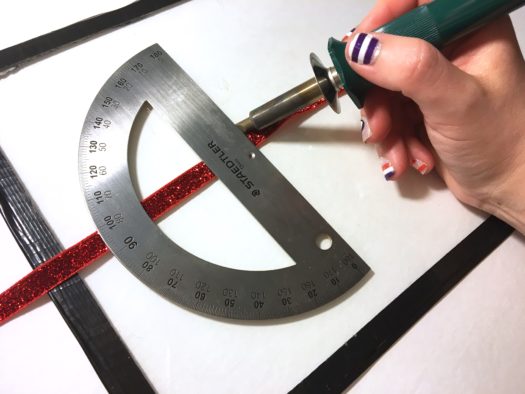 First I am measuring approx 38" of red glitter ribbon. This will be used for covering my entire headband, so if you'd rather have your band a different color you will need to use that color instead. To cut and heat seal your ribbon in one easy step you will need to use a woodburning tool. Do NOT cut with scissors and attempt to heat seal with a lighter as you would other types of ribbon! Glitter ribbon is flammable and will catch fire very quickly over an open flame. As shown in the pic above I am using a sheet of glass to cut my ribbon on (the sides have been covered with duct tape to cover it's sharp edges). I am also using a metal ruler to cut perfectly straight lines, although if you are an experienced user with woodburning tools you may not need a ruler since our ribbon isn't very wide.
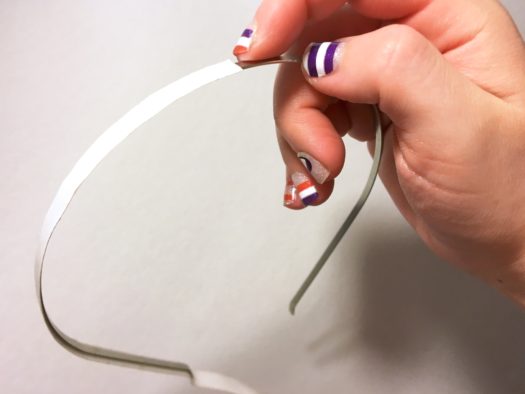 Now we're going to line our headband with double sided tape. Choose the general placement of where you want your embellished loopy bow to be on the headband- this will be your starting point to begin applying tape.
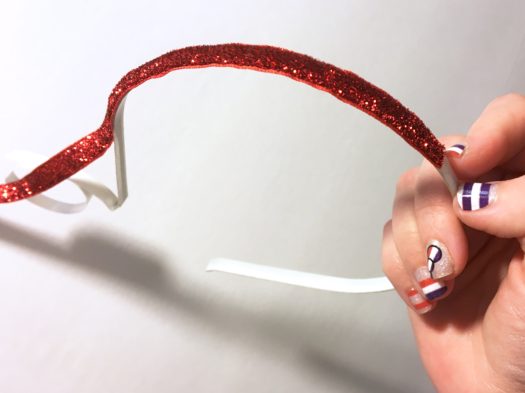 Once your headband is completely covered with tape you will be back where you started. Before cutting your tape from its roll leave an extra inch to use for overlapping your ribbon. Peel off the paper backing a small section at a time as you apply your glitter ribbon.
 After your entire headband is covered with ribbon and overlapping 1" at the starting point, you should have about 8" left as I do it the pic above. This is for our first loop of our bow.
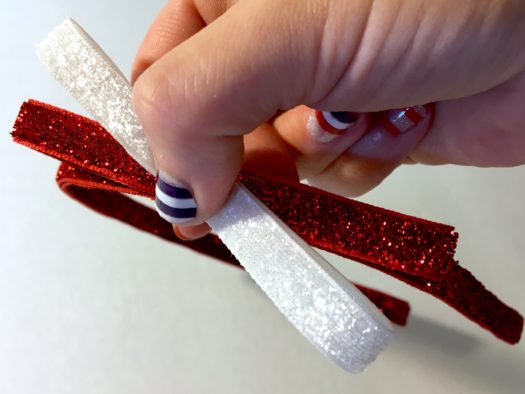
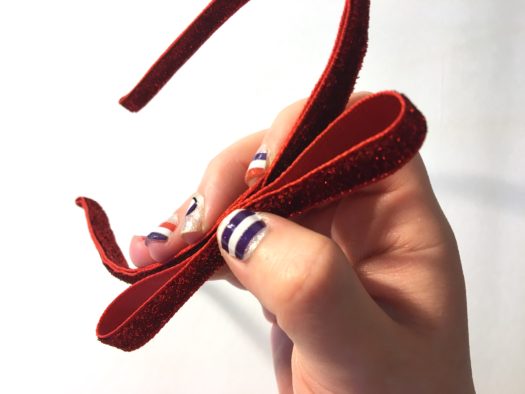 Take the end of your ribbon and secure it onto the headband with hot glue (directly across from where your tape ends) to form a circle. Find the center point of your circle and press down into a small amount of hot glue to form a loop as shown above.
 Cut 8" strips of white & blue glitter ribbon using your woodburning tool. Form a circle with your first color by slightly overlapping the ends and securing with hot glue. Press the center down ontop of where your ribbon meets at the underside of your ribbon to make a loop. Place the loop on either side of your red loop securing at the center with hot glue as shown above.
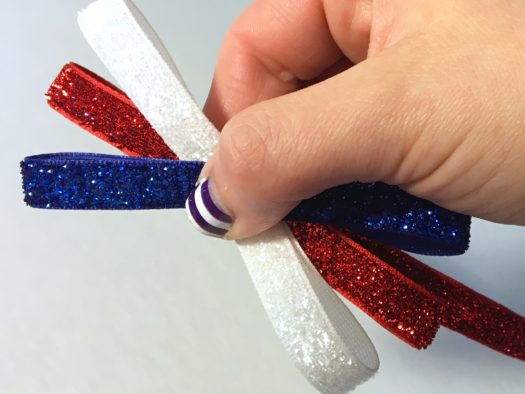 Take your strip of blue ribbon and repeat steps to form a loop and secure on opposite side.
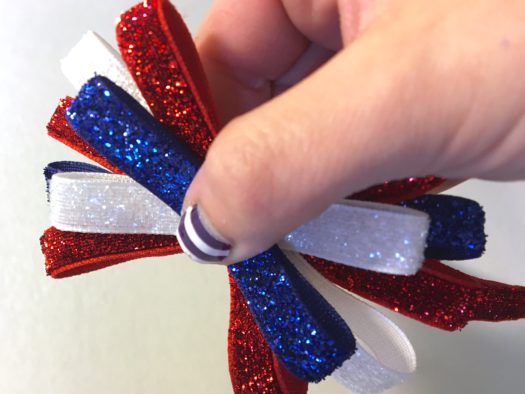 Continue making loops and stacking them as you desire! Decrease the length of ribbon used for each layer by 1 to 1 1/2". For example I have placed two 7" loops of red on the outer sides of my blue & white loops, followed by 5 1/2" loops of white & blue on top. I have a total of seven loops stacked up to make a cute little bow!
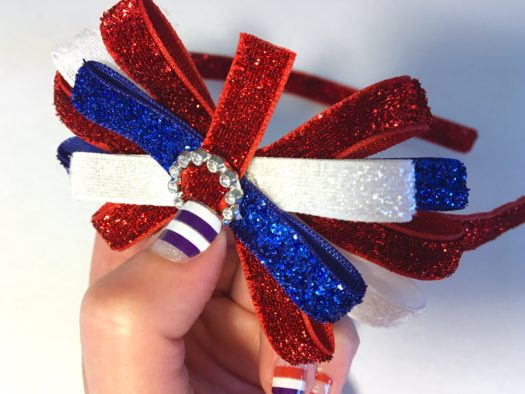 Now you will need a small strip of ribbon to go around your bow to secure it tightly. I am using a 2 1/2" strip of red ribbon. If you are using a ribbon slide be sure to slide it onto your ribbon now. Glue one end down at the underside of your headband with hot glue. Make sure your ribbon slide is in the proper position to be centered in the middle of your bow.
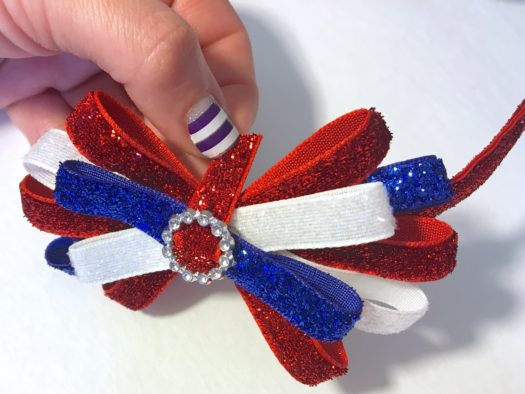 Pull your ribbon tight and continue glueing down till you have slightly overlapped your ends on the underside of your headband. Now your center should be tightly secured around your super sparkly bow!
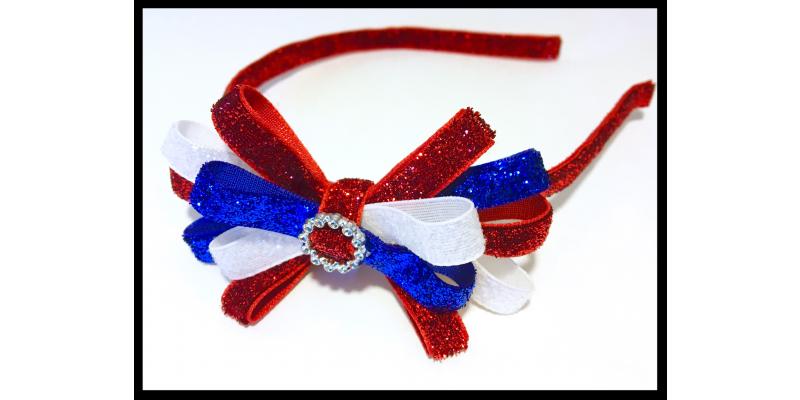
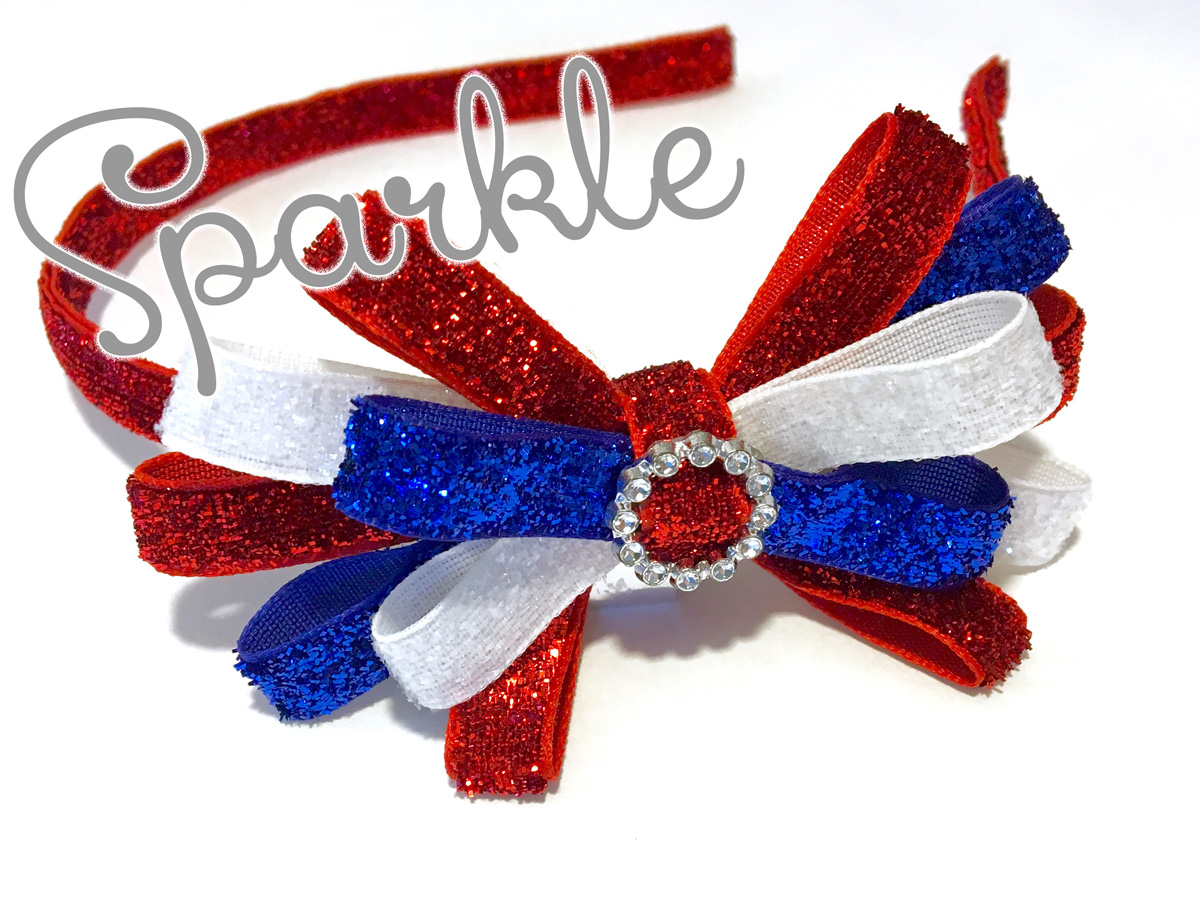
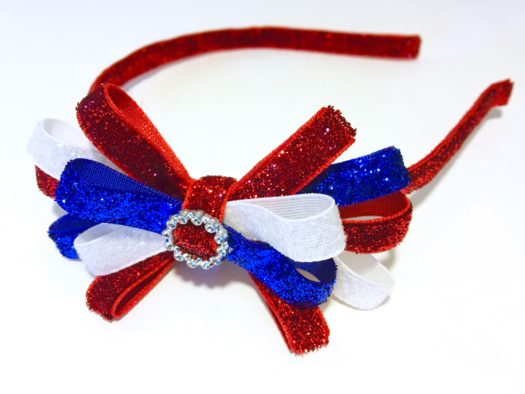
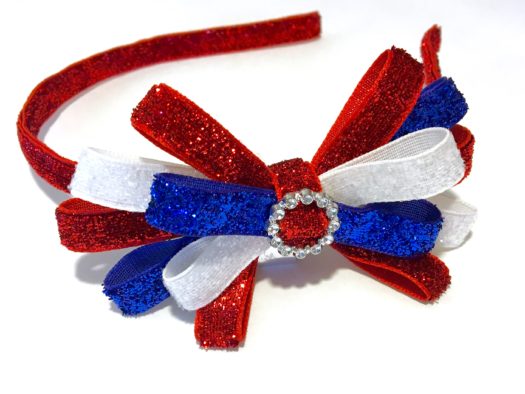 Check out this glamorous, patriotic headband we've just made! This is perfect for all ages as the headband can accommodate a toddler up to an adult! Matching "Mommy & Me" headbands anyone?? Or if you're looking for the functionality of a headband without the frills for a more grown up look, try a simple glitter ribbon lined headband with a small embellishment like HBC's small starburst rhinestone embellishment center or the beautiful rhinestone regal embellishment center! With all the fabulous options offered and many ways to decorate your headband you're sure to find just the right look! Have a safe & glamorous 4th of July!!
Visit the rest of our blog for more Hair Accessories Tutorials, Crafting Tutorials and DIY Instructions like this 4th of July Glitter Sparkle DIY Headband!
Loading...

