 Contributor post by Brittany
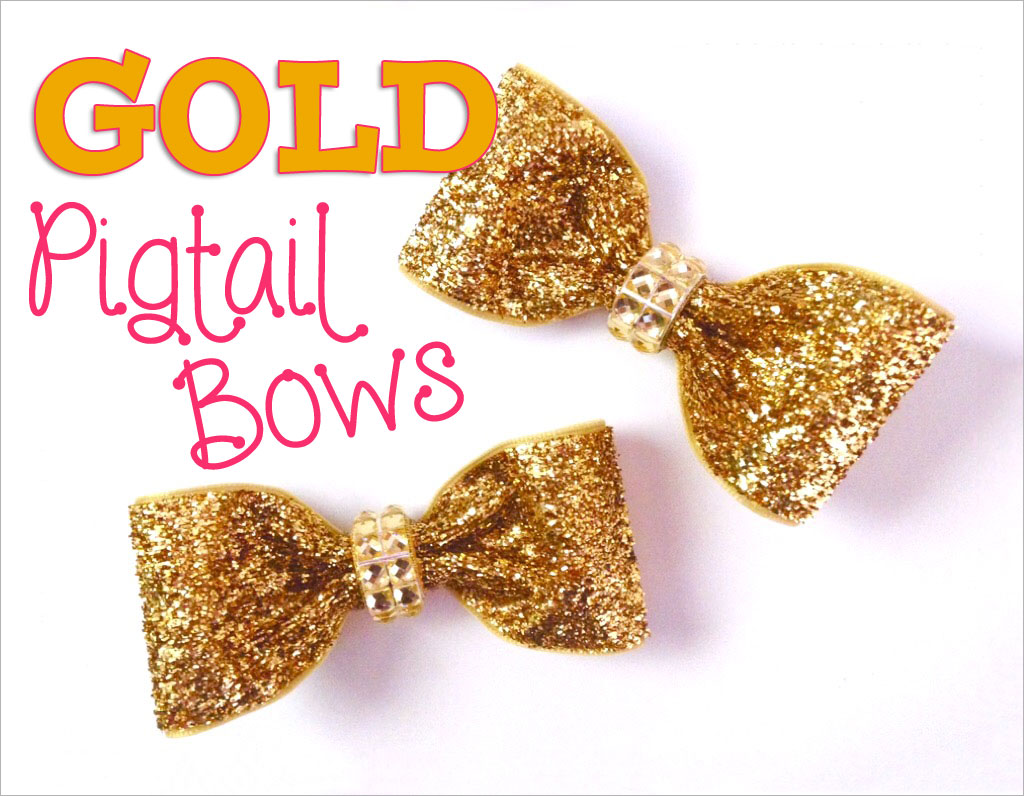
The gold color craze continues this Spring/Summer season! Metallic, glittery, shiny or matte-- gold continues to be one of the hottest trends right now! My daughter's closet has numerous darling little outfits accented in gold for the warmer season. From gold polka dots on bright Spring colors to glittering gold initial monograms, these adorable trendy outfits definitely need the perfect girly hair accessory to compliment them. My blonde beauty will be rocking some fabulous gold sparkly pigtail bows this season to perfectly compliment her outfits! Keep reading to learn how to make your very own in minutes!
Contributor post by Brittany
The gold color craze continues this Spring/Summer season! Metallic, glittery, shiny or matte-- gold continues to be one of the hottest trends right now! My daughter's closet has numerous darling little outfits accented in gold for the warmer season. From gold polka dots on bright Spring colors to glittering gold initial monograms, these adorable trendy outfits definitely need the perfect girly hair accessory to compliment them. My blonde beauty will be rocking some fabulous gold sparkly pigtail bows this season to perfectly compliment her outfits! Keep reading to learn how to make your very own in minutes!
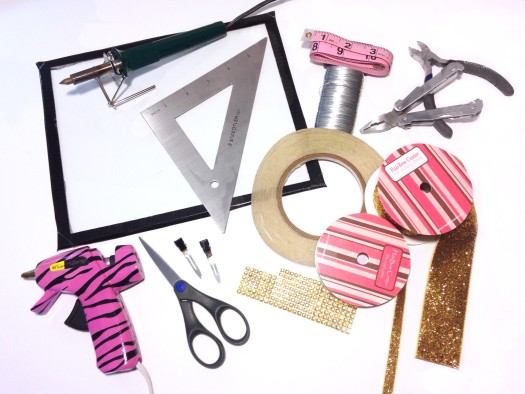 Listed below are the supplies you will need to create your very own set of sparkly gold pigtail bows:
•woodburning tool
•sheet of glass for cutting
•metal ruler
•hot glue gun
•scissors
•two 1.75" alligator clips
•gold rhinestone sticker sheet
•1/4" double sided fillet tape
•1.5" gold glitter ribbon
•3/8" gold glitter ribbon
•wire for securing center (I use 26 gauge wire)
•pliers
•wire cutters
•measuring tape
Listed below are the supplies you will need to create your very own set of sparkly gold pigtail bows:
•woodburning tool
•sheet of glass for cutting
•metal ruler
•hot glue gun
•scissors
•two 1.75" alligator clips
•gold rhinestone sticker sheet
•1/4" double sided fillet tape
•1.5" gold glitter ribbon
•3/8" gold glitter ribbon
•wire for securing center (I use 26 gauge wire)
•pliers
•wire cutters
•measuring tape
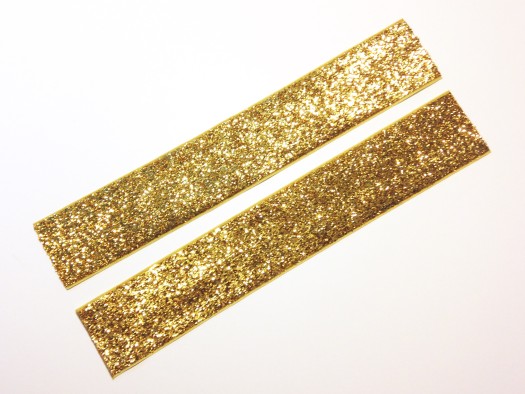
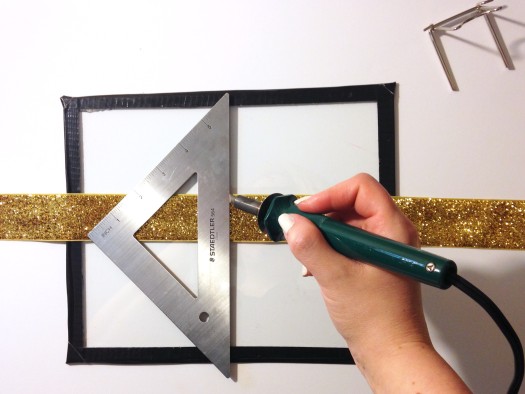 When cutting glitter ribbon I strongly urge everyone to use a woodburning tool since this ribbon is flammable. Therefore it can not be cut and heat sealed with a lighter as I normally would with grosgrain or satin ribbon. The woodburning tool cuts and heat seals your ribbon in one quick step, leaving your glitter ribbon perfectly shed & fray free. Using this tool also requires the proper cutting board underneath. I always use a sheet of glass, which is nothing more than the glass from an old 8x10 picture frame with the edges covered in duct tape so it will not have hazardous sharp edges which could easily cut your fingers. The last necessity when using a woodburning tool is a metal ruler. These rulers will hold up next to the super high temps of the woodburning tool and allow you to cut a perfect straight line. So now that you have all the necessary tools in place, you will need to measure two 8" strips of 1.5" gold glitter ribbon. As shown above, I have measured my ribbon and placed my metal ruler at the 8" mark as a guide to one simple cut per piece. Hold your ruler firmly in place as you make your cut.
 Above are my two 8" pieces of glitter ribbon which I will form into circles one at a time.
 When forming my ribbon into a circle I apply a thin line of hot glue to one of the ends and overlap the opposite end about 1/2" on top of it.
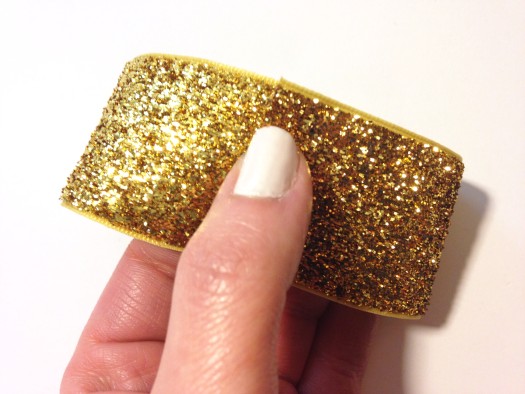
 Take your first circle of ribbon and flatten out with the seam in the middle of the backside. Fold in half at the center as shown above. The side with the seam should be touching your fingers during the first fold.
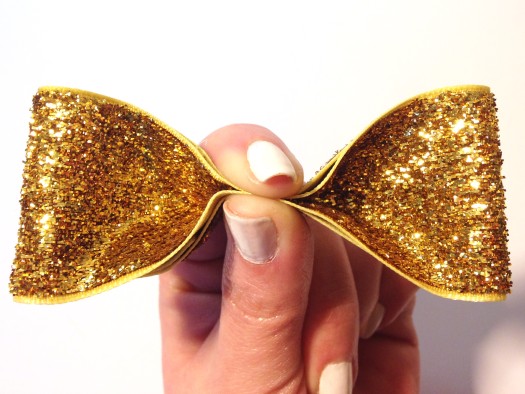
 For the next step you will fold each edge back down making a simple accordion fold as shown above. Hold your fingers tightly in place and wrap around the center several times with wire.
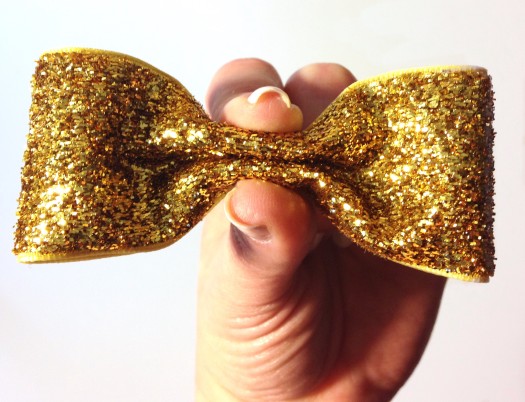
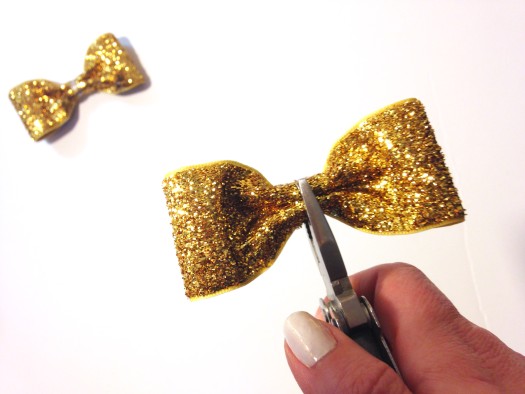 Pull wire very tight using your pliers and cut off with wire cutters. I like to flatten out the center with pliers as shown in the pic above.
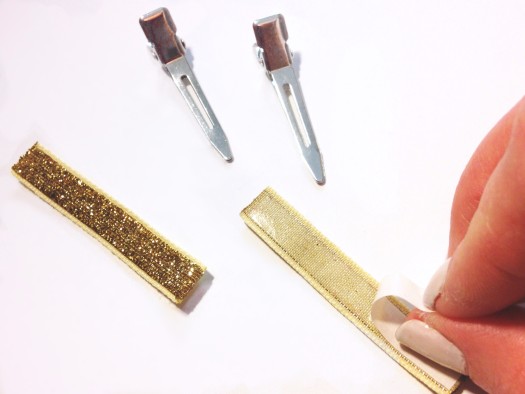 Next you will need to cut two strips of 3/8" gold glitter ribbon approx 2 1/4" long. Cut two strips of double sided fillet tape the same length, placing on the backside of glitter ribbon. Peel off paper backing to reveal the other sticky side.
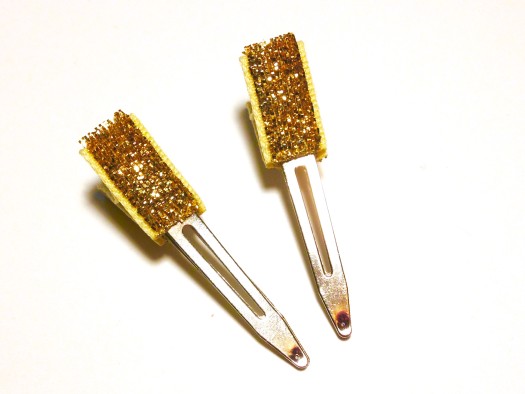 Place sticky side of tape onto ends of alligator clips as shown above. This will ensure no metal is seen from the underside of your pigtail bows. Next I am gluing my alligator clips in place on the backside of each bow and securing with a very thin gold ribbon. Since a very short piece is needed to wrap around the center I used a piece of gold ribbon from my scrap pieces. This will be covered and is only used to firmly secure the alligator clips in place. Use a thin line of glue around the entire center for a more secure hold. If you prefer to use elastics rather than alligator clips this can be done very simply as well. I prefer to use bare elastics for my daughters pigtails and then embellish with her sweet hair bows on top. By using alligator clips instead of elastics this also allows me to use the same bow set just to clip one or both sides of her hair back. It's a win win!
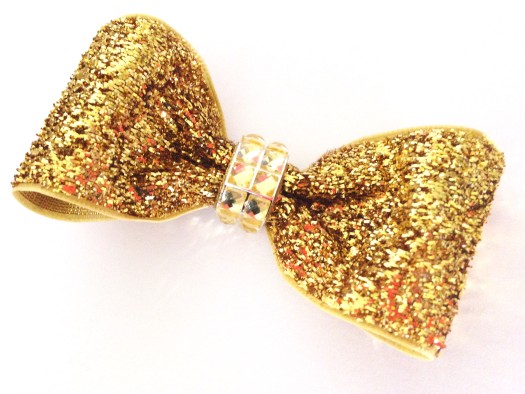
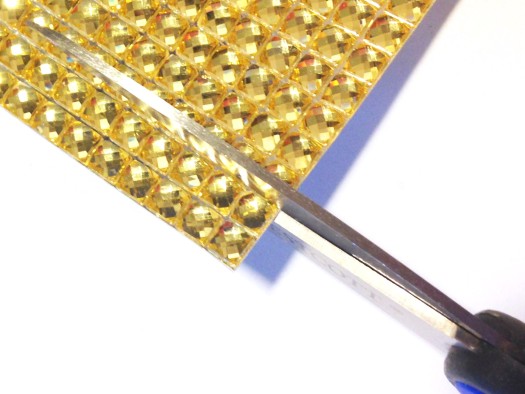 Now you will need to cut the proper length & width from your rhinestone sticker sheet to be wrapped around the center of your bows. I suggest pre-measuring your center before cutting. For my centers I will need strips of rhinestones that are 2x7 (2 rhinestones wide by 7 rhinestones long).
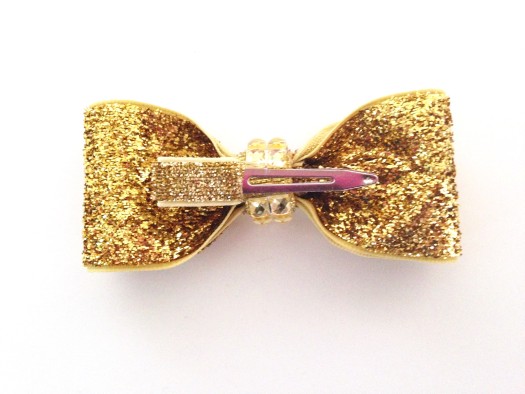
 Peel off the backing from the rhinestones and wrap around the center for a beautiful embellished center! Wrap from the top of your alligator clip to the bottom as shown below. You may add a small dot of hot glue at each end of your rhinestone strips if you feel the hold needs to be more secure.
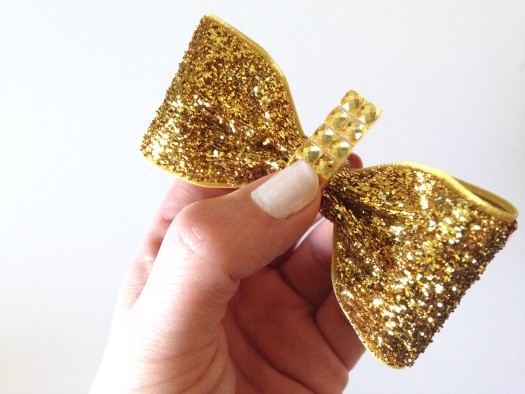
 Fluff the sides of your ribbon as desired for a full and shapely bow as shown below. Do this to each pigtail bow.
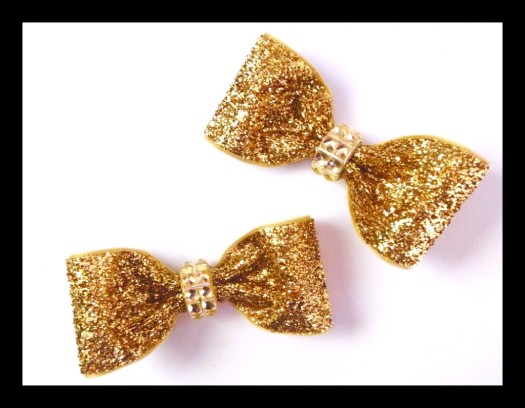
 Our adorable glittery gold pigtail bow set is now complete! The perfect gold accessory for trendy chicks of all ages are sure to love their new sweet sparkling set! Thanks for joining me today and I hope you've enjoyed this tutorial! Have a great day!
Visit the rest of our blog for more Crafting Tutorials and DIY Instructions!
Loading...

