 Contributor post by Brittany
To celebrate the new & exciting additional HBC colors that recently became available in 2.25" and 3" ribbon, I am sharing something HUGE today! I was super excited about this news and decided to feature one of these beautiful colors in my next blog post! Here in Kentucky we treasure our big bows so it's nothing unusual for my customers to say "the bigger the better!" when ordering their bows. If the feeling is mutual and you LOVE BIG BOWS, you don't want to miss this!
Contributor post by Brittany
To celebrate the new & exciting additional HBC colors that recently became available in 2.25" and 3" ribbon, I am sharing something HUGE today! I was super excited about this news and decided to feature one of these beautiful colors in my next blog post! Here in Kentucky we treasure our big bows so it's nothing unusual for my customers to say "the bigger the better!" when ordering their bows. If the feeling is mutual and you LOVE BIG BOWS, you don't want to miss this!
 Shown above are the materials used to make this much loved, jumbo sized, 8 inch boutique hair bow!
•3" solid grosgrain ribbon in Bubblegum Pink
•7/8" solid grosgrain ribbon in Bubblegum Pink
•Scissors
•Wire for securing center (I am using 26 gauge wire)
•Pliers/wire cutters
•Measuring tape
•Jumbo salon pinch clip
•2.25" large single prong alligator clip
•Lighter
•Hot glue gun
Shown above are the materials used to make this much loved, jumbo sized, 8 inch boutique hair bow!
•3" solid grosgrain ribbon in Bubblegum Pink
•7/8" solid grosgrain ribbon in Bubblegum Pink
•Scissors
•Wire for securing center (I am using 26 gauge wire)
•Pliers/wire cutters
•Measuring tape
•Jumbo salon pinch clip
•2.25" large single prong alligator clip
•Lighter
•Hot glue gun
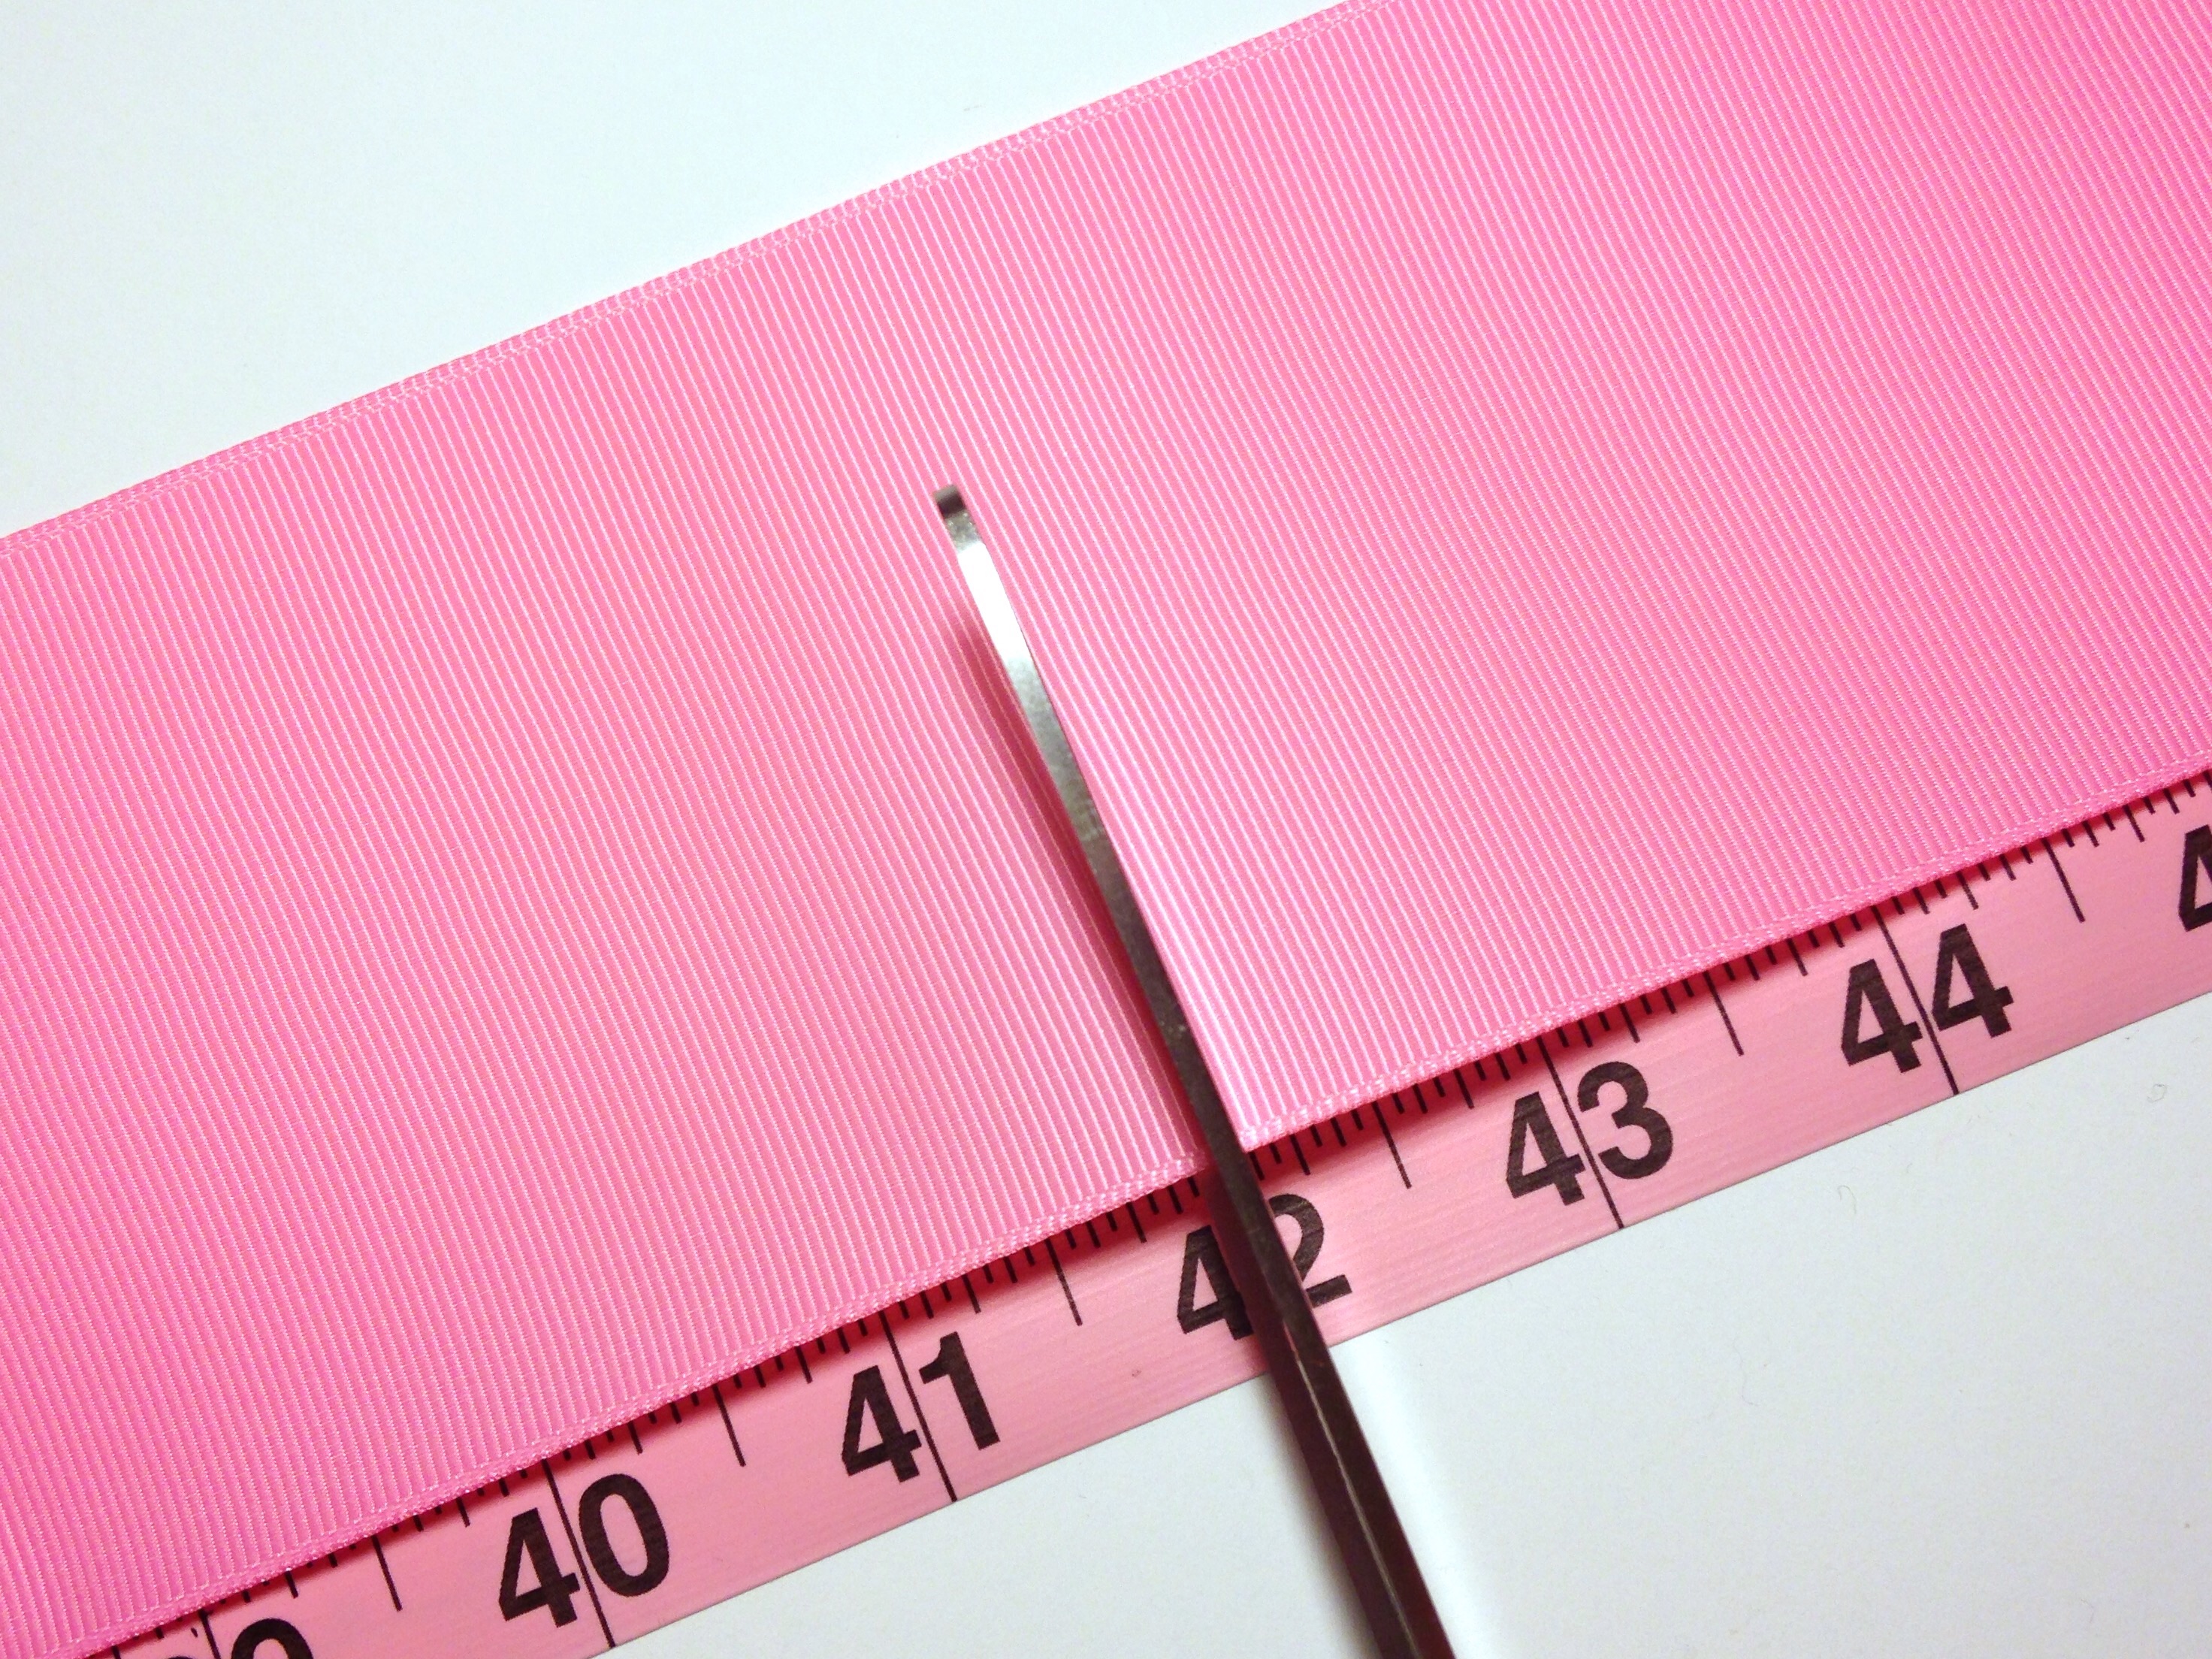 For this jumbo sized hair bow I am using approx 42" of 3" Bubblegum Pink solid grosgrain ribbon. What a sweet shade of pink to have just in time for Spring! Heat seal both ribbon ends with your lighter.
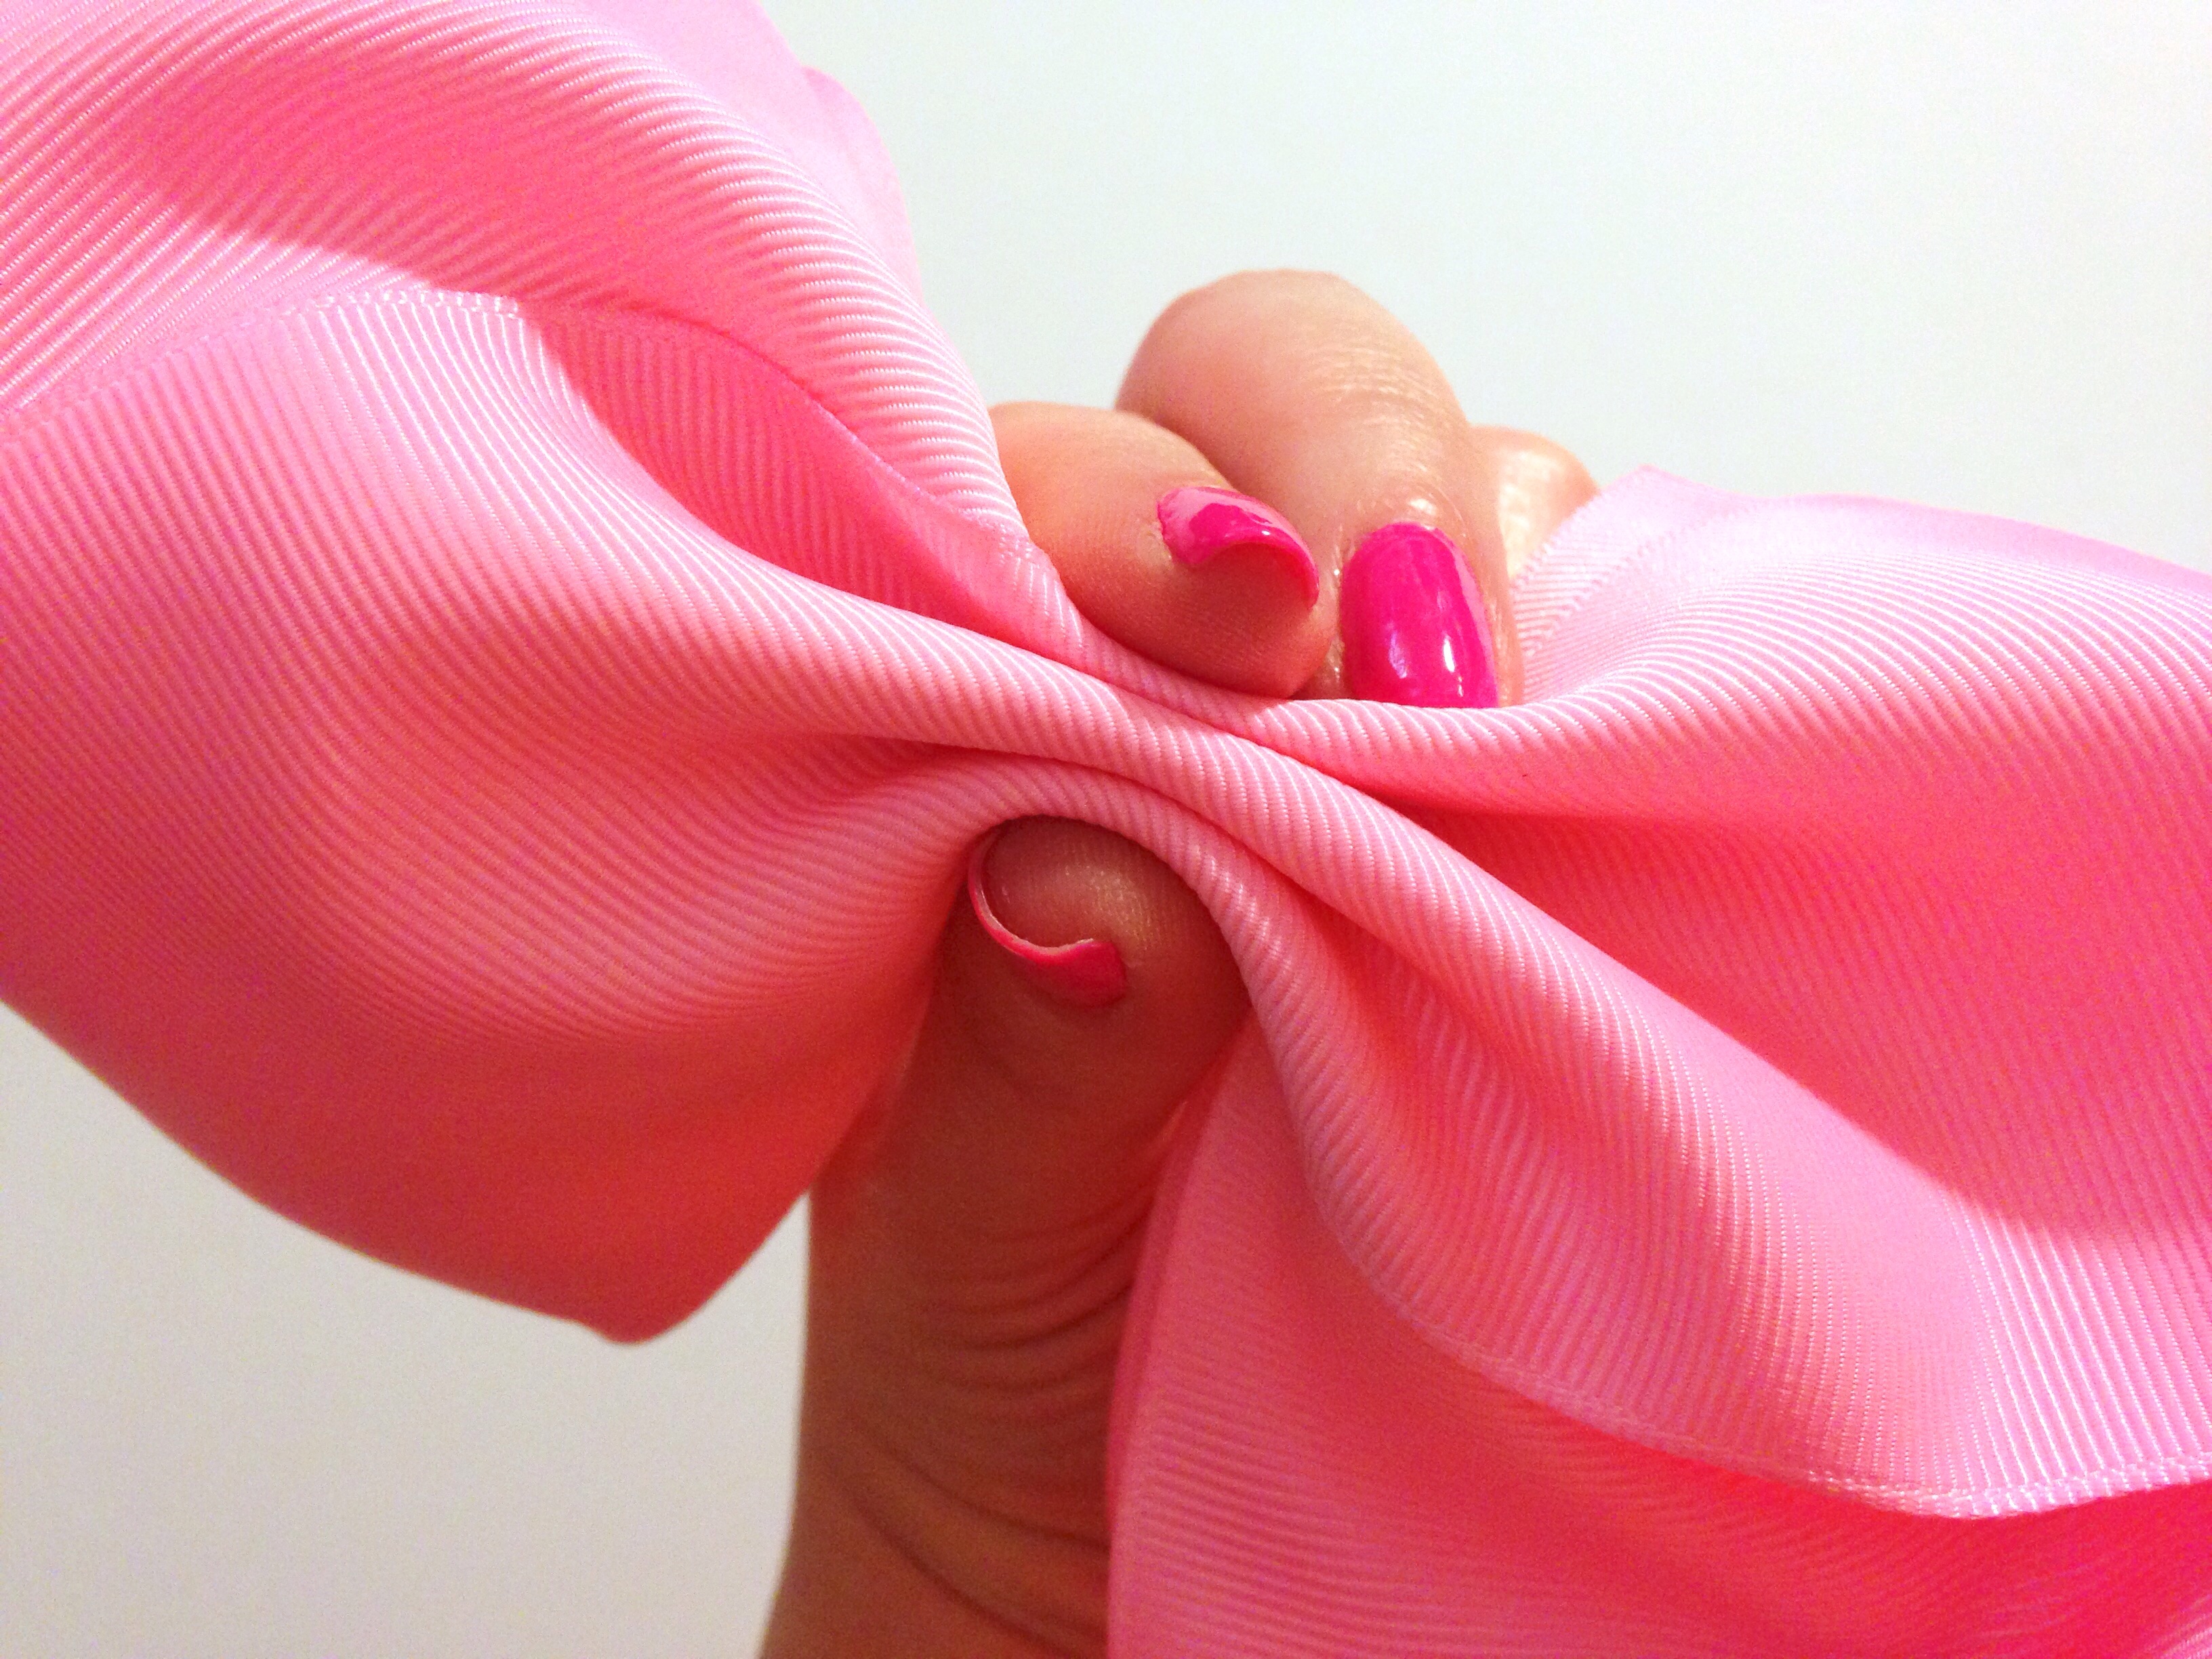
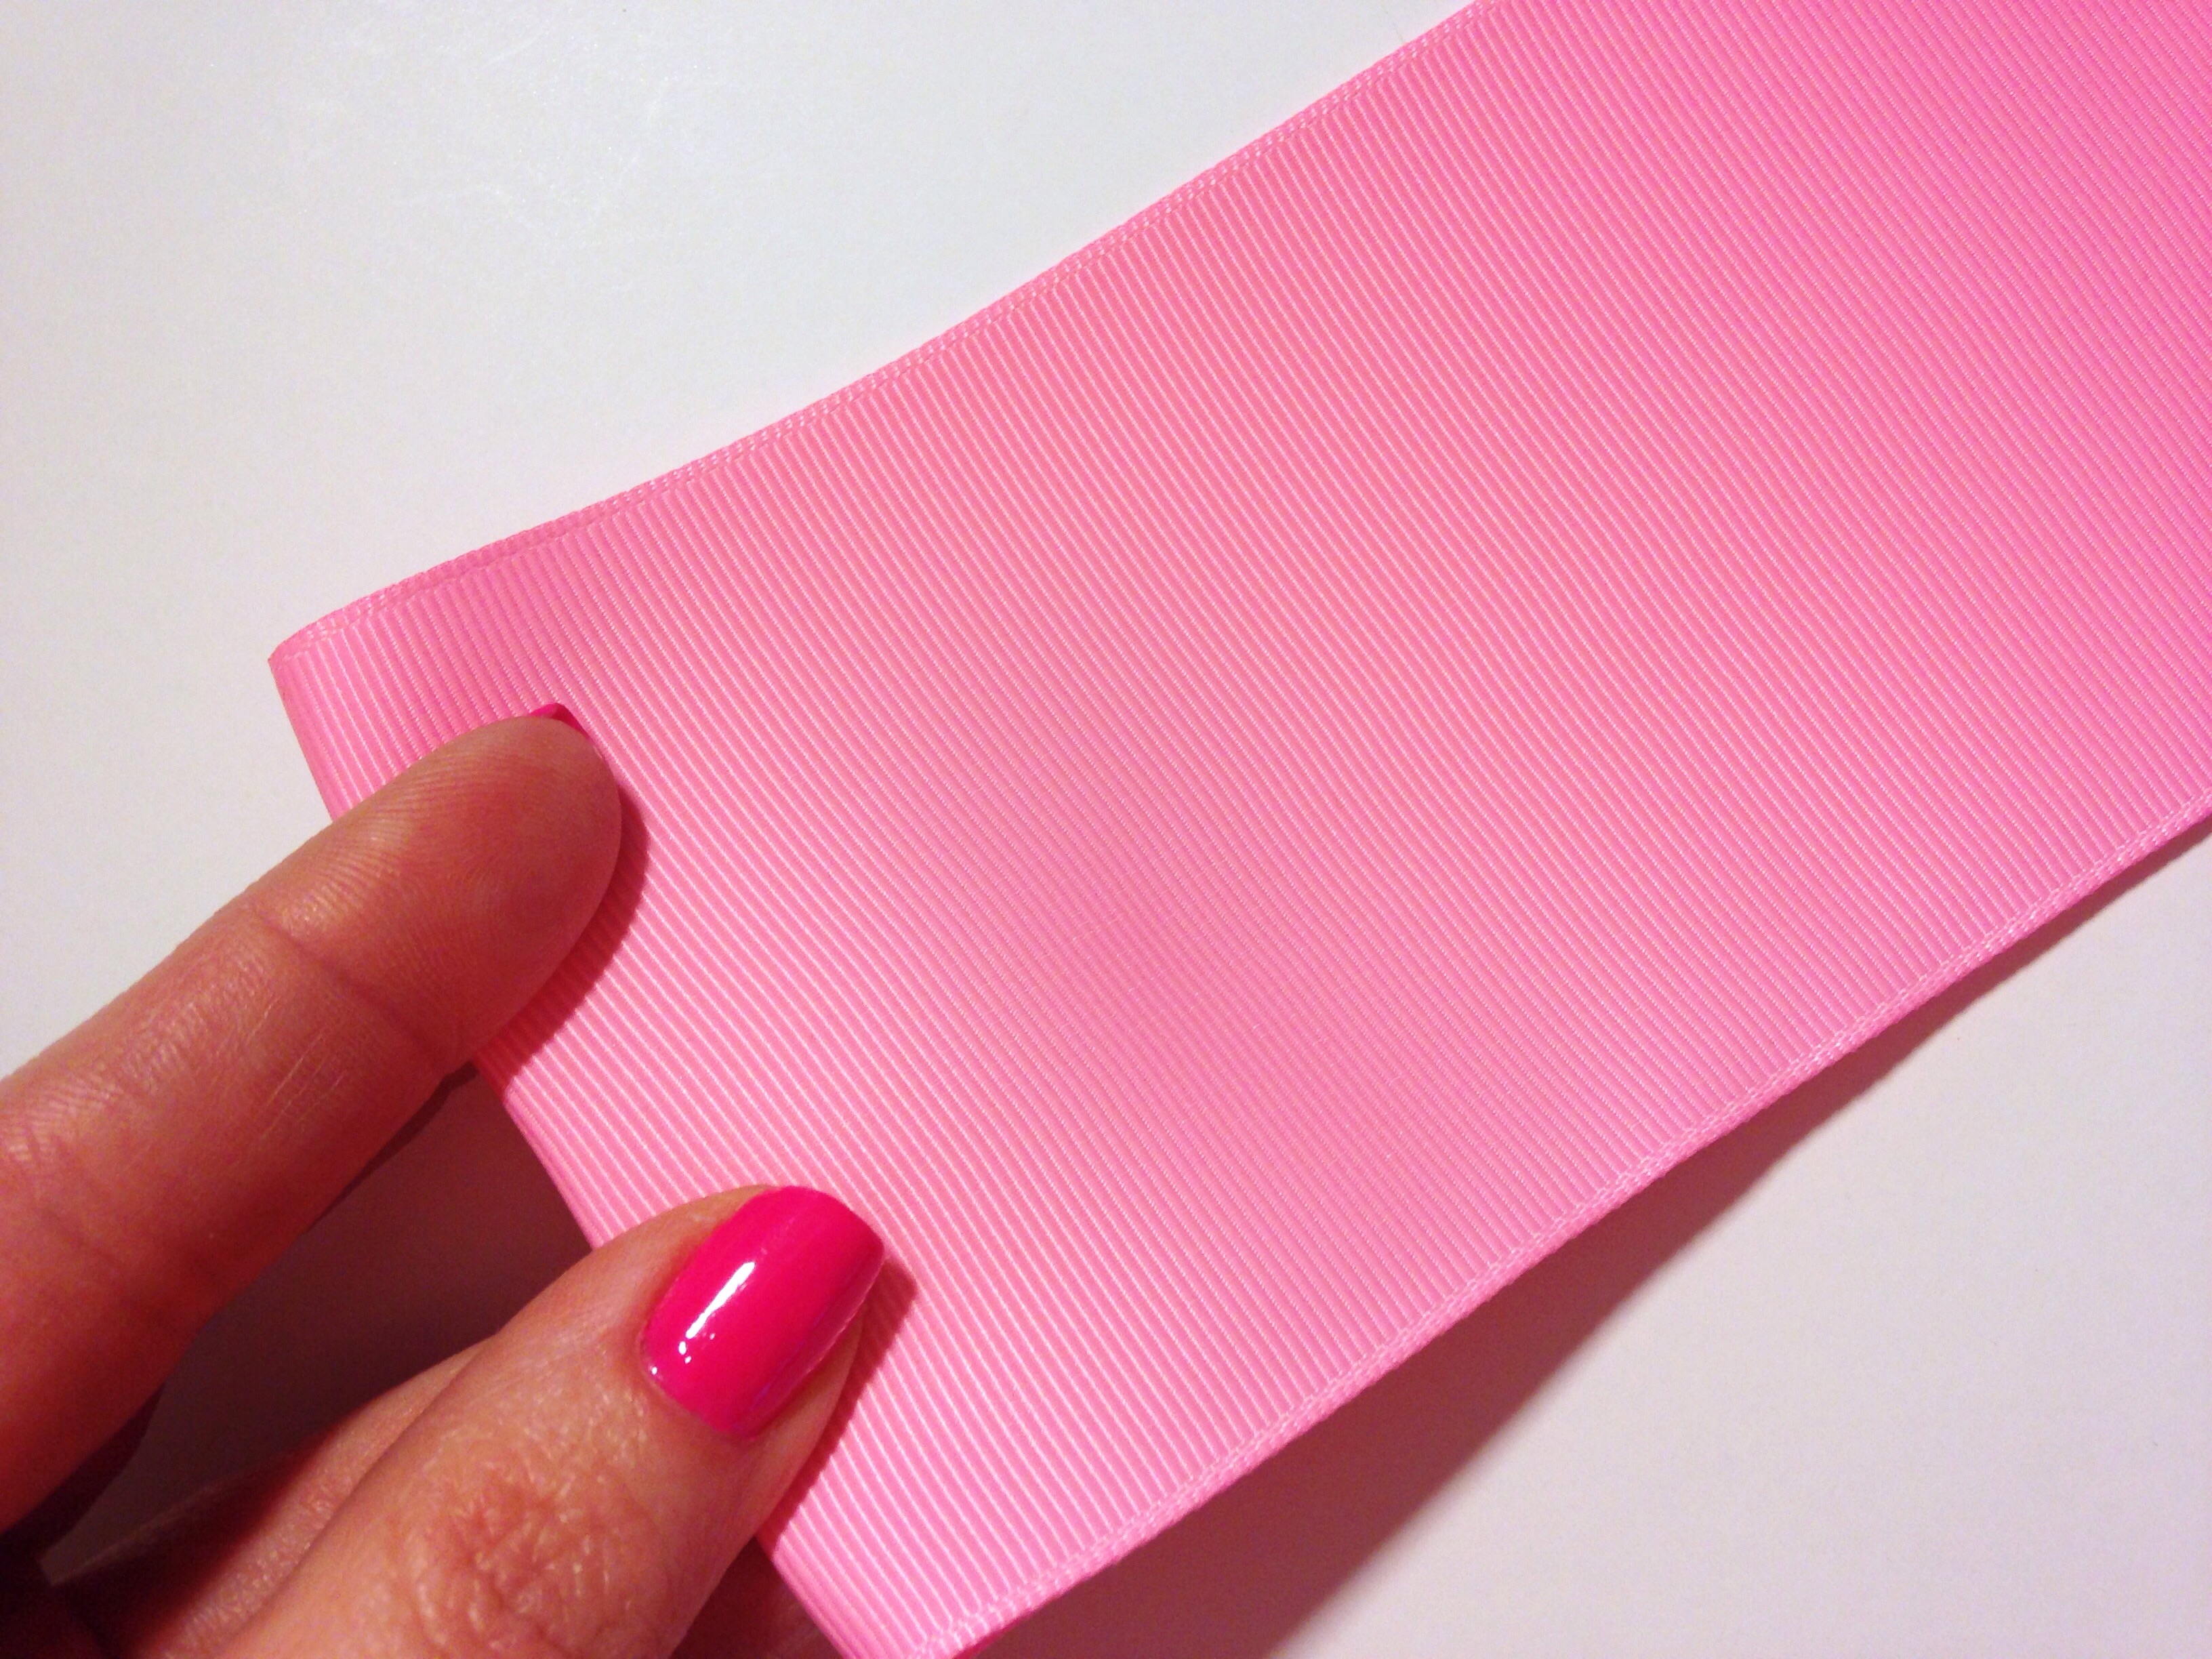 Fold your ribbon length in half and make a visible crease down the center. This will be very handy later when forming equal sized loops!
Below are the steps used to form our boutique bow. I'll be the first to admit how difficult it is to hold this wide ribbon in place compared to bows made with much smaller ribbon; especially if you have very petite hands like myself. It's a great help to use HBC's new jumbo salon pinch hair clips to help you breeze your way through these steps.
Fold your ribbon length in half and make a visible crease down the center. This will be very handy later when forming equal sized loops!
Below are the steps used to form our boutique bow. I'll be the first to admit how difficult it is to hold this wide ribbon in place compared to bows made with much smaller ribbon; especially if you have very petite hands like myself. It's a great help to use HBC's new jumbo salon pinch hair clips to help you breeze your way through these steps.
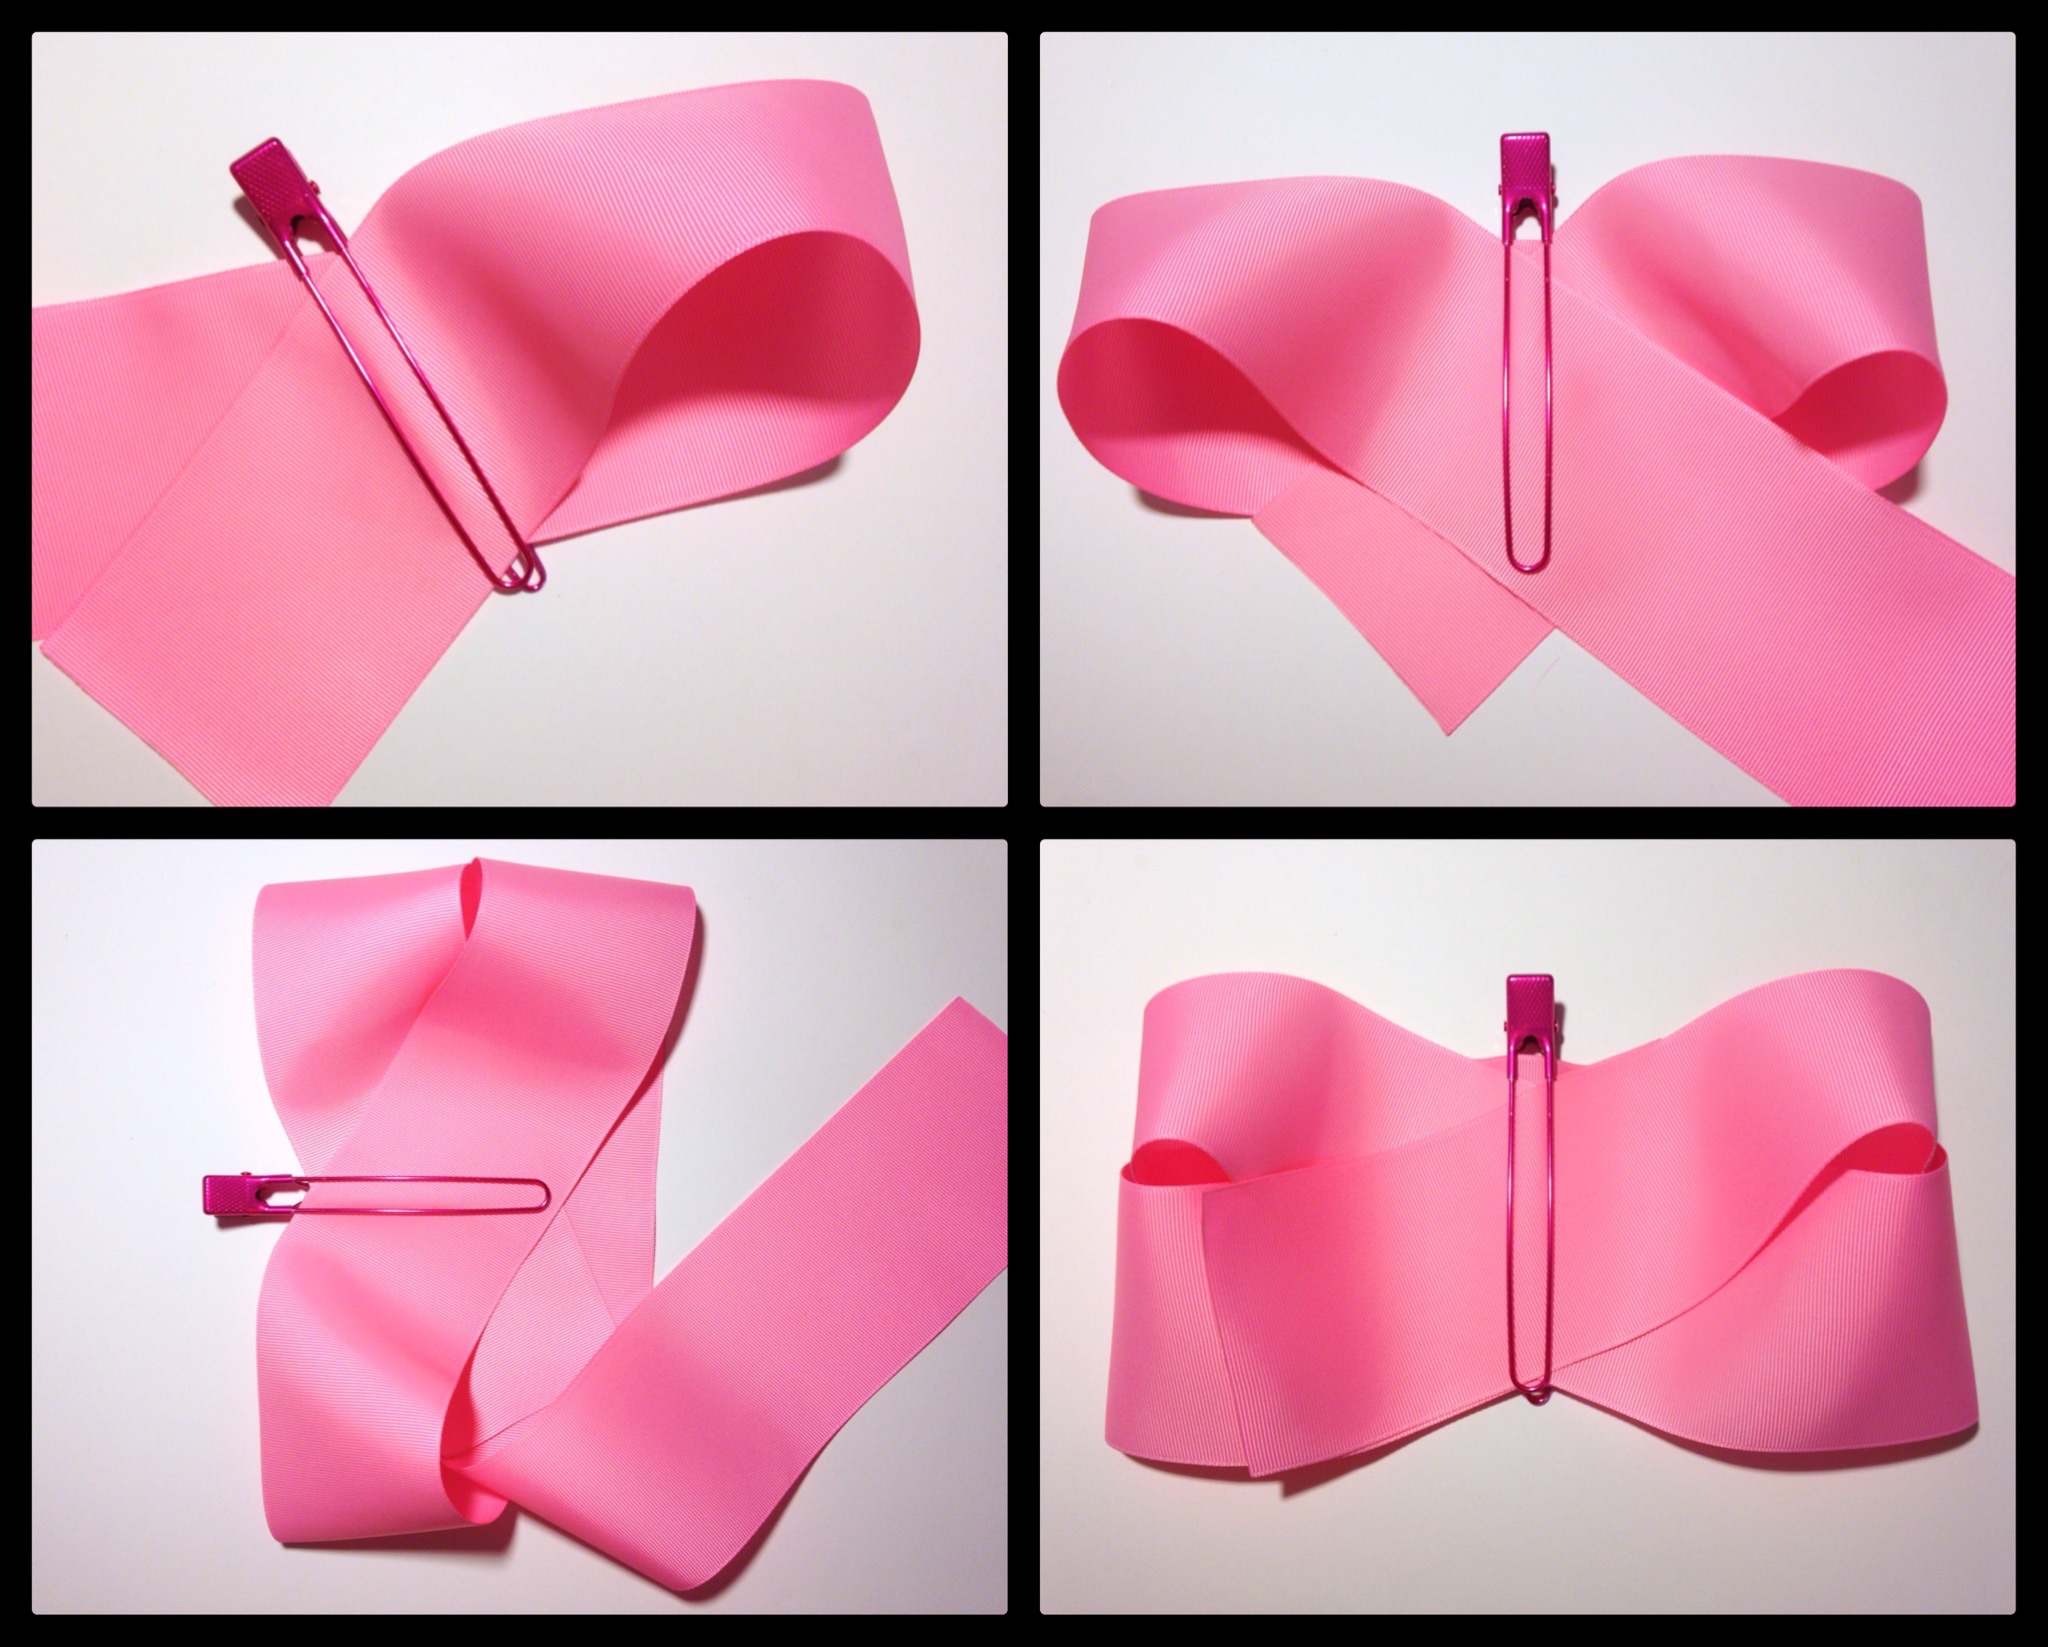 Step 1: Form your first loop as shown above in the first pic. Secure the loop with your salon clip. (Leave a few inches from each ribbon end for tails.)
Step 2: With your longest end of ribbon form your second loop. Hold your first loop in place as you move your clip to now secure both loops into place. Your crease we made earlier should be directly under your salon clip. If not, do some adjusting until your loops are equal in size and your center crease is in the correct place. If no adjusting is necessary, you are well on your way to having 4 equal sized loops!
Step 3: Your next loop is formed by looping your ribbon down as shown in the third pic. Rather than placing your ribbon along the backside of your bow, this ribbon should be tucked between the two layers.
Step 4: Your final loop is practically formed for you already. Save room at the end of your ribbon for your tail once again. Your tail should lay directly on top of the ribbon from the loop underneath.
Step 1: Form your first loop as shown above in the first pic. Secure the loop with your salon clip. (Leave a few inches from each ribbon end for tails.)
Step 2: With your longest end of ribbon form your second loop. Hold your first loop in place as you move your clip to now secure both loops into place. Your crease we made earlier should be directly under your salon clip. If not, do some adjusting until your loops are equal in size and your center crease is in the correct place. If no adjusting is necessary, you are well on your way to having 4 equal sized loops!
Step 3: Your next loop is formed by looping your ribbon down as shown in the third pic. Rather than placing your ribbon along the backside of your bow, this ribbon should be tucked between the two layers.
Step 4: Your final loop is practically formed for you already. Save room at the end of your ribbon for your tail once again. Your tail should lay directly on top of the ribbon from the loop underneath.
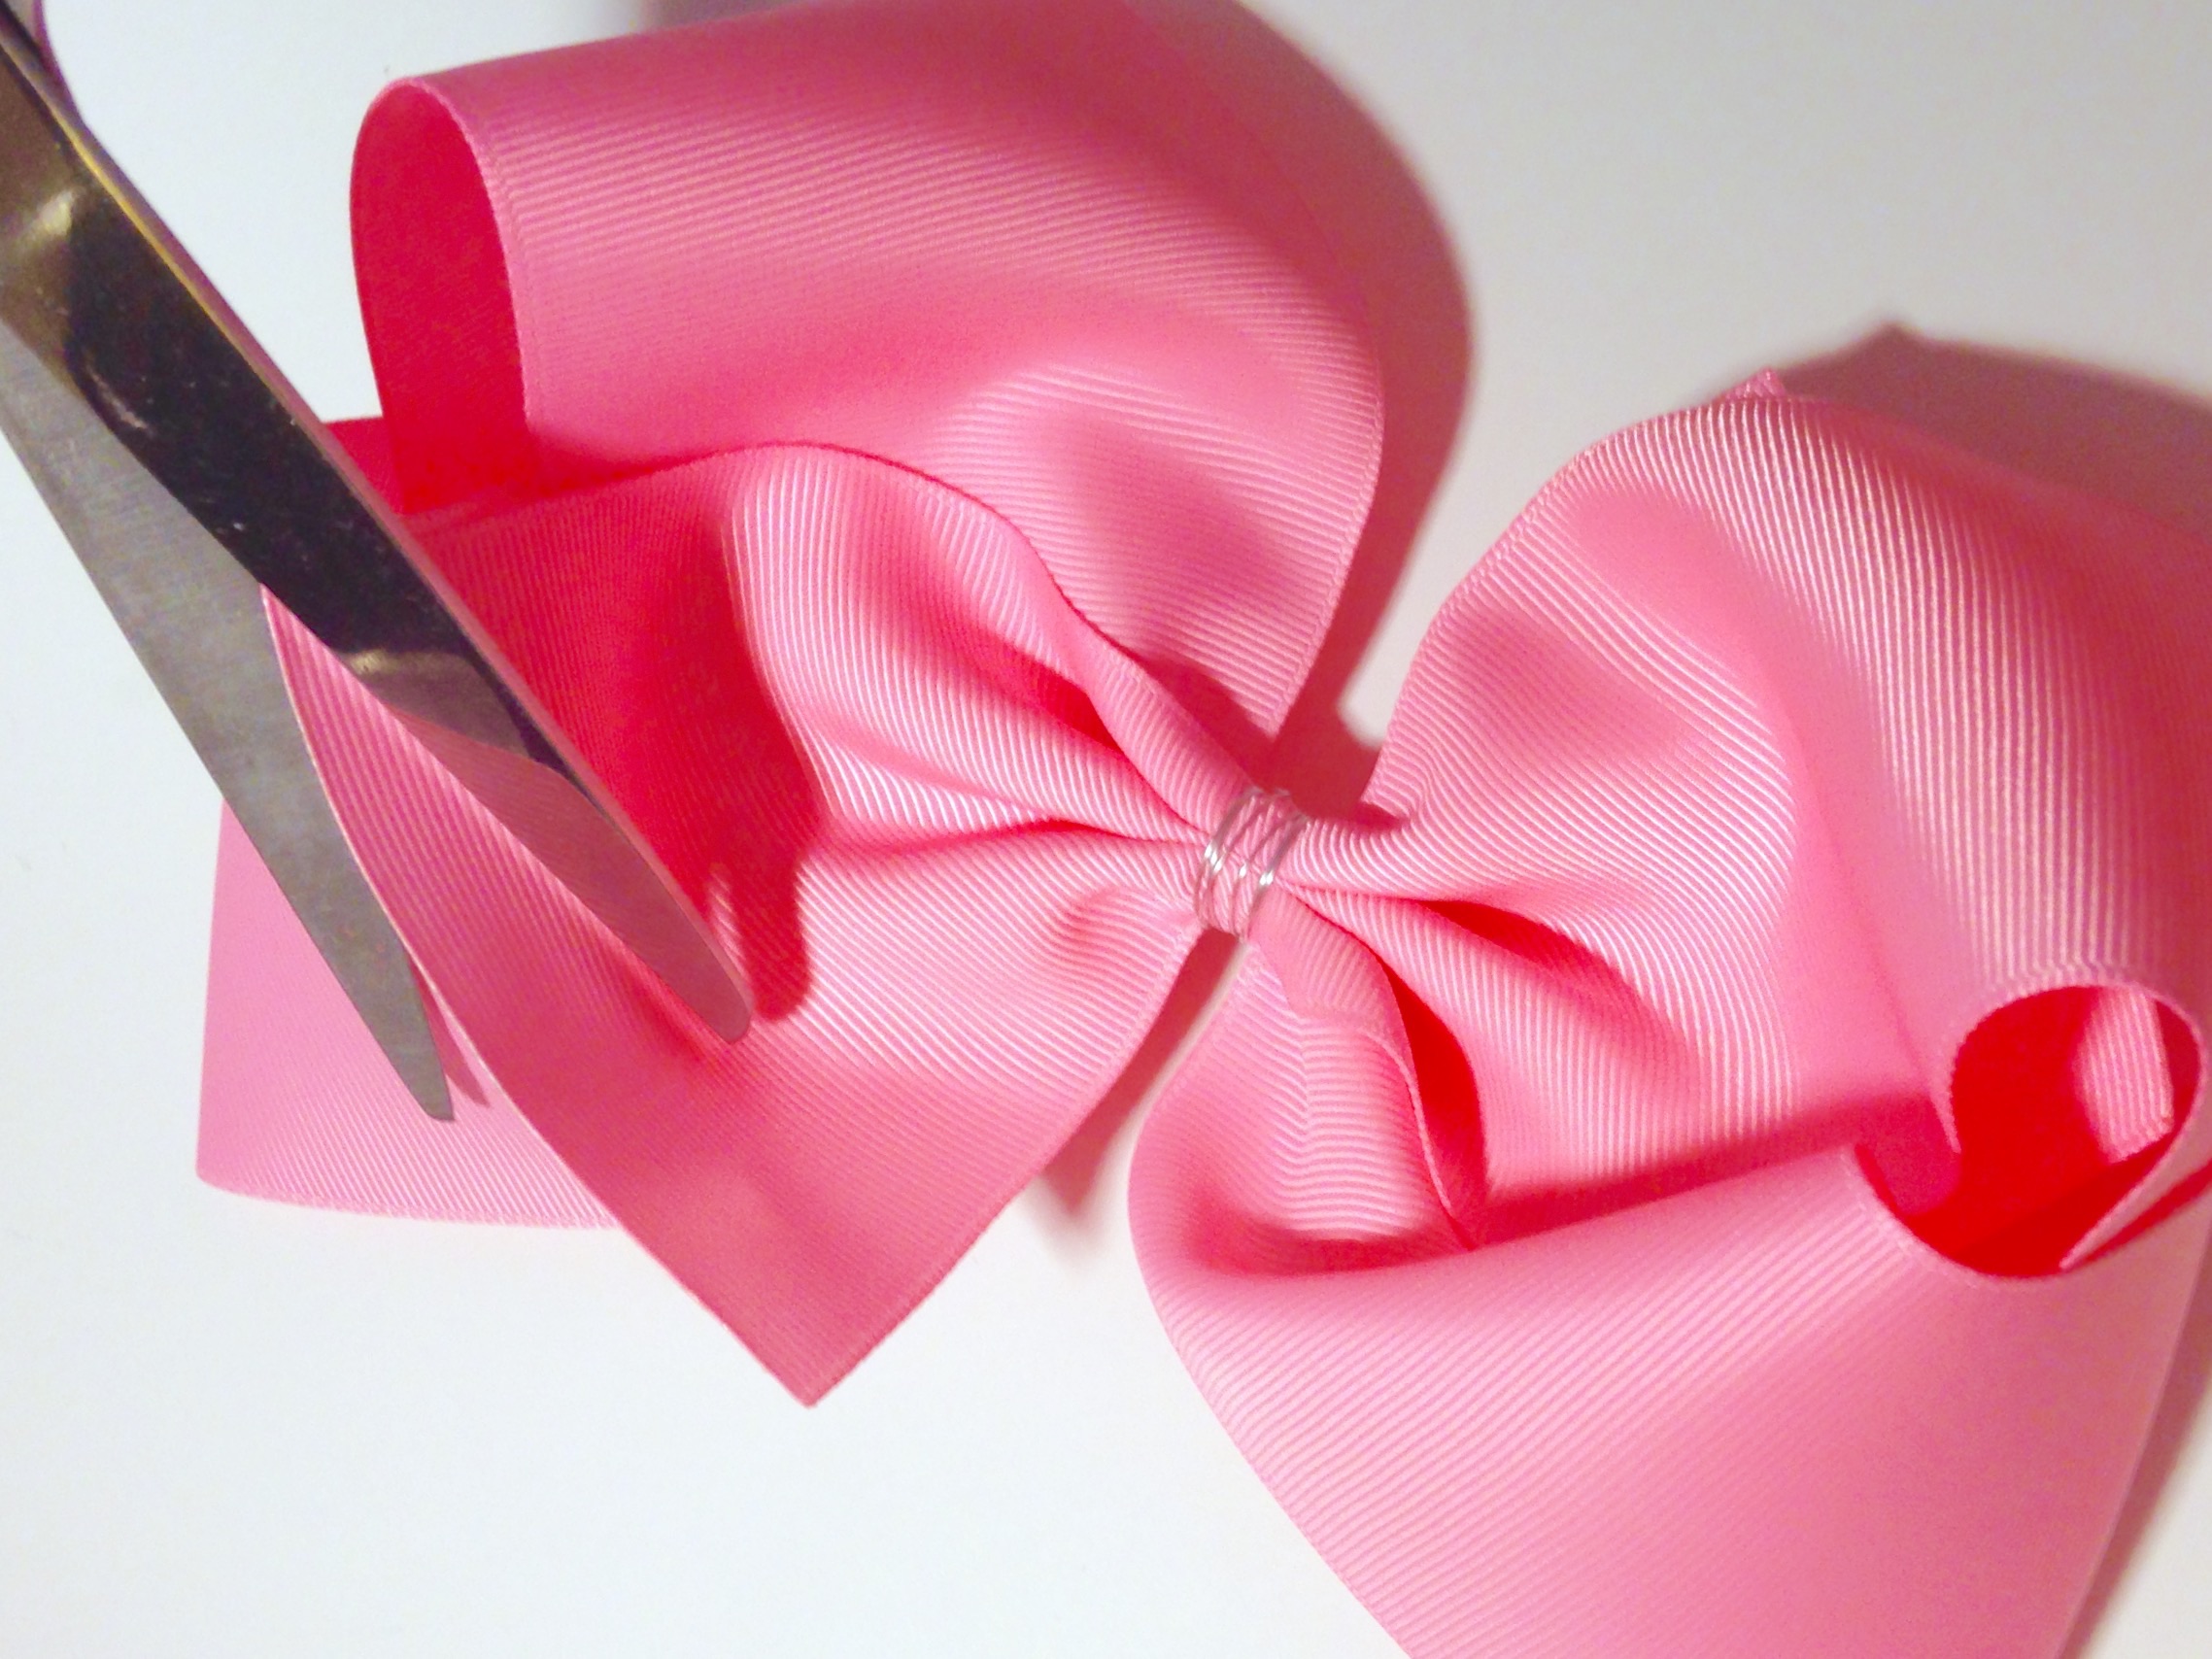
 Check all 4 loops to make sure they are equal in size. Before removing your salon clip you may adjust your loops to make them slant more or less to create the look you desire for your bow. Carefully remove your salon clip while holding all layers in place. Next you will make an accordion fold down the center of your bow as shown above. To do this you will start by folding the middle in half with your sides facing down. This will create your center fold. Fold each side back up and then back down once more for a total of 3 folds. Secure the center with wire (or your preferred method for maximum hold) and pull as tight as possible with pliers.
 Trim the tails however you like. I cut mine at an angle and heat sealed the ends to prevent them from fraying.
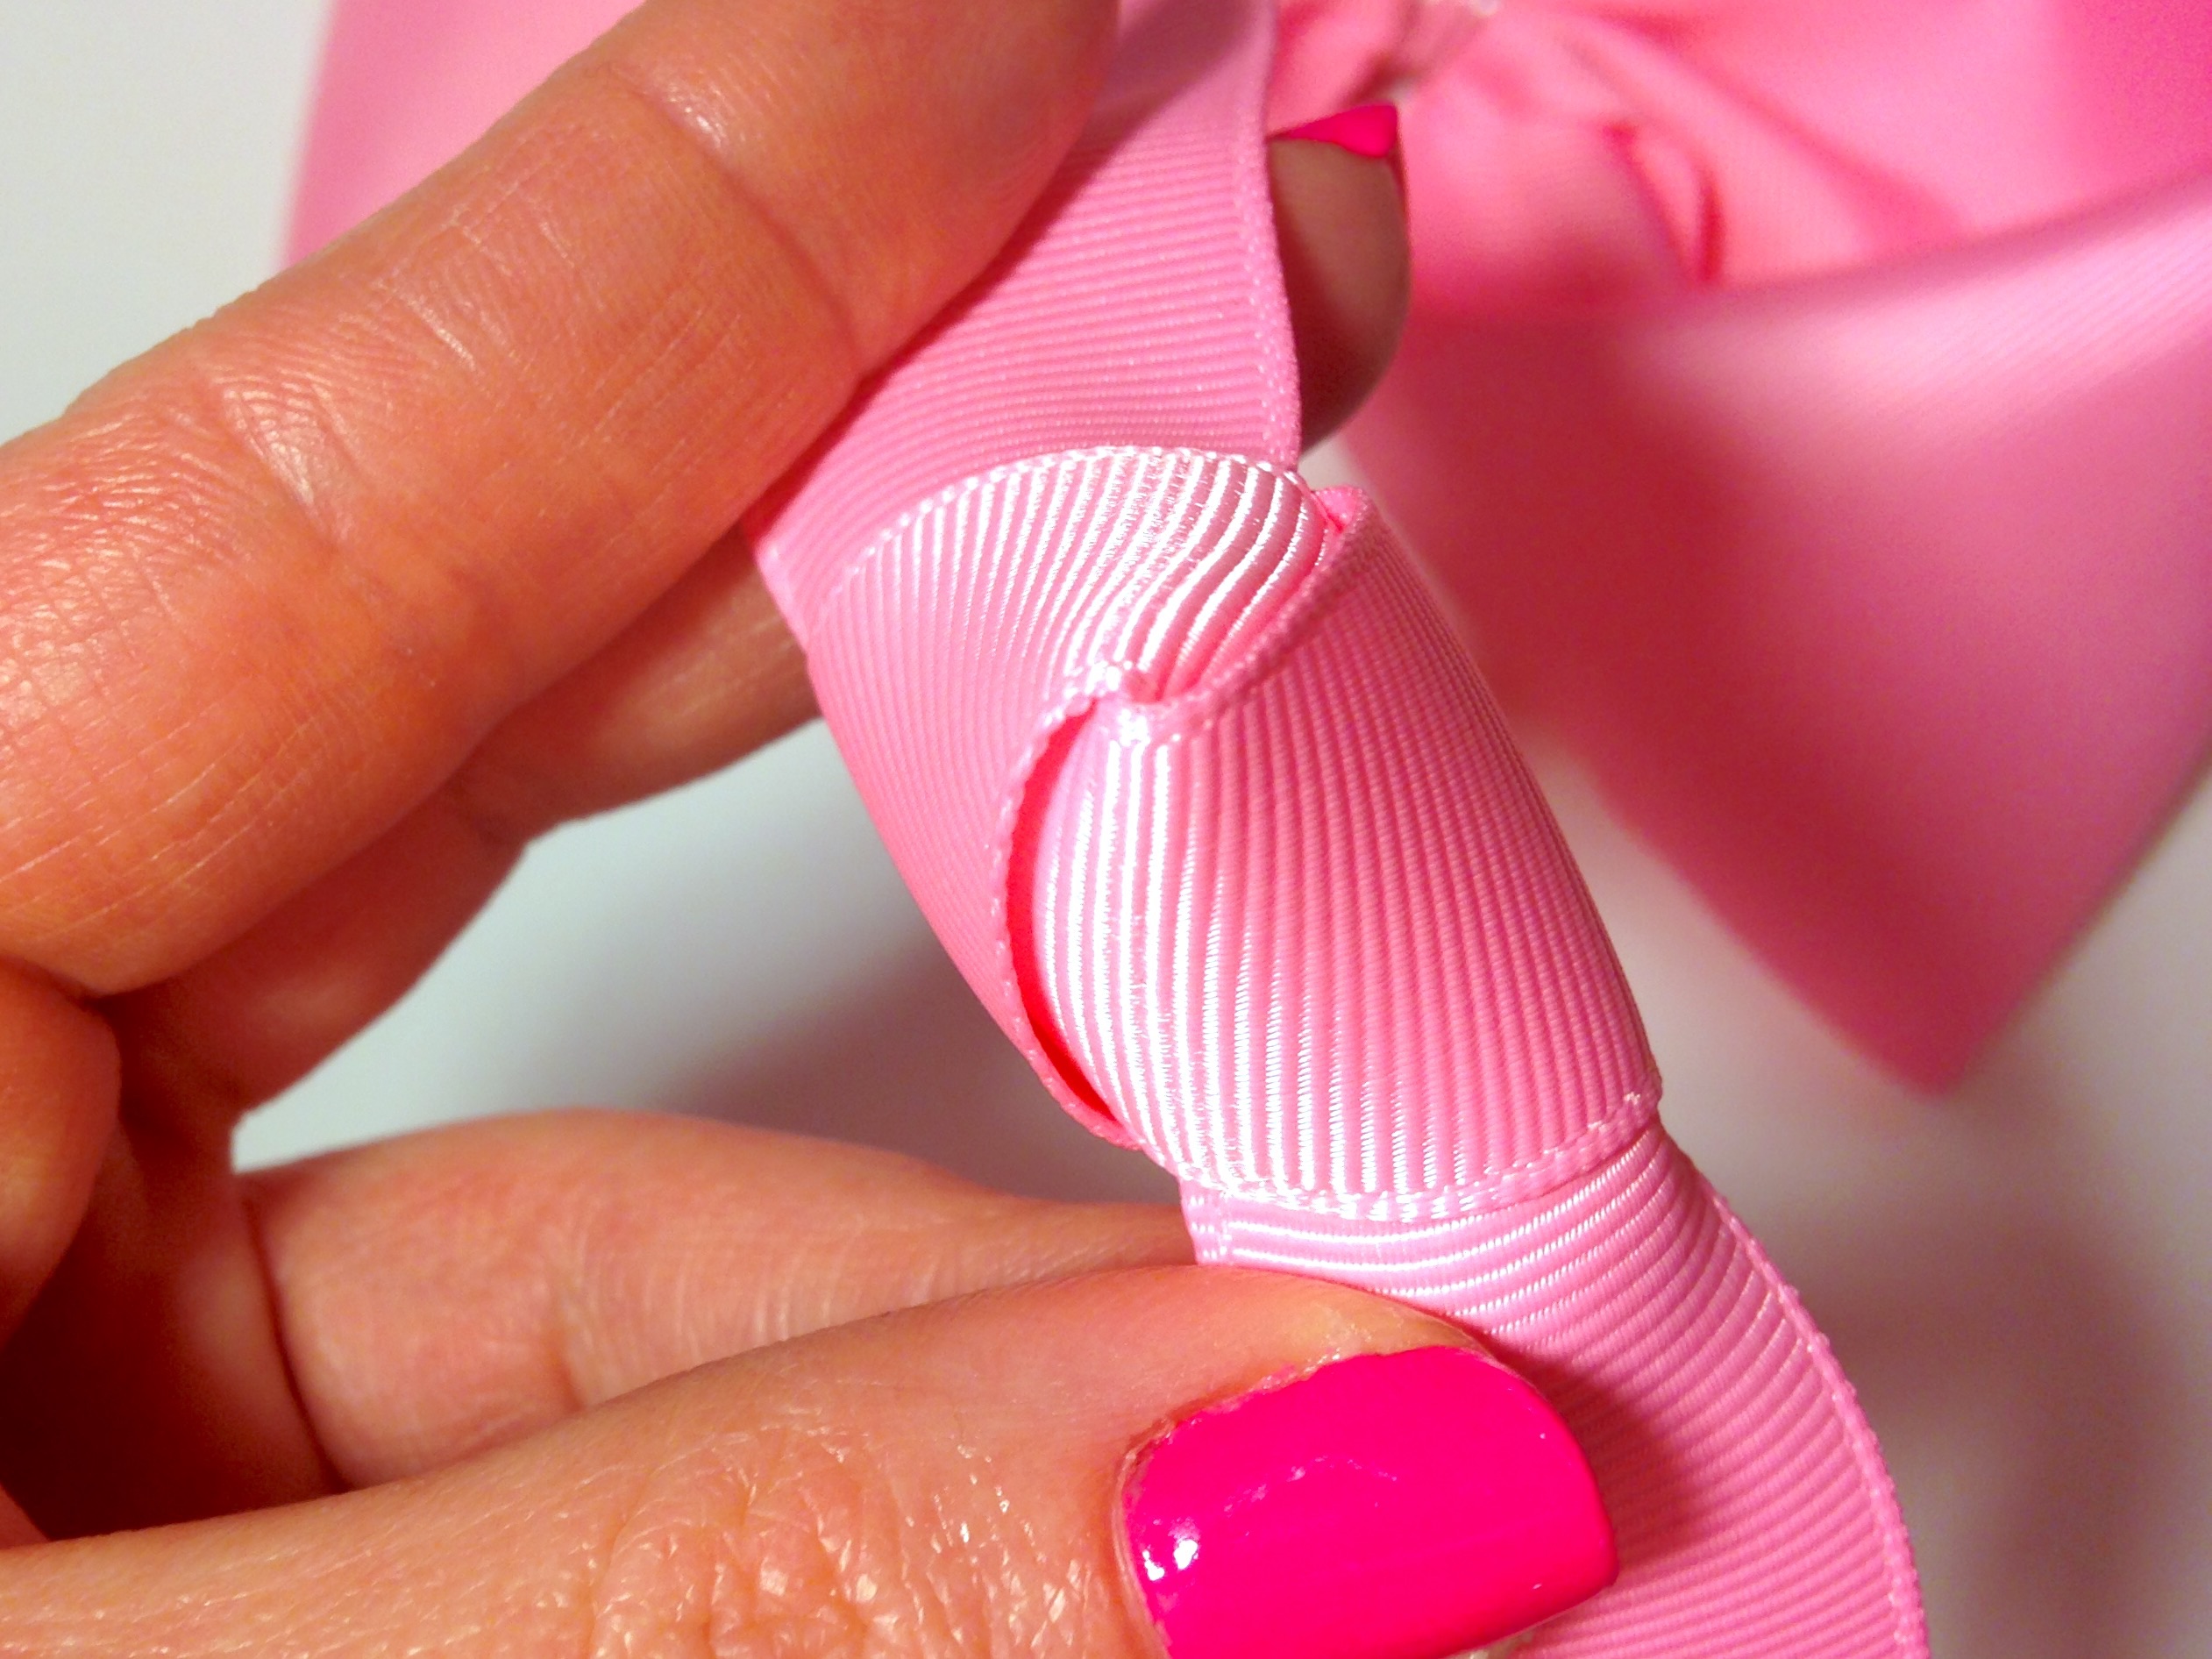 Now you will need a few inches of your 7/8" coordinating ribbon to cover the center of your bow. I like to tie a simple knot, but without pulling too tight. I like the appearance and shape this creates as the center point of my 4 generously sized loops.
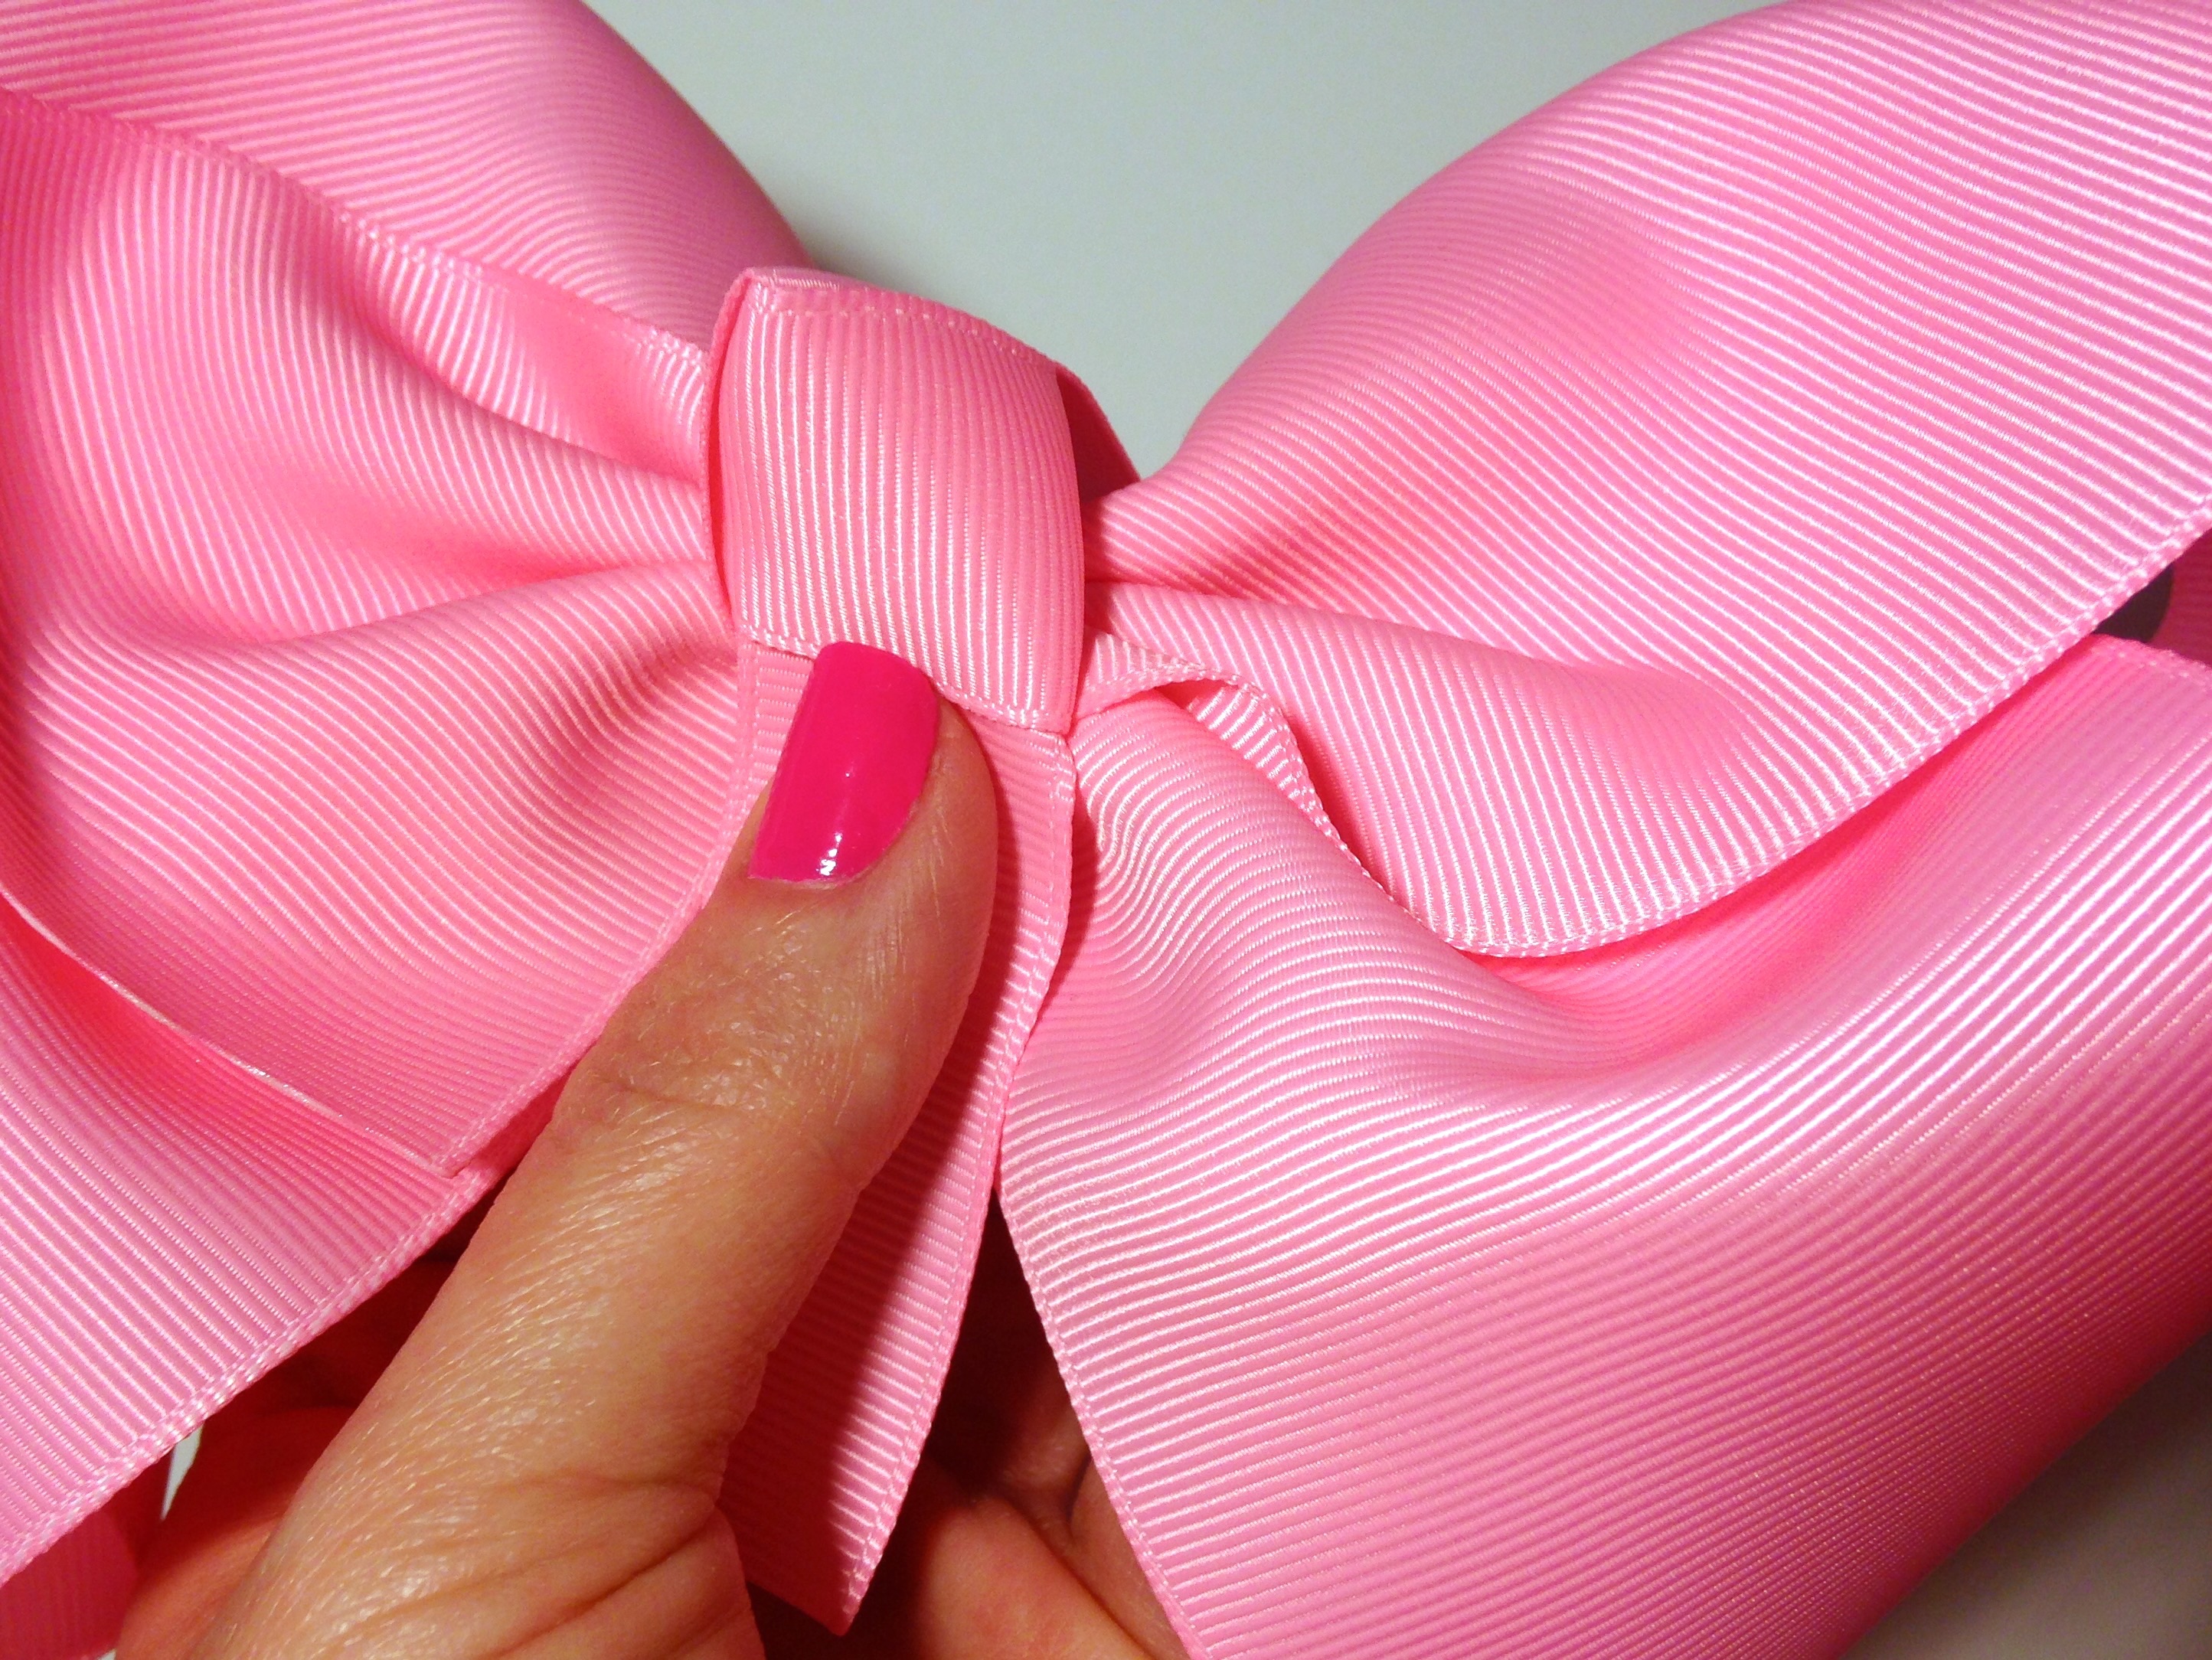 Attach your ribbon knot to your bow using your hot glue gun. I like to use glue all the way around the entire center to make it more secure.
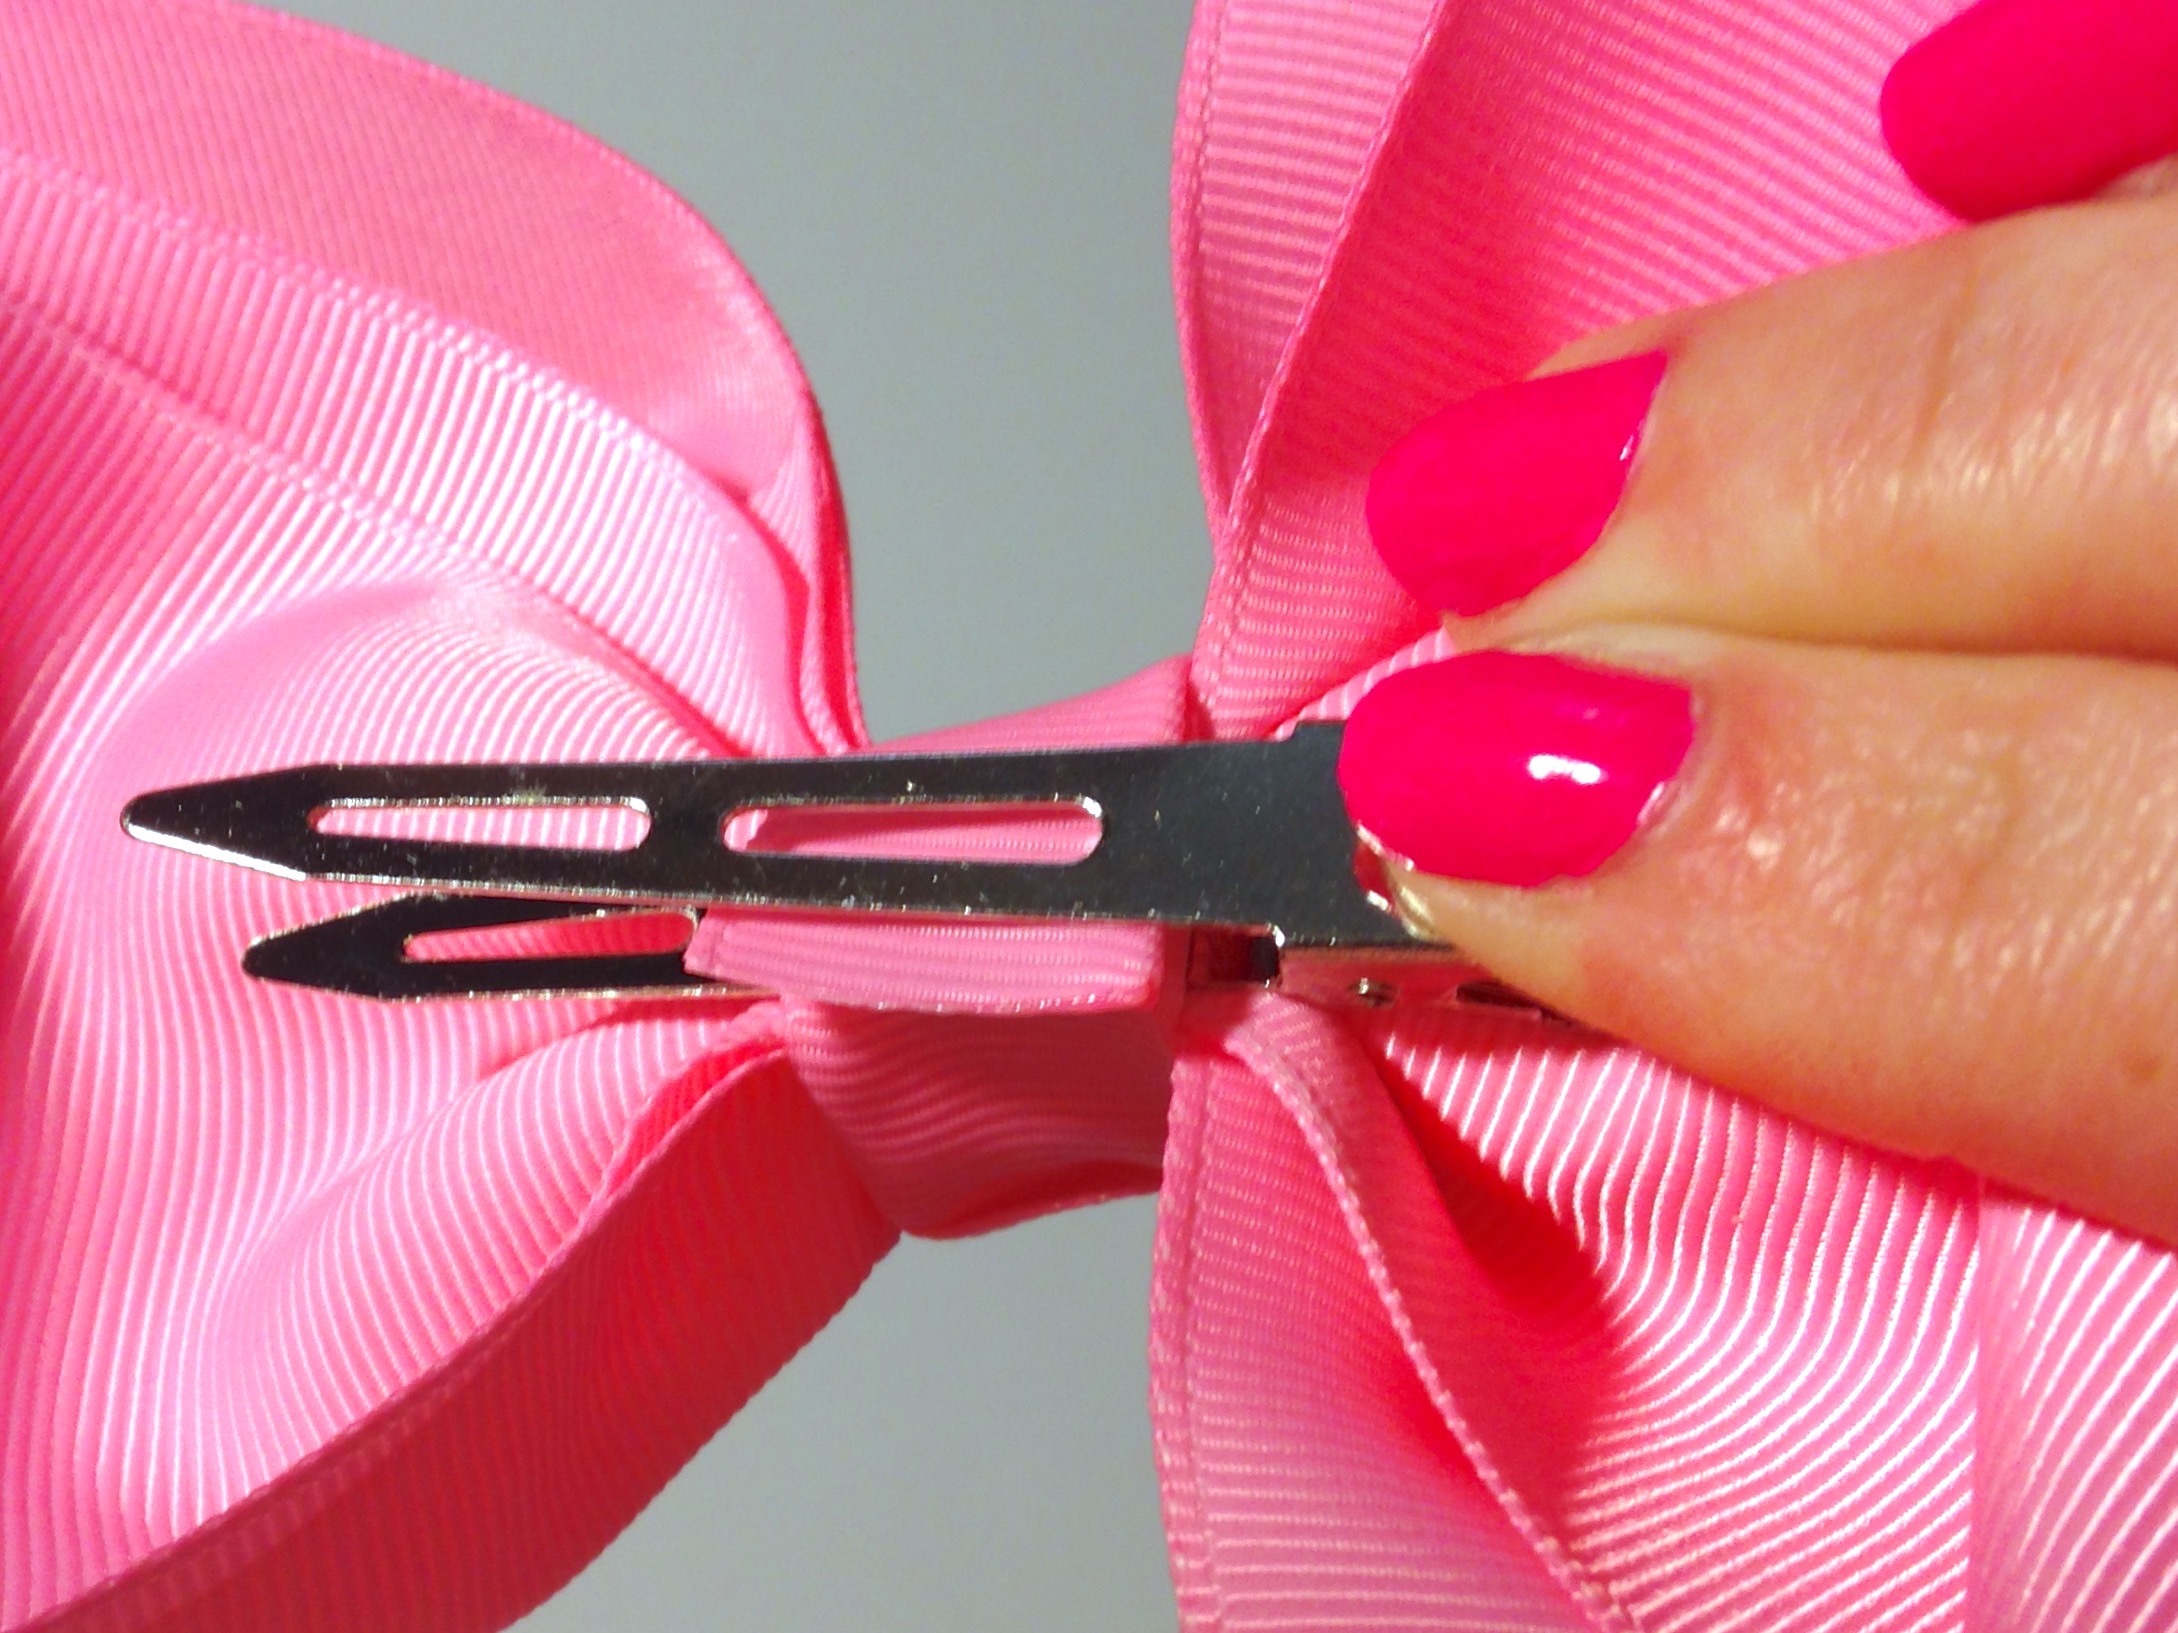 Don't forget to attach your large alligator clip to the back as you wrap with ribbon. Use plenty of hot glue to keep both the ribbon and clip firmly in place, but not too much so you may avoid glue oozing out and being messy.
Now I am going to measure this beautiful Bubblegum pink jumbo hair bow to make sure it lives up to its name...
Don't forget to attach your large alligator clip to the back as you wrap with ribbon. Use plenty of hot glue to keep both the ribbon and clip firmly in place, but not too much so you may avoid glue oozing out and being messy.
Now I am going to measure this beautiful Bubblegum pink jumbo hair bow to make sure it lives up to its name...
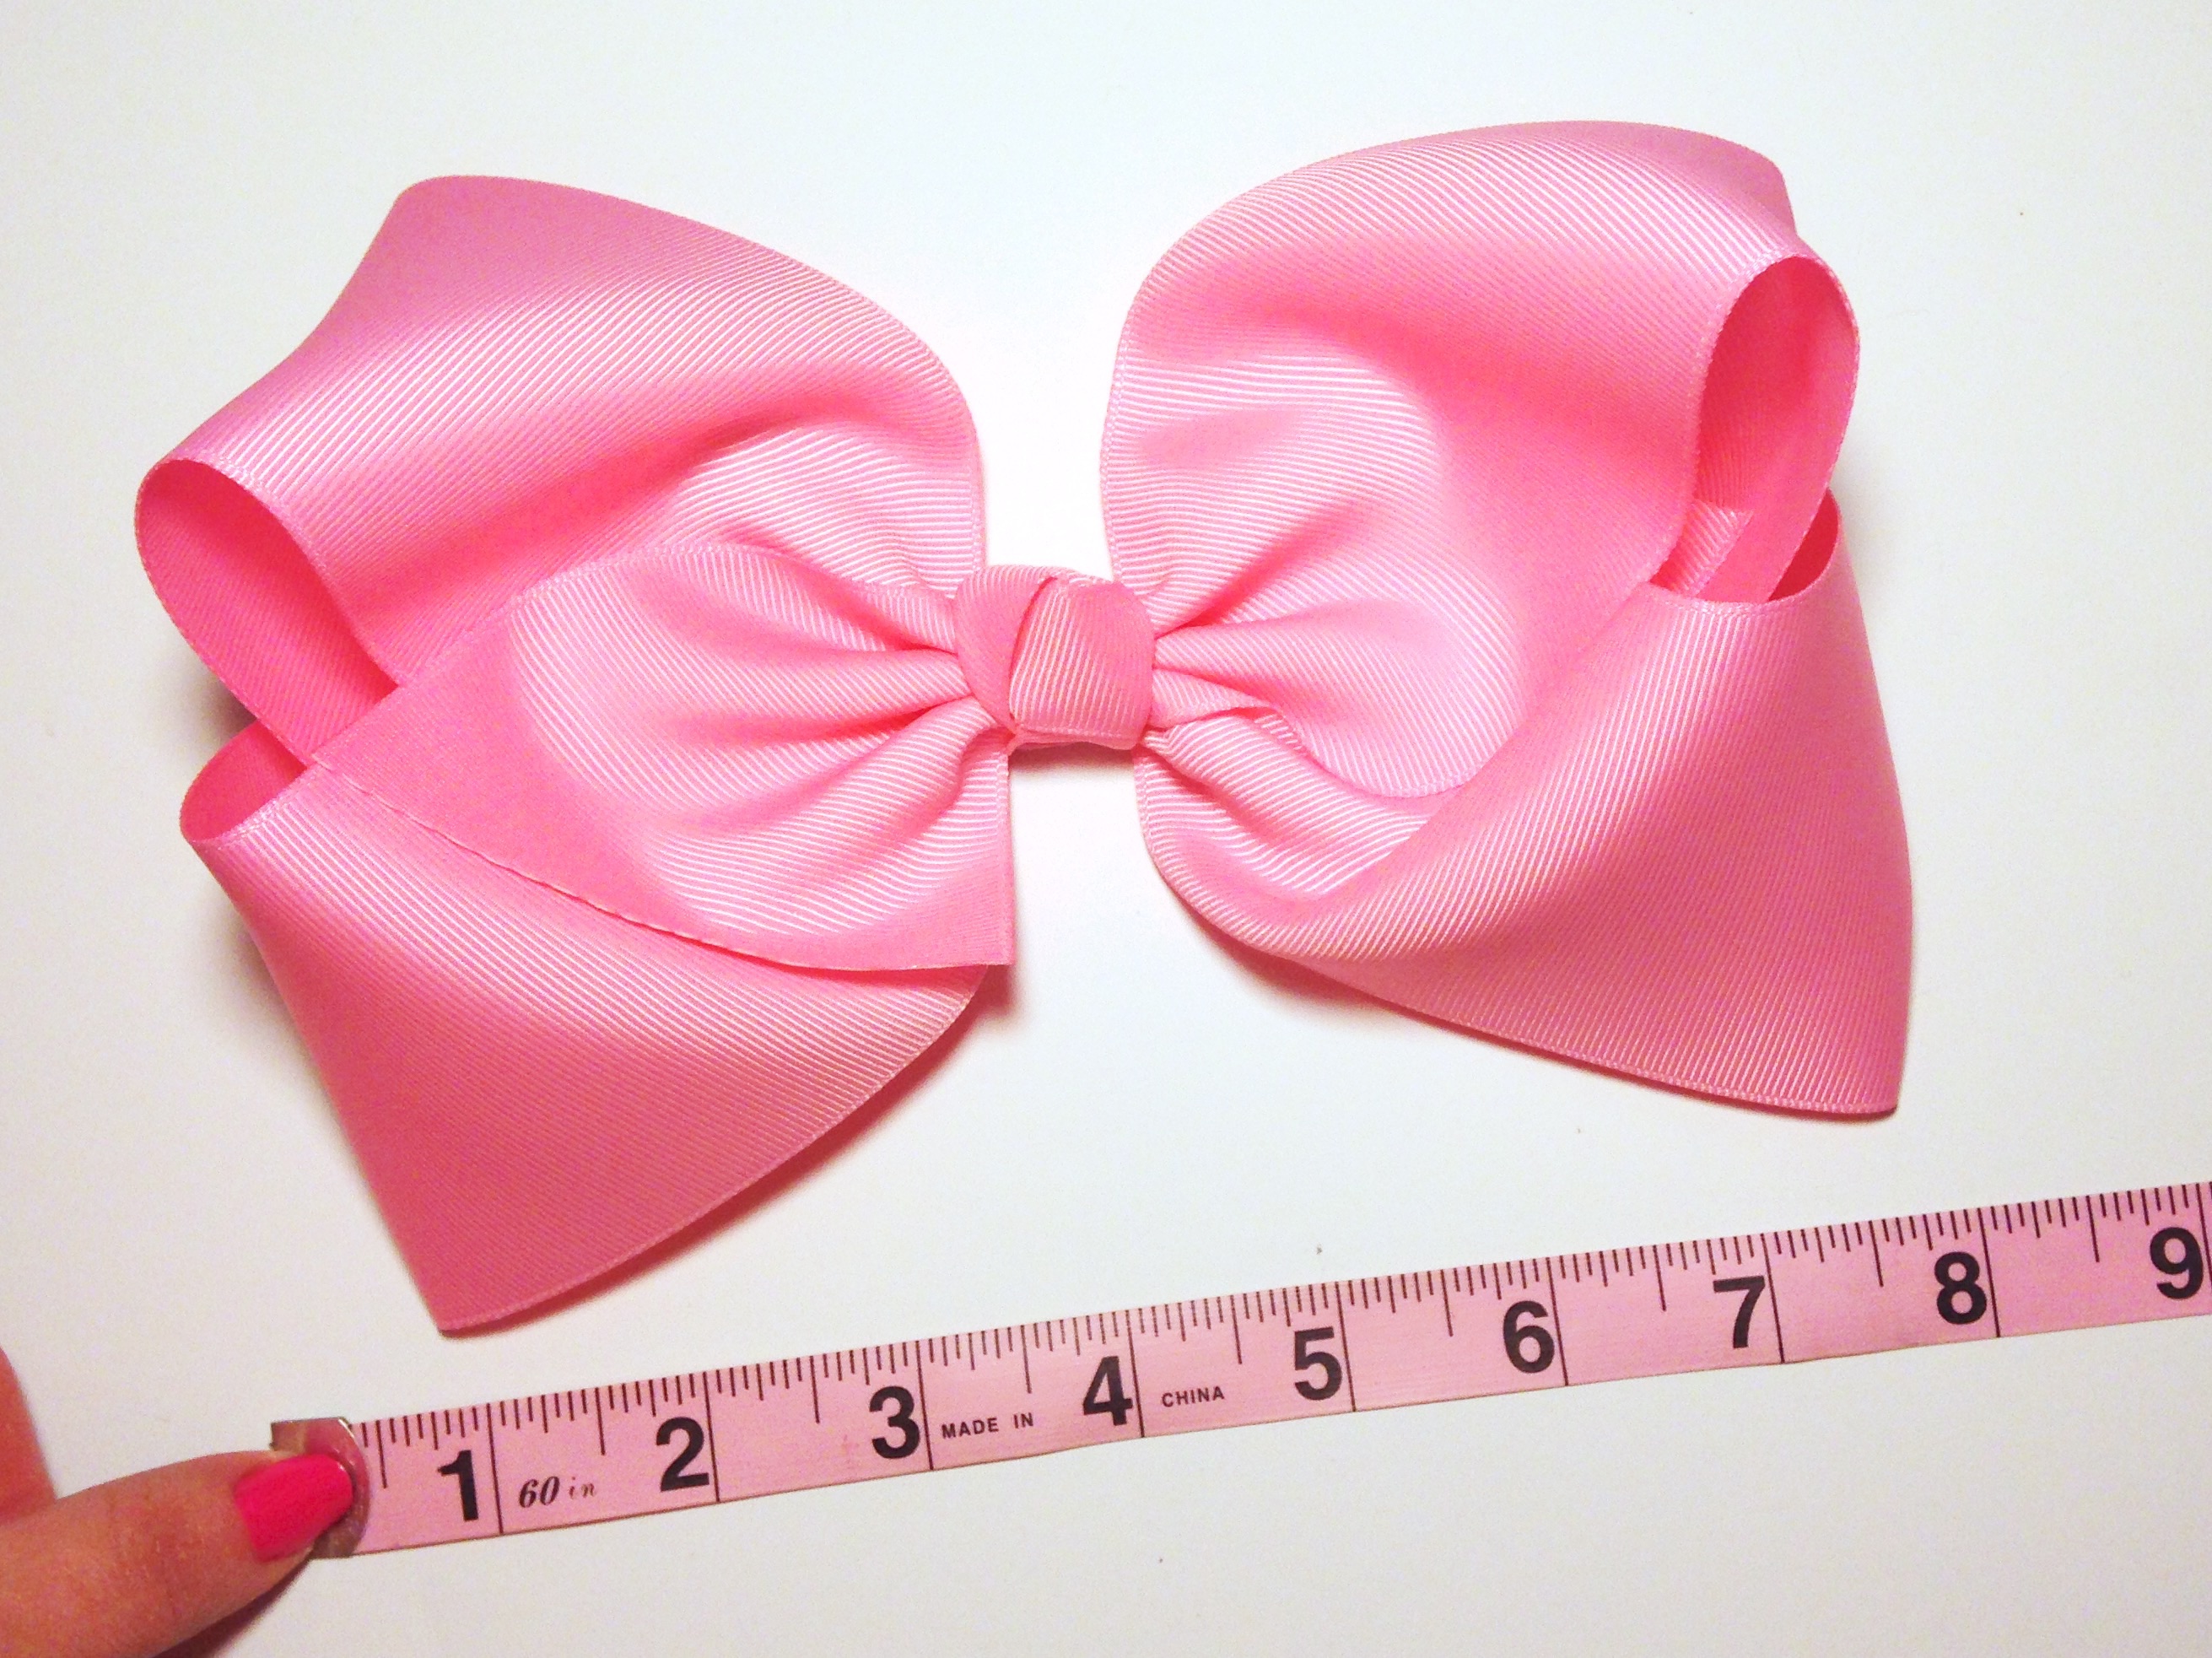 WOW!! The pic above shows us from end to end this bows is measuring approx 8 inches indeed! These are definitely the largest boutique style bows I make and should by all means satisfy big bow fans of all ages! So what do you think? Are you a "tiny treasures" or "bigger is always better" kind of hair bow Momma?? I'd love to hear your opinions! Thanks for joining me and I hope you've enjoyed!

Visit the rest of our blog for more Crafting Tutorials and DIY Instructions!
Loading...

