
Contributor post by Brittany
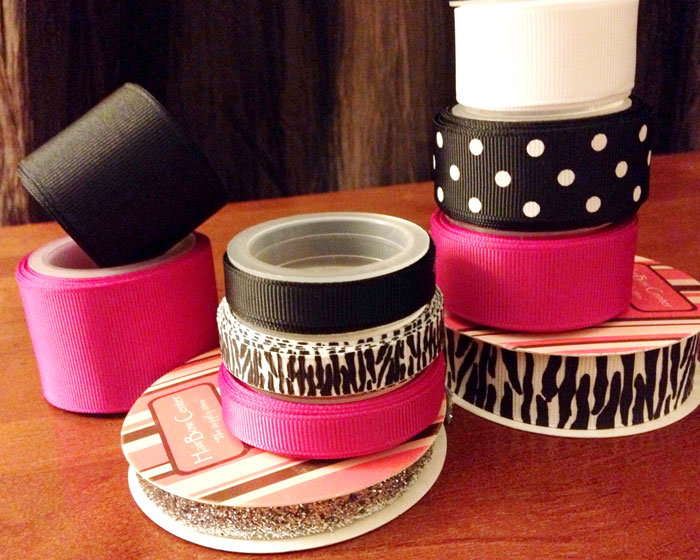
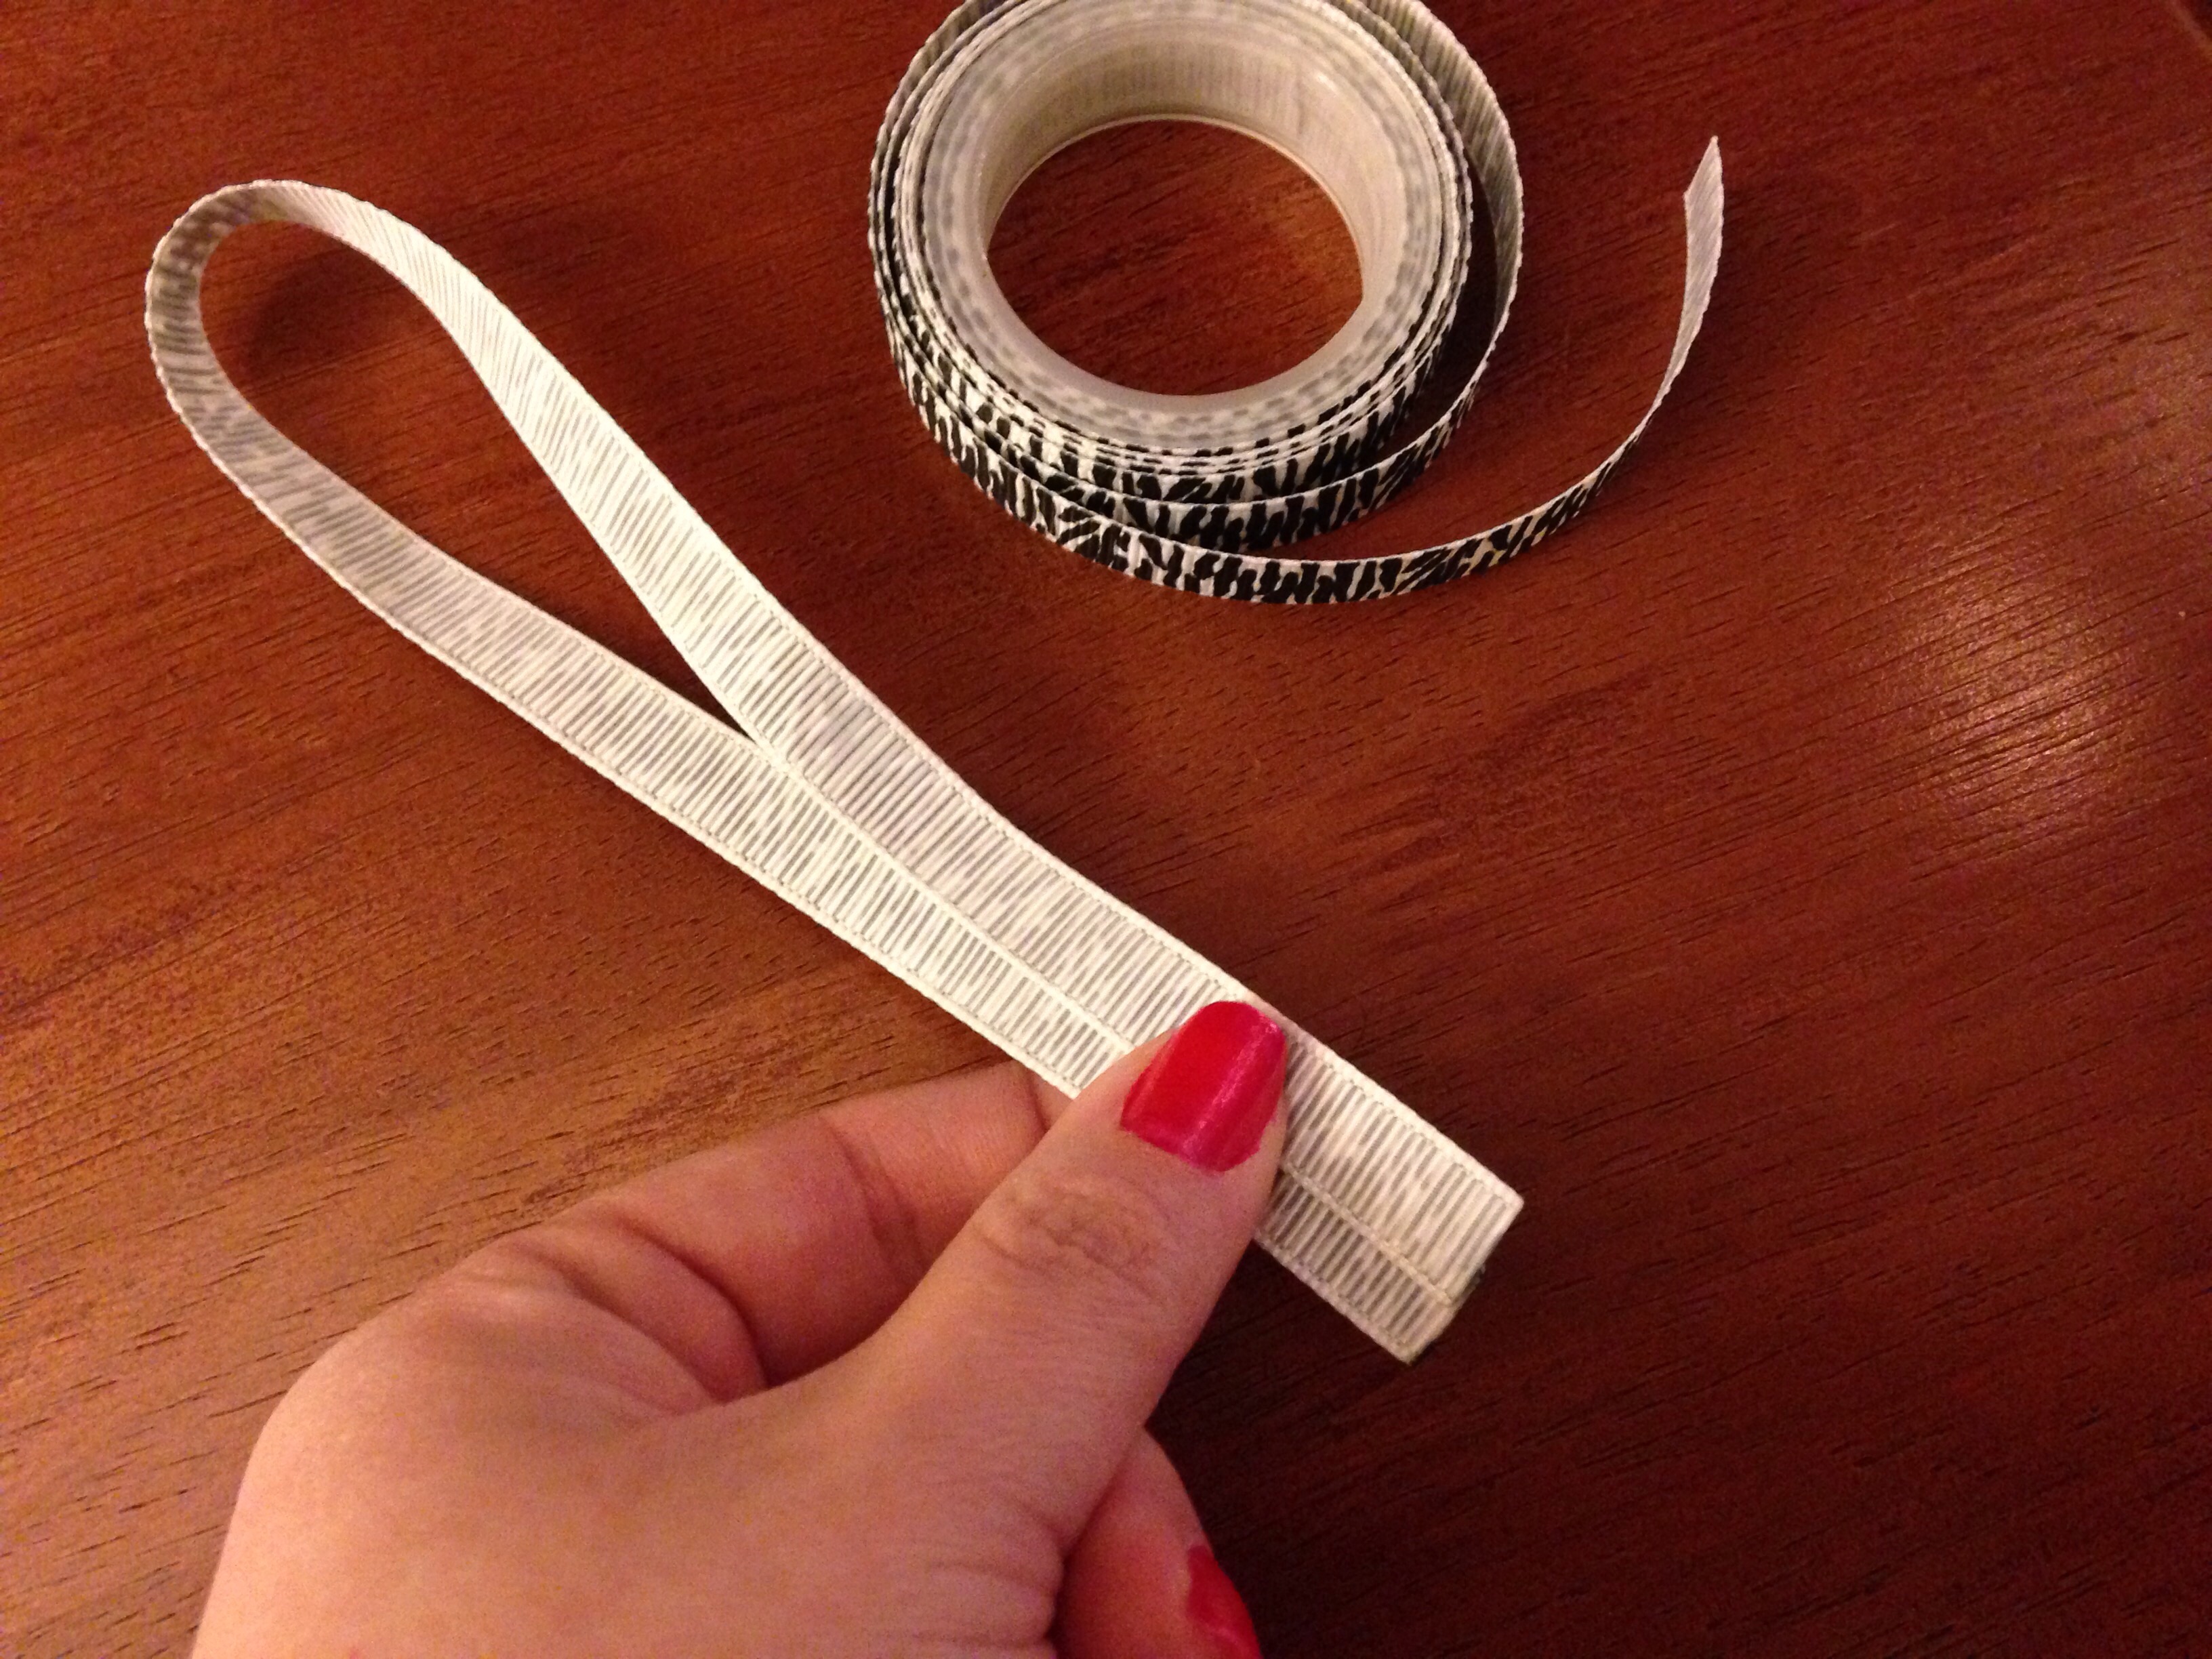
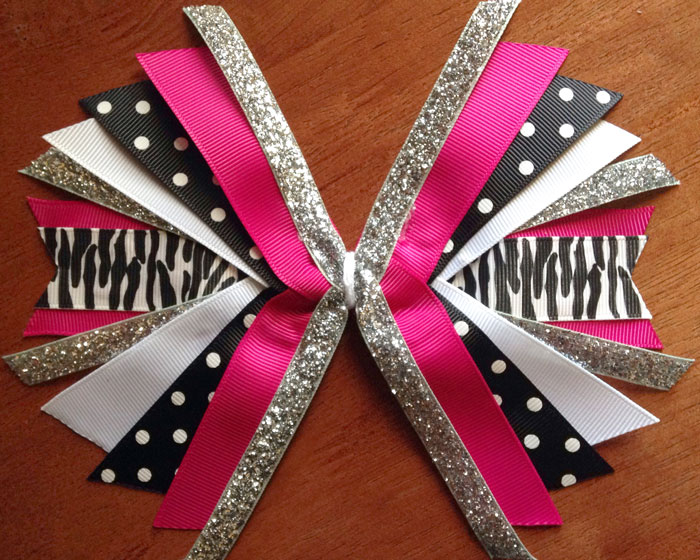
•7/8" grosgrain ribbon: white, black w/white dots, fuchsia and zebra print
•3/8" grosgrain ribbon: black, zebra and fuchsia
•3/8" glitter ribbon in silver
Additional tools you will need:
A ruler for measuring ribbon length, scissors, hot glue gun, 18-20mm rhinestone or other center embellishment of choice, E6000 or Quick Hold (optional), a lighter or wood burning tool for heat sealing ribbon ends, alligator clip or hardware of your choice, embroidery floss and a large salon clip.
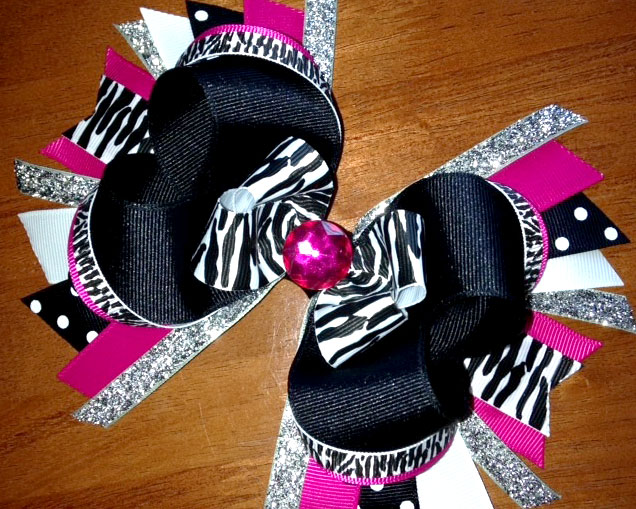
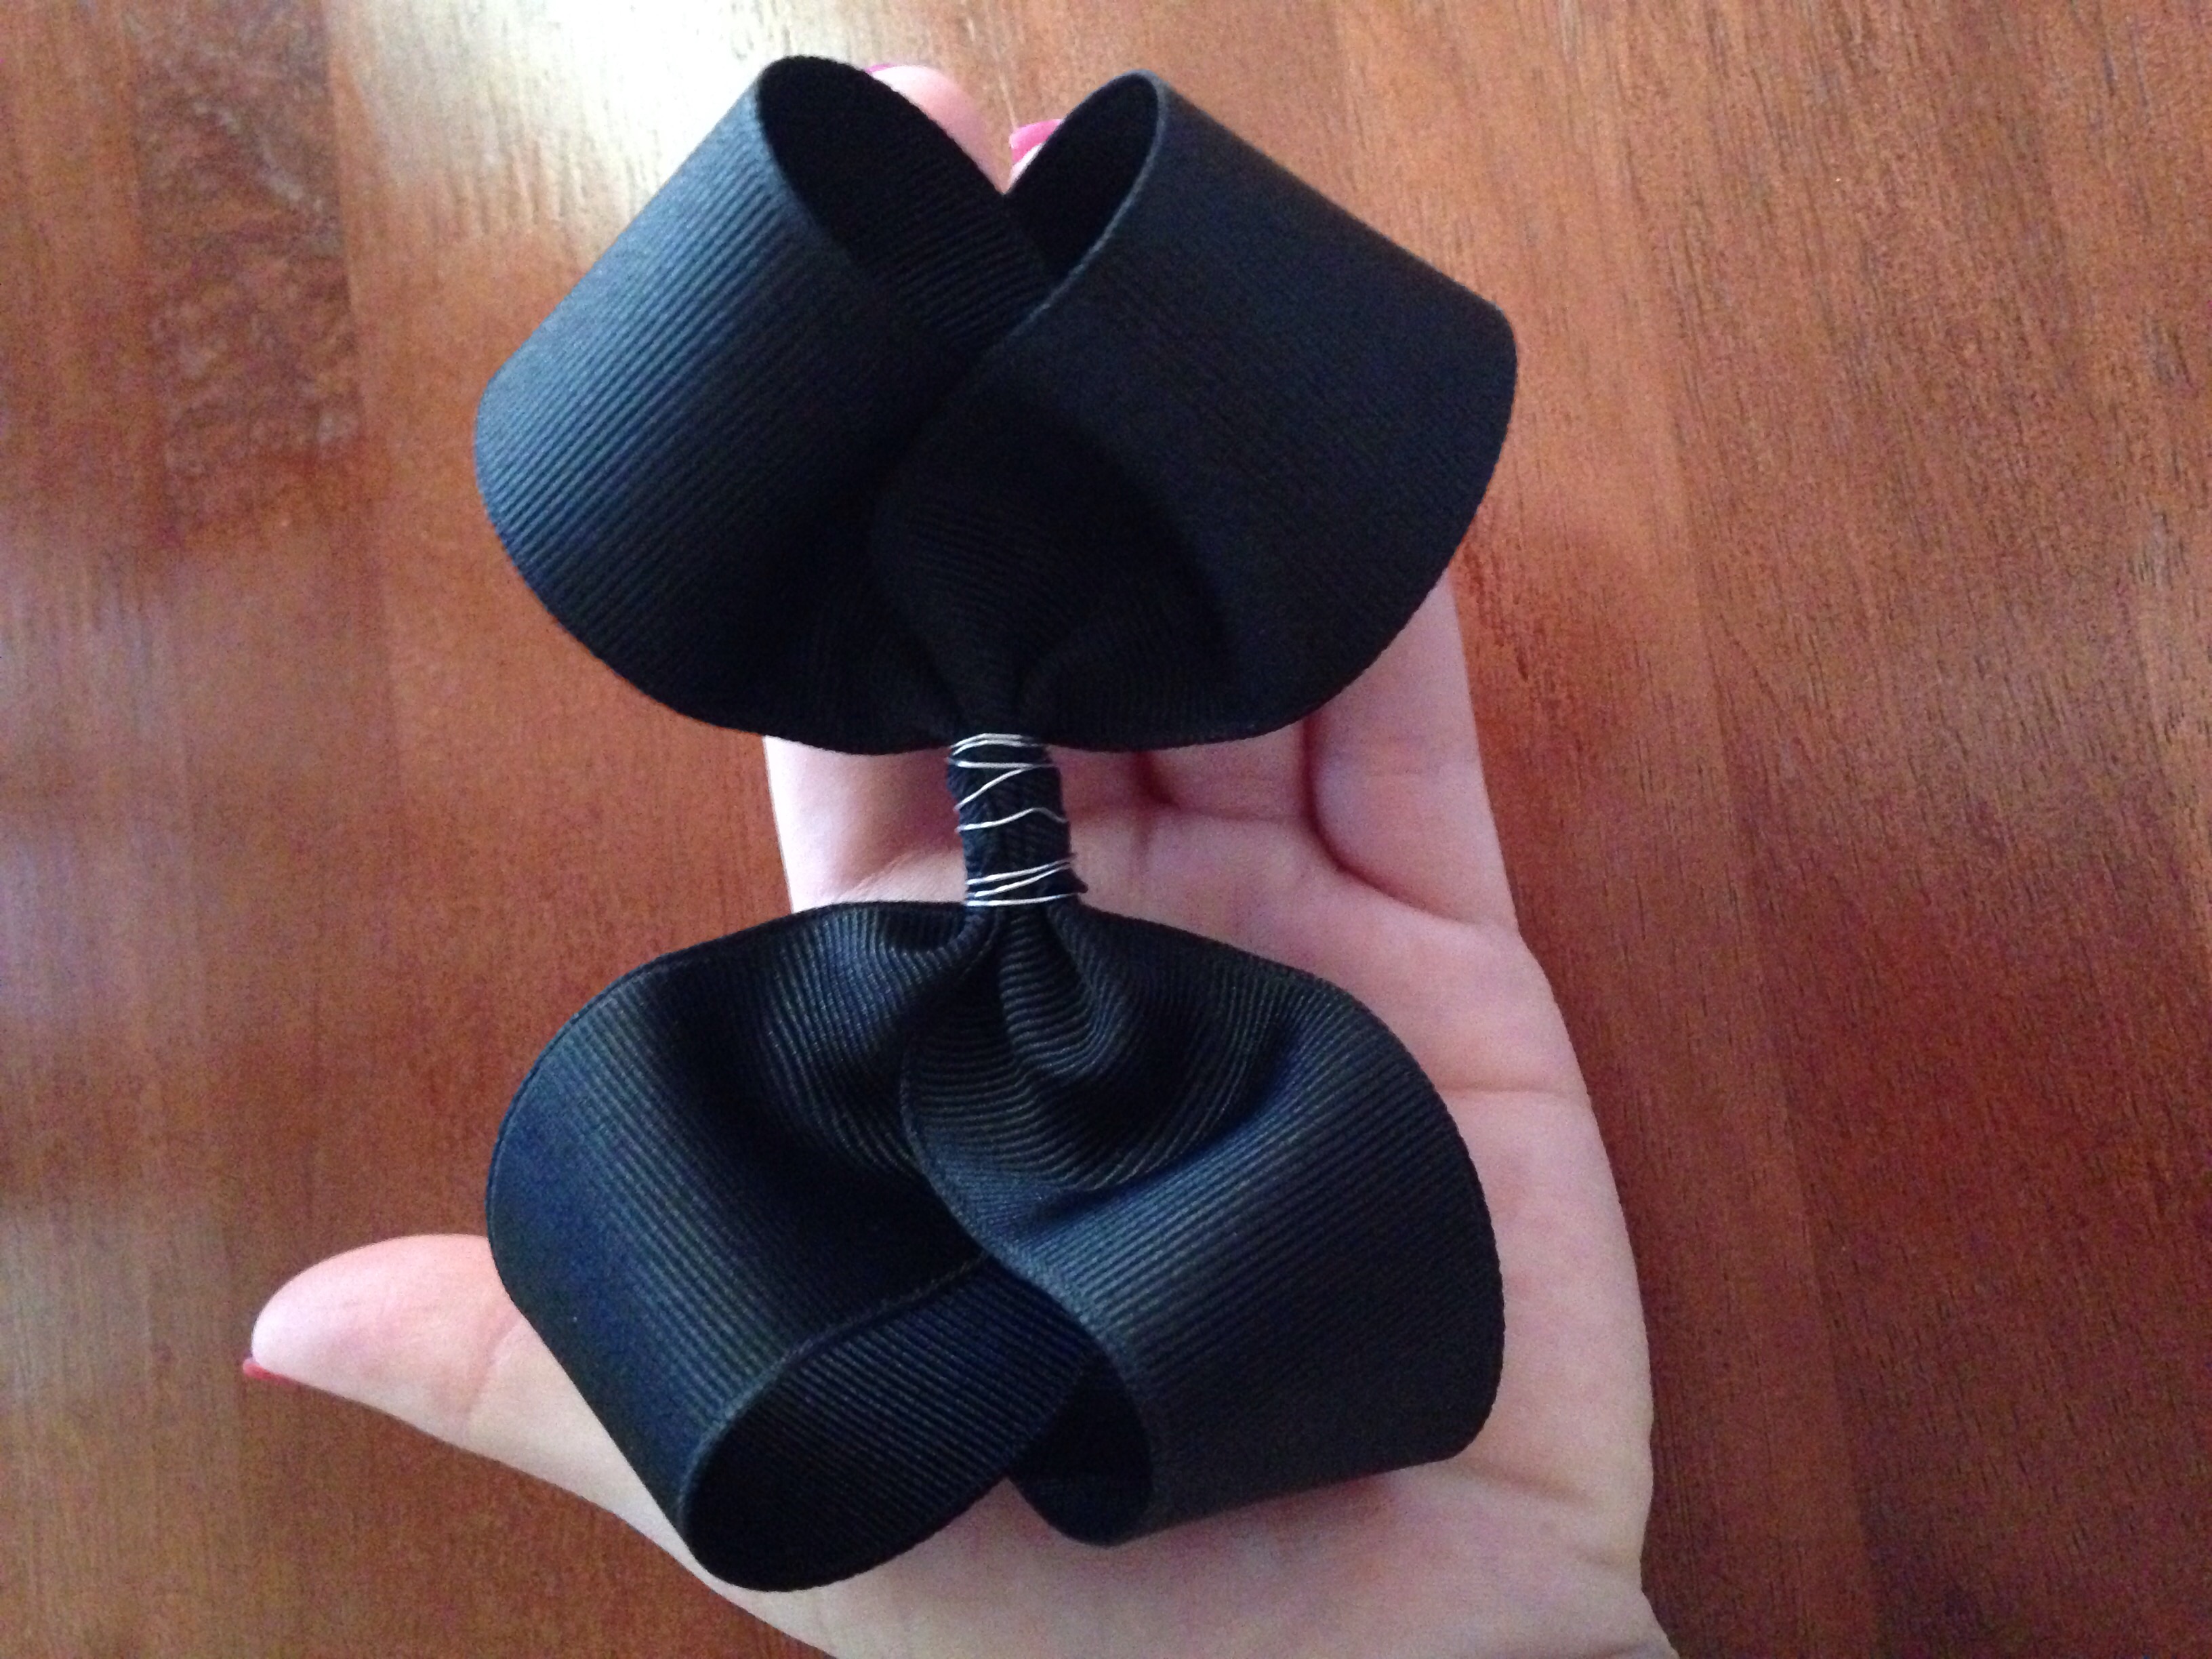
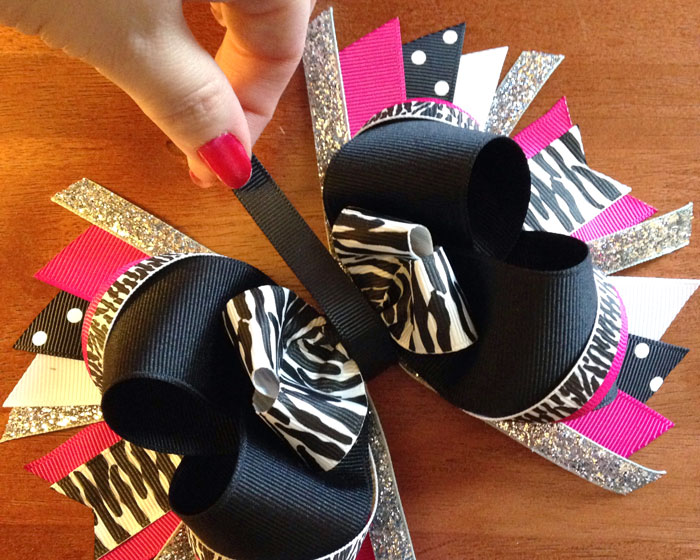
For the main (center) bow you will need approx 26" of 1.5" black grosgrain ribbon. Make sure to heat seal ALL ribbon ends. (If you do not have a method you have already mastered for making a basic bow, HBC offers great templates.)
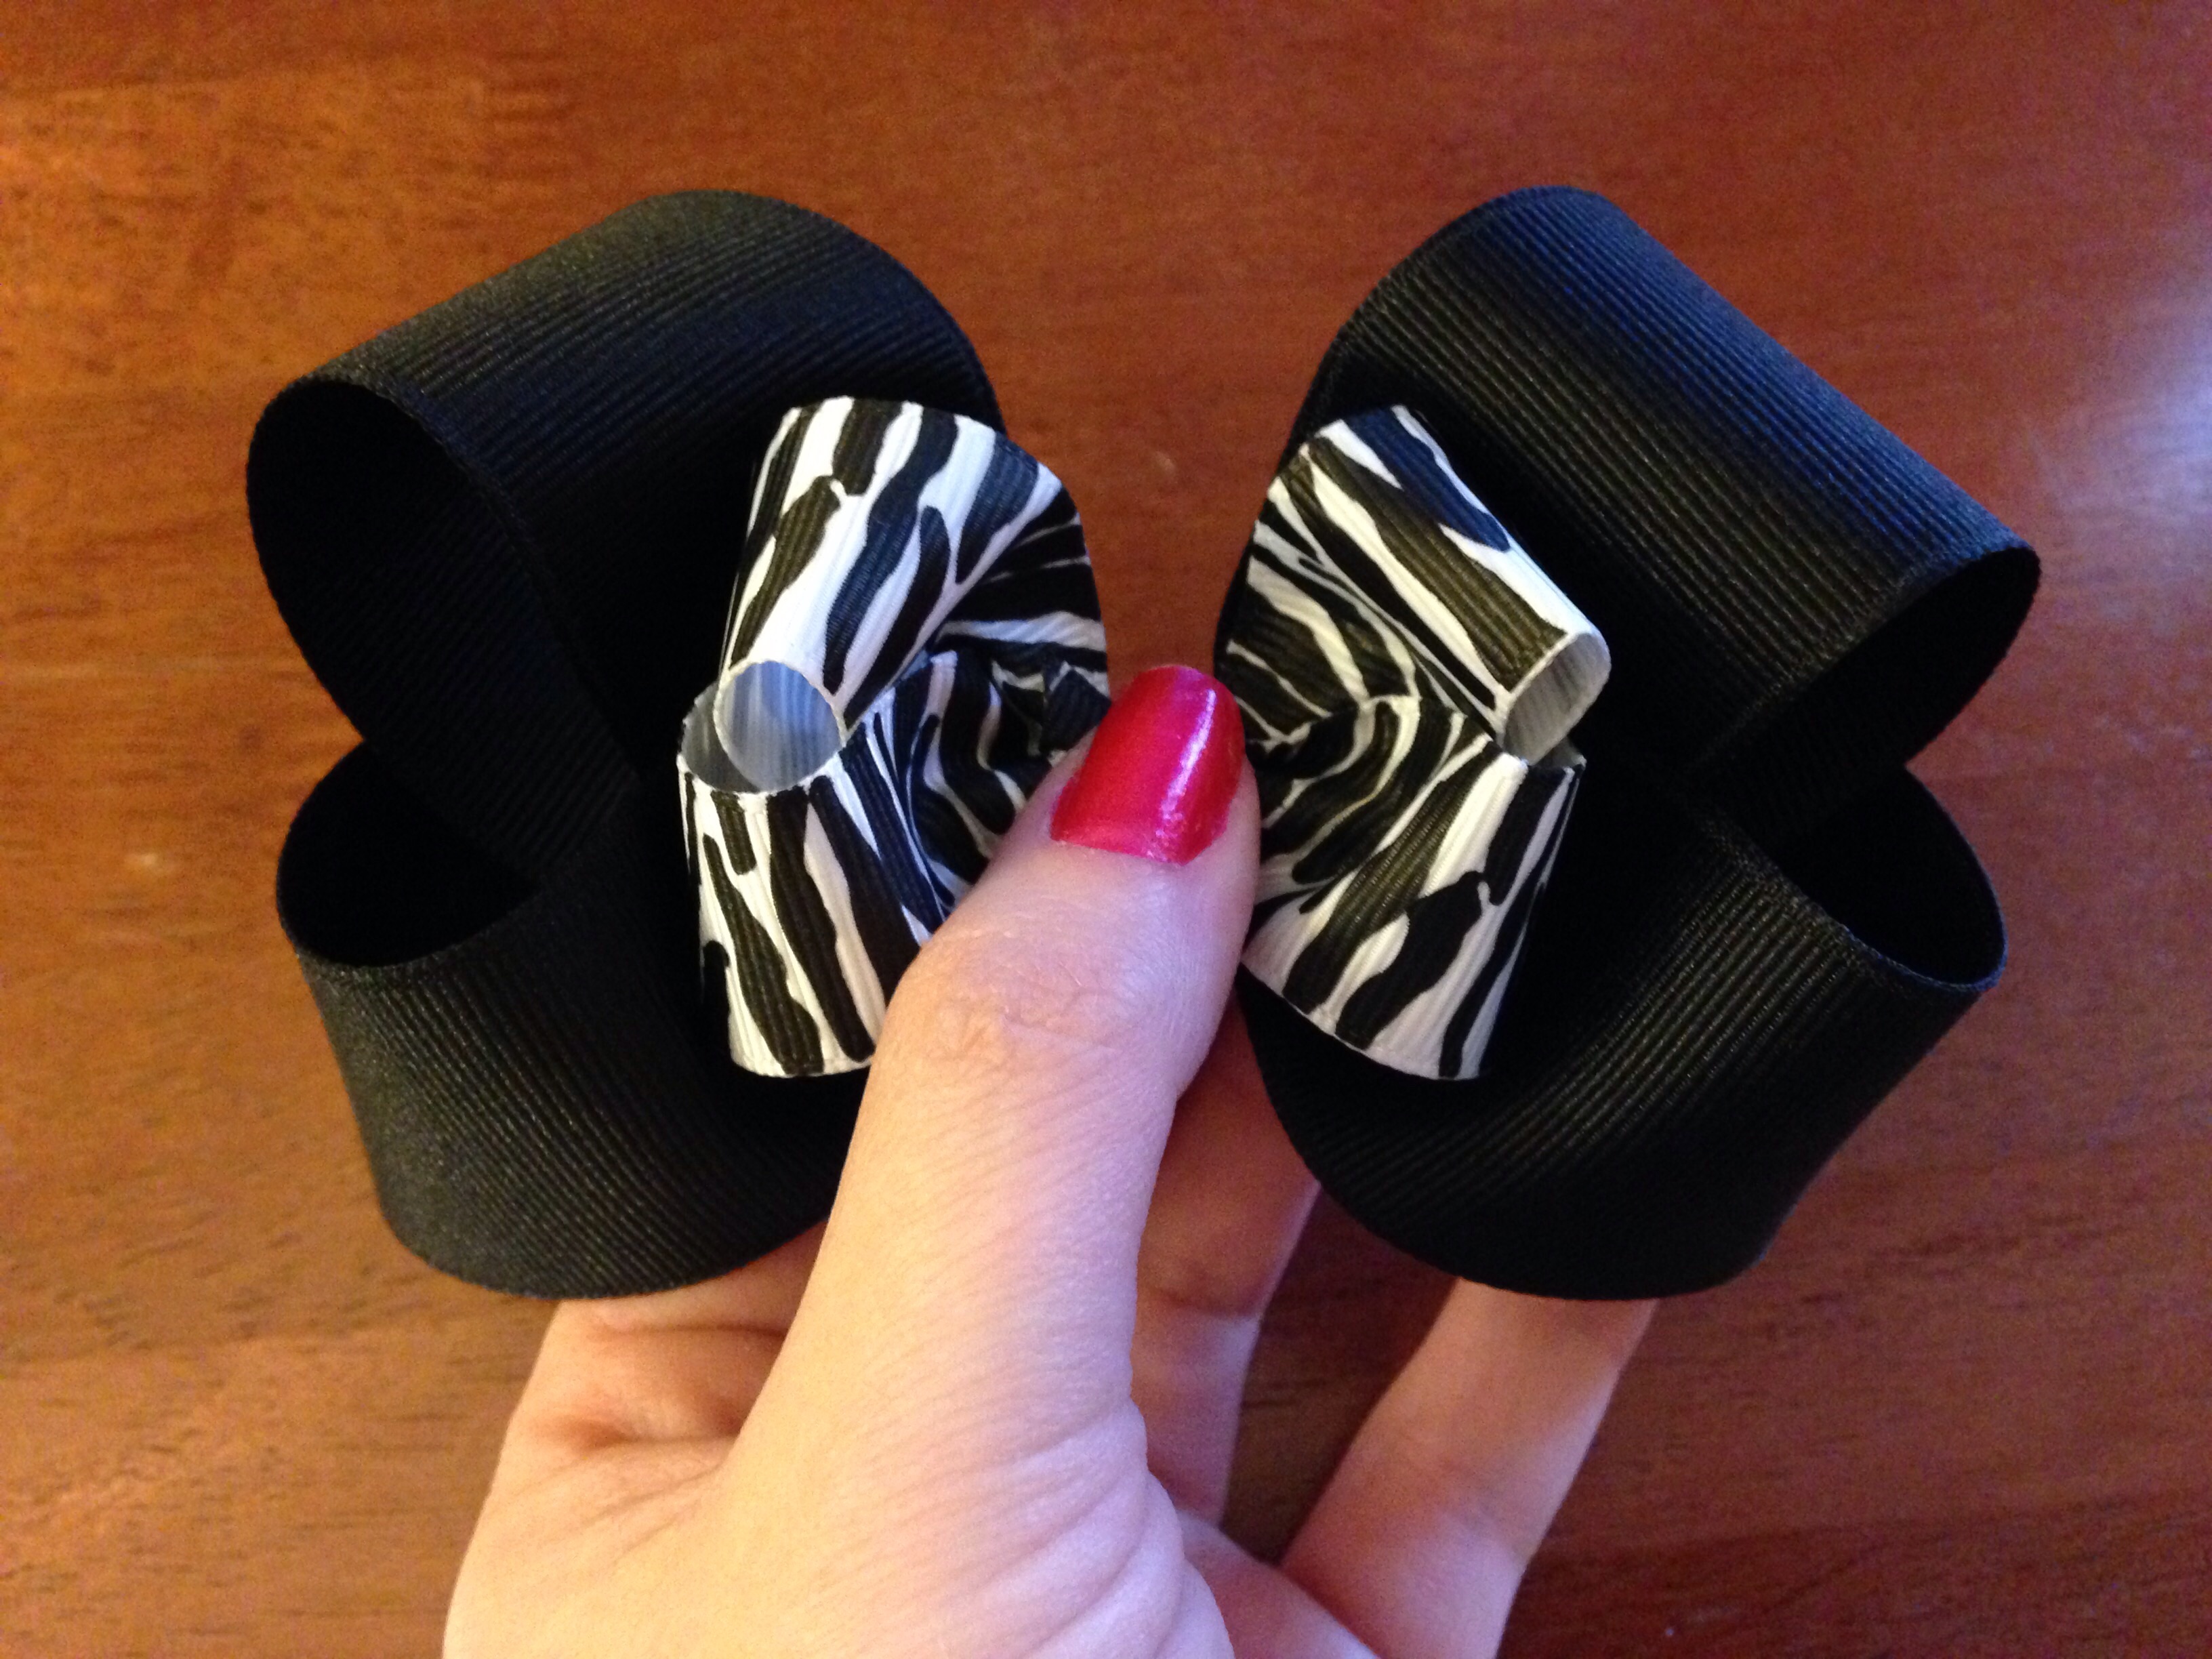
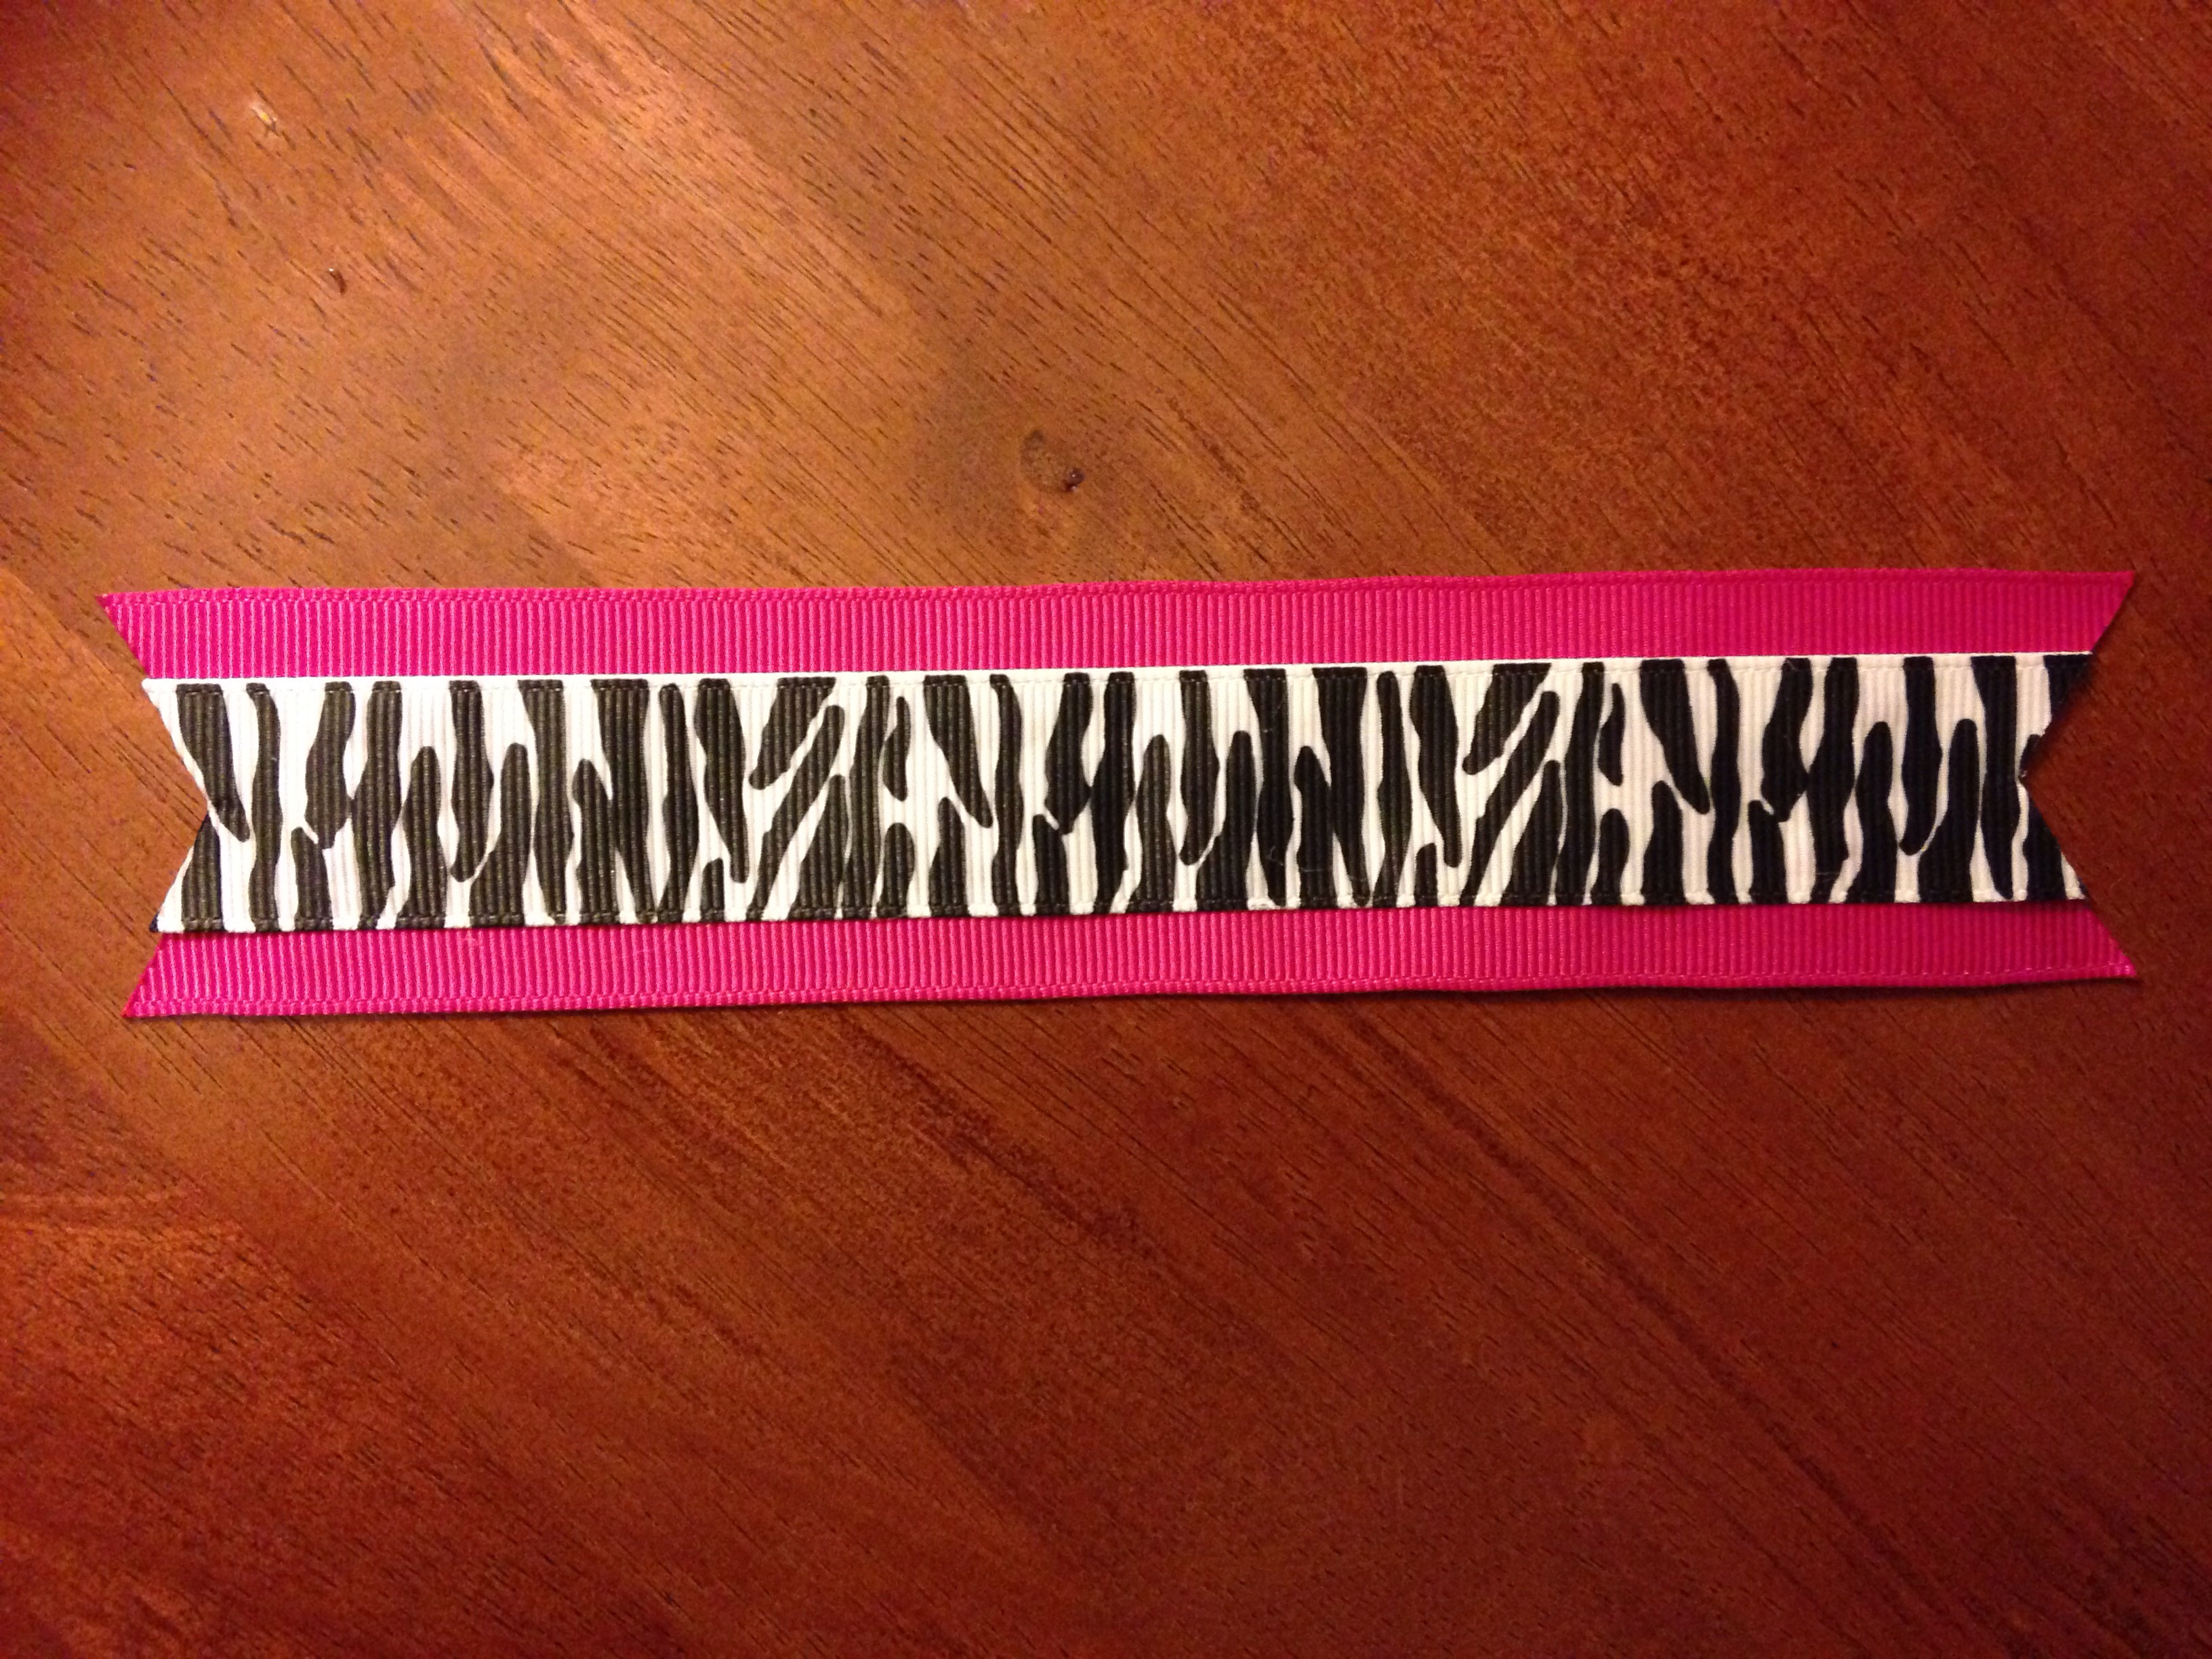
For your top bow you will need approx 13" of 7/8" black & white zebra print ribbon. You may use a larger bow if desired, but make sure to check how it fits into your main bow.
Next you will make "butterfly surrounds". For my petite hands I like to make 2 separate pieces instead of one large piece to allow easier construction and placement. For each surround you will need 12" of 3/8" zebra ribbon. With the back side facing up, bring your ends together and allow one ribbon to overlap the other about half way.
Use your hand or a clip to hold ends into place and find the center point of the ribbon.
Place the very center on top of your ribbon ends to create your first surround.

Use a hot glue to secure into place. Repeat this process to make your second surround. To add depth to the surround I used 3/8" fuchsia ribbon to line the inside of the loops. This will add a pop of eye catching color!

After both pieces are complete, check your placement and glue to the back of your main bow. You may also glue your main & top bow together using a dot of hot glue and covering with 3/8" black ribbon.

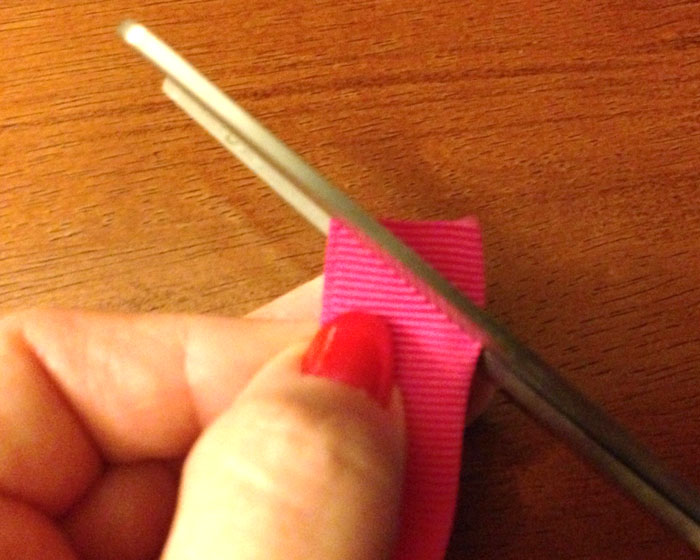
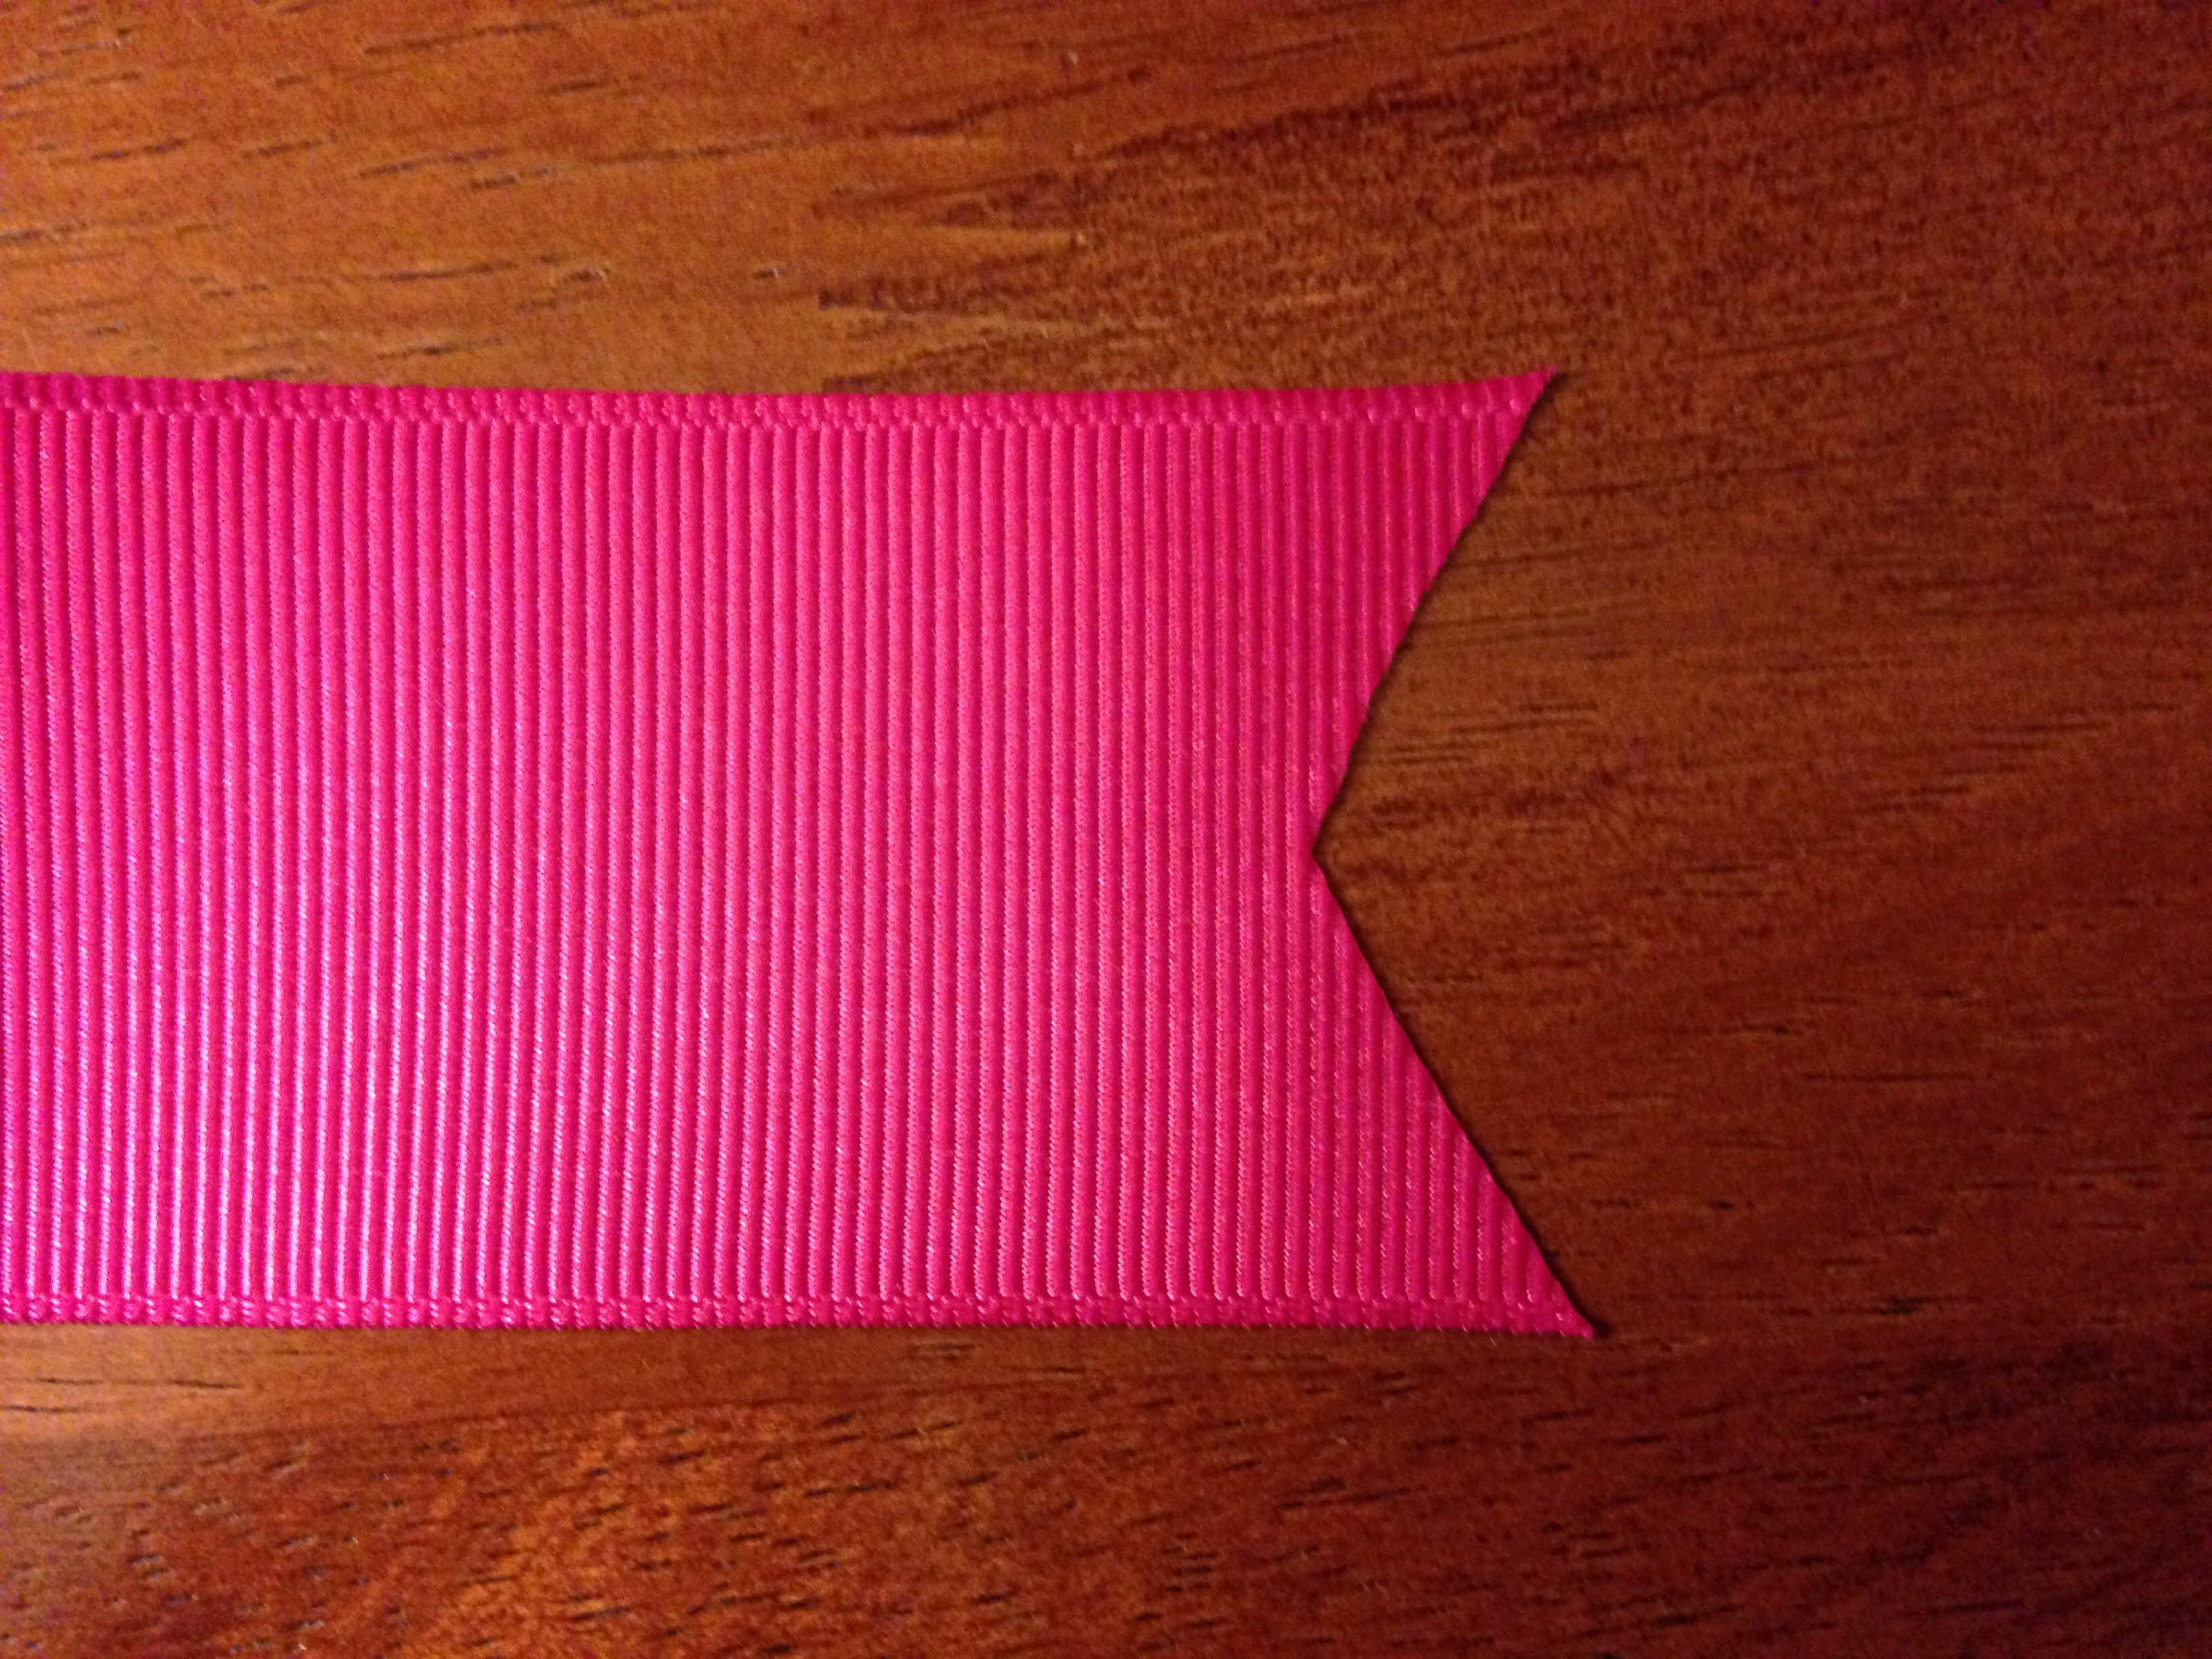
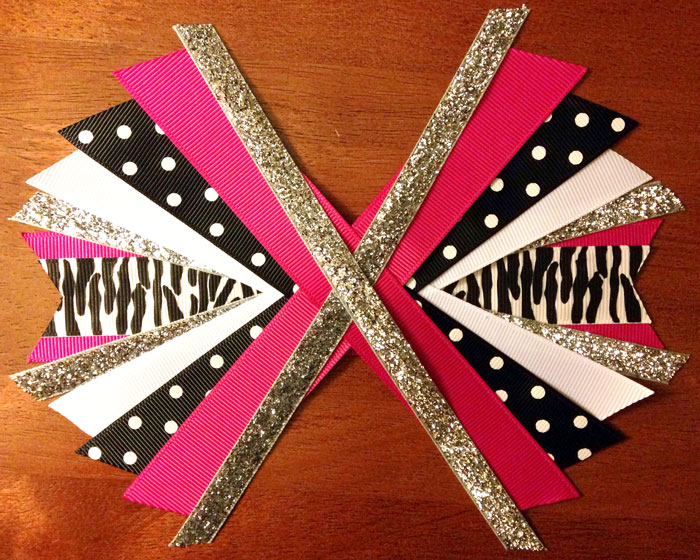
Now on to the tails! Adding tails to your bows can add so much fun & flare! This is where I like to really get creative. There are unlimited options for you to try new things, so look to HBC for inspiration! Some people say tails just aren't worth the trouble b/c they can never get them the way they want. So I am sharing my method with you that is super easy and sure to produce beautifully placed tails every time! First we will make our center tail. For this you will need approx 7" of 1.5" fuchsia ribbon. I like to cut the ends into a V shape or "dove tails" as some people call it. For fast and precise results fold the end of your ribbon in half and cut at an angle starting from the fold and finishing at the edges of your ribbon.
When you unfold your ribbon you will have a perfect V shape!
Next you will use the same length of 7/8" zebra print ribbon to layer on top. Use the same method for cutting your ends. Secure into place with hot glue as needed.
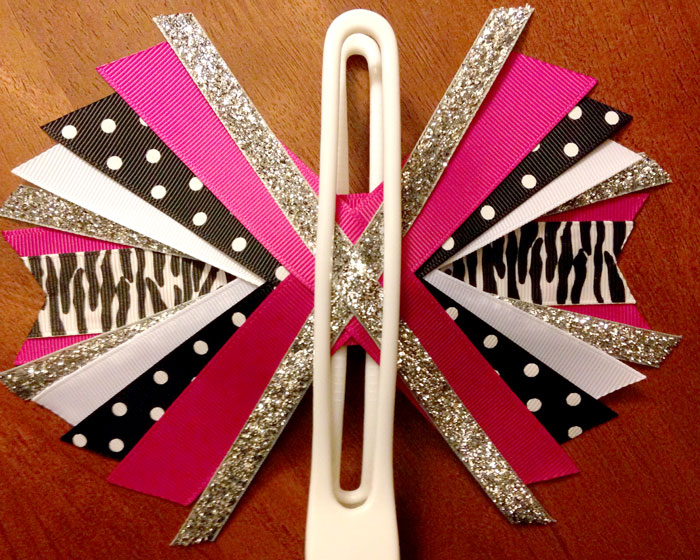
Still using 7" long pieces cut your other tails as desired (I cut them at an angle) and place one color at a time to form your layer of tails. Be sure to overlap a little to make room for movement later.
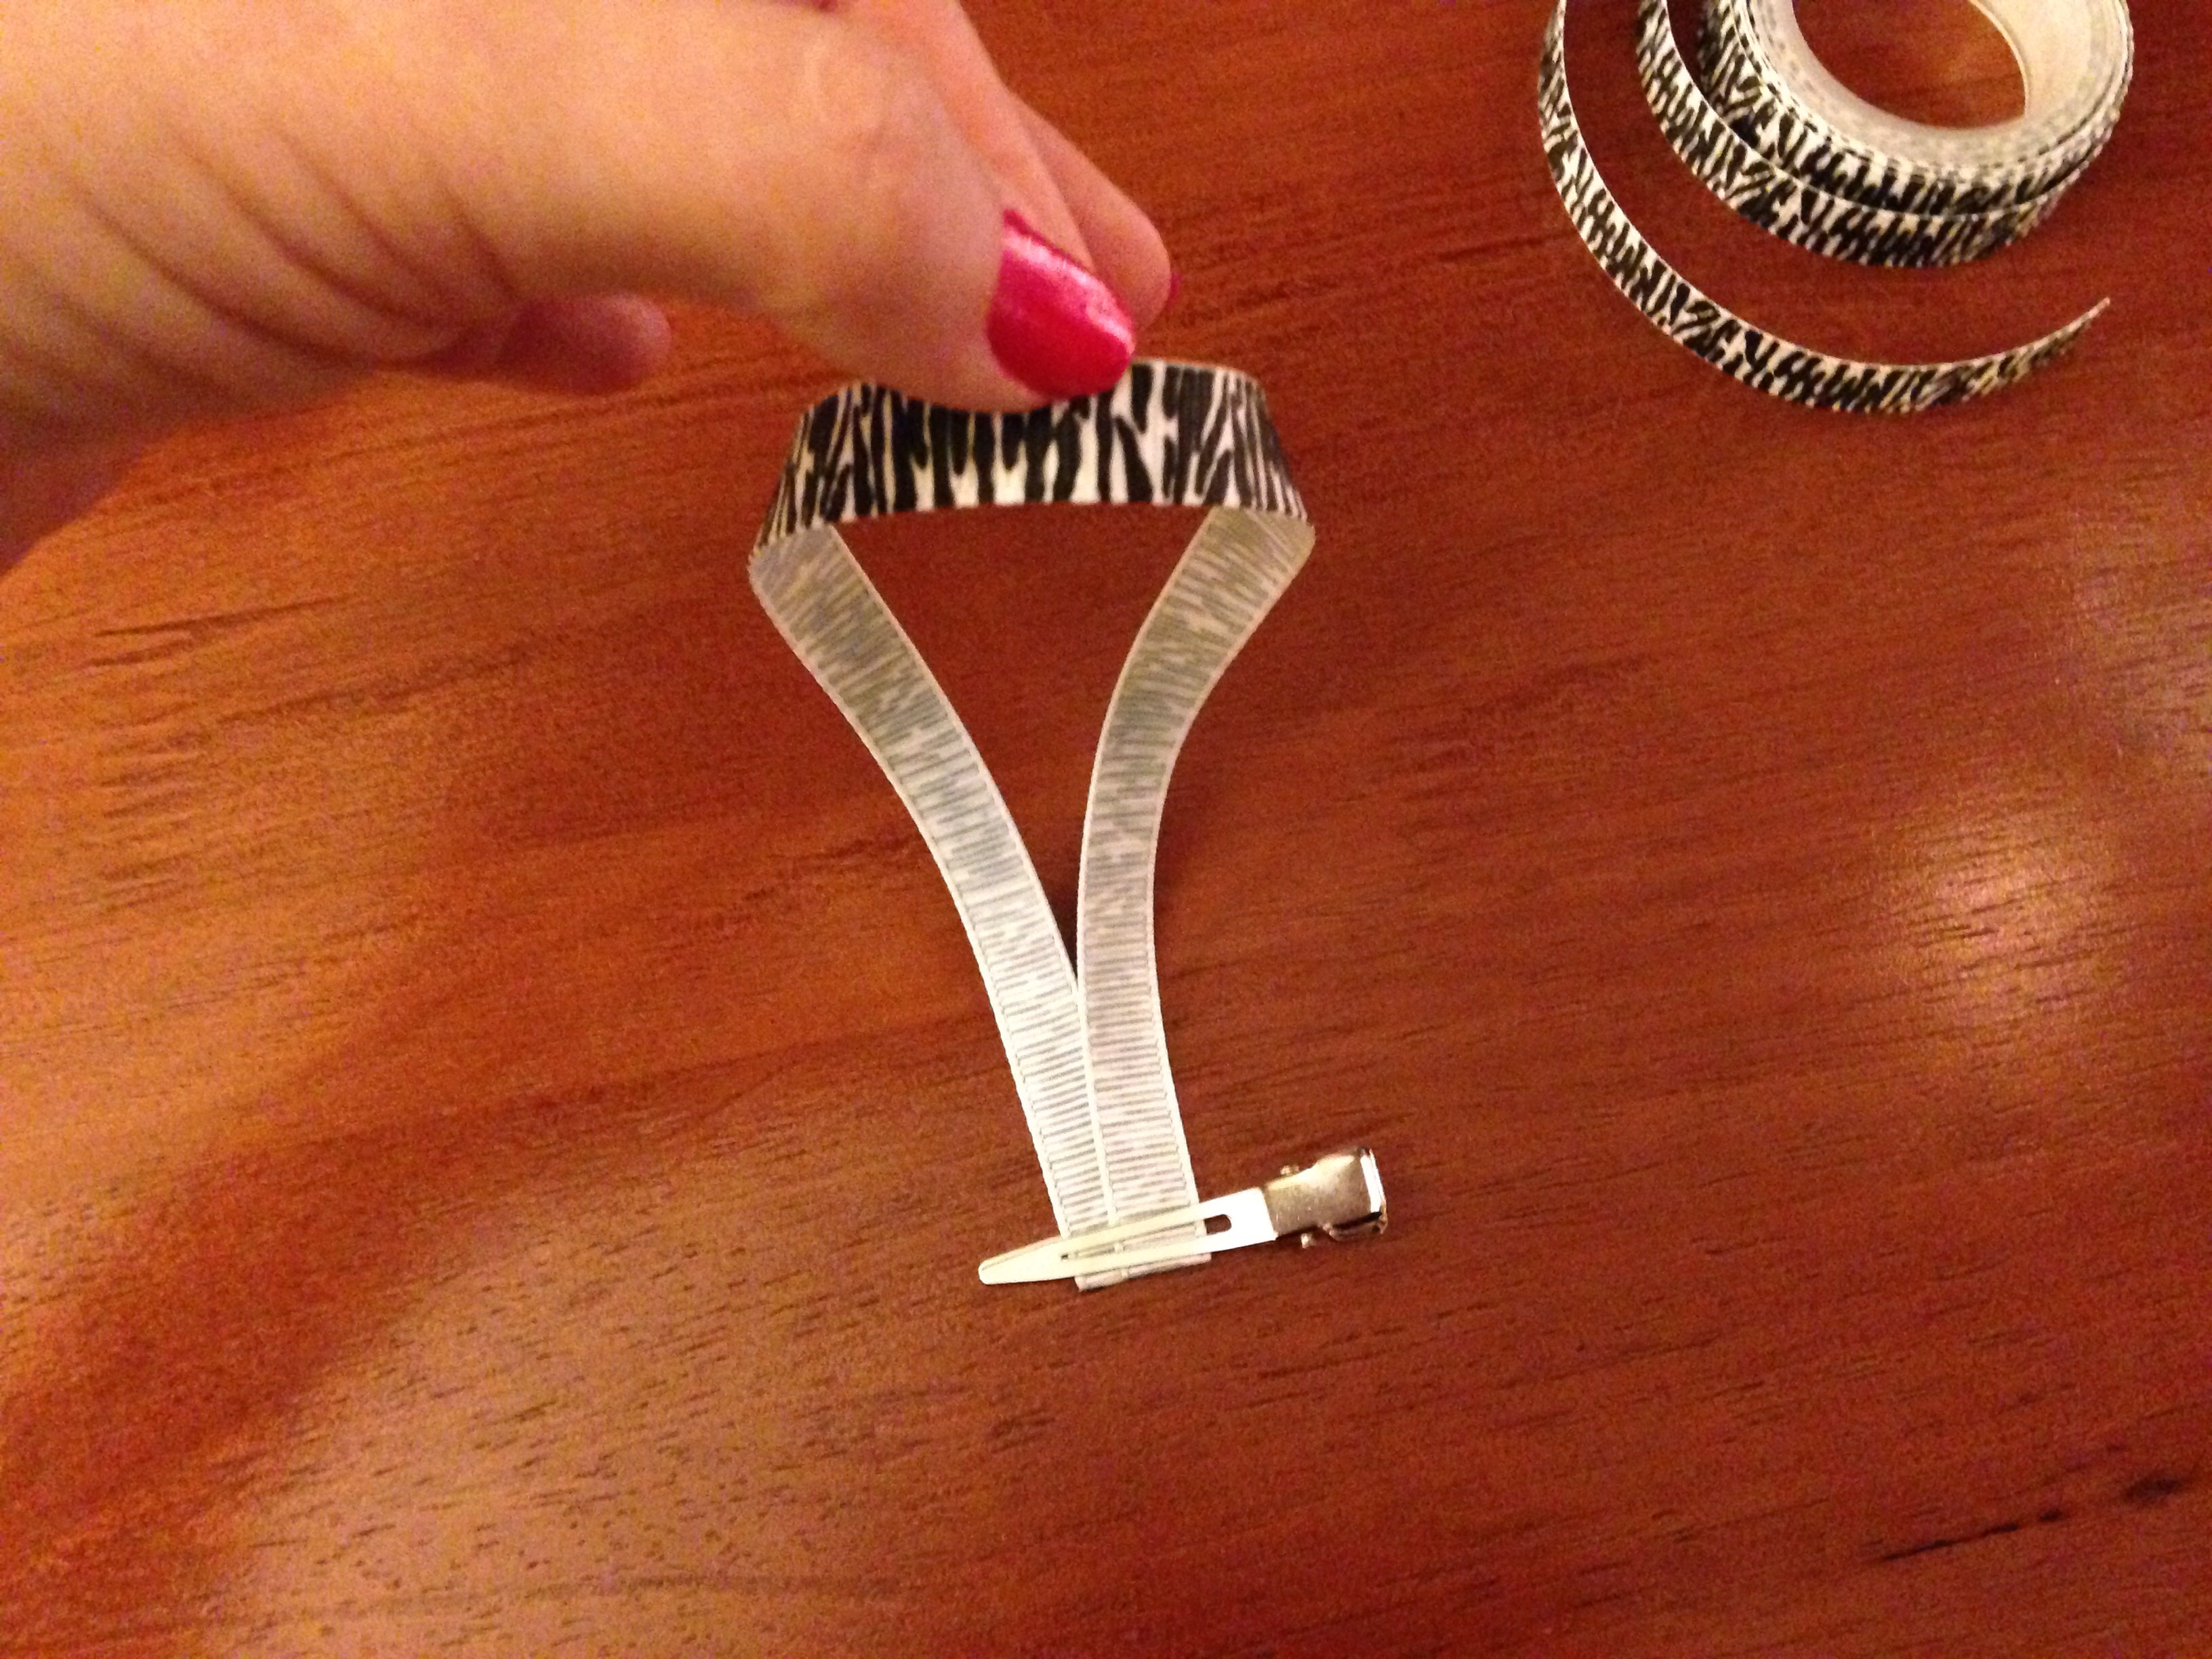
Next you will need a large salon clip to hold your tails securely into place.
Thread embroidery floss through the hollow ends of your clip and wrap around your gathered ribbon 2 times.
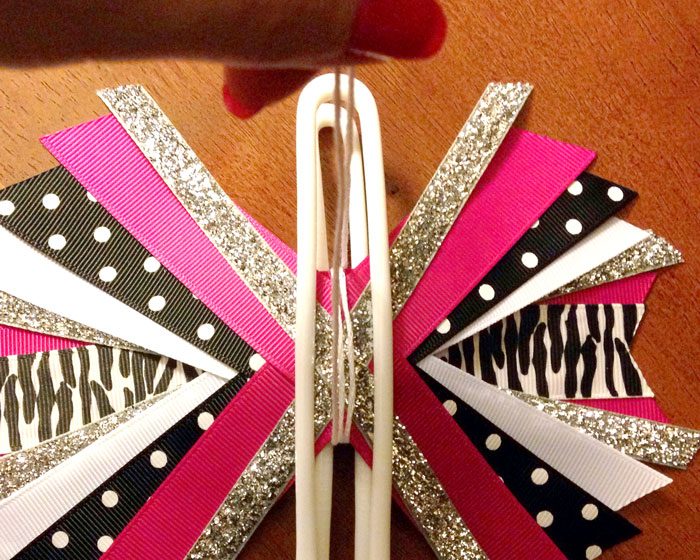
Tie off your embroidery floss with a very quick motion for less movement of your ribbon. Remove your clip after you've made a double knot and bring your embroidery floss around to the back and tie once again.
Now you are ready to attach all layers together! Add a dab of hot glue to the back of your bow and place ontop of your tails. Next take your 3/8" black ribbon and wrap around the center of all layers. Don't forget to add your clip to the back during this step.
We are almost done! All beautiful masterpieces have a bright and bold center focal point, so I have chosen an 18mm hot pink rhinestone for the finishing touch! I suggest using E6000 or Quick Hold when attaching embellishments, but you may also use hot glue.
TA-DA!! Your zebra glamour bow is now complete! I hope you have enjoyed making your beautiful new bow and it brings great joy to your special little princess!
Visit the rest of our blog for more Crafting Tutorials and DIY Instructions!
Loading...

