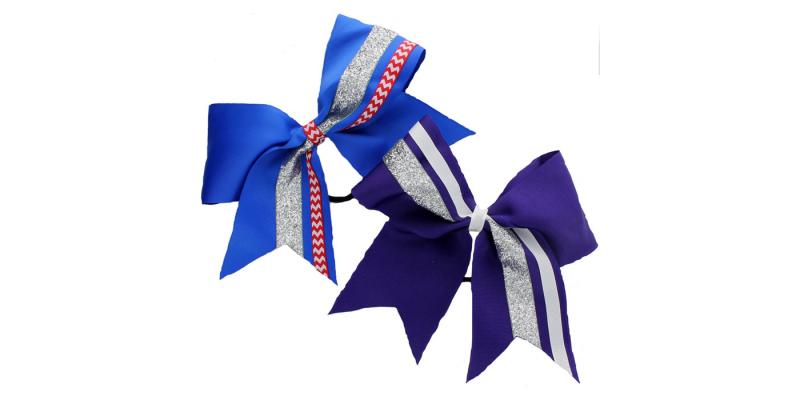
Do you have a cheerleader in your family? Or just have a favorite sports team you want to represent? Then I have the perfect tutorial for you! In this easy DIY tutorial I am going to show you how to create a Cheer Bow. The color combinations and looks for cheer bows are endless, so let your mind go and get creative! Don't worry if the first couple don't turn out as perfect as you would like; Practice makes perfect! :)
Supplies needed for this tutorial:
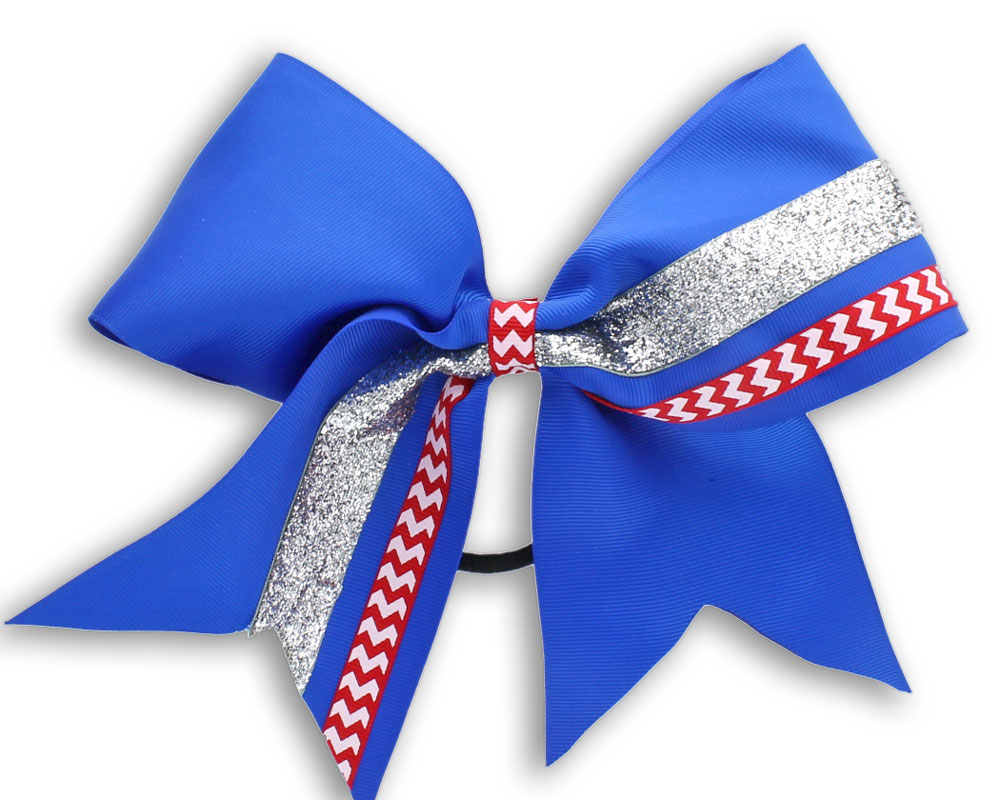
28" of 3" Grosgrain Ribbon
14" of 3/4" Glitter Grosgrain Ribbon
14" of 3/8" Red Chevron Ribbon
3" of 3/8" Red Chevron Ribbon (this is used for the center)
Scissors
Glue Gun
Needle and Thread

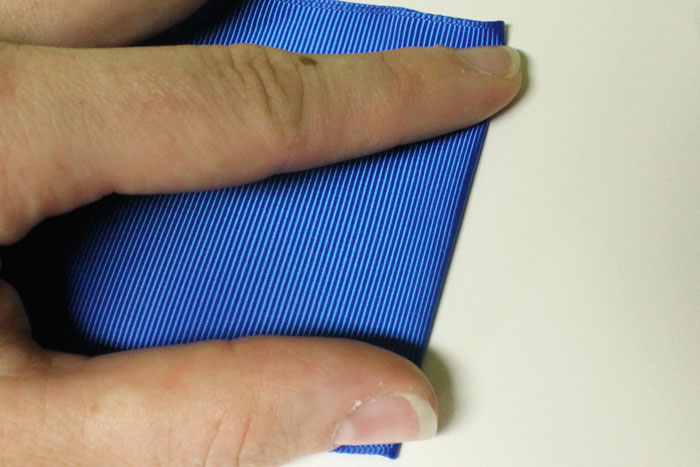
To begin with, measure out the ribbon, and heat seal all ends. Take your 3" ribbon and fold it in half, rub the center continuously to create a crease. This will ensure that you are using the middle of the ribbon when you apply the smaller pieces, and when you make your bow. Hint: If your grosgrain ribbon is wrinkled you can use an iron or straightener on a low setting to get rid of the wrinkles. You can even use the iron/straightener to get your center crease.
Unfold the ribbon, the crease you created in the center should be facing down. In saying this, the point of the crease should be the side that is visible.
Next take your double sided tape and line the fourteen inch pieces of the 3/8" ribbon and the 3/4" ribbon. 
I lined the 3/4" ribbon on both sides to ensure that the edges would stay down.
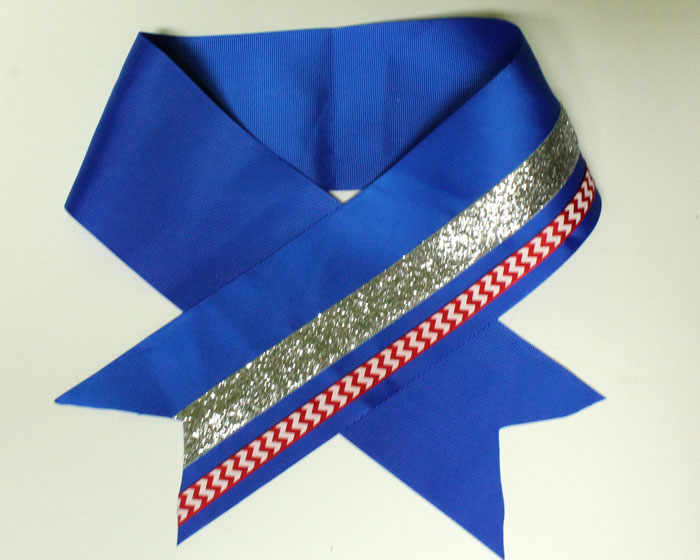
Take and peel off the paper backing from the 3/8" ribbon, and leaving abut a quarter of an inch space apply the ribbon to the top of the base ribbon. It's okay if the ribbon you are taping overlaps the crease in the center.
![]()
Leaving the same amount of space, apply your 3/4" ribbon.

Using your crease, fold your ribbon in half, and then fold it in half again length wise. Take your scissors and cut diagonally across the loose ends. This will give you your v-shape for your tails. Don't forget to heat seal again!

Now we can start shaping our bow, flip the ribbon over so that the chevron side is not visible. Start off by crossing the ribbon, I made sure that the tail with the chevron ribbon was on top.
Play with the tails until you have them to how long you want them. Make sure to keep the crease in the center so that your bow is not lopsided.
Take and fold the ribbon in the center.

Take your needle and thread and run it through the center of the bow, then take and securely wrap the thread around the center. Once that is done tie off the thread in the back.

Now it is time to apply the ponytail elastic to the back. Use your glue gun and apply a generous amount of glue to the back of the bow and stick the ponytail hair elastic to it. Then take your needle and poke it through the elastic and hair-bow and wrap the thread around the bow and elastic several times before tying off.

Add additional glue on either side of the hair elastic and take your chevron ribbon and secure it to the center, trim off any extra ribbon.
![]()
Now you have a cute Cheer Bow!! Thanks for reading!

Visit the rest of our blog for more Crafting Tutorials and DIY Instructions like this Layered Cheer Bow!
Loading...

