If you are new to making hair-bows, don't let the curly korker pieces intimidate you! Danielle shares in her post how to easily make your own by baking them in your oven, but if that sounds too involved for you, we also have these adorable little curly korker ribbons pre-curled for you and ready to cut and use. You can find them on our site here. With ready-to-use korker pieces, this hair-bow comes together super easy and fast and has a real "wow" factor!
 Contributor post by Danielle at Korker Krazy
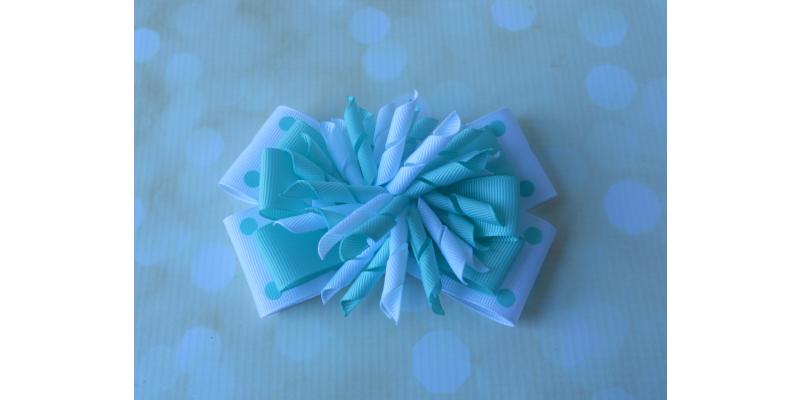
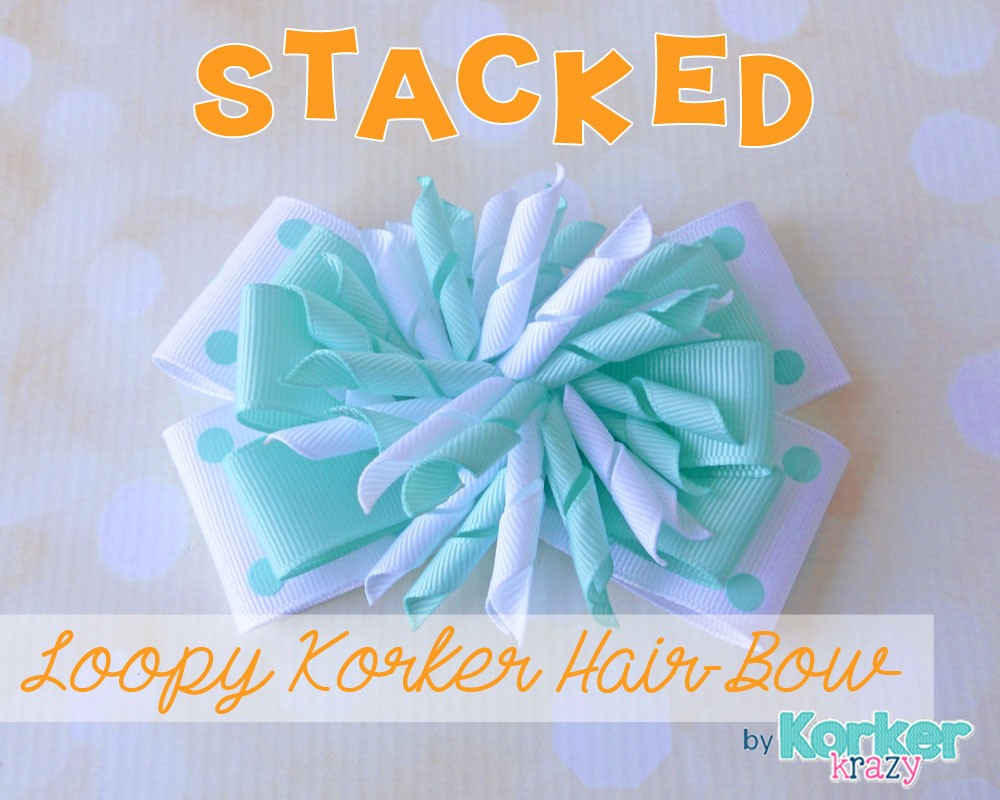
This post combines two of my favorite hair-bow elements: loops and korkers! Why not stack them up?!
Supplies Needed:
3/8" Grosgrain Ribbon in White and Aqua 7/8" Grosgrain Ribbon in Aqua 1.5" Grosgrain Ribbon - I'm using White with Aqua dots that I found at Wal-Mart. Hot Glue Gun & Glue Scissors & Lighter Needle & Thread Wooden Dowels & Clothespins Alligator Clip or Lined Clip

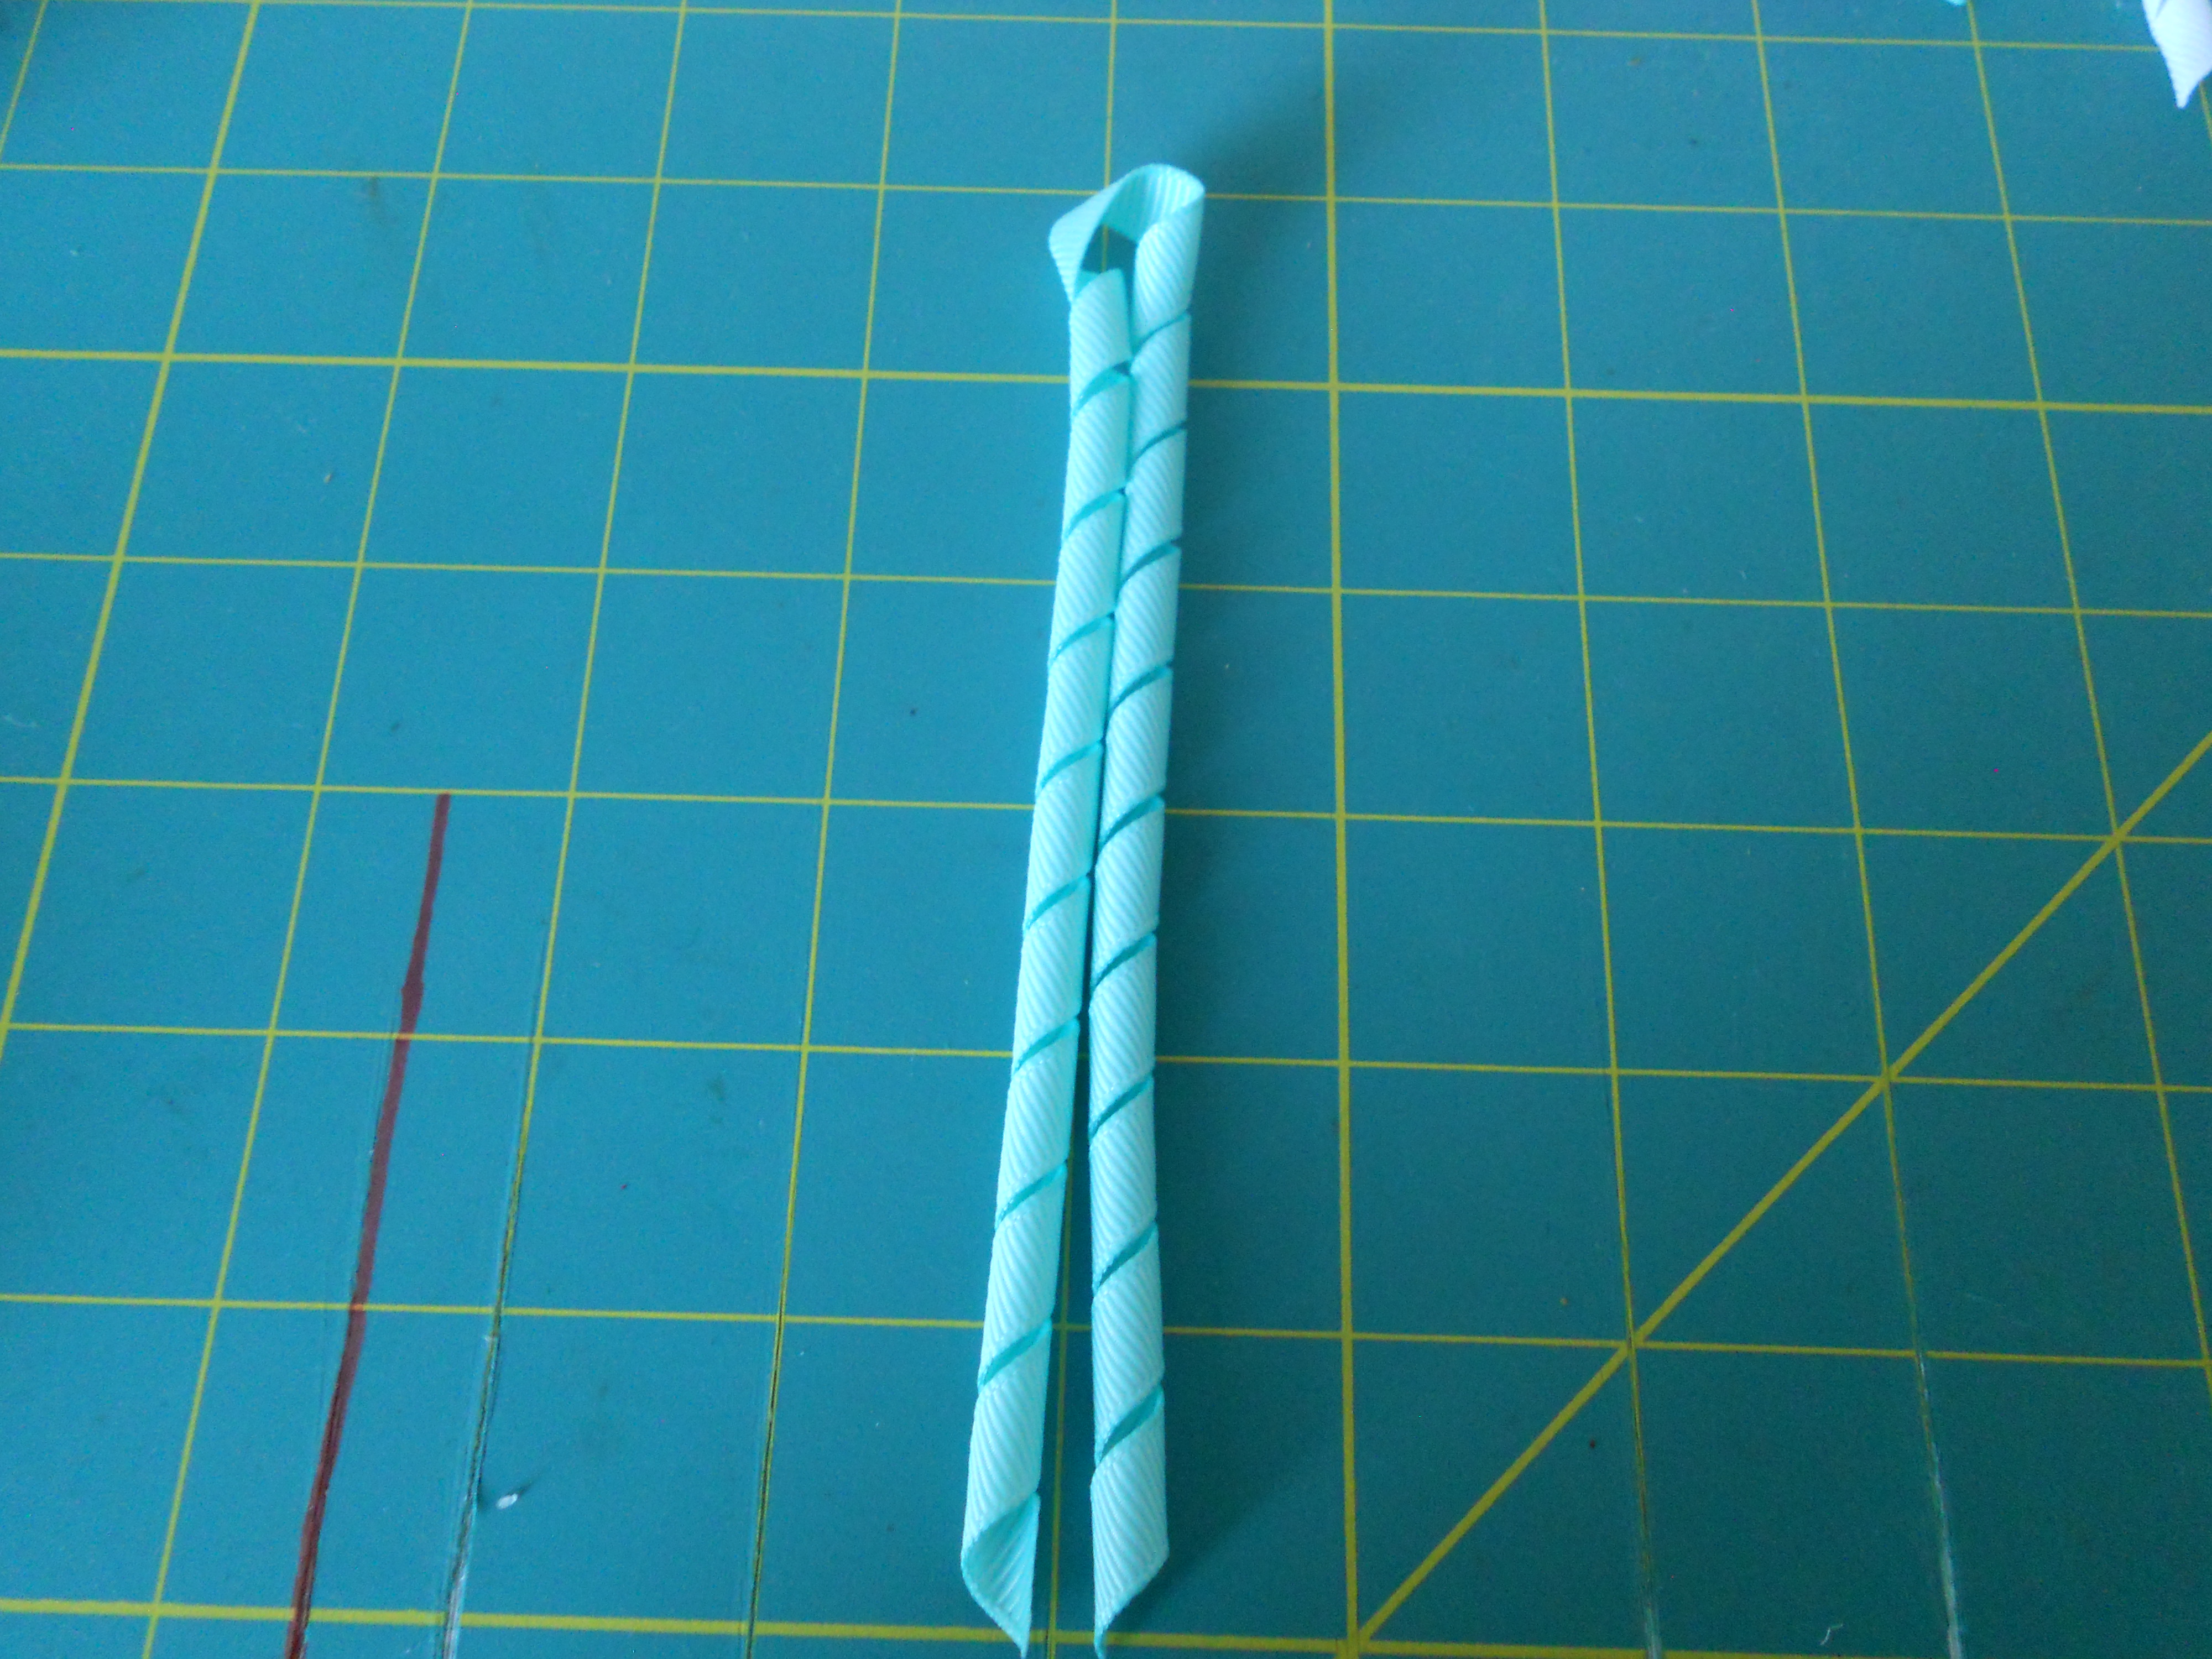
Step 1: Wrap your 3/8" ribbon around the wooden dowels tightly, securing each end with a clothespin. To make one korker bow we need 4 12" pieces, I'm making 2 white and 2 aqua.
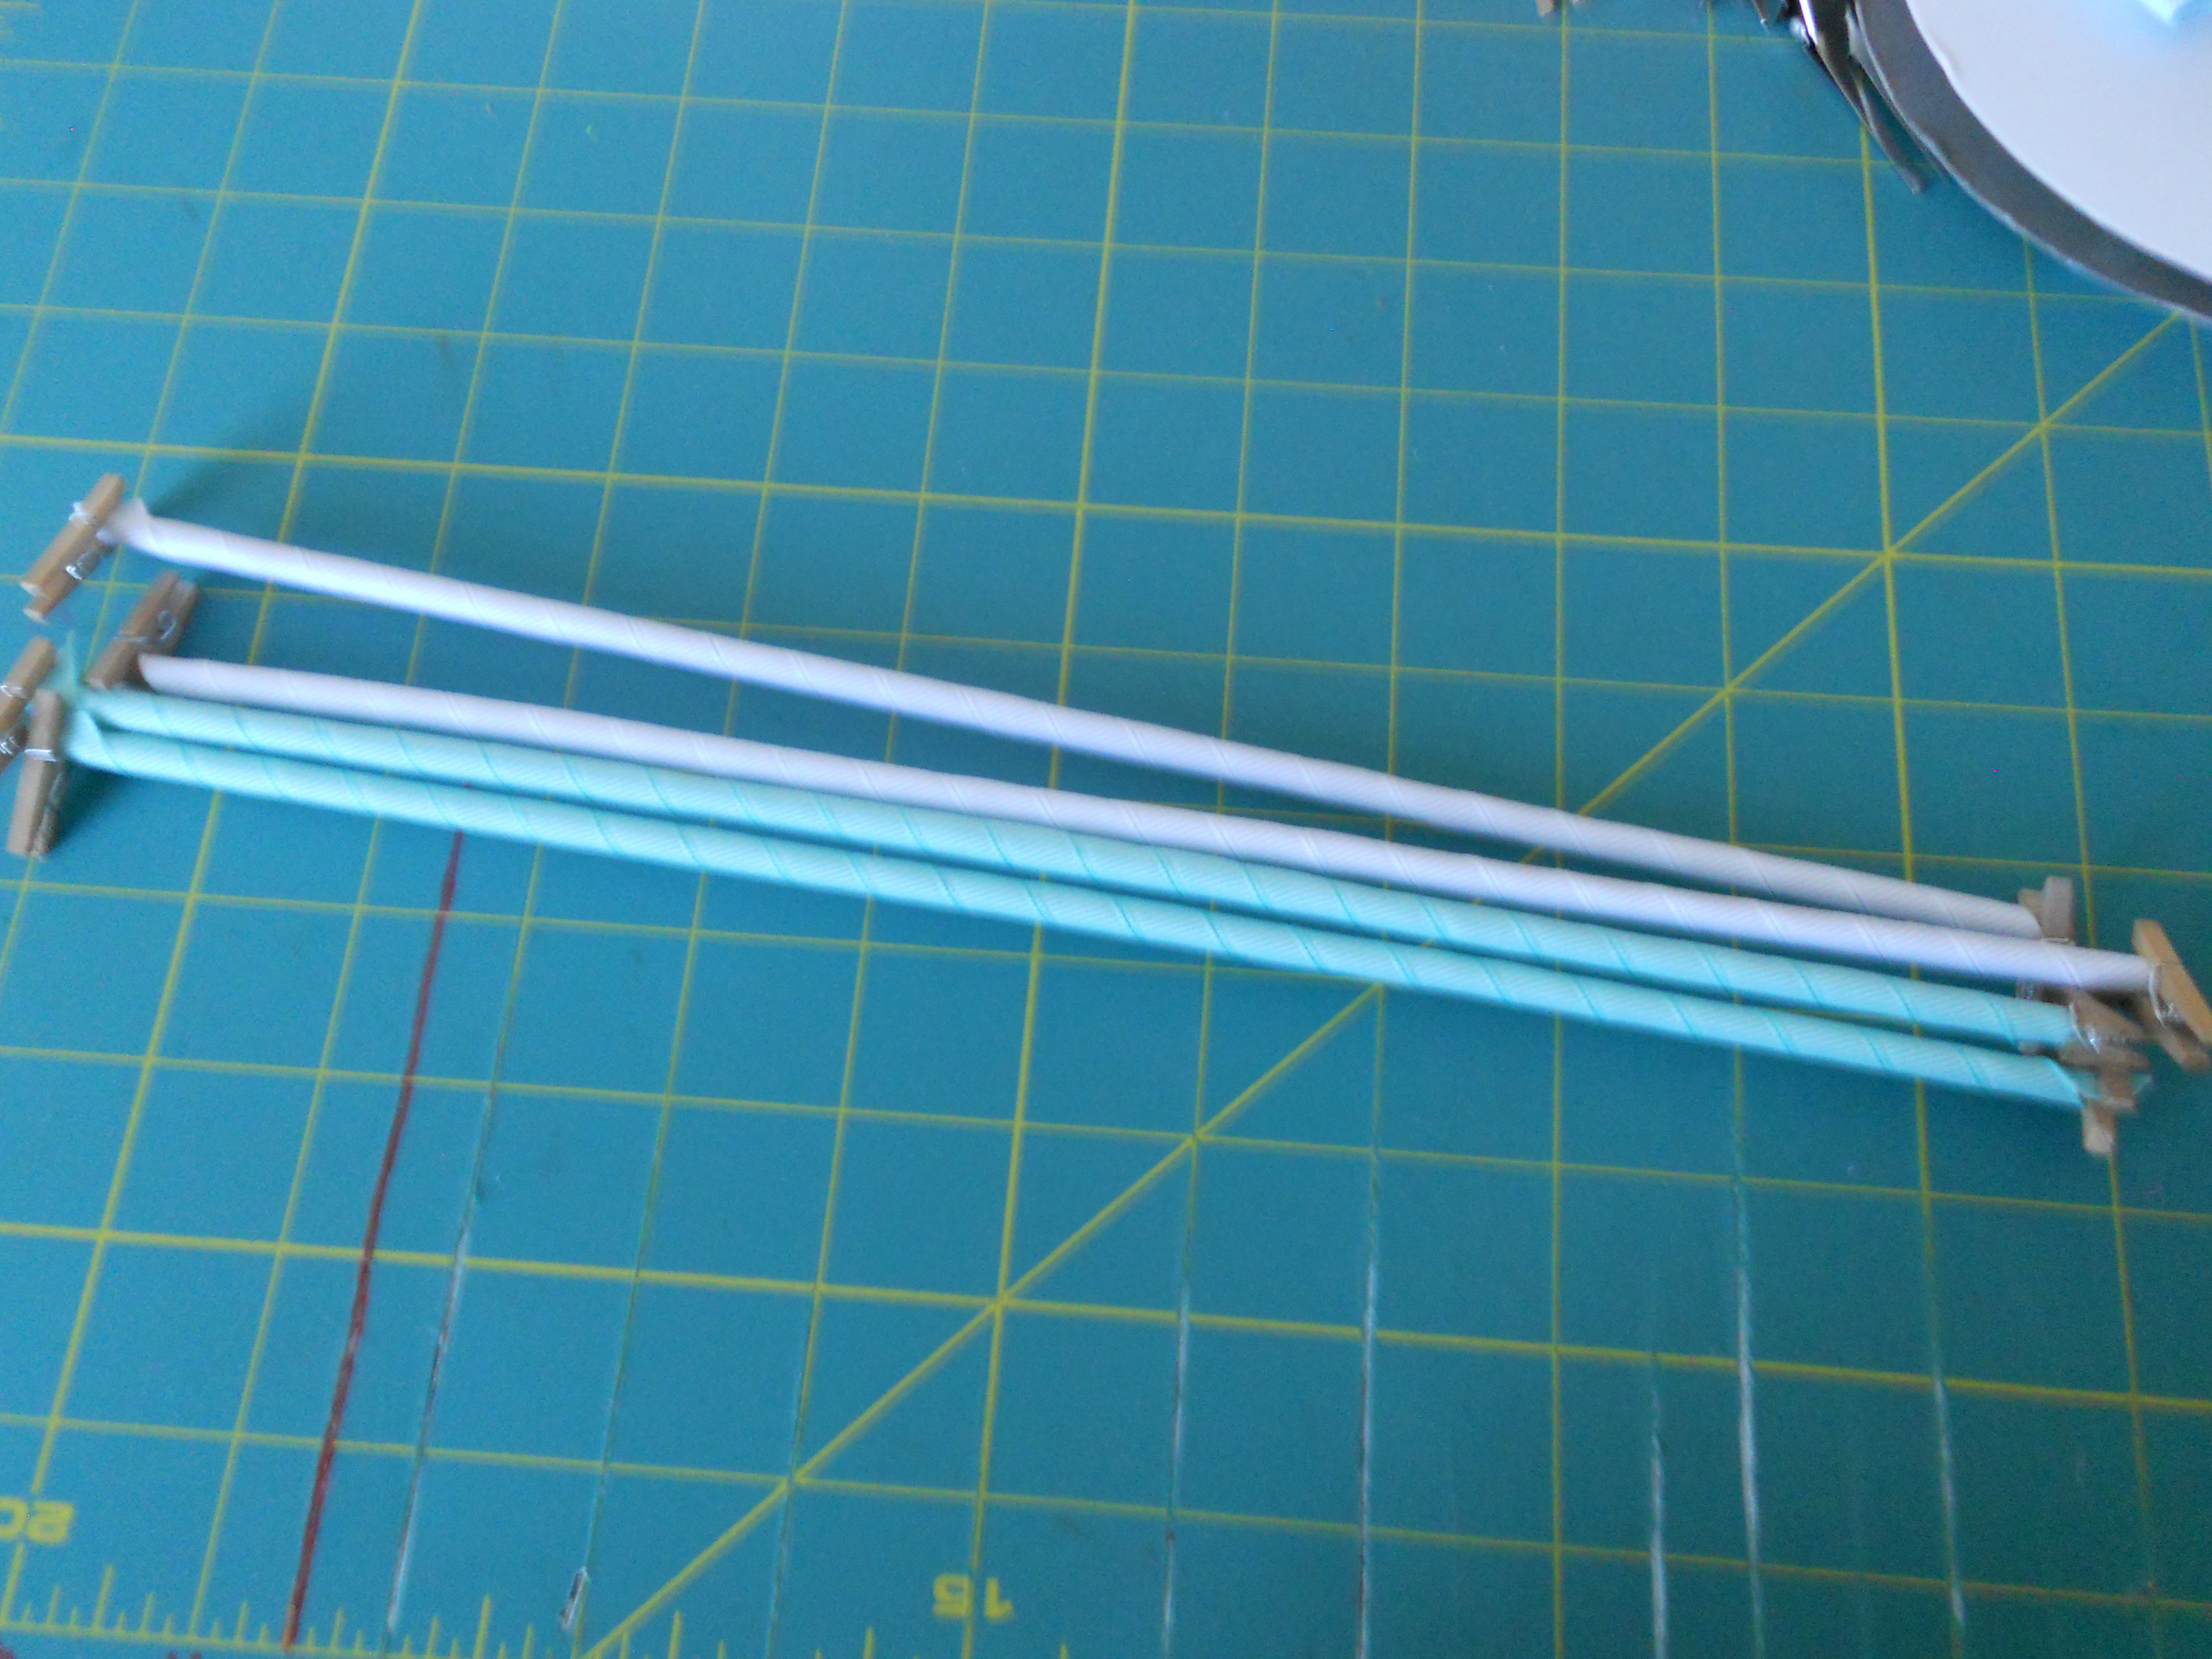
Step 2: Place your wrapped dowels on a baking tray and bake for 25 minutes at 245 degrees. You do not need to spray anything on the ribbon! Once they are finished baking remove the pan from the oven and allow the ribbon to cool completely before removing it from the dowels.

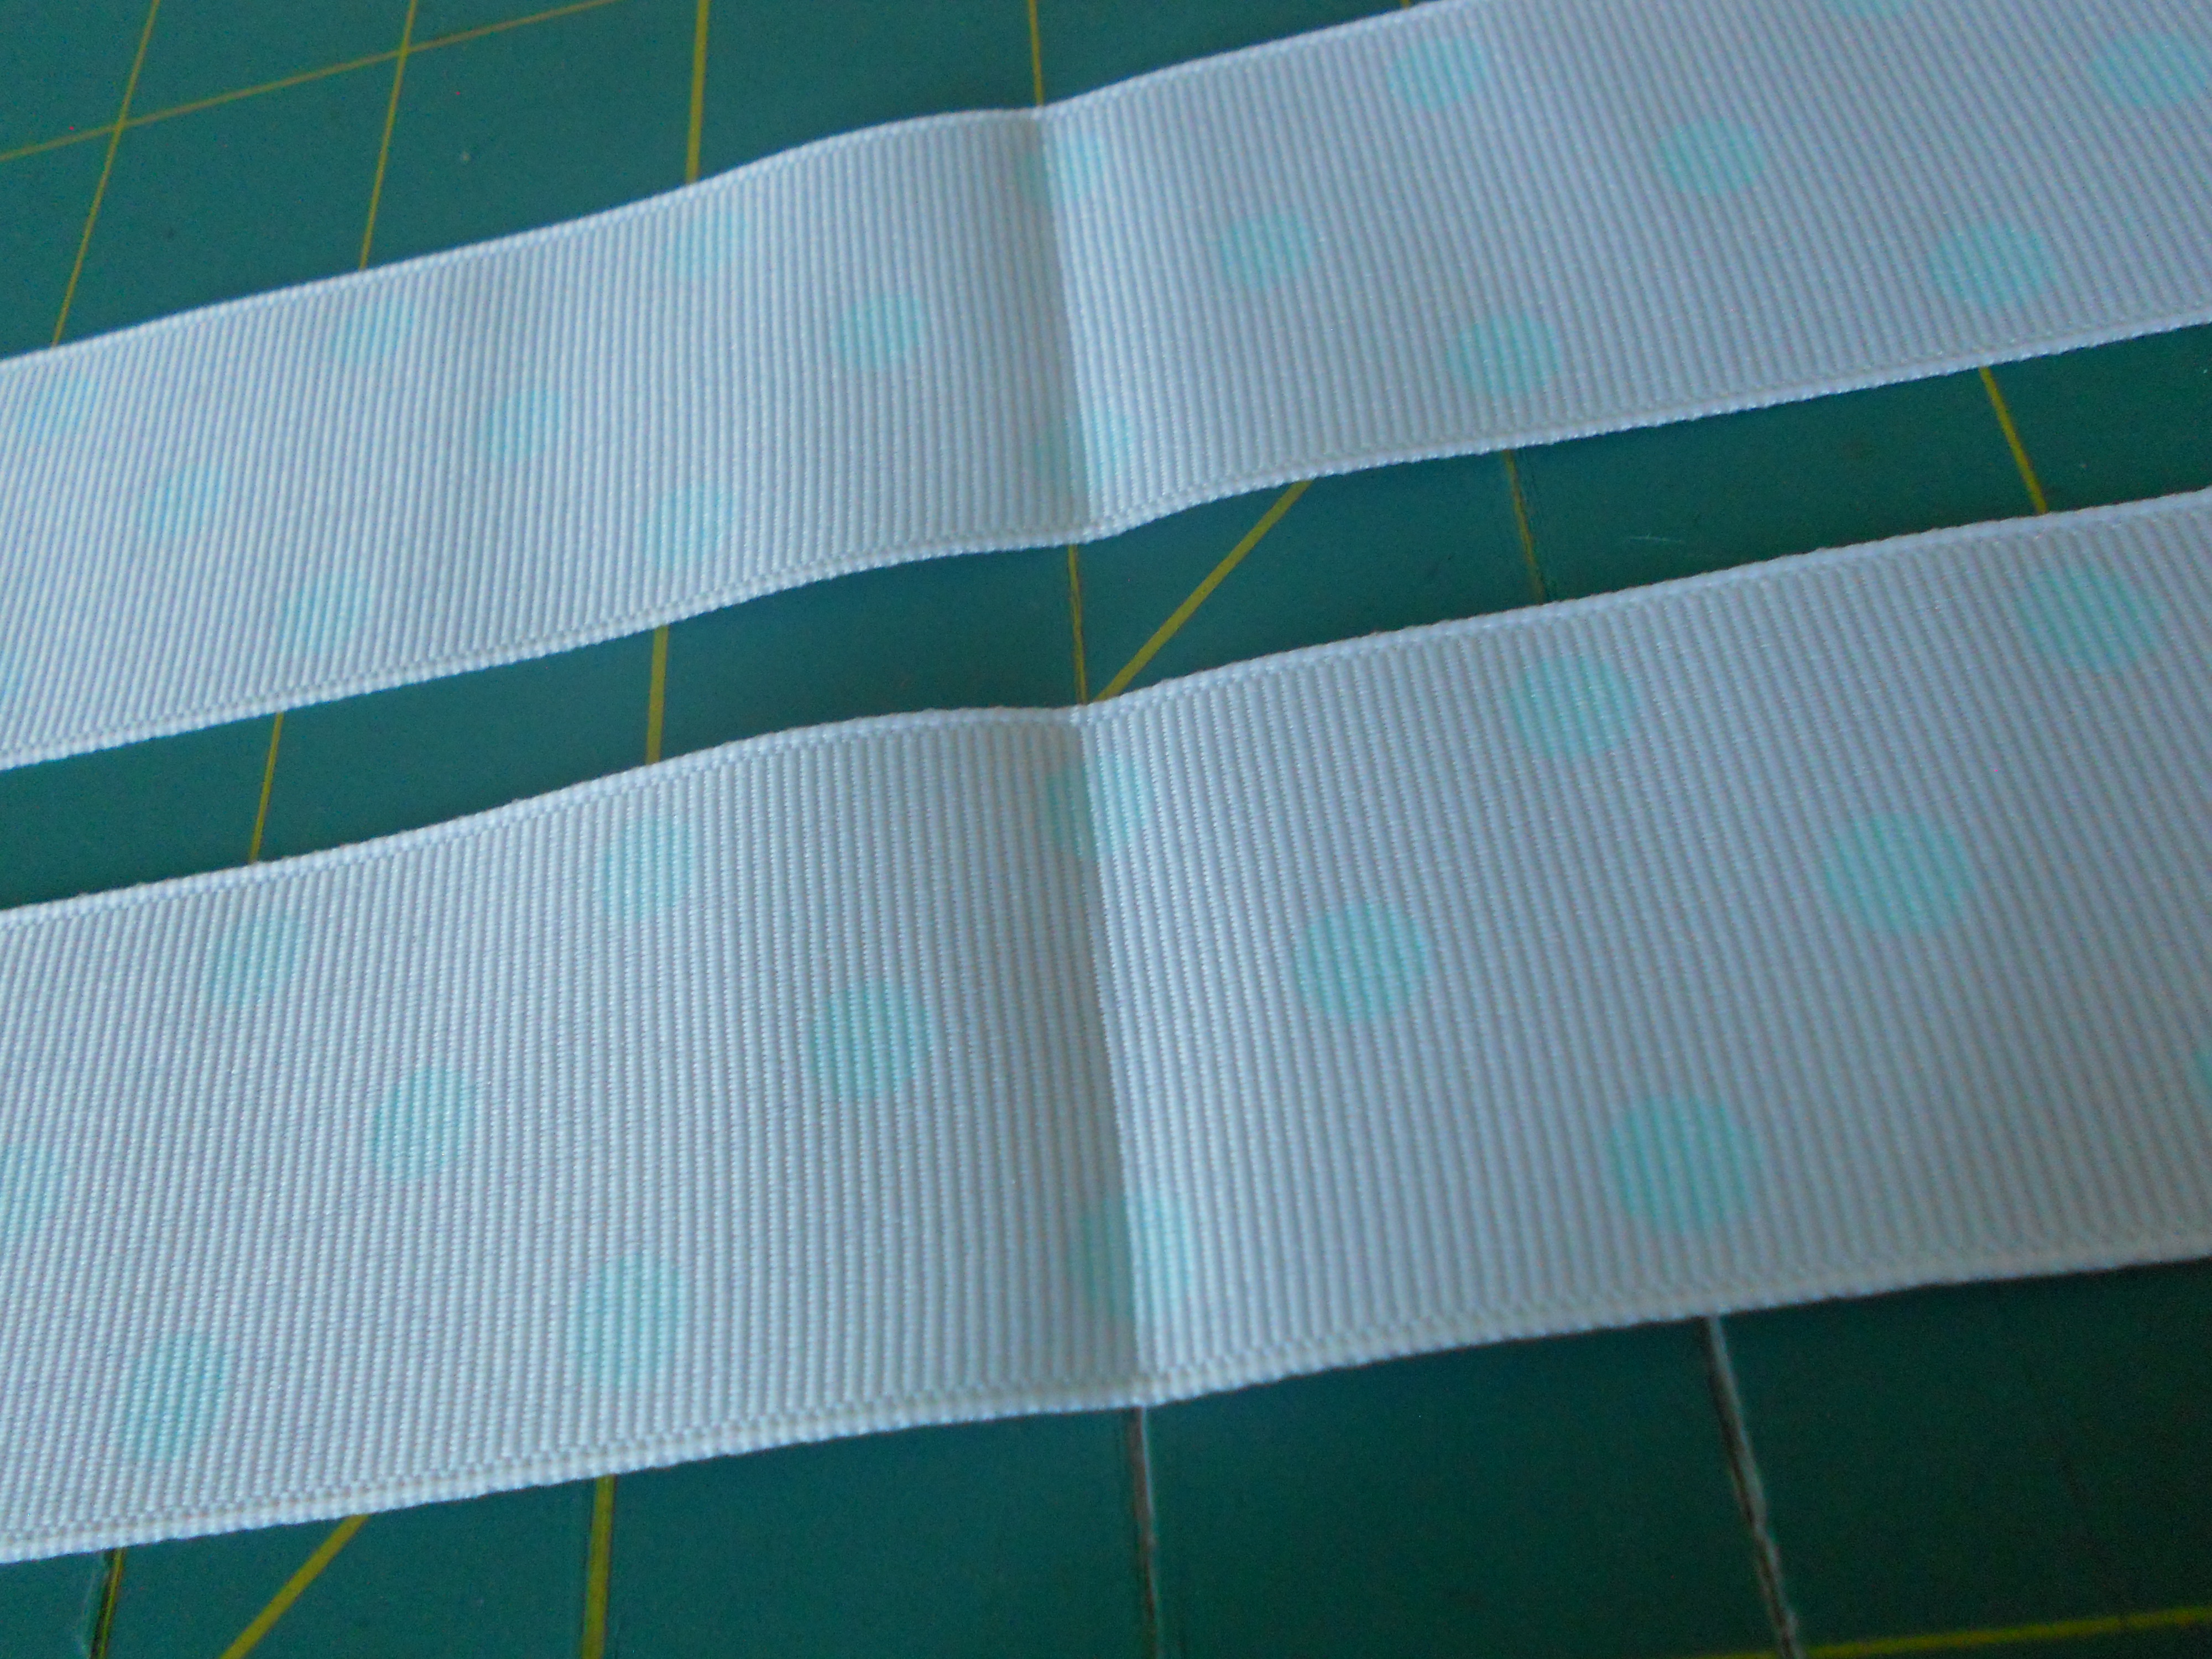
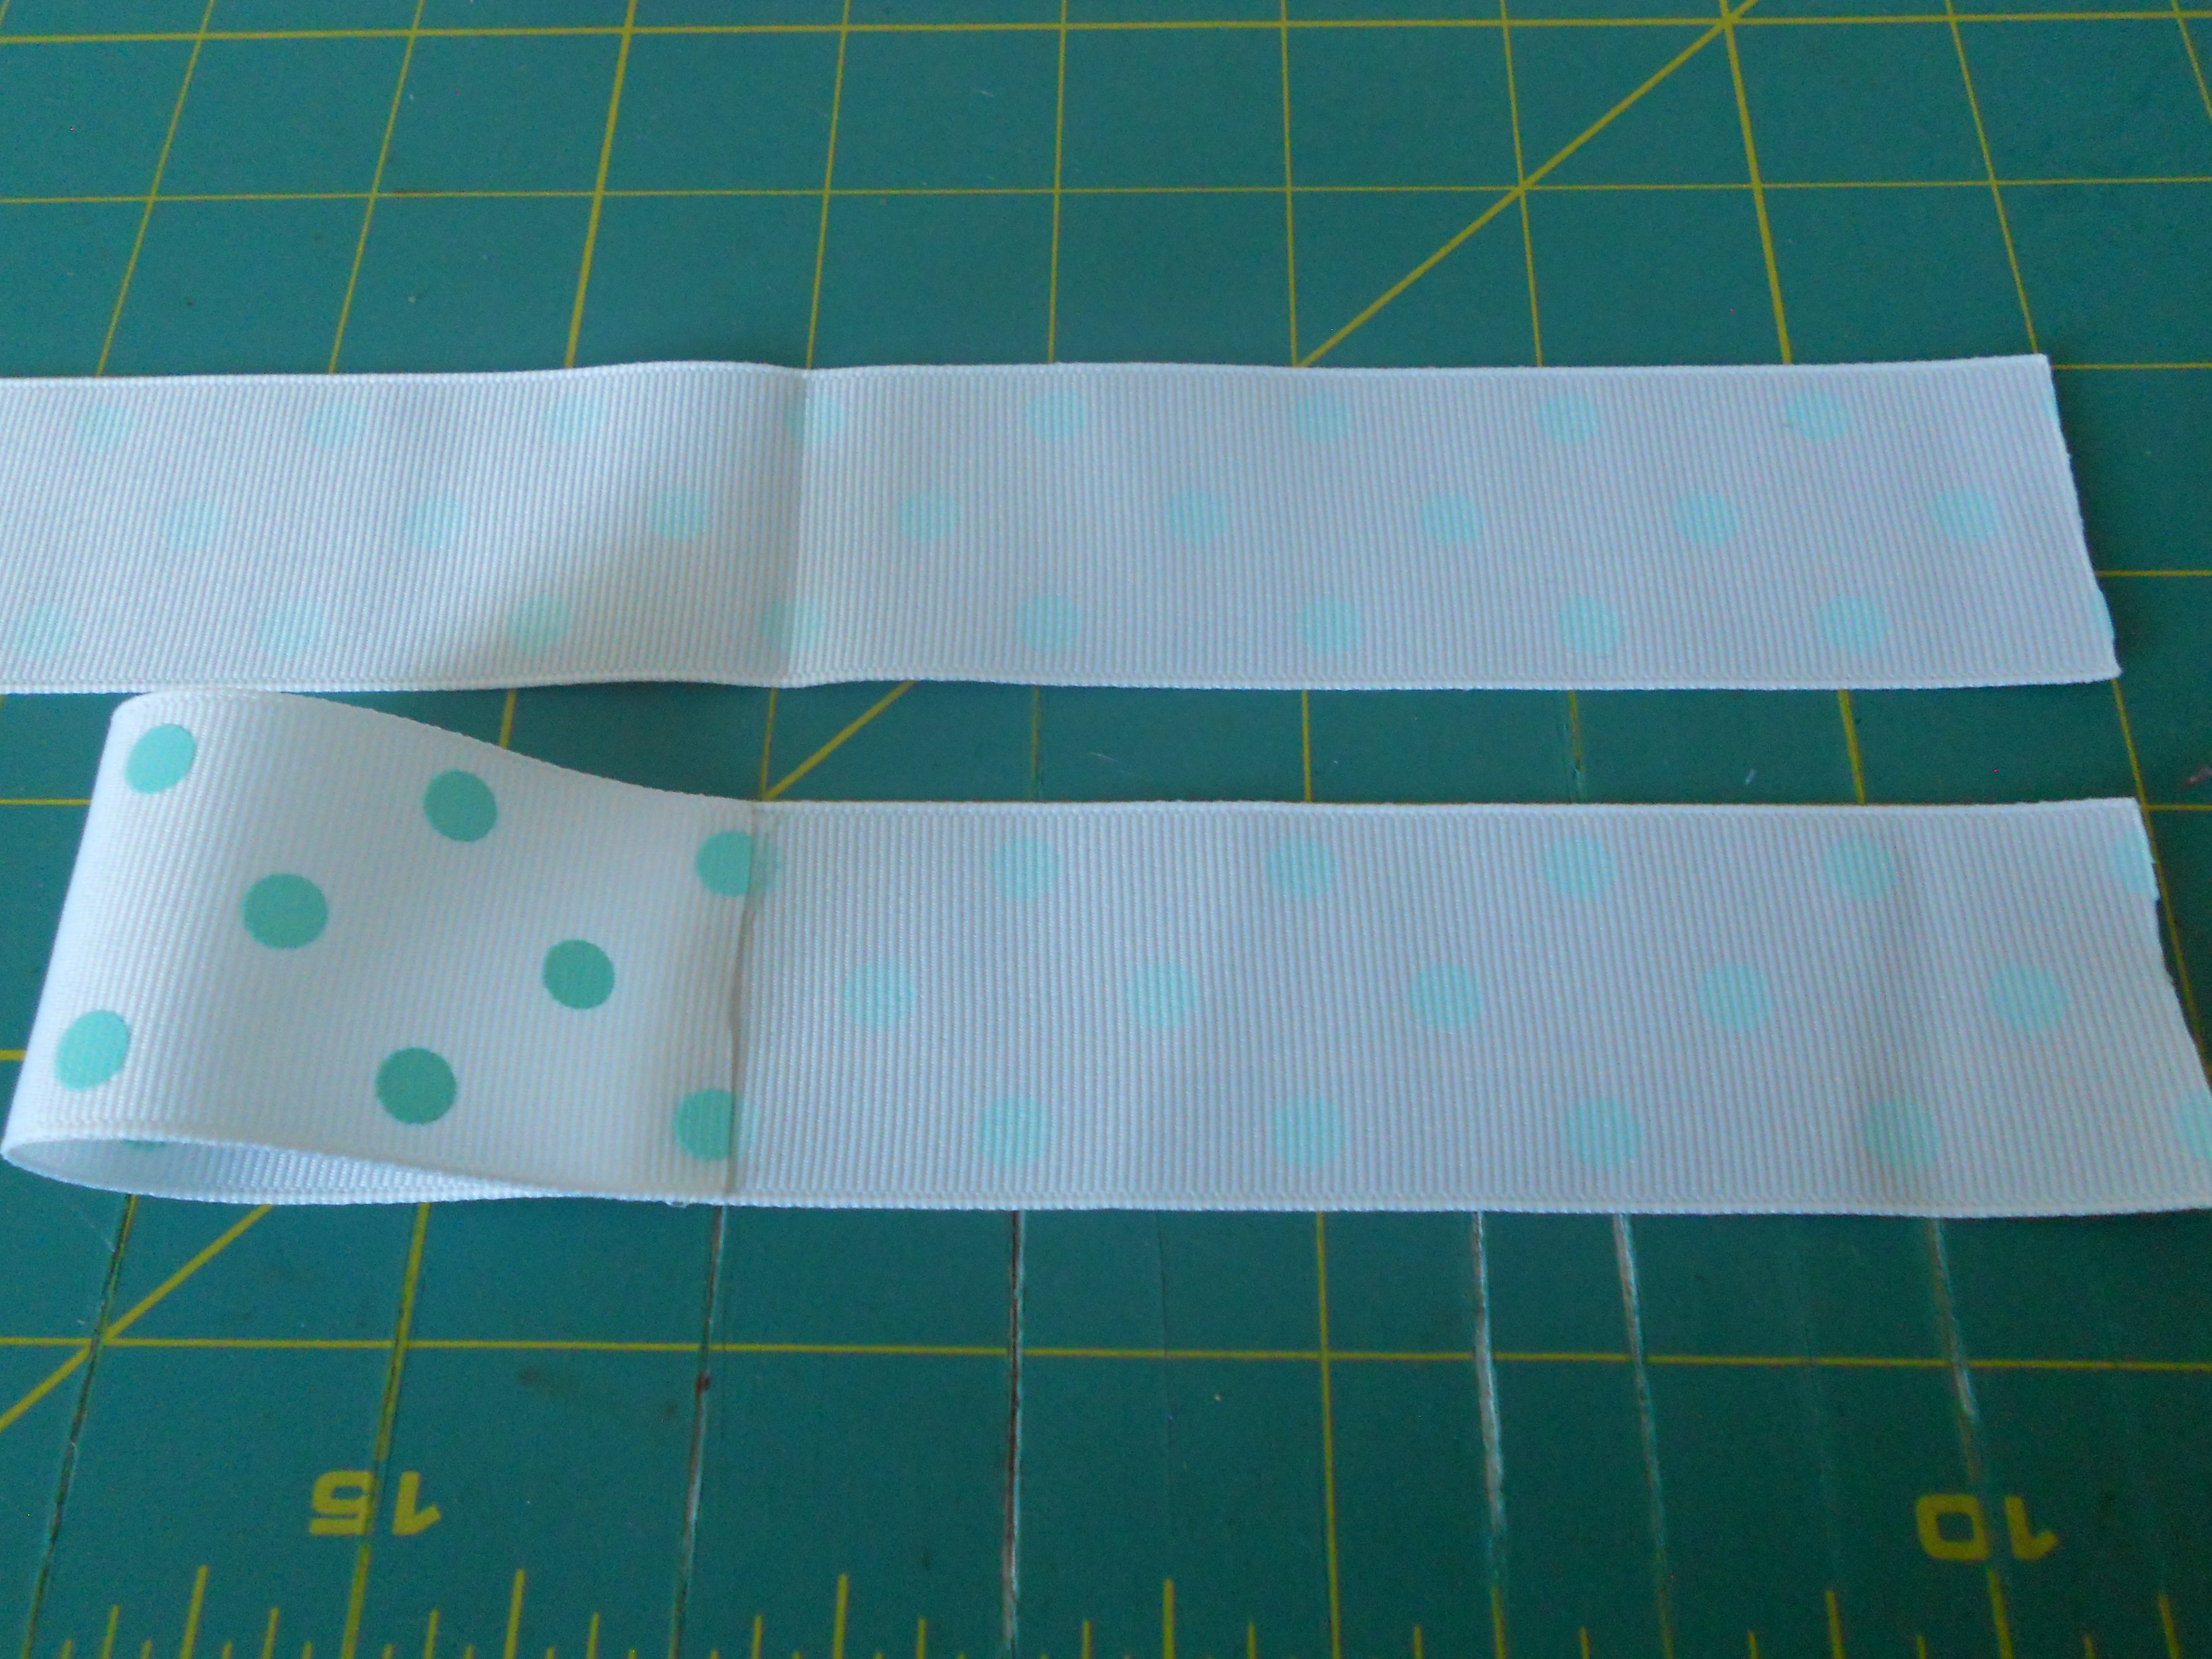
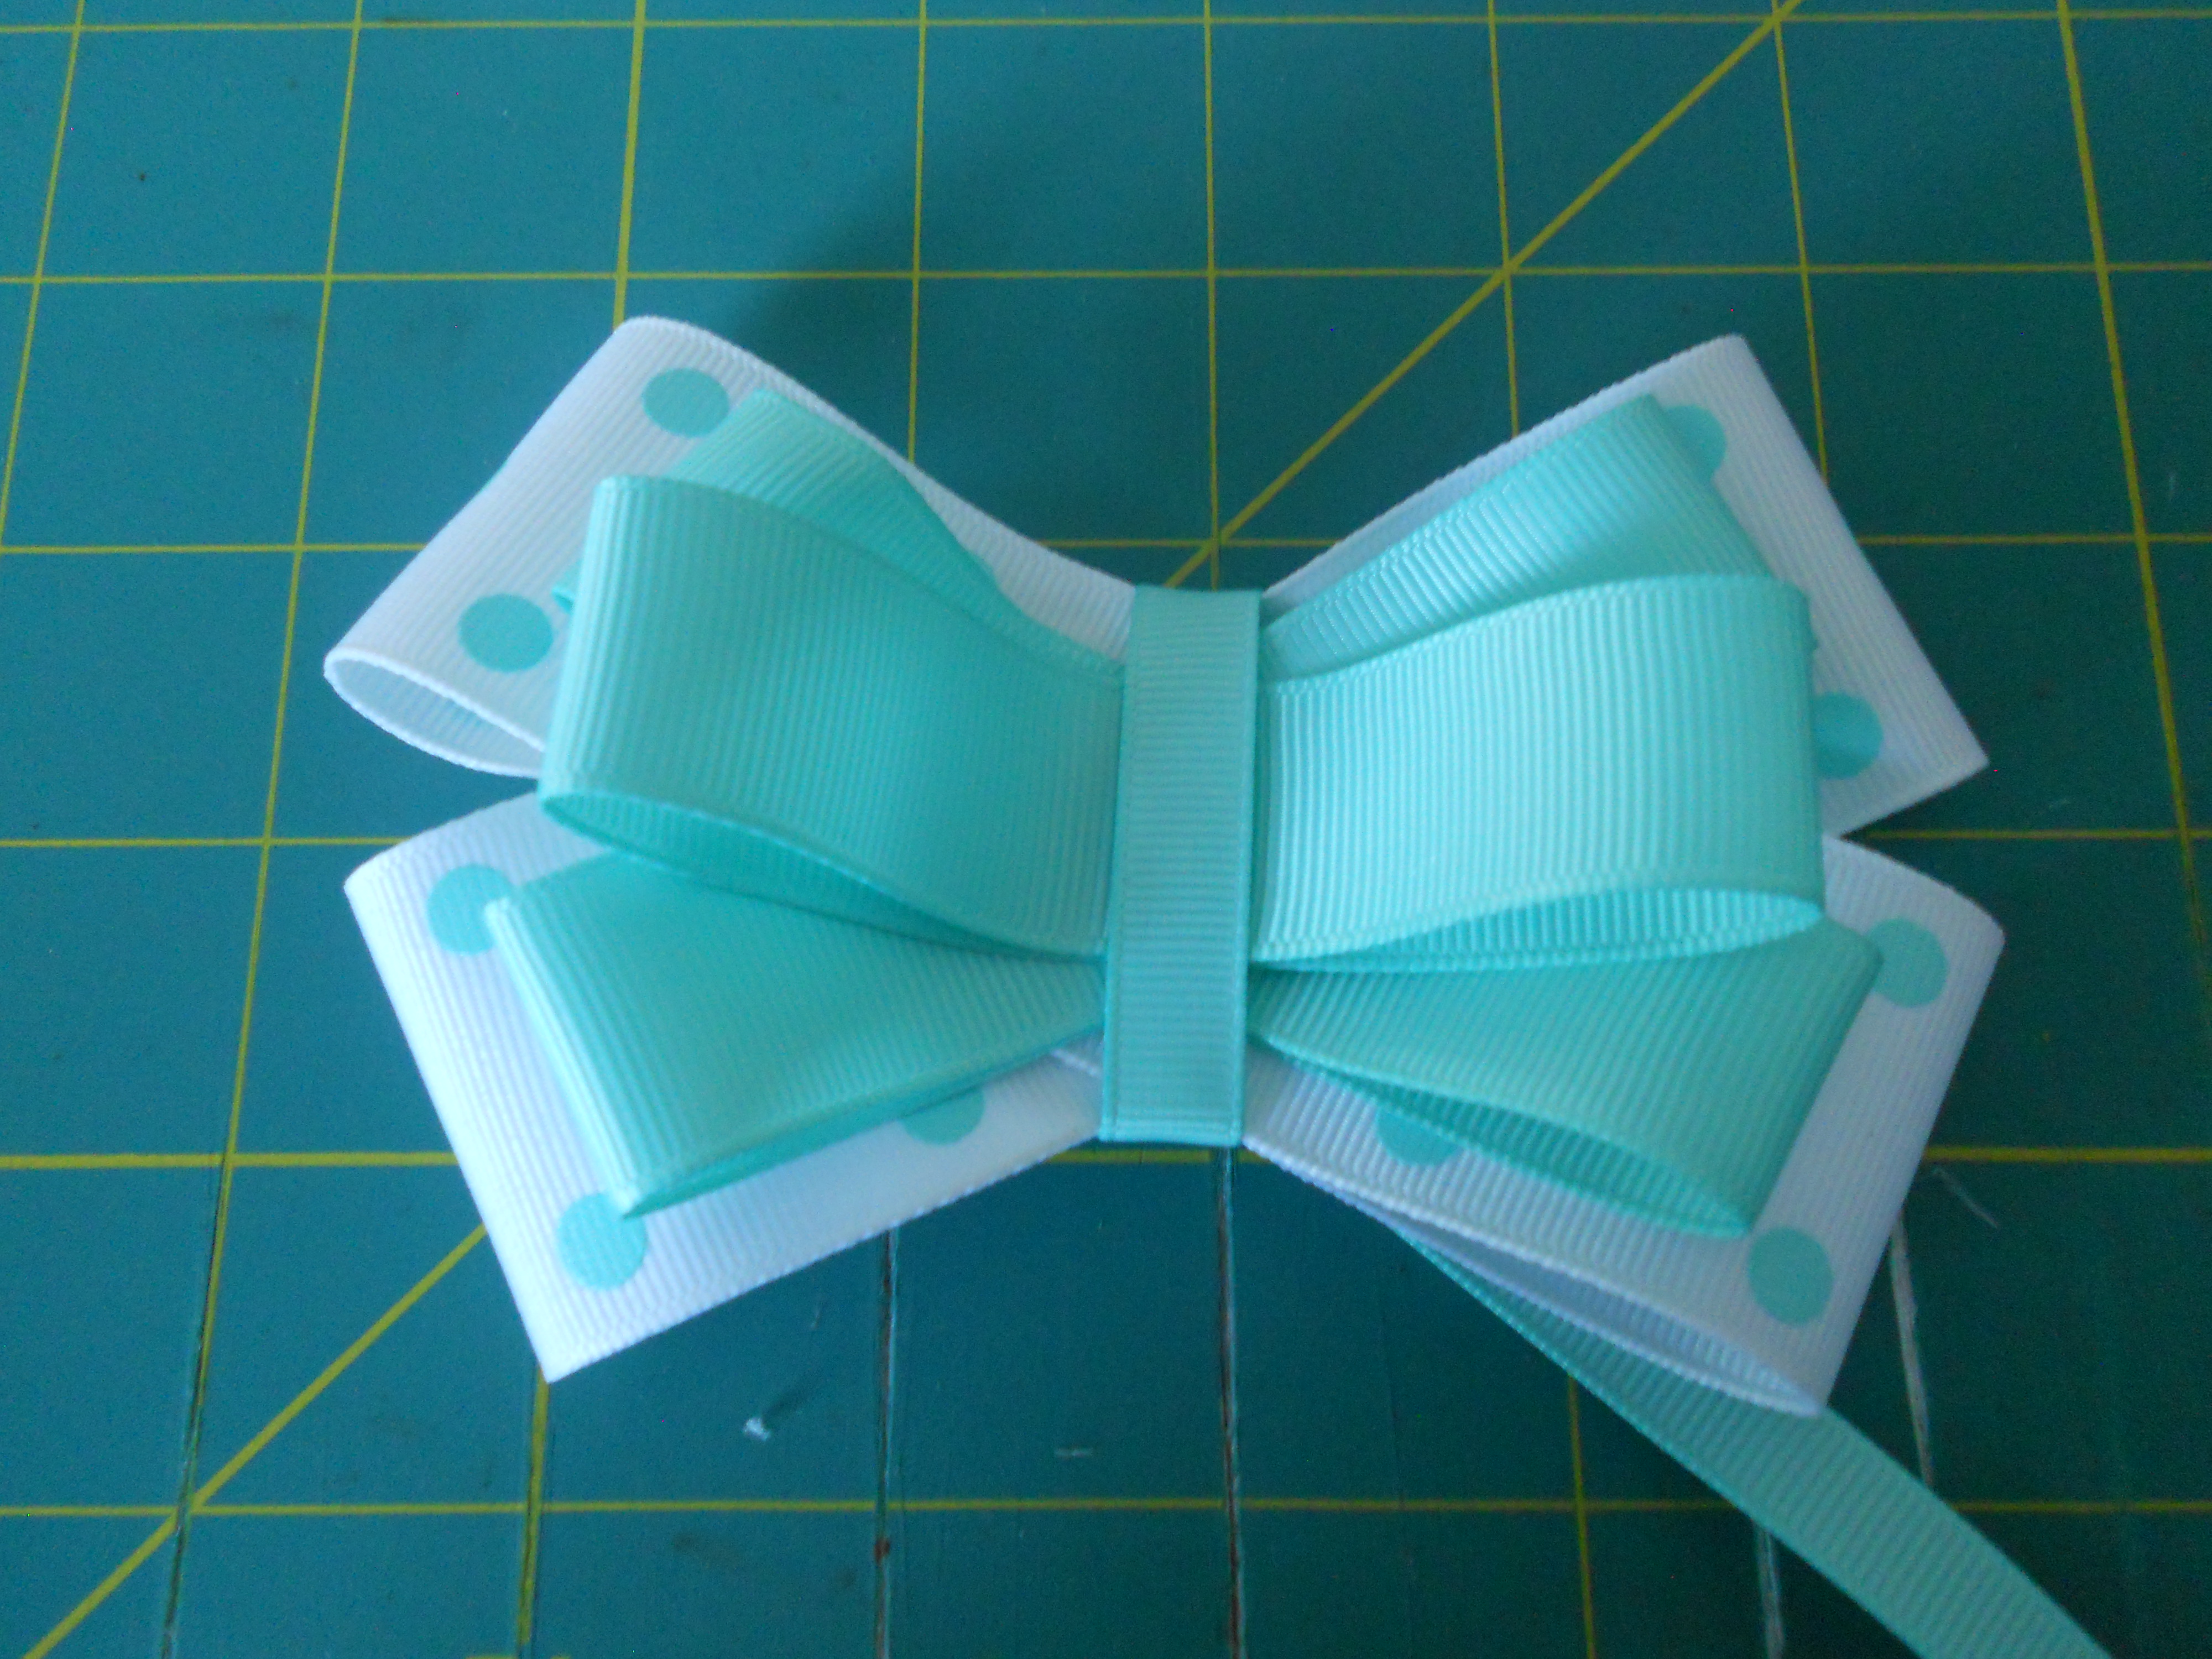
Step 3: While our korkers are baking we can go ahead and make the bow! Cut two 10" strips of your 1.5" ribbon, heat seal the ribbon ends. Fold the ribbon in half and crease the center.
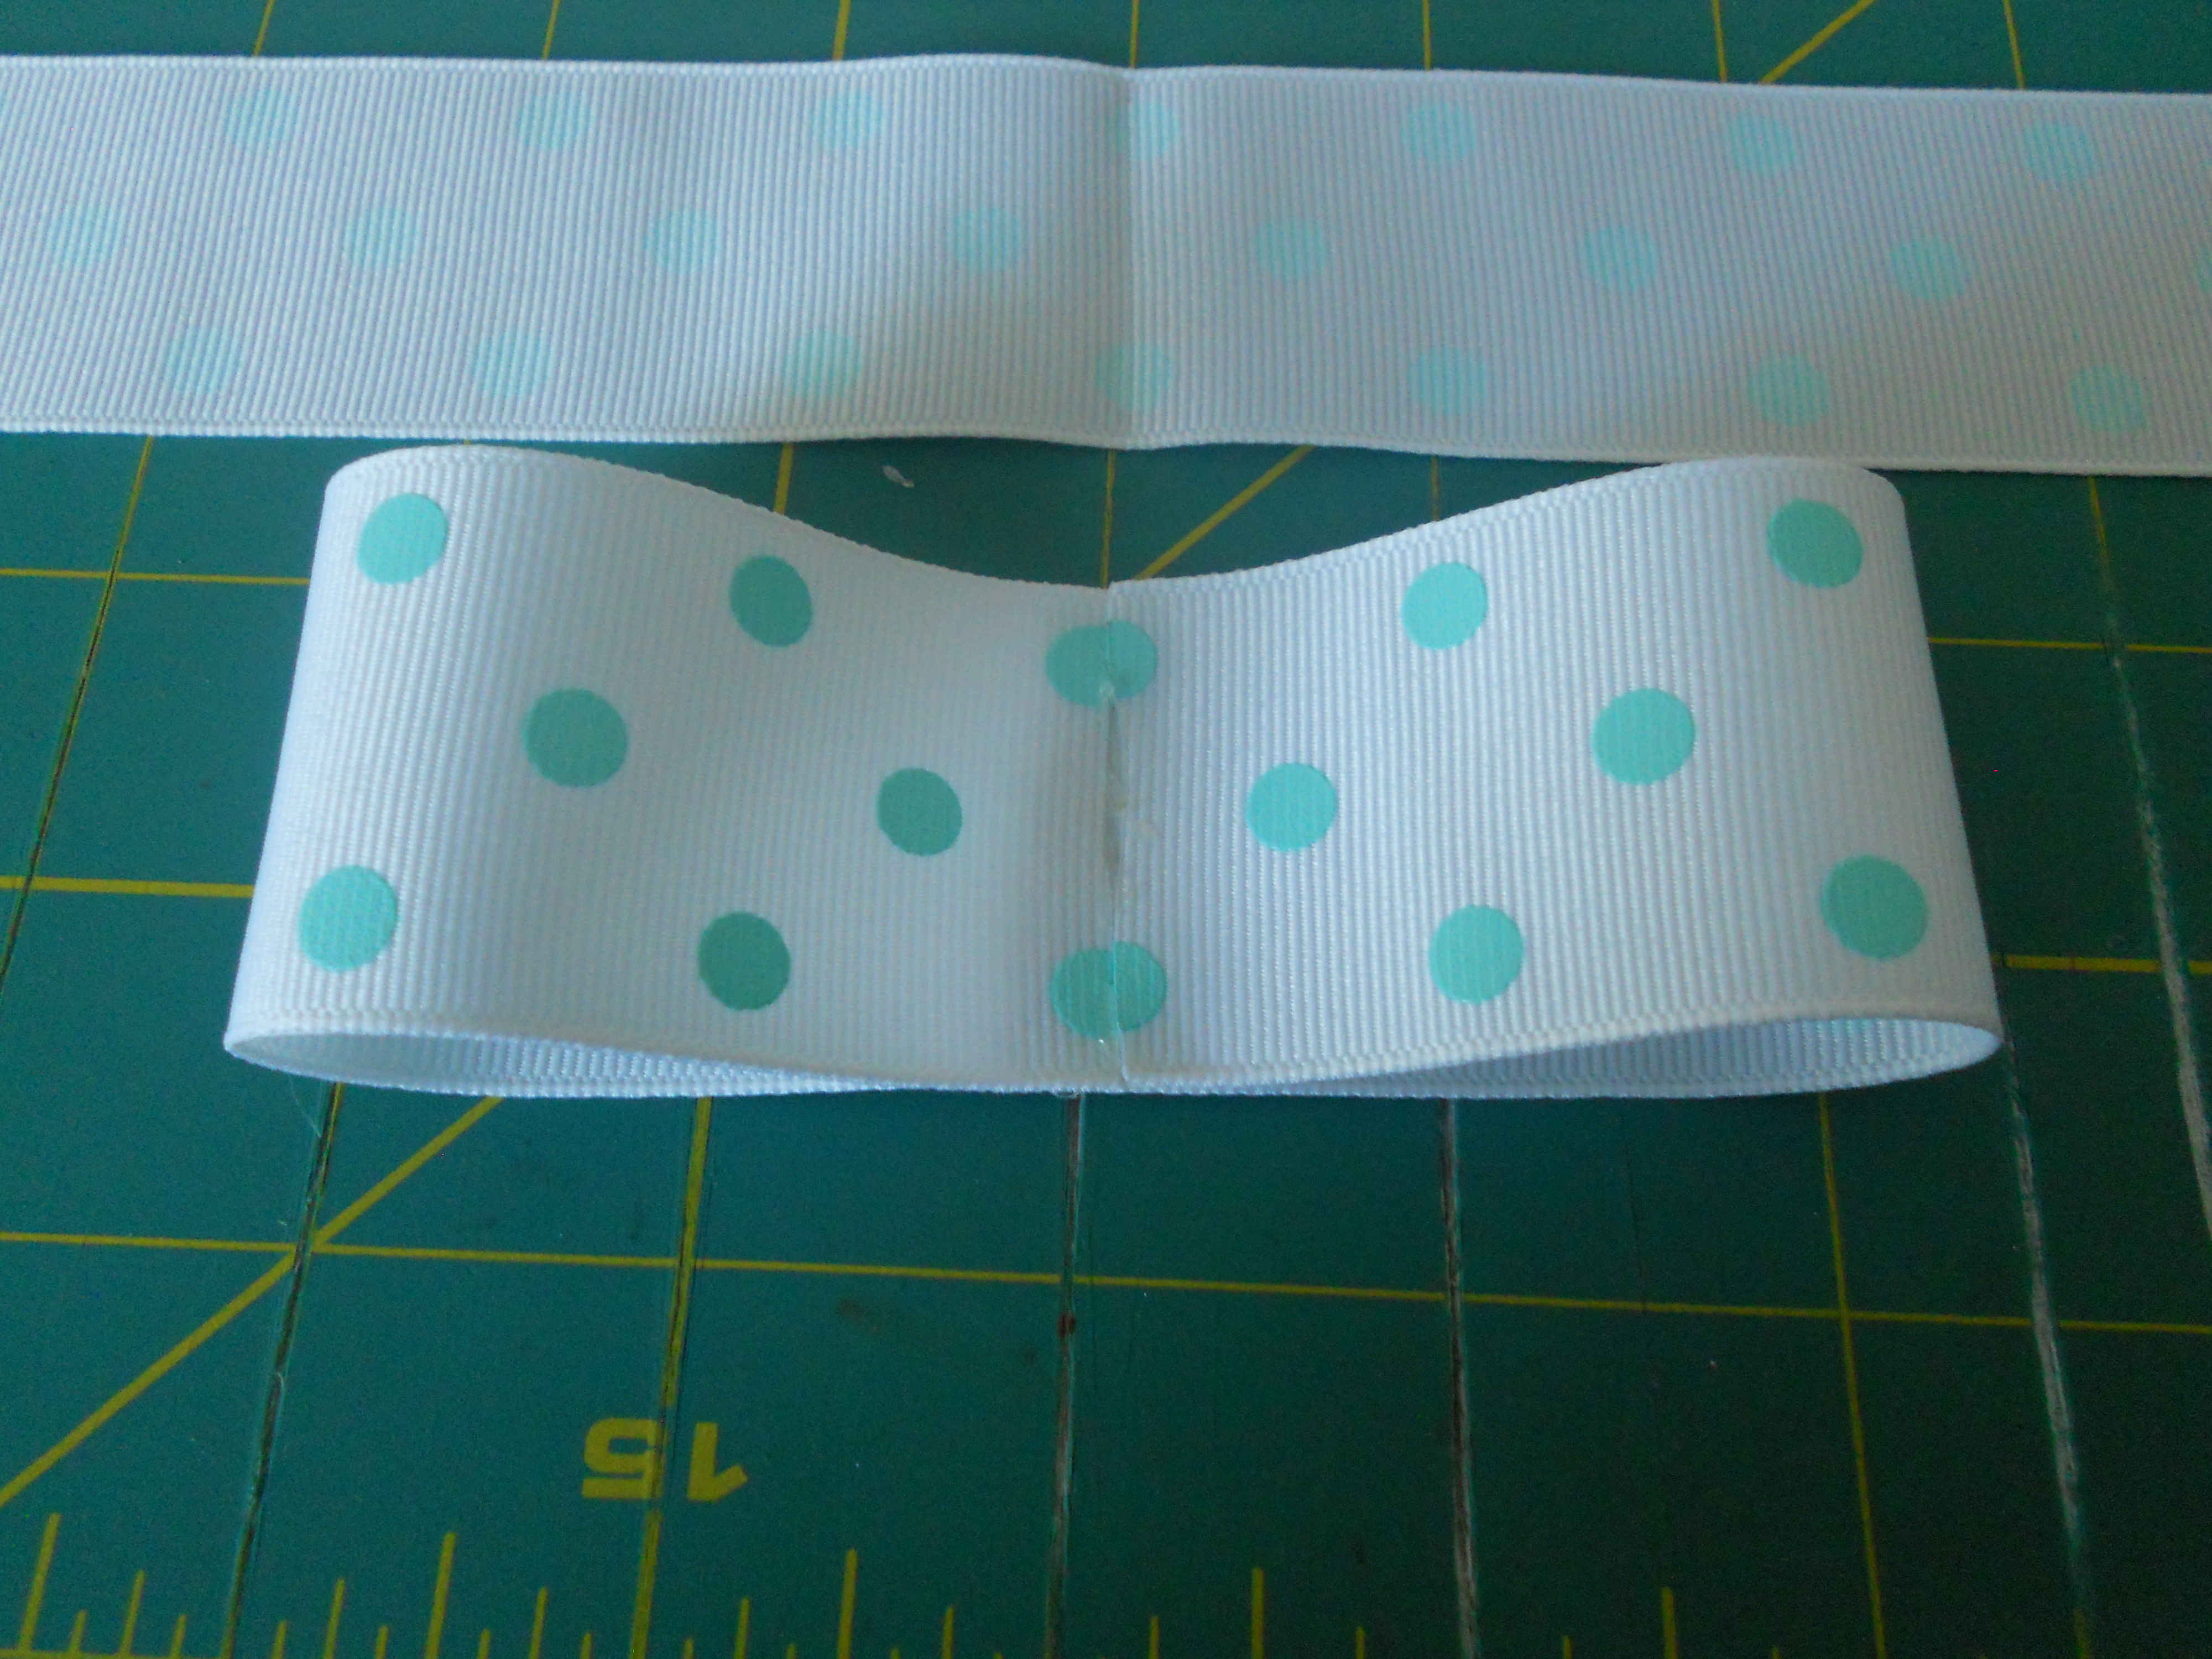
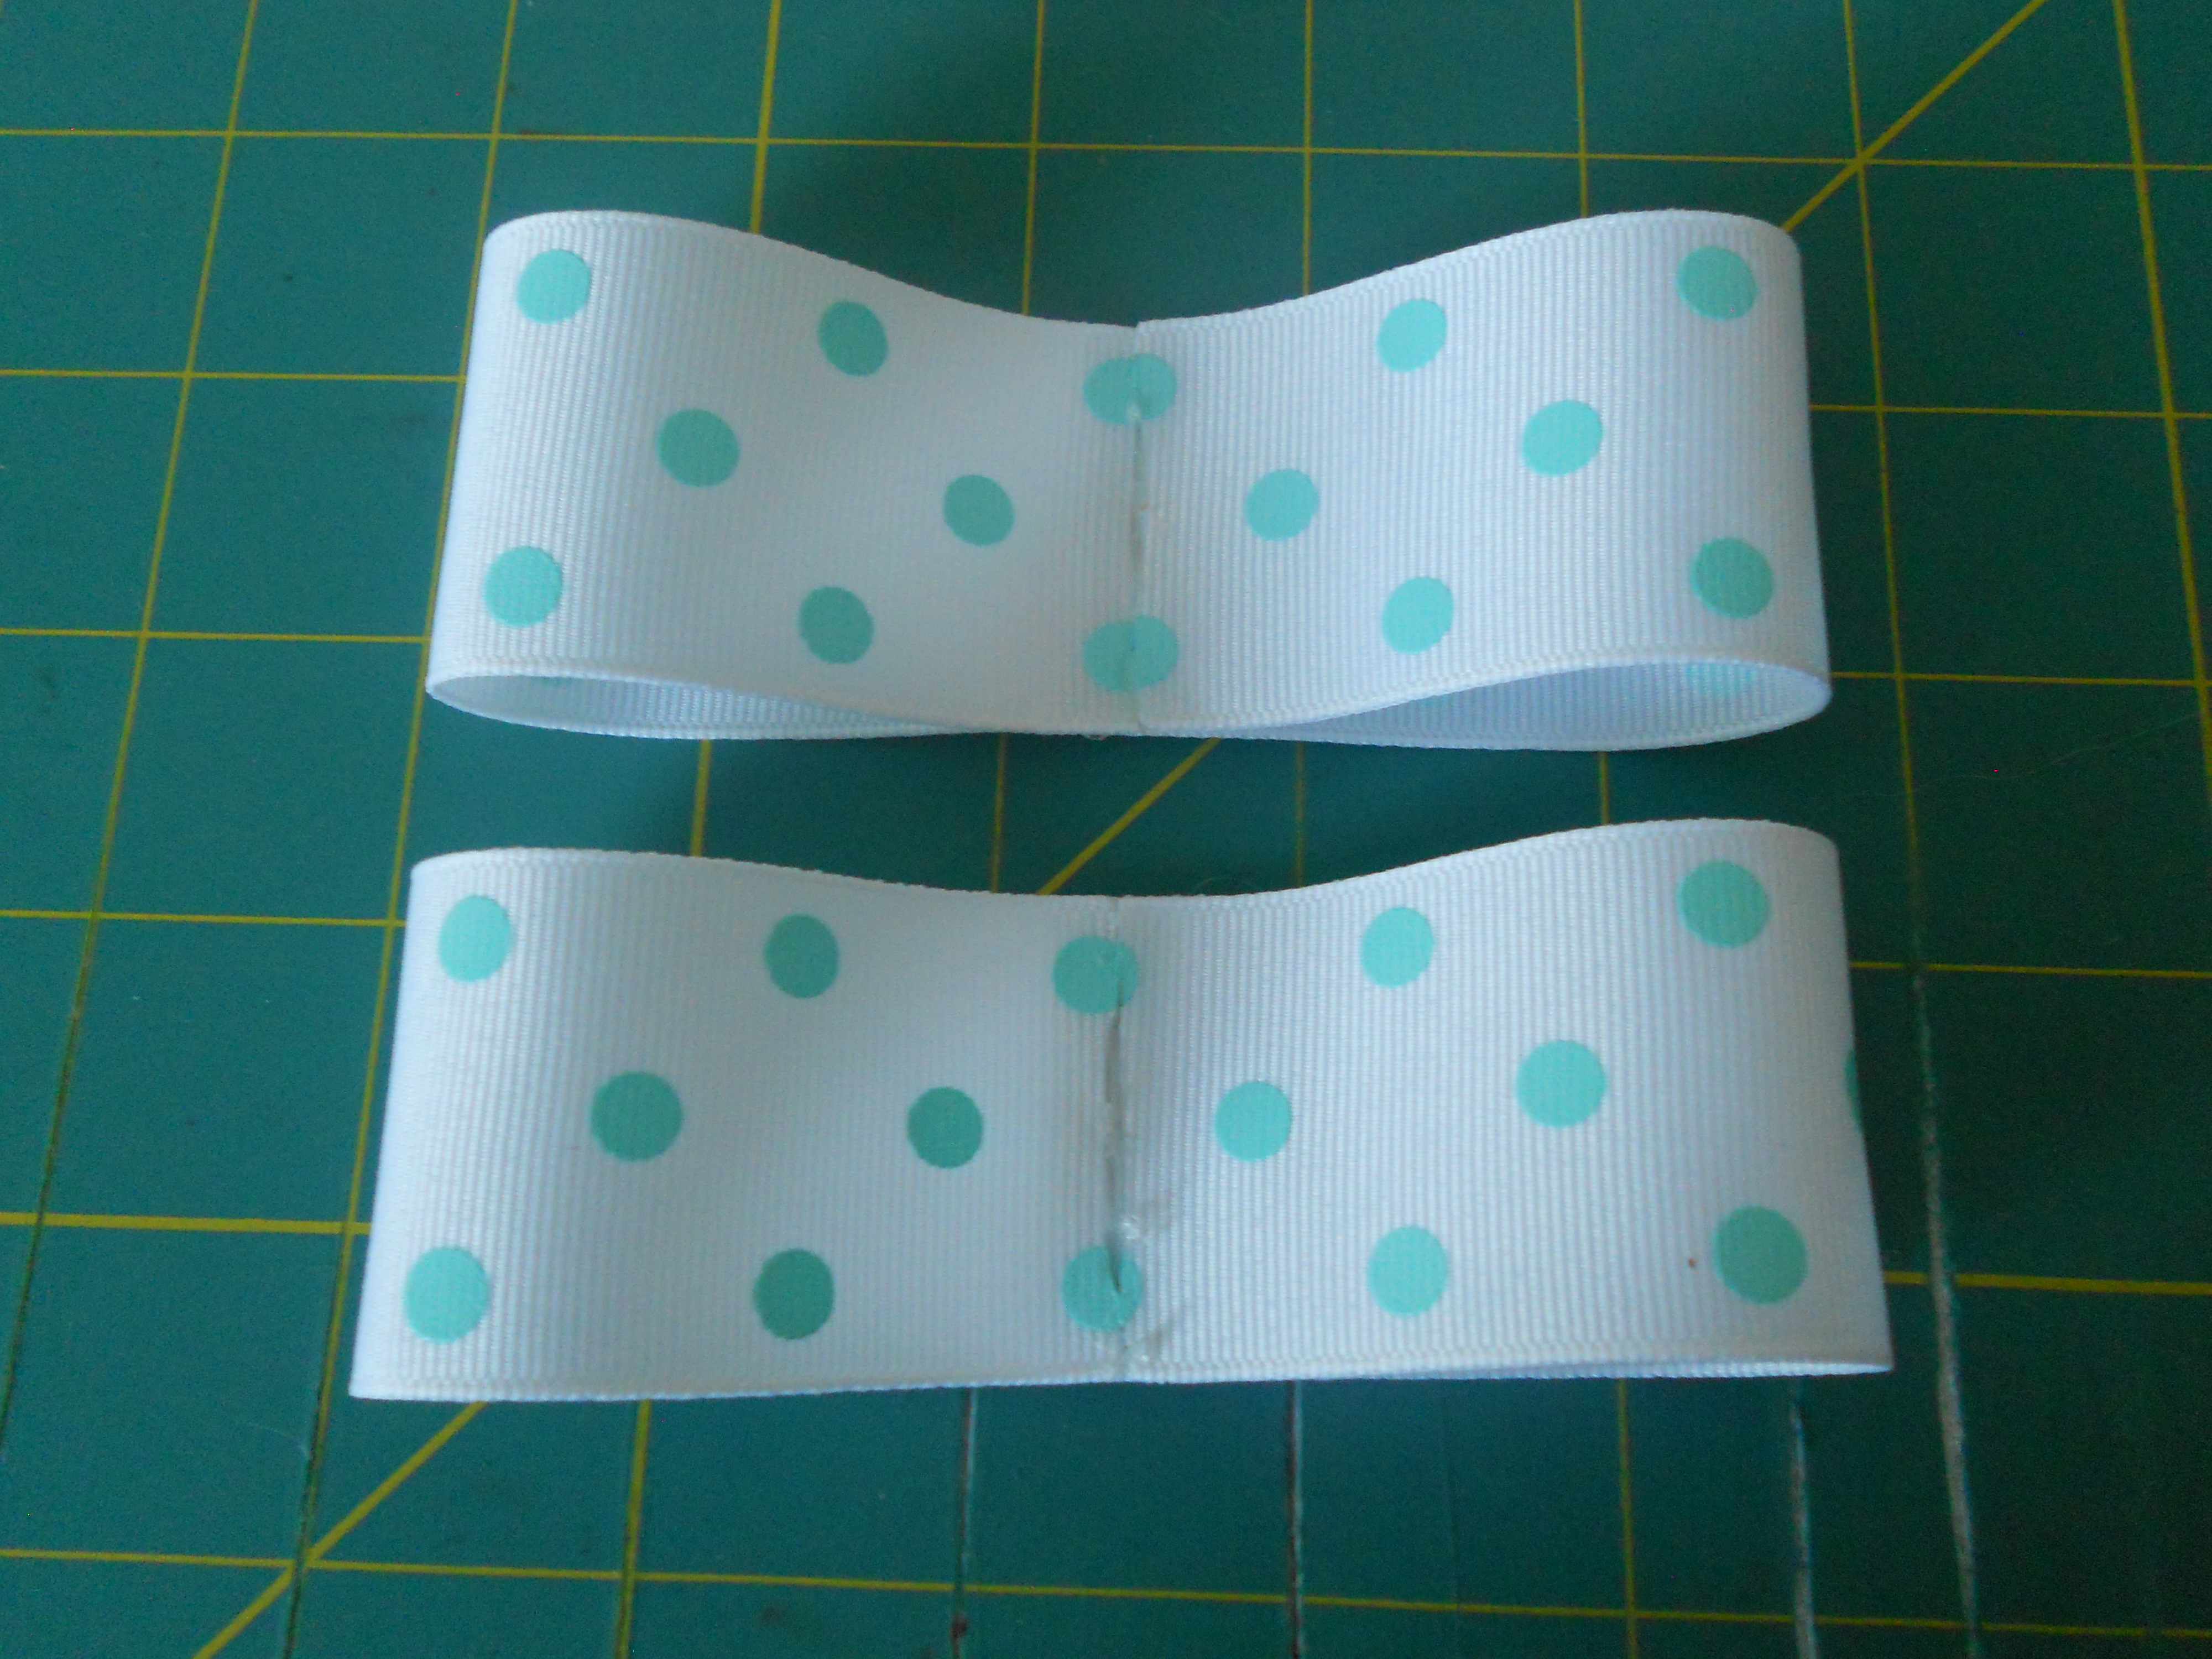
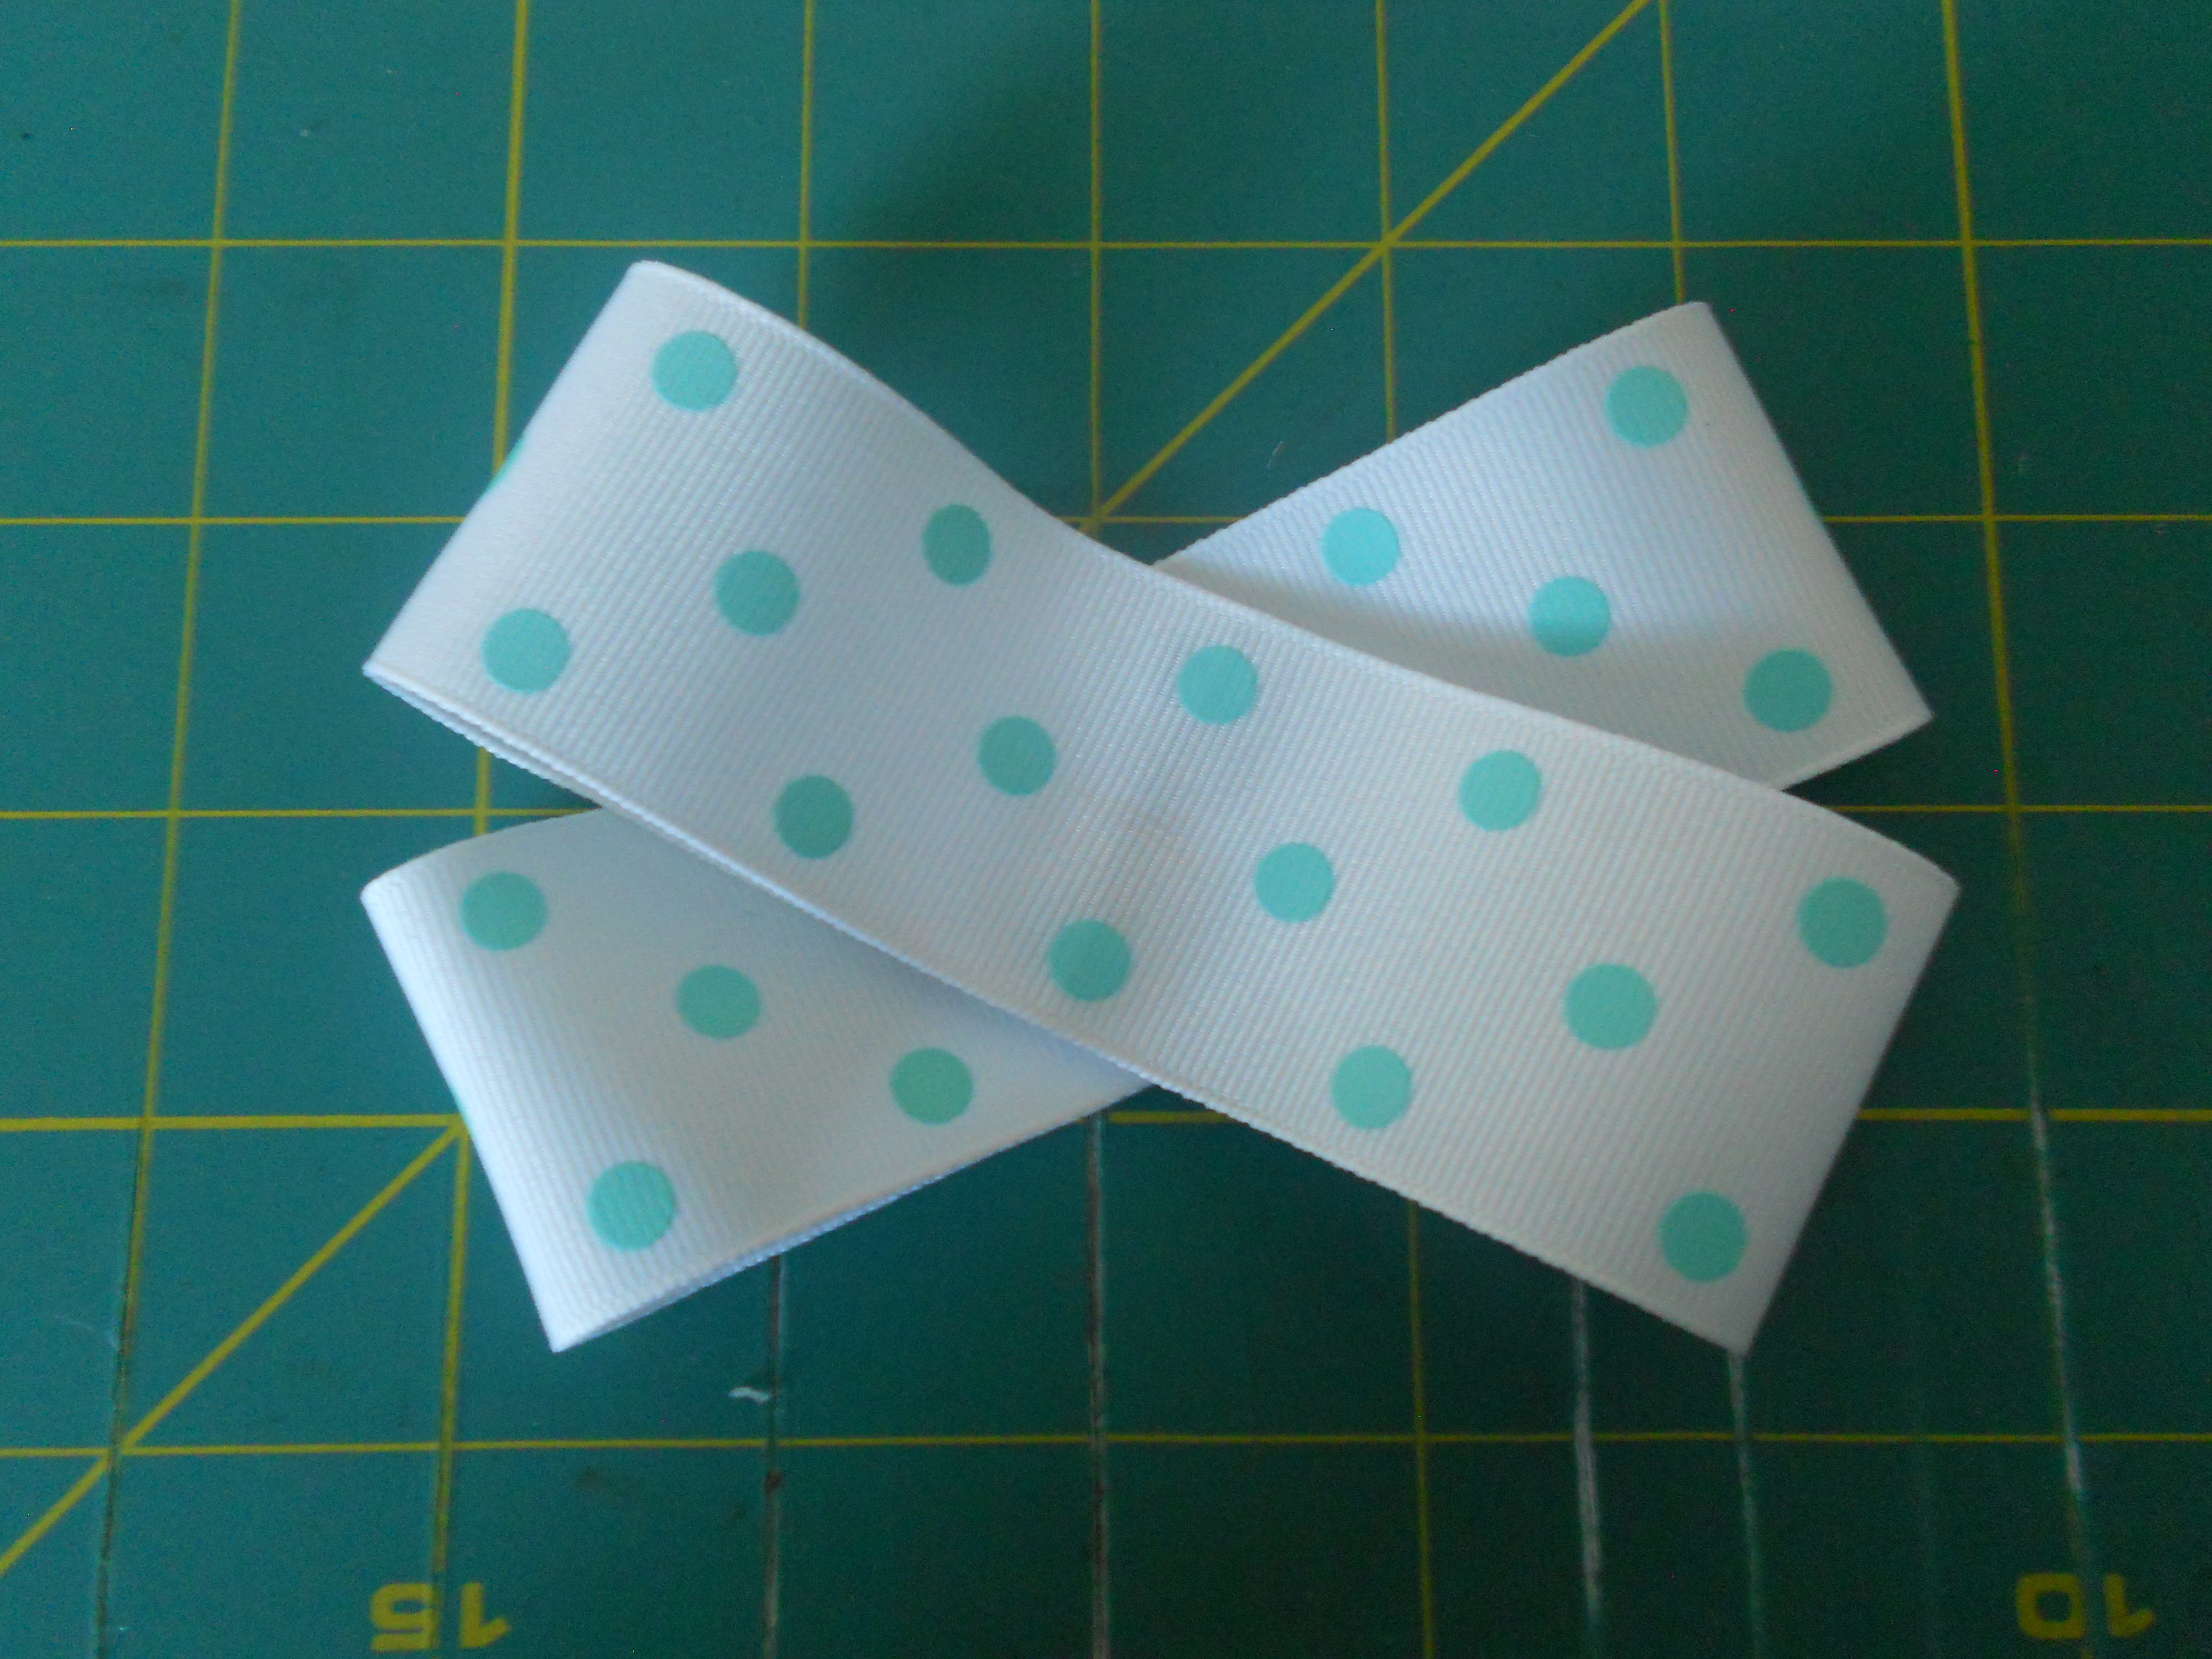
Step 4: Put a line of hot glue on the left side of your center crease, fold the left side of your ribbon over and glue it down to form your first loop. Put a line of hot glue on the right side of your center crease, fold the right side of your ribbon over and glue it down to form your second loop. Repeat for your other 10" piece. Once both of your loops are formed glue the centers together to form an "x" shape.
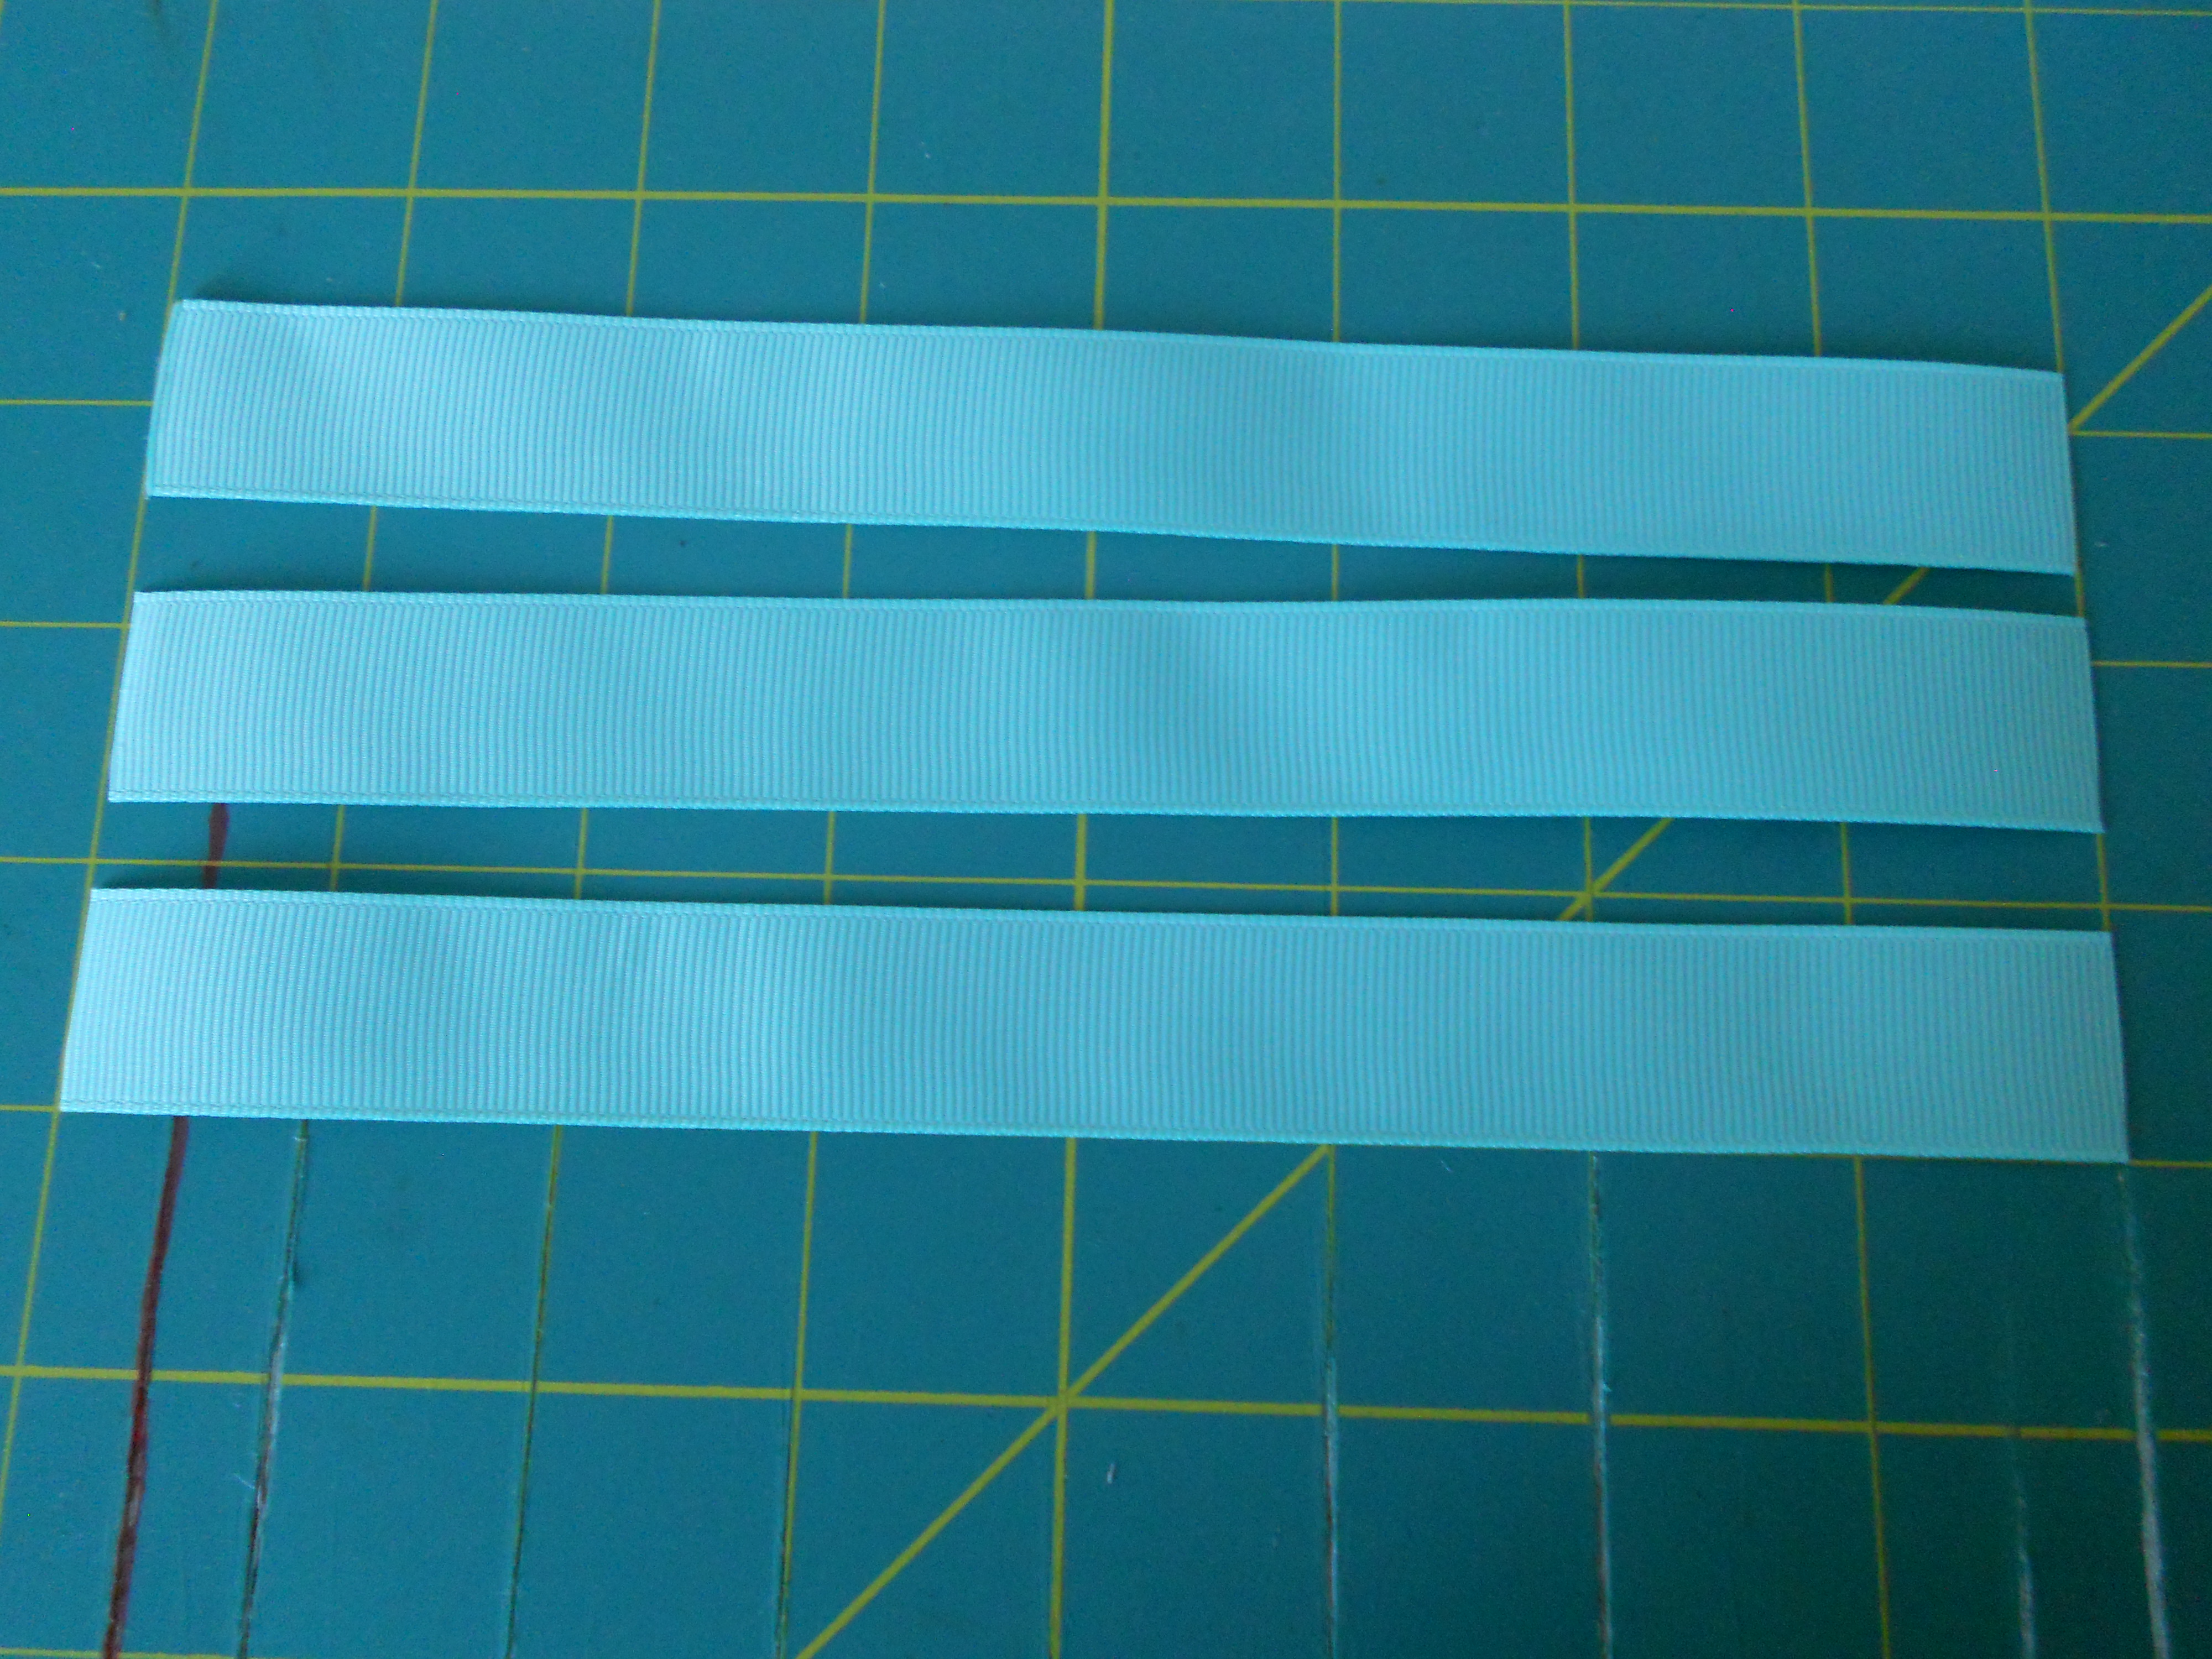
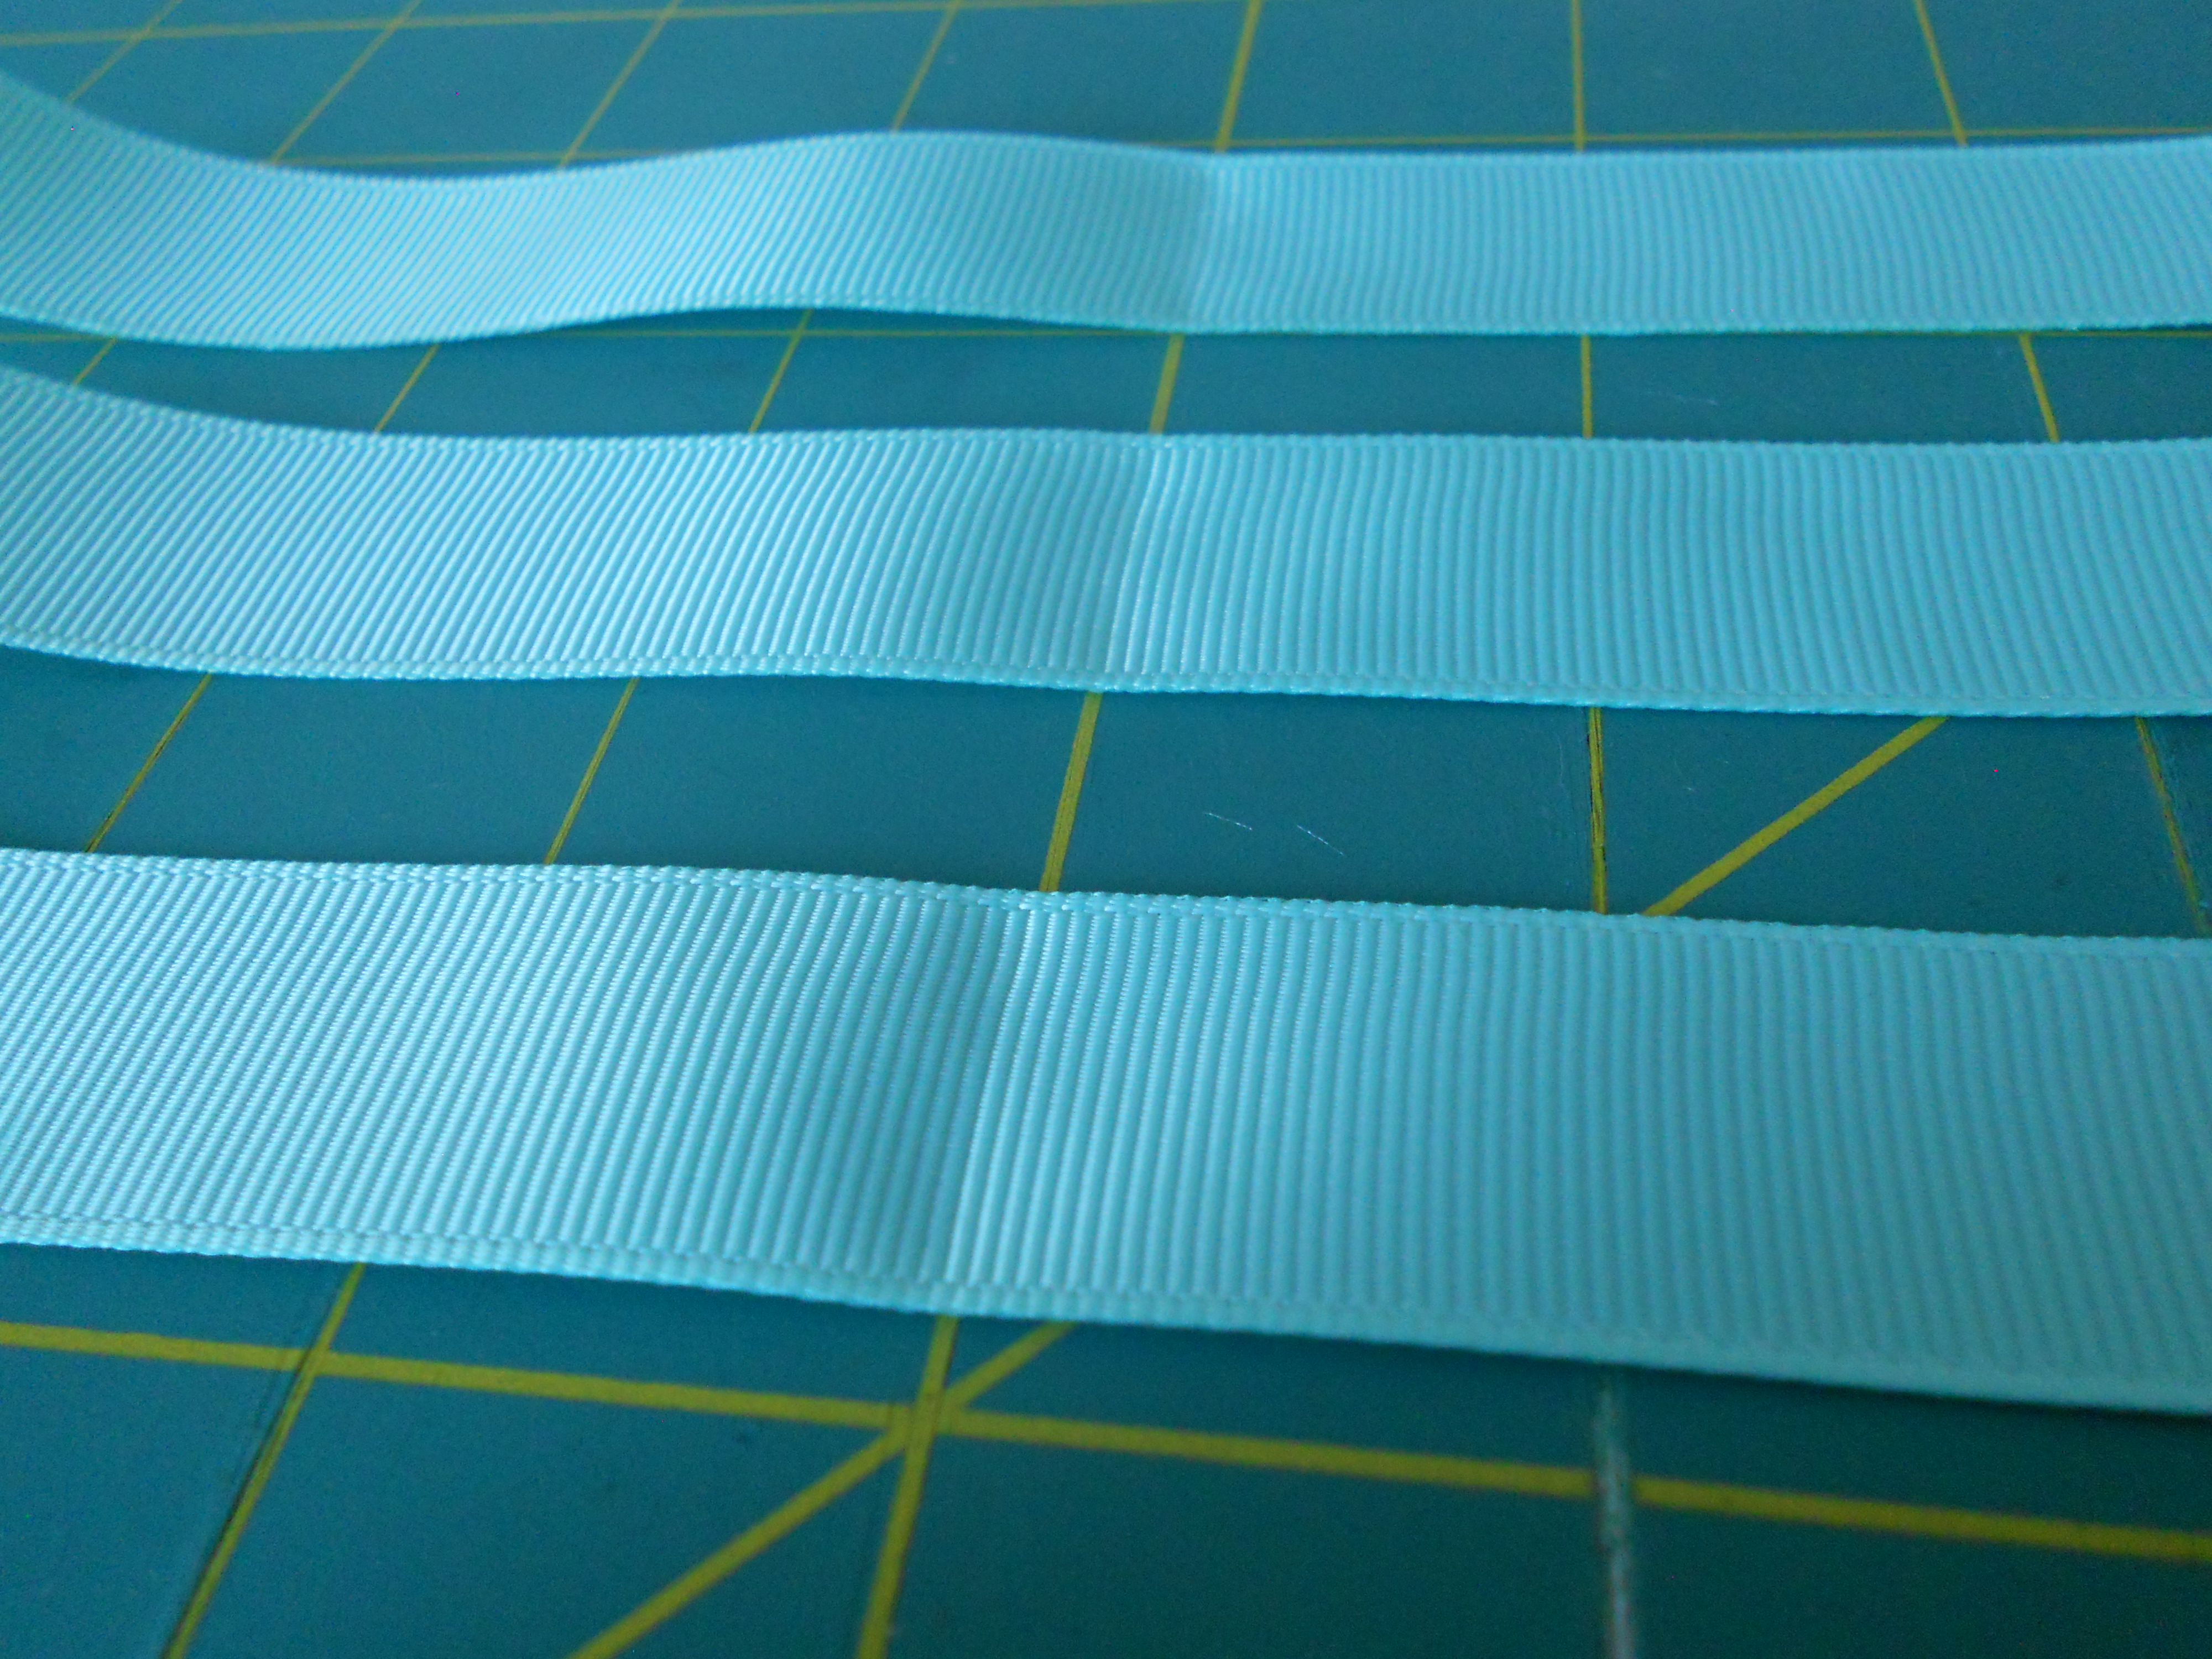
Step 5: Cut three 8" strips of your 7/8" ribbon, heat seal your ribbon ends. Fold the ribbon in half and crease your centers.
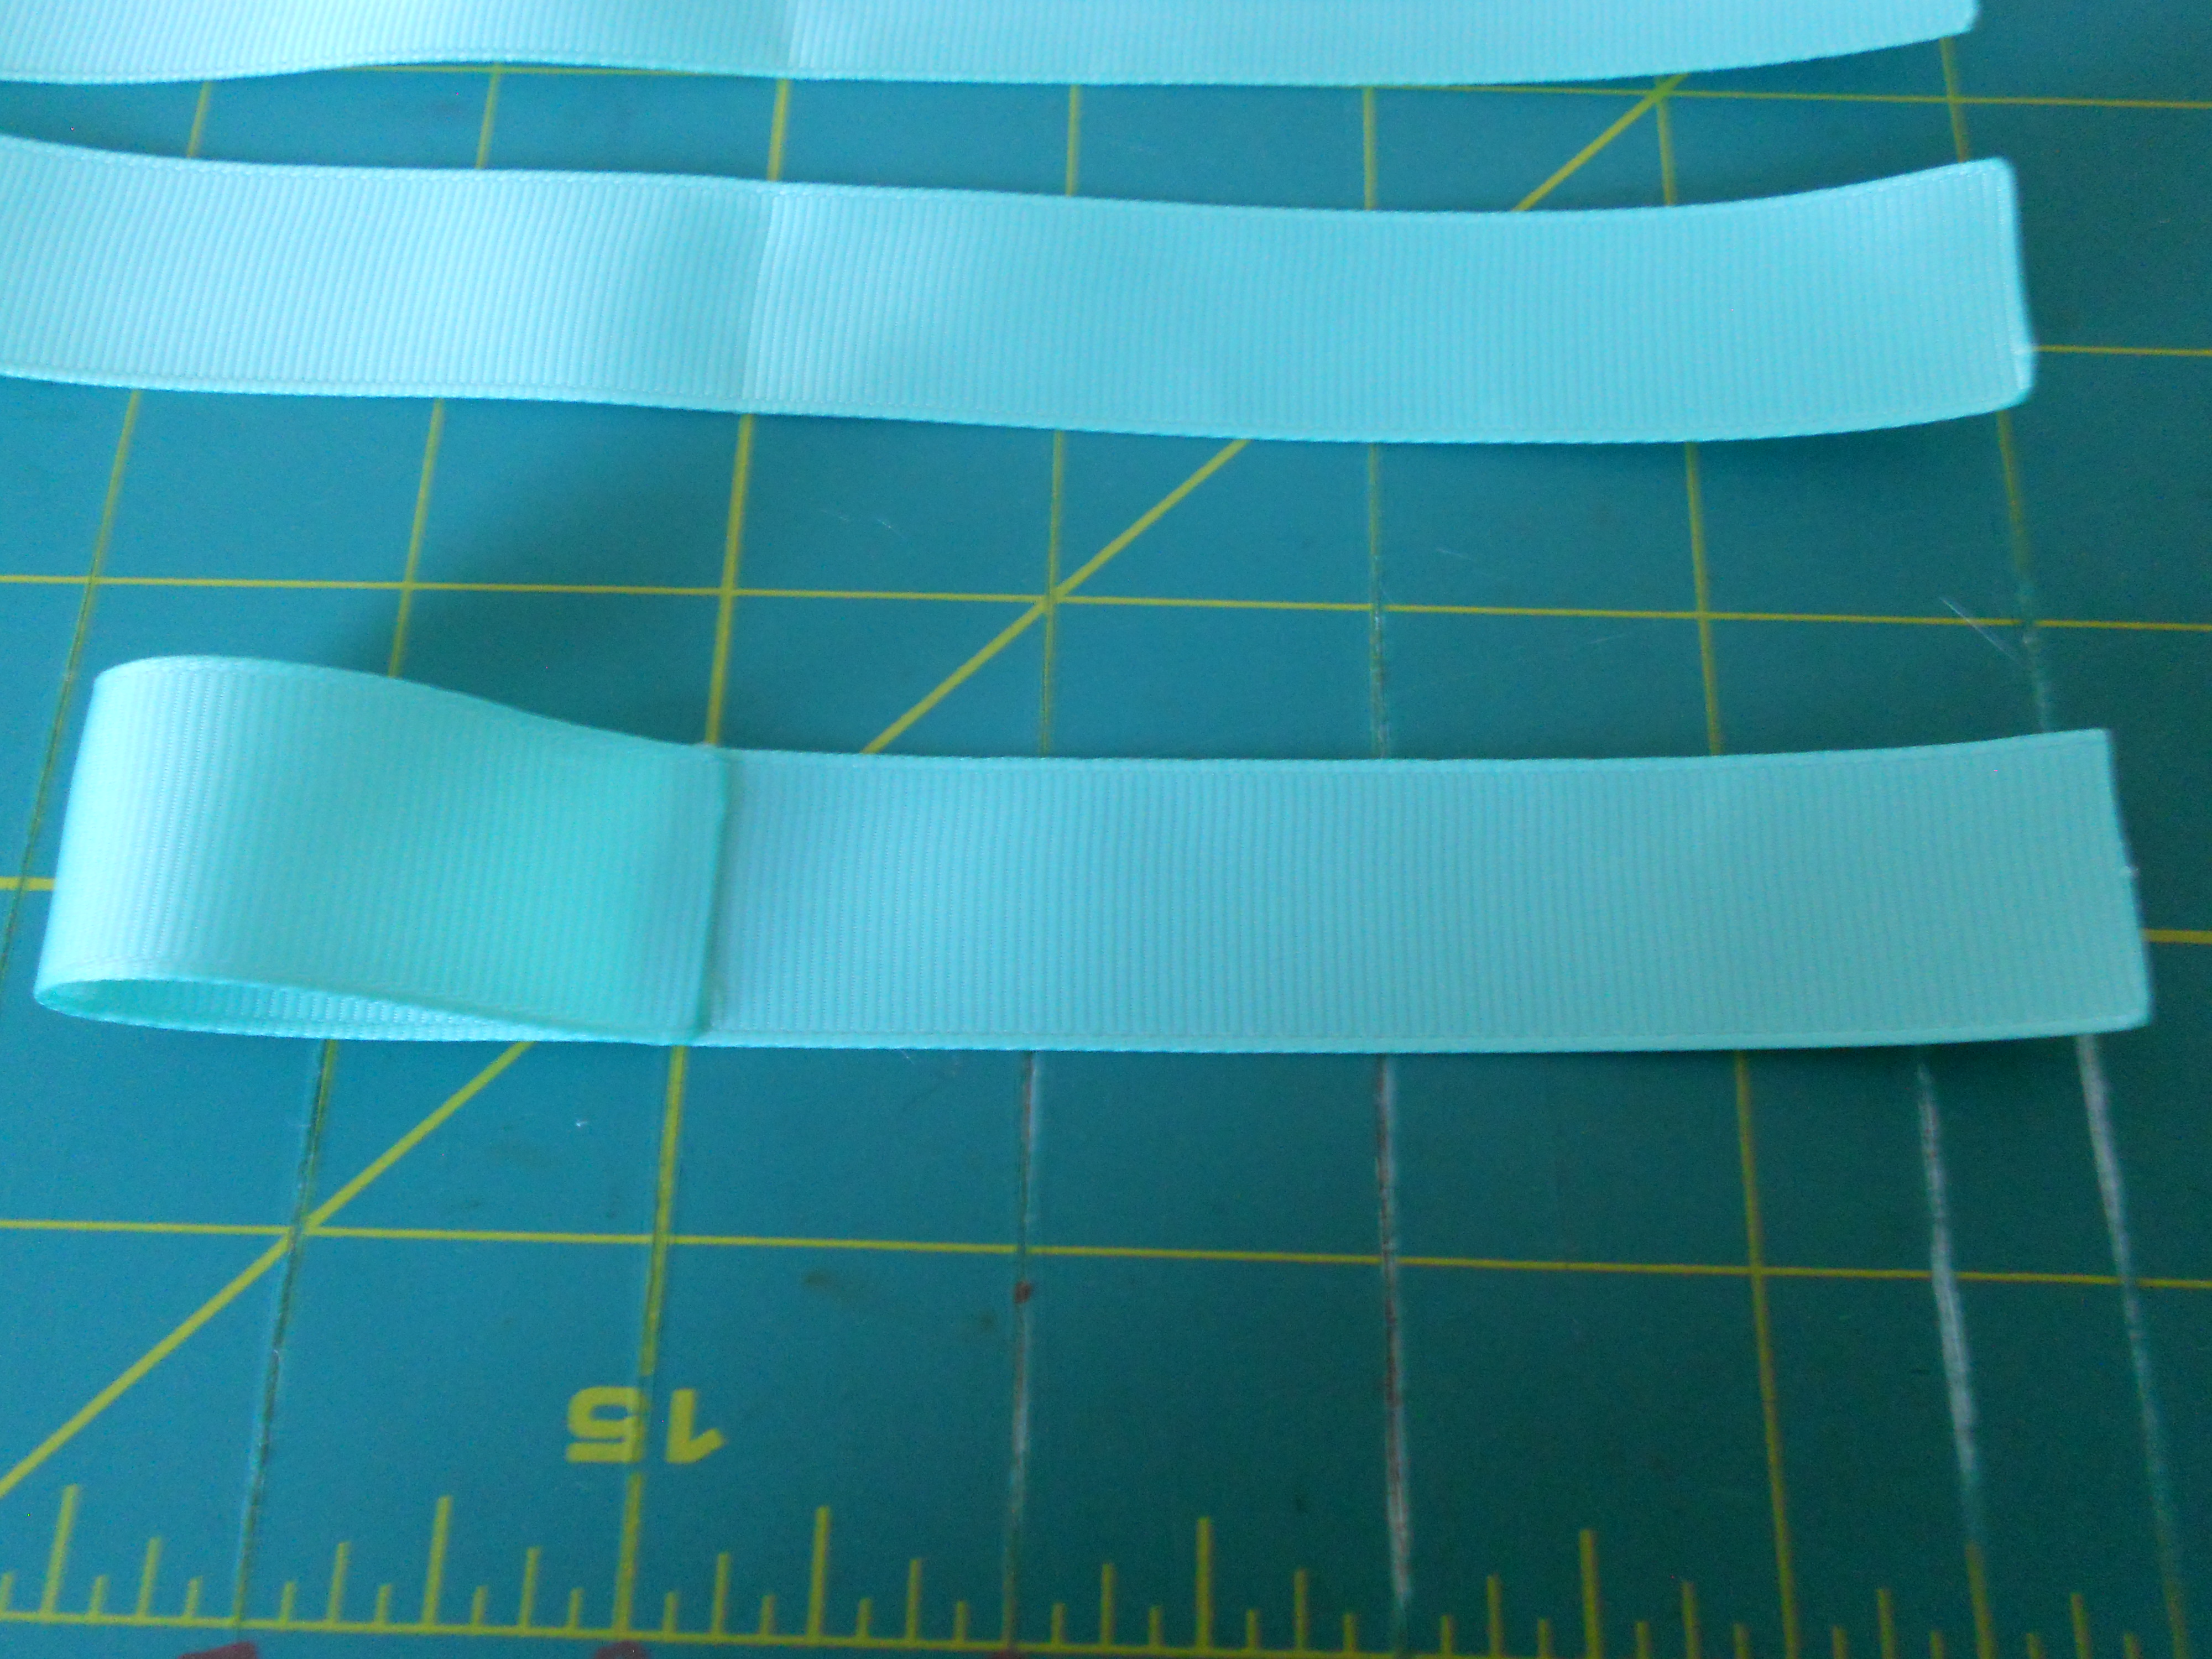
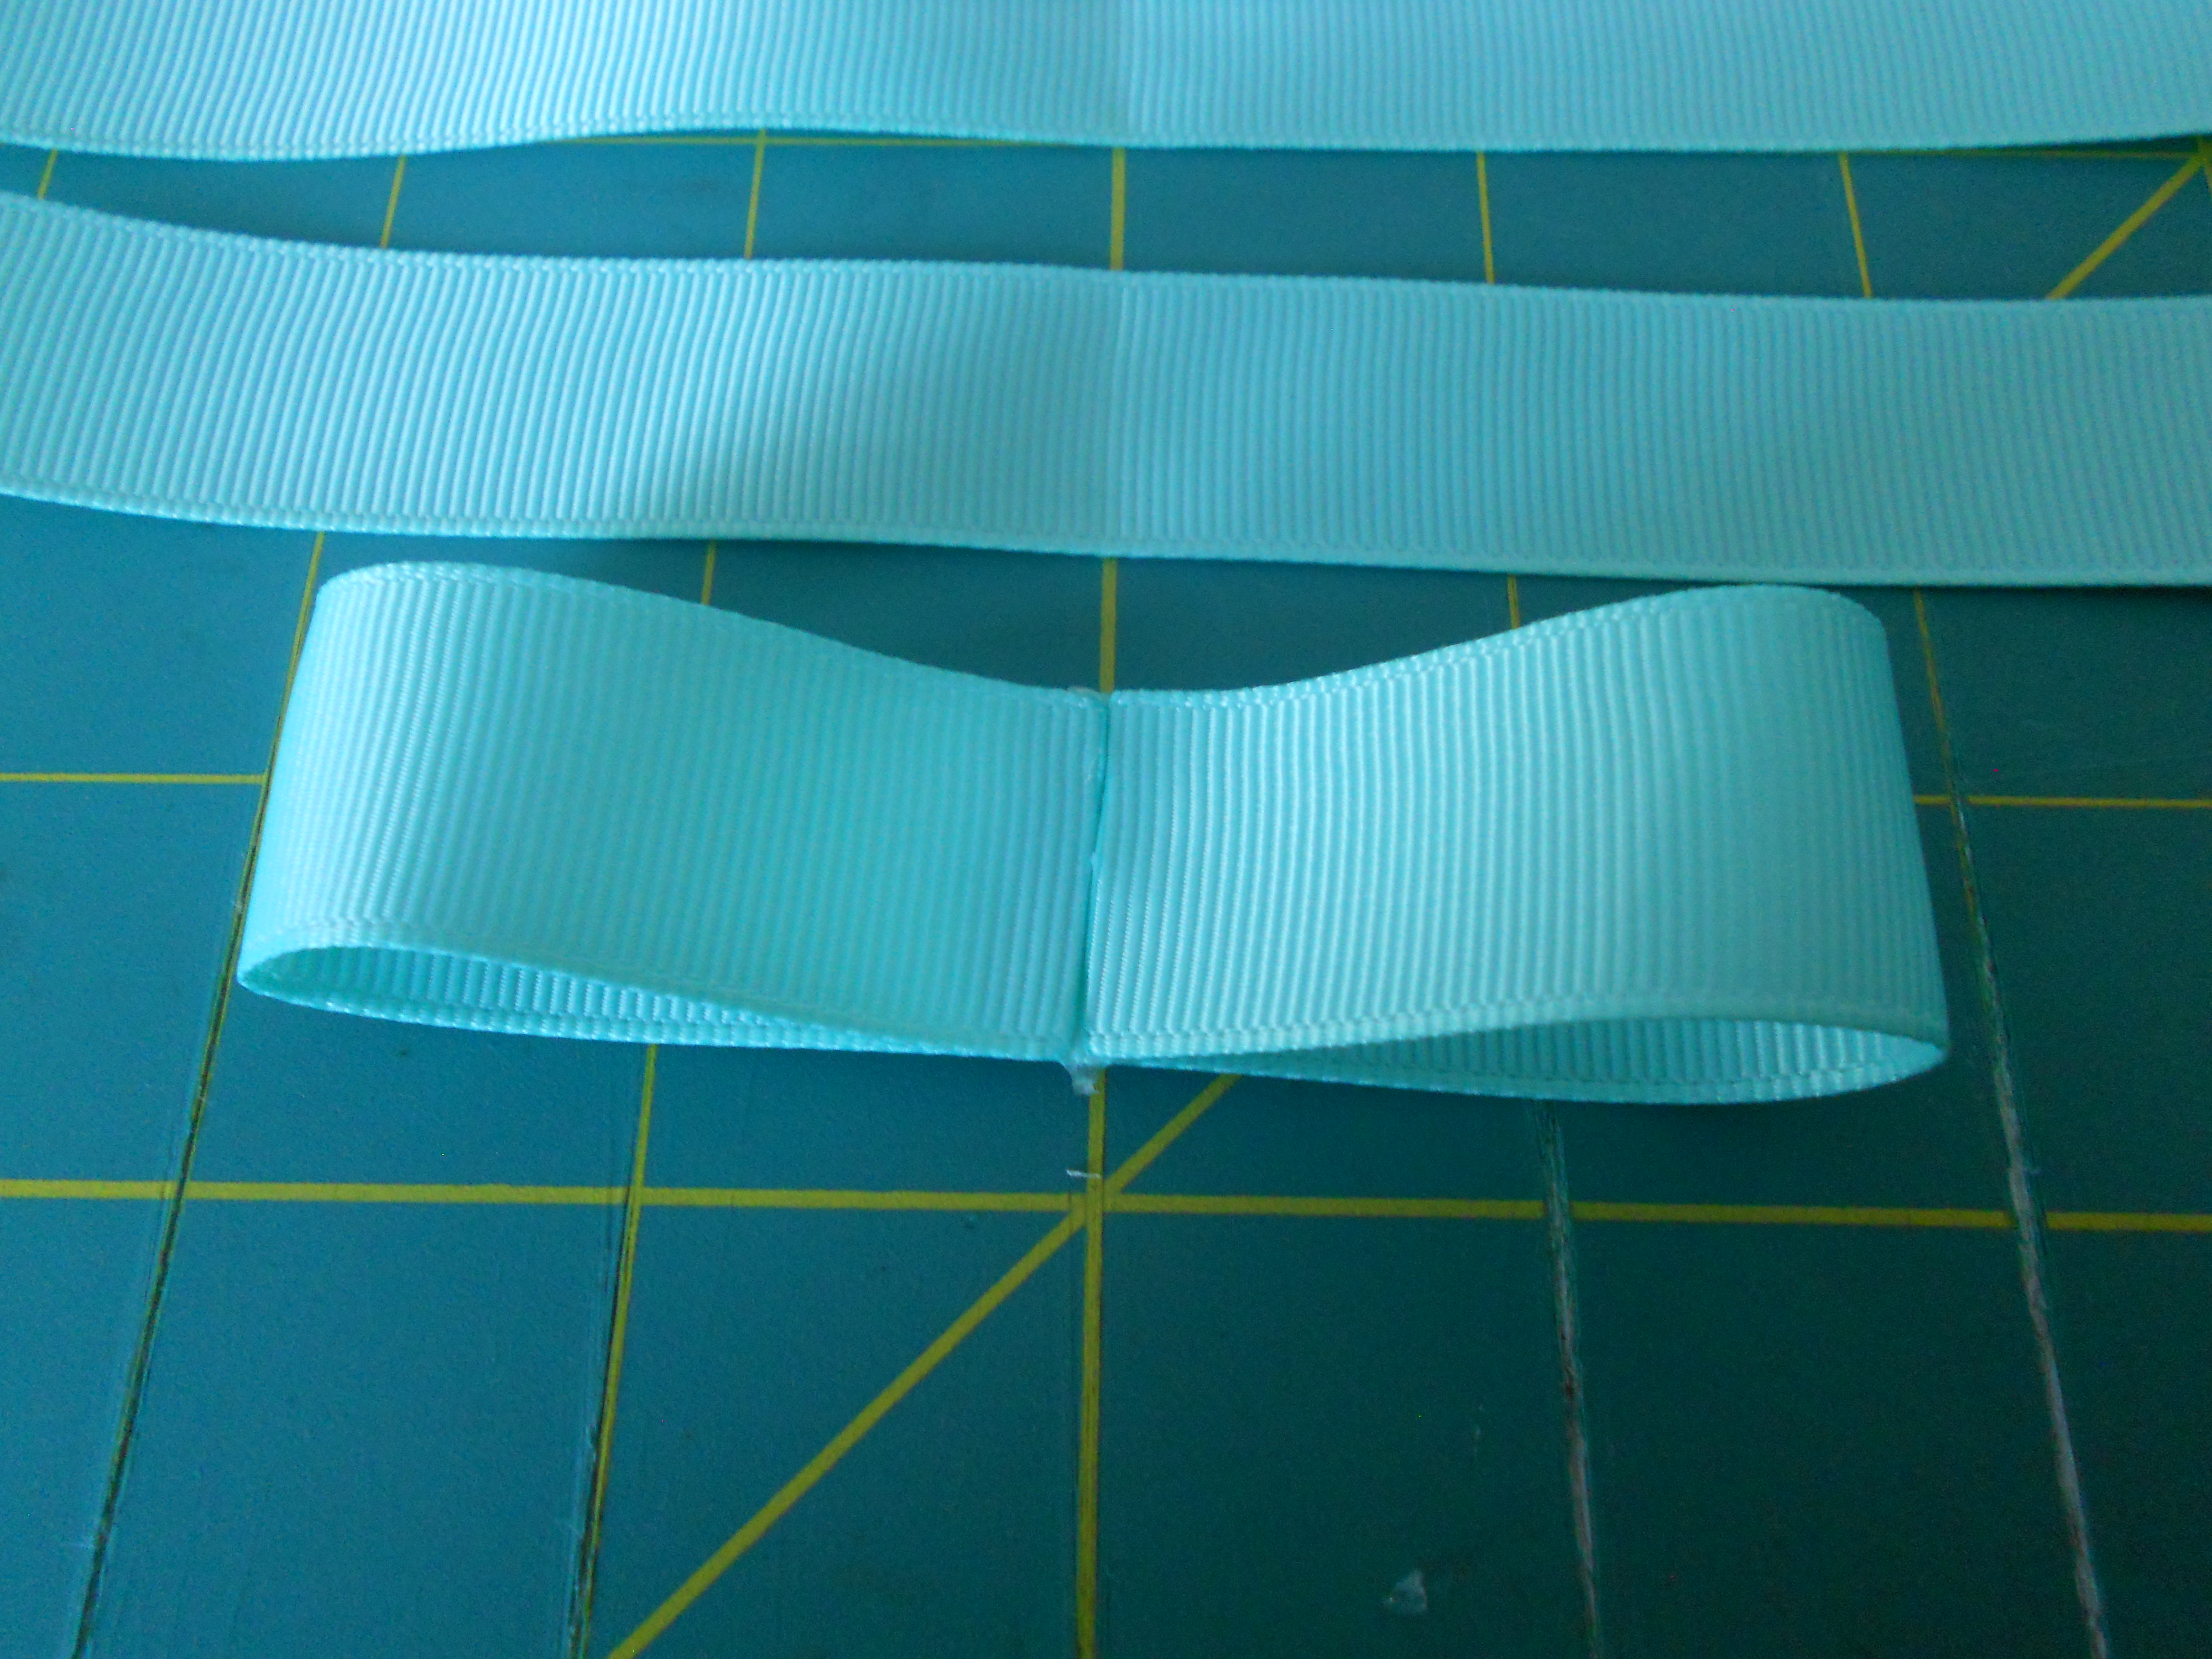
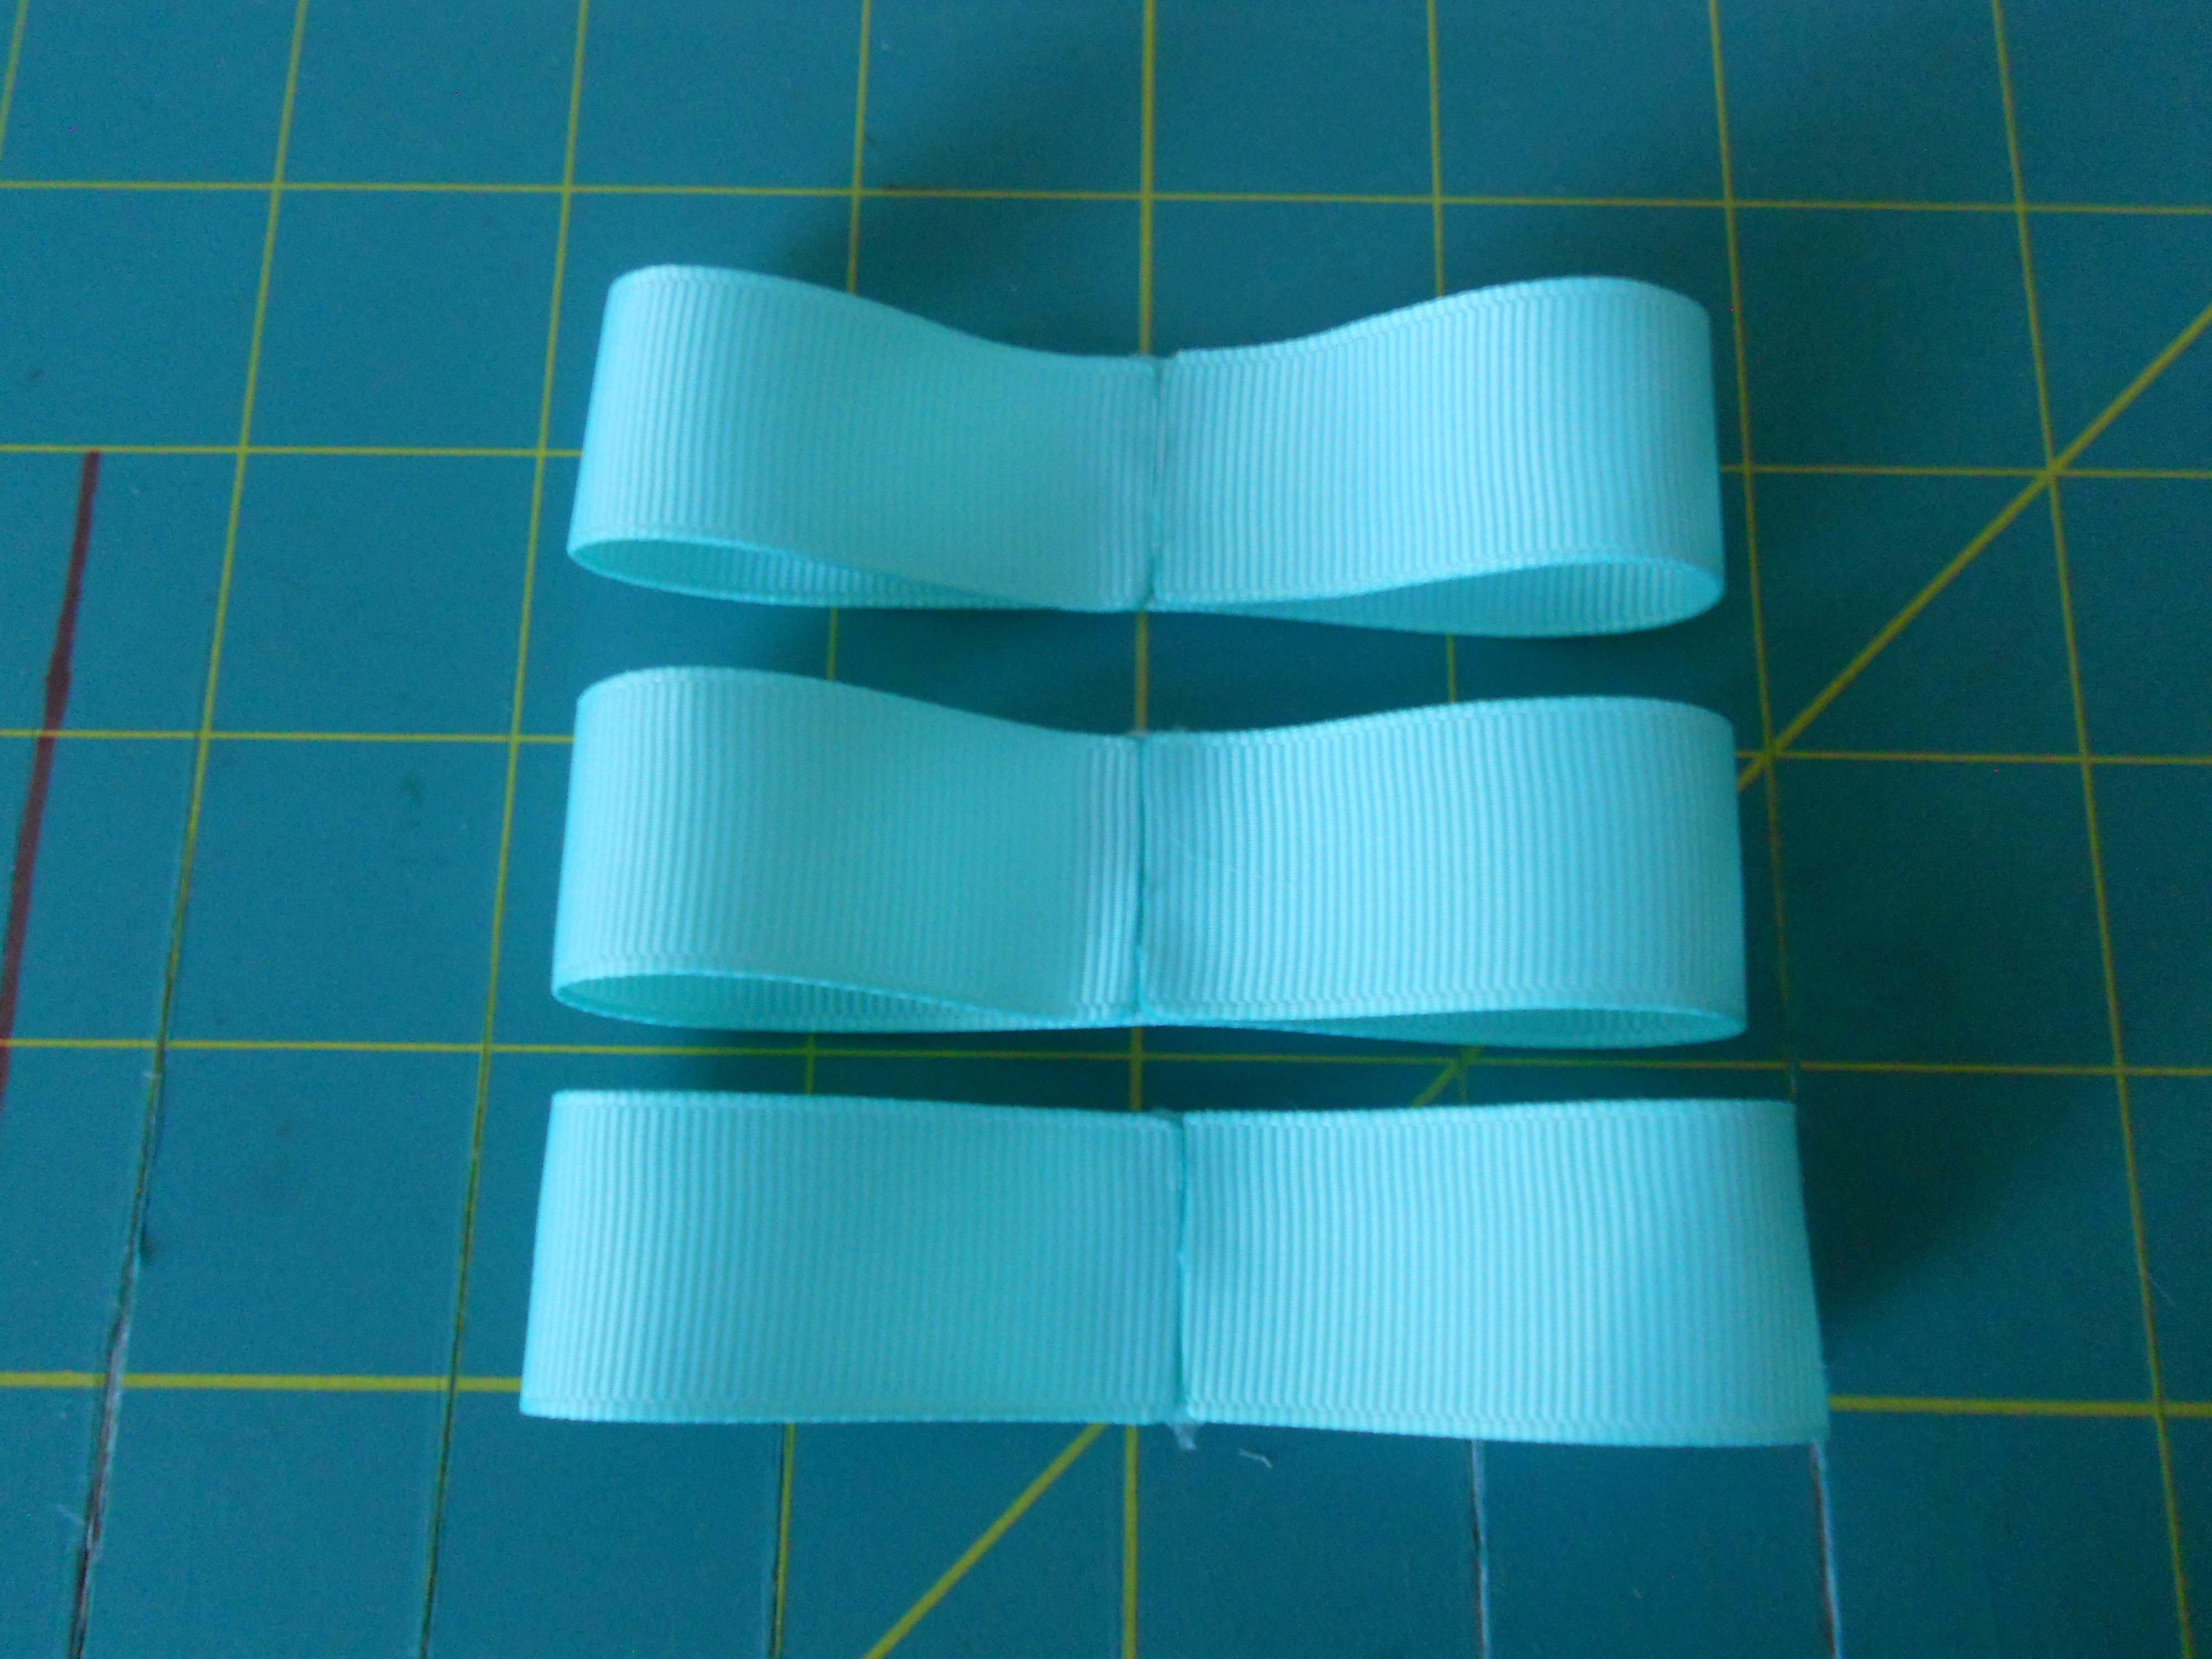
Step 6: Put a line of hot glue on the left side of your center crease, fold the left side of your ribbon over and glue it down to form your first loop. Put a line of hot glue on the right side of your center crease, fold the right side of your ribbon over and glue it down to form your second loop. Repeat for your other two 8" pieces.


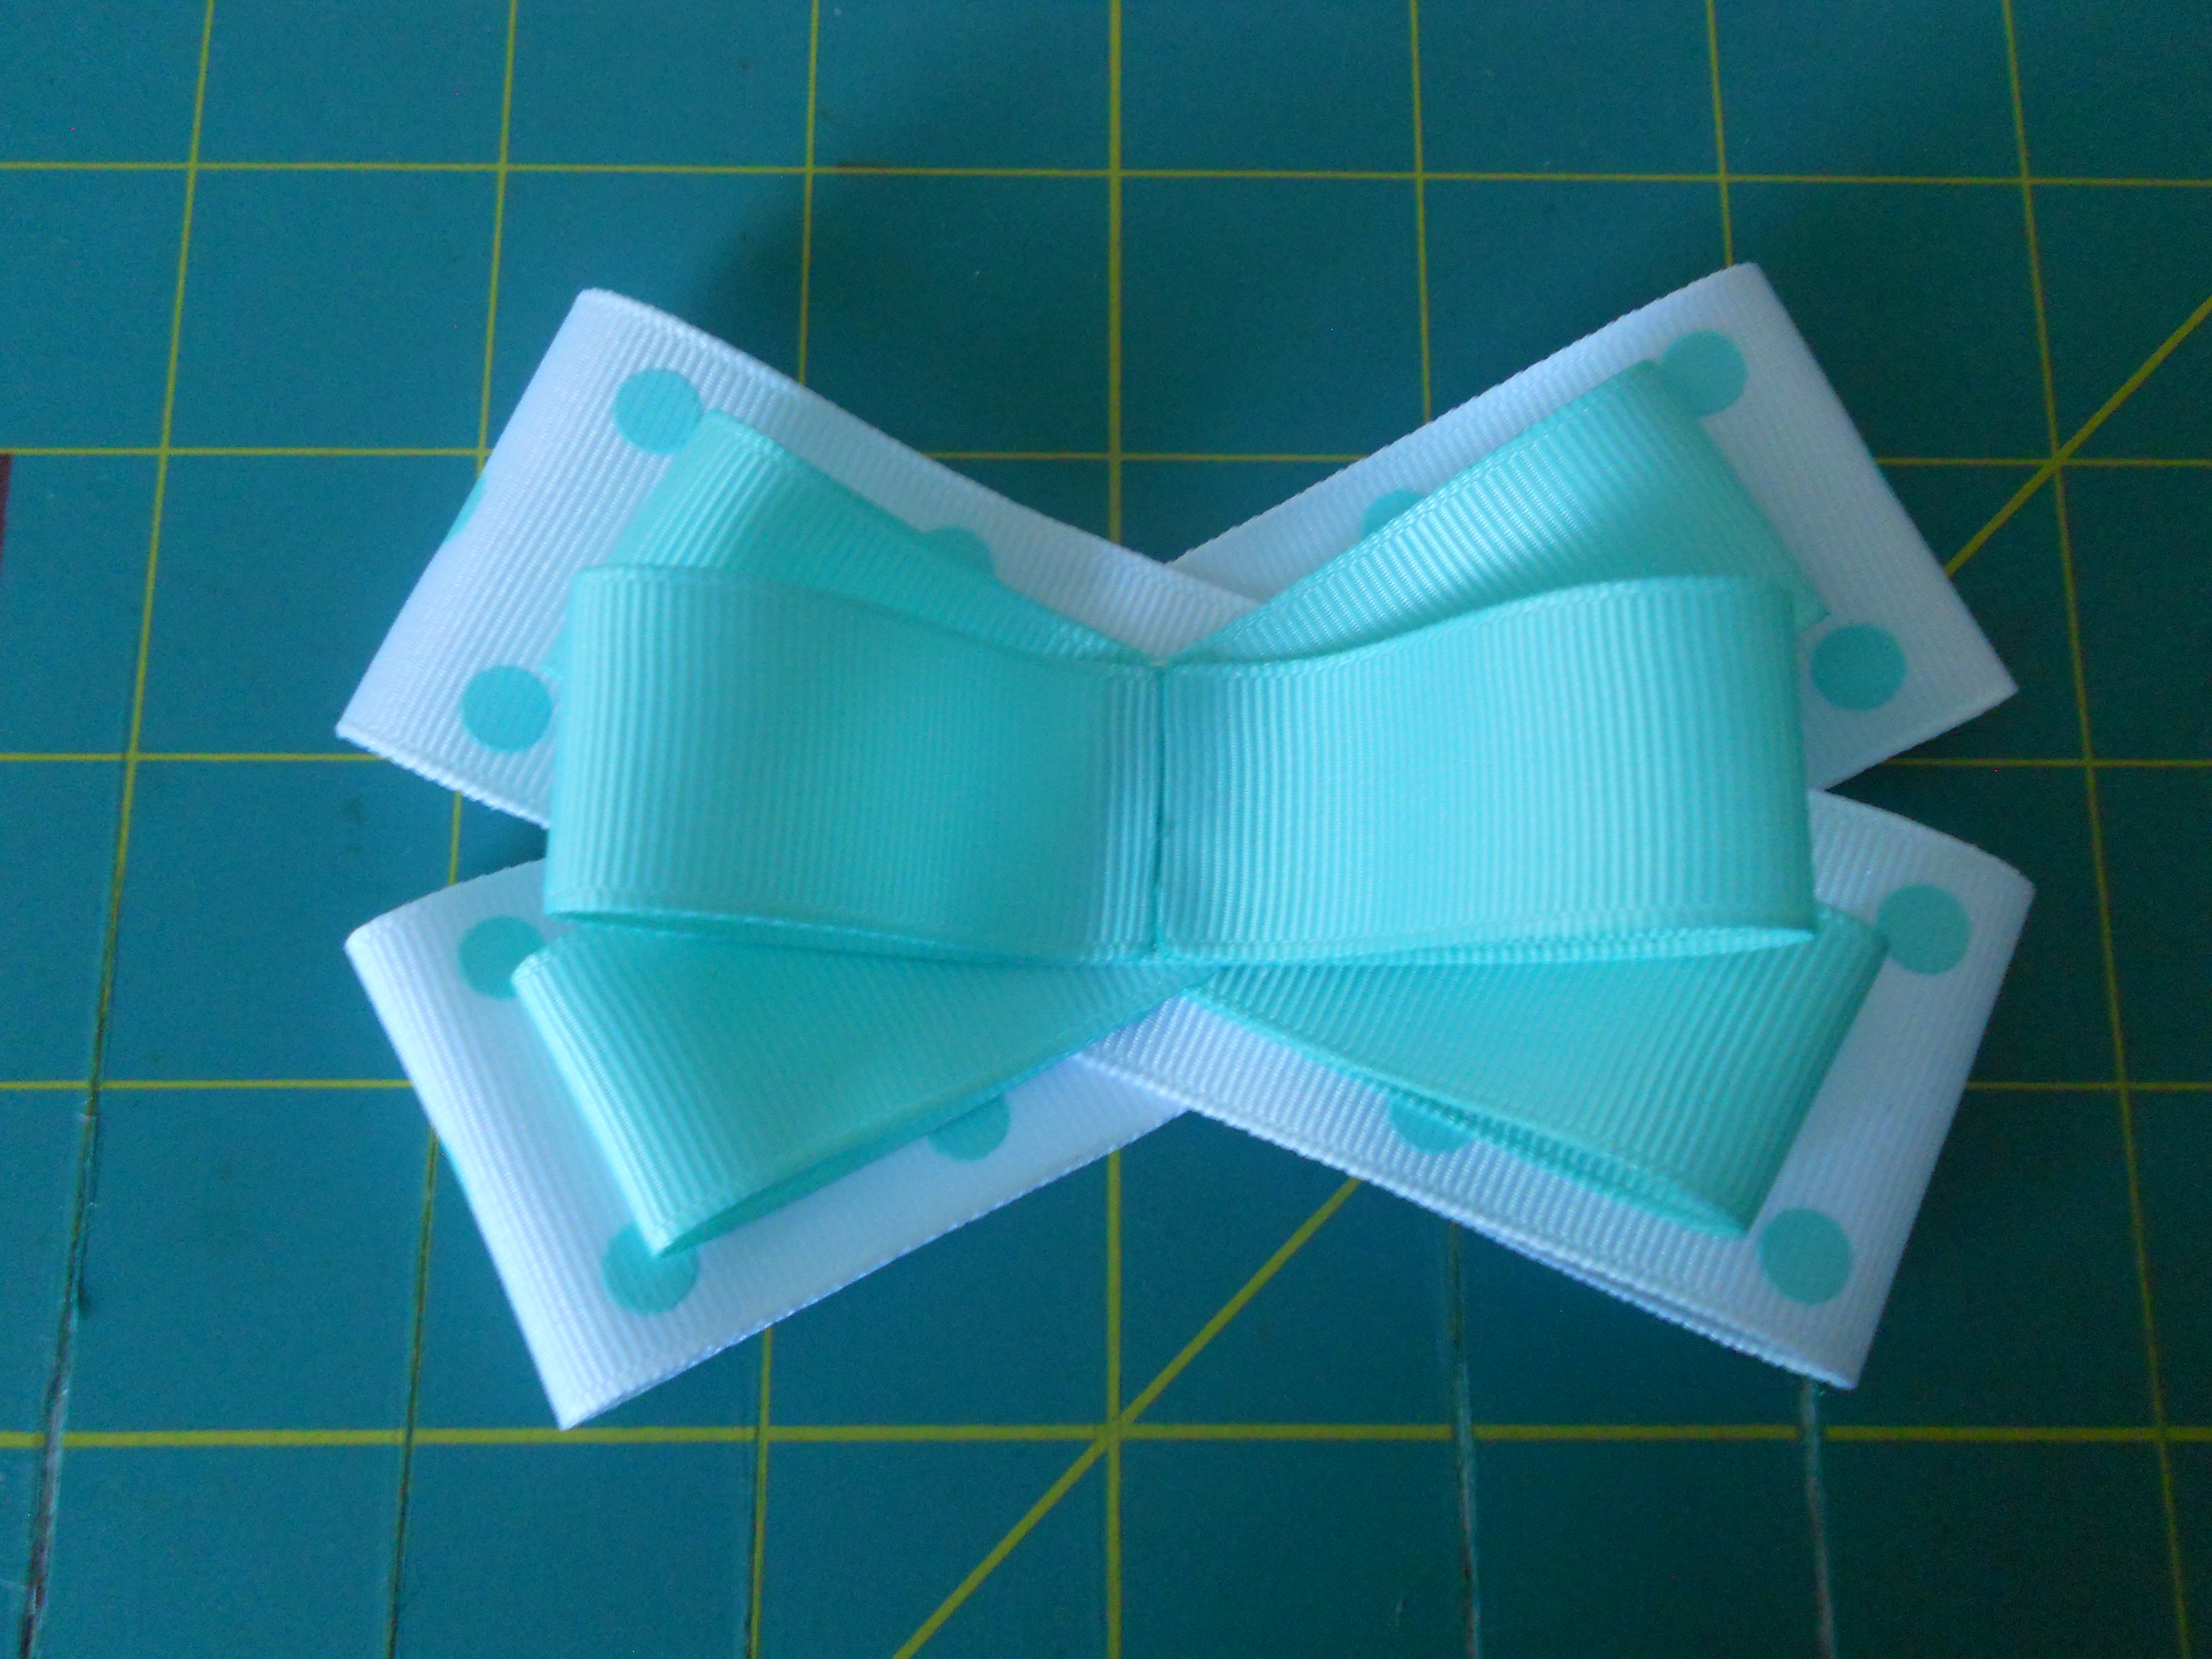
Step 7: Glue your 7/8" Loops to your 1.5" loops. Start by gluing two pieces in an "x" shape, then glue your last piece in the center.
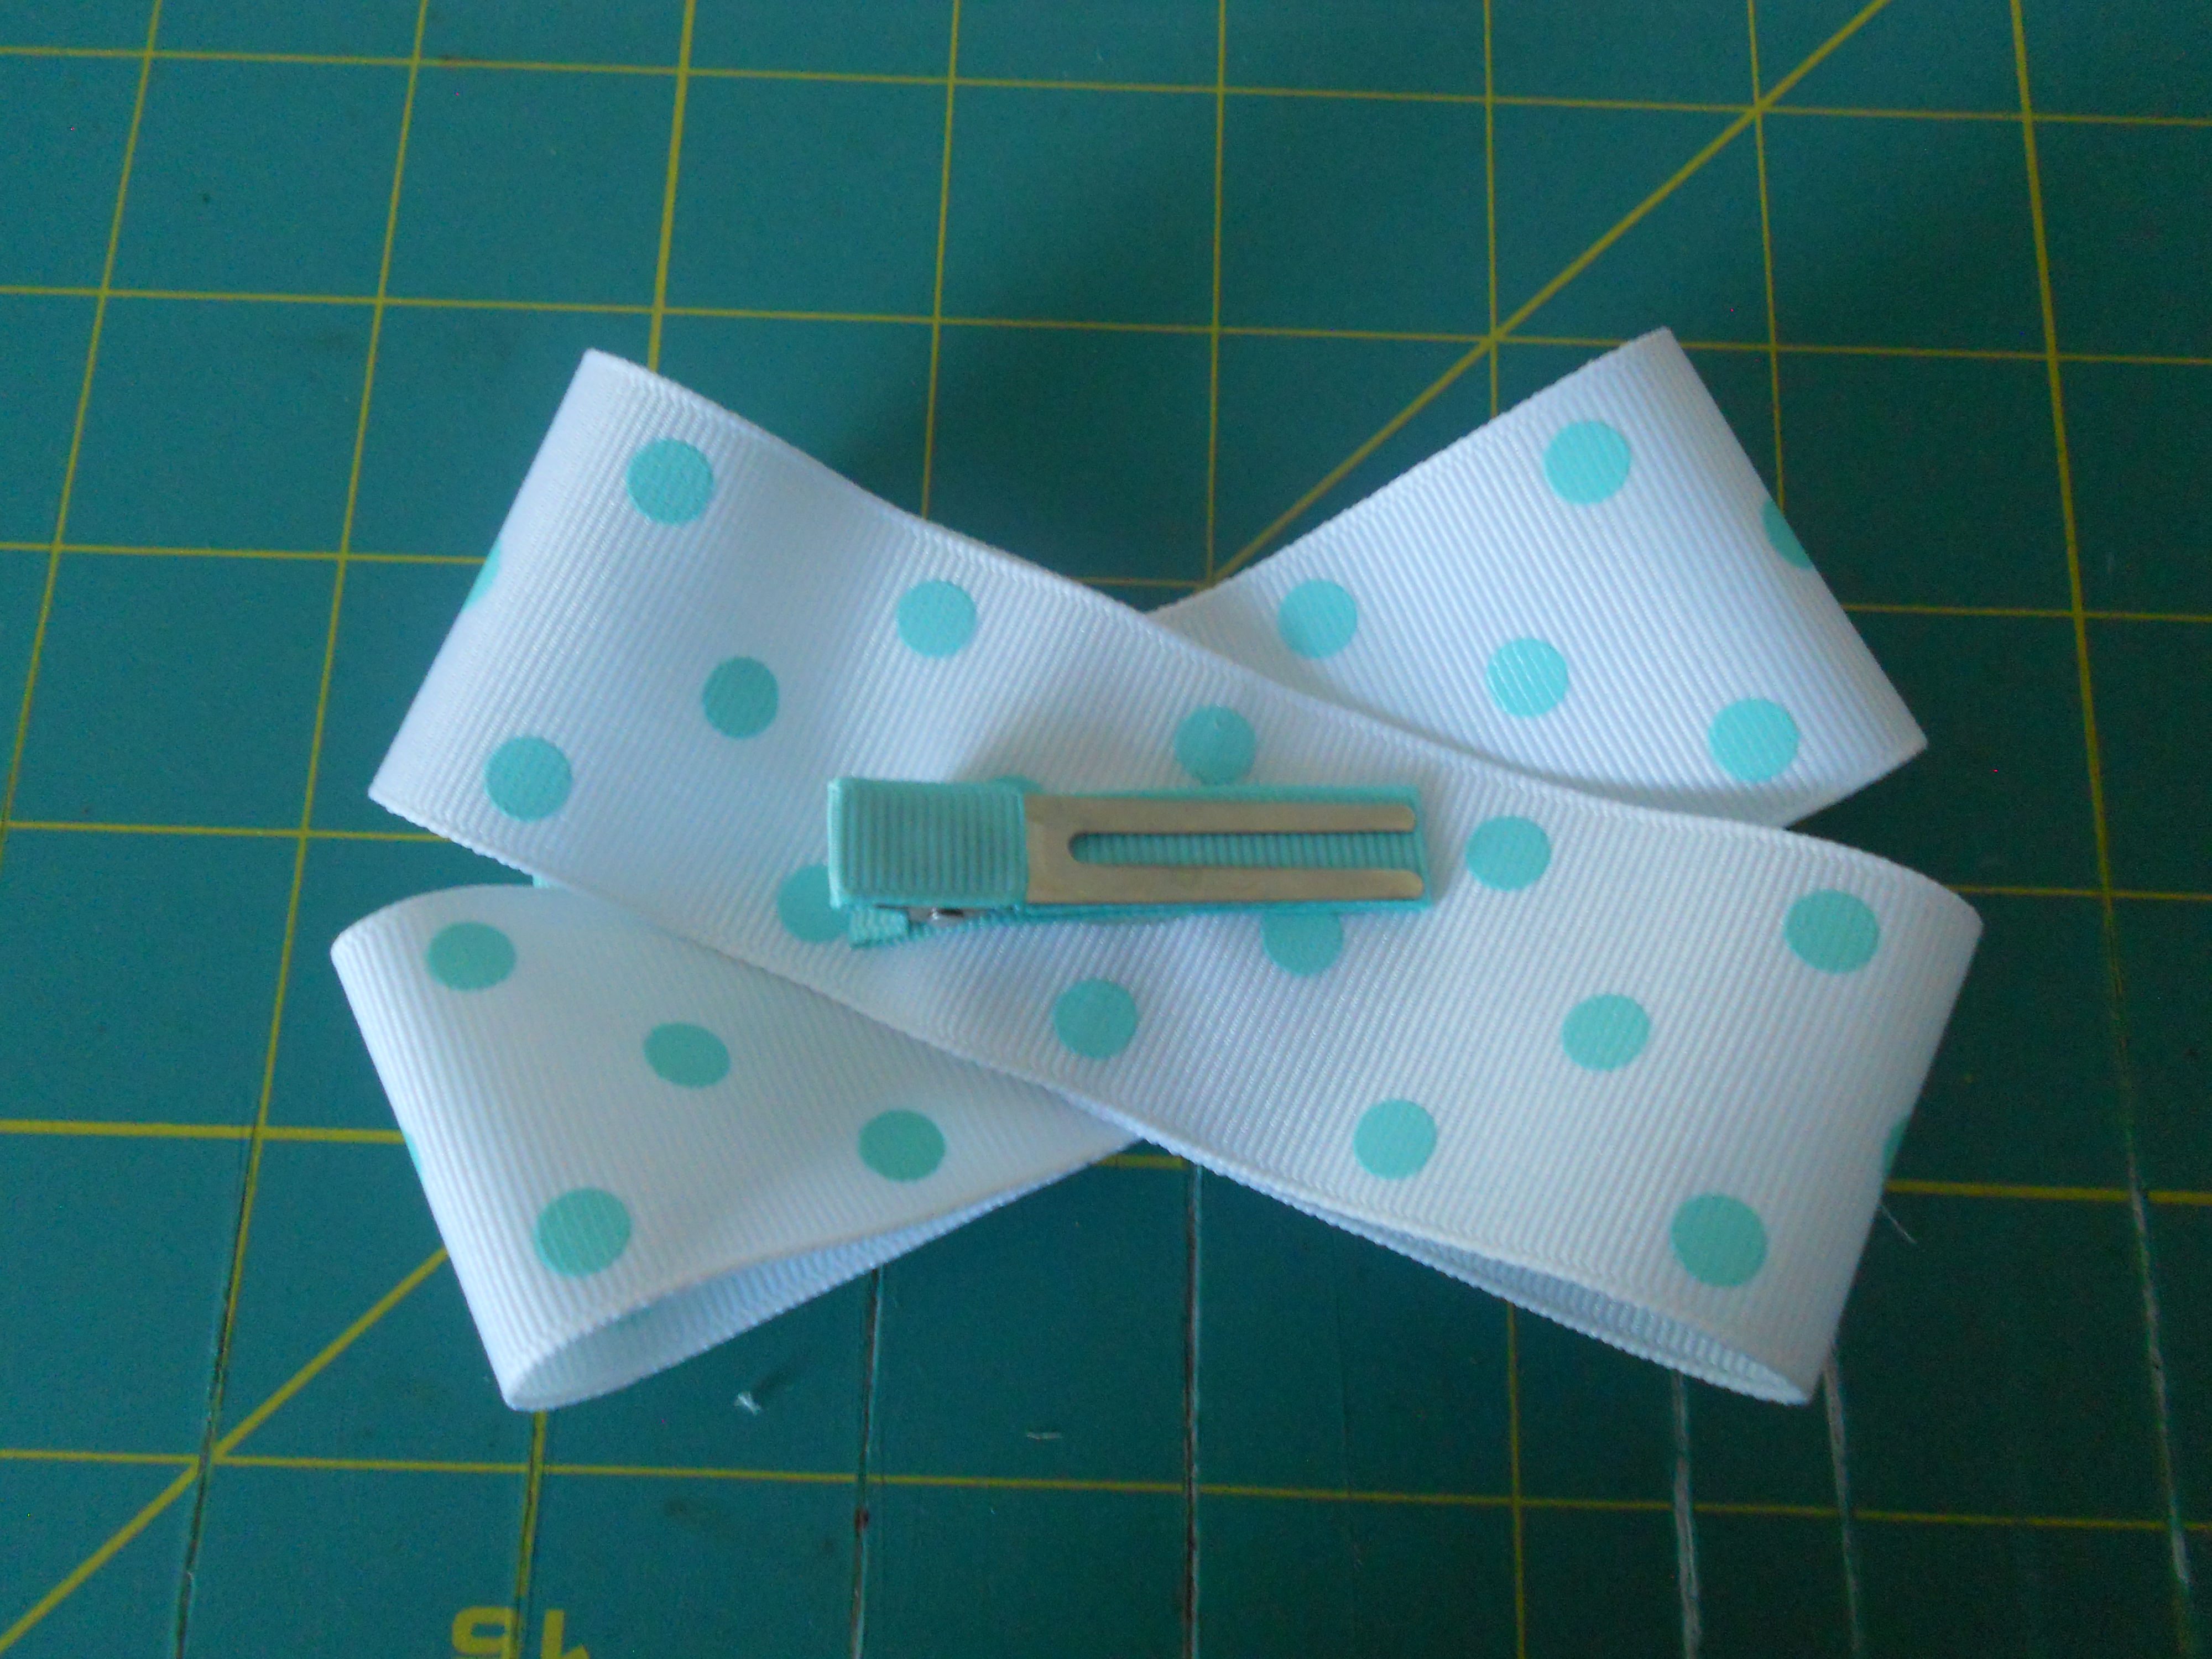
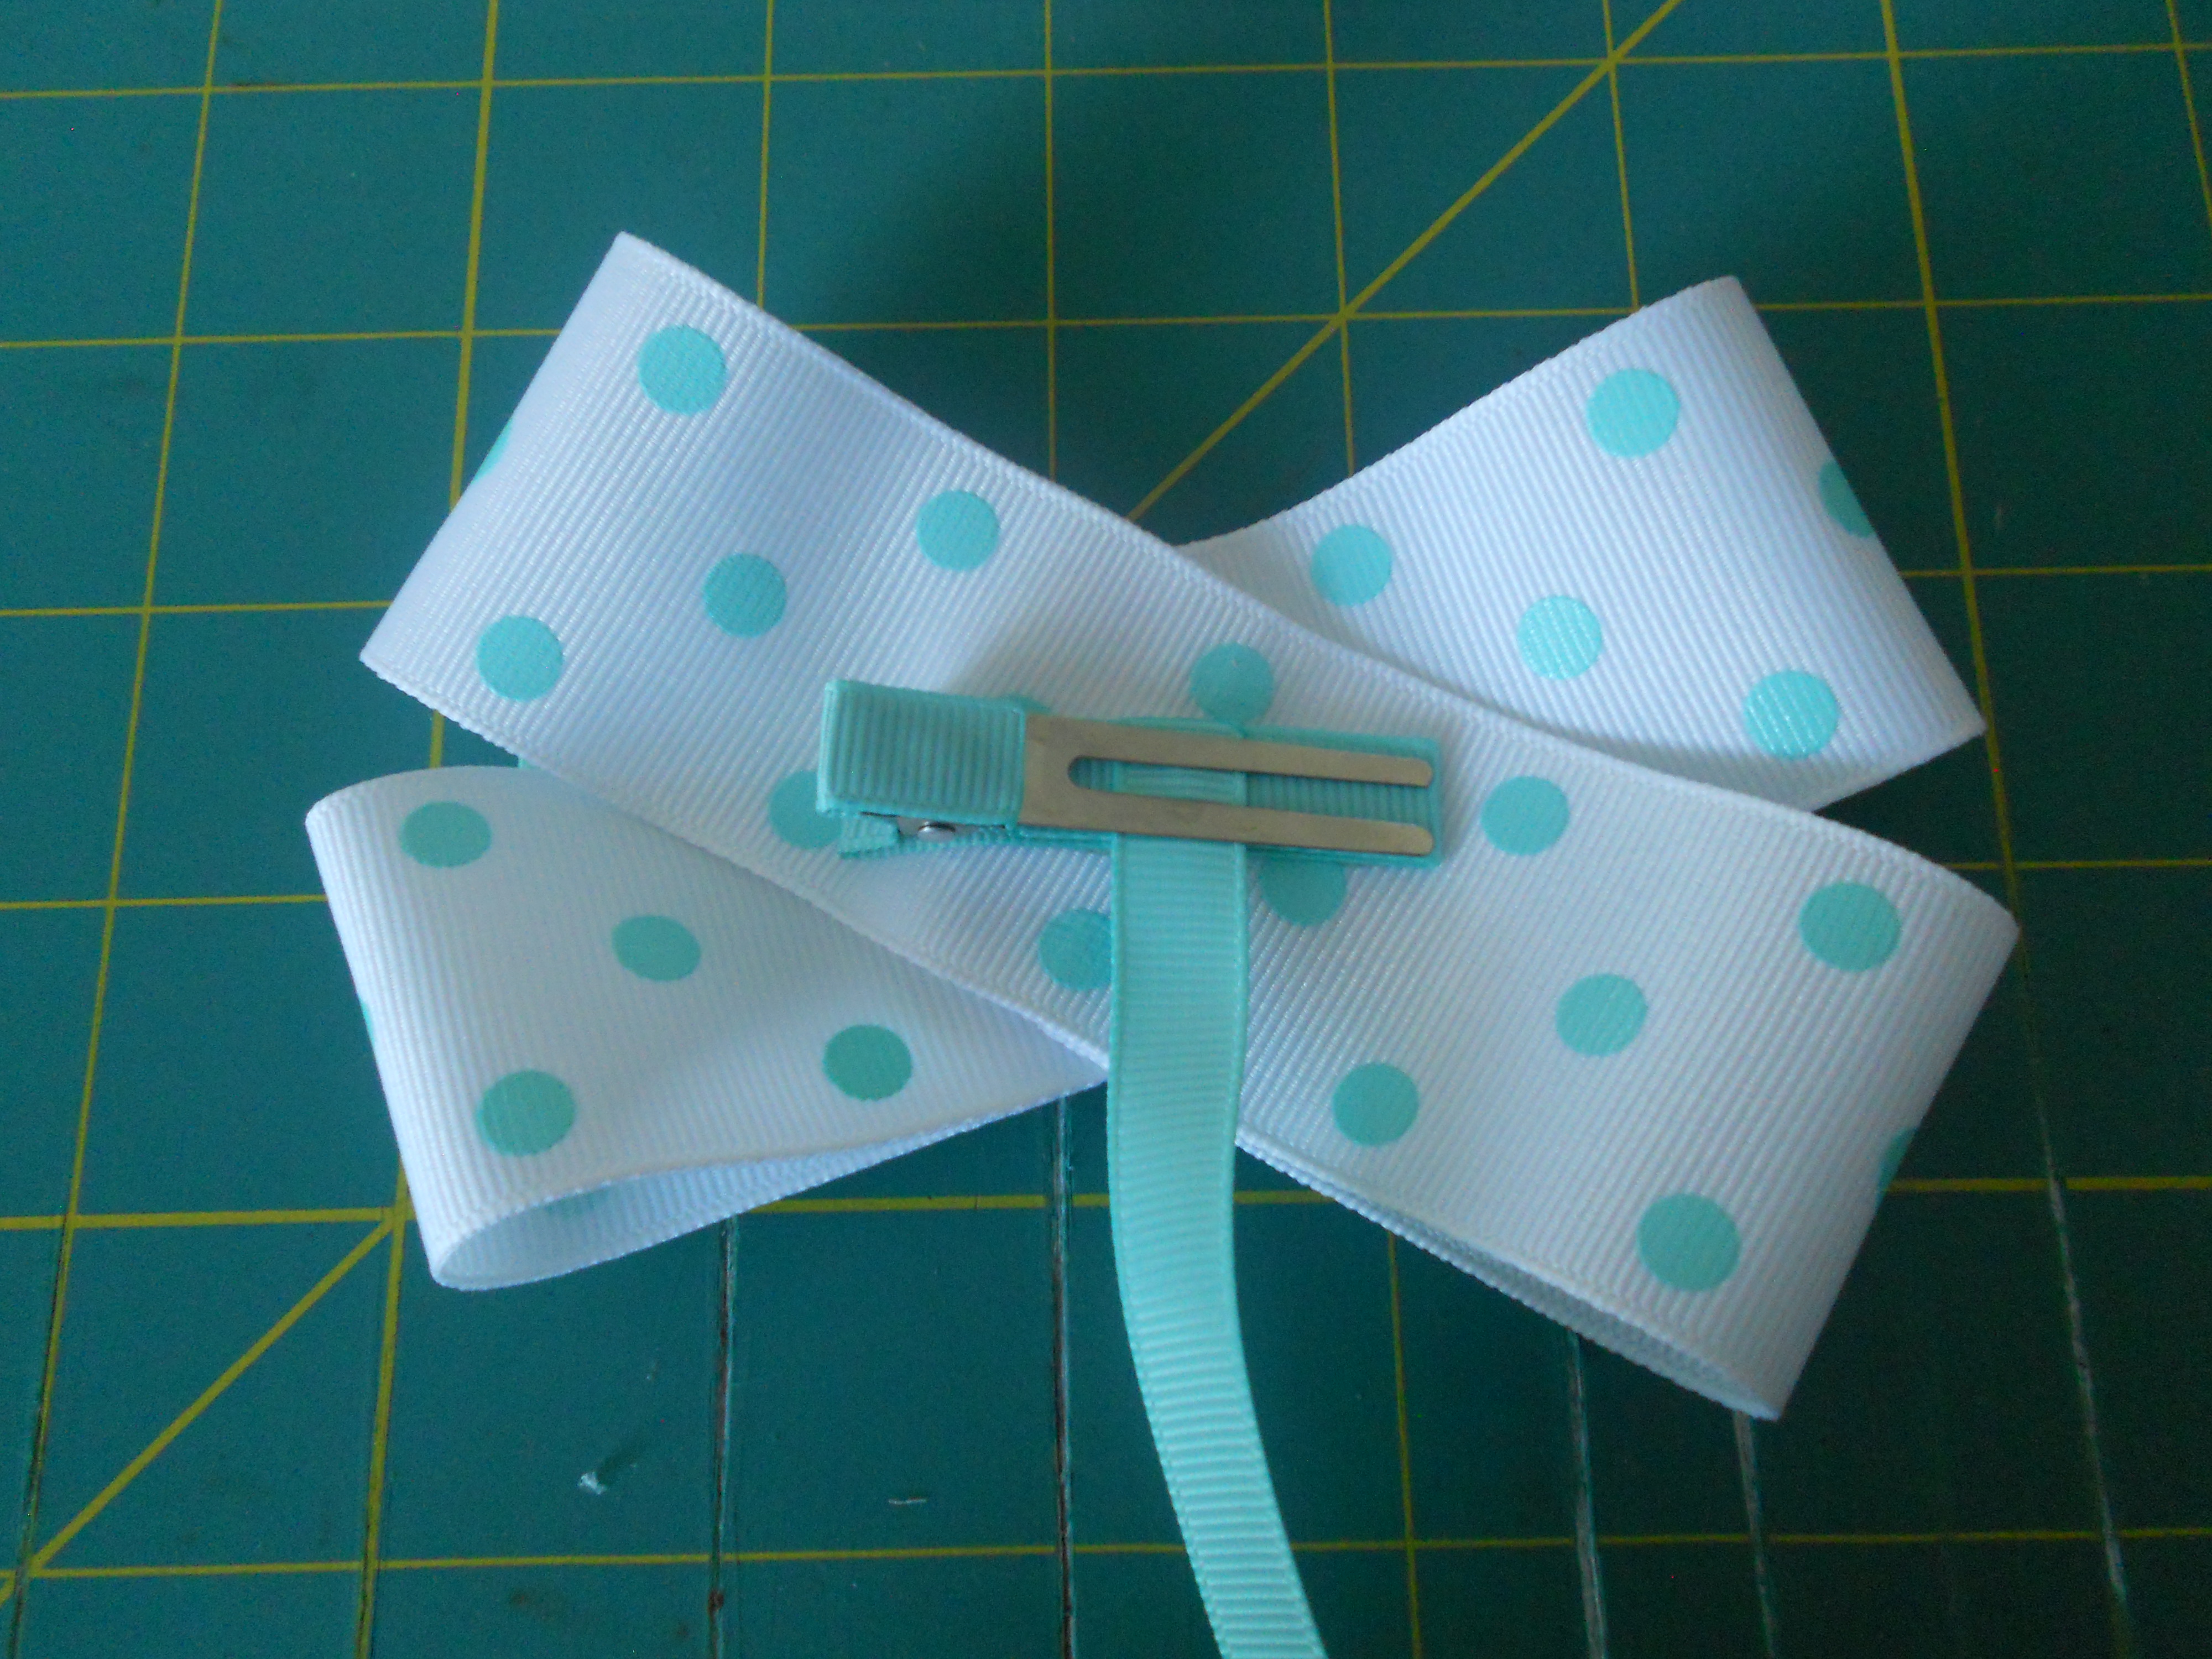
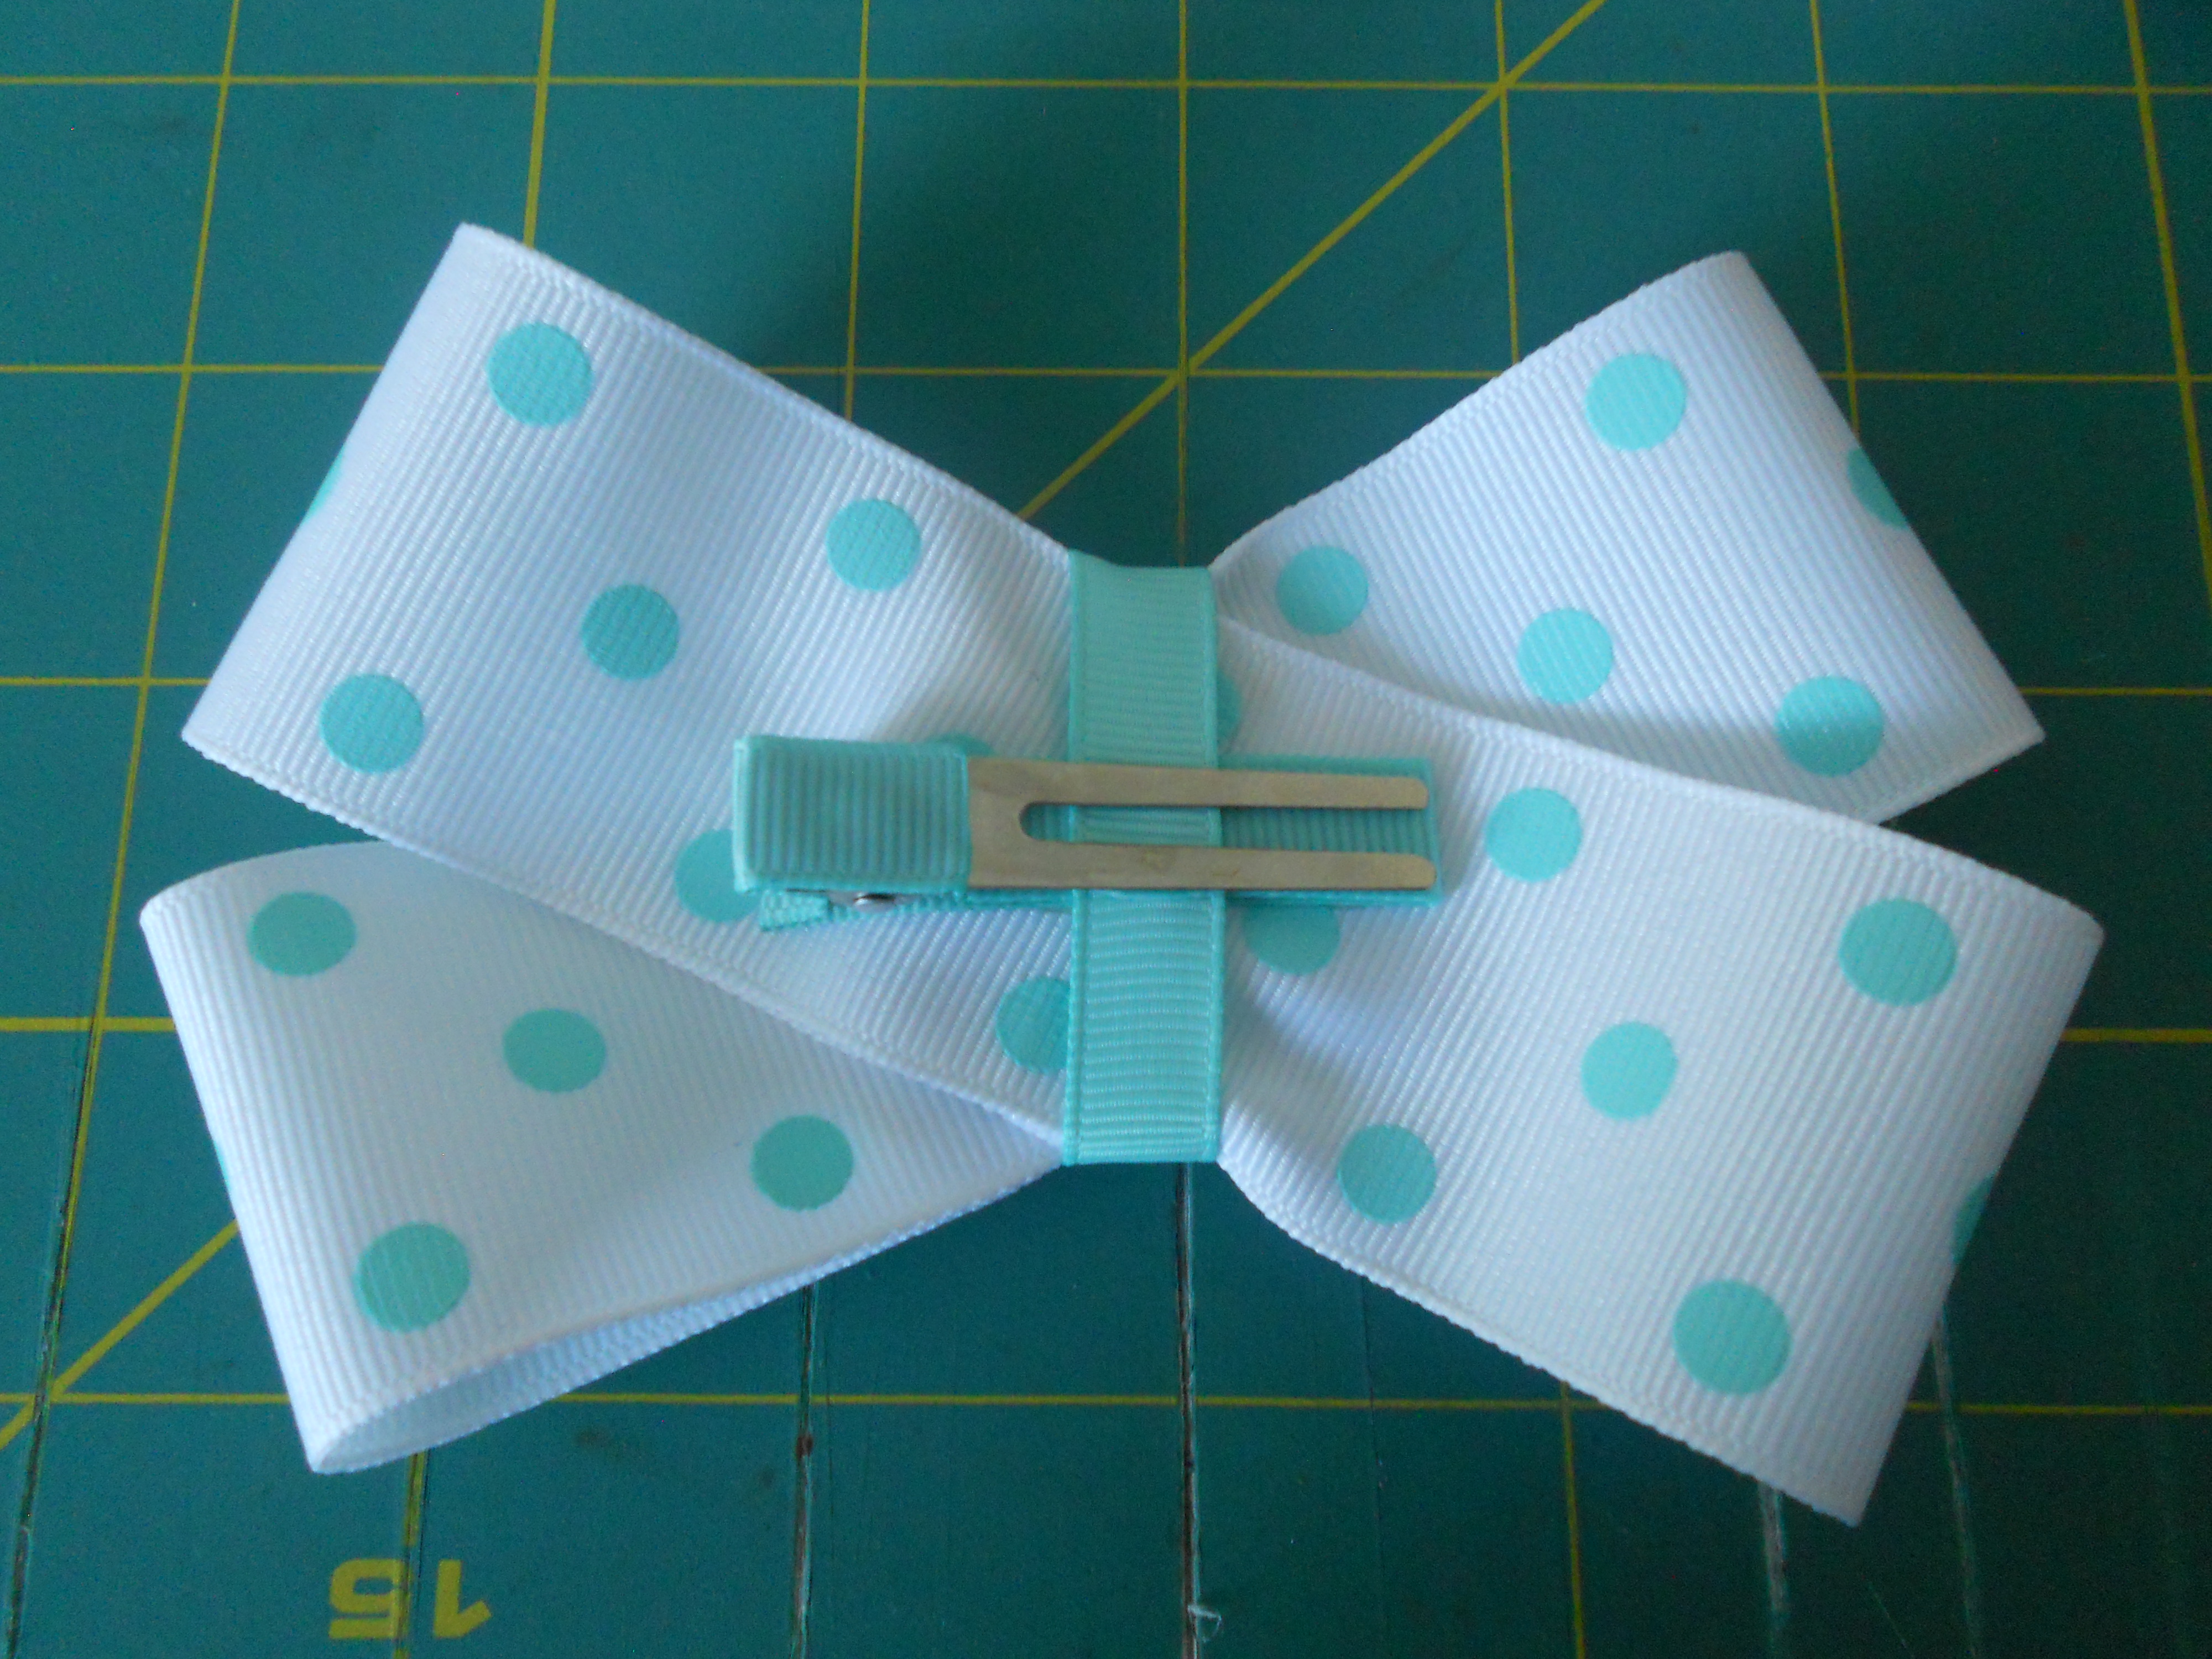
Step 8: Glue your lined clip to the back of your bow. Using matching 3/8" ribbon wrap the center. Start by gluing one end onto the clip, wrap it all the way around the bow and glue the other end to the clip. Remember to heat seal your ends.


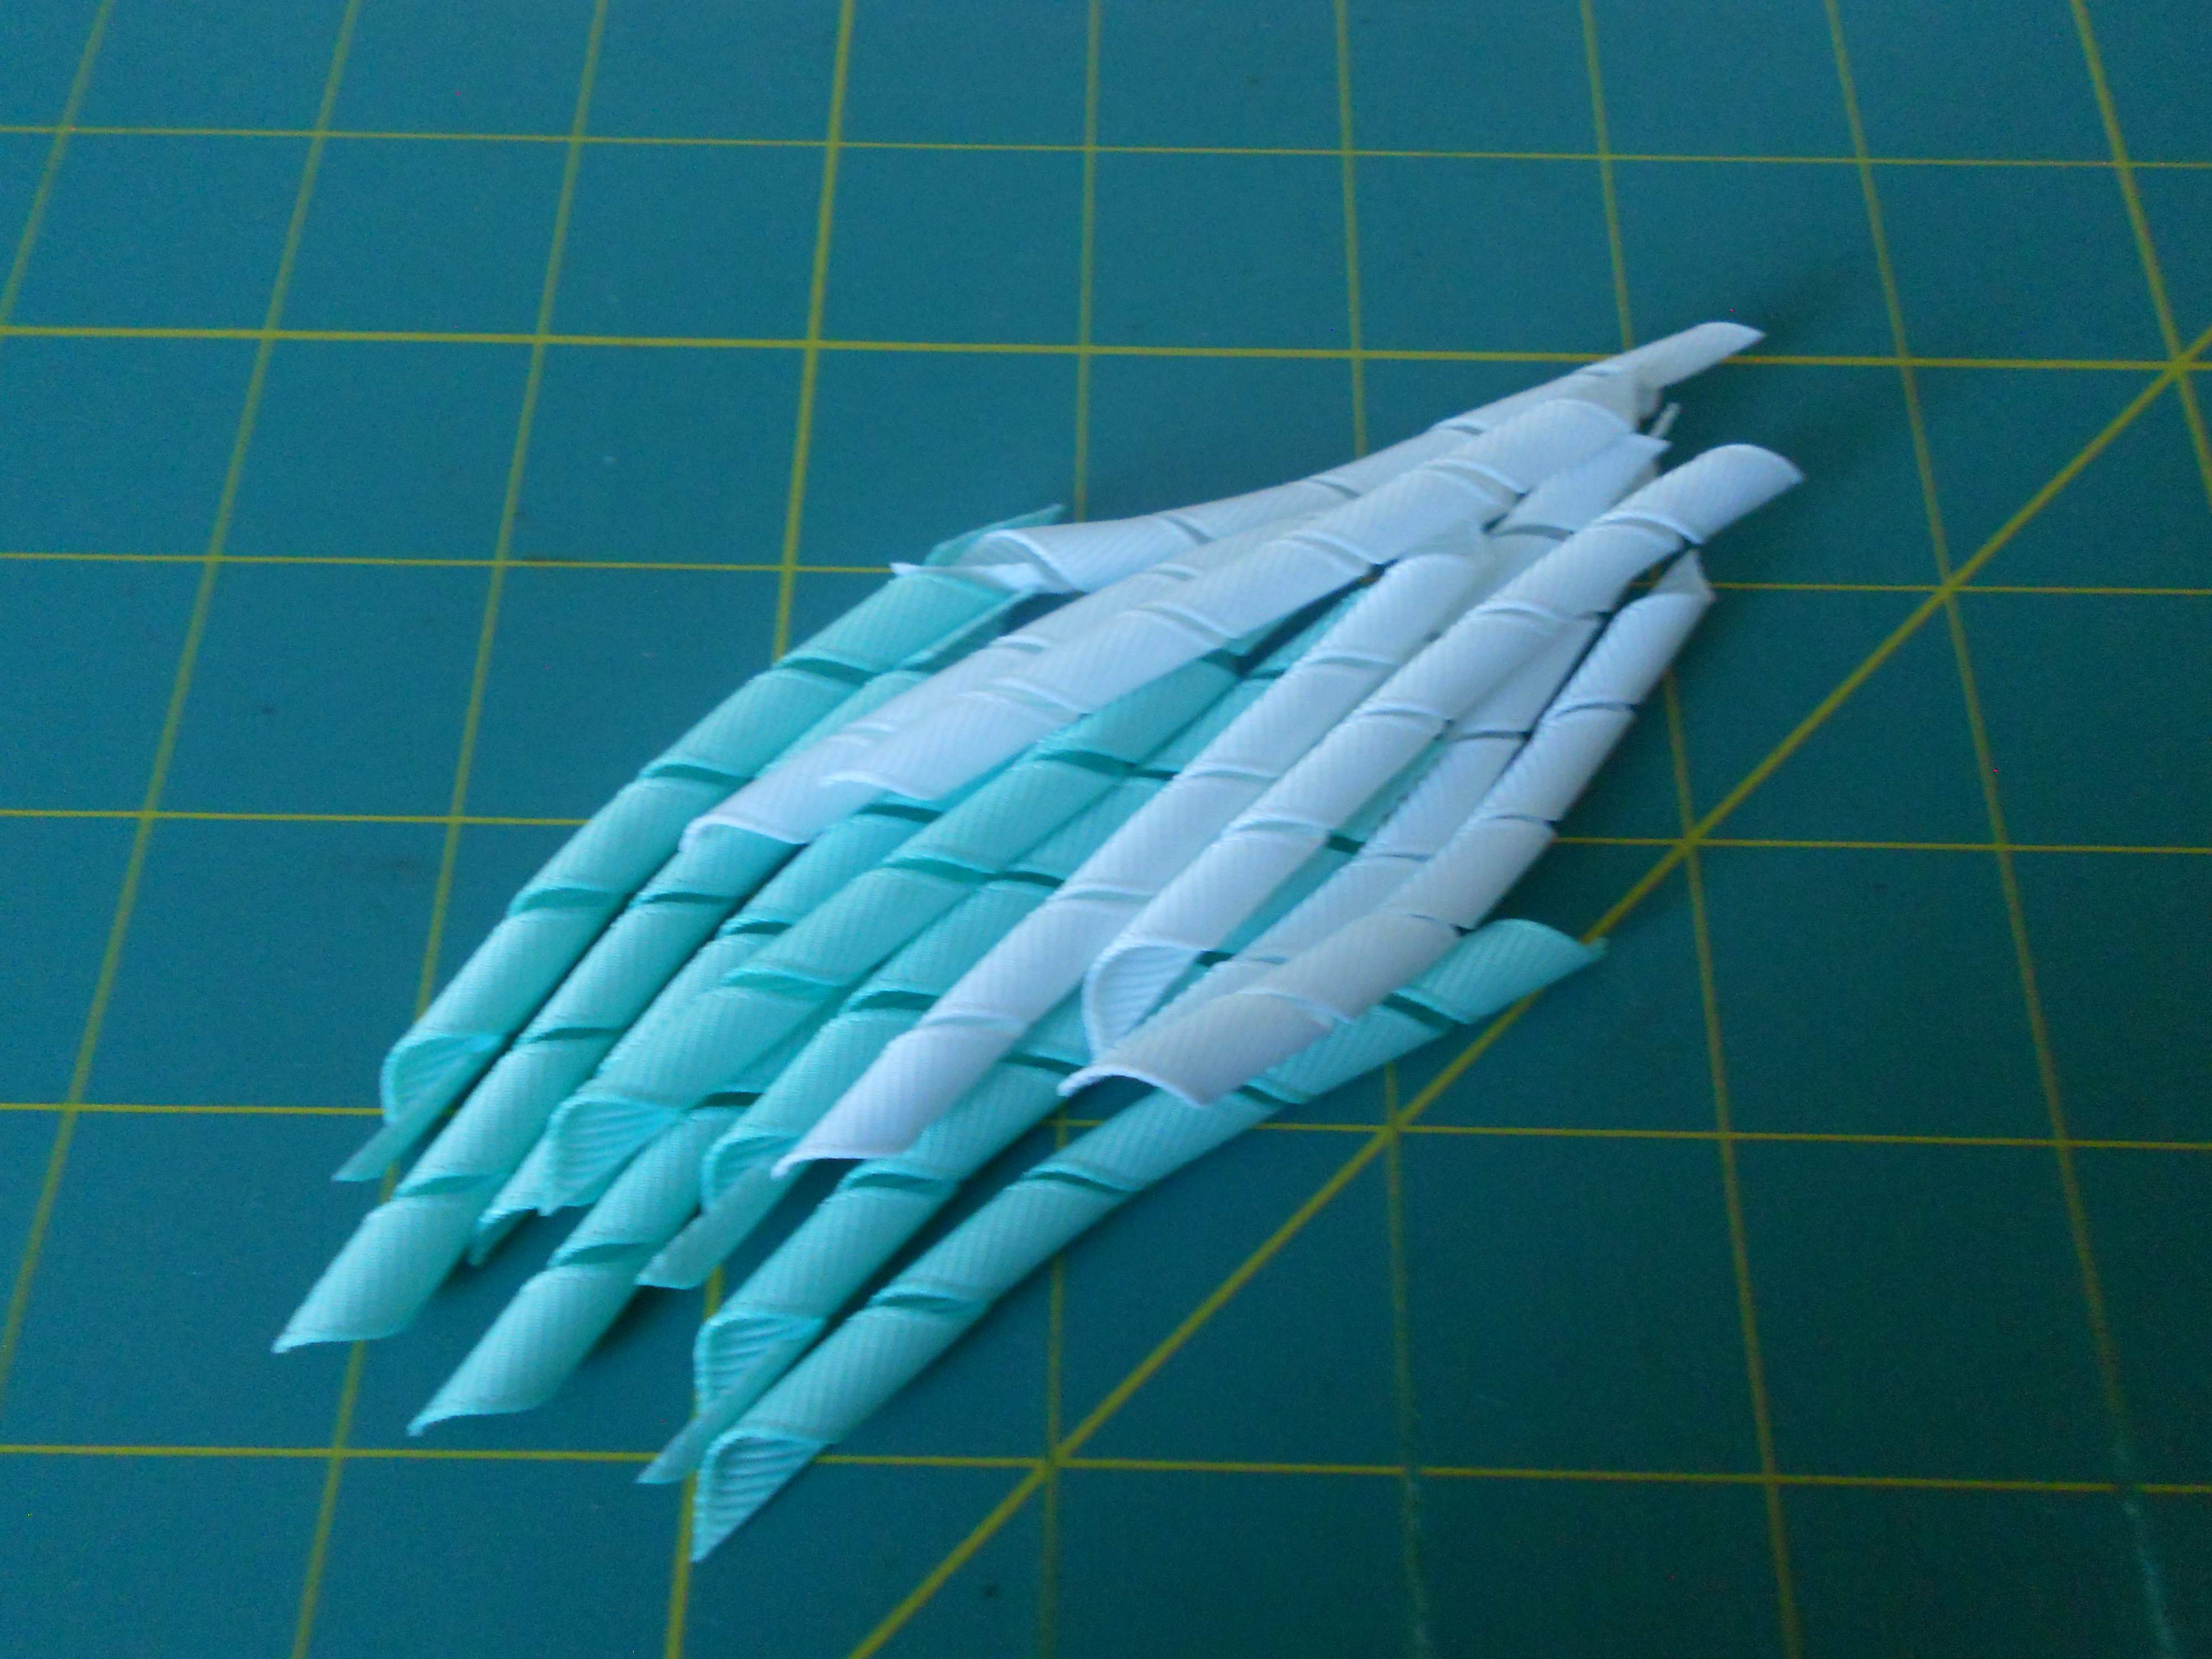
Step 9: Make your korker bow. Start by cutting all of your ribbon ends. I cut mine all at the same angle for a uniform look. Cut each 12" piece in half and then in half again. You should now have 16 3" pieces. Heat seal all of your ends.
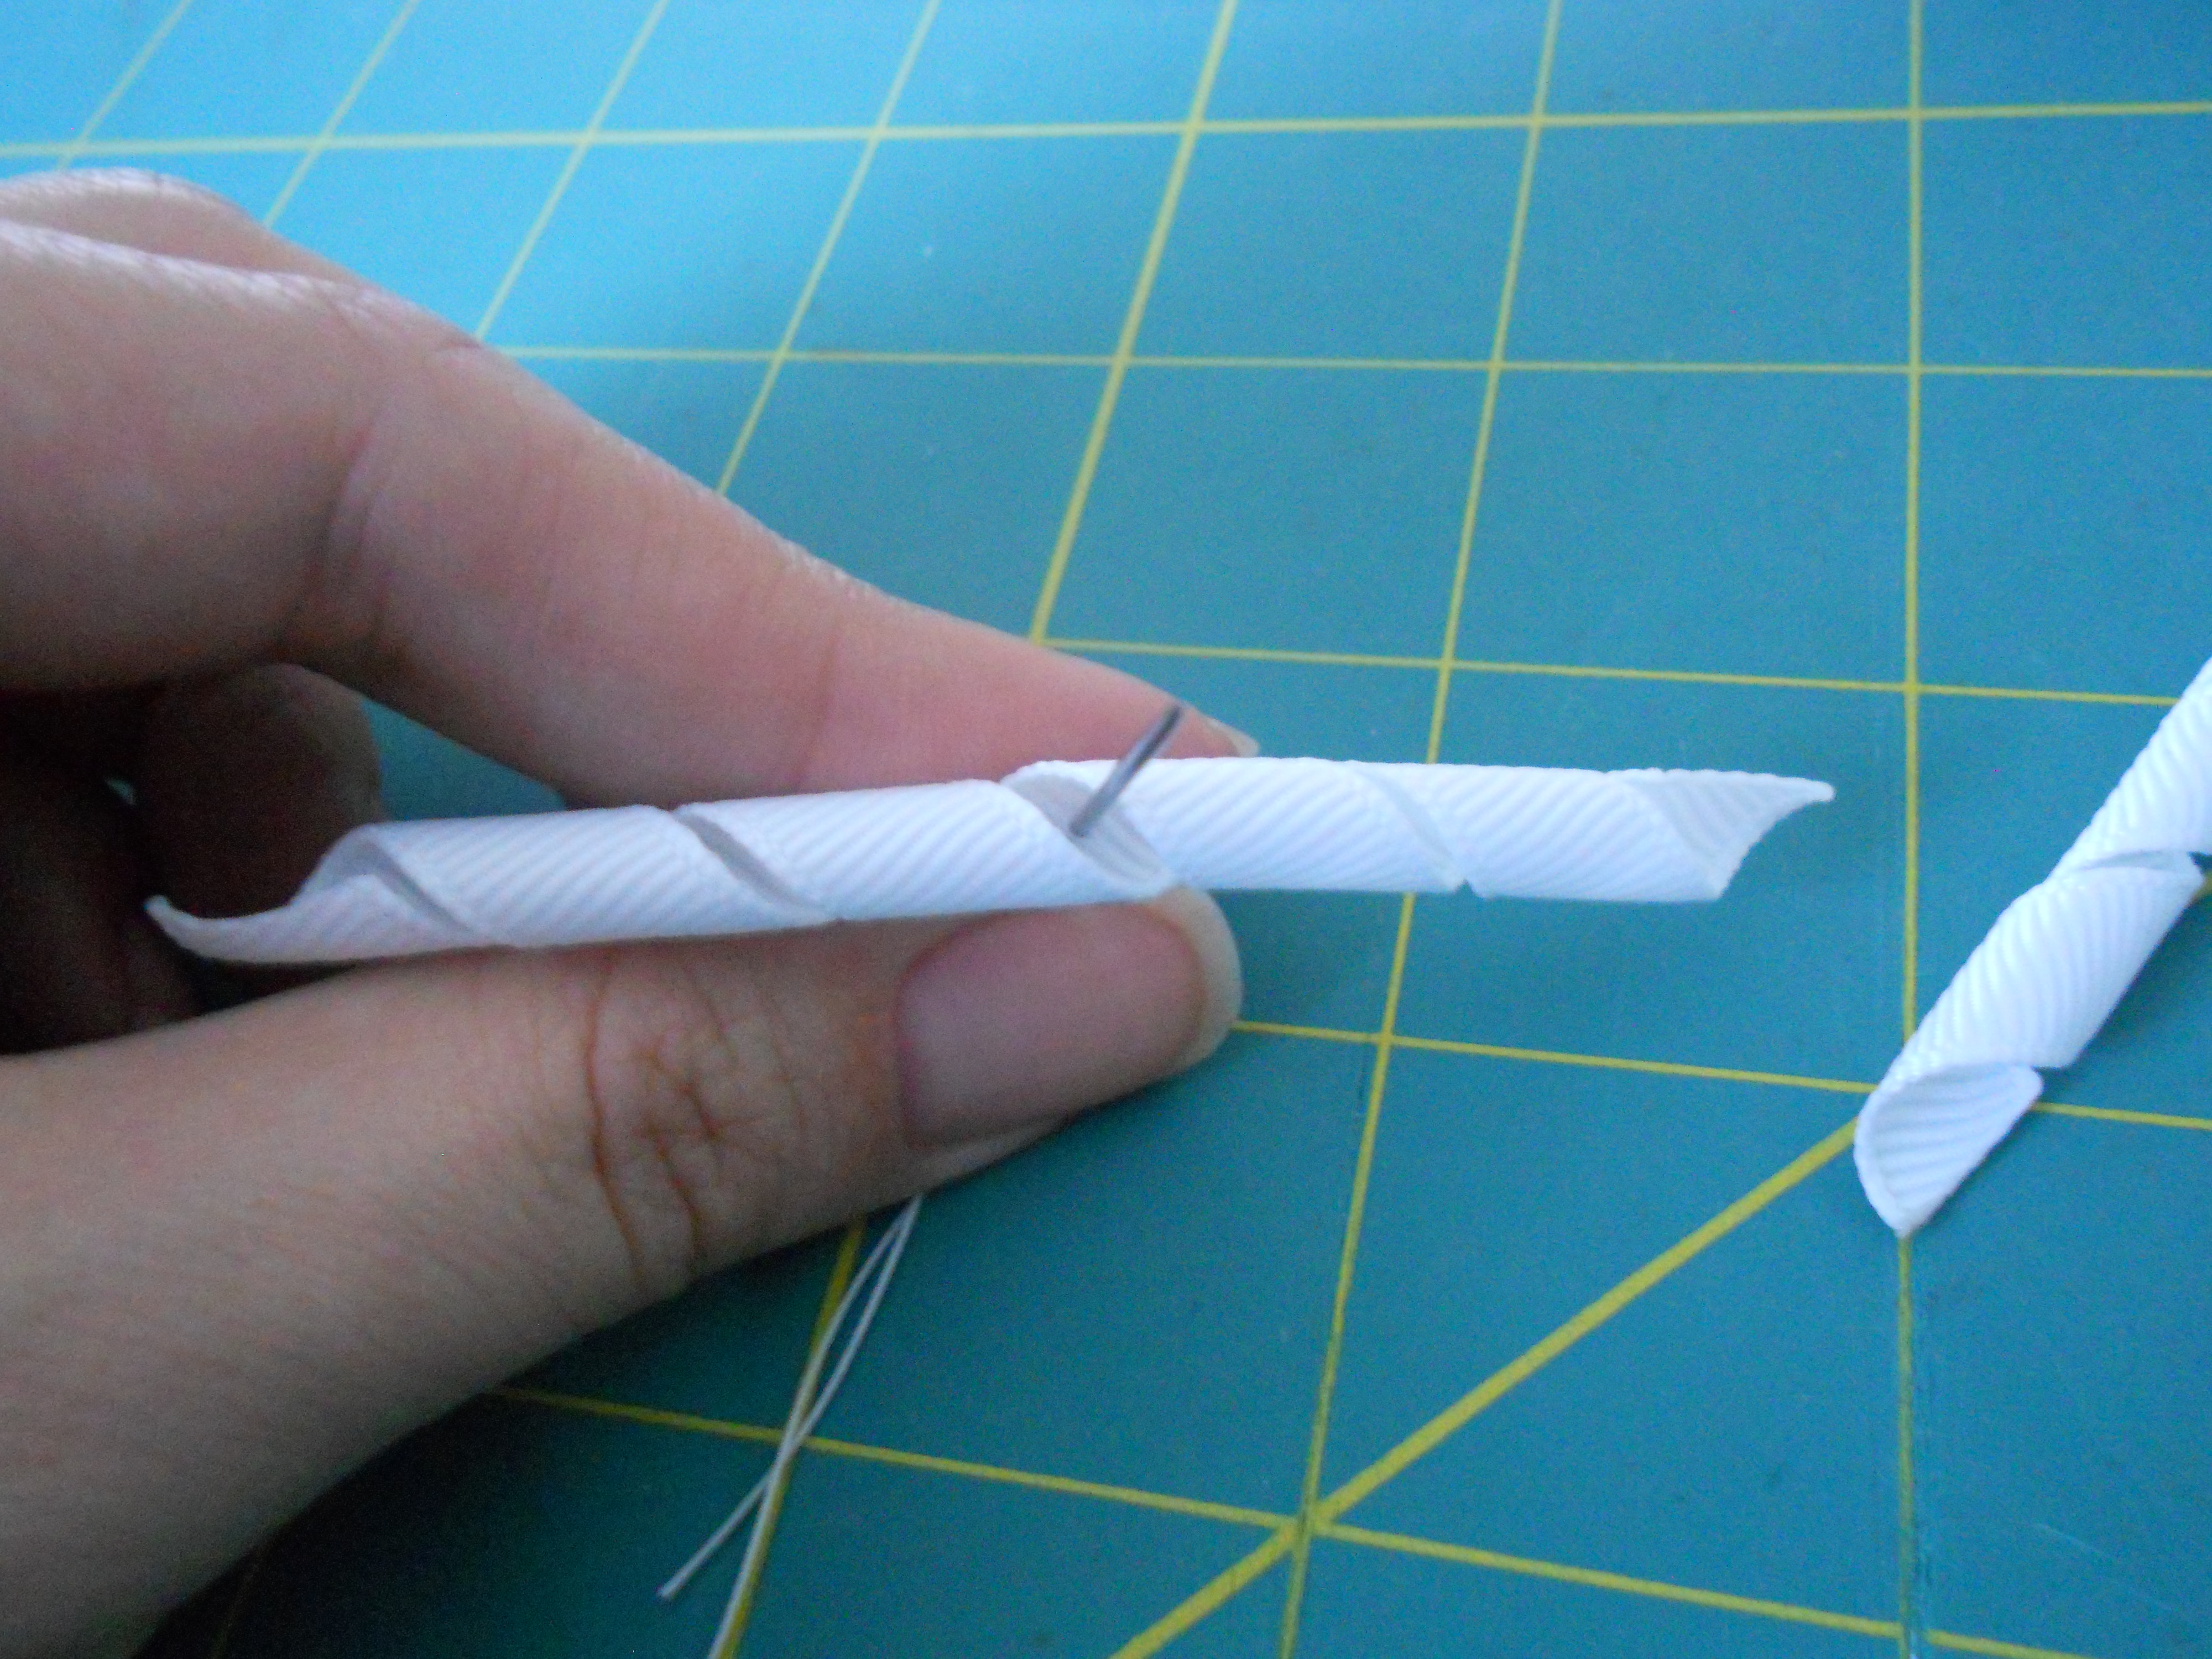
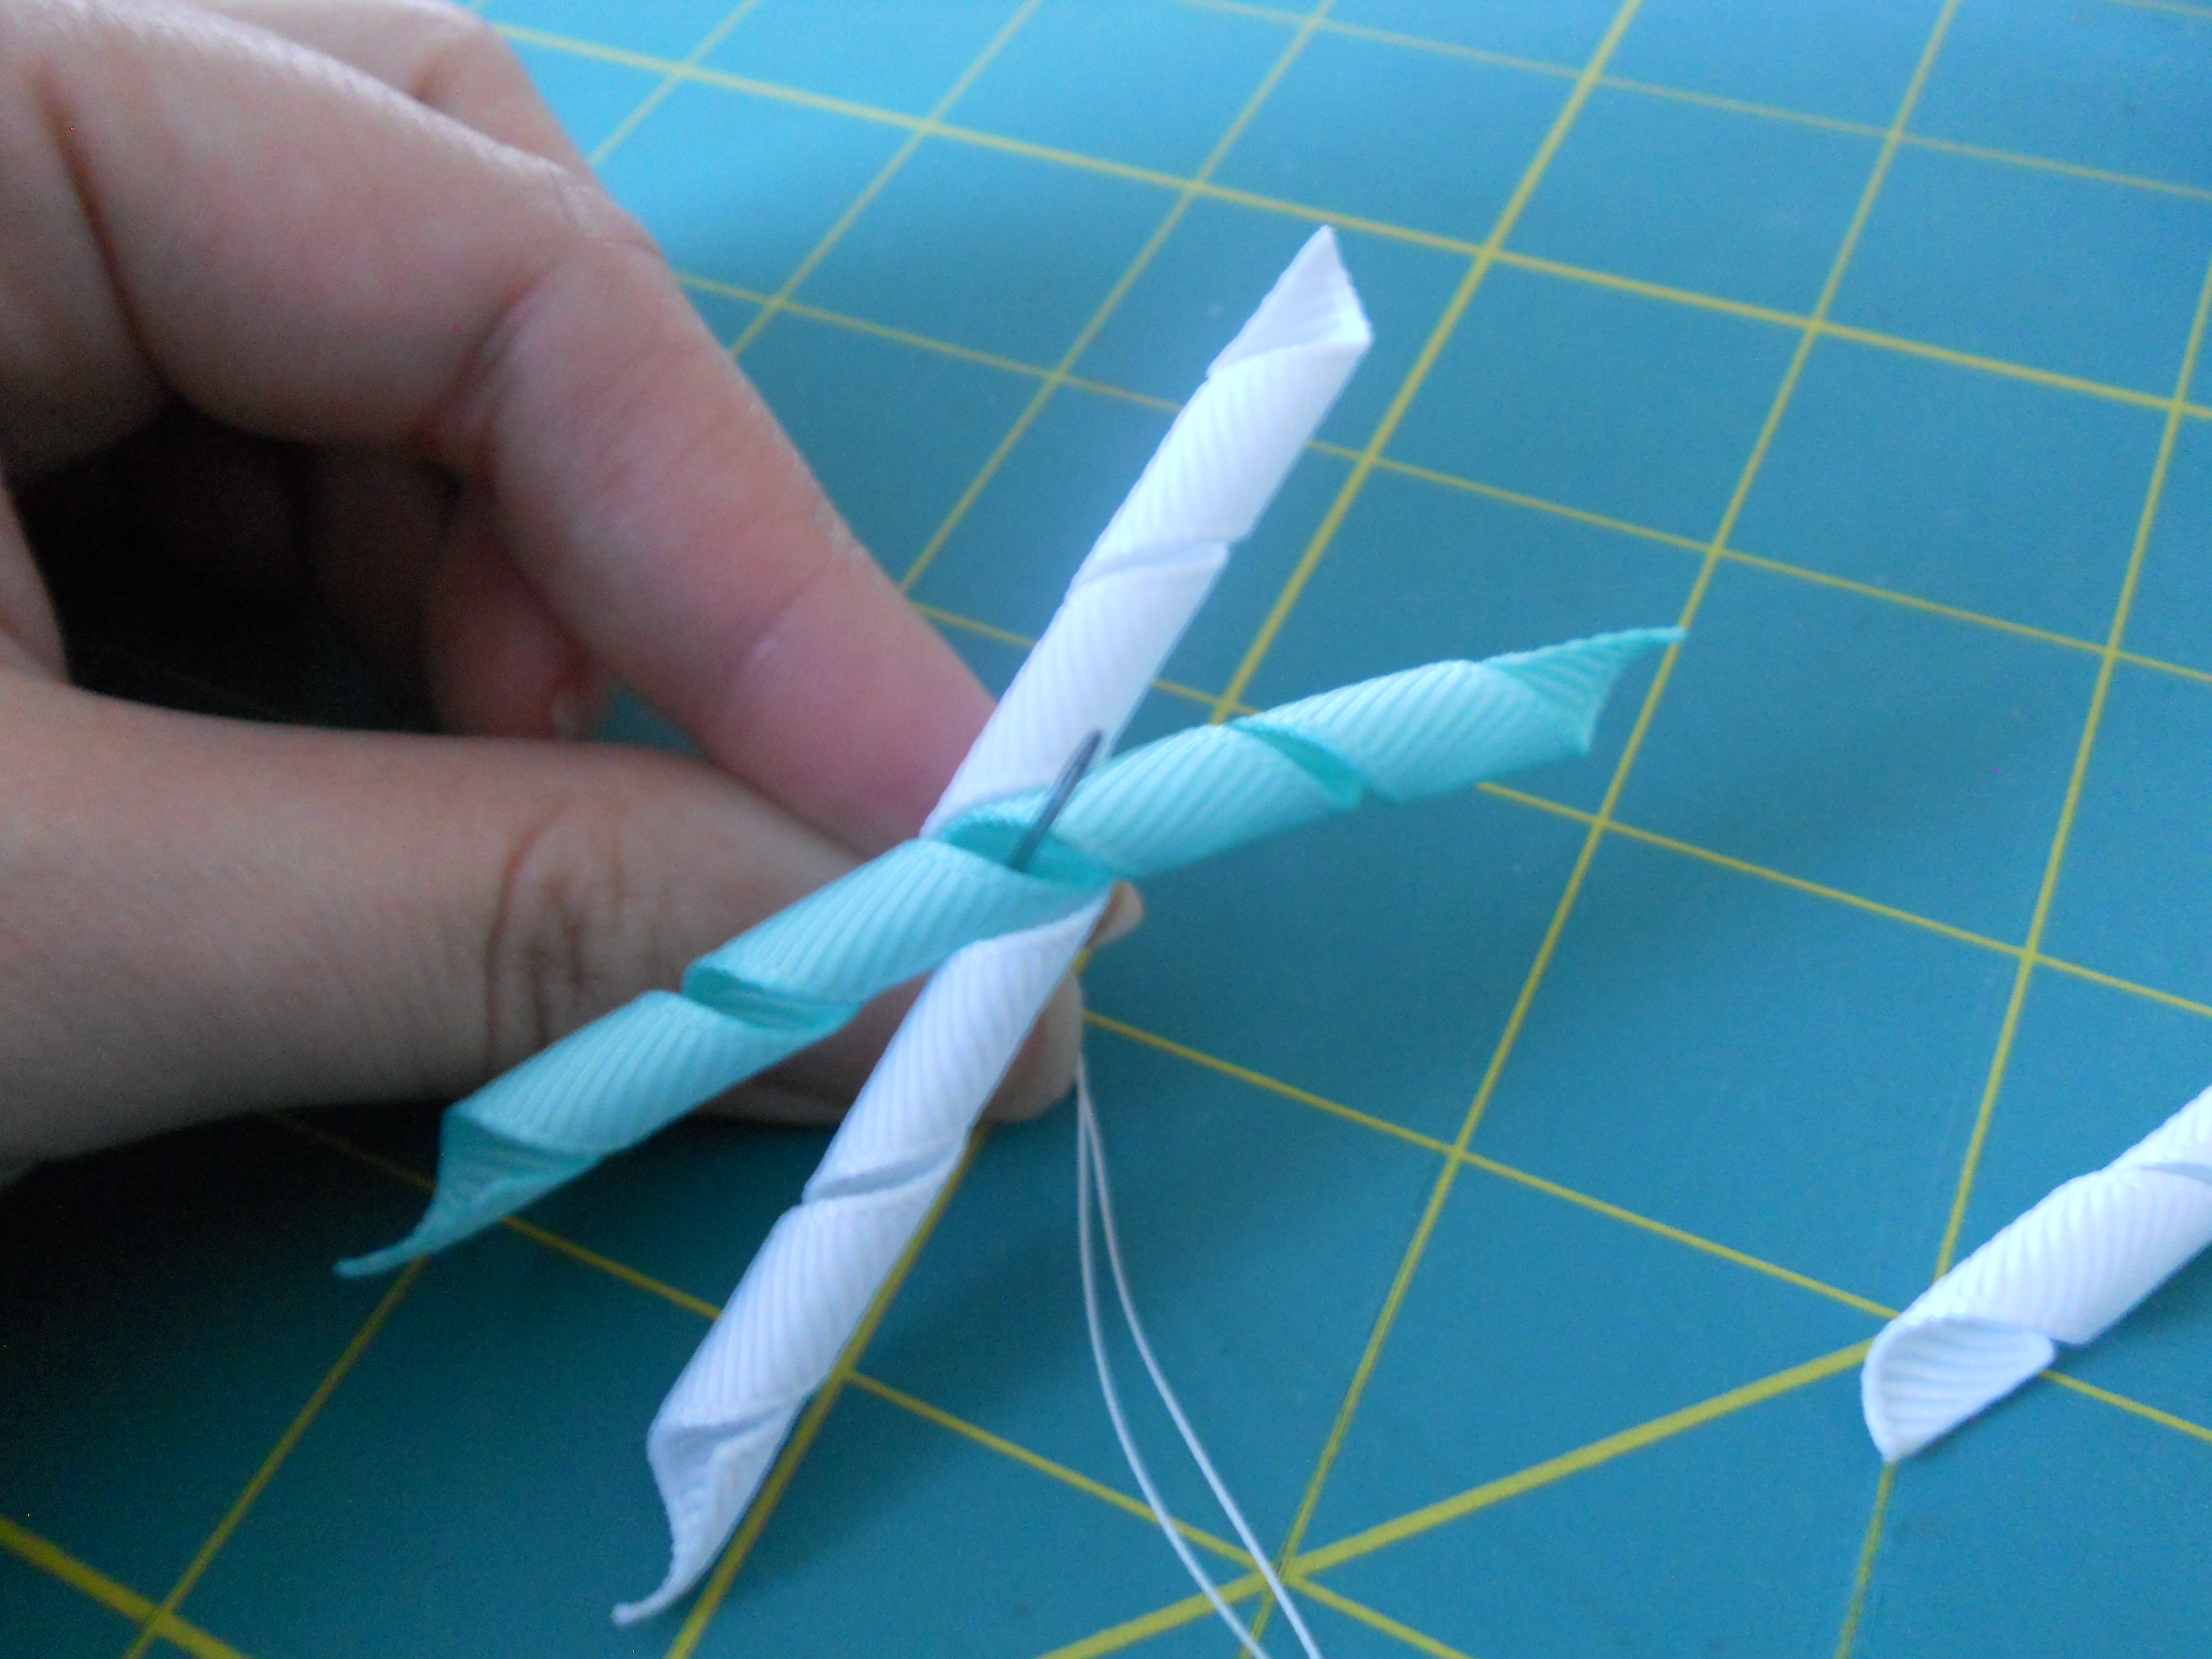
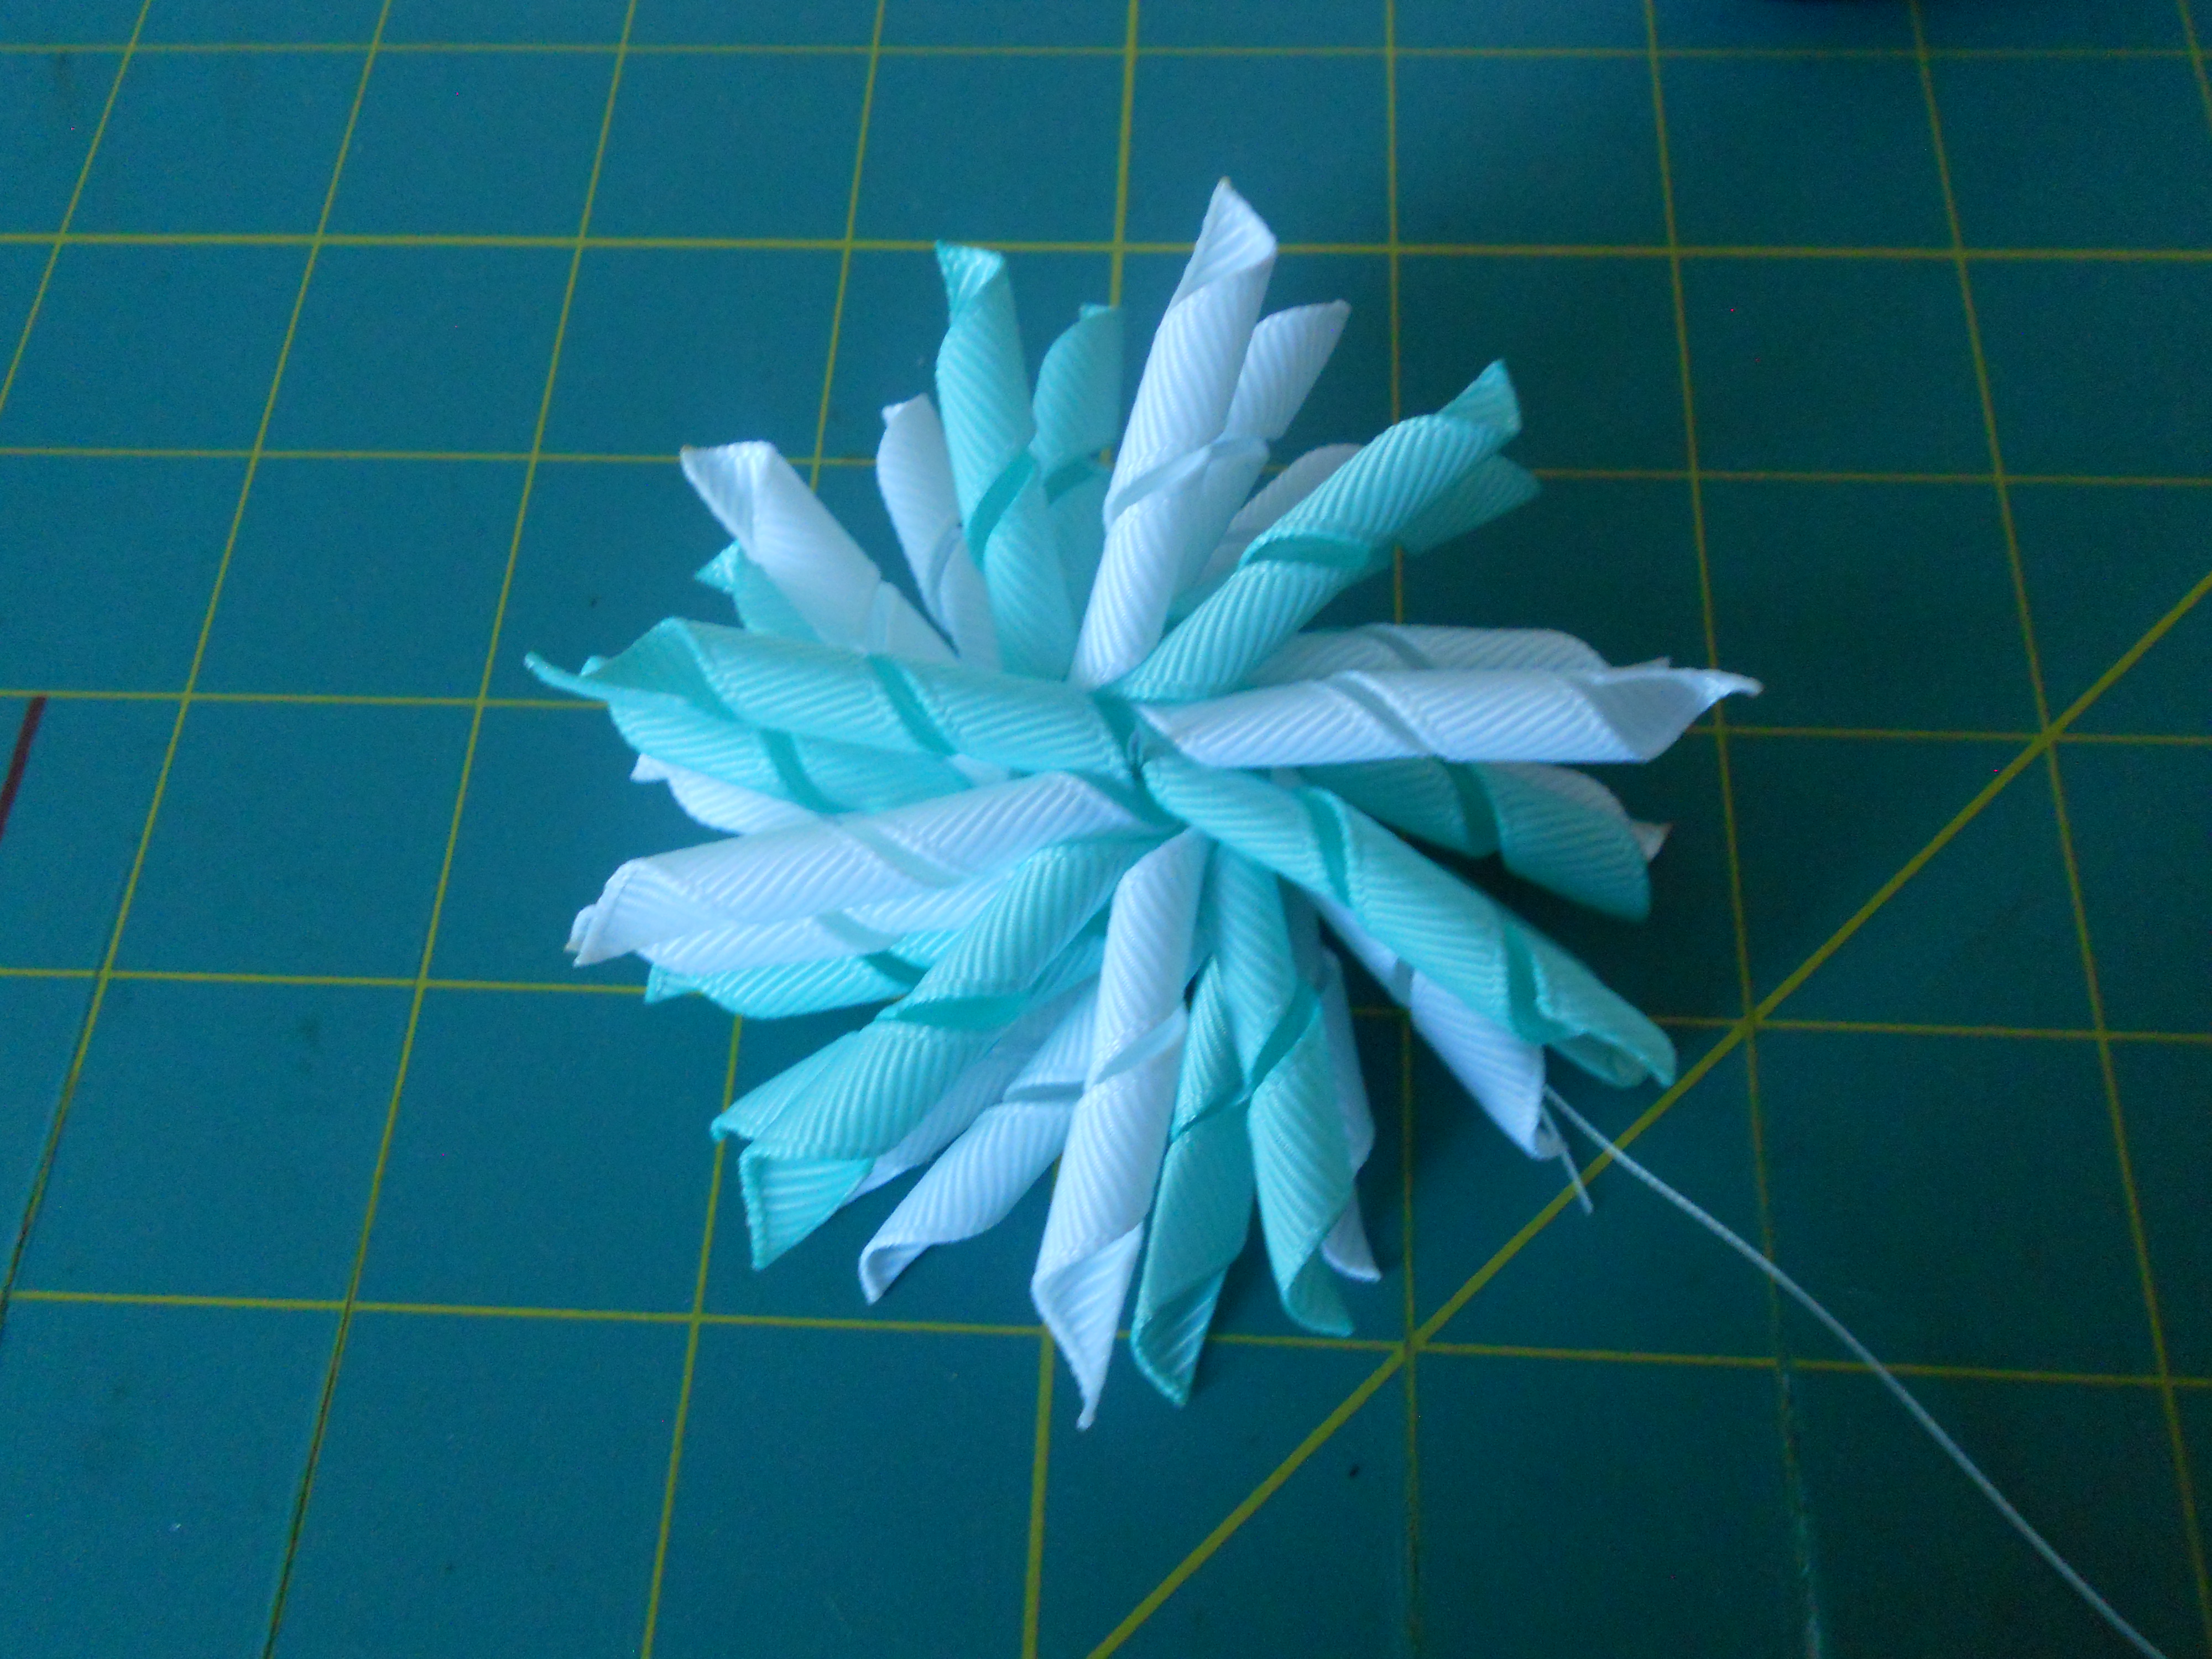
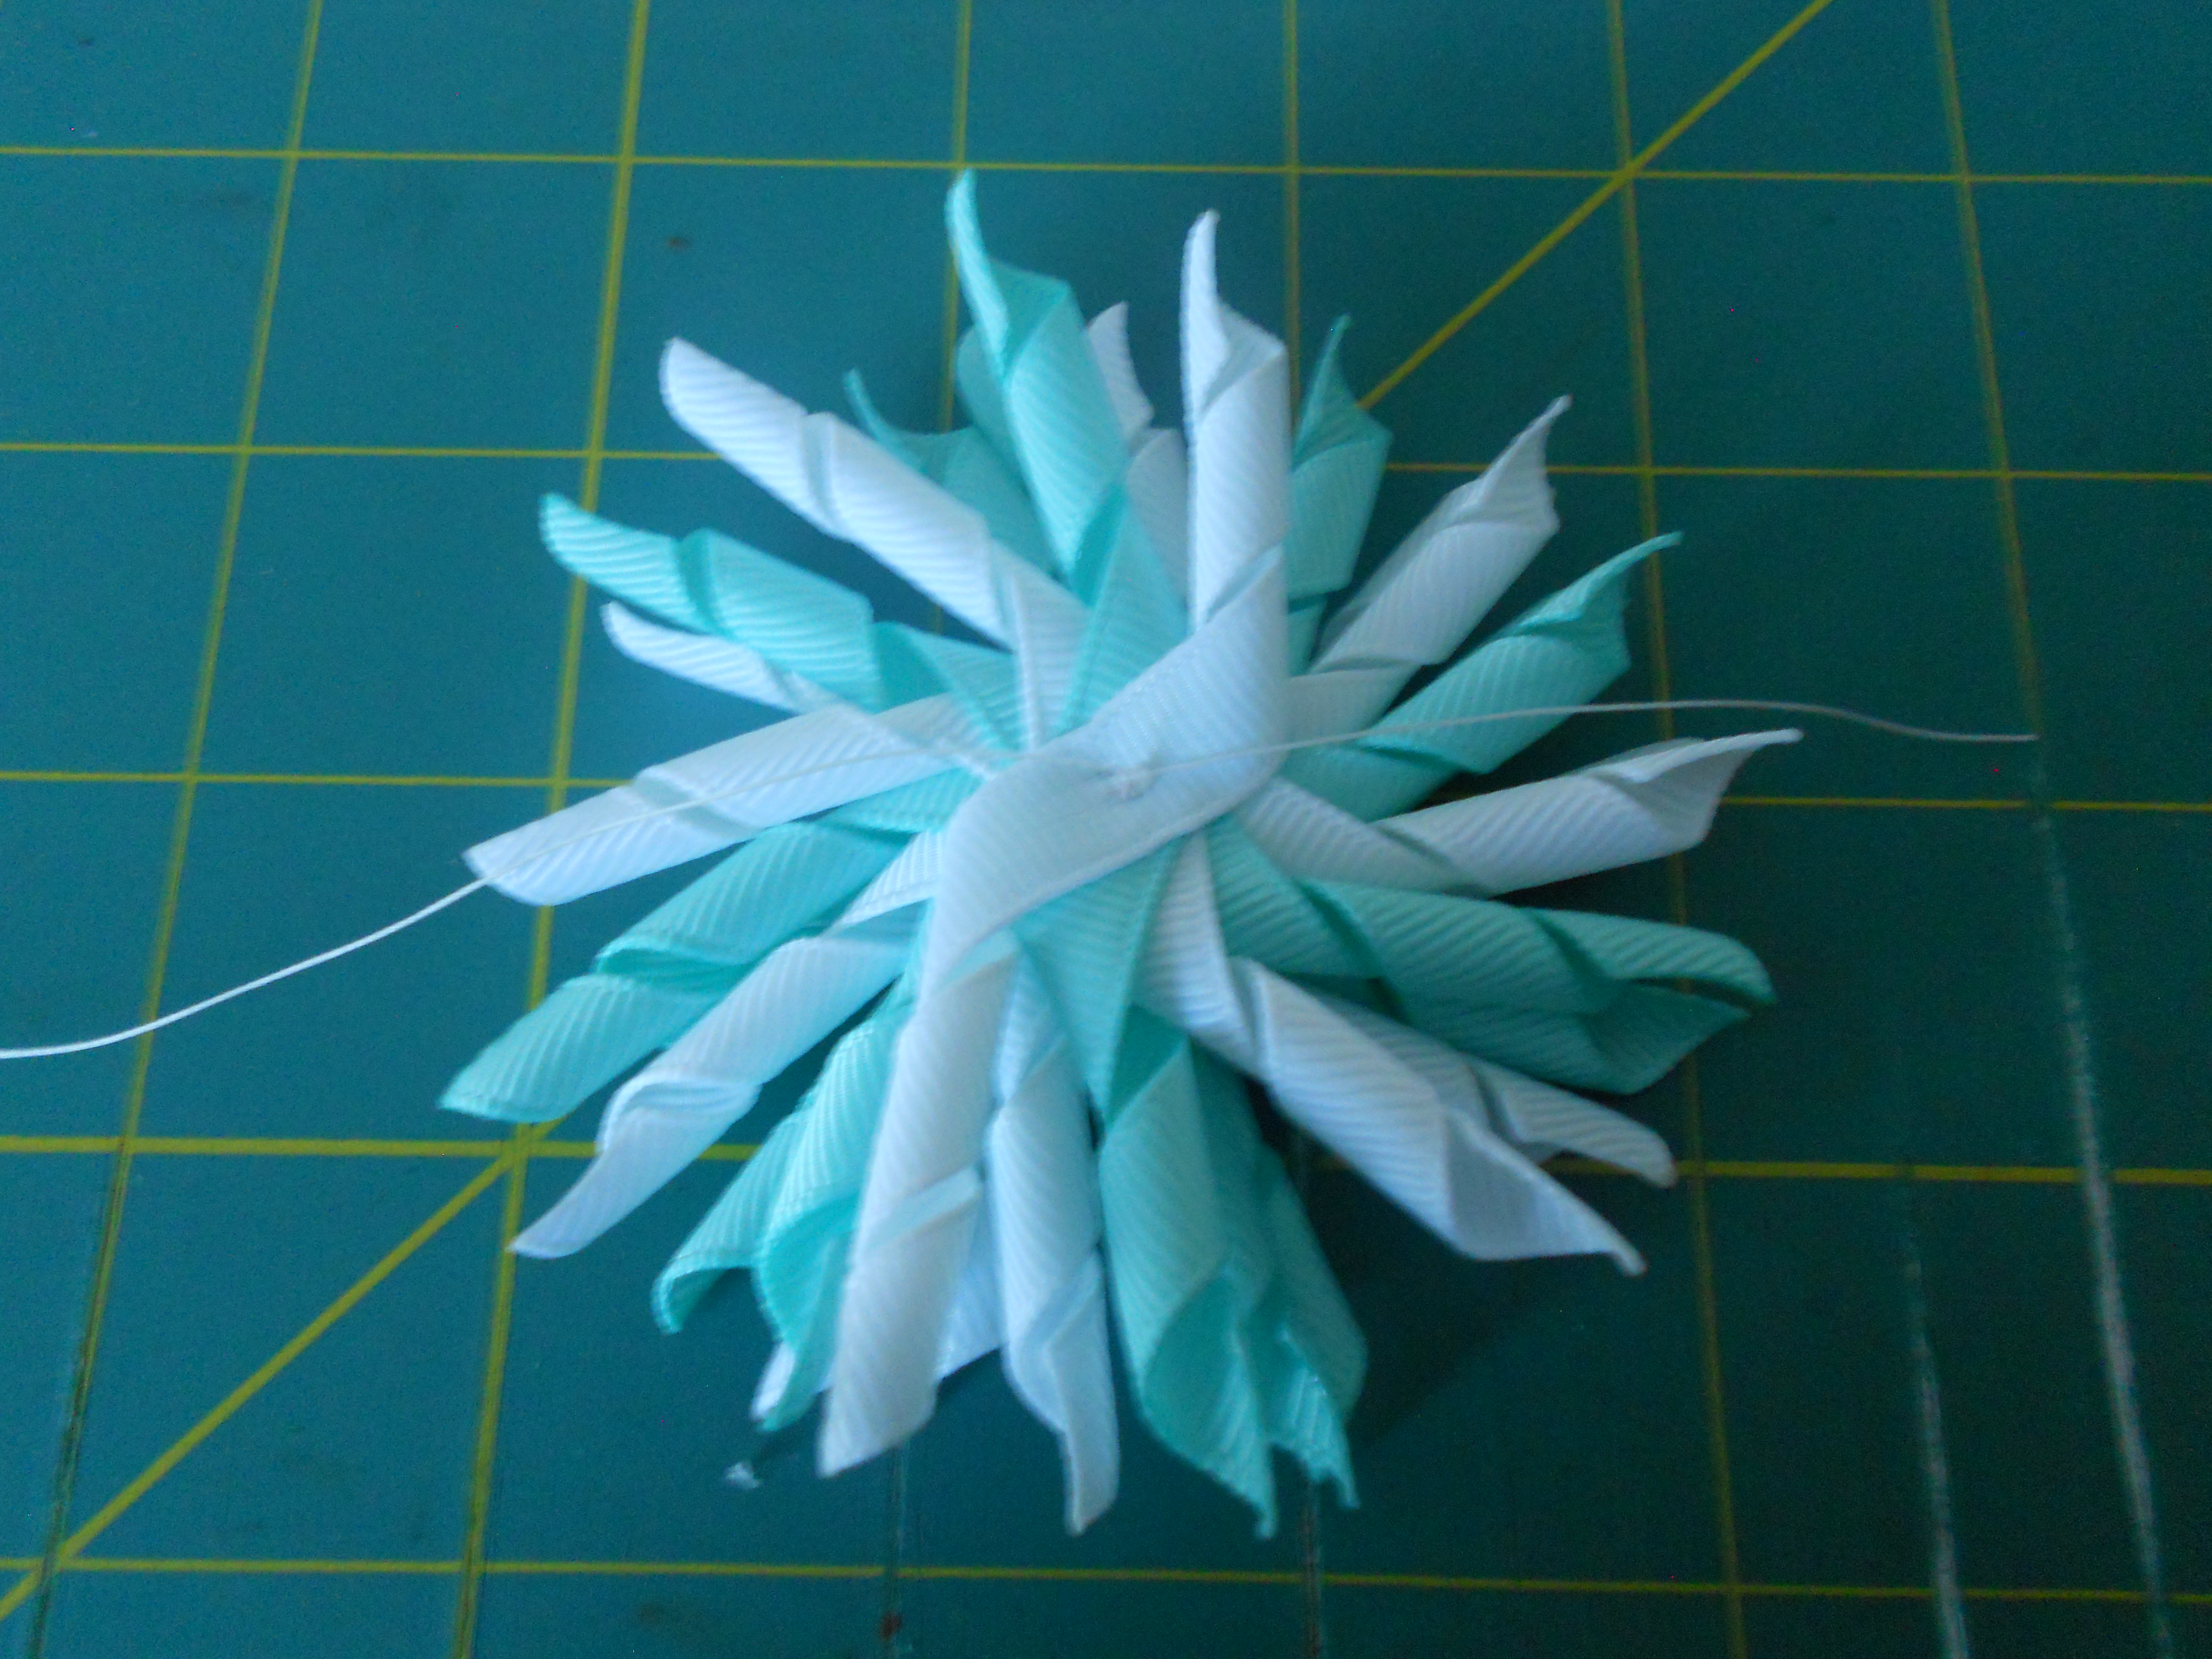
Step 10: Get your needle and thread ready! Start by placing the center of your first korker piece through the needle. Keep adding pieces onto the needle in the pattern you want. Once you have added all of your korker pieces thread the needle through the center several times and tie off on the back.
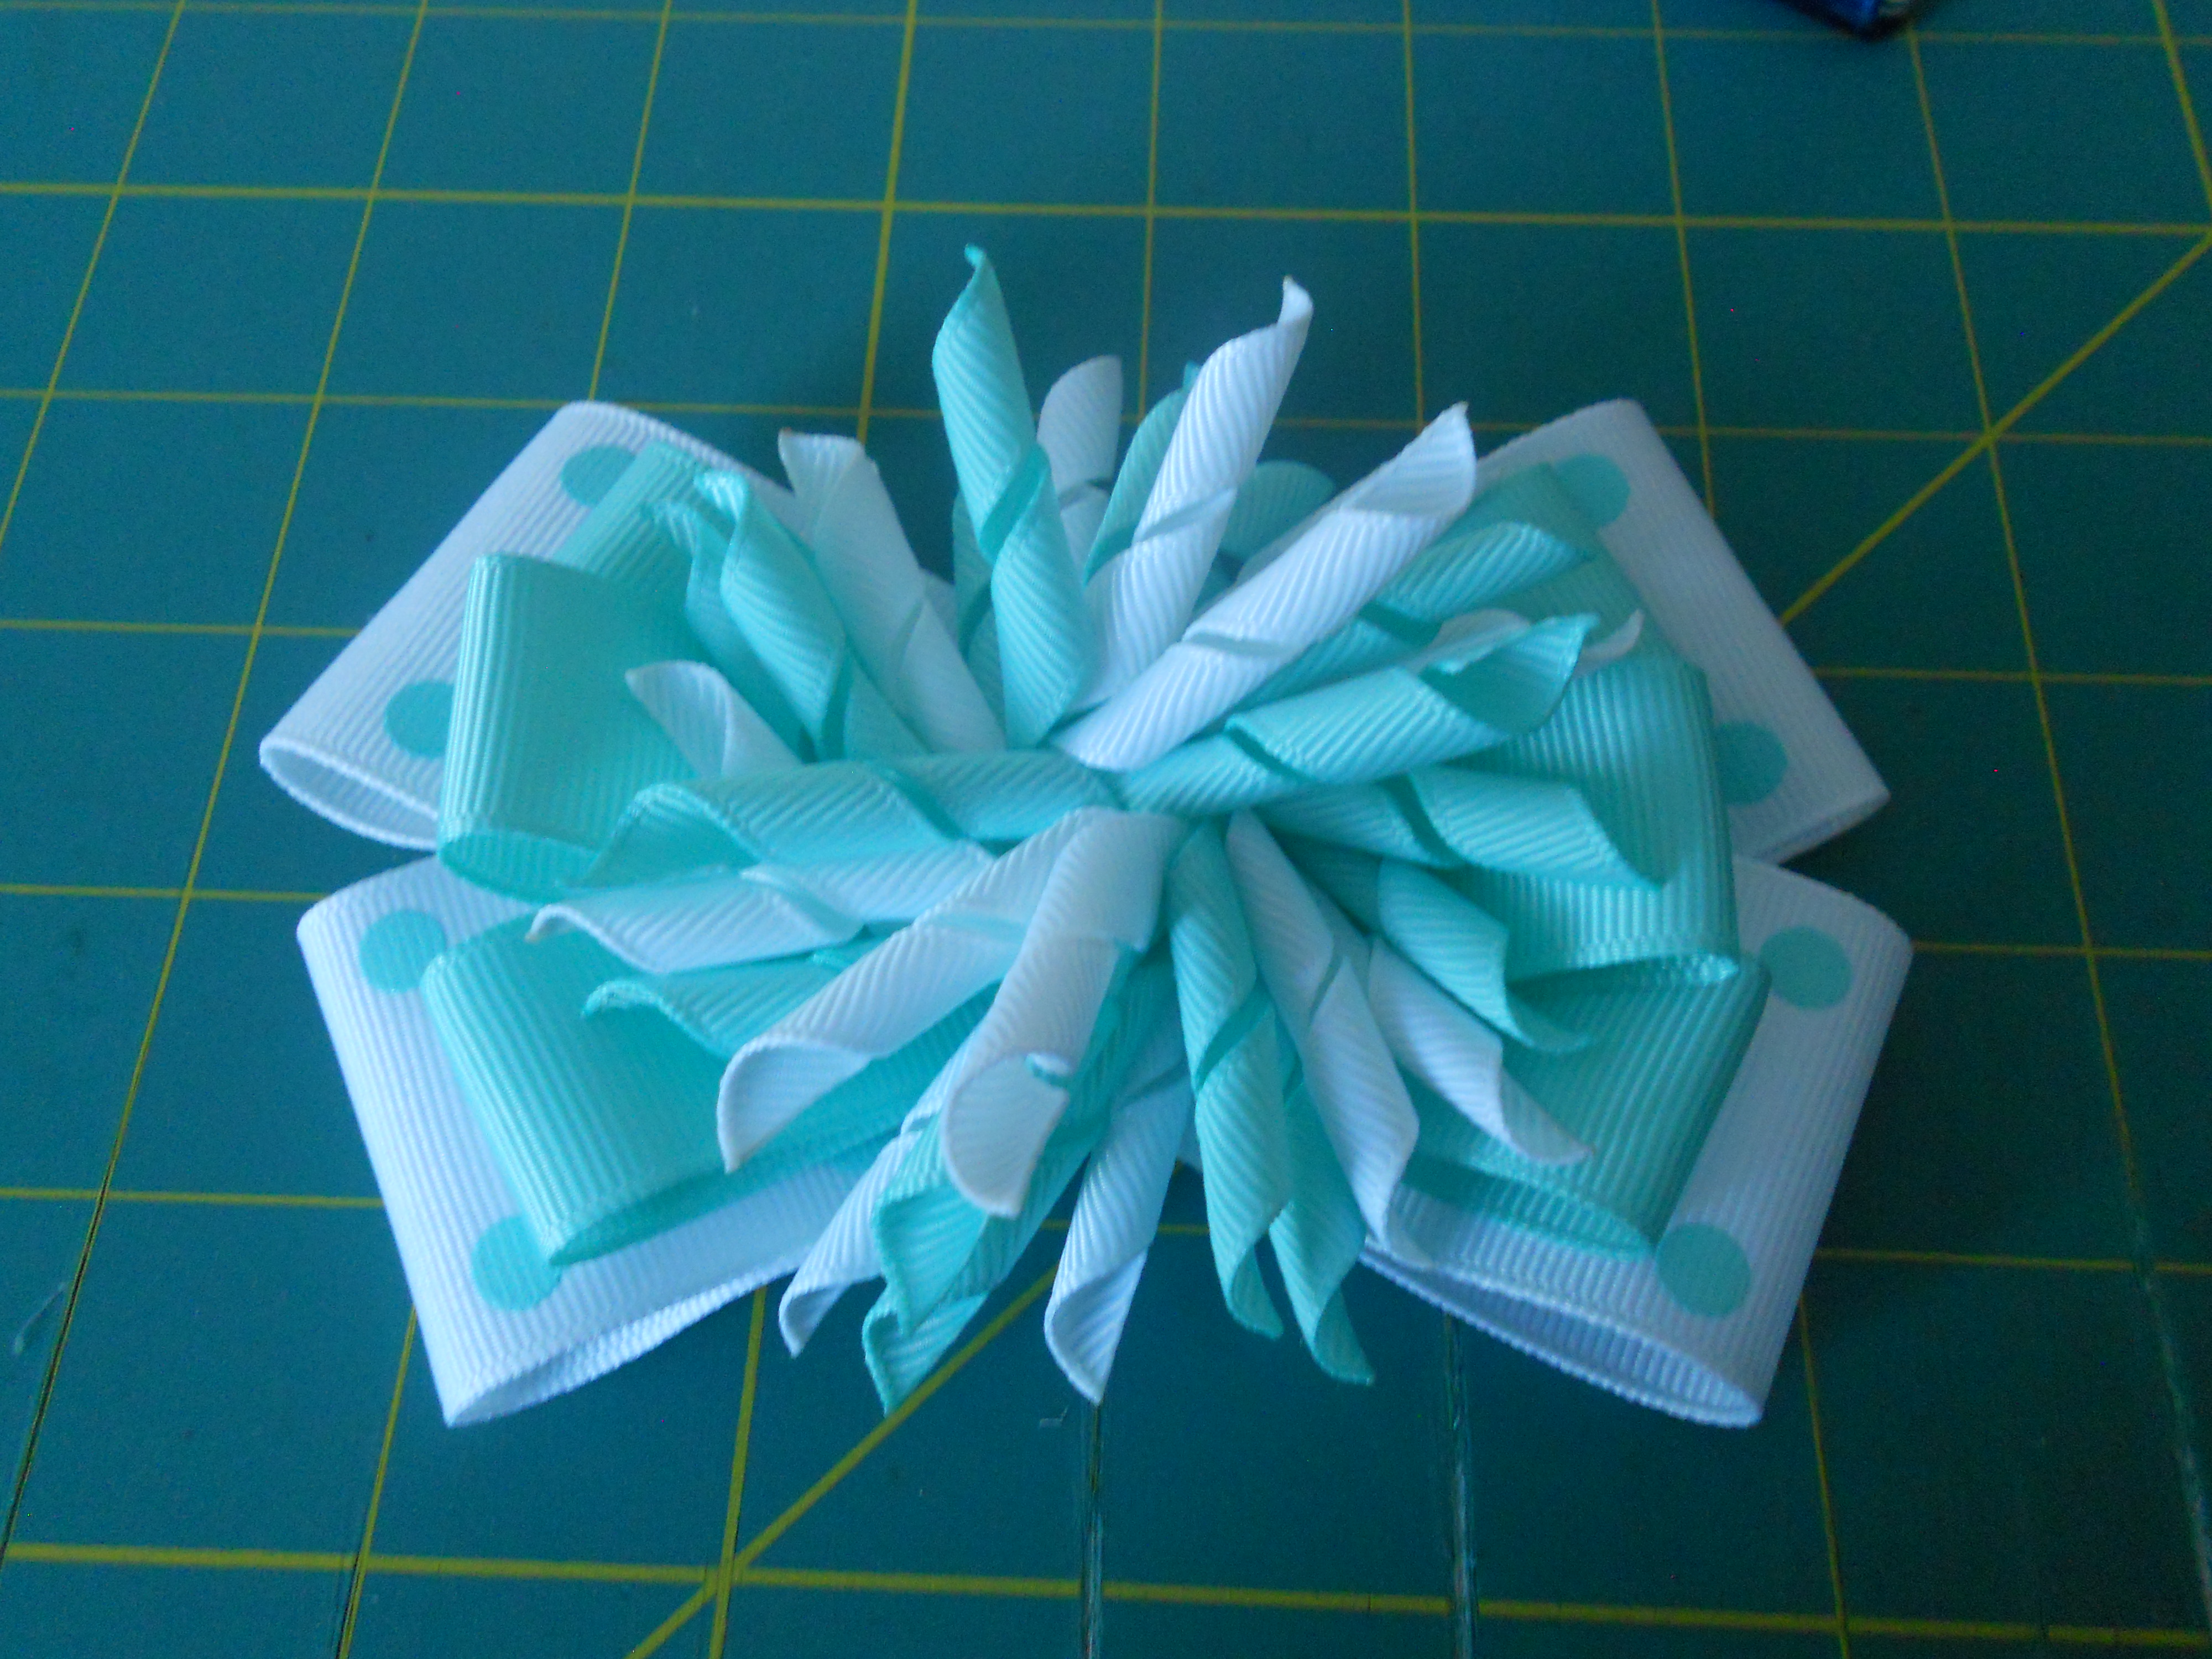
Step 11: Glue your finished korker bow to the center of your loops. Your bow is finished!! Sometimes I like to add a rhinestone or bottle cap to the center of the korker. These are probably my favorite bow to make and my daughter loves them!
Visit the rest of our blog for more Crafting Tutorials and DIY Instructions!
Loading...

