

Contributor post by Danielle at Korker Krazy
Today I'm going to show you another pattern for the woven headbands: the Zig Zag Pattern! School is almost back in-session and these ribbon woven headbands are always a big hit with school-girls of all ages!
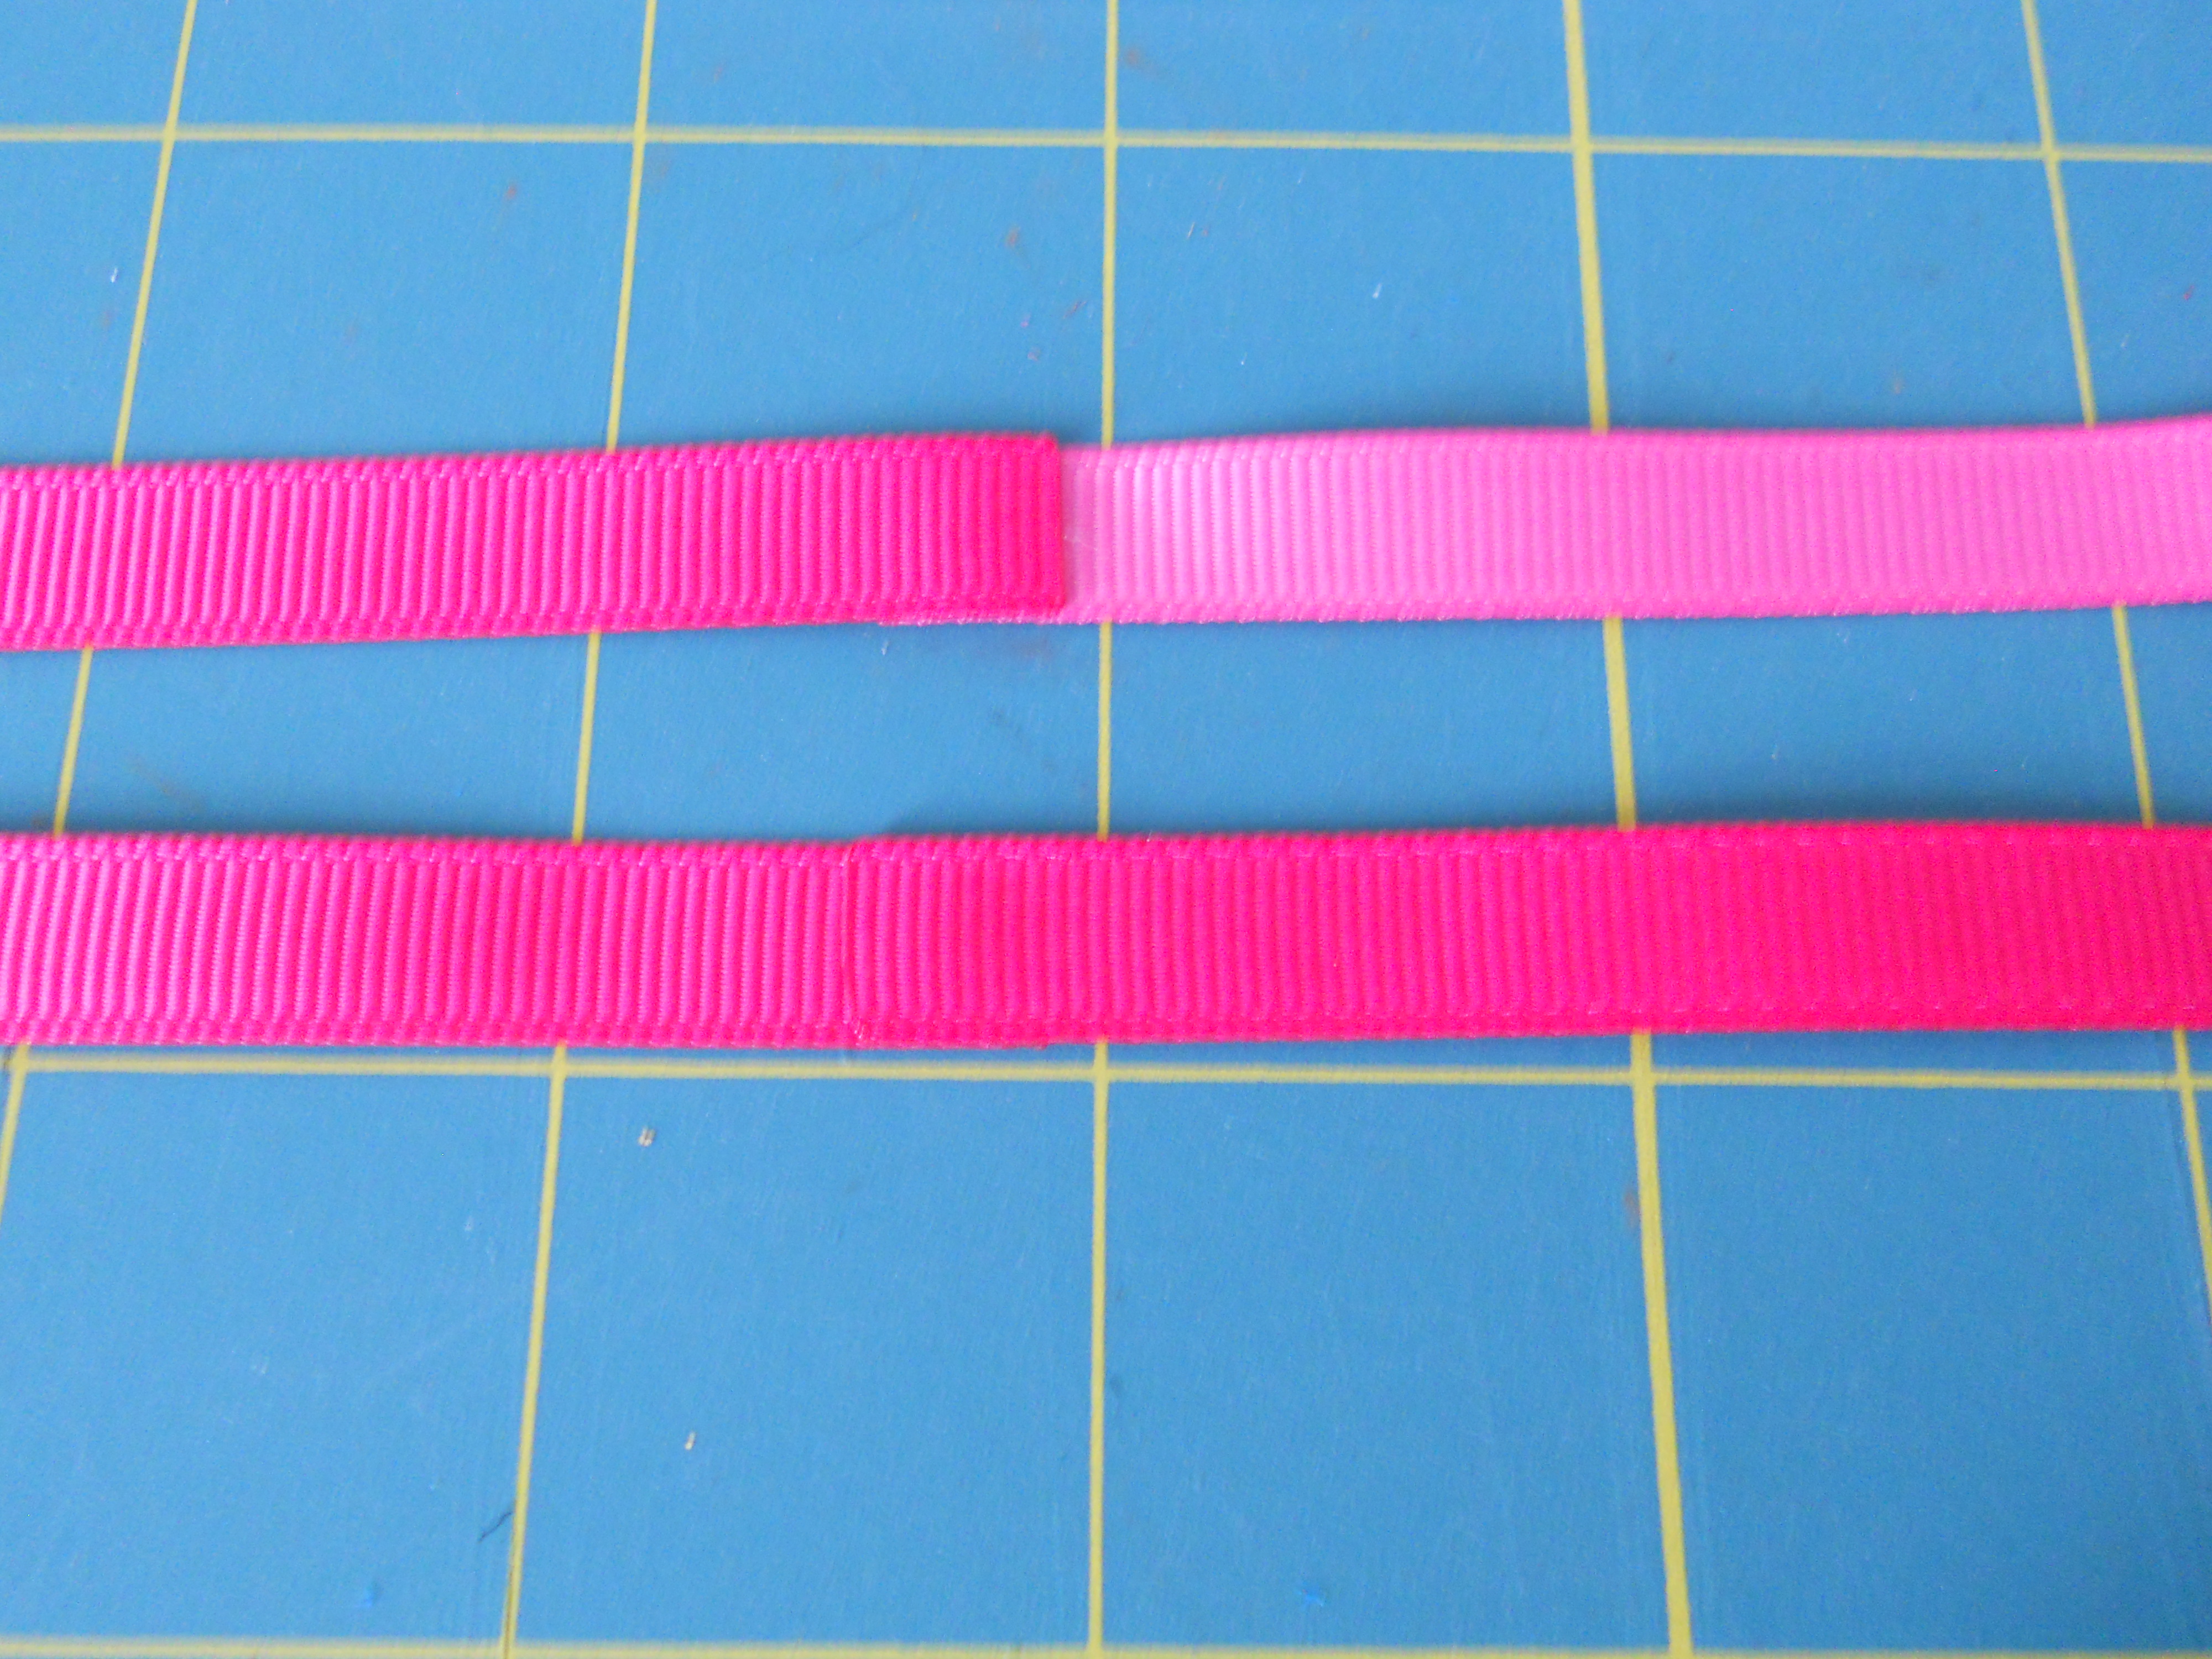
Supplies Needed: 3/8" Grosgrain Ribbon (I am using Shocking Pink and Hot Pink) Scissors Lighter Hot Glue Hot Glue Gun 1/2" Plastic Headband Blank Alligator Clip
First, decide on your colors! For this pattern we need two different colors. Next cut three 24" pieces of your first color and one 24" piece of your second color. Heat seal all ends with a lighter. Using your hot glue gun, glue the ends together making 2 continuous pieces.
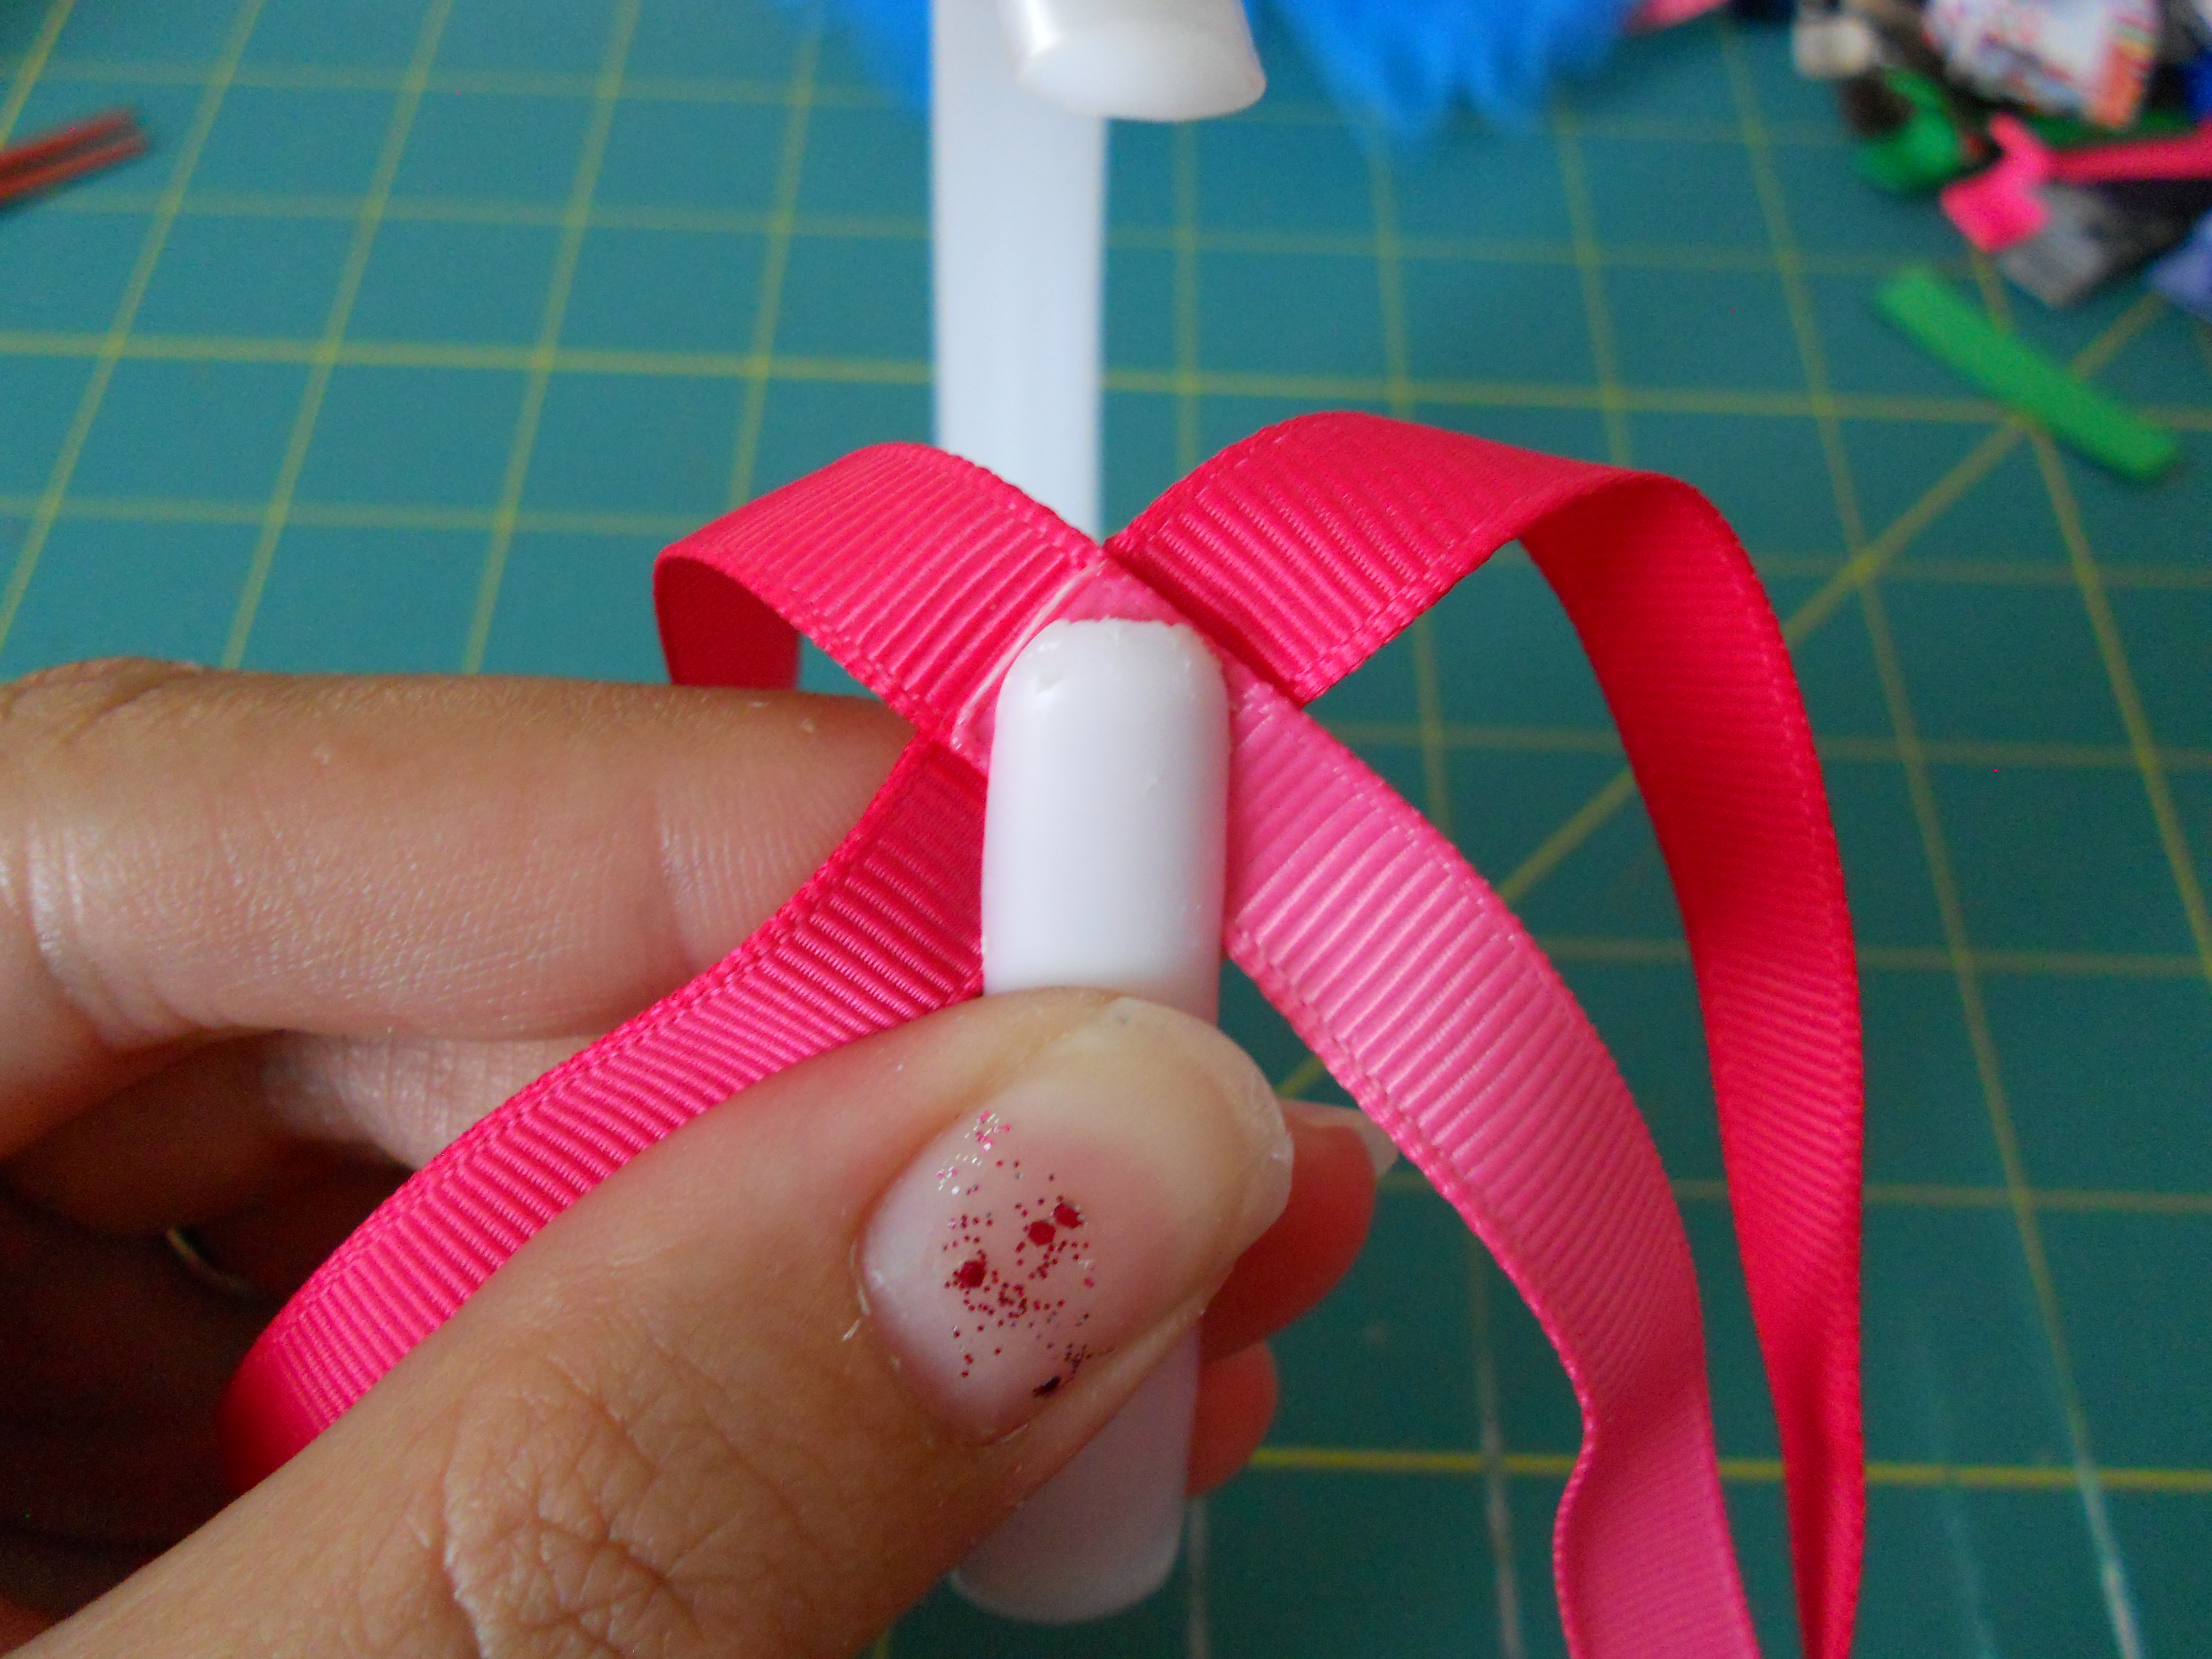
You should now have two continuous lengths of ribbon. Now we are going to glue the pieces together in the center to form an "x".

Now we are ready to start weaving our headband. First place your "x" on the back center of the headband blank. The color that we only have one piece of should be on the bottom right hand side.
Step 1: Fold your top right ribbon across the headband.
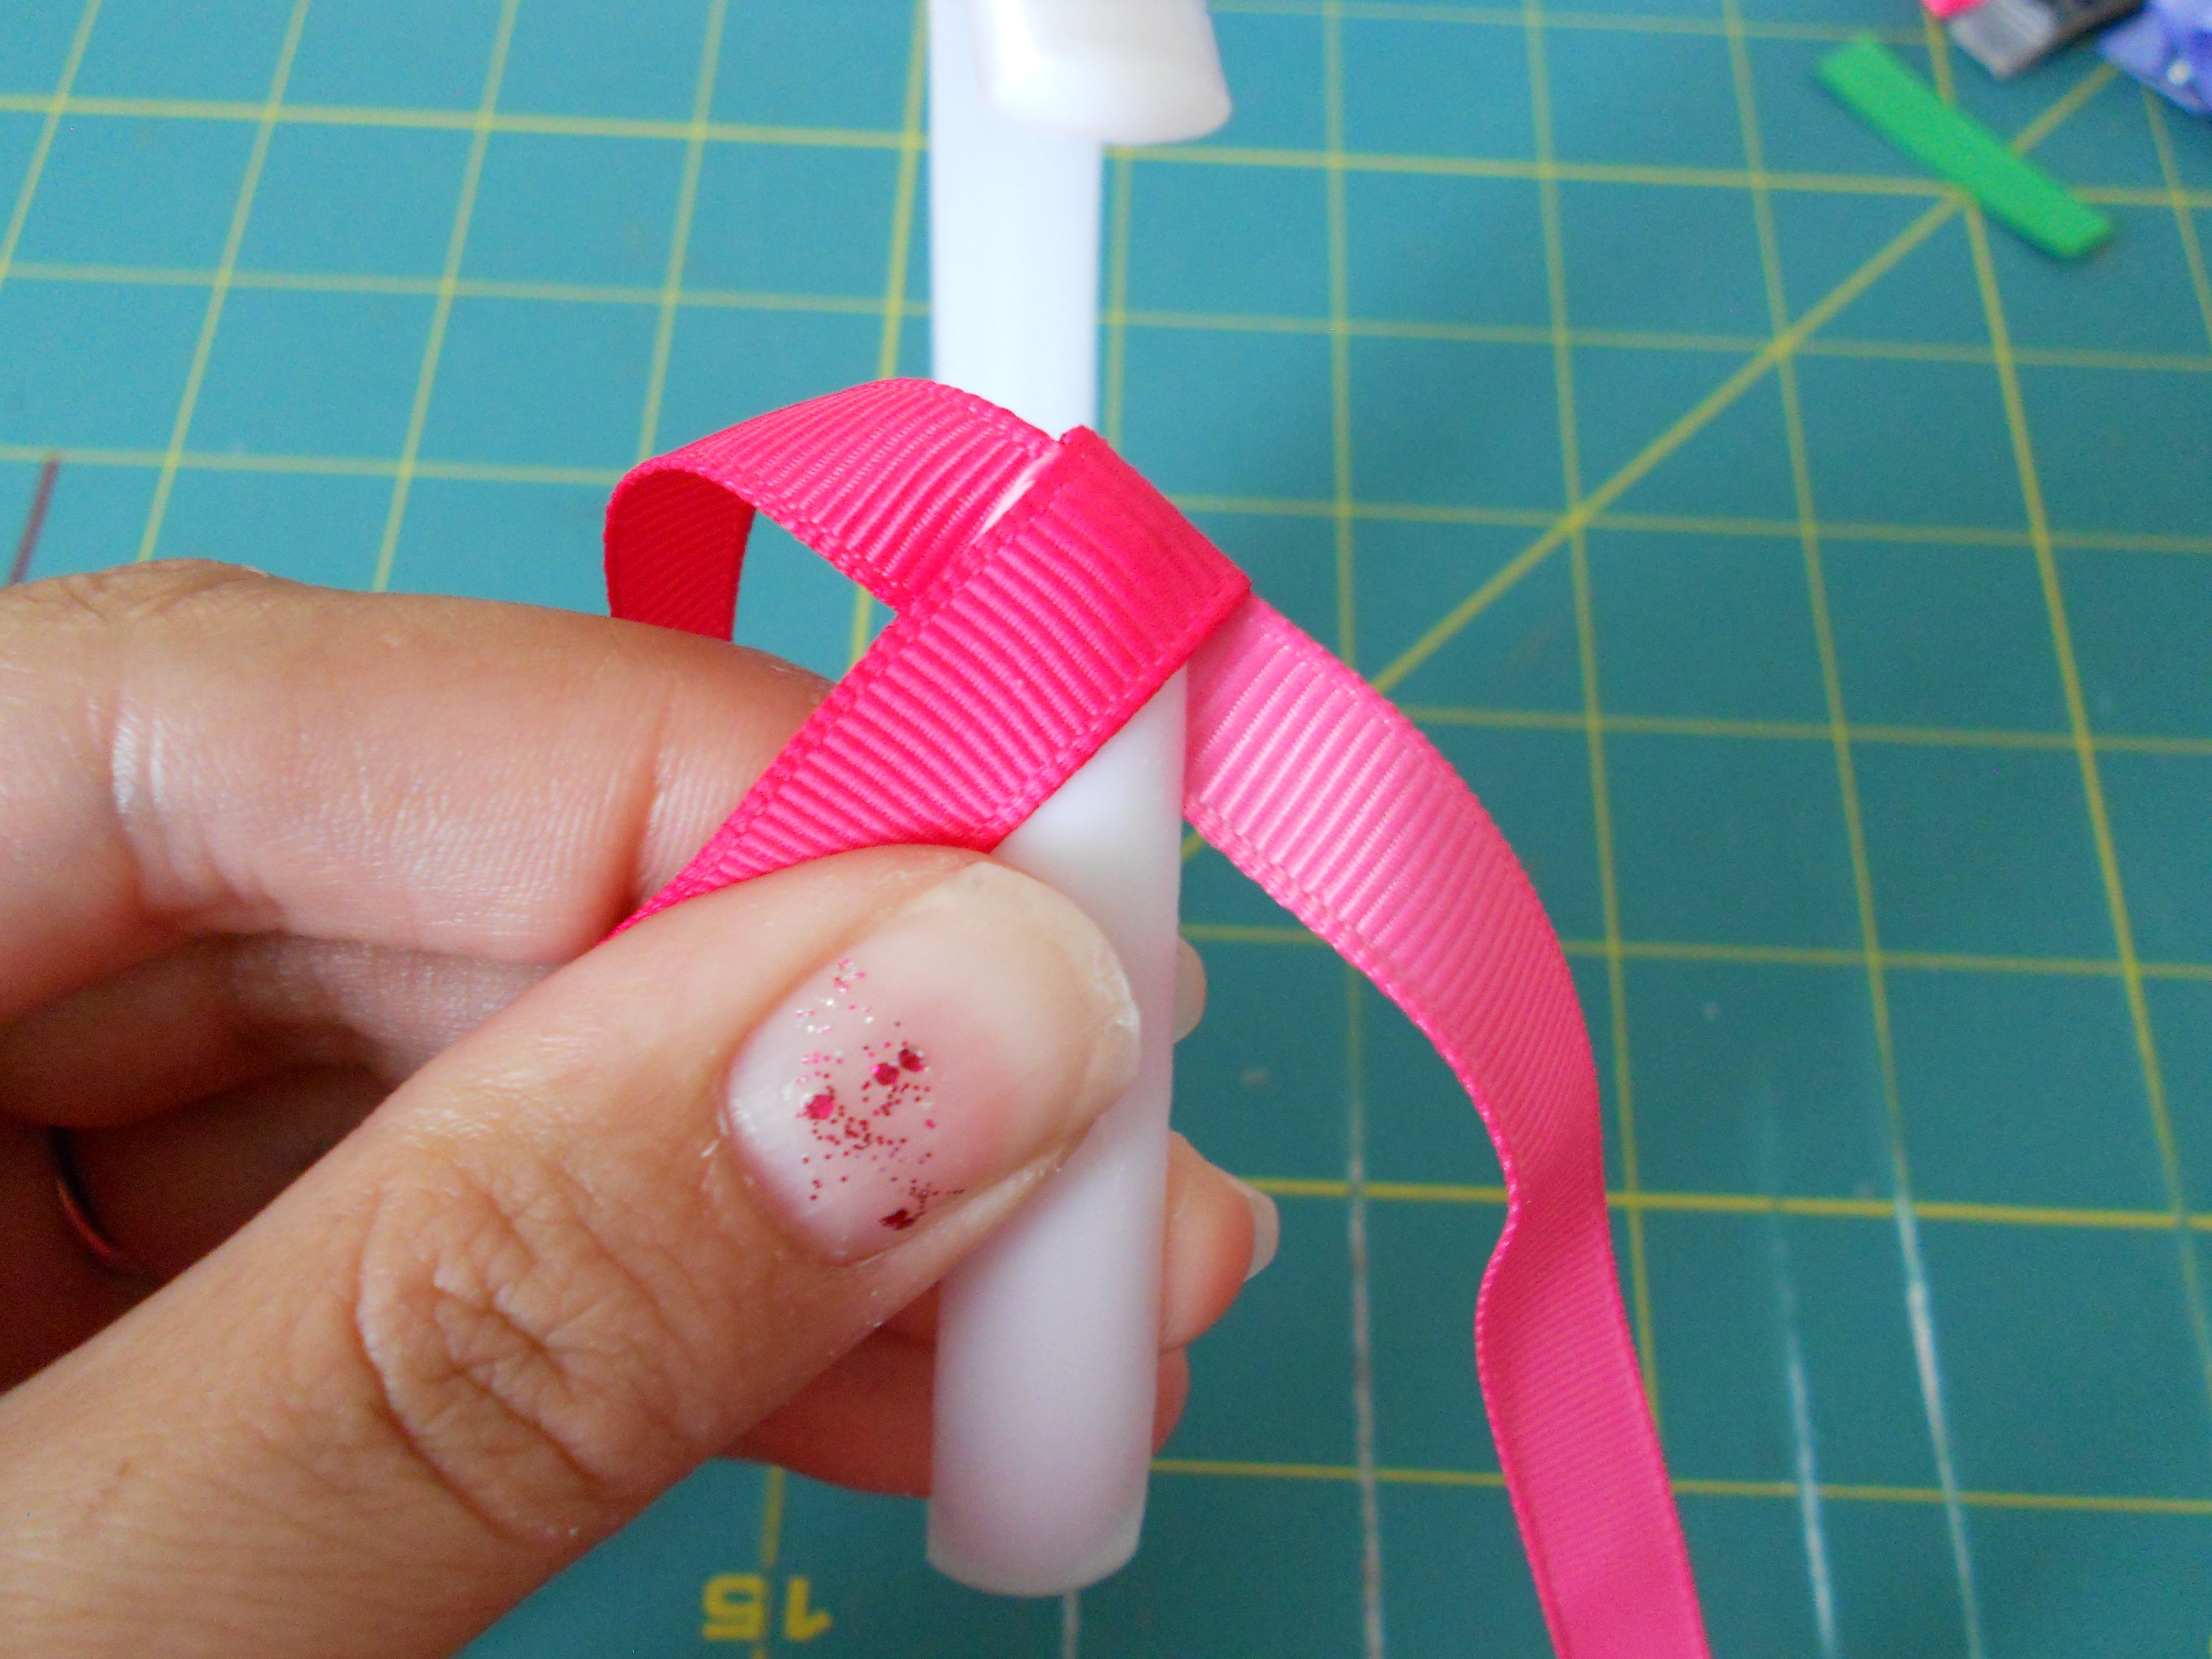
Step 2: Fold your top left ribbon across the headband.
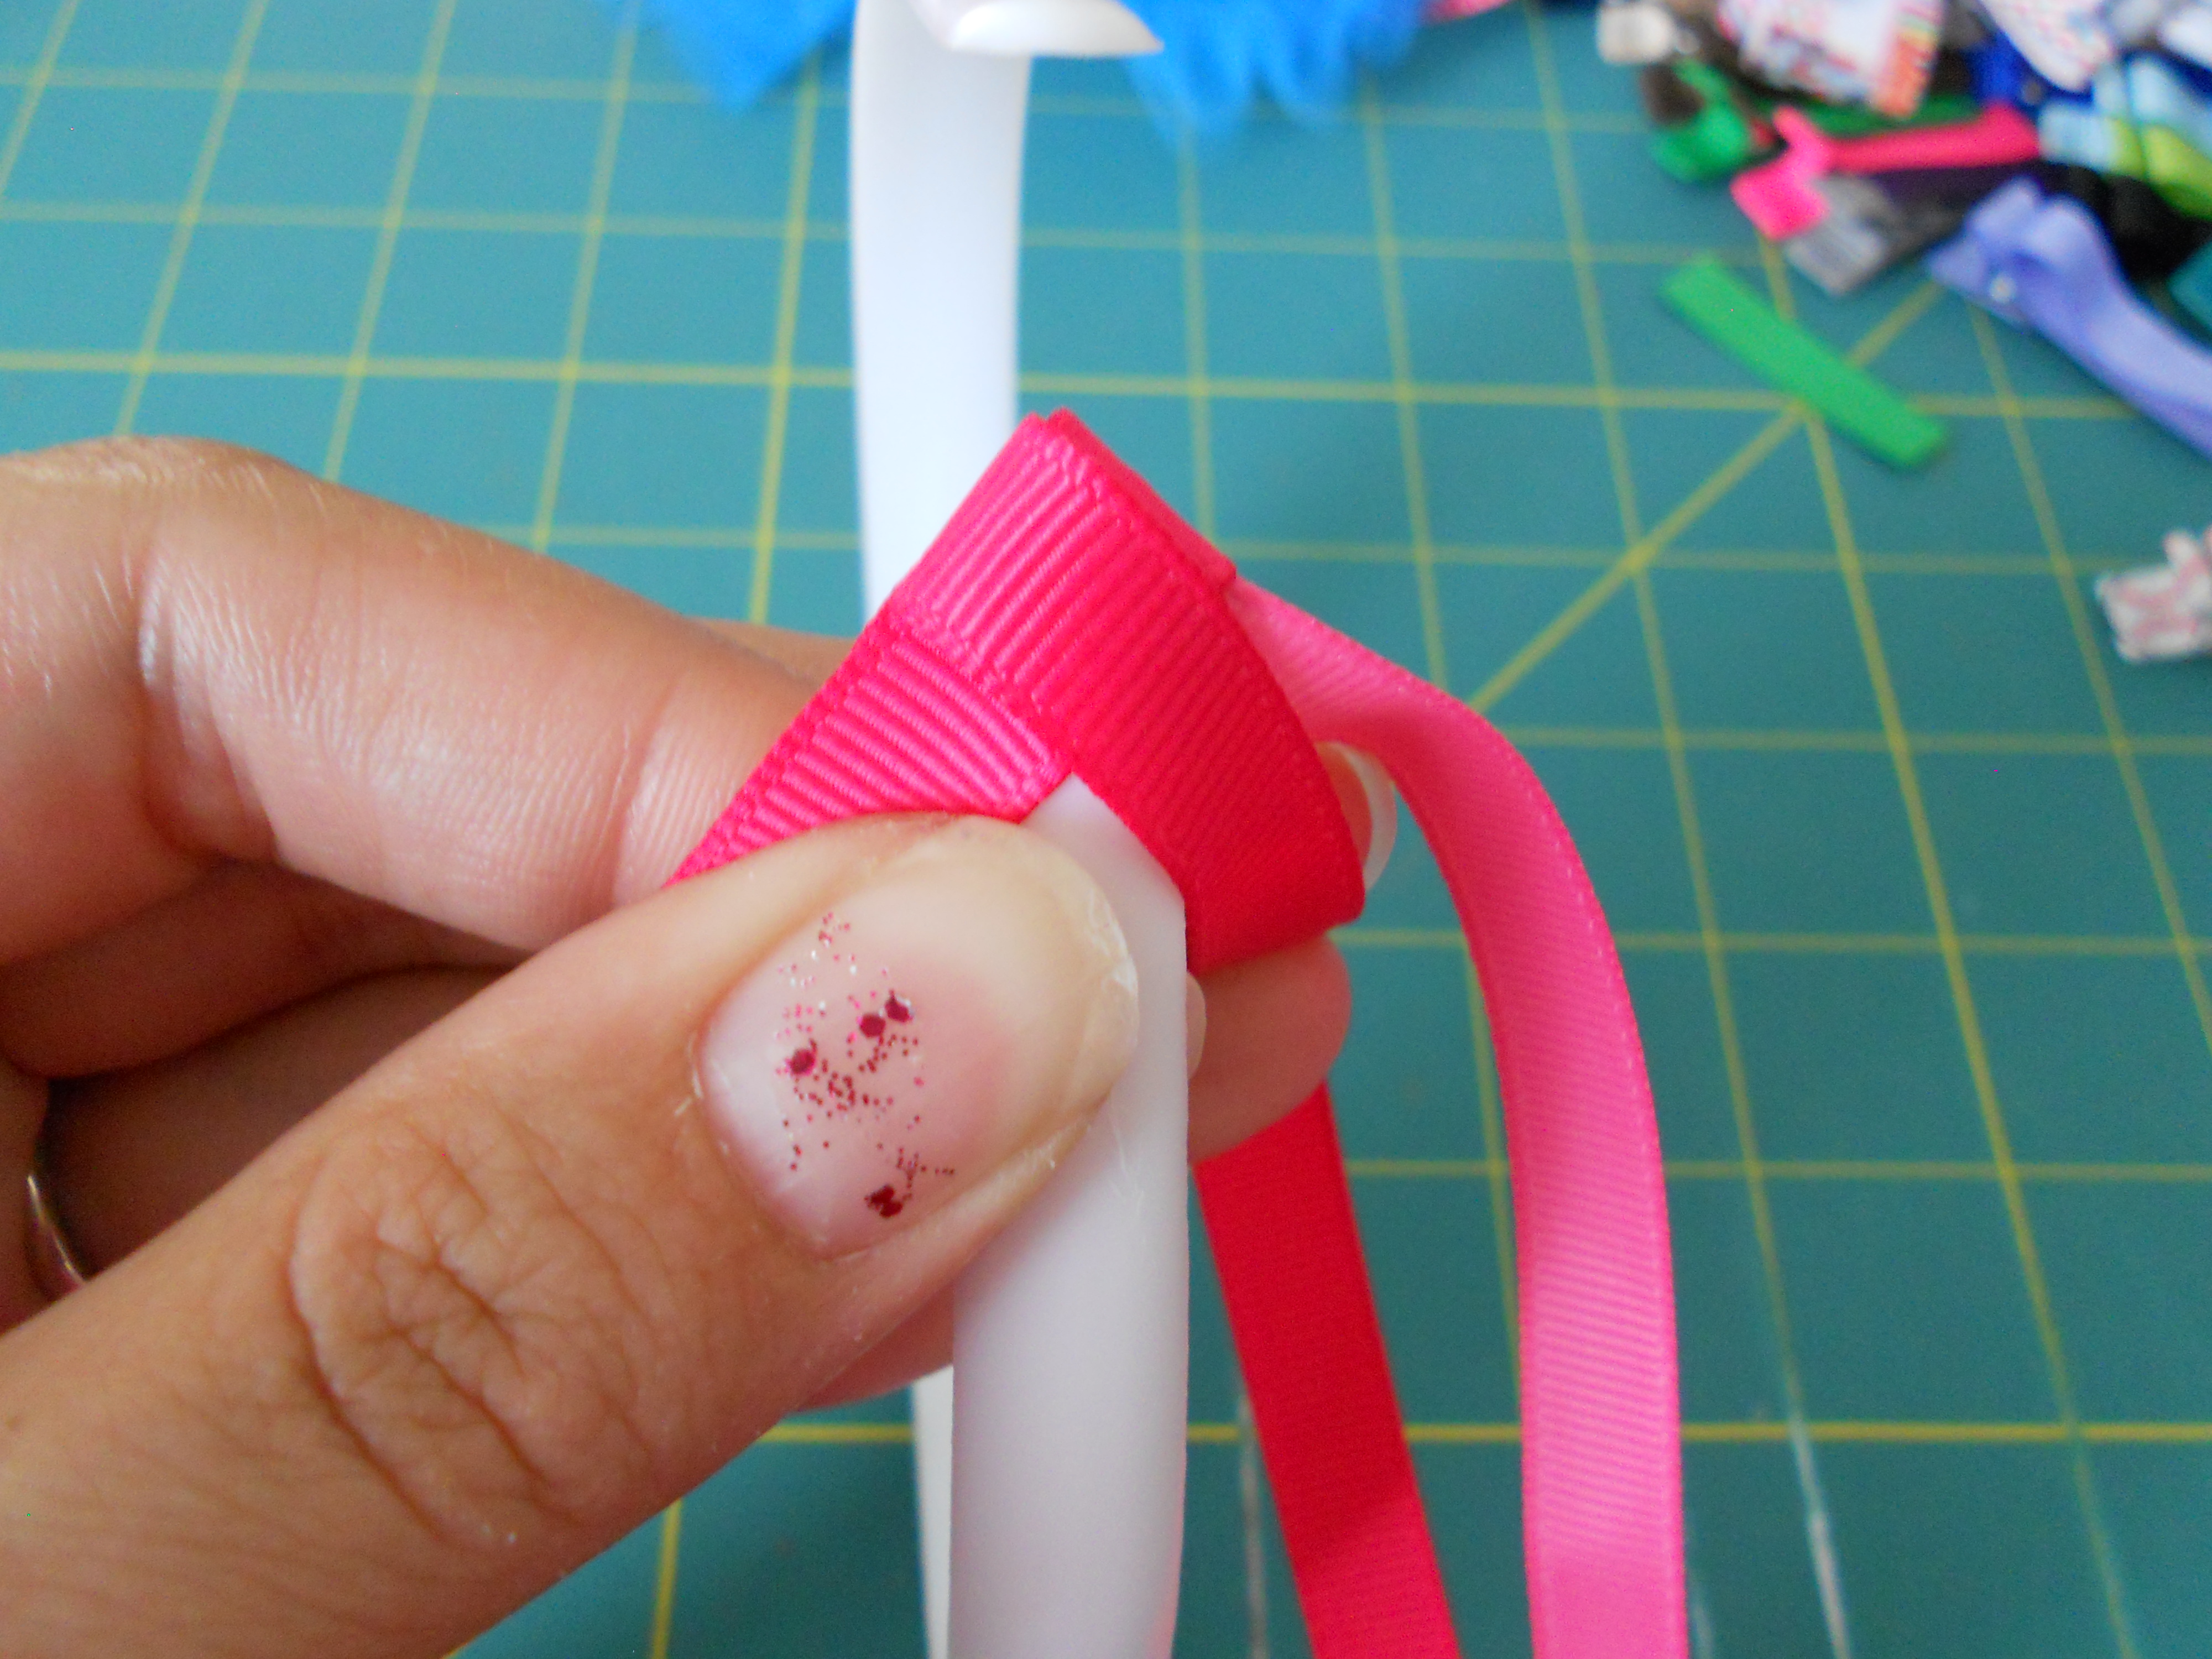
Step 3: Fold your top left ribbon behind the headband. You want this piece on the back of the headband make sure not to overlap any other ribbons.
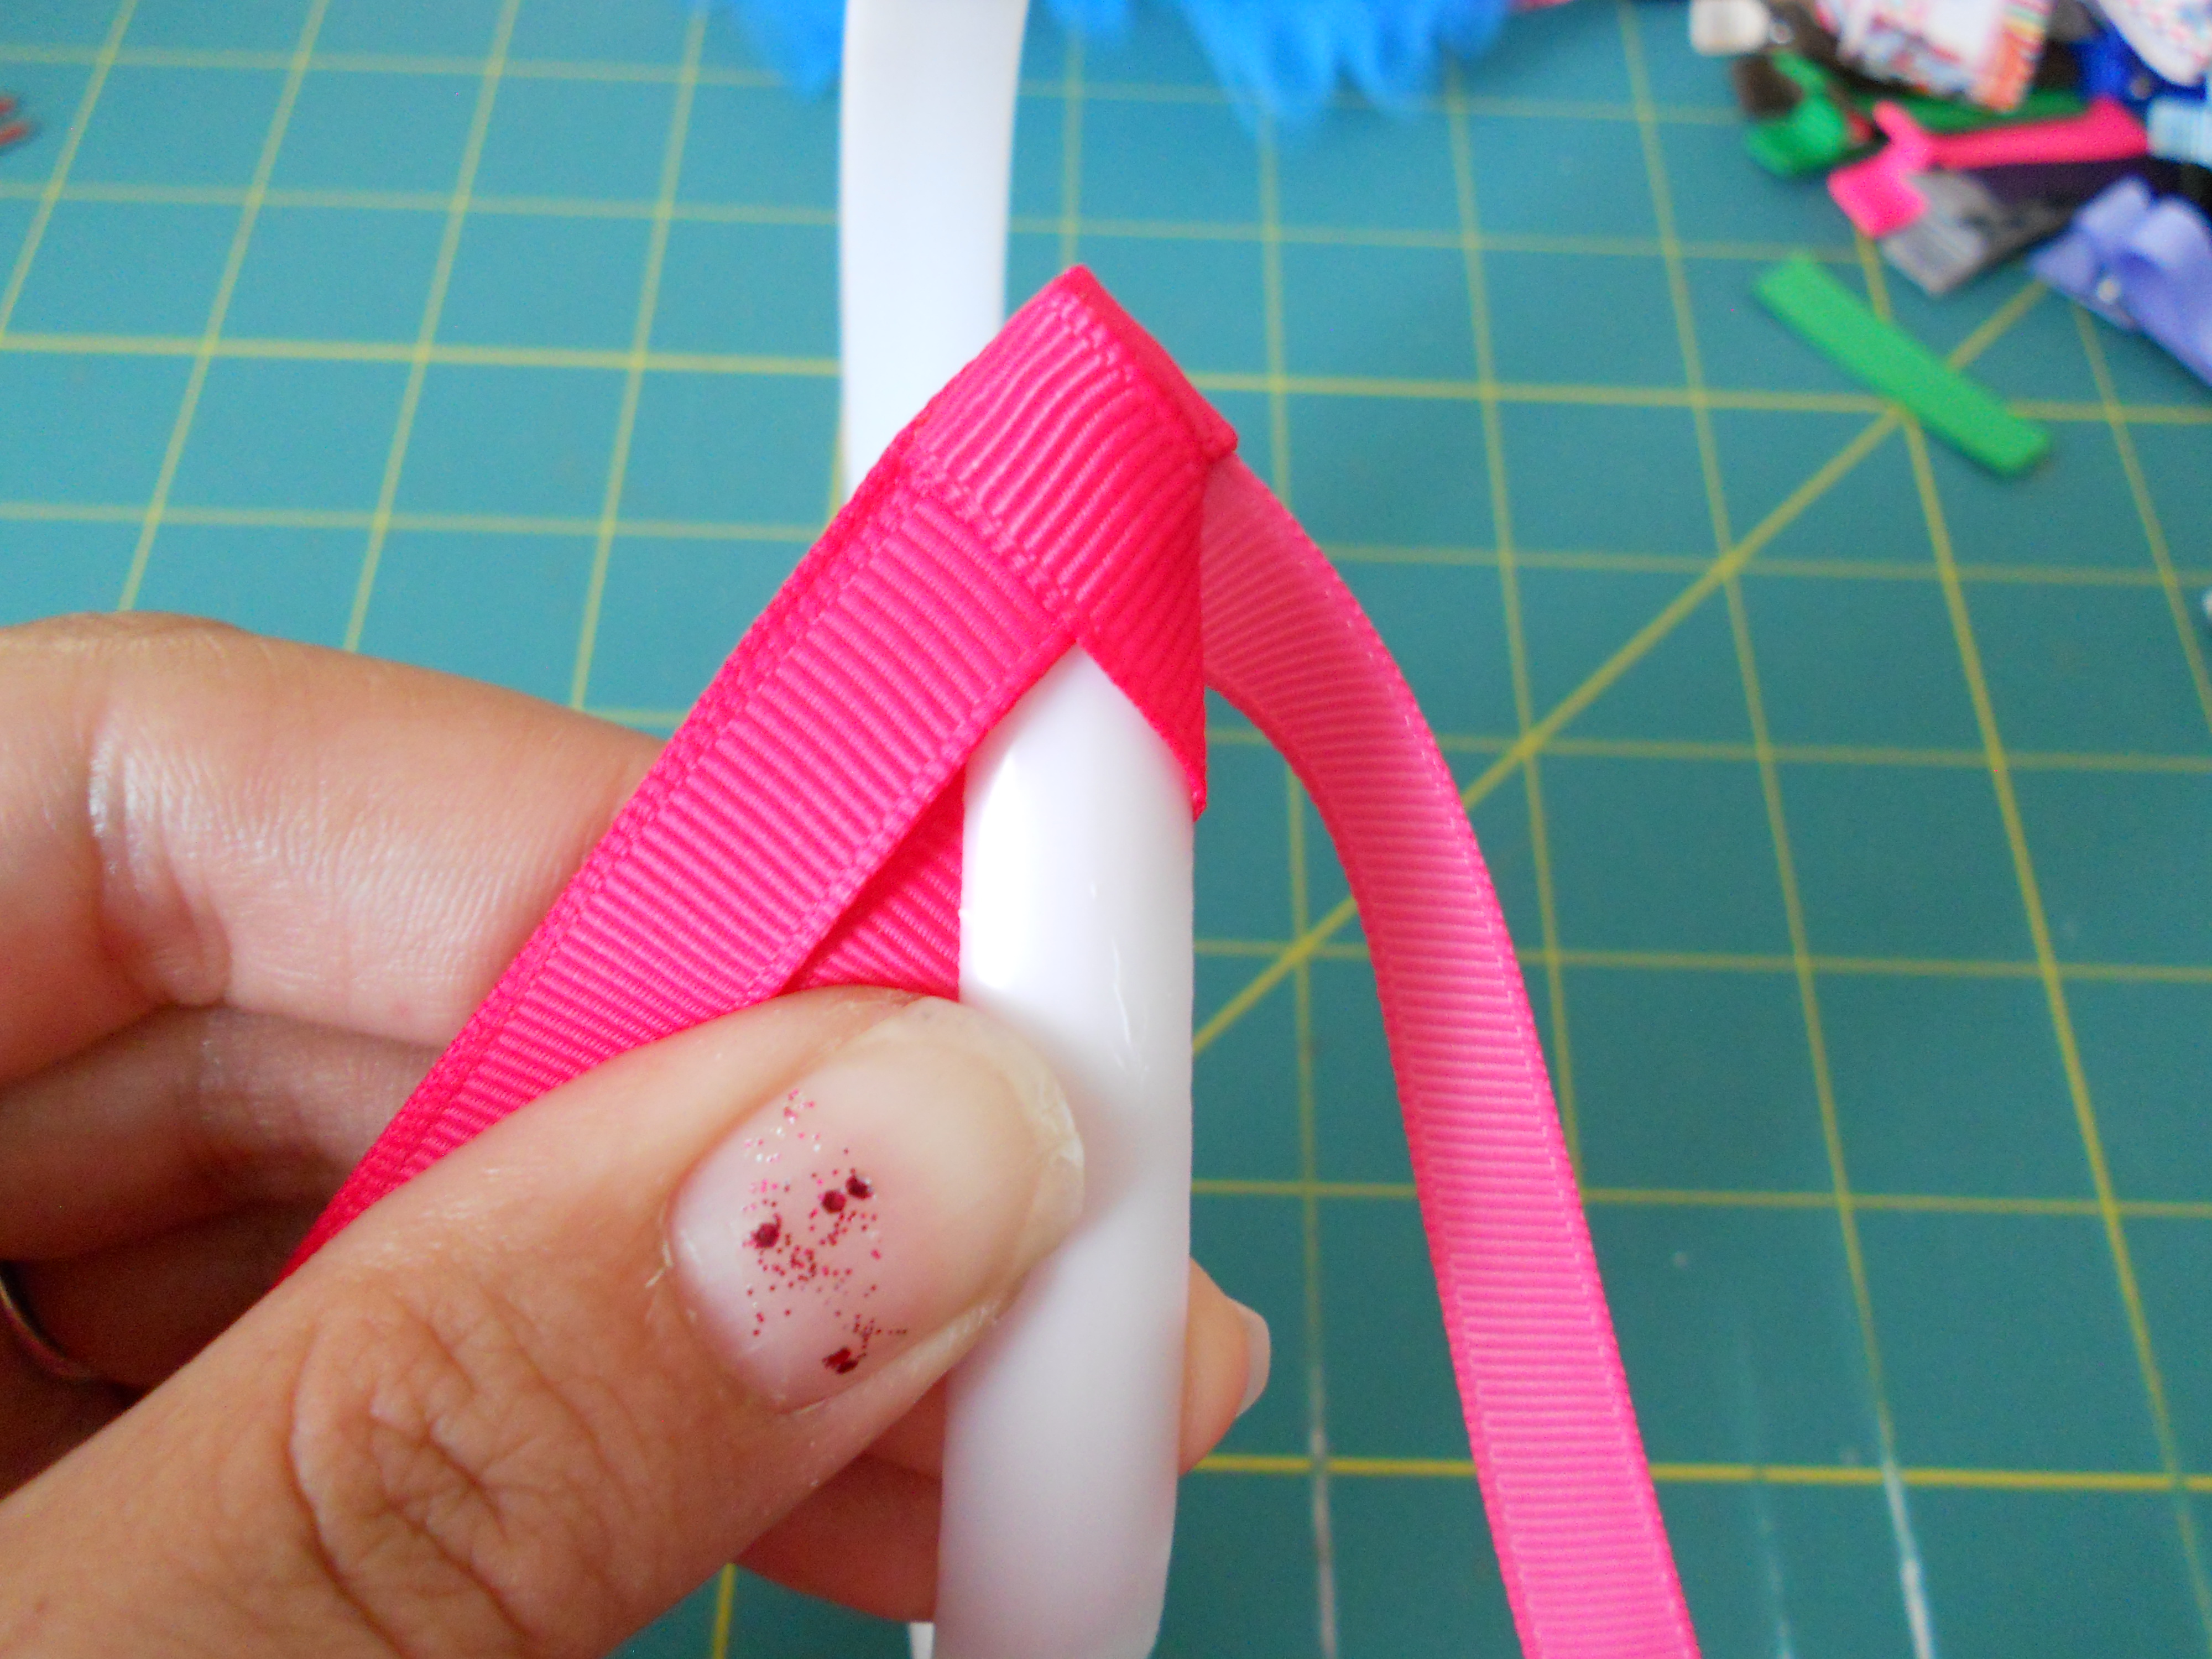
Step 4: Fold your bottom right ribbon across the headband (hot pink). This should be the only ribbon remaining on the right side of the headband.

Step 5: Now all of your ribbons are on the left side. Weave your top left ribbon in between the ribbon above it. Shocking Pink should be weaved below shocking pink and above the hot pink ribbon.

Step 6: Fold your top left ribbon around the back of the headband.
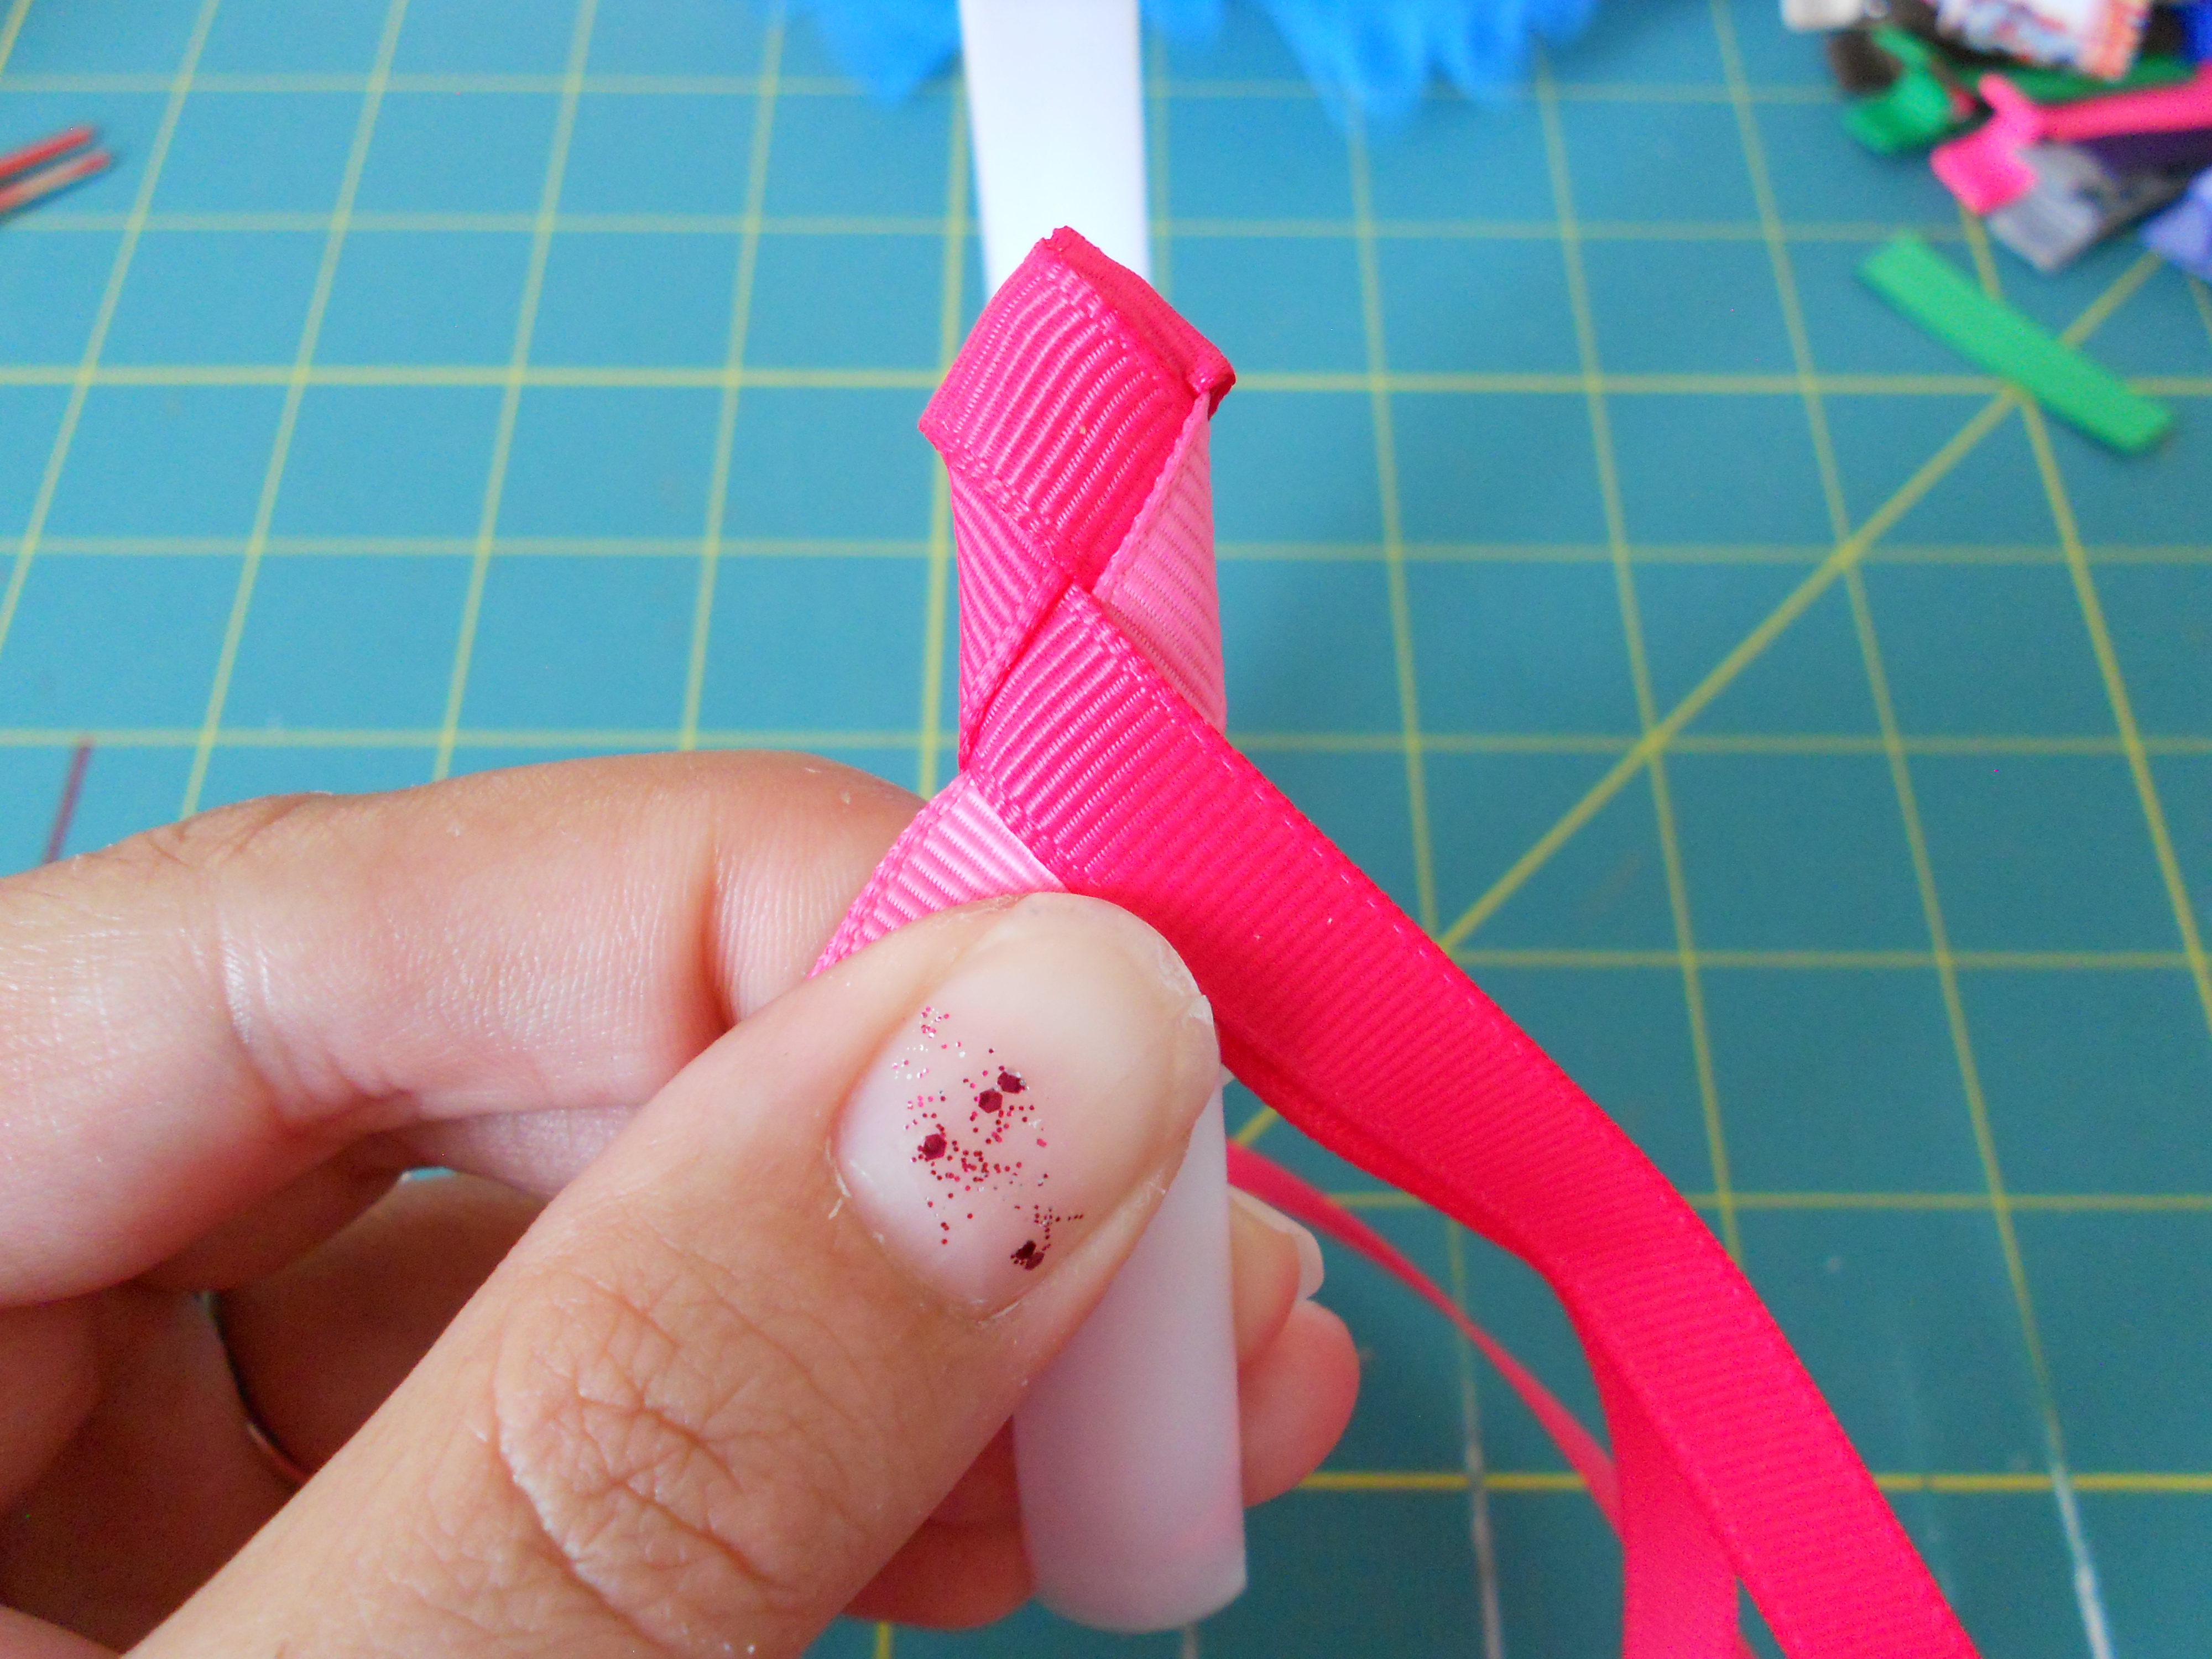
Continue the same pattern for the rest of the ribbon. You will notice the "zig zag pattern" as you continue weaving. When you come to the other end of the headband use your alligator clip to hold the ribbon ends.

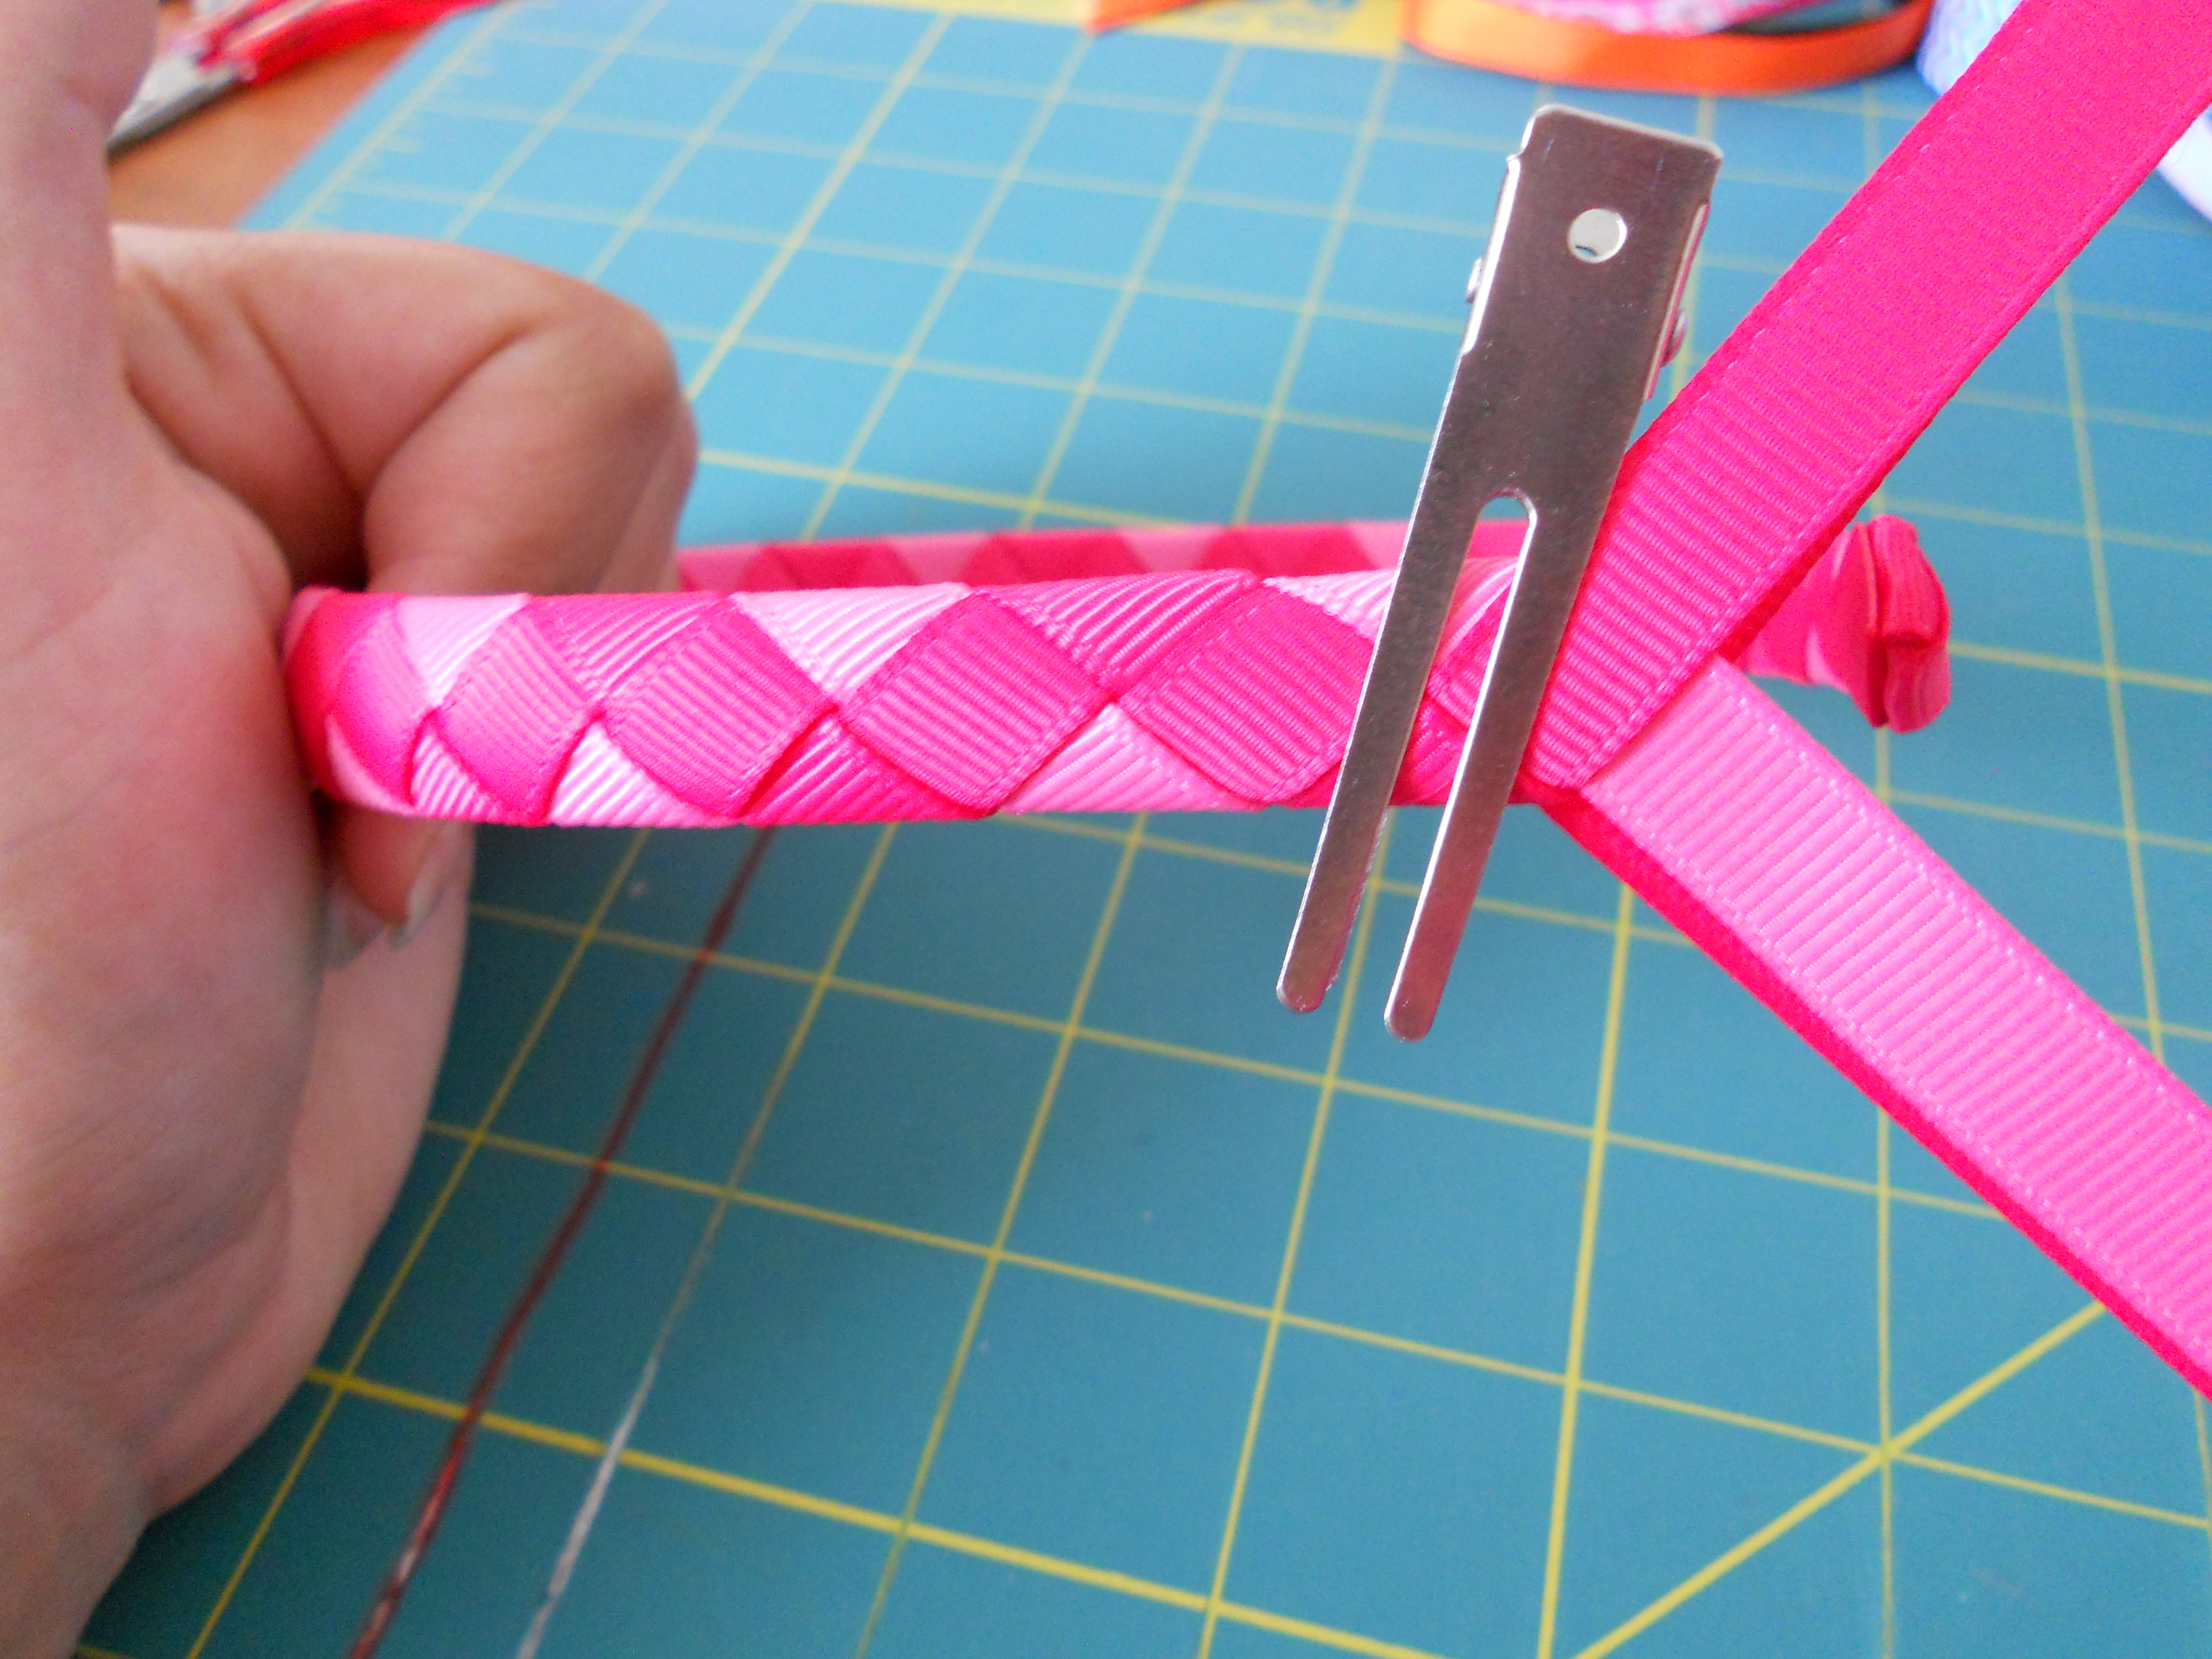
Step 7: Hot glue the ends to the headband. Start by gluing down the ends that will be against the headband. Flip your headband over and glue down the end that is against that side of the headband. Glue the two remaining ribbons down.
Step 8: Use your scissors to cut off the excess ribbon. Don't cut the ribbon too close to the headband.

Step 9: Use your lighter to burn the ends of the ribbon. I run the lighter back and forth and press down on the ribbon (quickly - it's hot!!).
Make sure the edges of the plastic headband are covered for a professional finish.
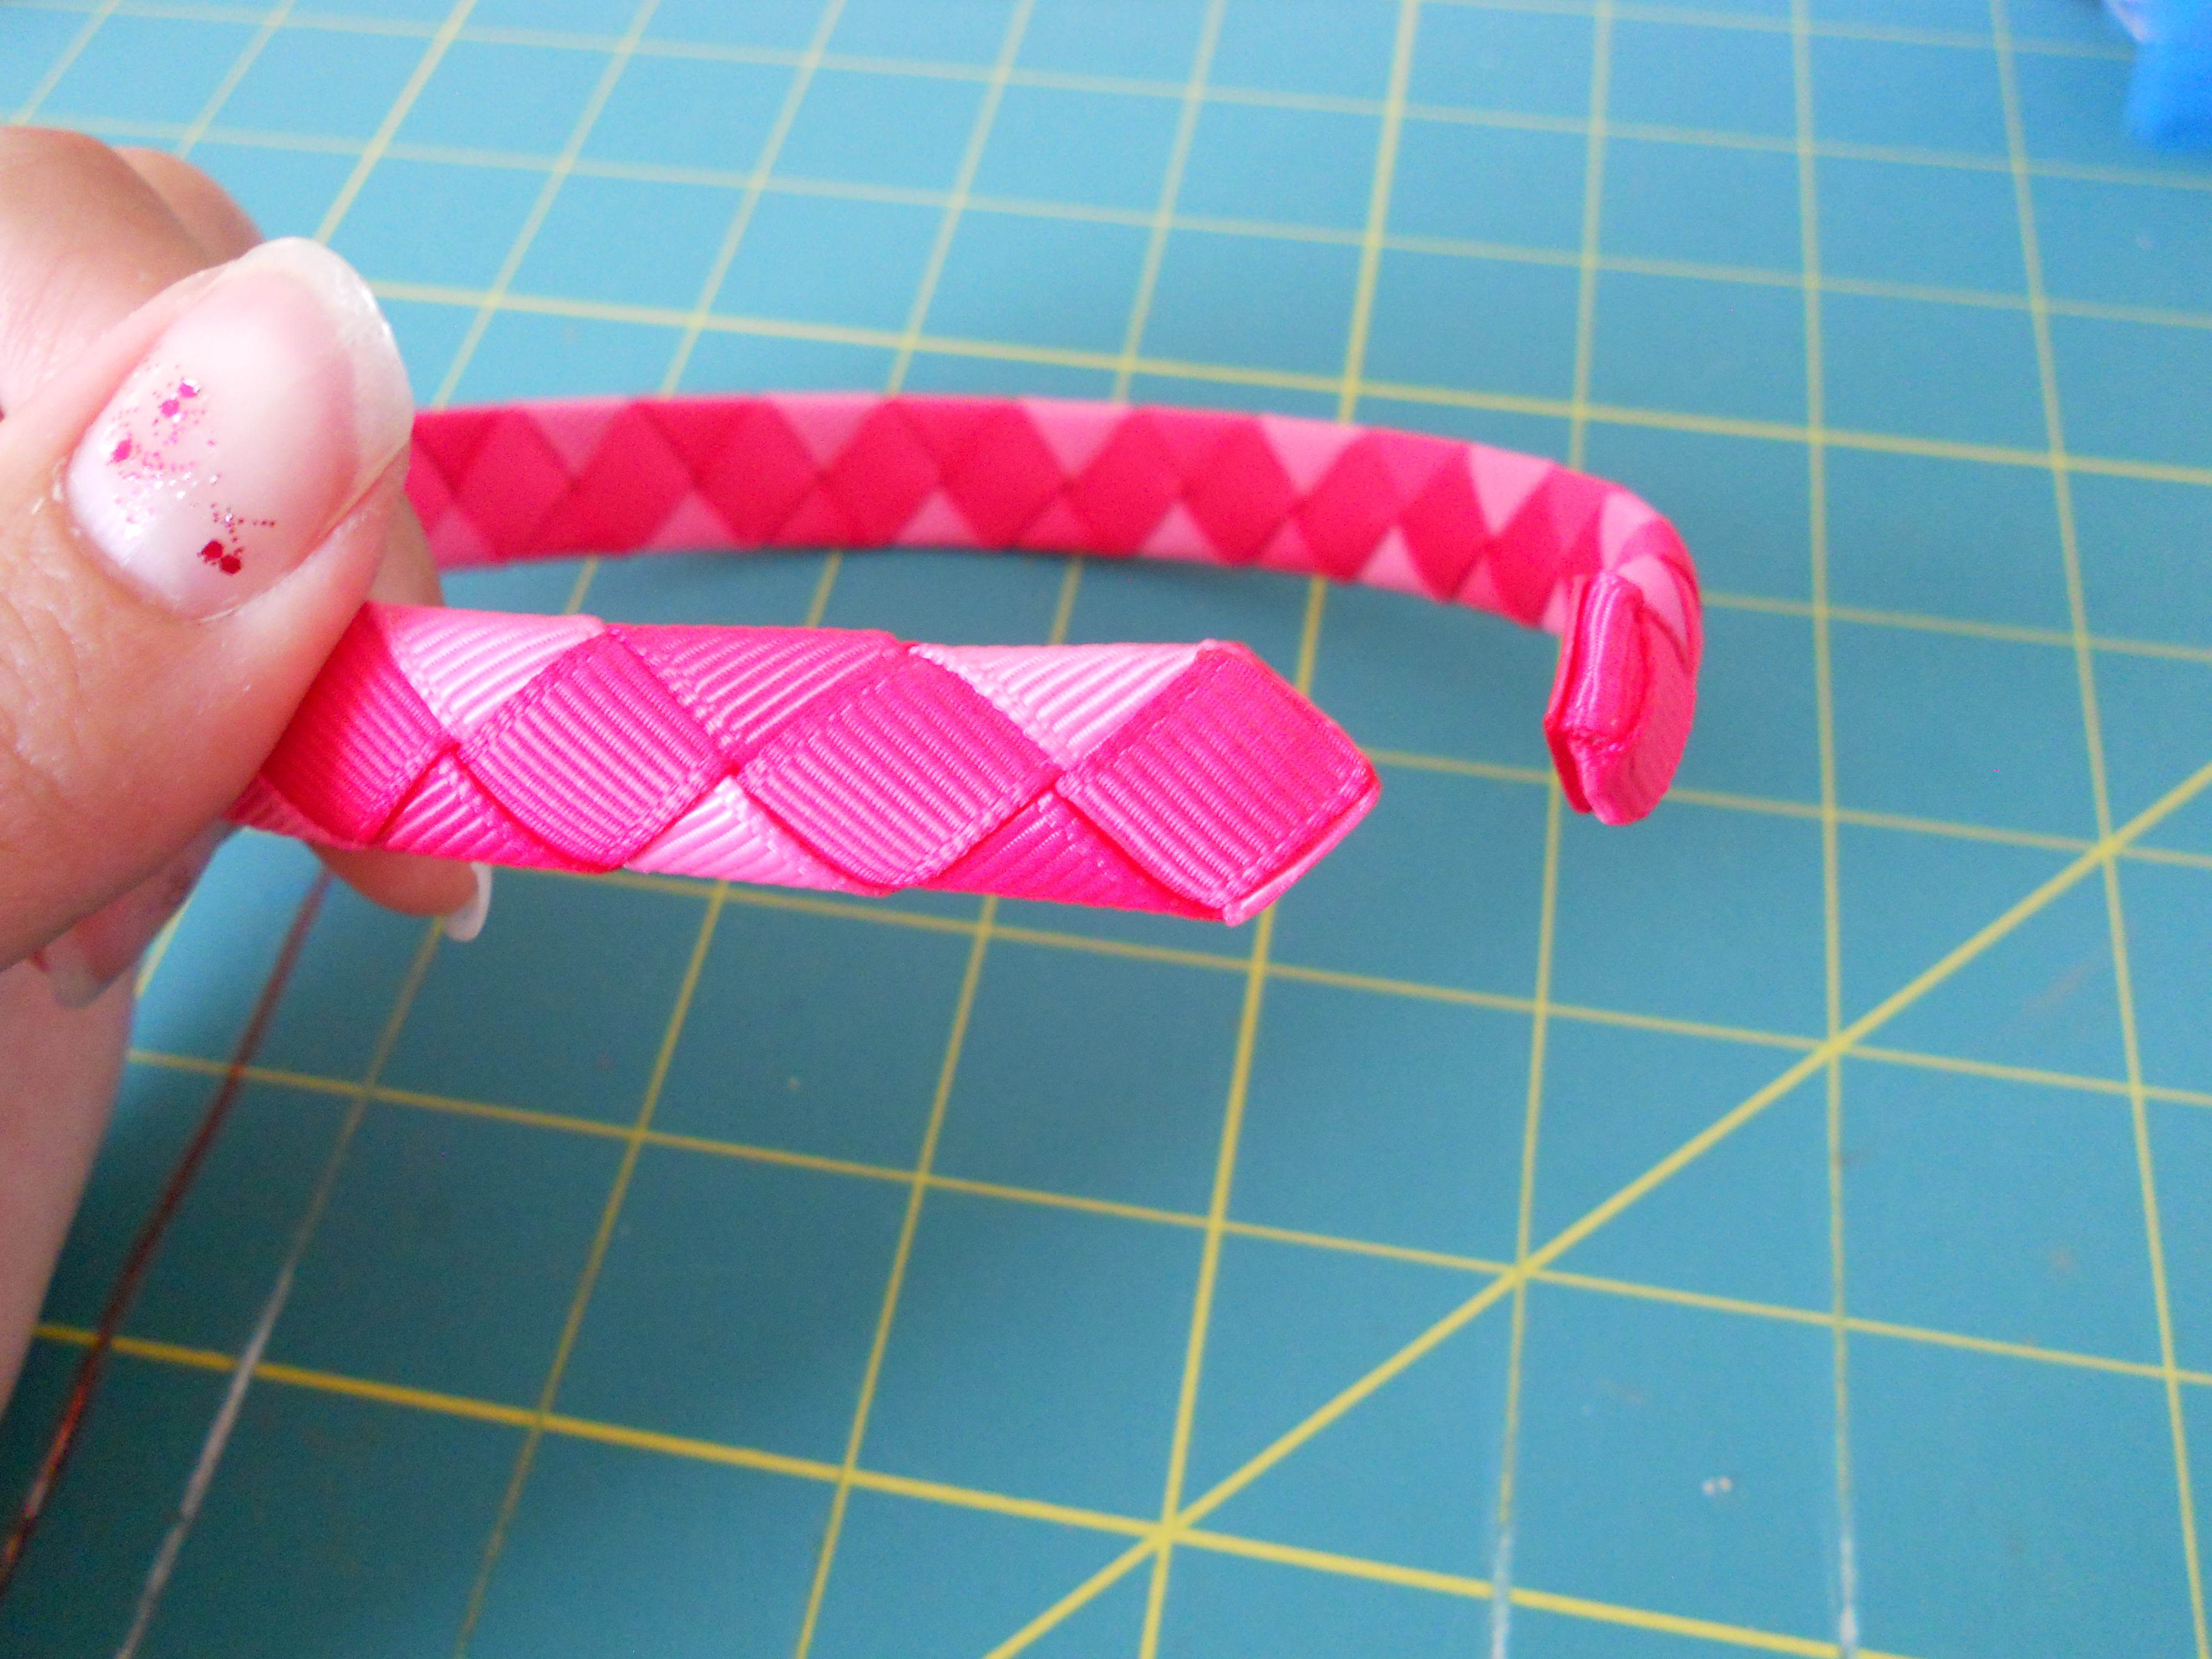
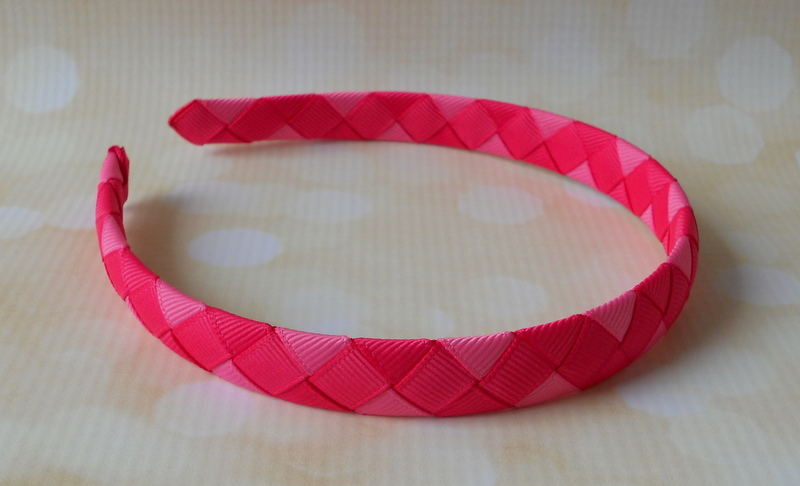
You've completed the zig zag pattern! This pattern is so fun and would look even better on a 1" headband blank!
Make sure you check out the blog for all of my other woven headband tutorial patterns!
Visit the rest of our blog for more Crafting Tutorials and DIY Instructions!
Loading...

