
Contributor post by Danielle at Korker Krazy
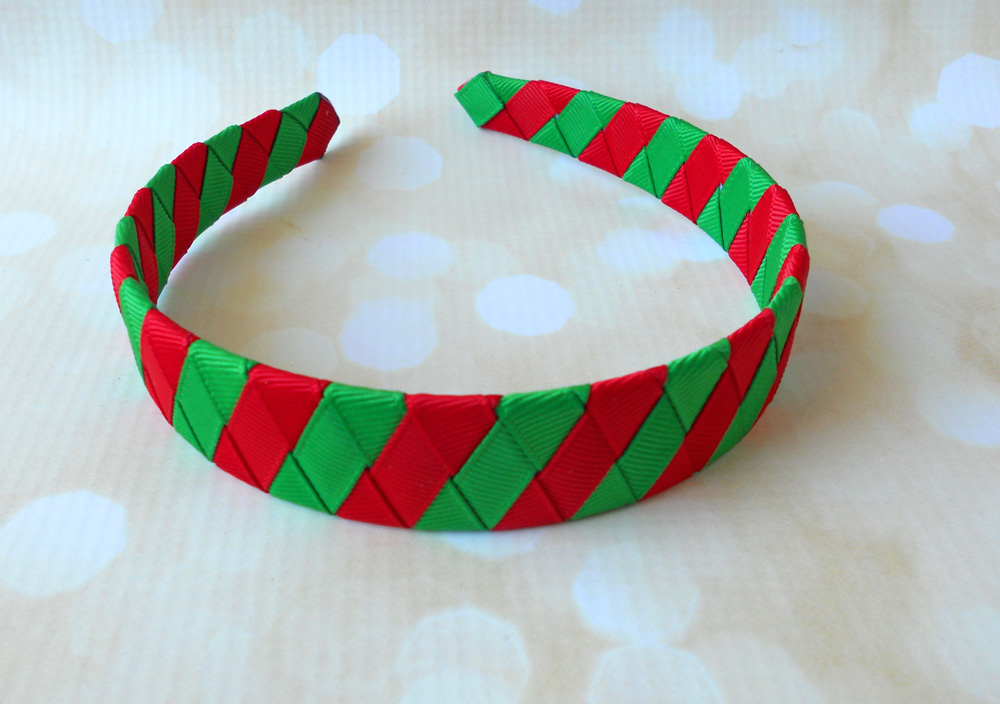
Hi! Danielle here from Korker Krazy! Christmas is my favorite time of the year, I love making Christmas bows and headbands for my daughter to wear! Today I'm going to show you the stripe pattern using Christmas colors and using the larger size headband.
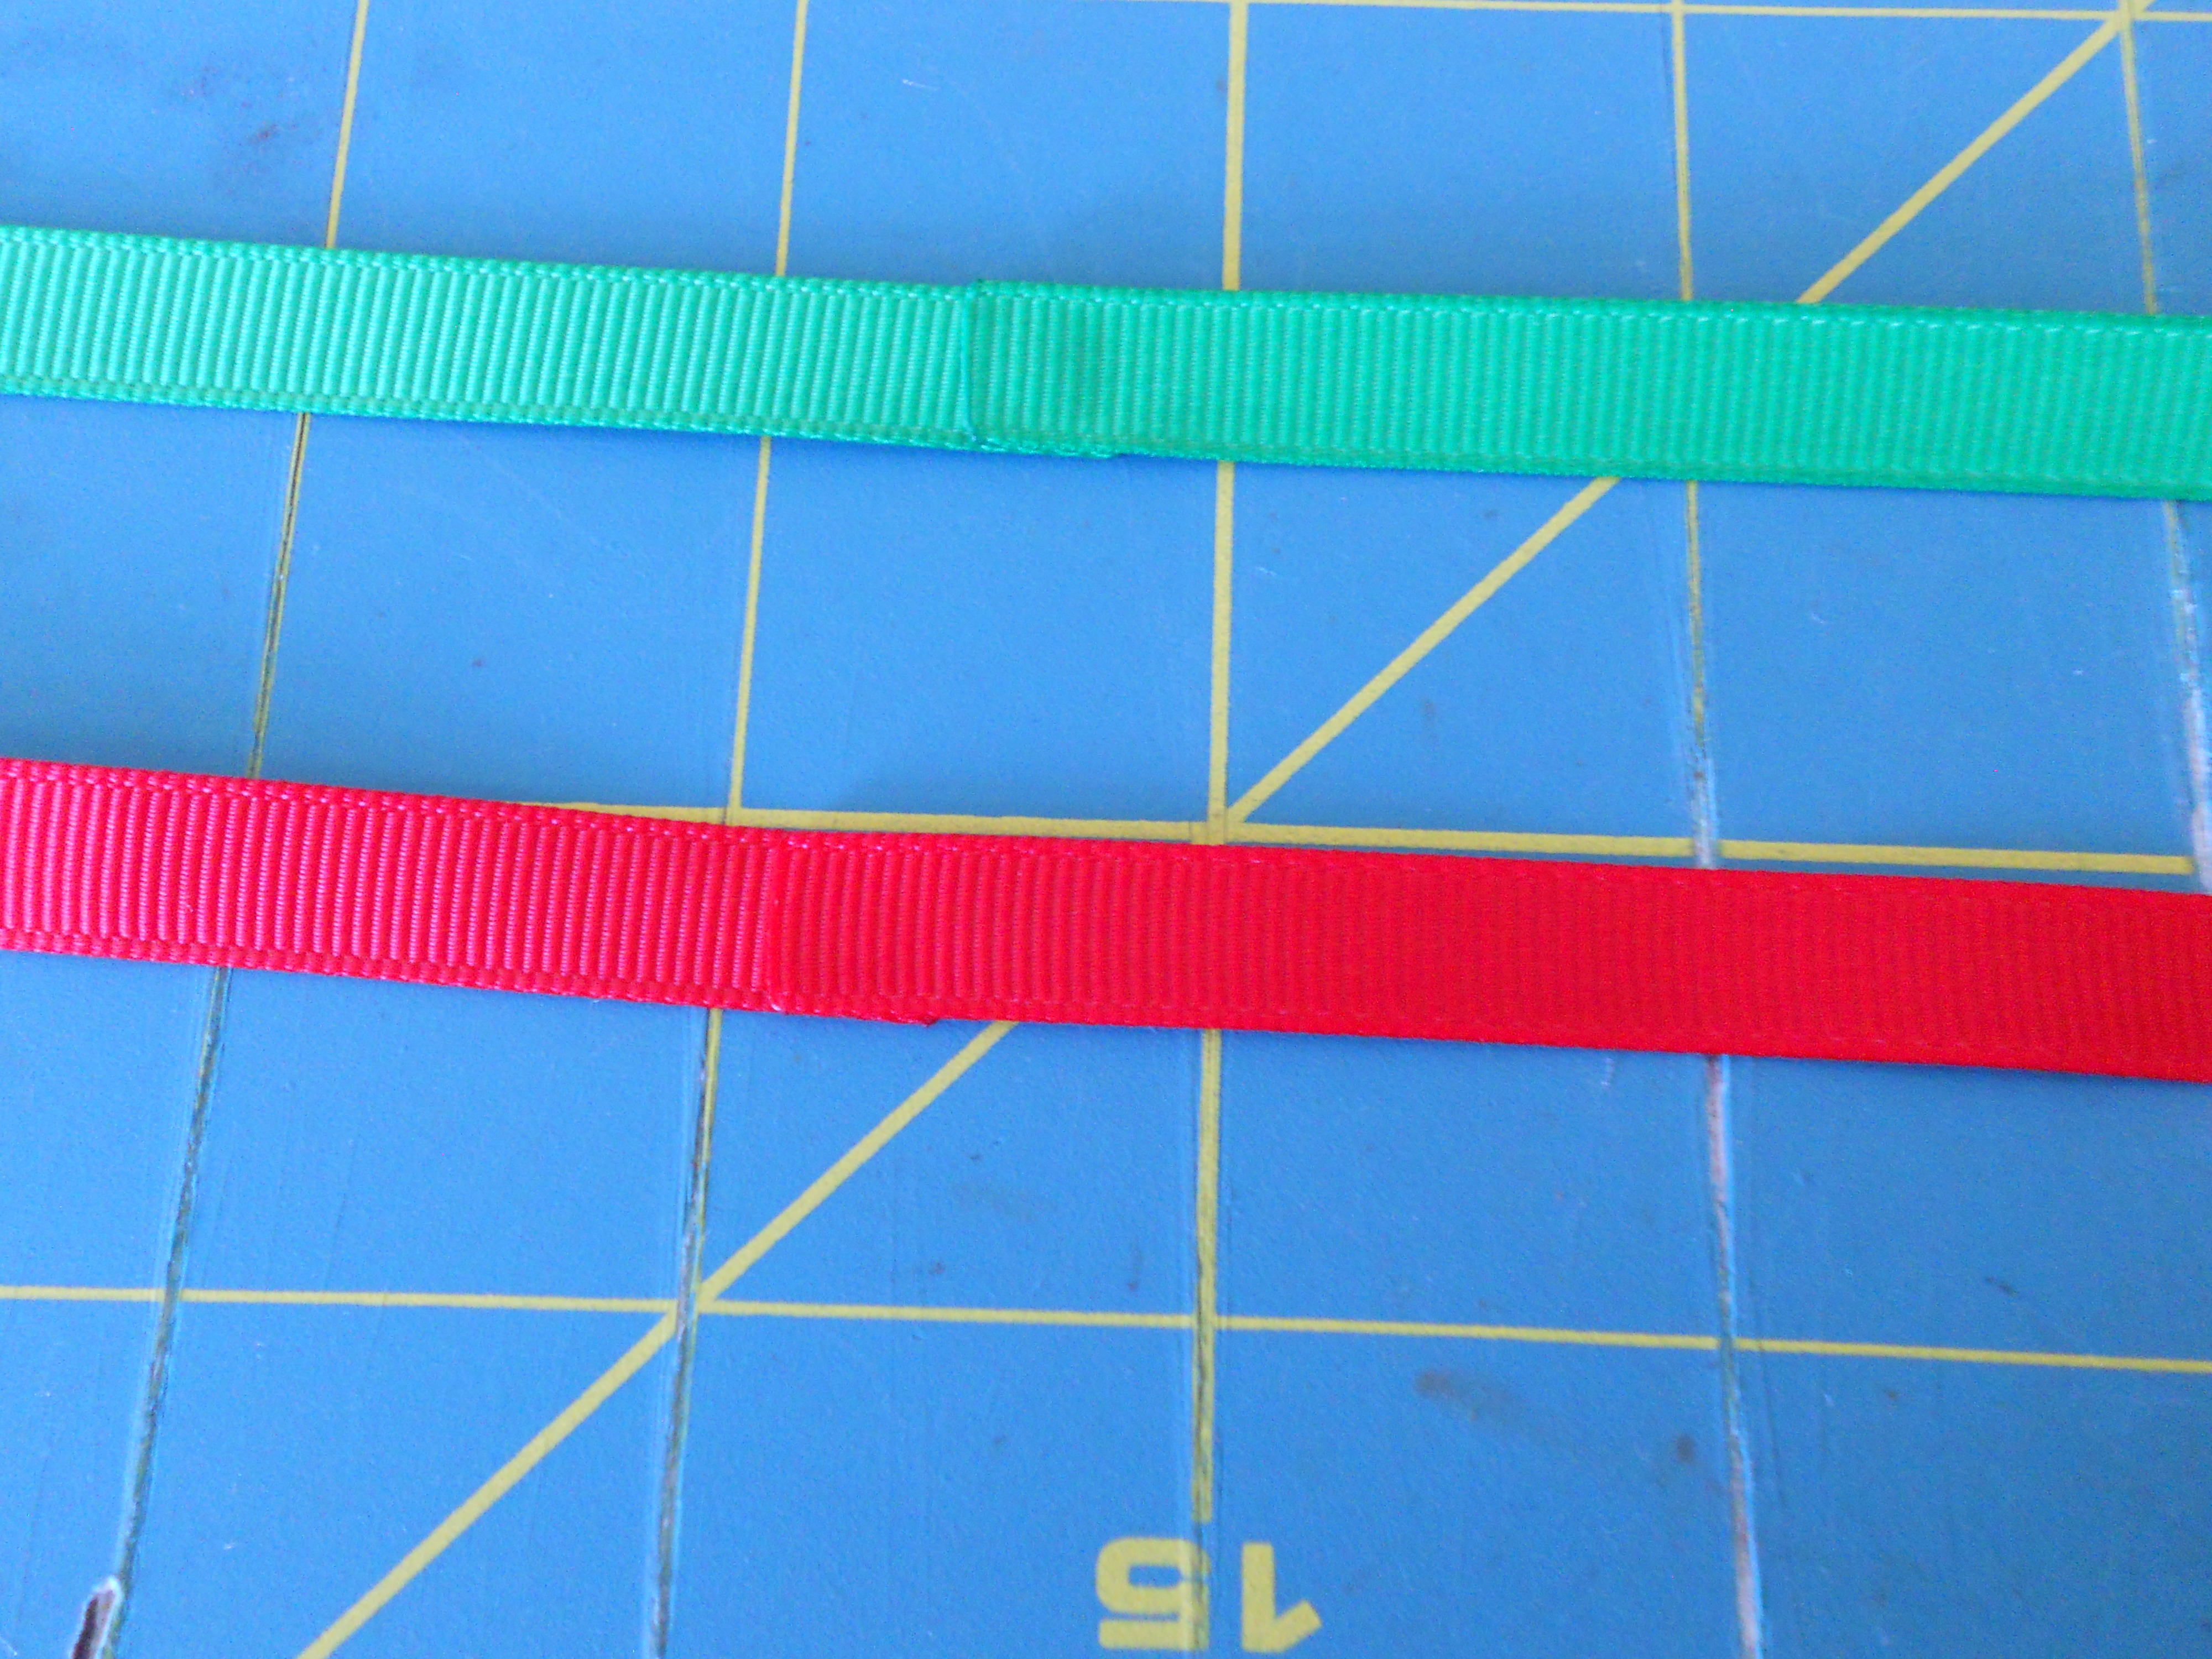
Supplies Needed: 3/8" Grosgrain Ribbon Red and Emerald Scissors Lighter Hot Glue Hot Glue Gun 1" Plastic Headband Blank Alligator Clip

Step 1: Cut two 36" pieces of each color (you need four 36" strands total). Heat seal all ends with a lighter. To achieve the stripe pattern, we need to use two different colors and the ends of the matching colors need to be glued together. Overlap the ends 1/2" and hot glue them together. You now have two pieces of ribbon, glue them together to form an "x" shape. The matching colors need to be across from each other.
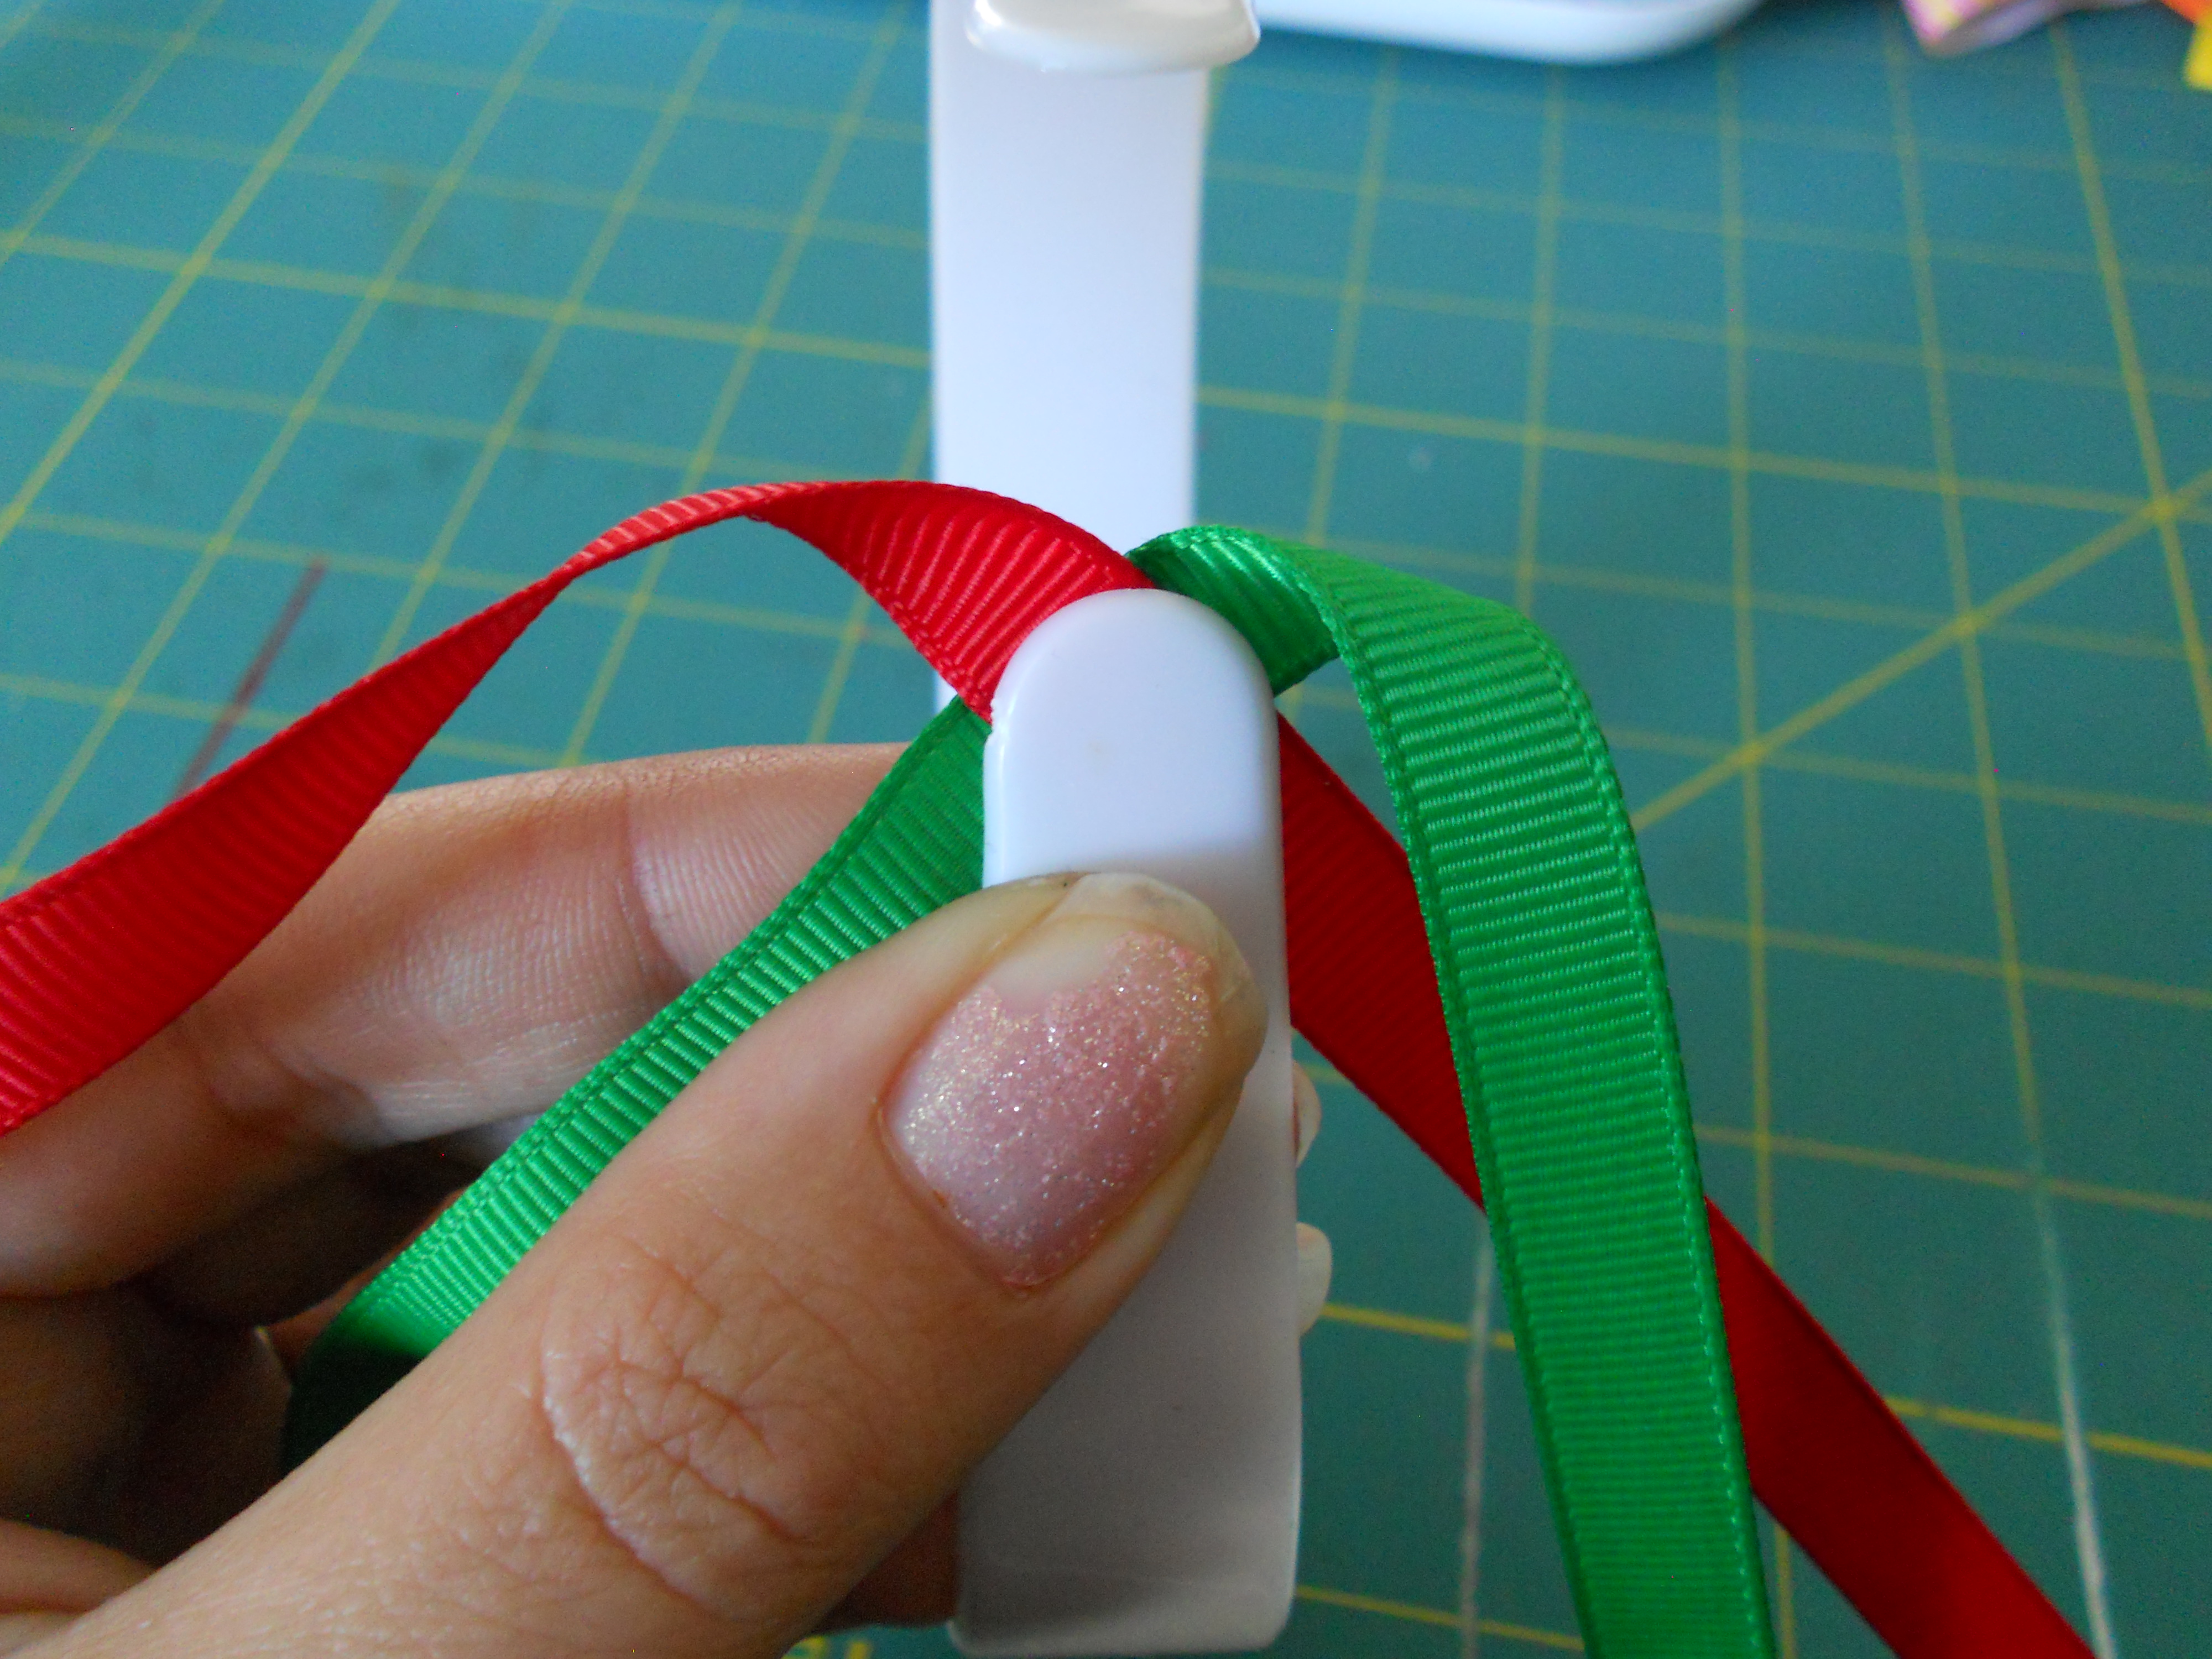
Step 2: Place the center of the "x" on the back of the headband. You should have one piece of red and one piece of emerald on each side. The matching colors will be diagonal from each other.
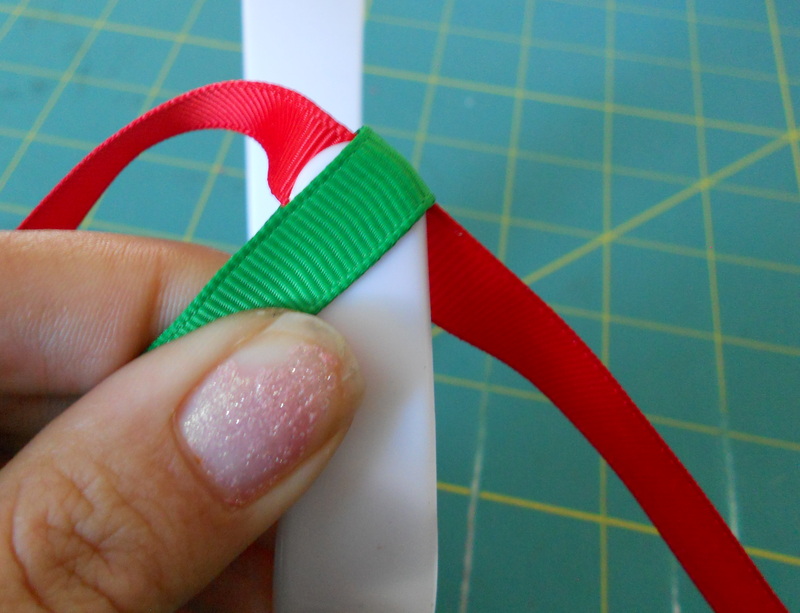
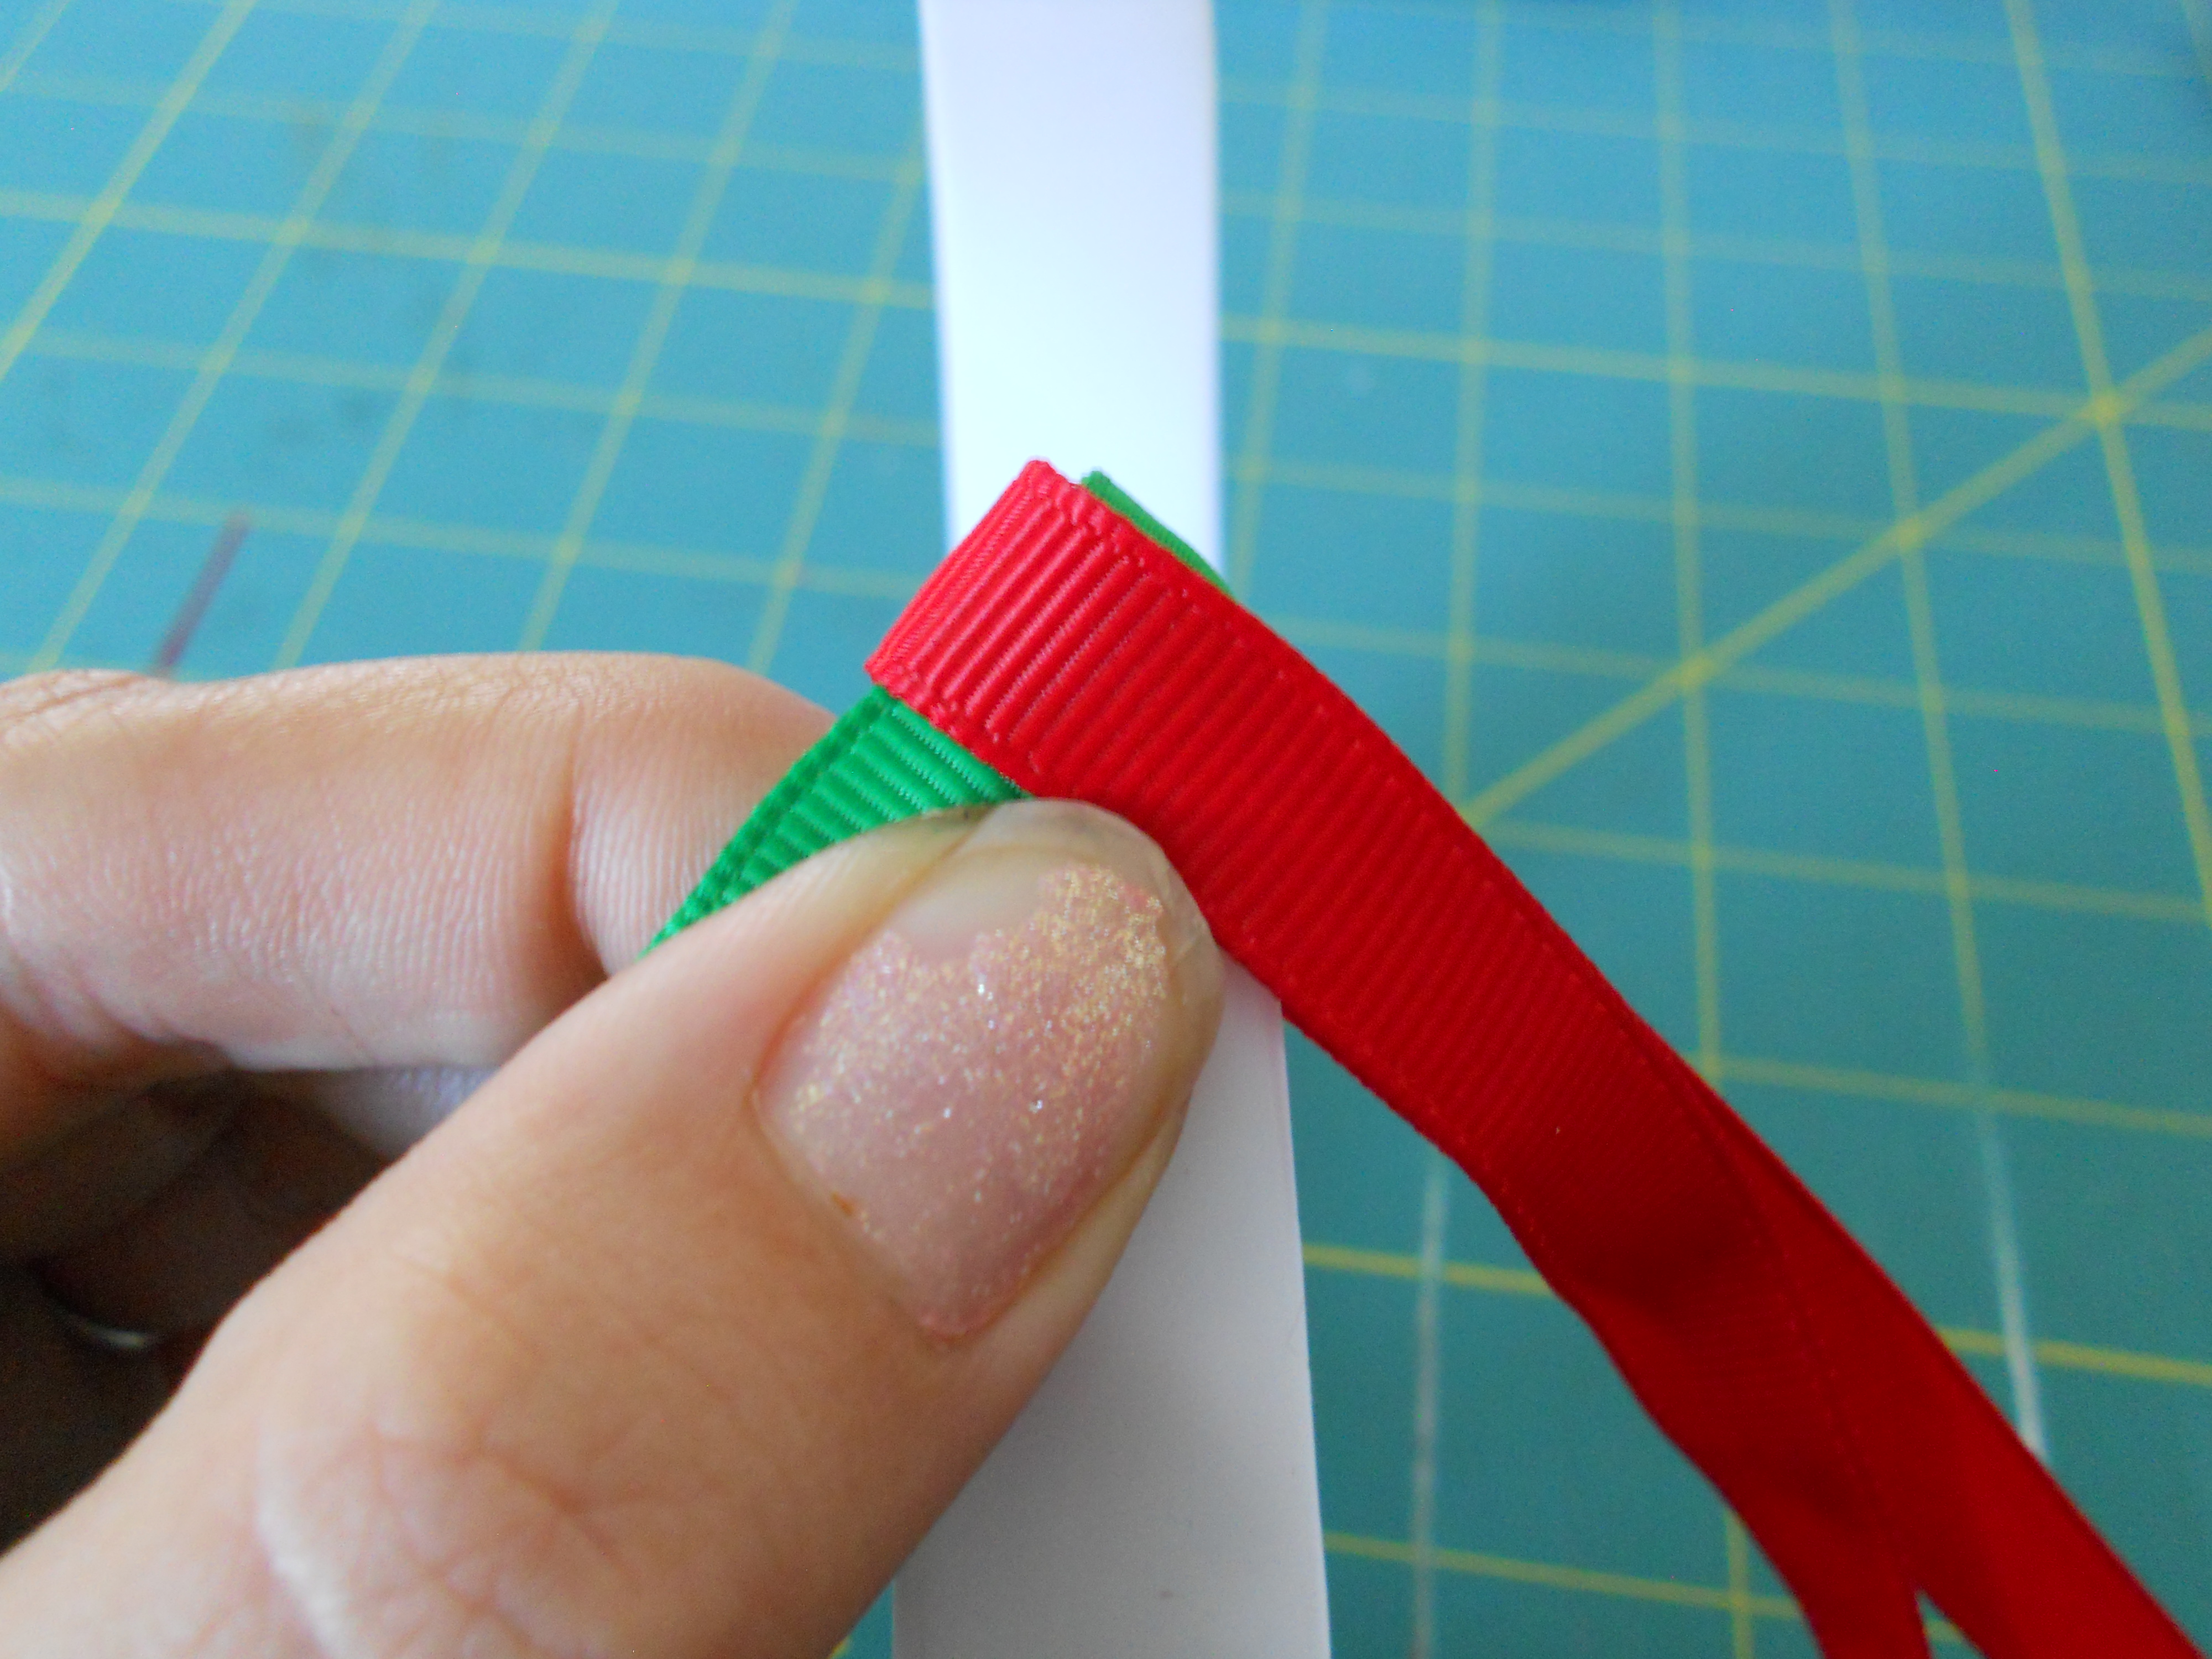
Step 3: Fold your top right ribbon across the headband (emerald). Fold your top left ribbon across the headband (red).

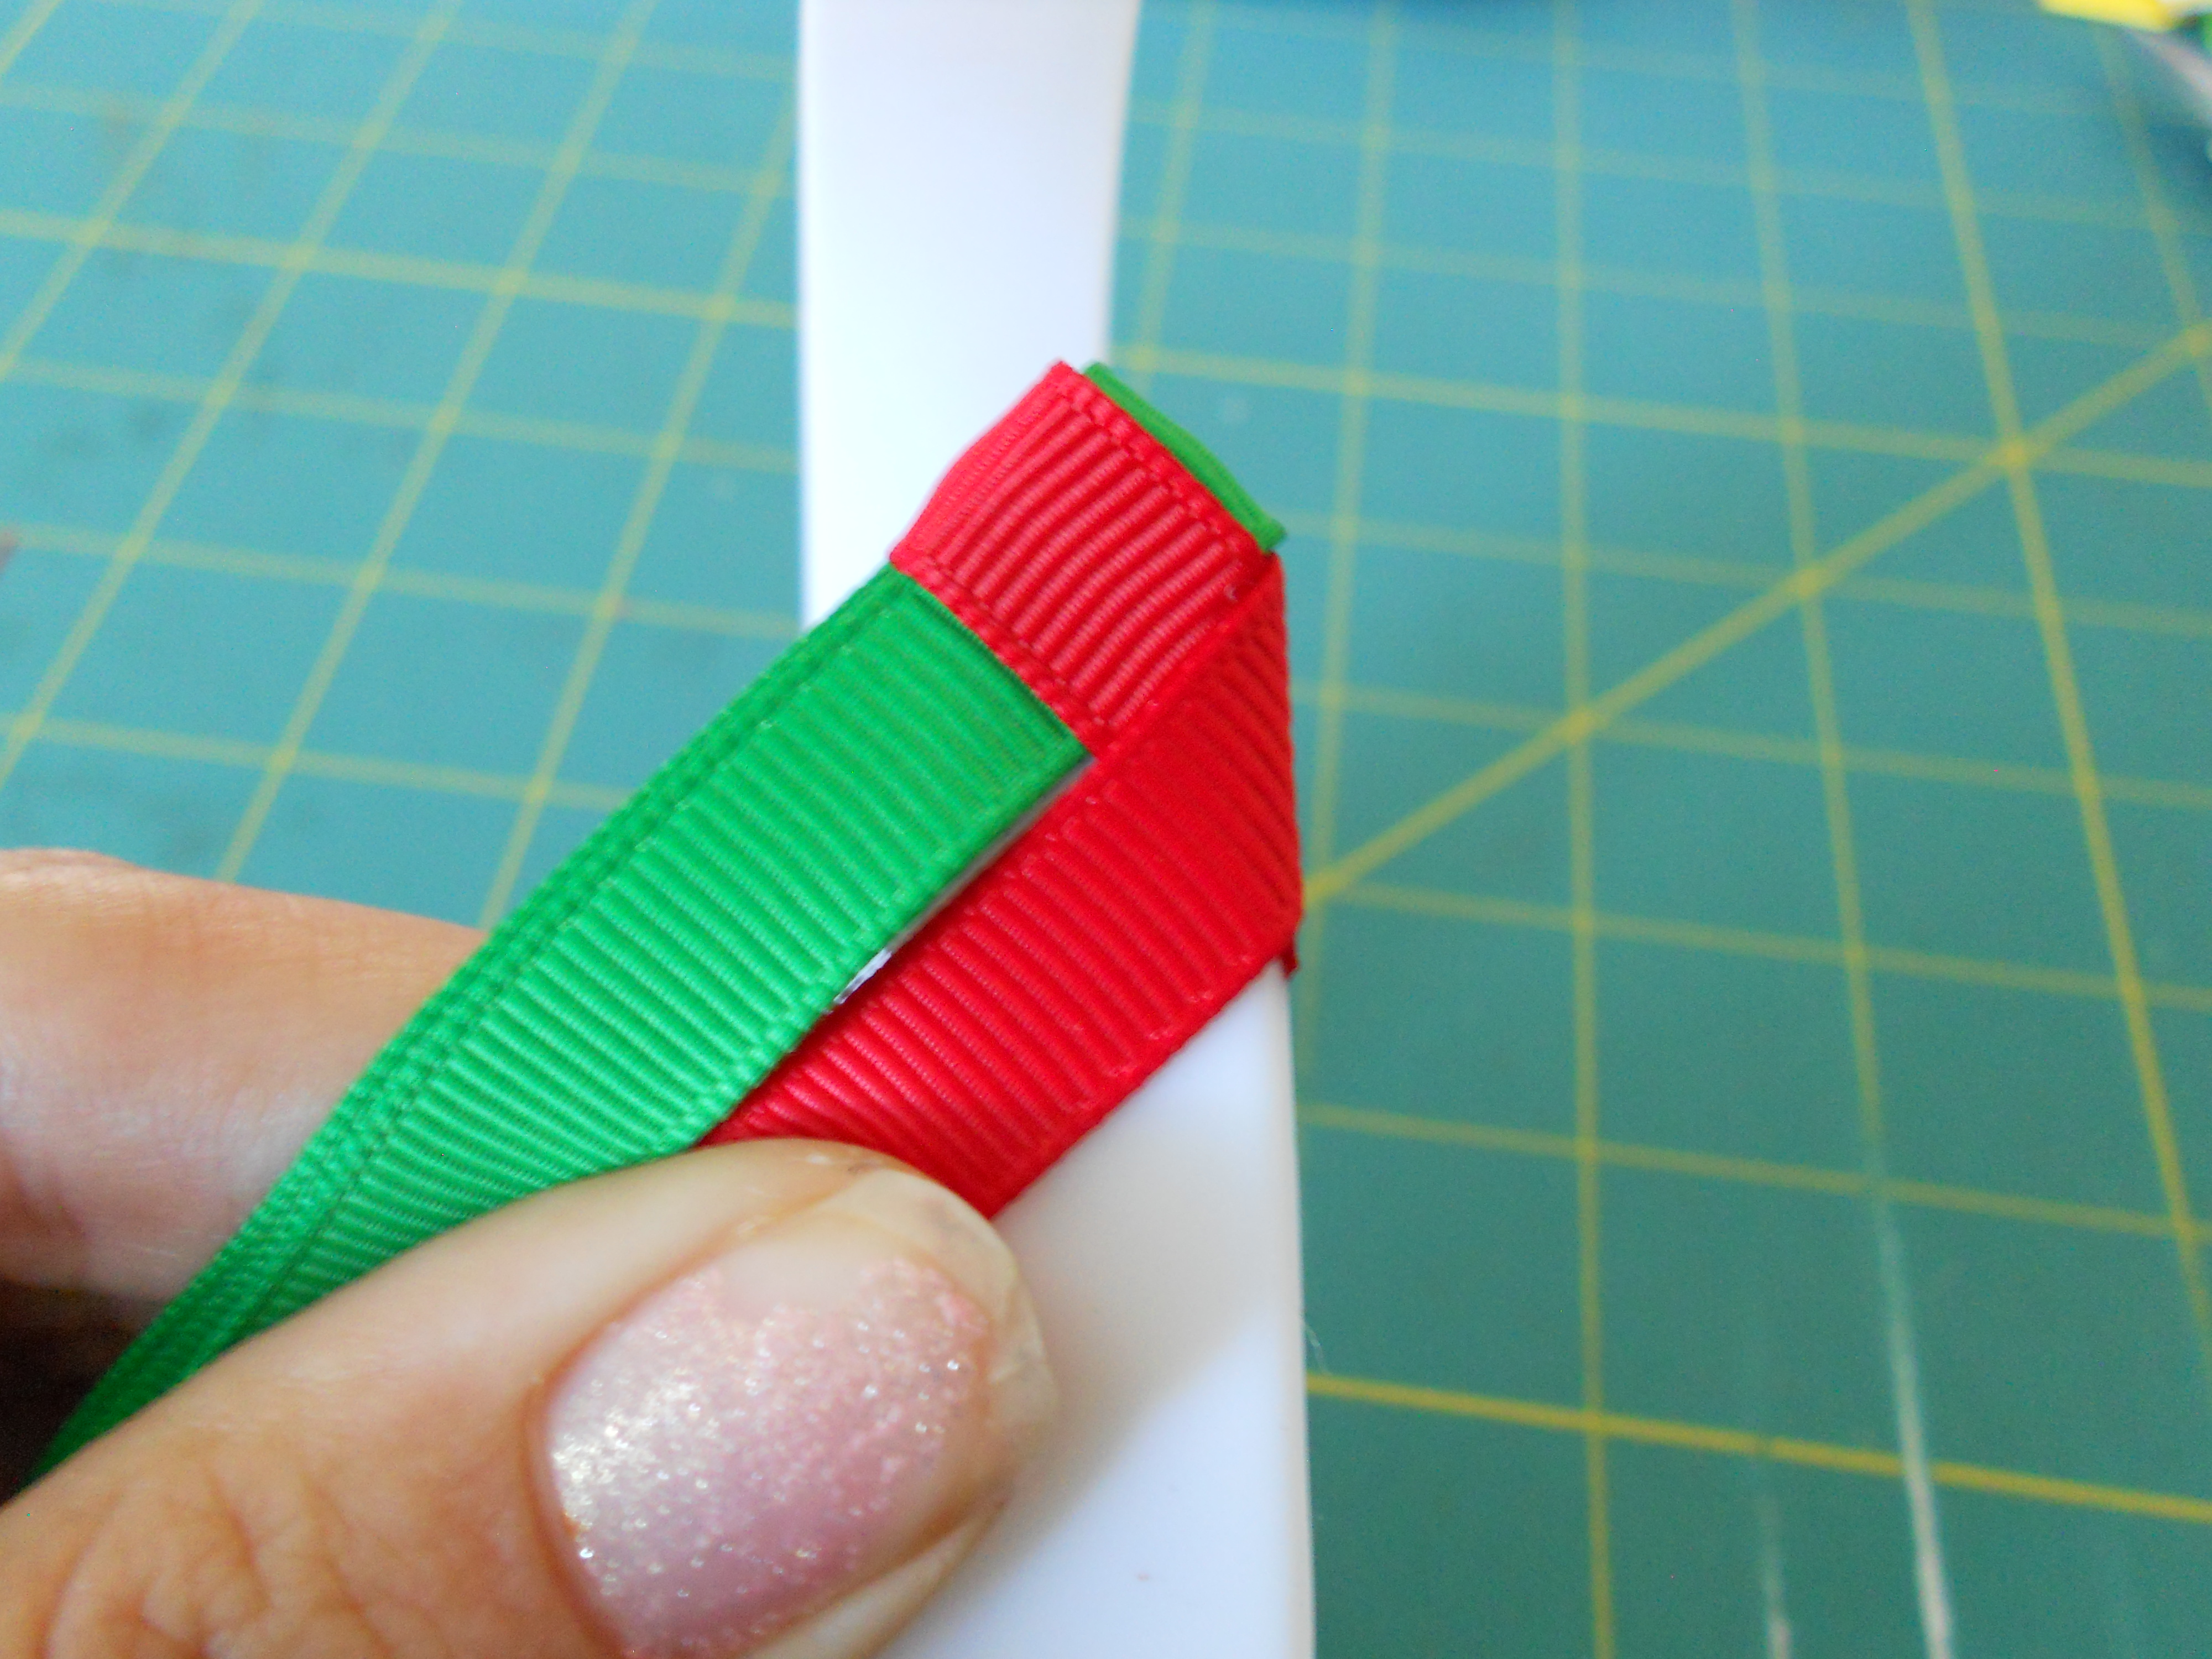
Step 4: Fold your top left ribbon behind the headband (red). This piece should be up against the back of the headband, make sure not to overlap any other ribbons.
Fold your bottom right ribbon across the headband (red). This piece should be the only piece that is still on the right side of the headband.
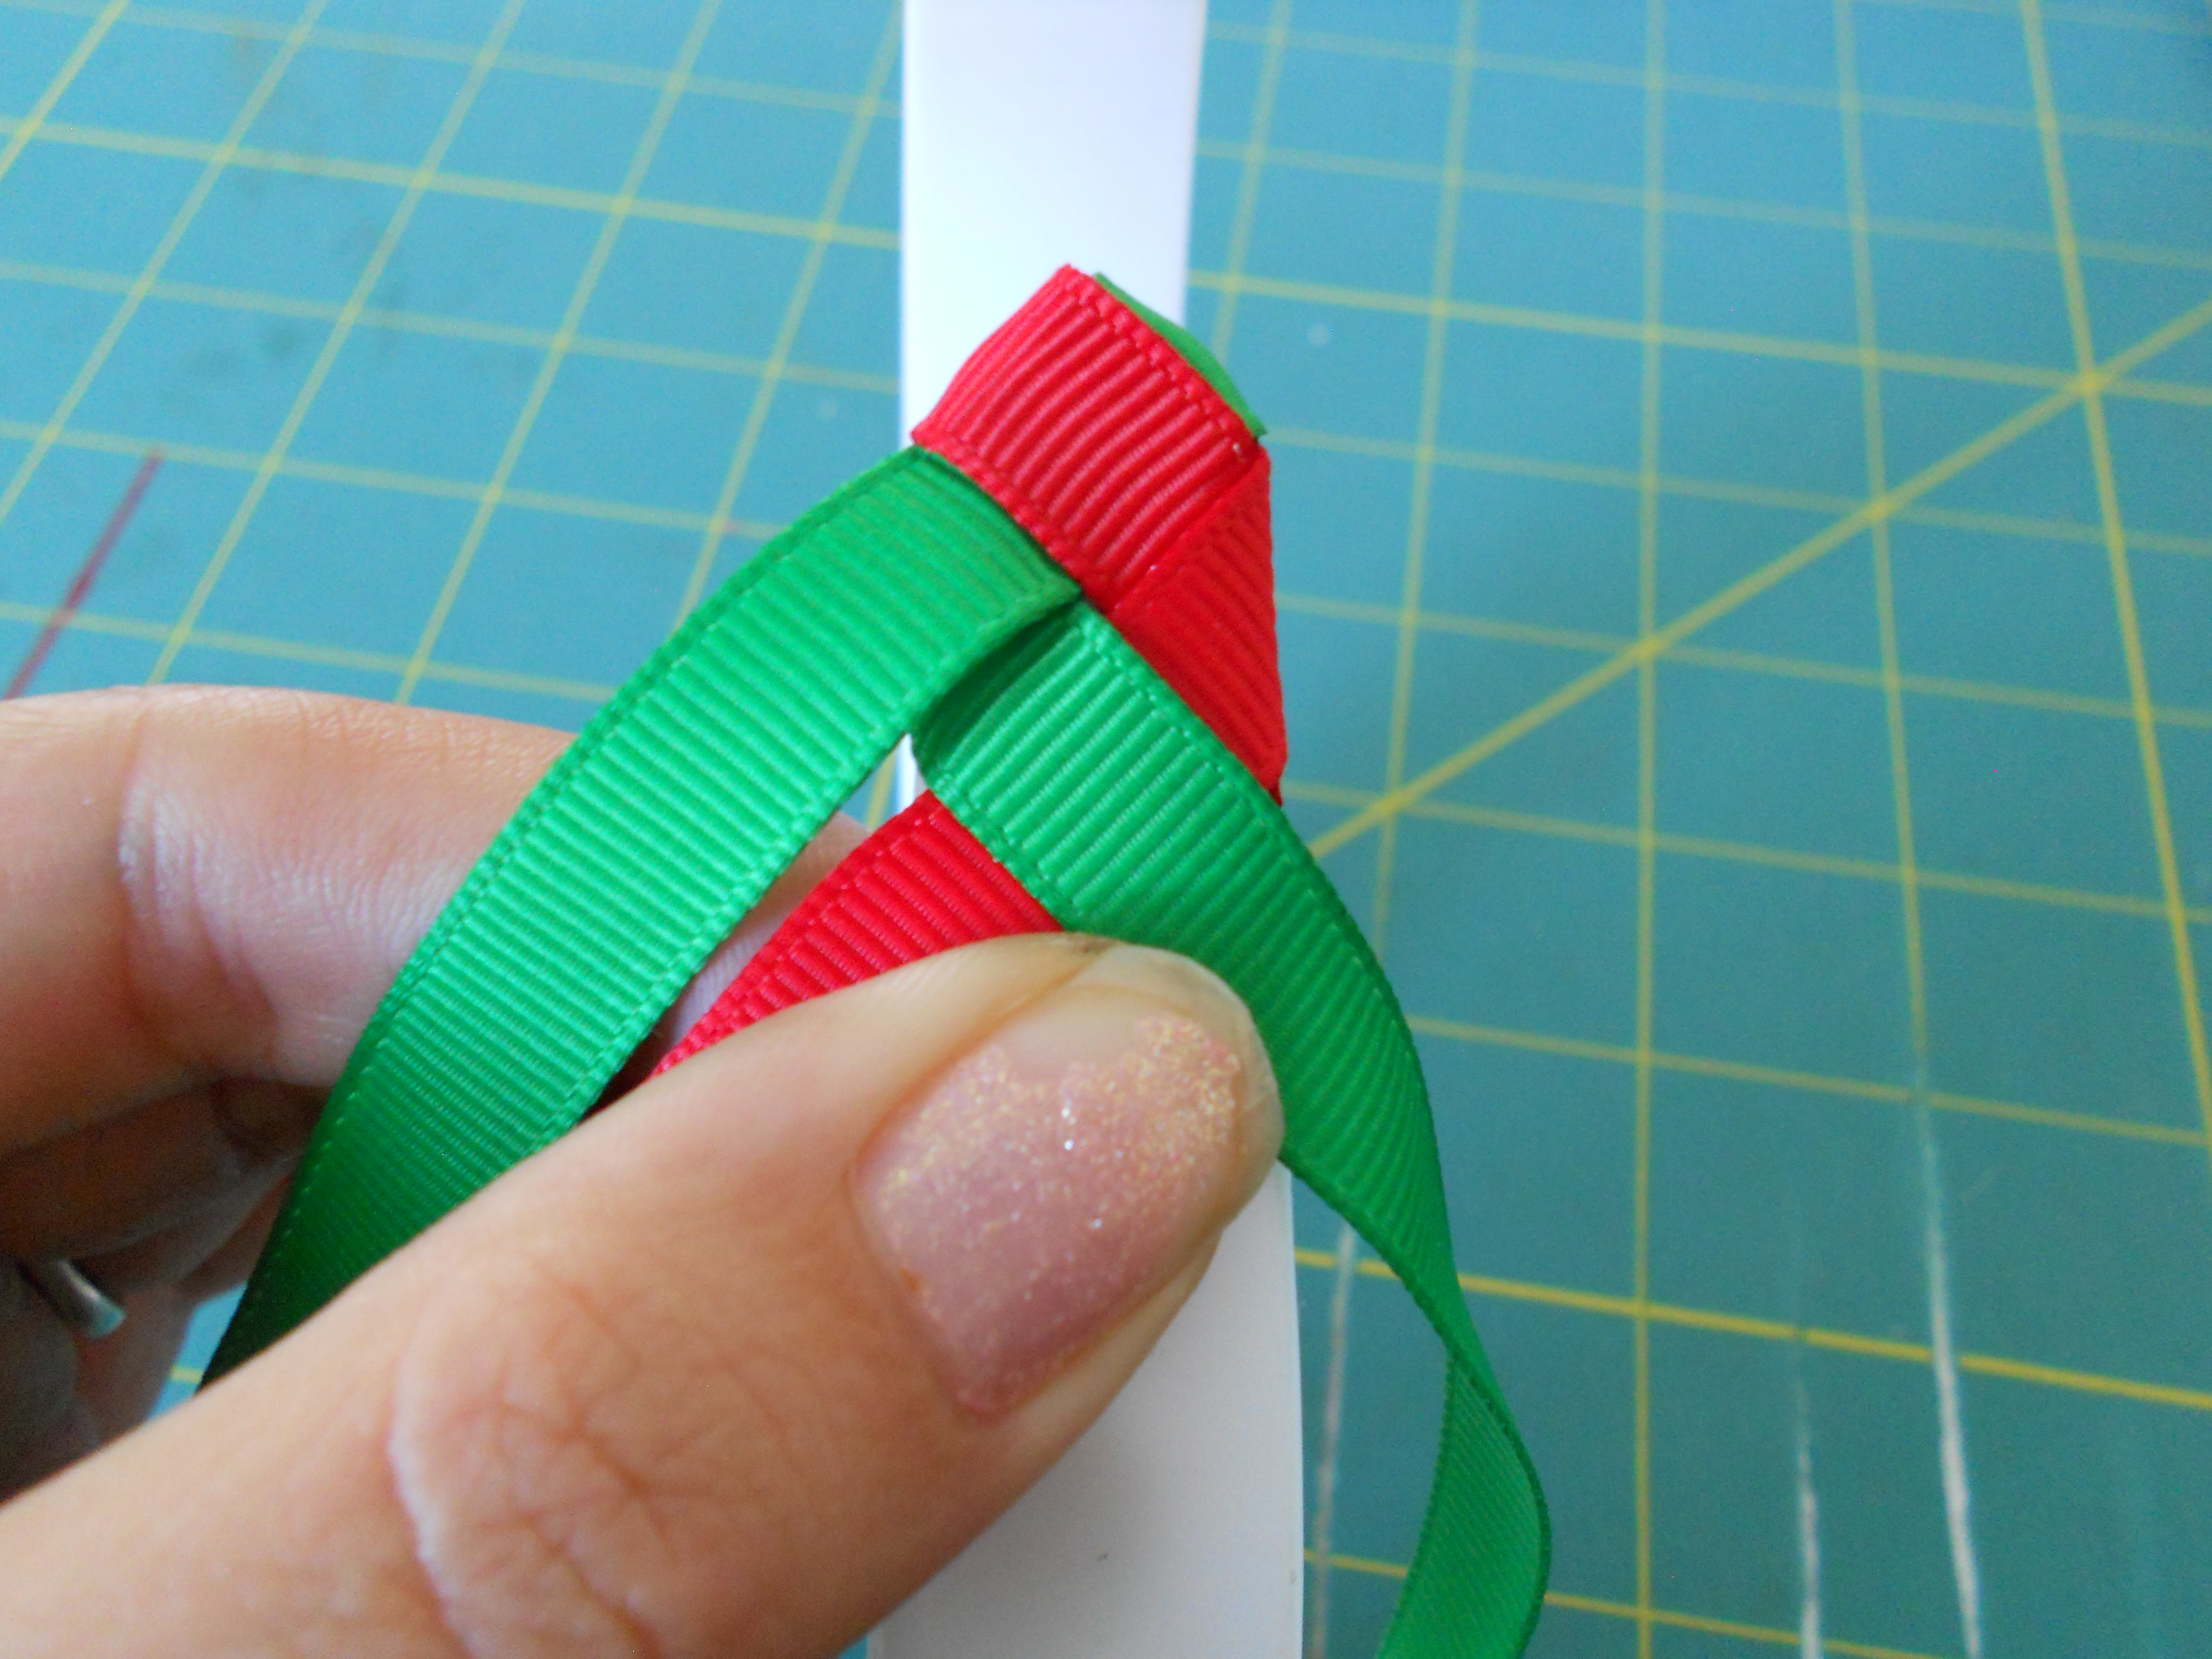
Step 5: Before you start this step make sure all 4 ribbons are on the left side of the headband. Weave your top left ribbon in between the ribbon above it. Emerald should be weaved below the other Emerald and above the red ribbon. Fold your top left ribbon around the back of the headband (Emerald).

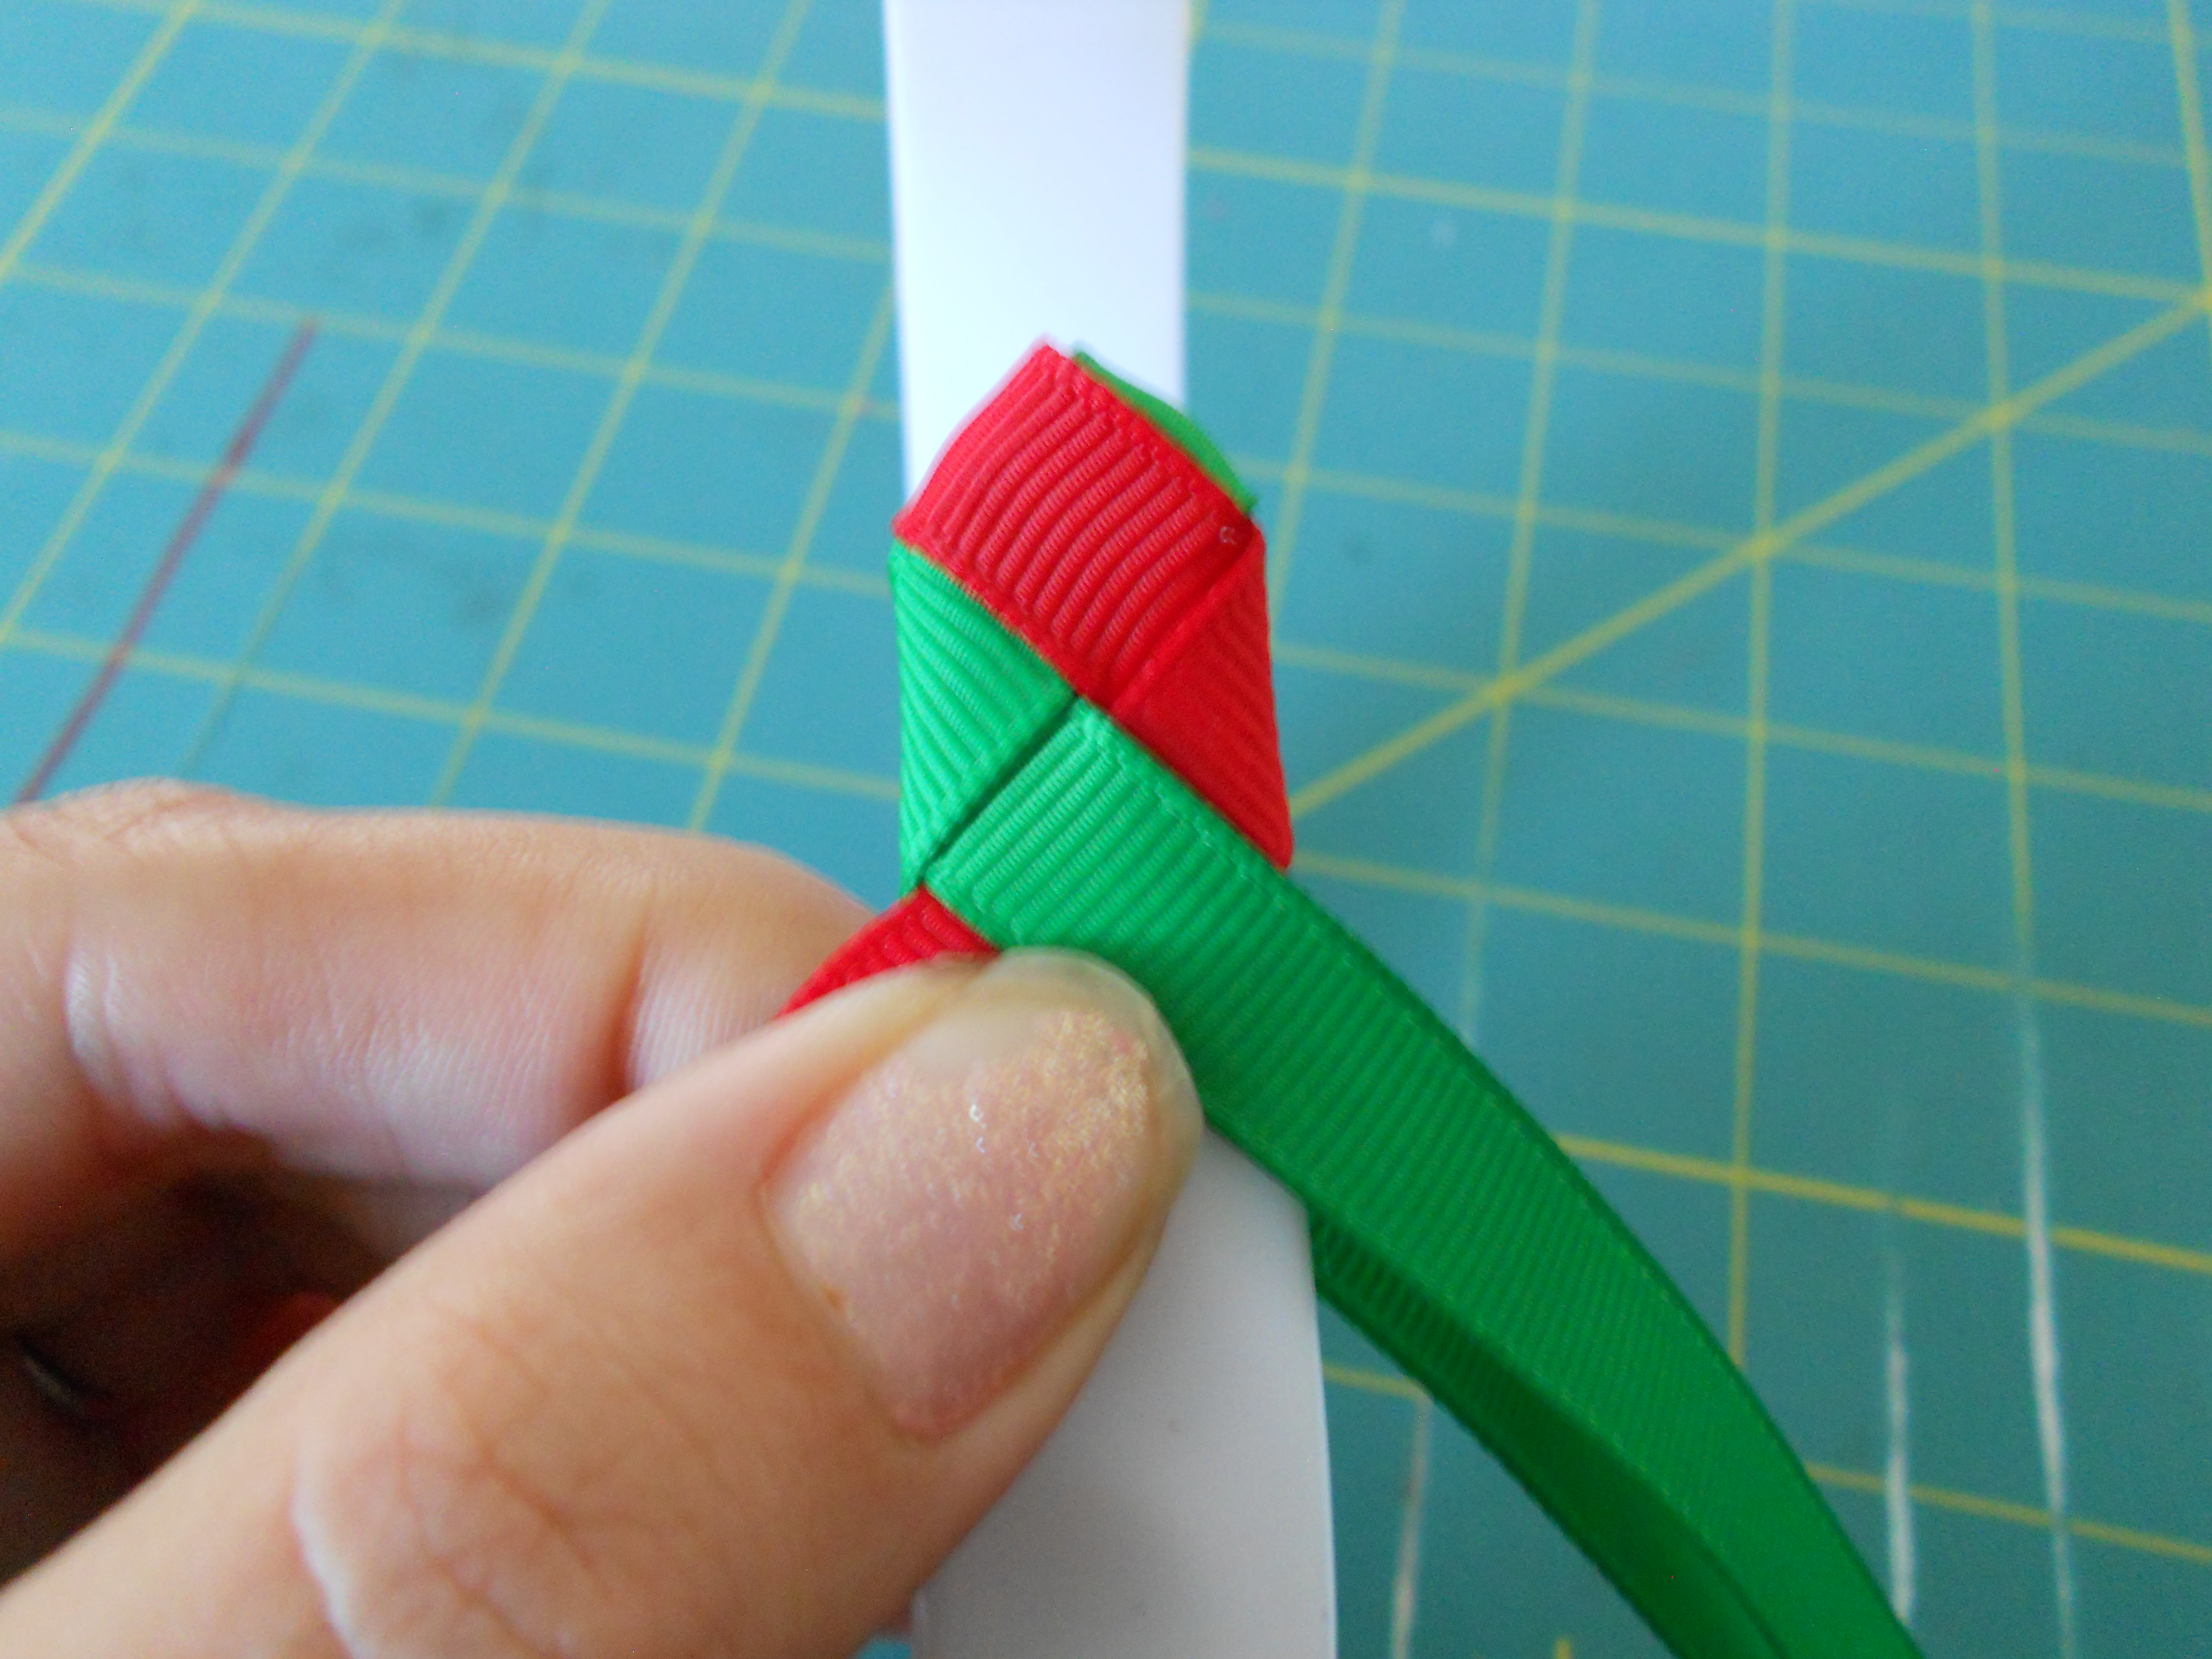
Continue the steps above to weave the entire length of the headband. Hold your ribbon tightly as you weave to ensure an even pattern.
The 1" headbands are harder to weave than the 1/2" headbands. You must maintain a tight hold on the ribbon at all times or your pattern will be crooked. If you are having trouble with this I suggest you practice my 1/2" headband tutorials a few more times.
As you continue weaving the headband the stripe pattern will become very clear.

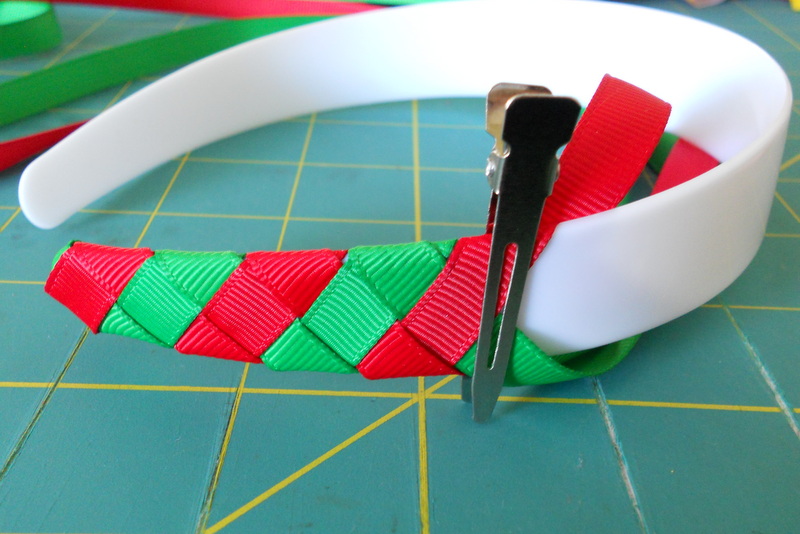
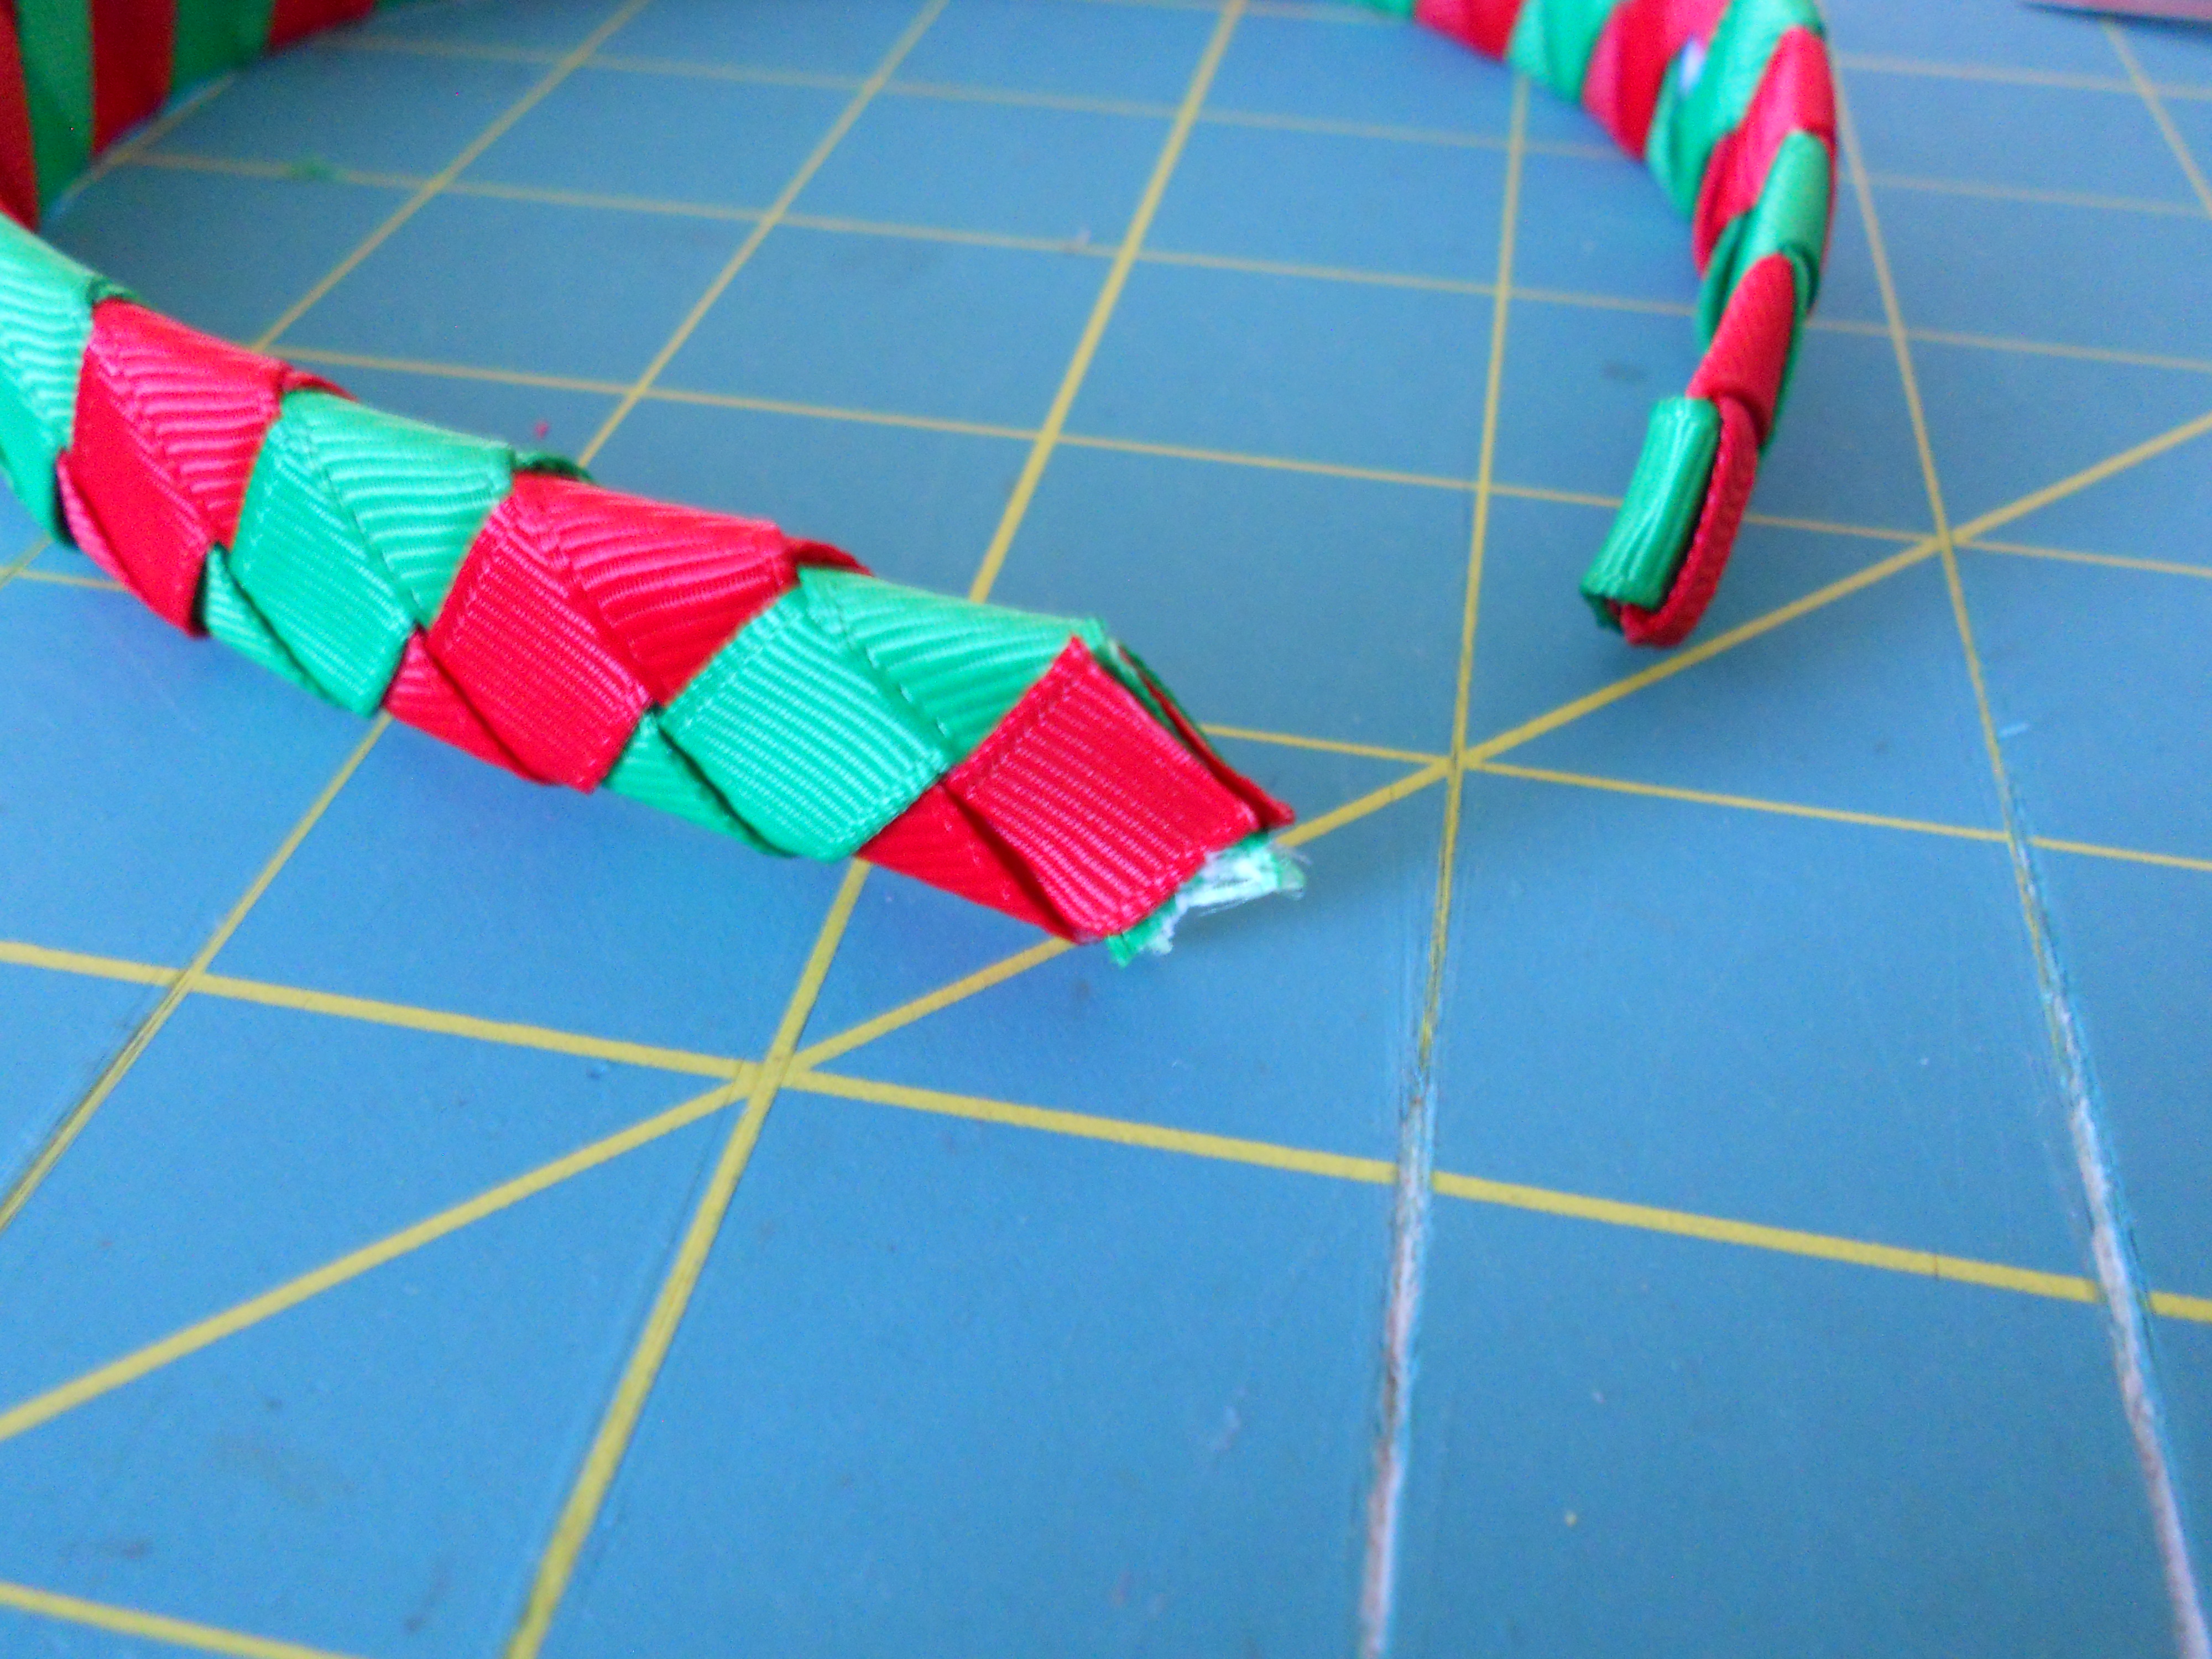 When you come to the end of the headband use an alligator clip to hold the ribbons in place. You want to make sure the white of the headband is completely covered - If the ribbon hangs over the edge that is okay. Hot glue all of the ribbon ends down and then cut them with your scissors. Use your lighter to gently heat seal the ends.
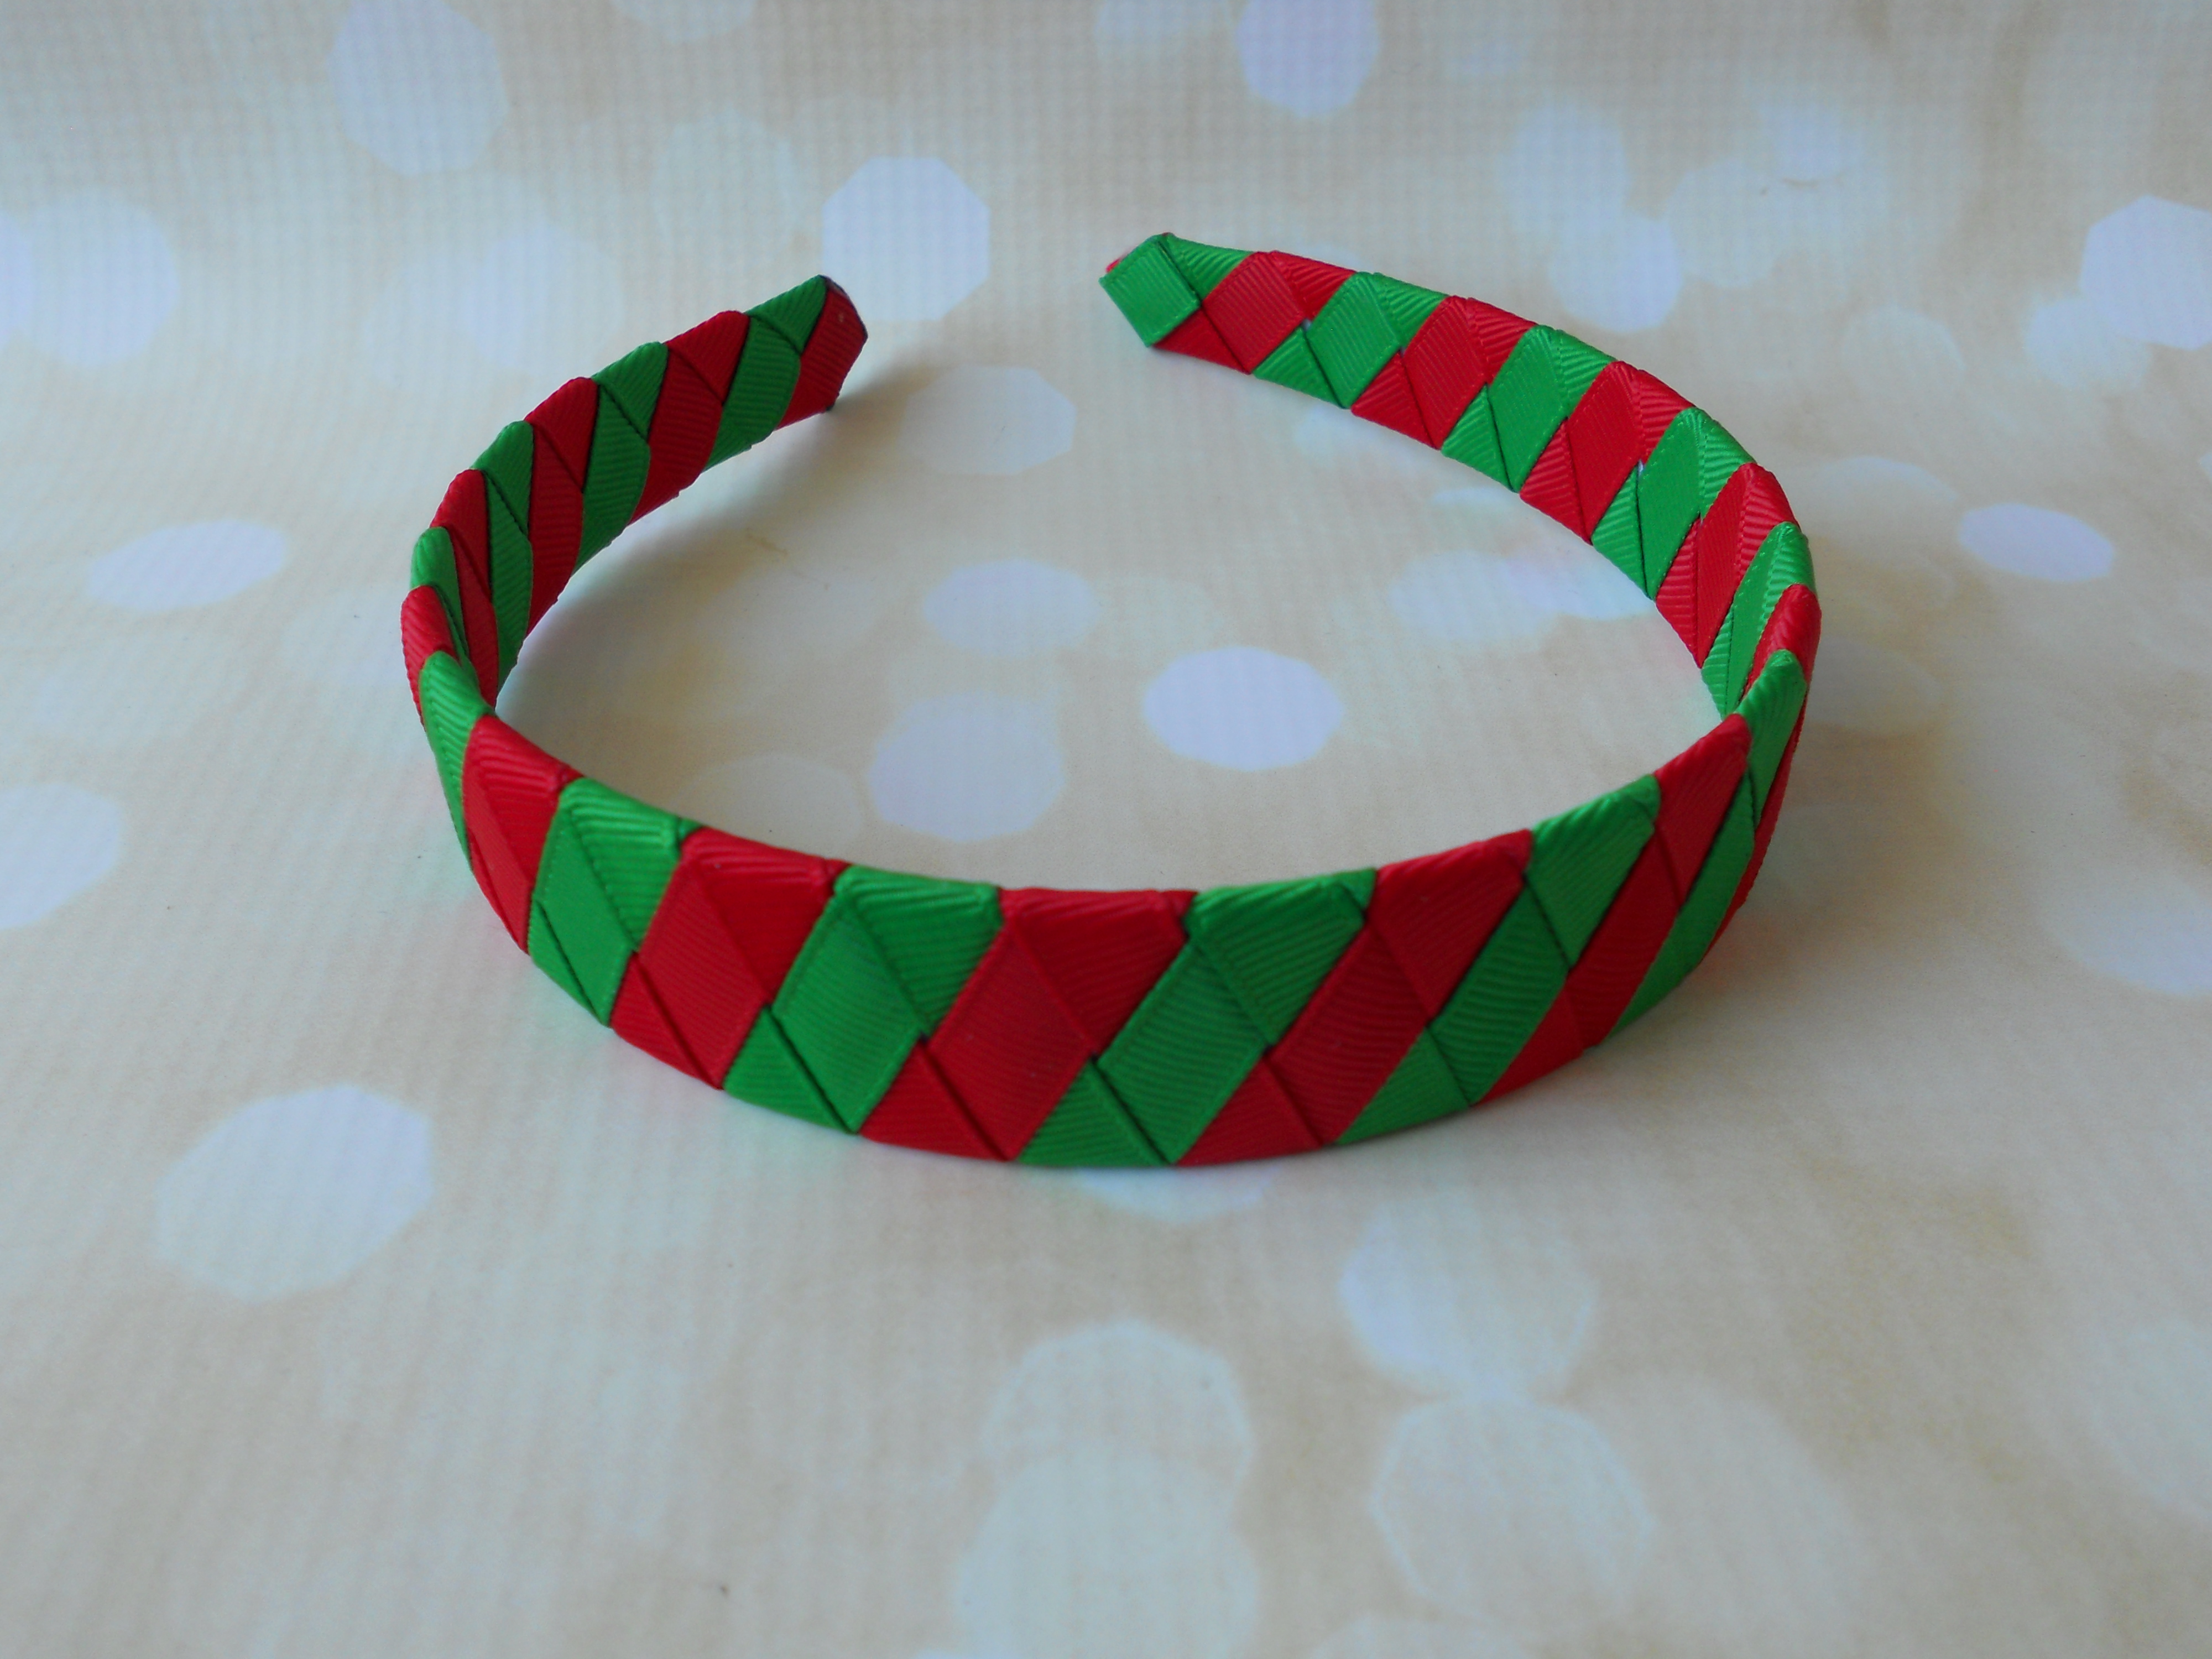
Ta-da! You're all finished. Clip a bow onto one of the center ribbons and you're all set!
Visit the rest of our blog for more Crafting Tutorials and DIY Instructions!
Loading...

