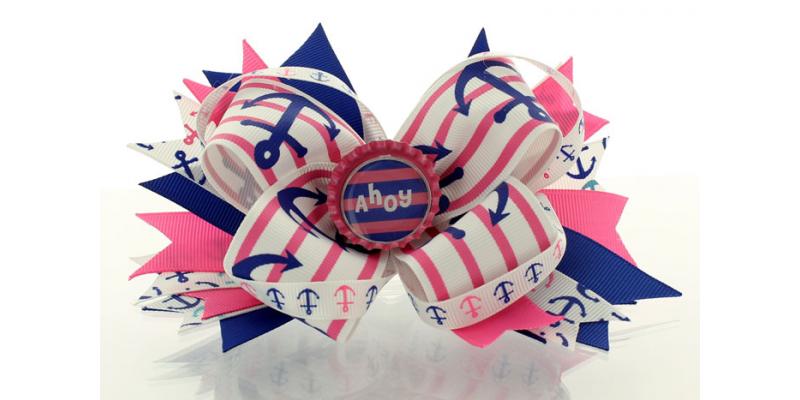

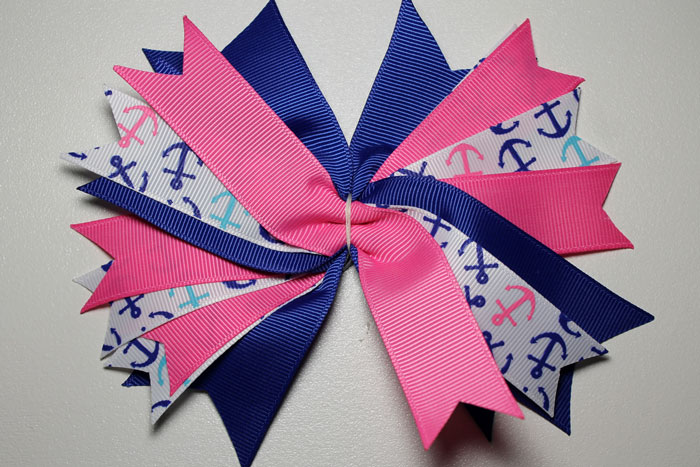
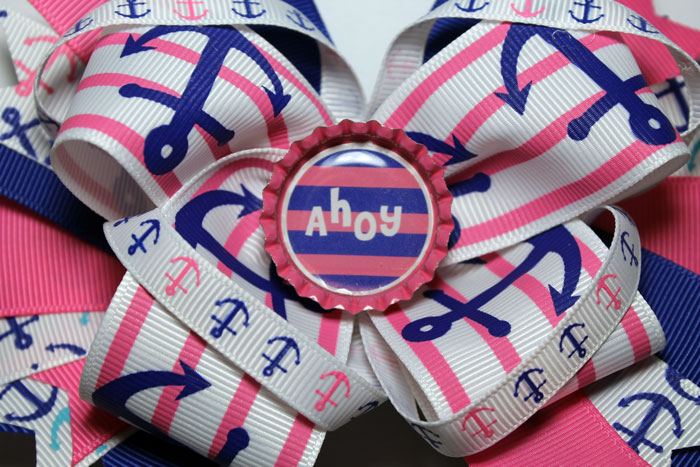
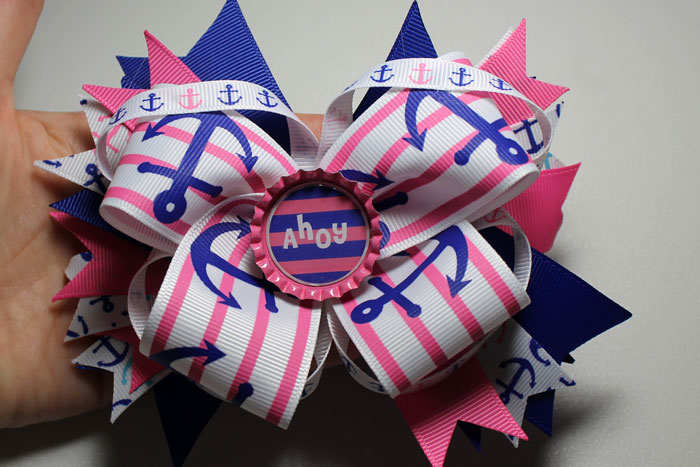
Are you in love with the nautical anchor print these days? It’s a very popular print, and rightly so! It is just one of those prints that is cute and super girly, and looks great on anything! We also have a free set of downloadable bottle-cap images available for this theme that really puts the icing on the hair-bow! So, here is an easy tutorial on how to make this cute boutique styled hair-bow!
Here is a list of the supplies you will need for this hair-bow:
-
Three 6” pieces of 1 ½” Cobalt grosgrain; 7/8” Hot Pink grosgrain; 7/8" Pink Blue Nautical Anchor Ribbon
-
One 22” piece of 1 ½” Pink Blue Nautical Anchor ribbon
-
Two 12” pieces of 3/8” Pink Blue Nautical Anchor Ribbon
-
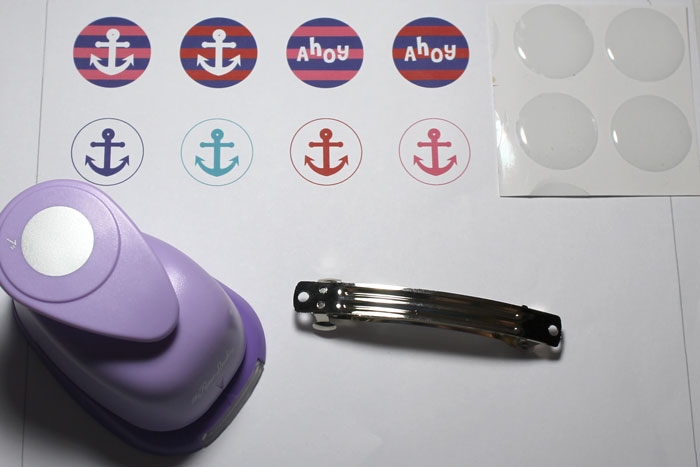
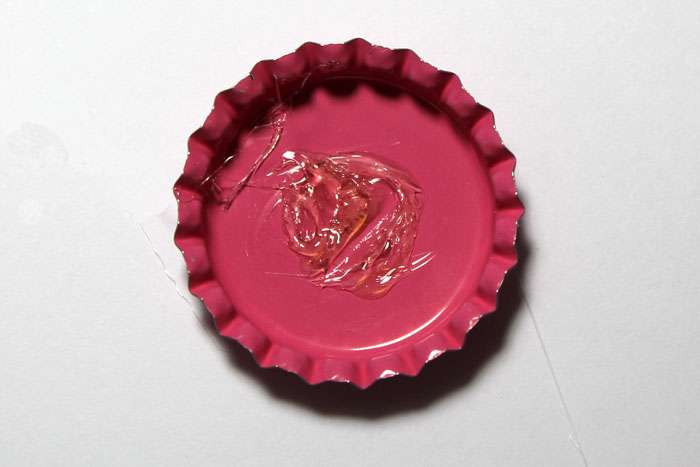
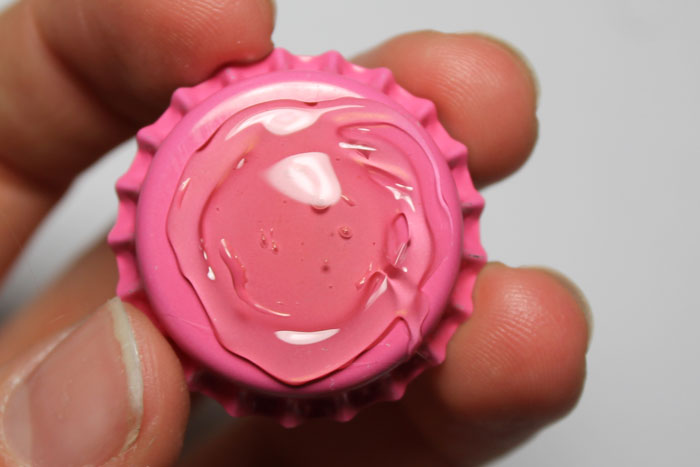
Hot Pink Bottle Cap
-
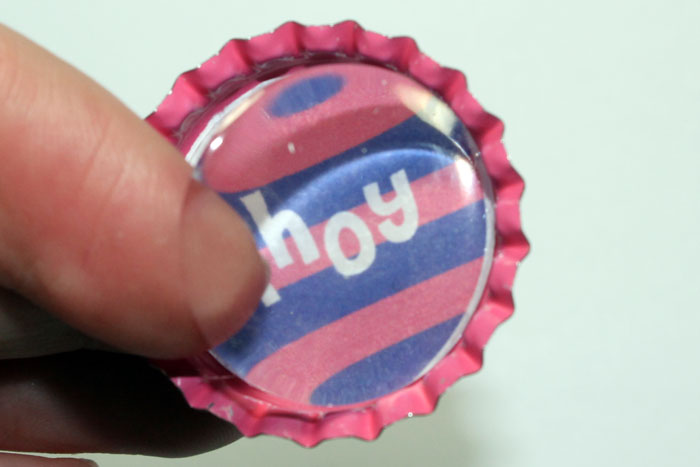
Pink Blue “Ahoy” Bottle Cap Image
-
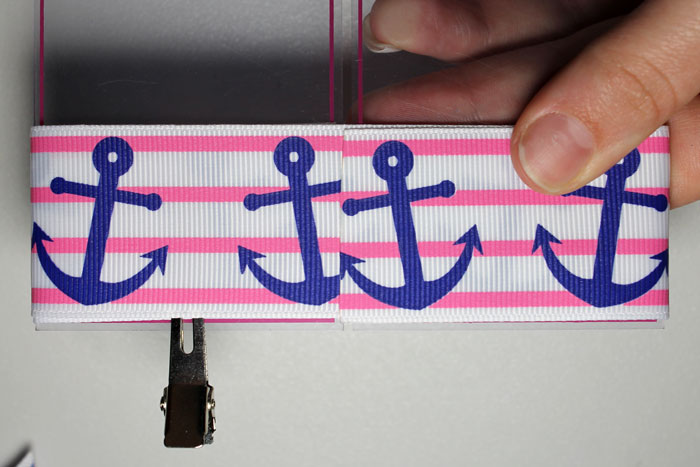
80 mm French Barrette (or hardware of your choice)
-
No Bow No Go size 5 template
-
Hot Glue Gun
-
Scissors
-
Ruler
-
Needle and Thread
-
Sewing Pin
-
Lighter

Okay, I know the supplies list is kind of scary, but this tutorial really isn’t that bad. :)
Step 1: Measure and cut out all of the pieces of ribbon that are listed above.
Step 2. Take all of the ribbon except for the 3/8" anchor ribbon and cut the ends in a ‘v’ shape. Then heat seal the ends of all your ribbon.
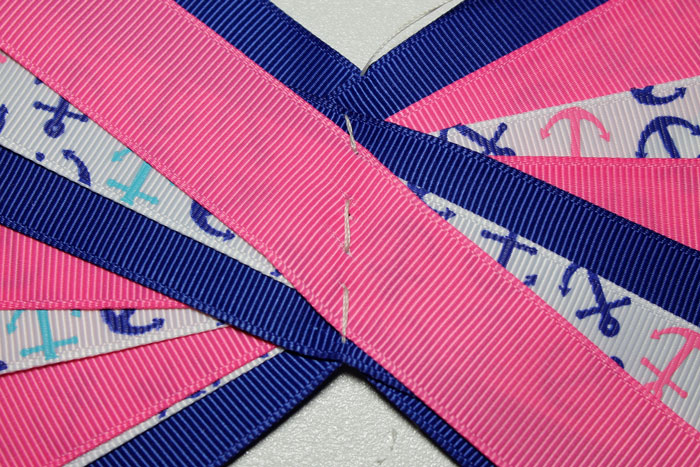
Step 3: Take a pin and start stacking the cobalt and hot pink grosgrain with the 7/8” anchor ribbon. Alternate the colors to create a unique base for your bow.
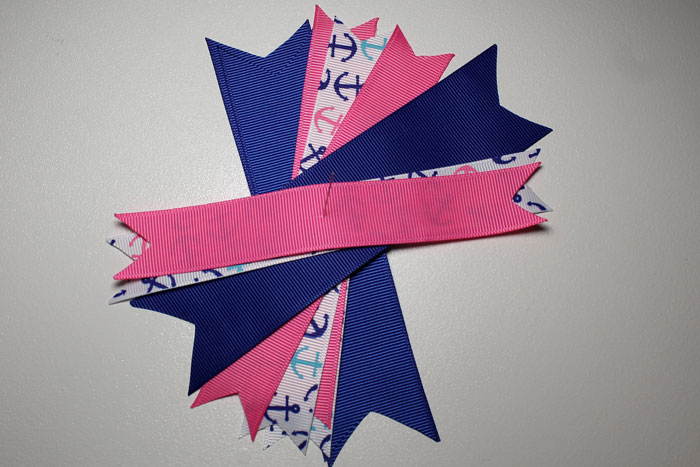
Step 4: Fan out the ribbon to create an ‘x’ shape, then, while the ribbon is still in this shape take your needle and thread and stitch up the middle. Once that is done take the pin out and then pull the stitching tight to gather the ribbon. Wrap your thread around the ribbon a few times then tie it off.

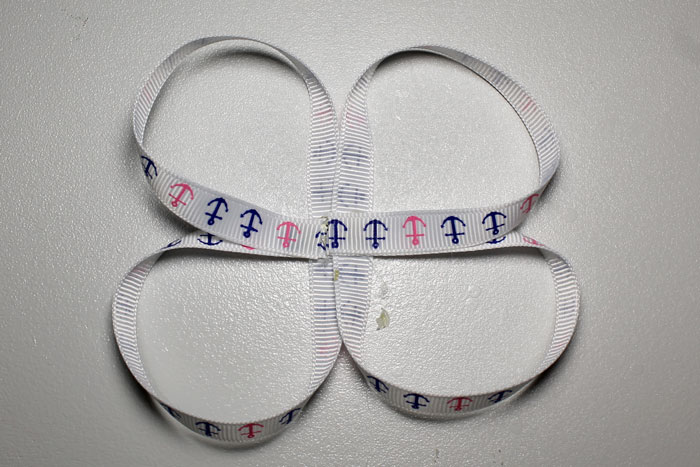
 Step 7: Starting with one piece of your 3/8" anchor ribbon, create two loops that meet in the center. You can sew the loops in place or use glue. I used glue when I made mine. Repeat the same process for the other piece and then glue both pieces together.

 Step 9: Once all three of the bow pieces are in place set the bow aside and grab your EK Success punch, bottle cap images, and your bottle cap. For the bottle cap images all you need to do is download the anchor themed set from our HBC website and print them off. Did I mention that this particular set we are working with is free?! :) You can use regular paper or photo paper. I found that the photo paper held the color better and looked more vibrant than the regular paper. But it is just what you prefer. Both ways are fine. The bottle cap image on the right is regular printing paper.

Visit the rest of our blog for more Crafting Tutorials and DIY Instructions!
Loading...

