
 Contributor post by Brittany
Christmas is by far my favorite holiday! I love all the festive decorations, twinkling lights, watching snowflakes fall, snuggling up in front of the warm fireplace, baking Christmas cookies with my family, Christmas shopping... the list goes on & on! In my house, every activity or family gathering calls for a different holiday outfit, and to make my daughter's outfit even more special I make a perfectly matching hair accessory! So get ready and gather up your favorite red & greens because today we are making an adorable Christmas present sculpture hair clip!
Contributor post by Brittany
Christmas is by far my favorite holiday! I love all the festive decorations, twinkling lights, watching snowflakes fall, snuggling up in front of the warm fireplace, baking Christmas cookies with my family, Christmas shopping... the list goes on & on! In my house, every activity or family gathering calls for a different holiday outfit, and to make my daughter's outfit even more special I make a perfectly matching hair accessory! So get ready and gather up your favorite red & greens because today we are making an adorable Christmas present sculpture hair clip!
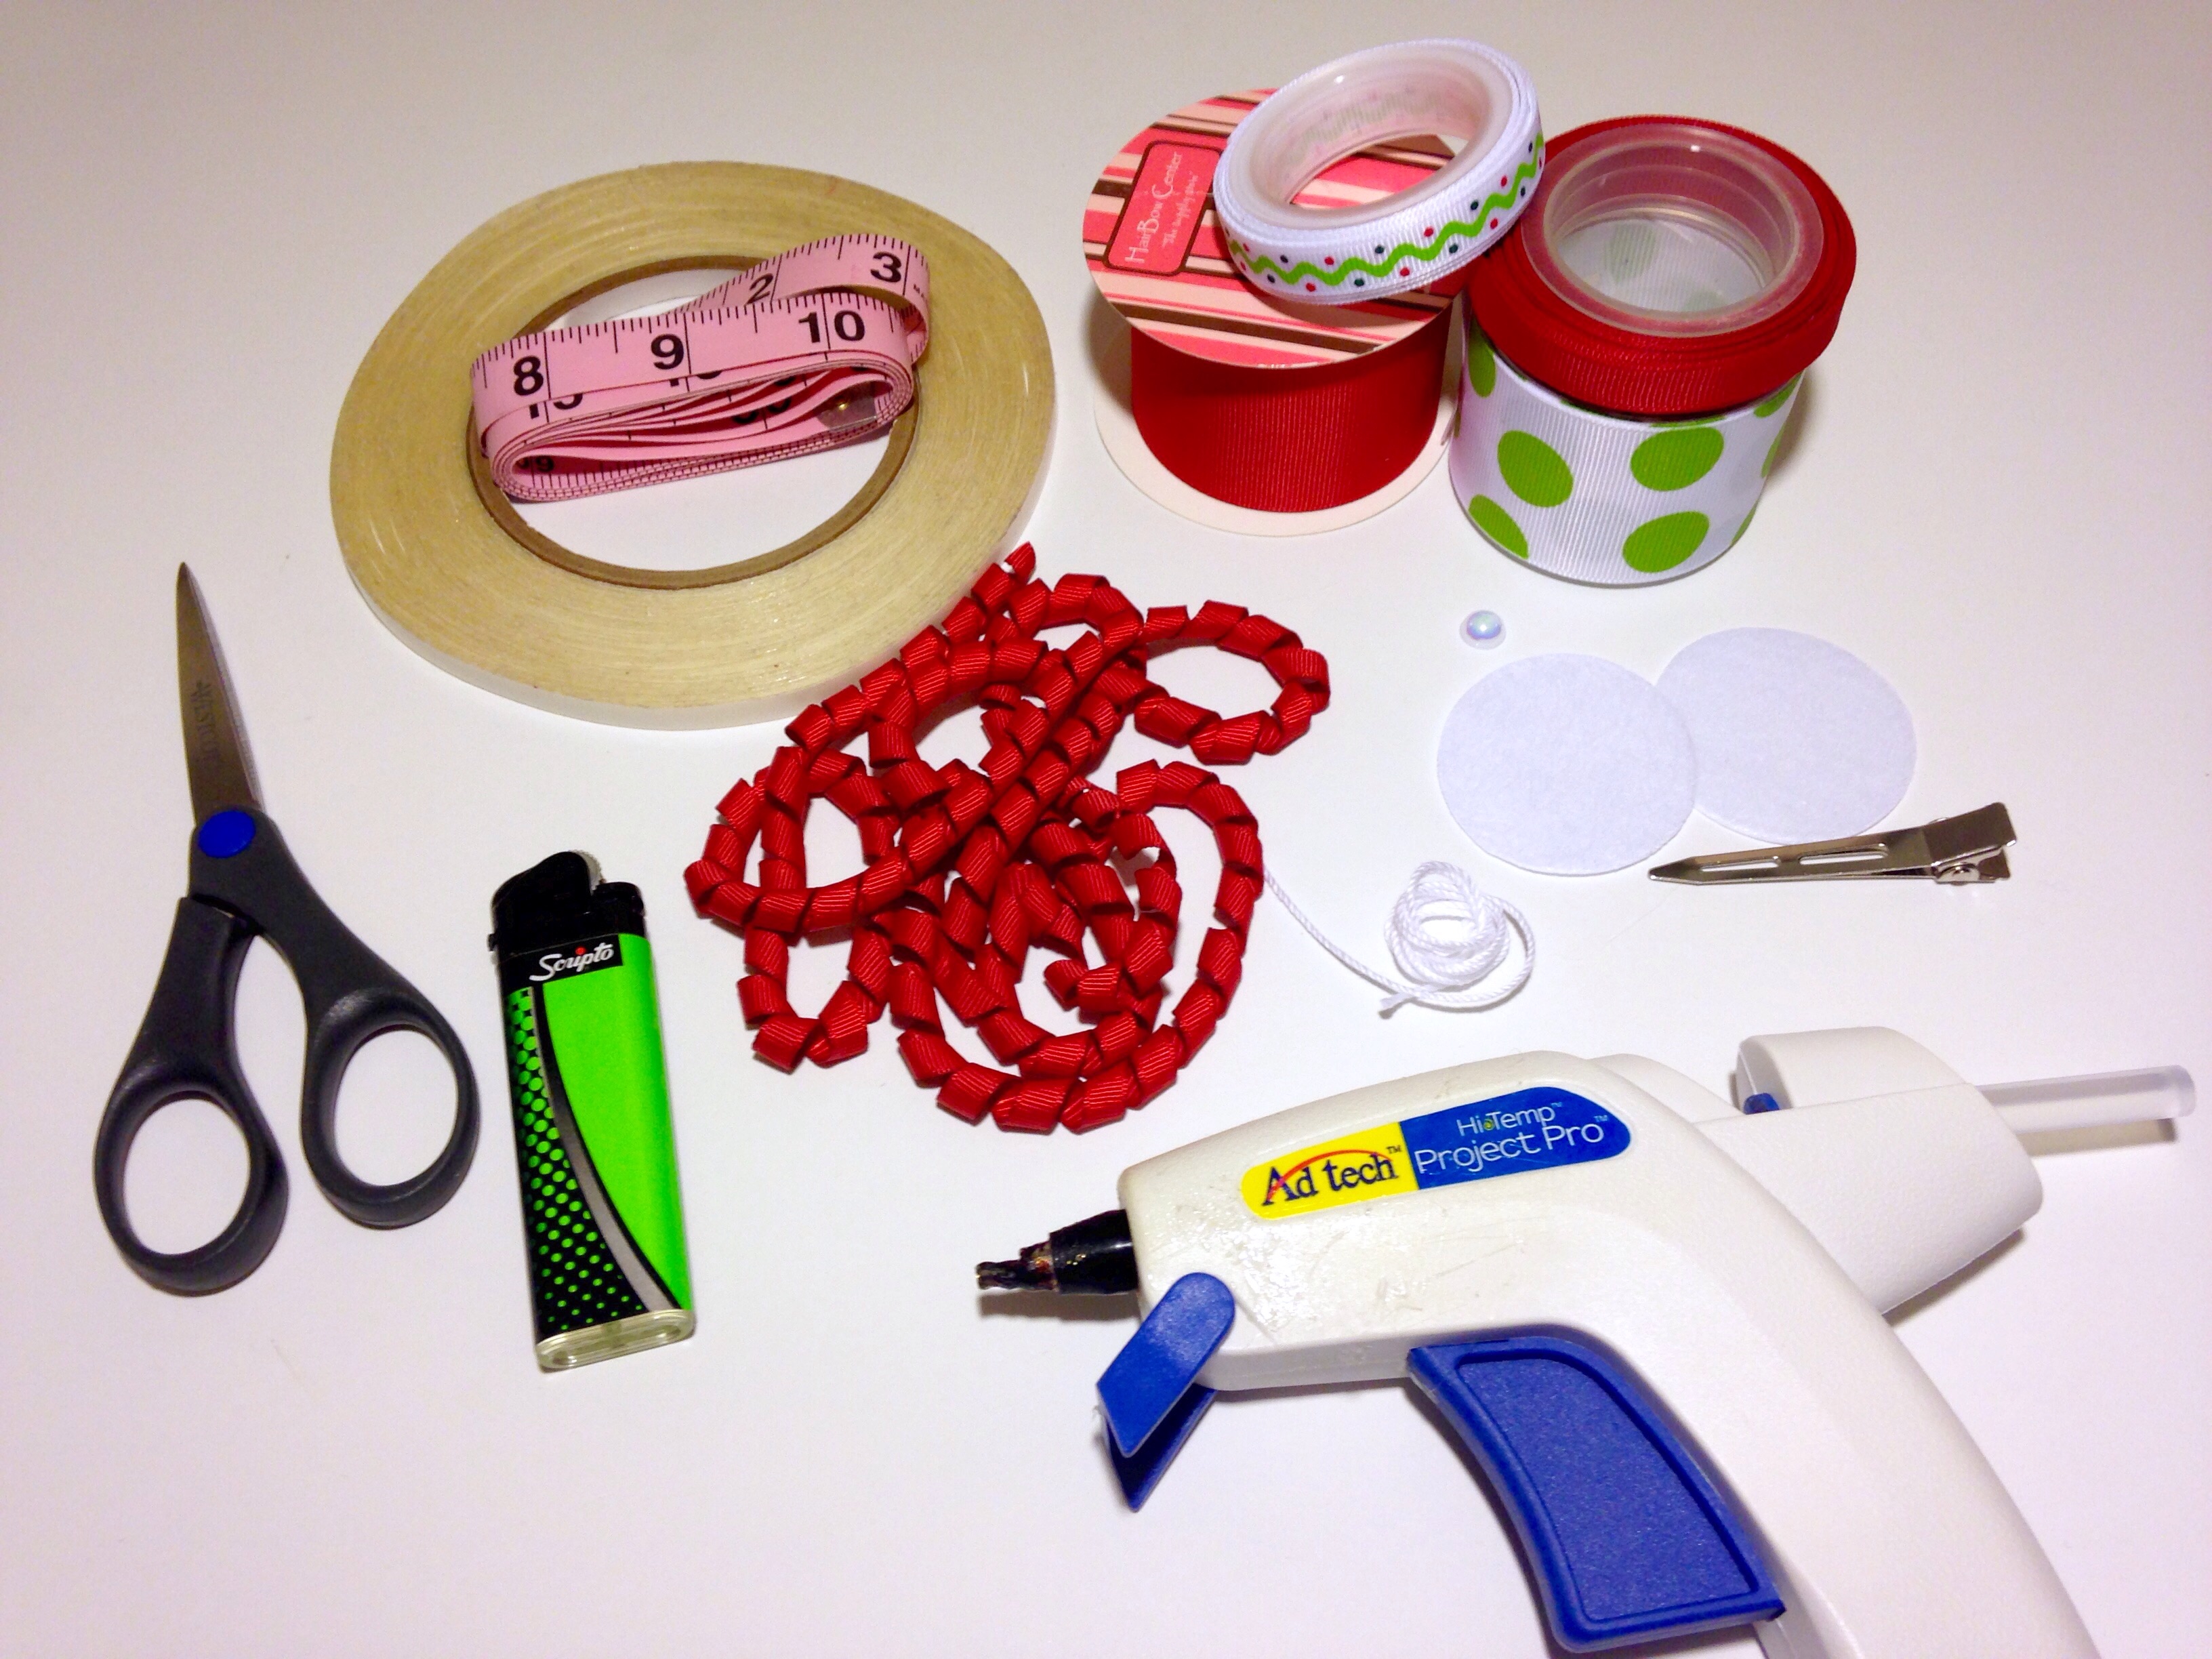 Shown above are the supplies you will need:
•1.5" red solid grosgrain ribbon
•1.5" white w/large apple green dots ribbon
•3/8" green Christmas pattern ribbon
•3/8" red grosgrain ribbon
•1/4" double sided fillet tape
•measuring tape
•scissors
•lighter
•1/4" red solid grosgrain korker ribbon
•small embellishment
•2- 1.75" white circle felt pads
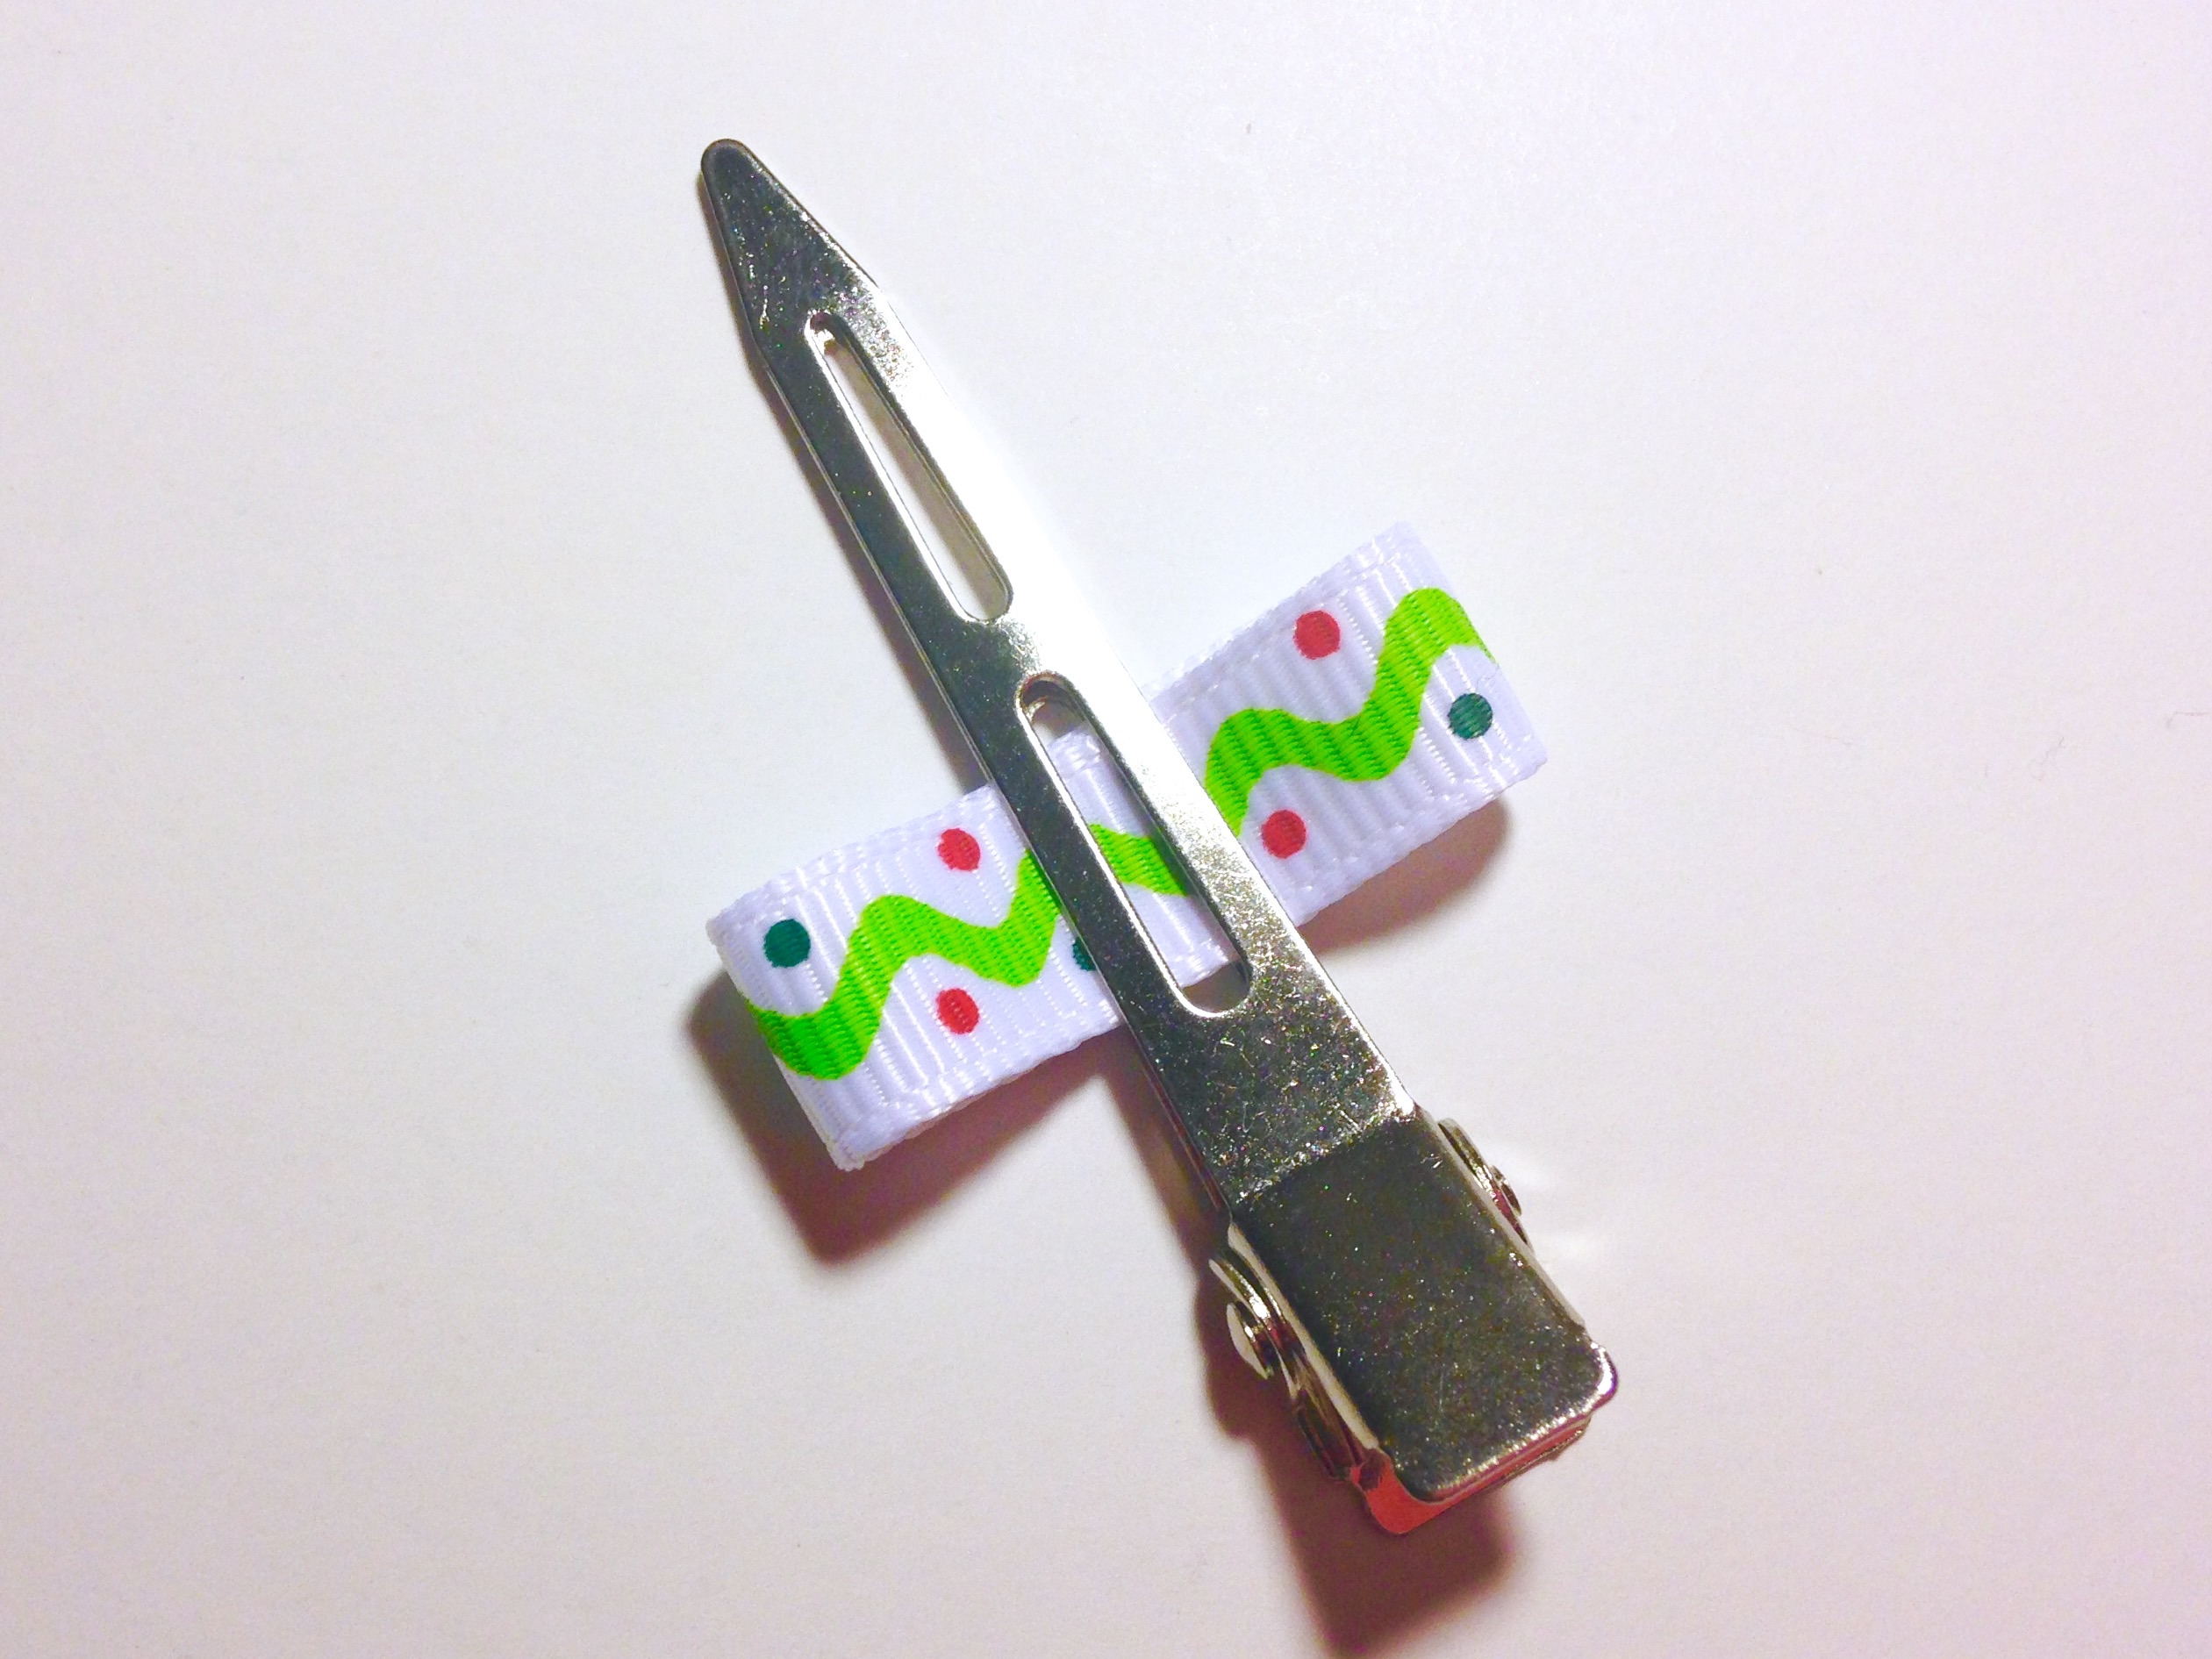
•2.25" large alligator clip
•strong thread
•hot glue gun
Shown above are the supplies you will need:
•1.5" red solid grosgrain ribbon
•1.5" white w/large apple green dots ribbon
•3/8" green Christmas pattern ribbon
•3/8" red grosgrain ribbon
•1/4" double sided fillet tape
•measuring tape
•scissors
•lighter
•1/4" red solid grosgrain korker ribbon
•small embellishment
•2- 1.75" white circle felt pads
•2.25" large alligator clip
•strong thread
•hot glue gun
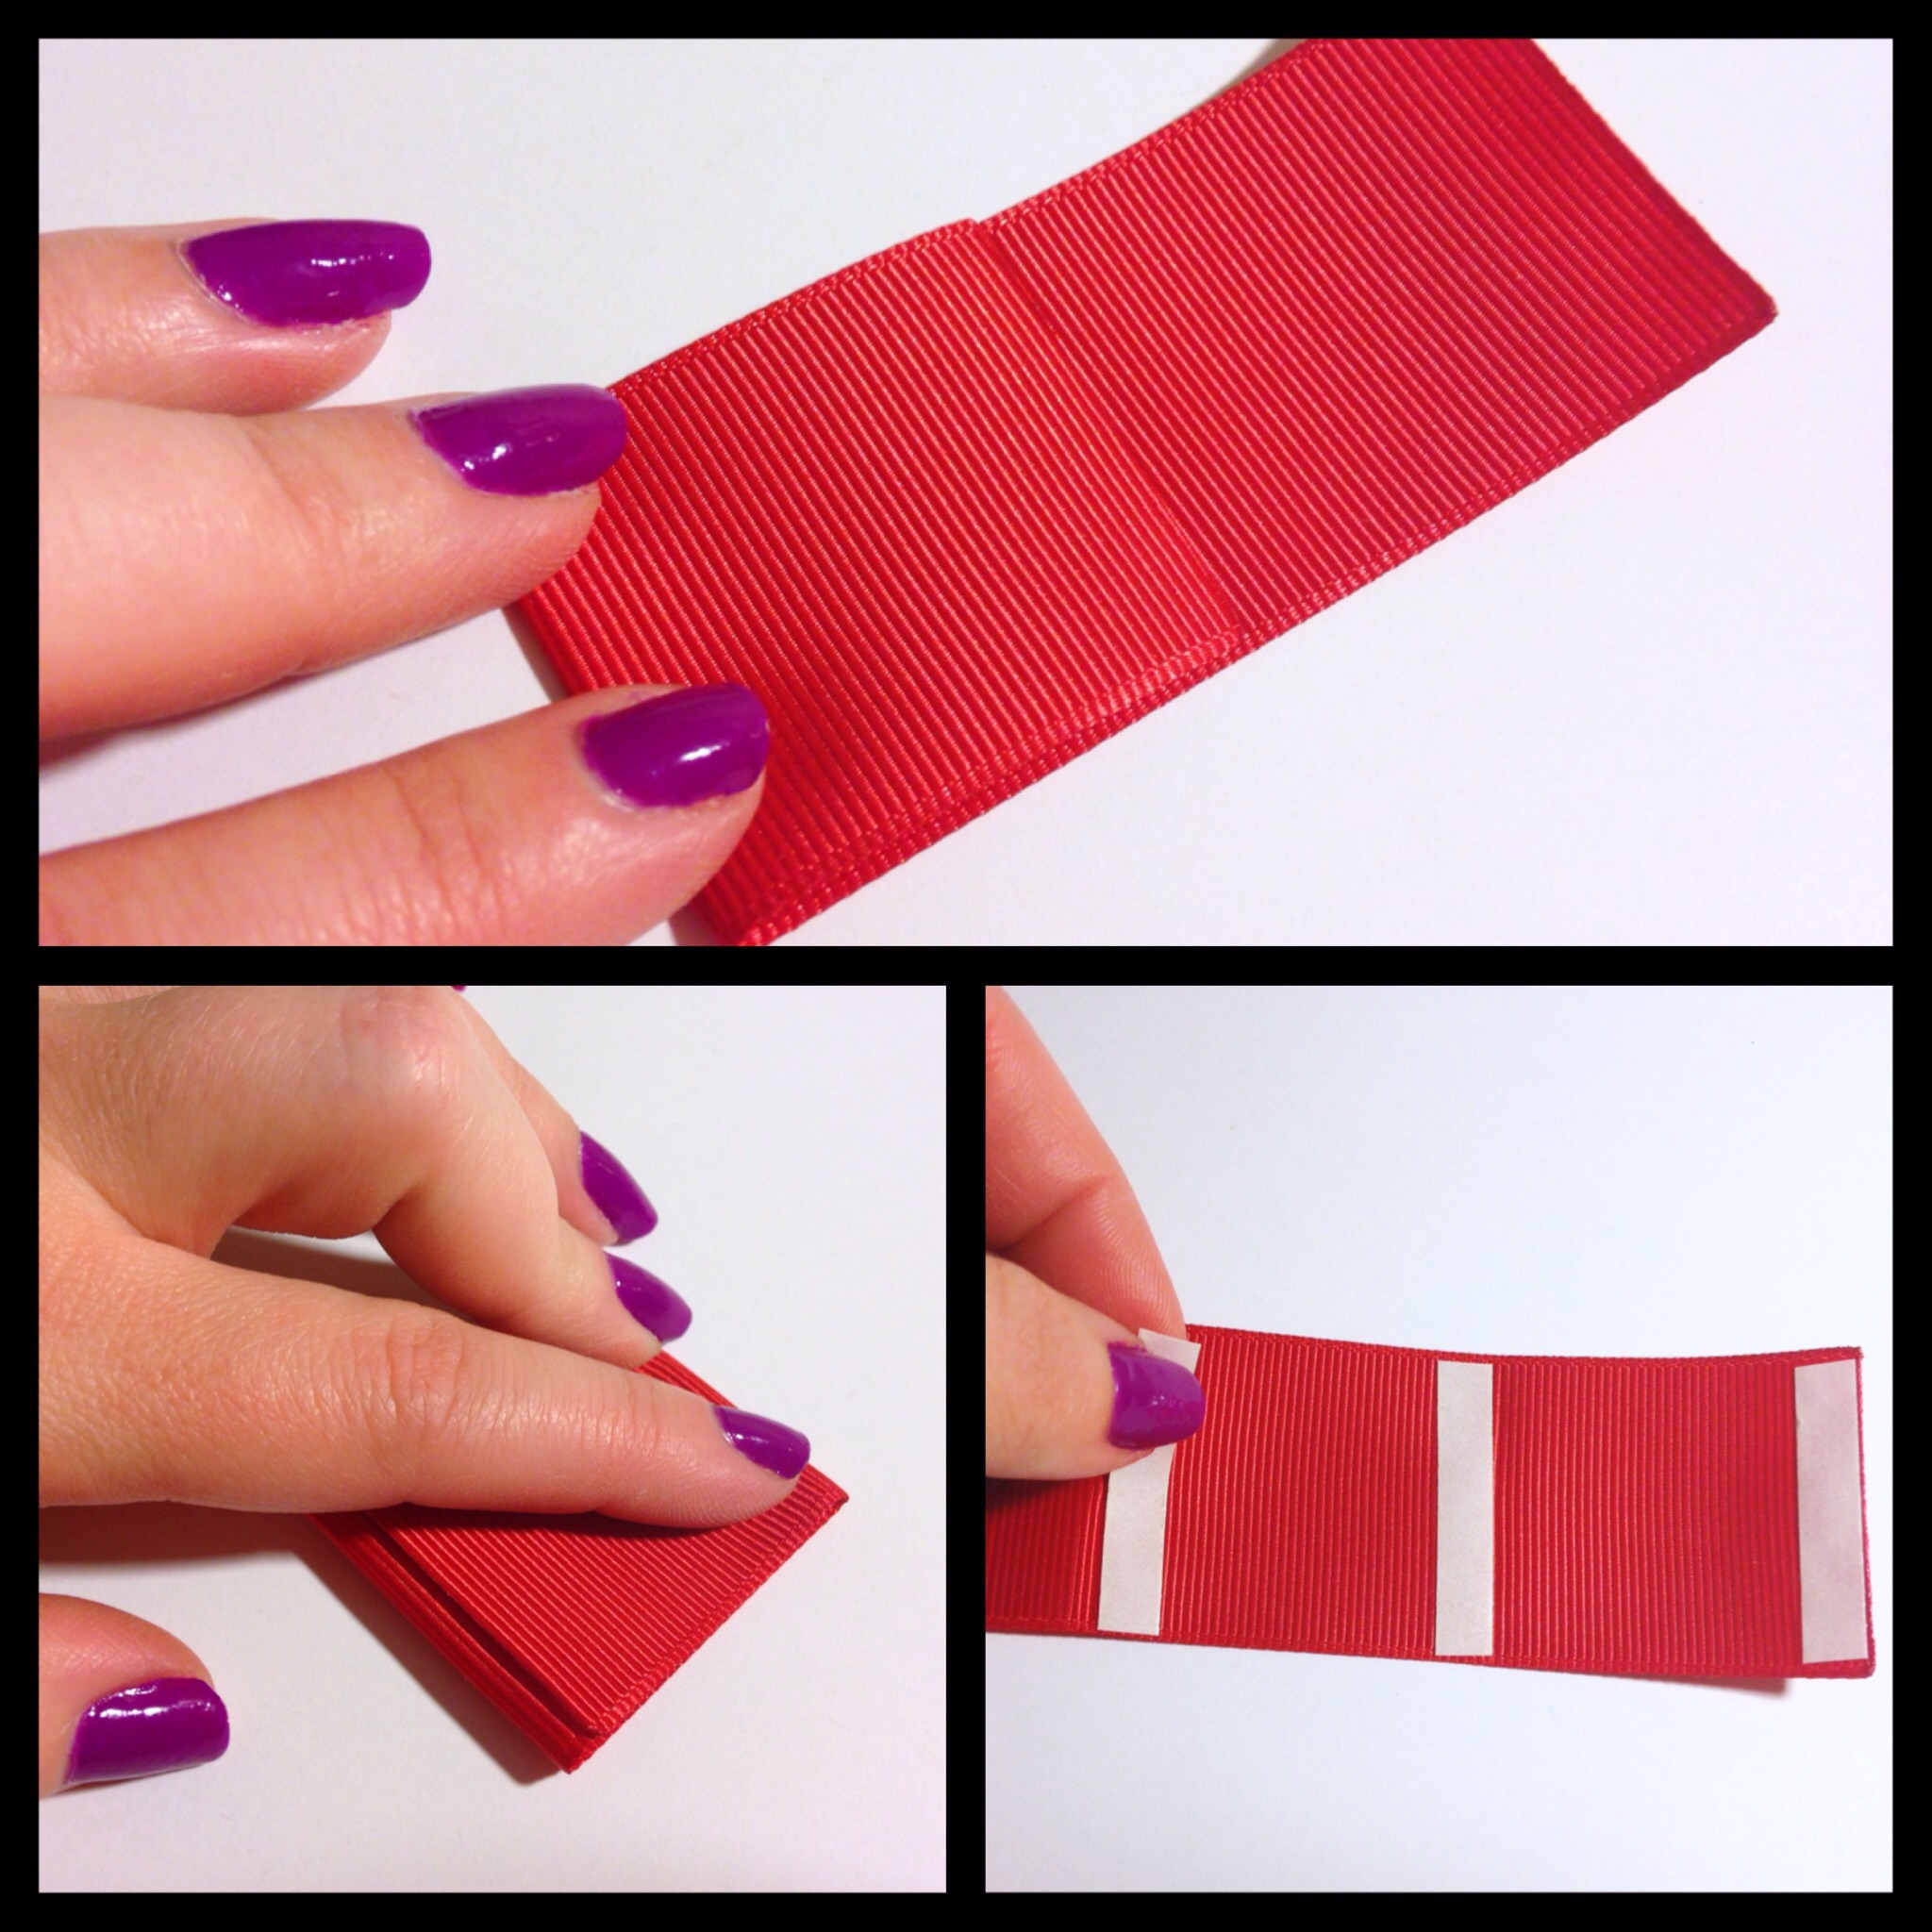 Let's start making presents! First we are going to make a square using 4.5" of red 1.5" ribbon. Don't forget to heat seal your ends. Shown in the pic above are the first steps to making our perfect square. Start by folding 1/3 of your ribbon and making a crease. Bring the opposite end down and press ontop, leaving a small space so the edge will not be seen from the front. This creates a seamless appearance. Press very firm to make hard creases. Now open your ribbon back up and you should see your creases very easily. Next we need 3 pieces of double sided tape. The first 2 pieces should be placed along the right side of your first 2 creases. The third piece of tape should be placed at the end of your ribbon. Once your tape is in place, remove the paper backing.
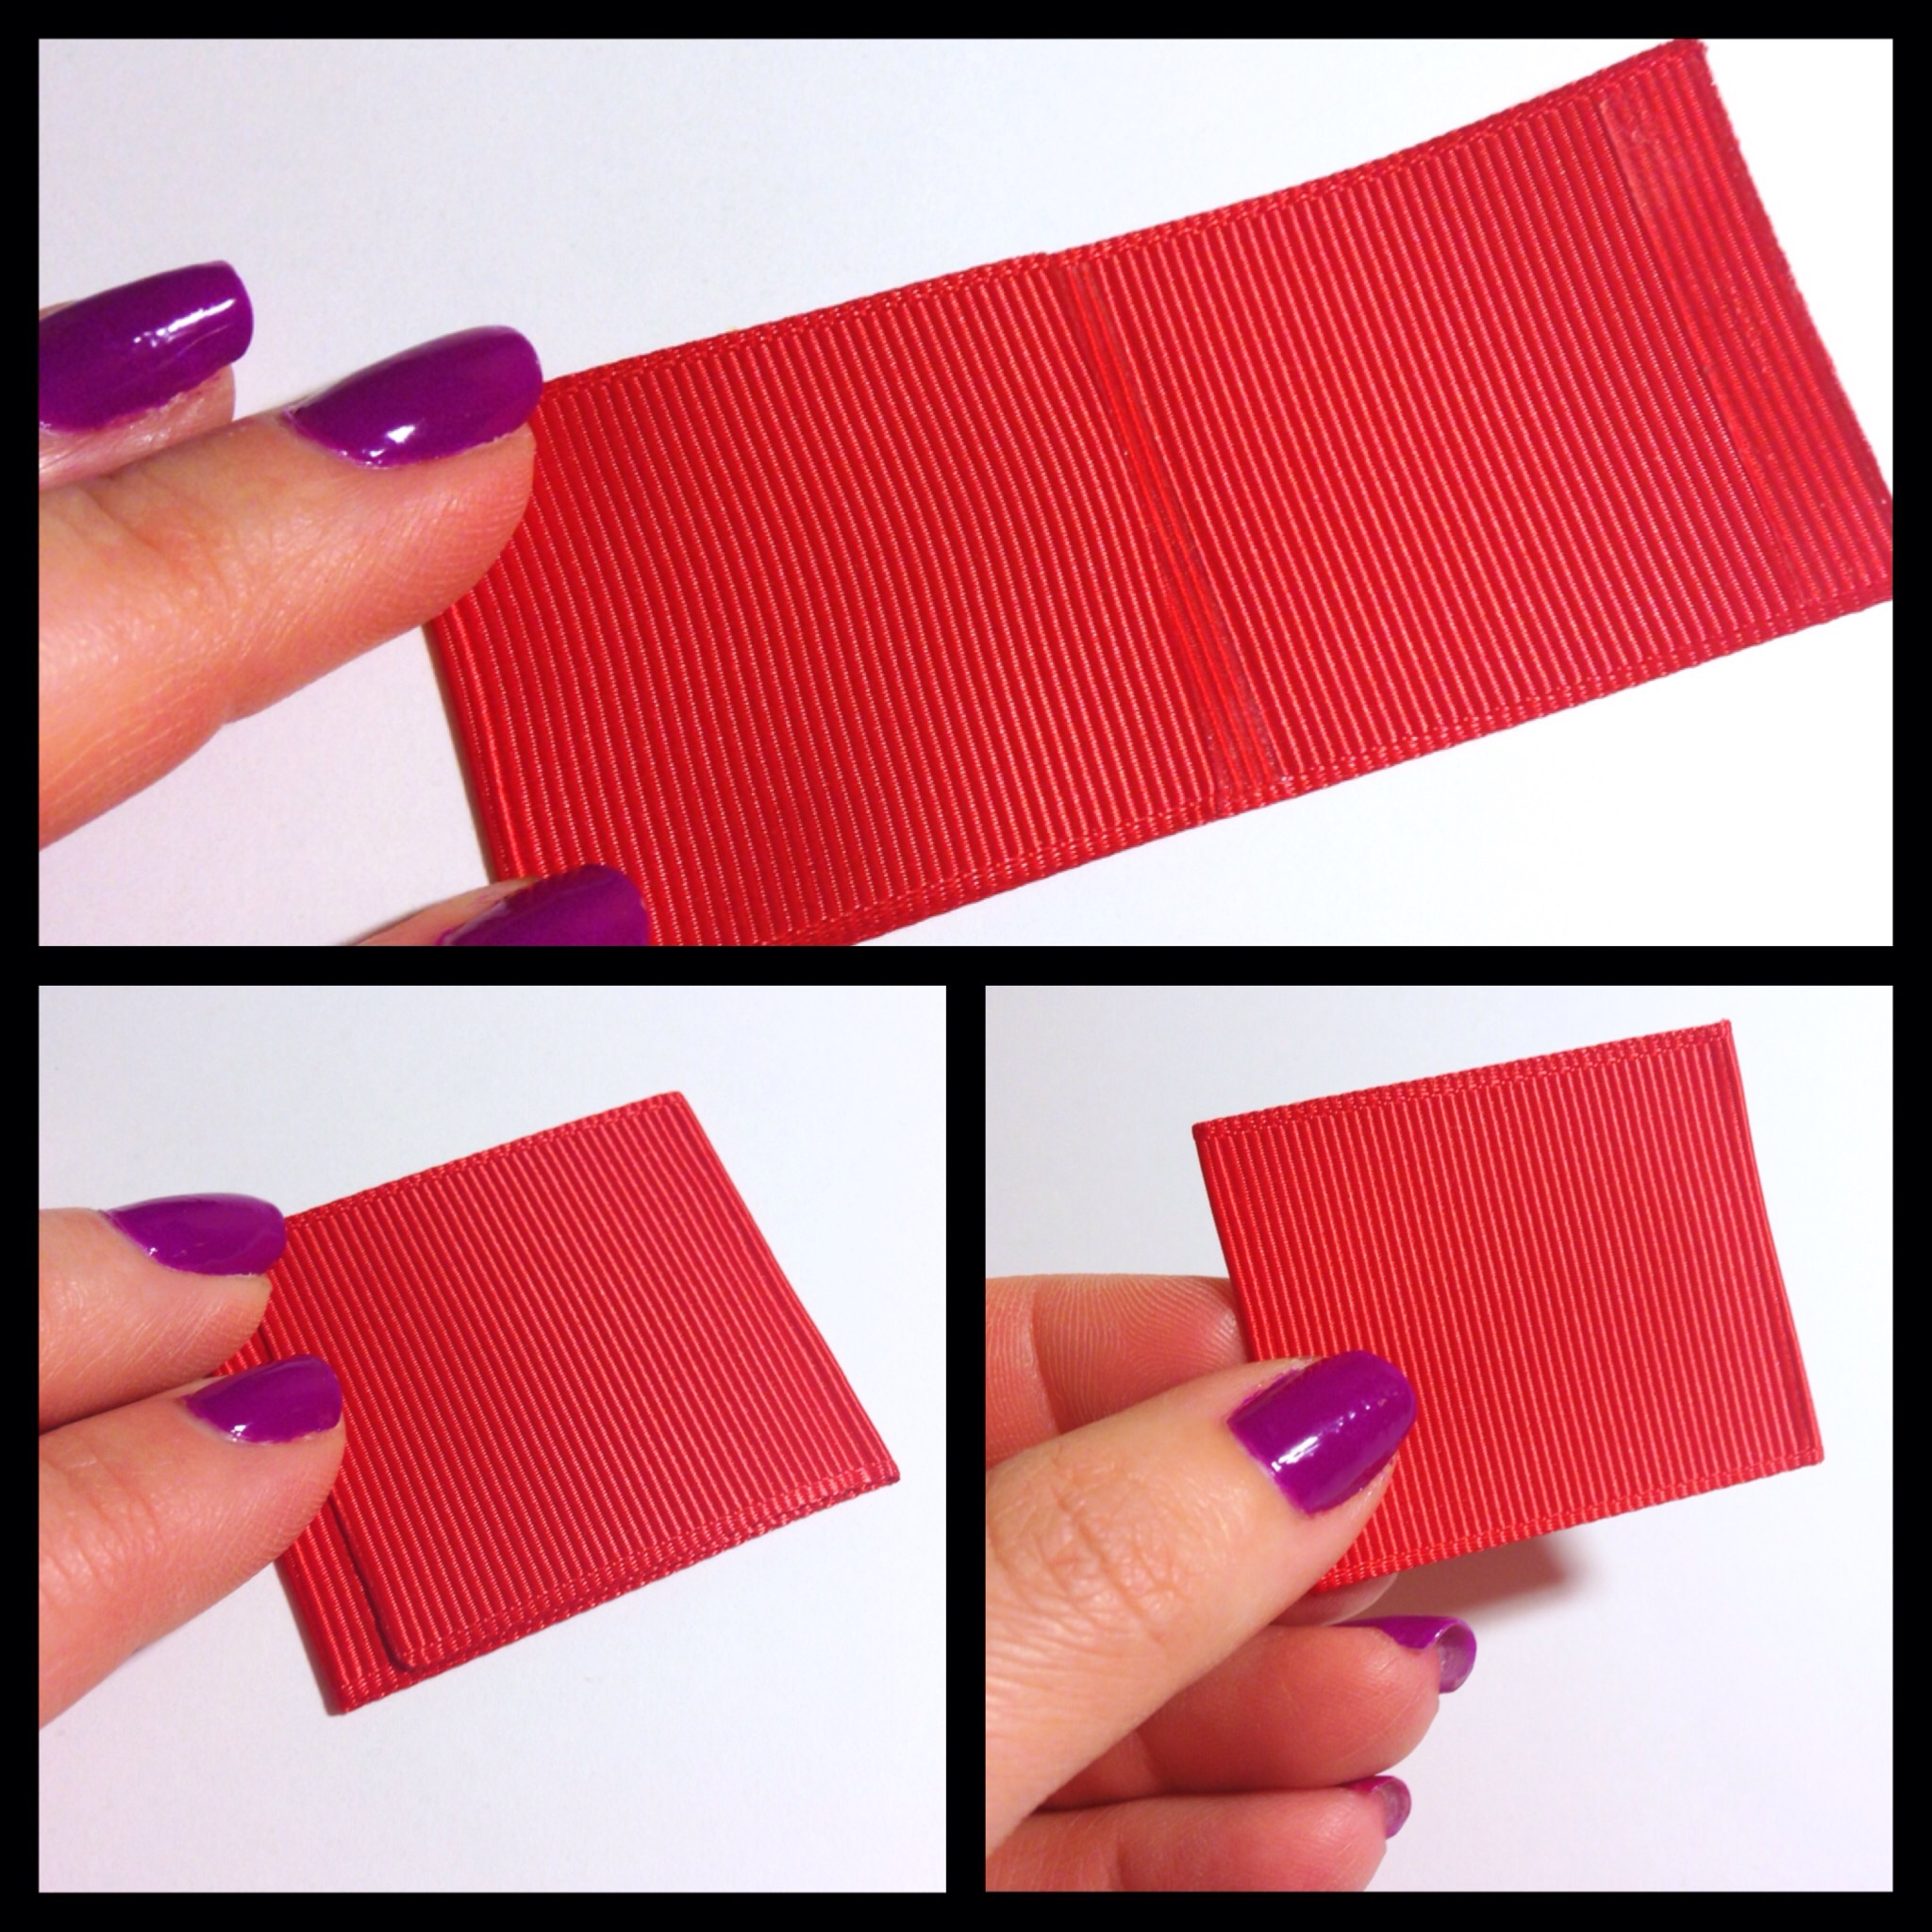 Carefully fold your first section of ribbon back down into place as shown above. Make sure you have a nice, straight edge that is free of bumps or bubbles. Now bring the end of your ribbon down and lay on top, paying close attention as each piece of tape adheres to your ribbon. Now you should have a perfect square!
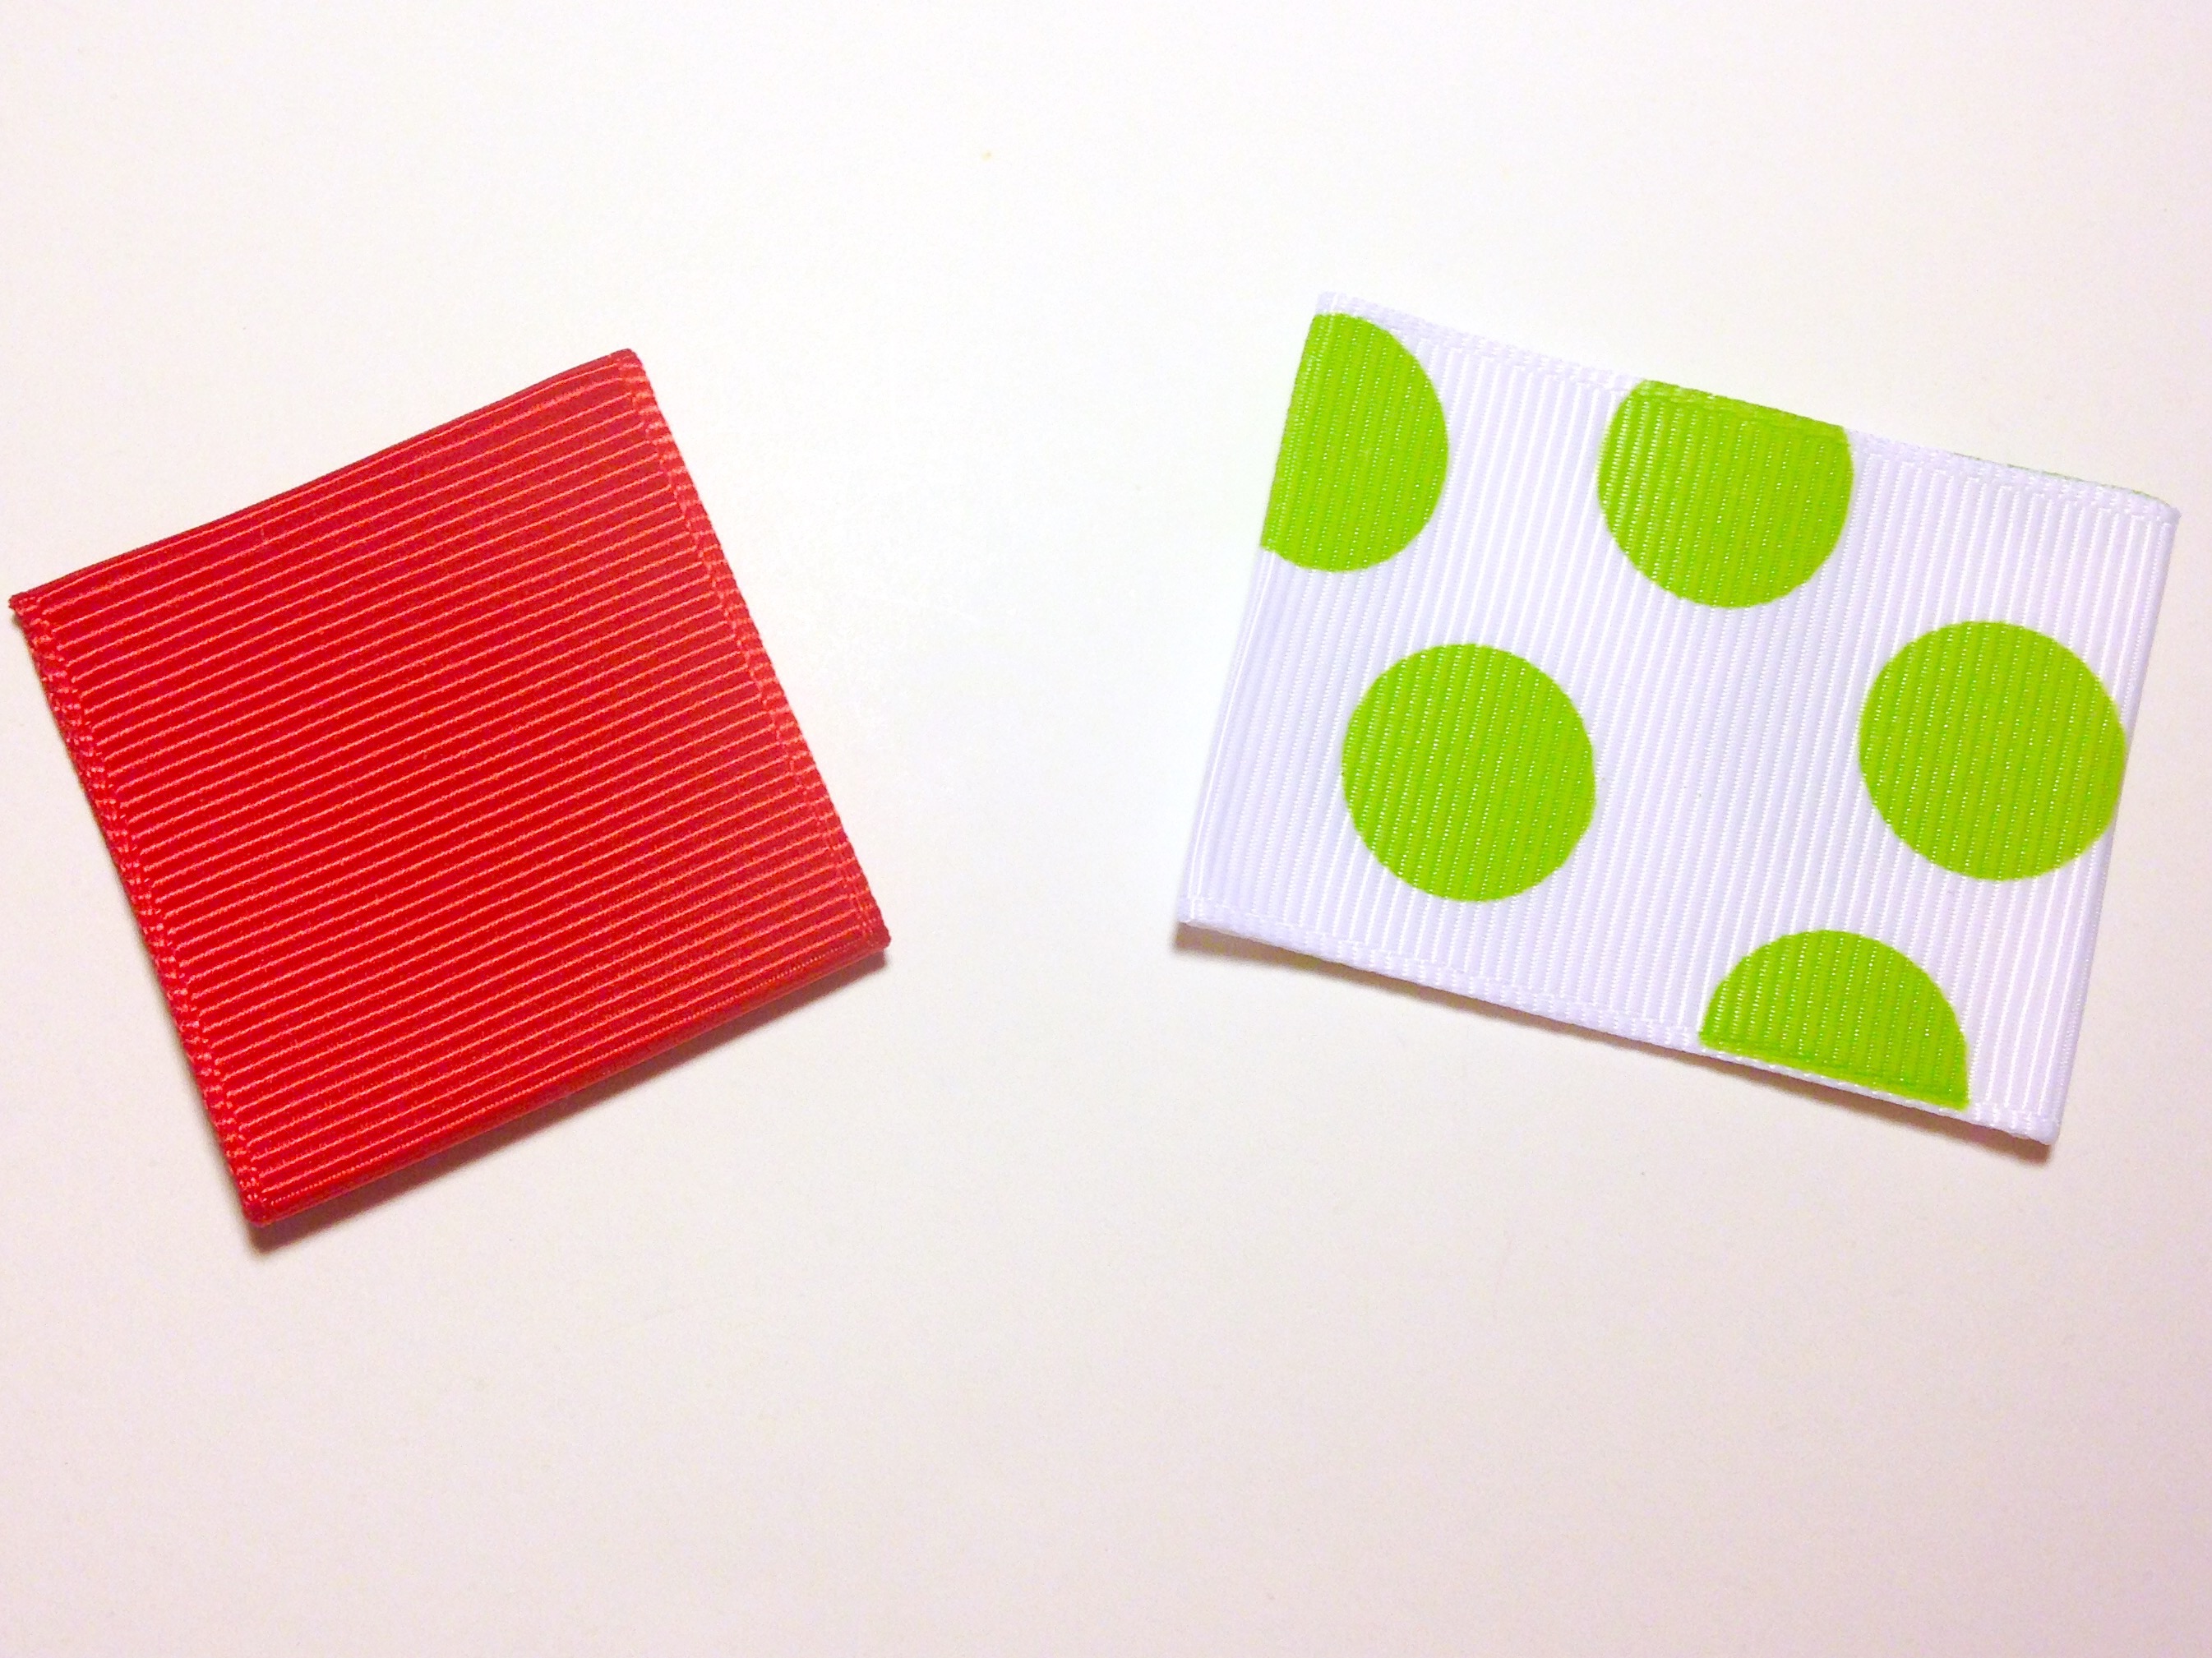 For my second box I want a rectangle shape. I am using approx 7" of 1.5" white w/large apple green dot ribbon. Follow the same steps to create your rectangle as we did to make our square, folding 1/3 of your ribbon strip at a time.
 Now it's time to make our packages pretty! There are tons of ways to decorate our presents and so many adorable Christmas ribbons to do this with! Thanks to HBC's collection of ribbon you are sure to find exactly what you need to create the perfect look! For my red present I have chosen to accent it with 3/8" green Christmas pattern ribbon. You will need 7" of this ribbon to wrap around your "box". The simplest way to apply this is by using 3.5" at a time, so cut your 7" strip of ribbon in half and heat seal your ends. Wrap your first piece around the middle of your box as shown in the pic above. You may use hot glue or double sided tape to secure your ends. Both work great!
 Now take your second piece of 3/8" ribbon and wrap around the middle of the other side.
 Every present must have a pretty decorative bow! I am going to make a small bow using about 3" of the same 3/8" ribbon. Heat seal your ends and shape your ribbon into a loop making sure to leave at least 1/2" overlapped in the back. Hold your loop in place by clipping your alligator clip onto the center. Notice in the pic above there is hollow spacing at the top and bottom of the ribbon loop.
 Using strong thread, wrap around your ribbon twice through the hollow spaces. Pull your thread tight and tie a knot as shown in the pic above. This transforms our ribbon loop into a sweet little bow!
 Hot glue the bow onto the top of the present and finish off it's festive look with a tiny embellishment in the center! Super cute!
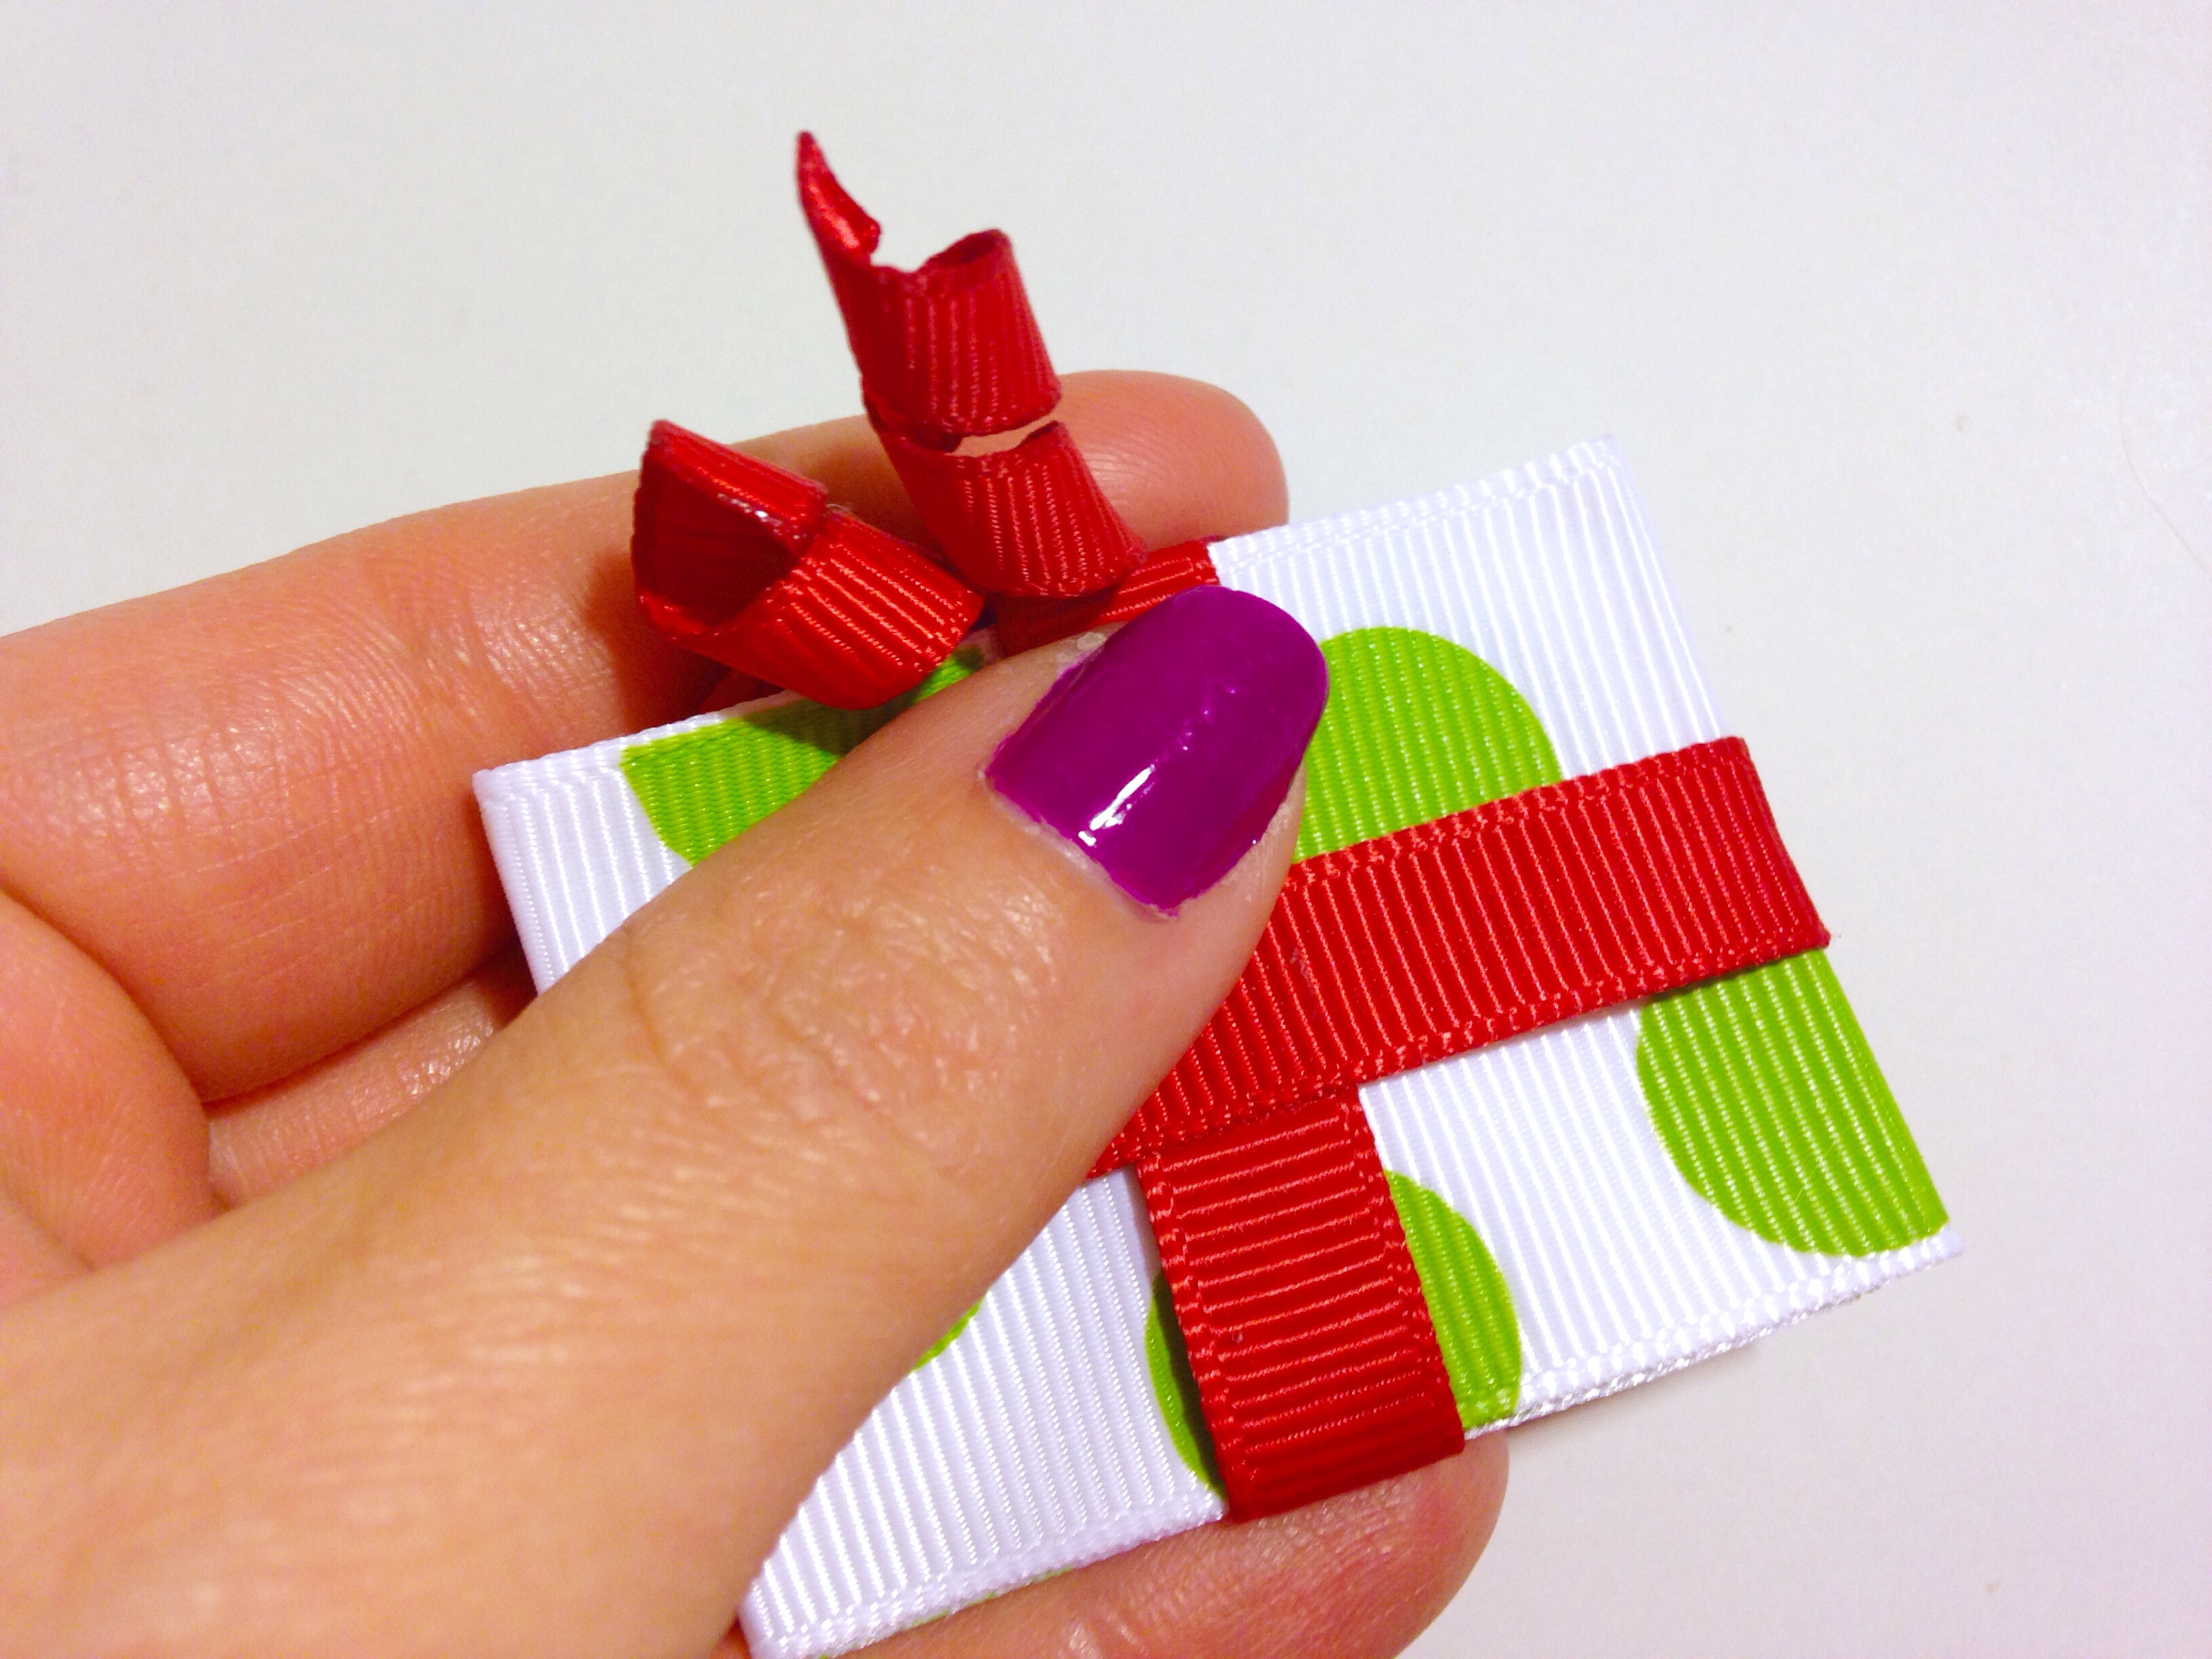 For my polka dotted present I am using solid red for it's accents. You will need a total of 8" of 3/8" ribbon to wrap around this present. Place it on just as we did the first present. I want to decorate this present with a different bow that is a little bigger. So what better to use than cute and curly korker ribbon?! Personally I probably wouldn't go to all the trouble of curling the ribbon just to use such a small amount, but lucky for us HBC has done all the work for us! This 1/4" korker ribbon (they also offer 3/8") comes perfectly curled and ready to use! Pretty awesome, huh? I am taking small pieces of my korker ribbon and attaching them to the backside of my present, very close to the top. You can use as many pieces as you'd like, and make them as long or short as you want!
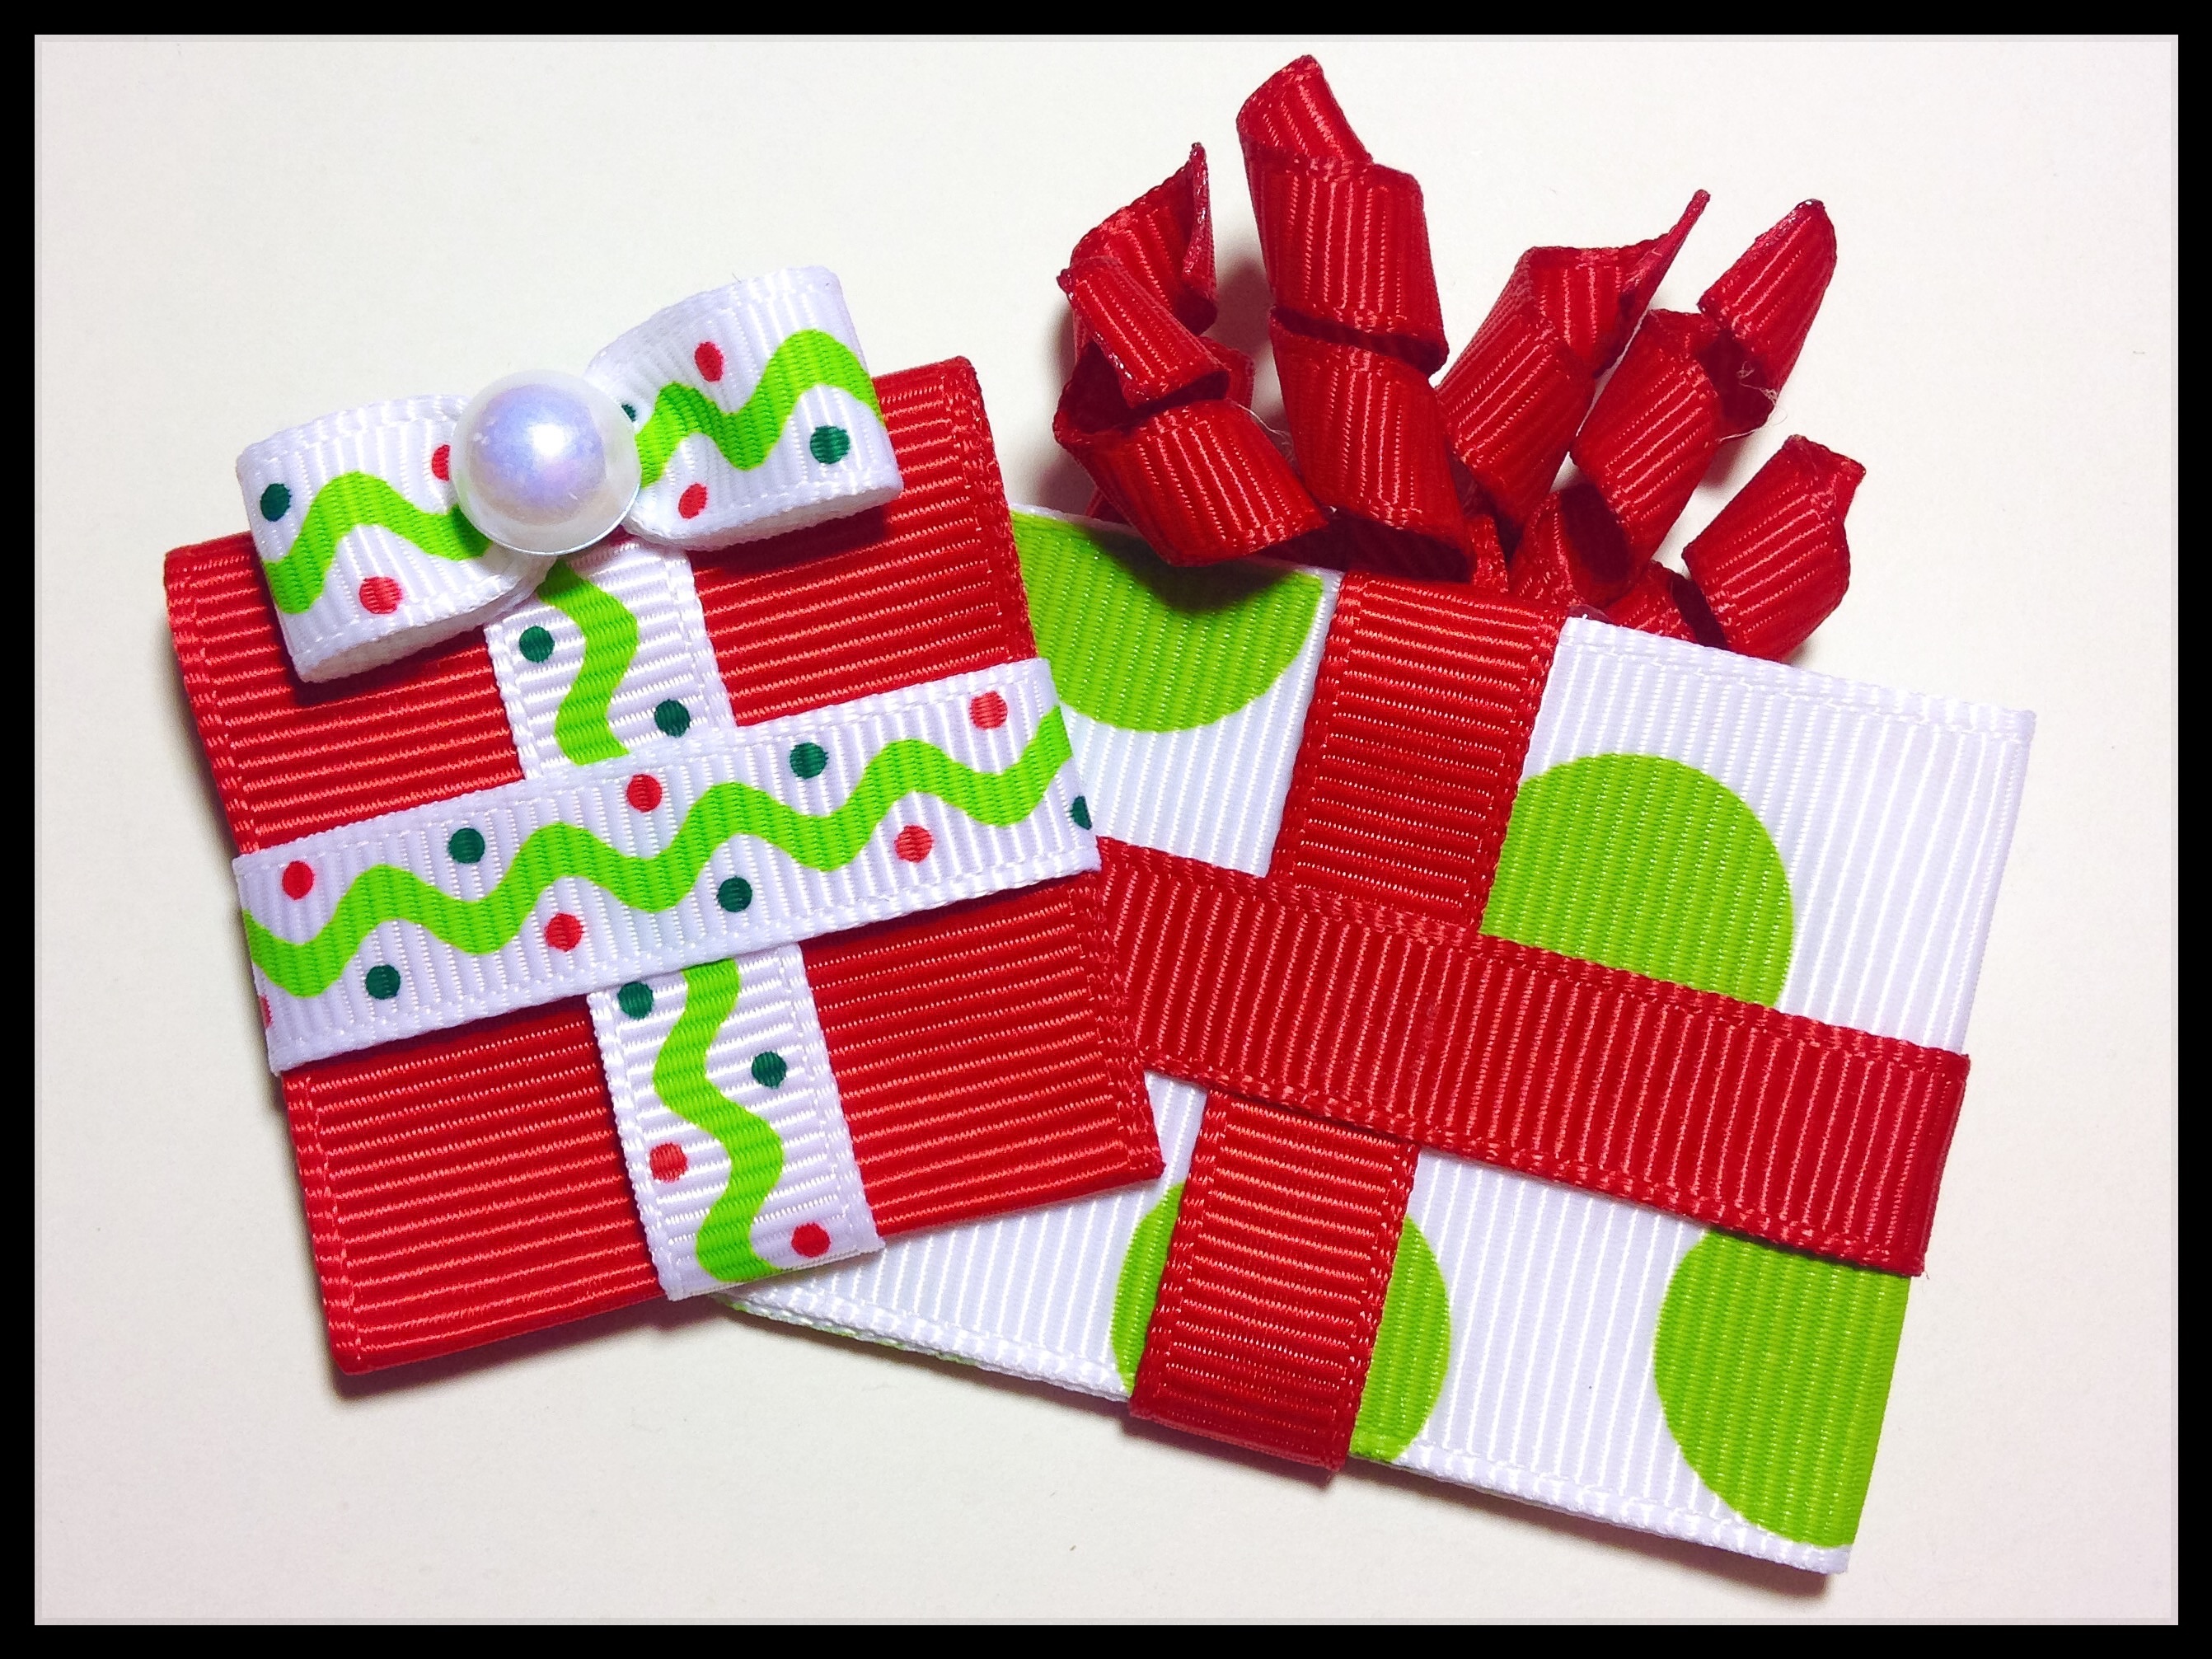
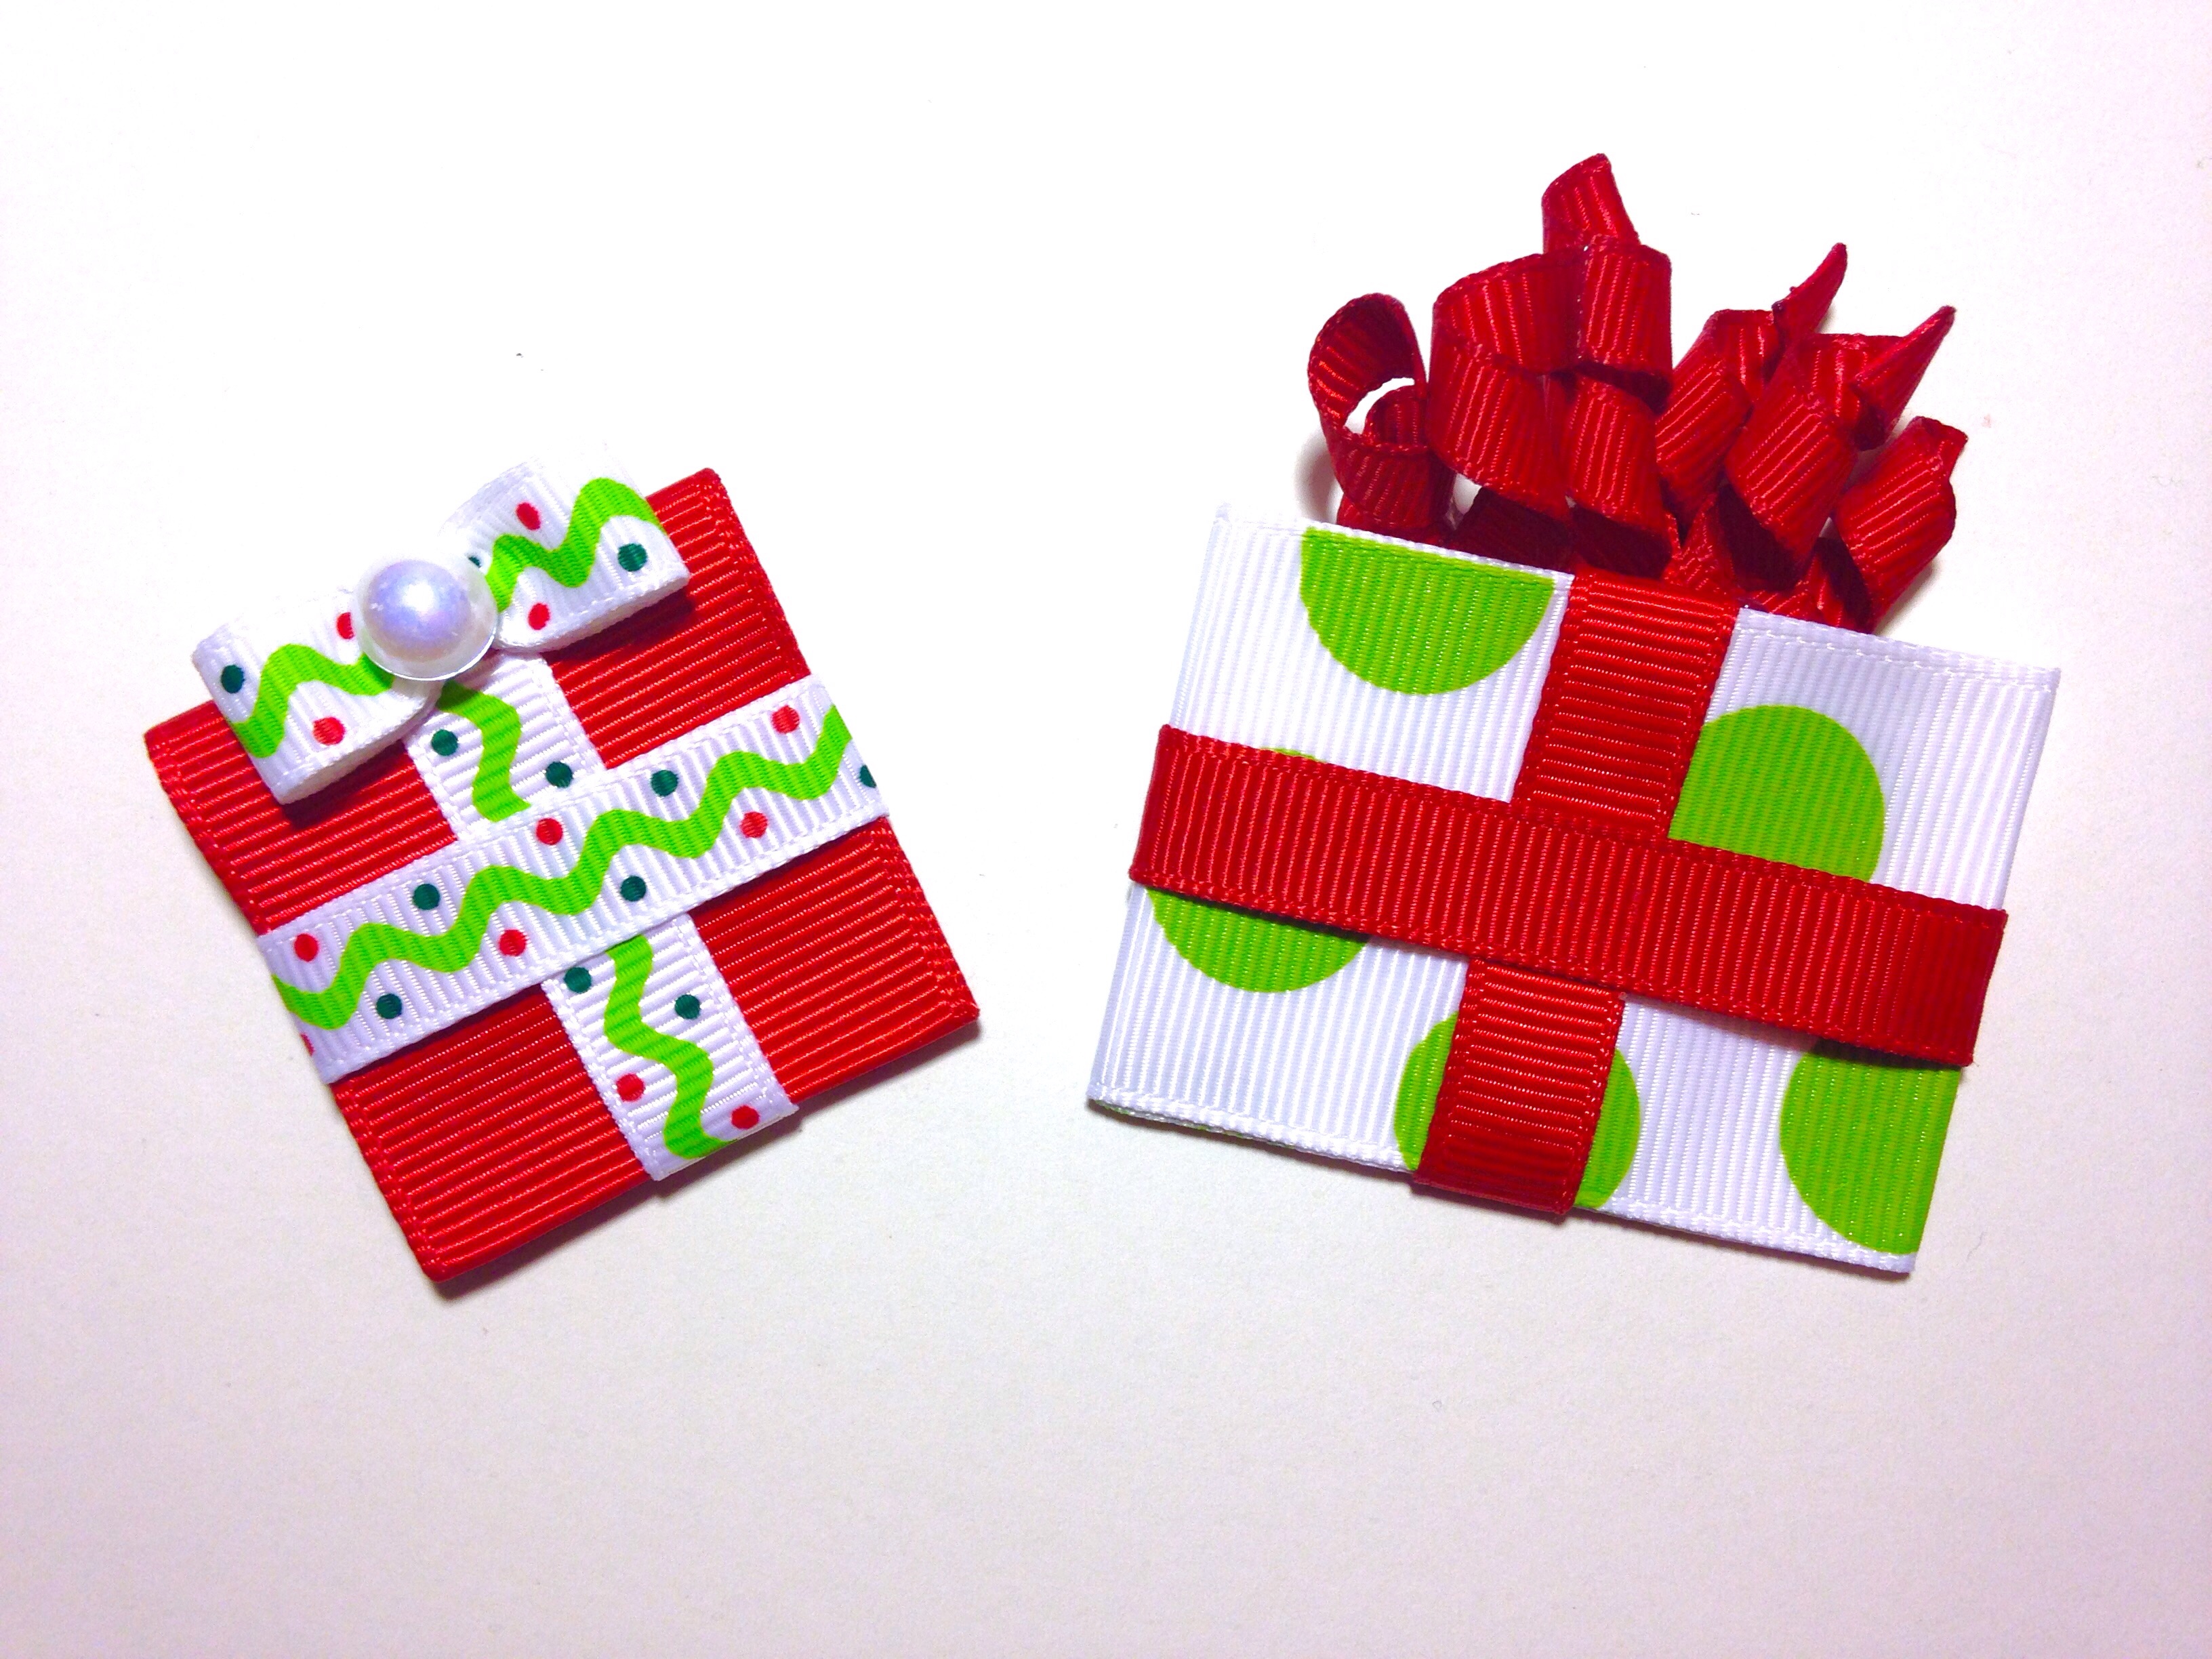 Now we have 2 super cute Christmas presents that are all decked out in red & green! Who's ready for Christmas now?
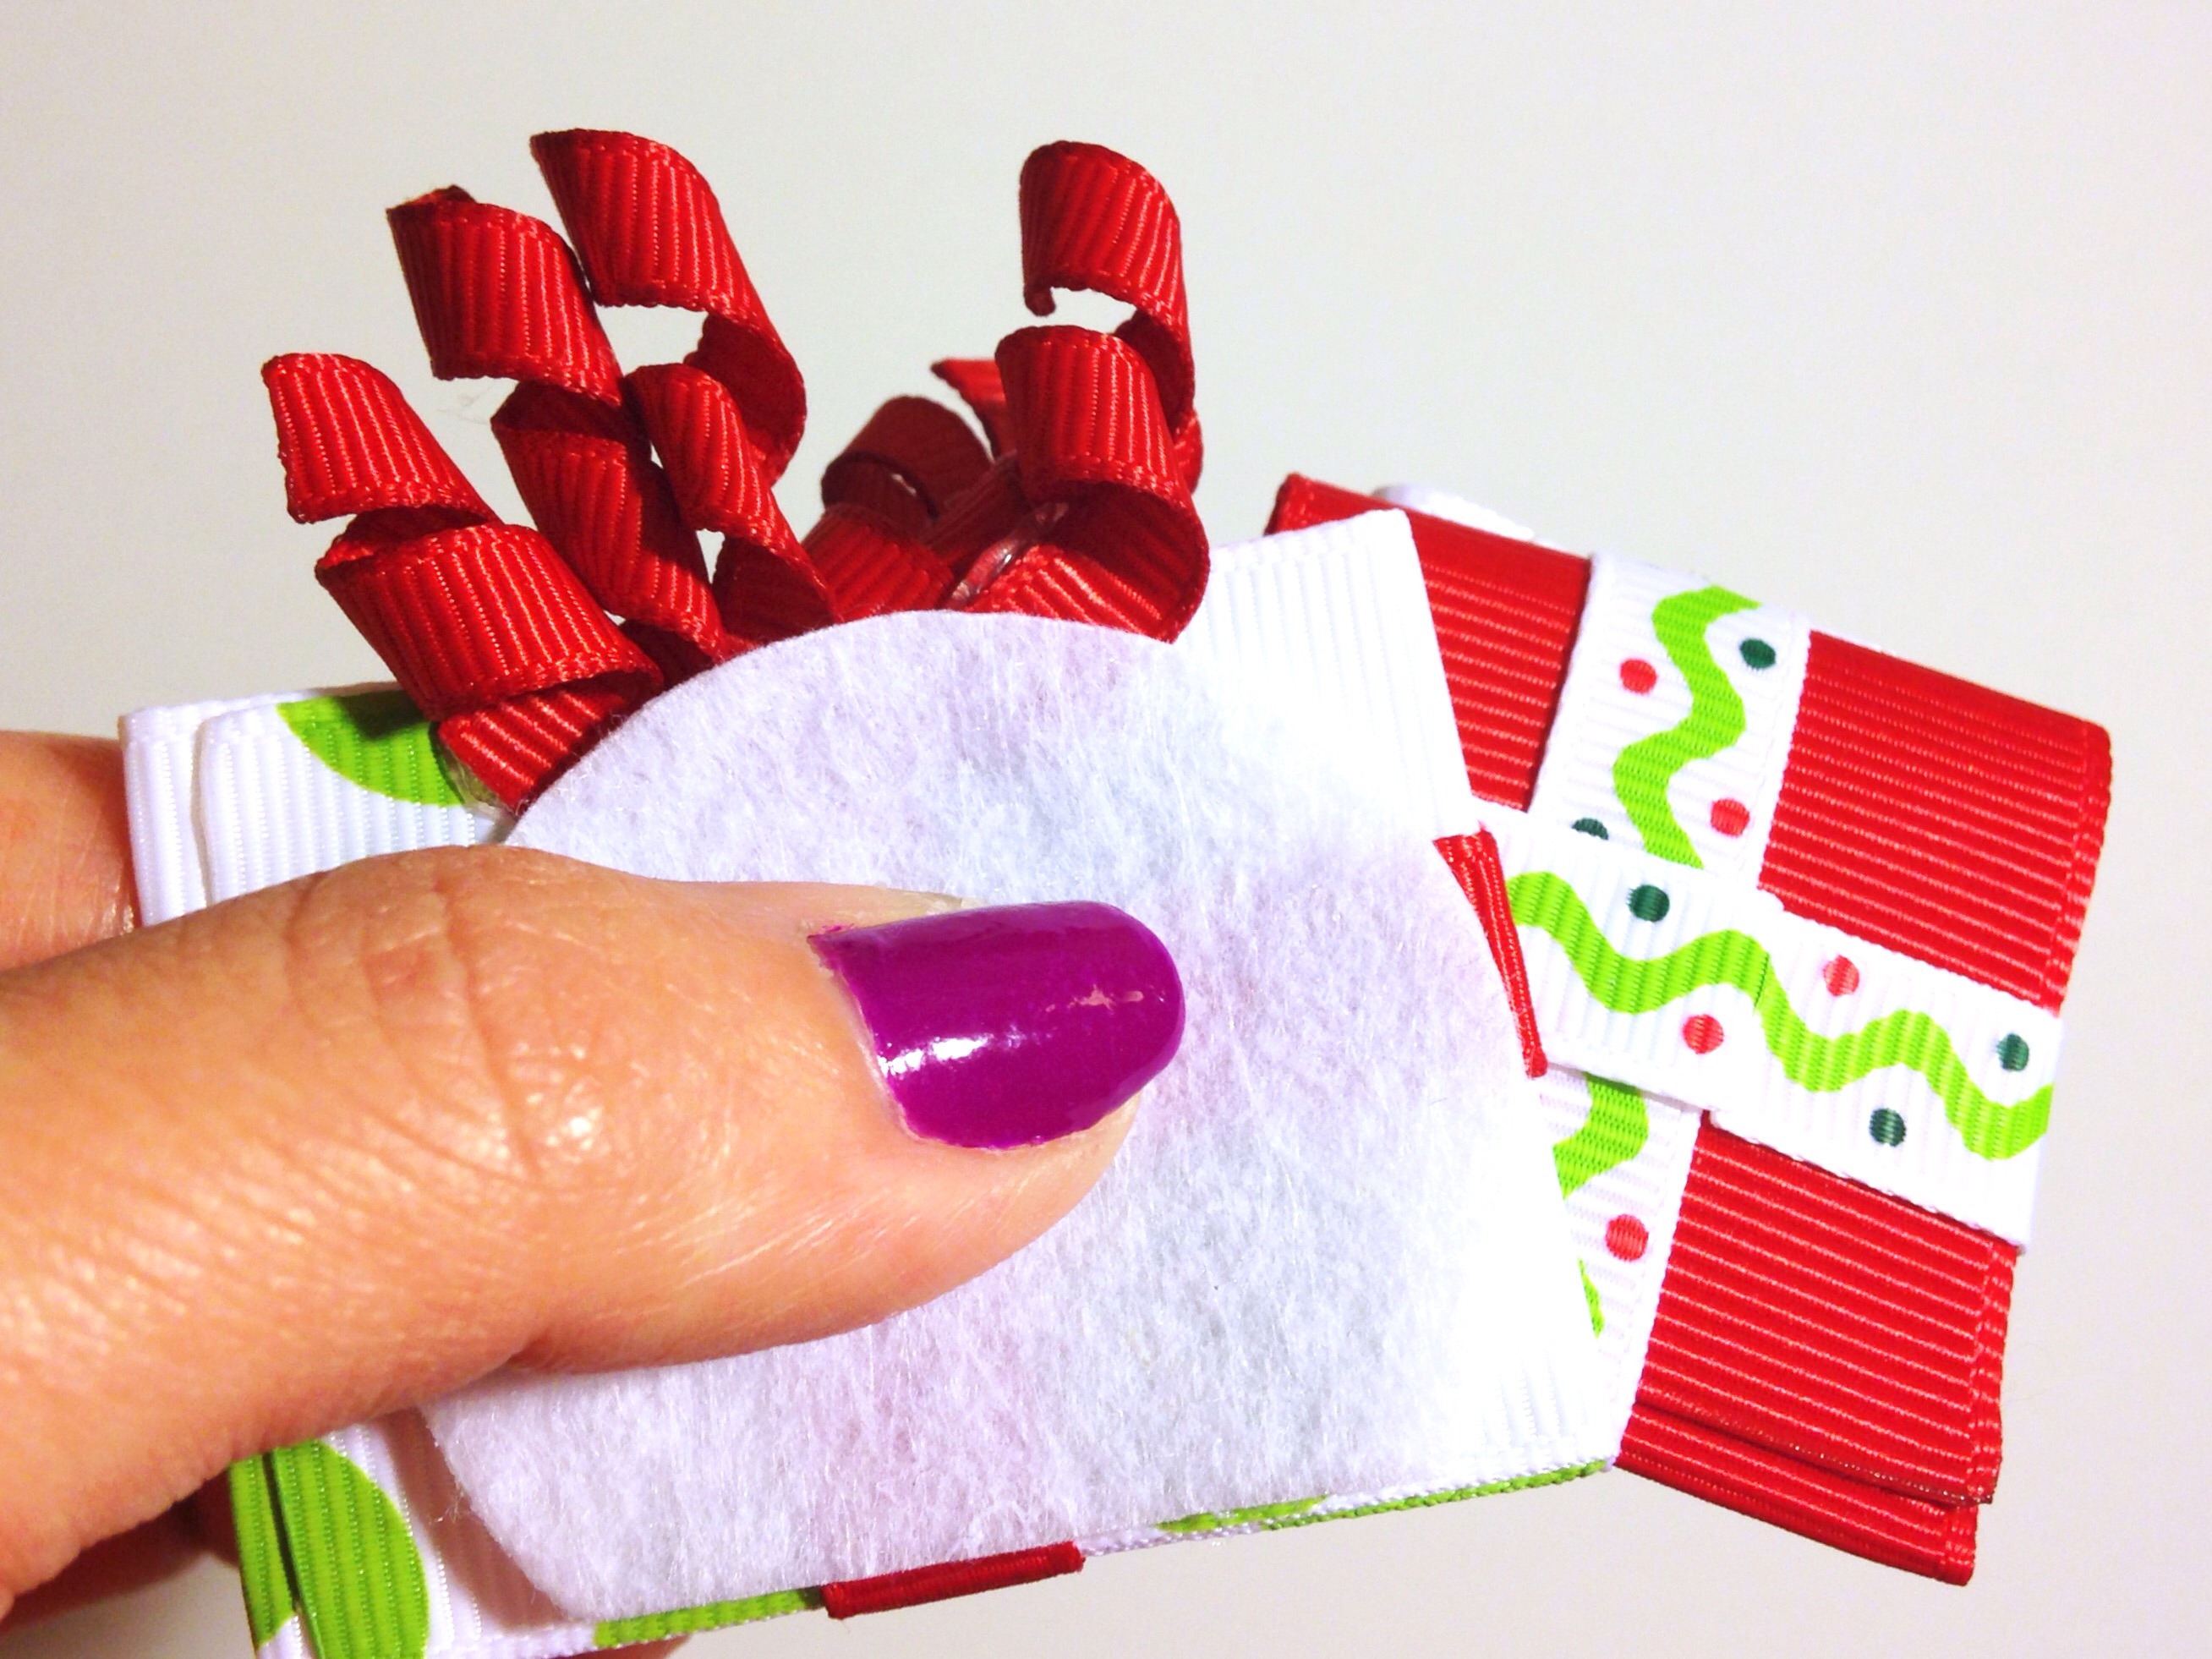 We're almost done! Our perfect little presents need to be attached to each other. I used hot glue for this task. Feel free to stack them any way you like! Next we are going to add a clip to the backside of our presents. I am using two 1.75" white circle felt pads and a 2.25" large alligator clip. If you're worried you may see the end of your clip you can cover it with coordinating 3/8" ribbon. Depending on how you stacked your presents, you may need to trim your circles just a little to insure they won't be visible from the front. As shown in the pic above, glue your first felt circle onto the backside of your presents.
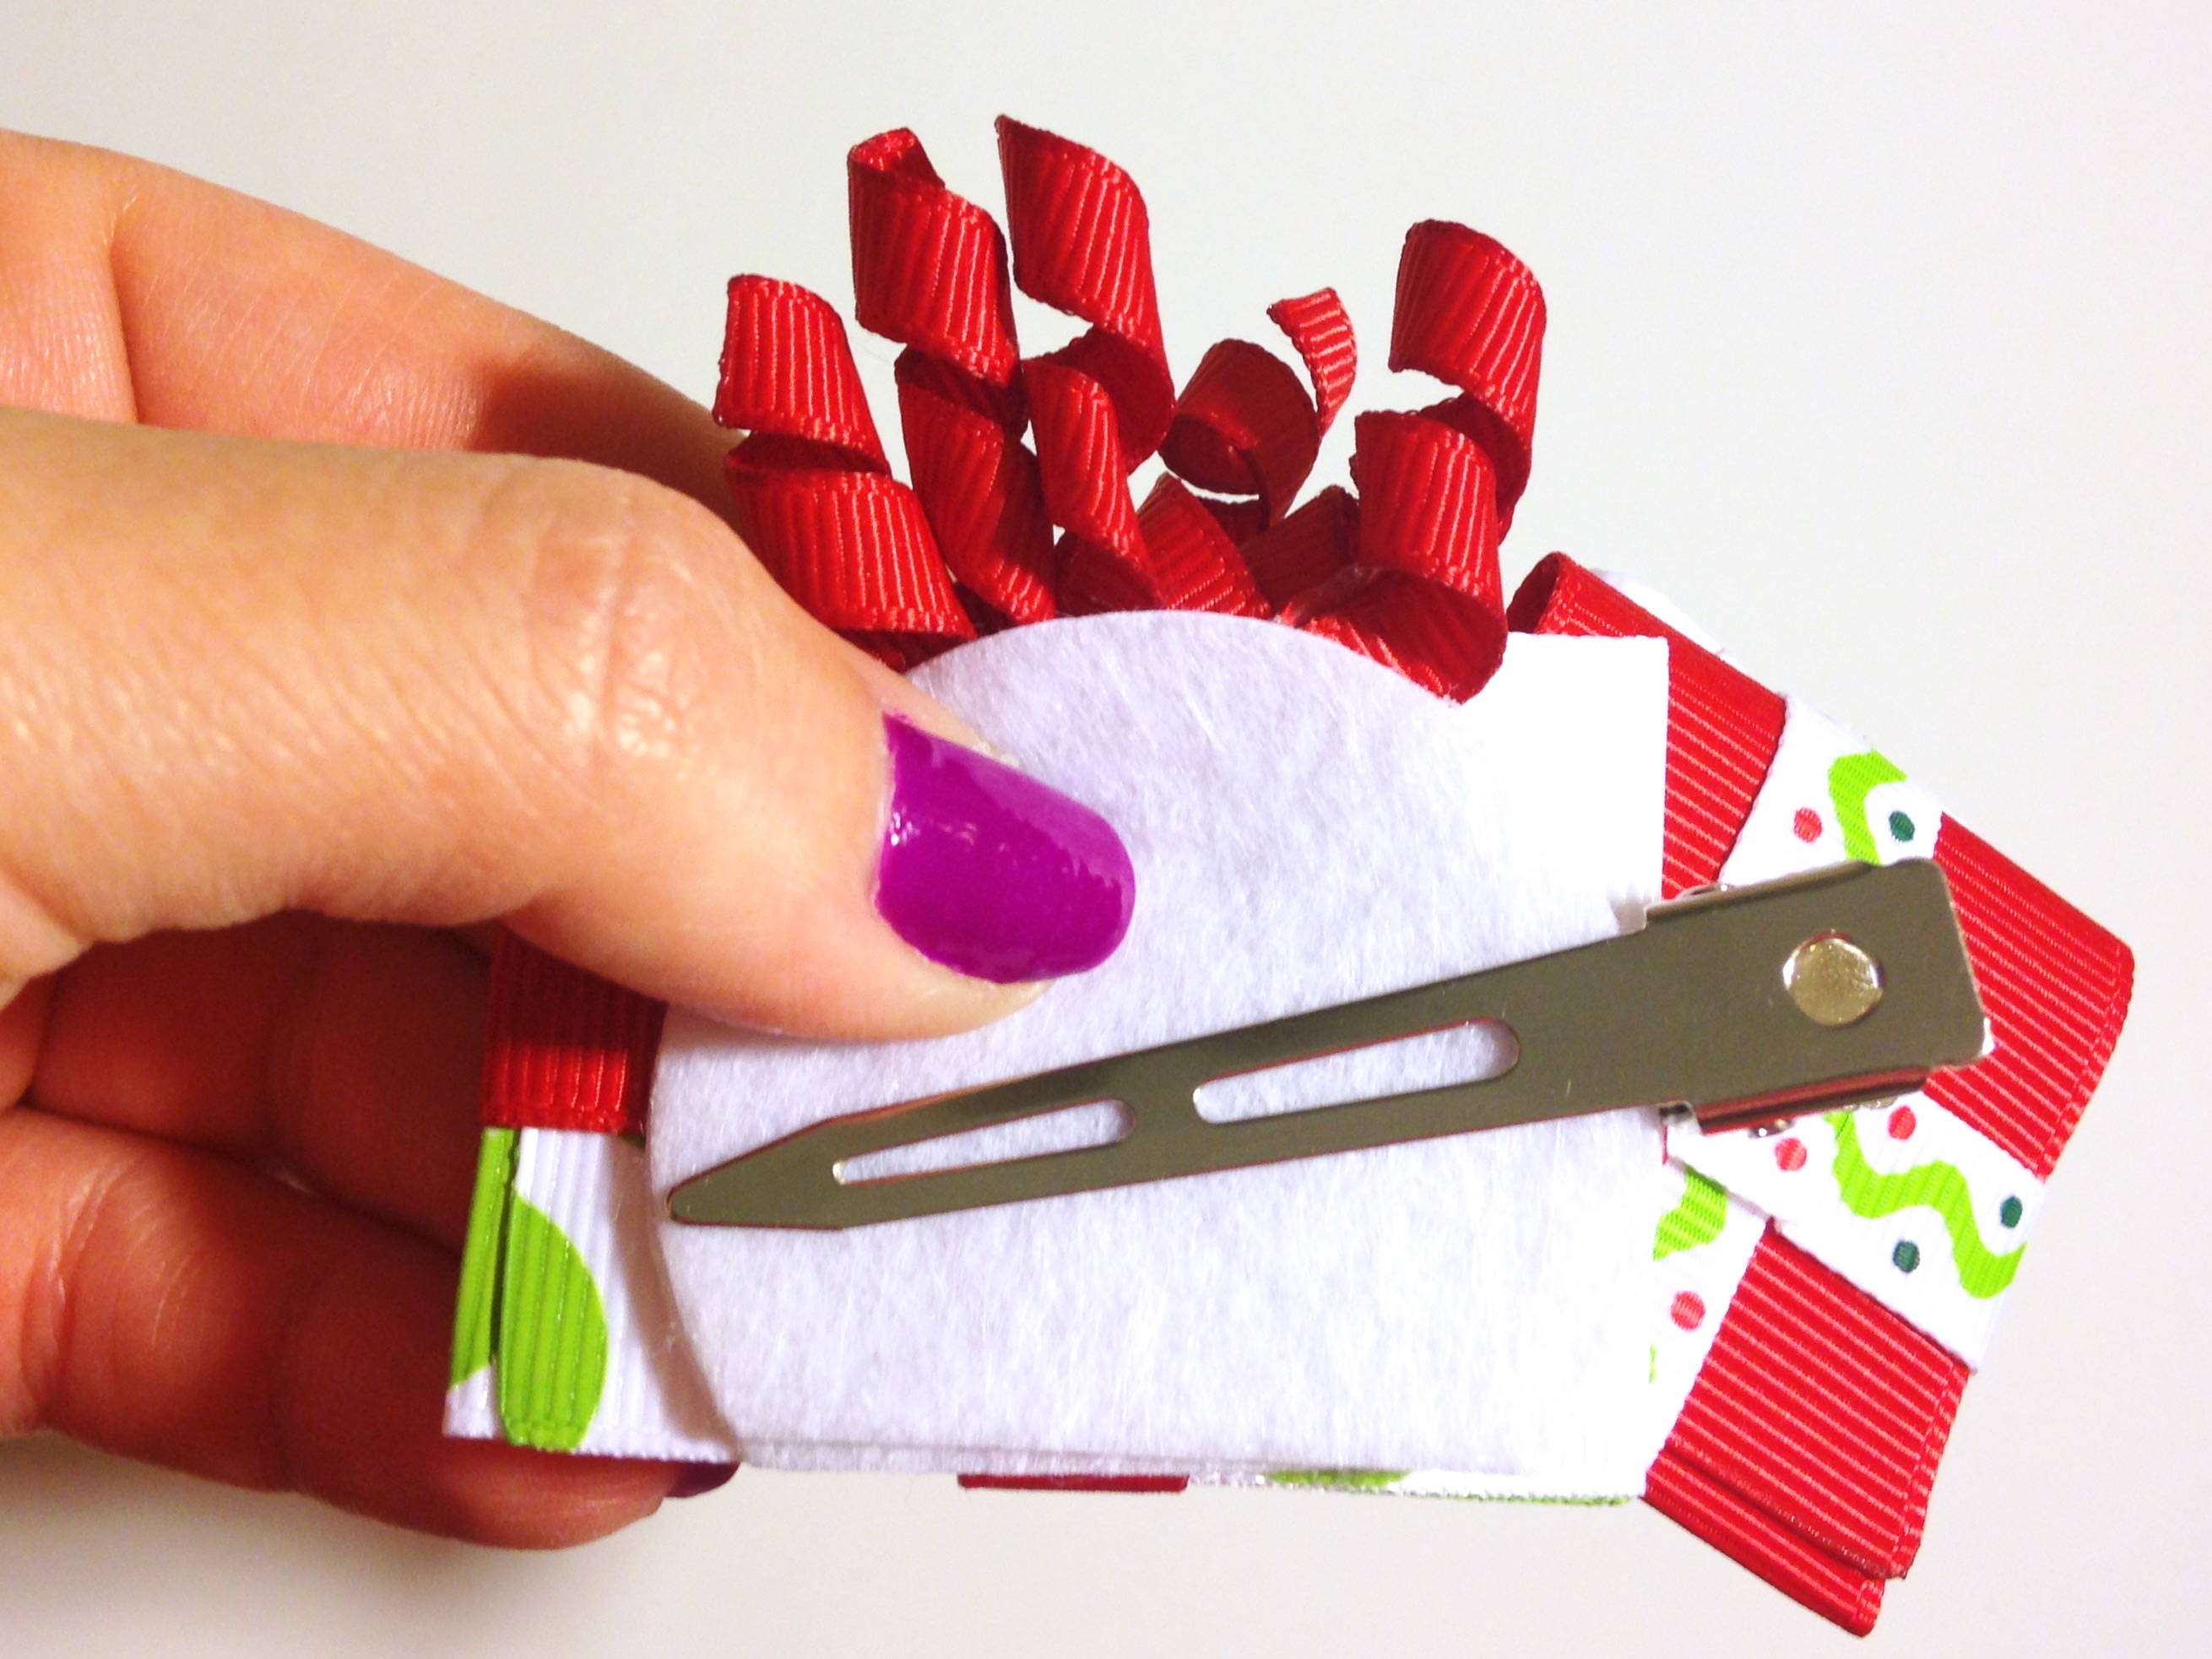 Now I am using my second felt circle to secure the upper prong of my alligator clip. To do this I am applying hot glue between the felt pads and sandwiching in the top prong, leaving the lower prong free.
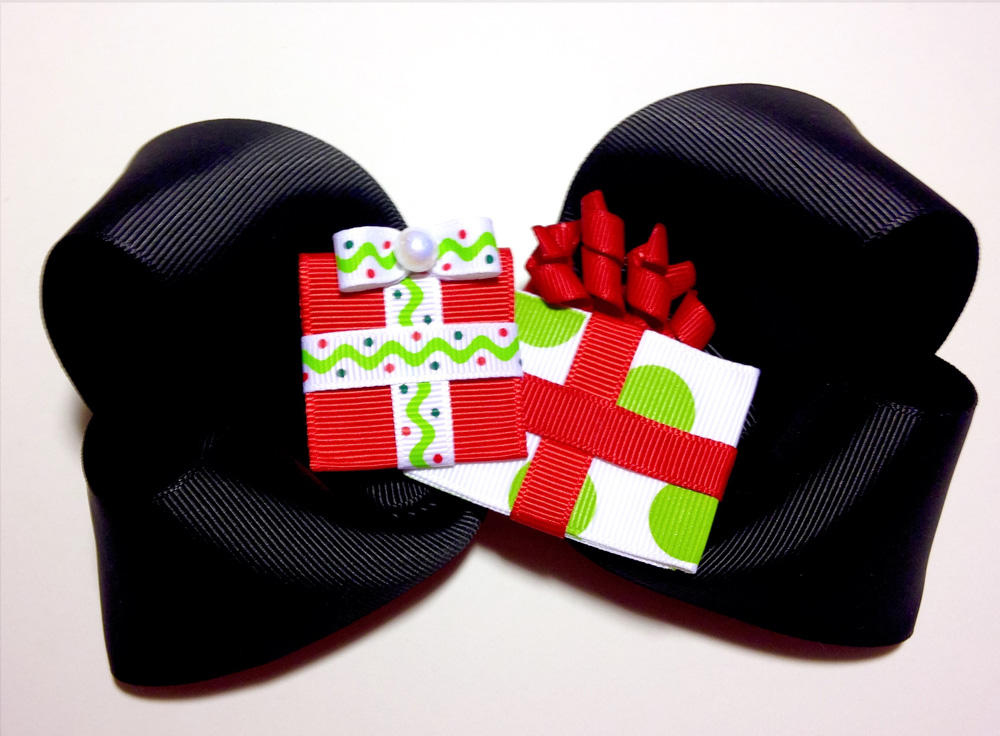
Wow! I'm loving how cute our present sculpture turned out! And the best part is it can be worn several different ways. Clipped directly into your little love's hair, on a headband or hat, or clipped into a large hair bow as a sweet holiday centerpiece! Thanks for joining me and I hope you've had fun making our super cute Christmas present sculpture hair clip! Merry Christmas!!
Now I am using my second felt circle to secure the upper prong of my alligator clip. To do this I am applying hot glue between the felt pads and sandwiching in the top prong, leaving the lower prong free.
Wow! I'm loving how cute our present sculpture turned out! And the best part is it can be worn several different ways. Clipped directly into your little love's hair, on a headband or hat, or clipped into a large hair bow as a sweet holiday centerpiece! Thanks for joining me and I hope you've had fun making our super cute Christmas present sculpture hair clip! Merry Christmas!!
Visit the rest of our blog for more Crafting Tutorials and DIY Instructions!
Loading...

