 Contributor post by Brittany
Raise your hand if you love the look of a sweet, silky, satin hairbow! (MEEEE!) I just love how even the most simply designed bow constructed with HBC's luxurious satin ribbon can take your little love's look to pure perfection instantly! I love using satin for special occasion bows, pageant bows, birthdays, holidays, you name it! Today I am going to put a twist on a traditional satin bow to create an adorable look that is fit for a princess! So gather up your supplies and let's get started!
Contributor post by Brittany
Raise your hand if you love the look of a sweet, silky, satin hairbow! (MEEEE!) I just love how even the most simply designed bow constructed with HBC's luxurious satin ribbon can take your little love's look to pure perfection instantly! I love using satin for special occasion bows, pageant bows, birthdays, holidays, you name it! Today I am going to put a twist on a traditional satin bow to create an adorable look that is fit for a princess! So gather up your supplies and let's get started!
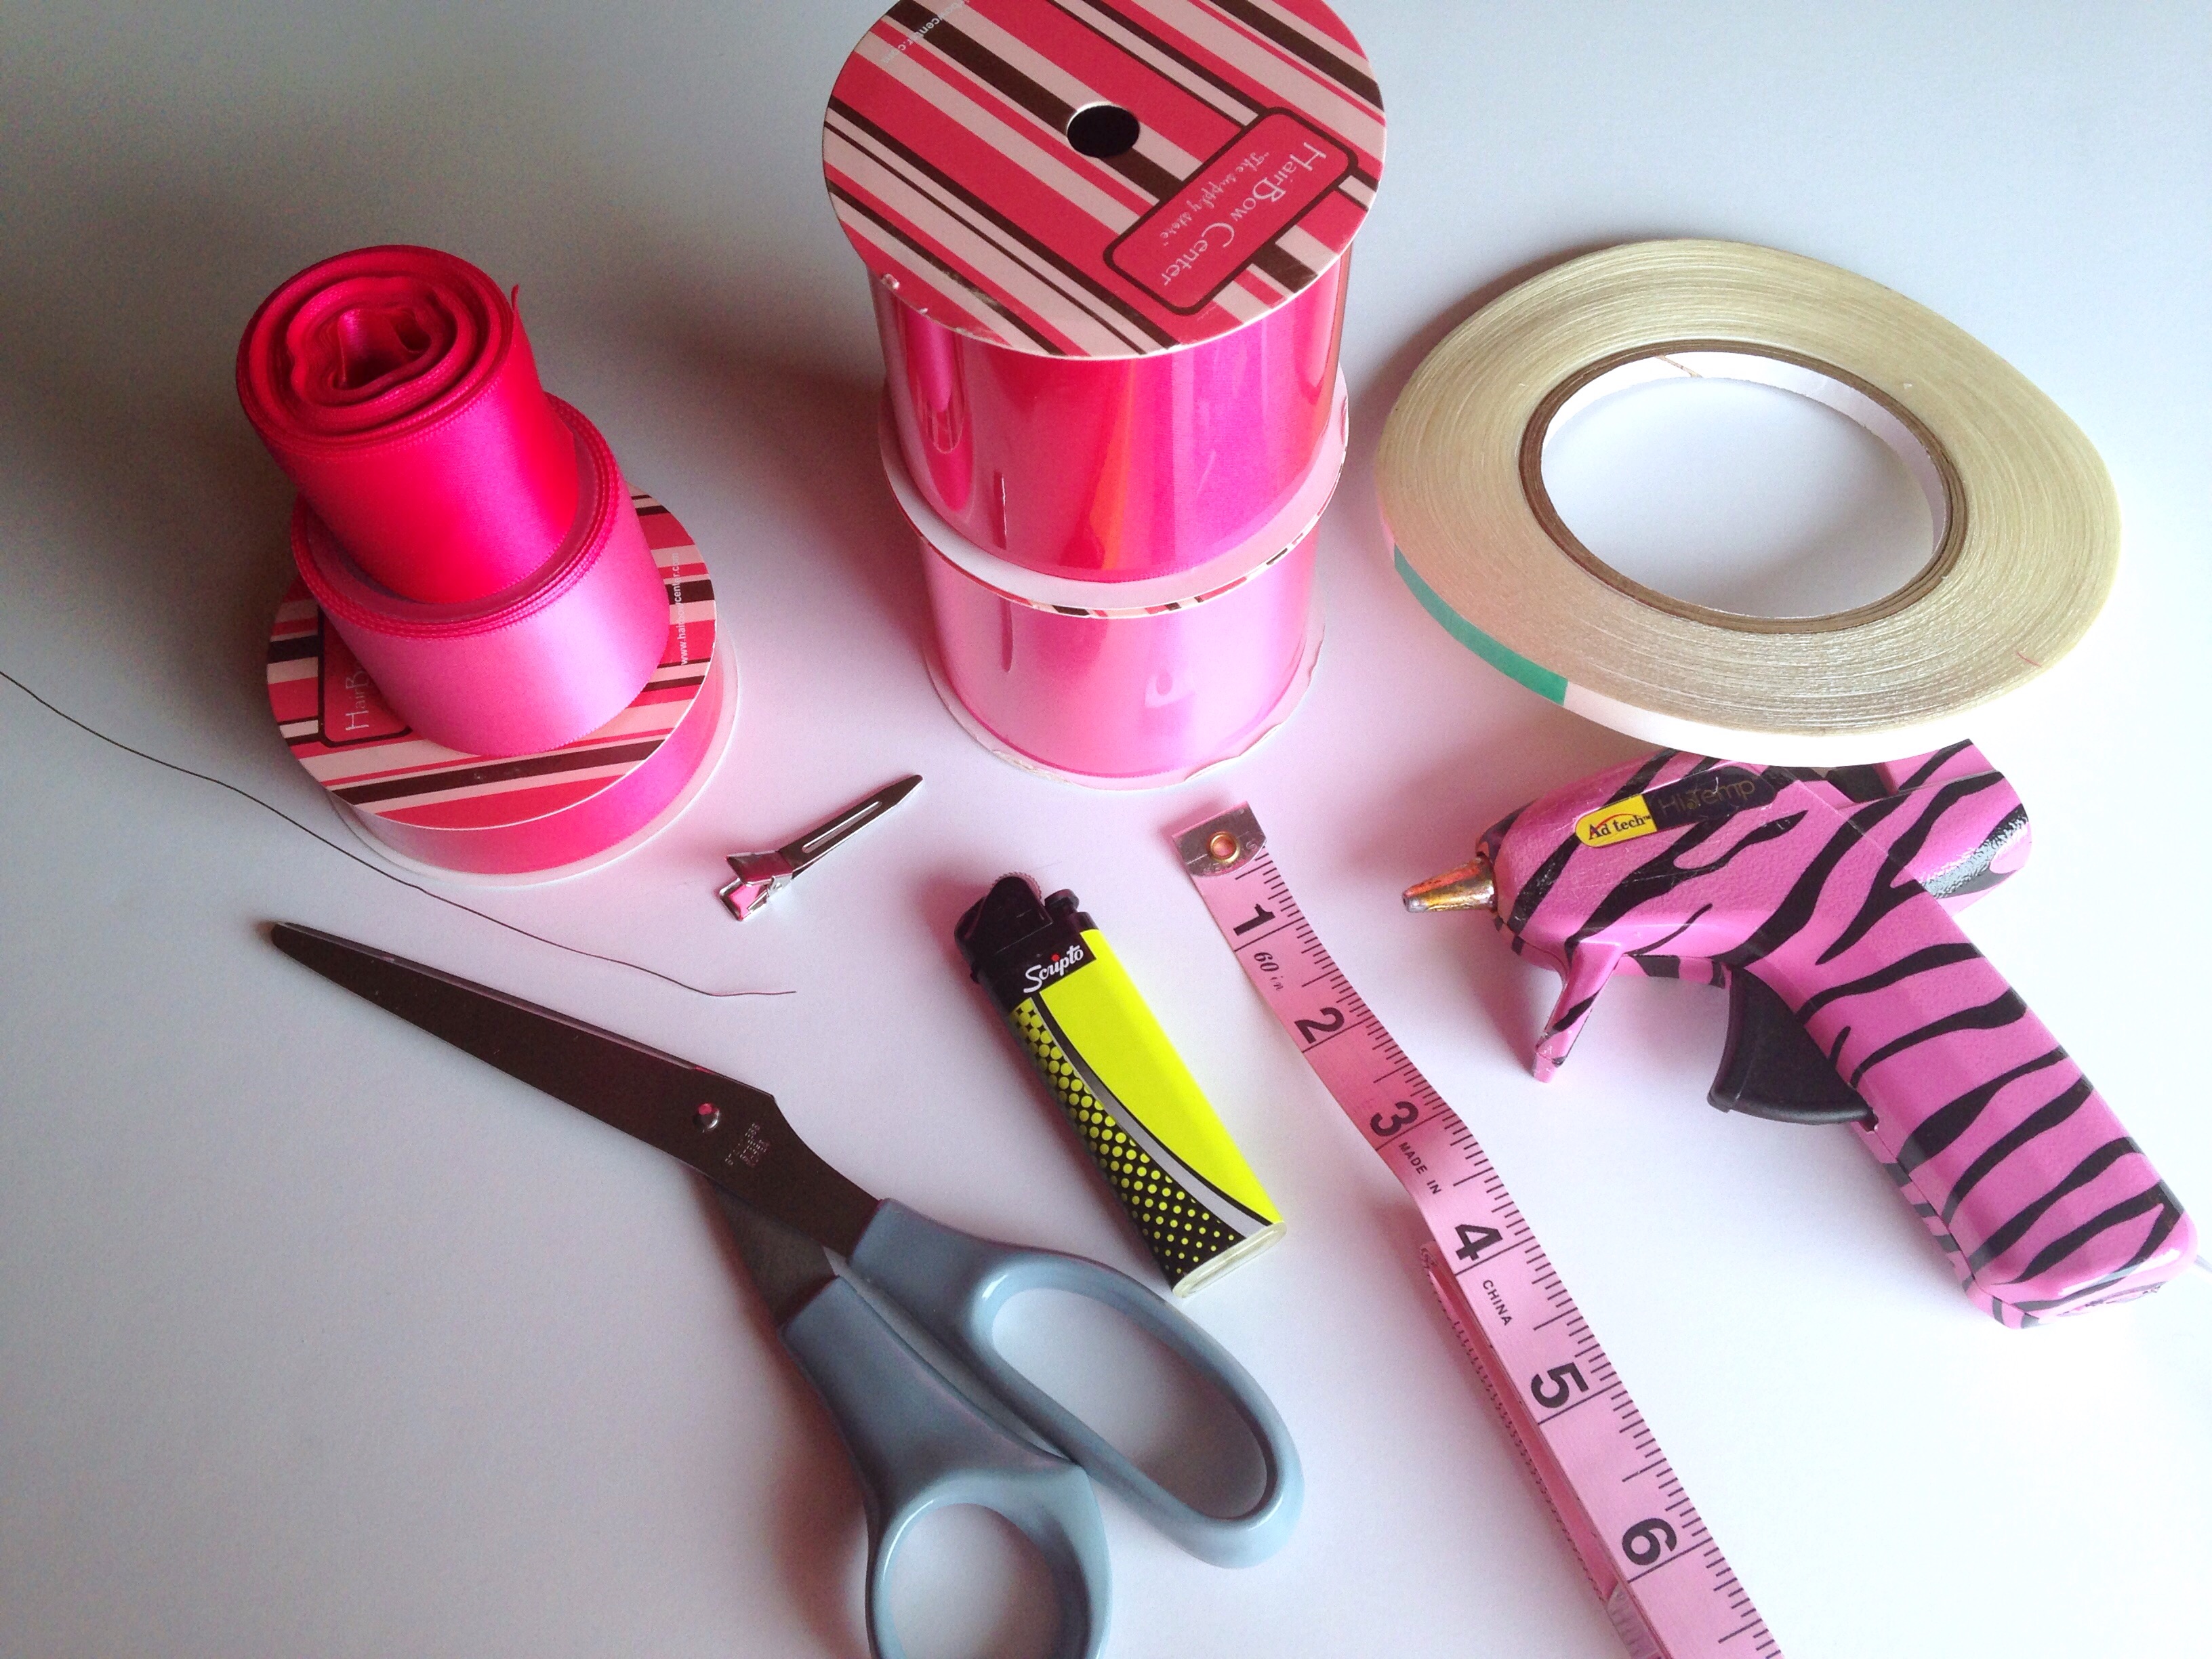 All supplies can be found right here at HBC! You will need:
•2.25" Shocking pink satin ribbon
•2.25" Hot pink satin ribbon
•1.5" Shocking pink satin ribbon
•1.5" Hot pink satin ribbon
•7/8" Shocking pink satin ribbon
•1/4" Double sided fillet tape
•1.75" alligator clip
•Wire (or your choice of material for securing bow centers)
•Scissors
•Lighter
•Measuring tape
•Hot glue gun (optional!)
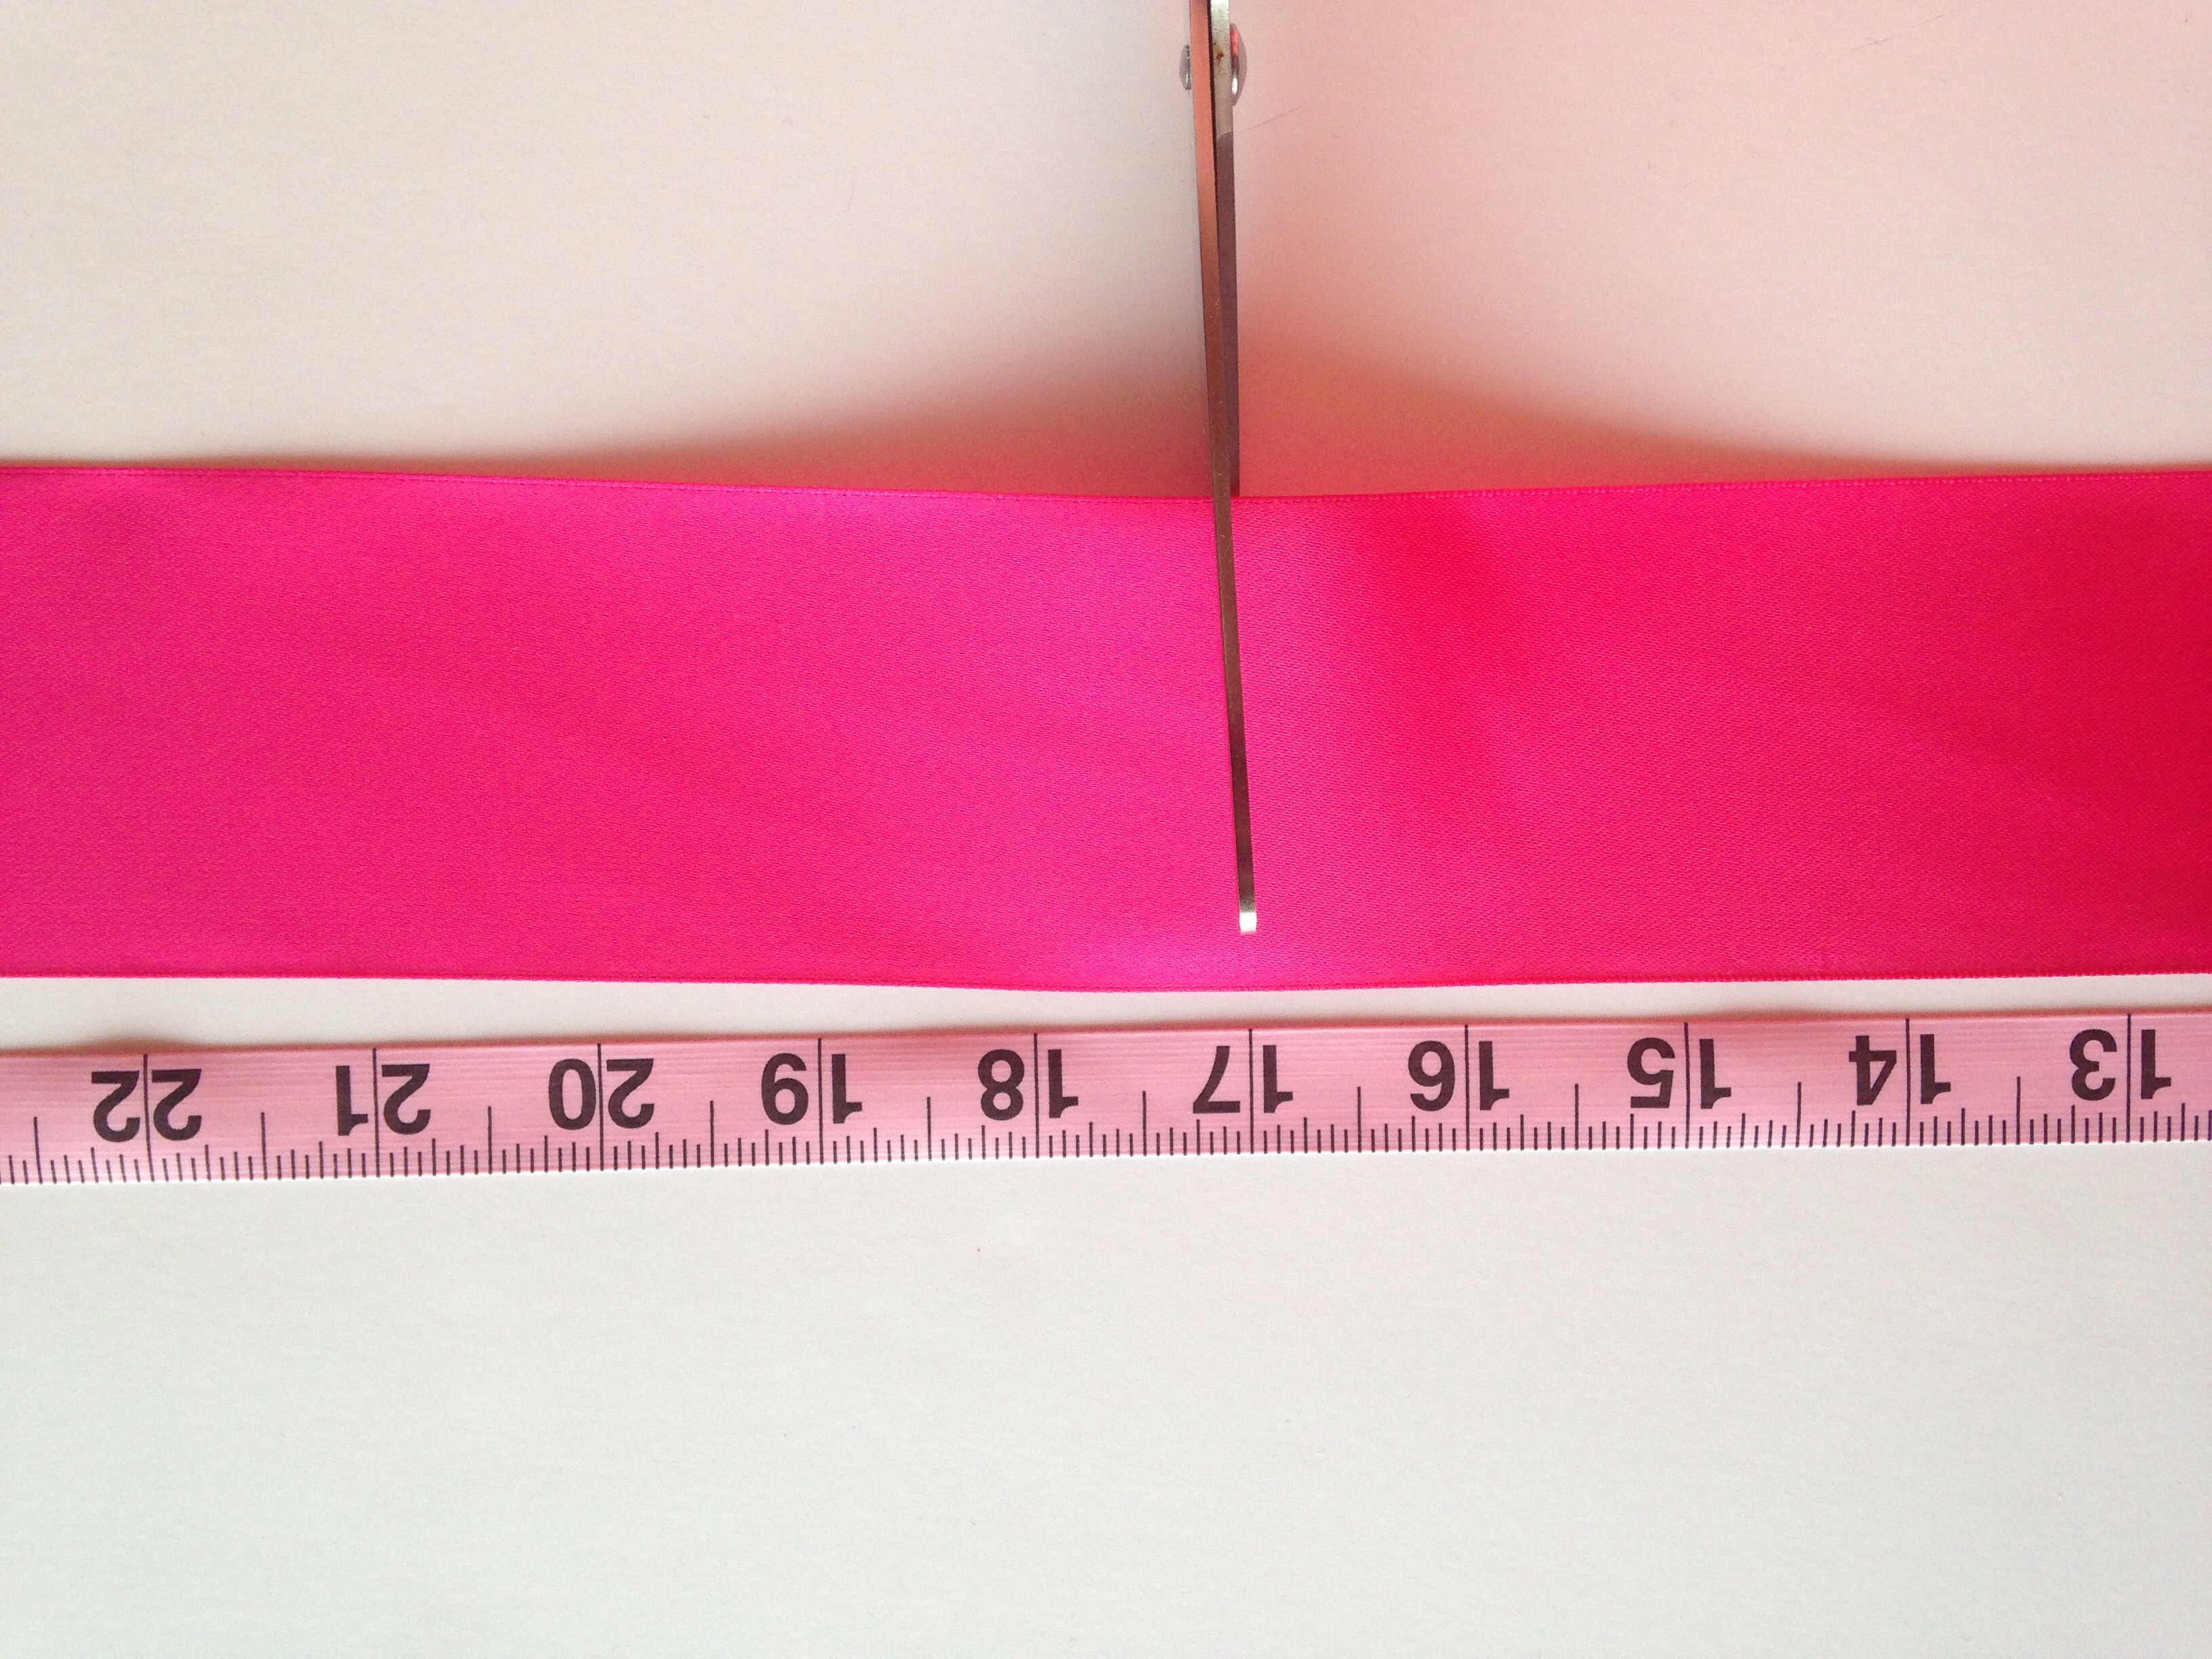
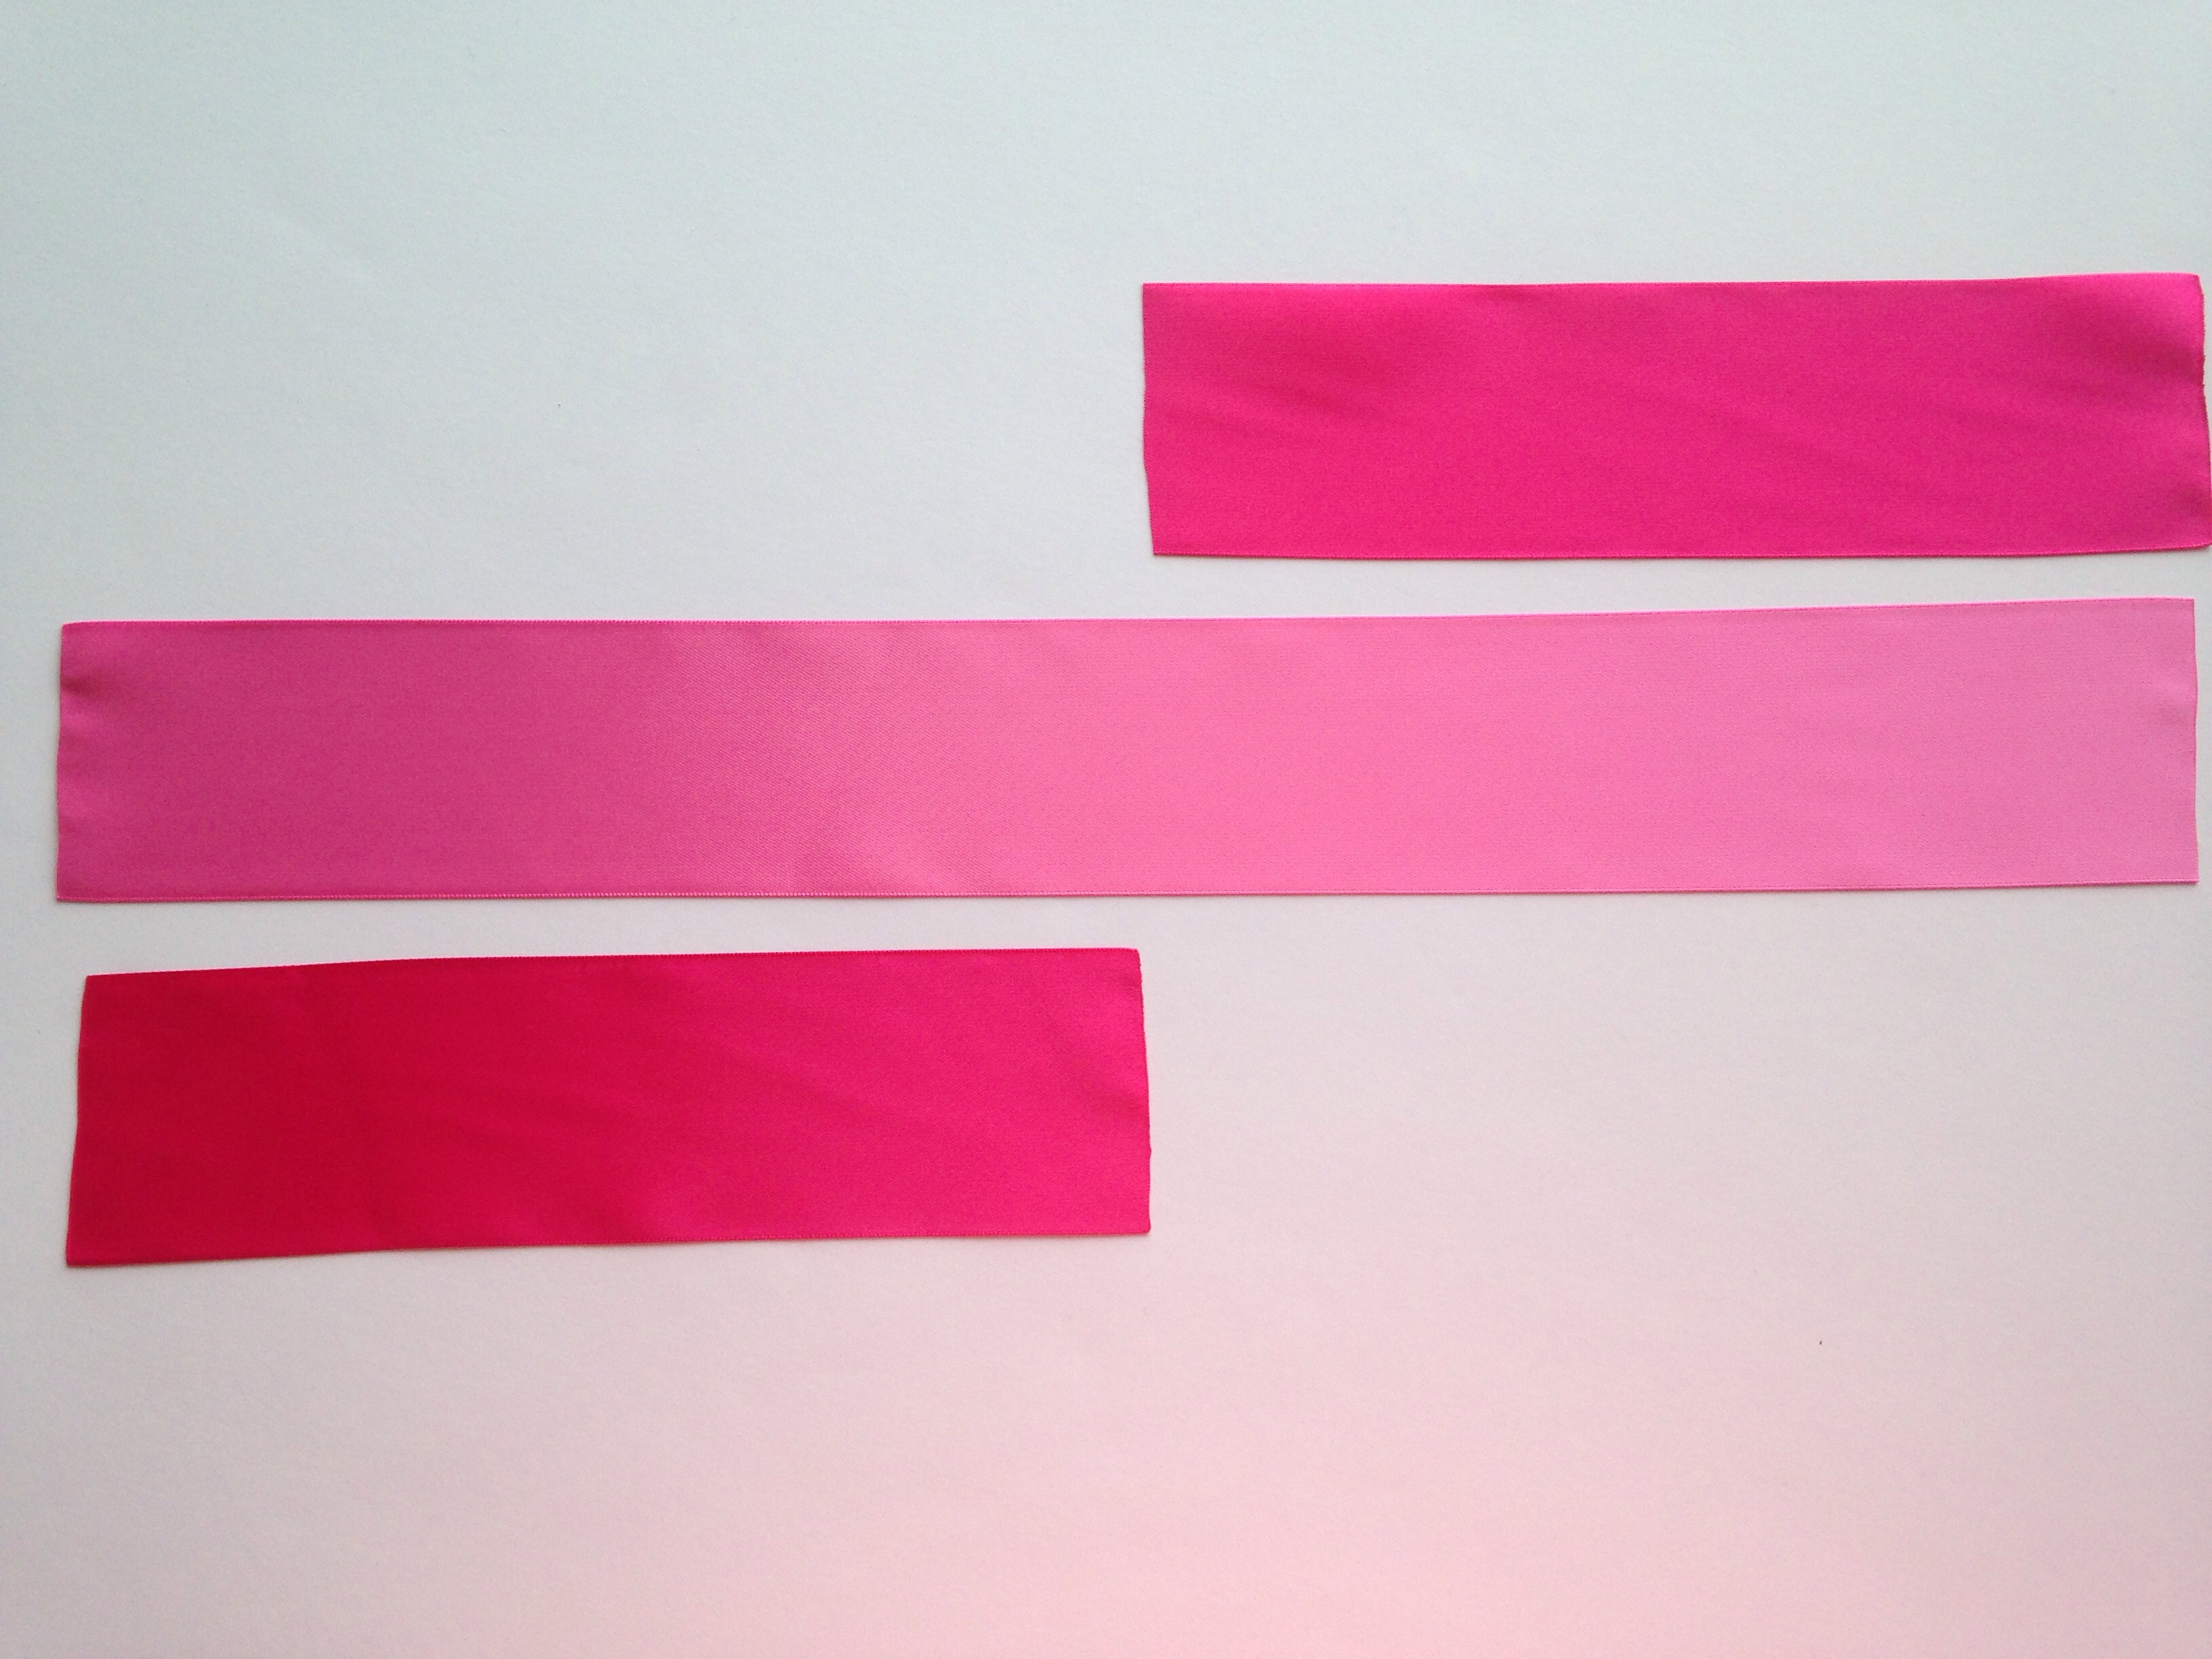
Some of you may remember reading how to make the "Easy 4 color boutique bow" awhile back. While that is definitely an easy method to follow I have since discovered how AMAZING HBC's double sided fillet tape is, therefor you can literally make this entire bow using absolutely NO hot glue if you chose to! Seriously! The first time I used this tape I was truly impressed so if you have not already purchased this amazing stuff I urge you to get it ASAP! Now let's get our gorgeous satin ribbon prepared! Since I am making a large bow I have chosen 2.25" ribbon which makes the perfect sized bows for my daughter. (HBC is the ONLY place I know of that carries this awesome size satin ribbon! Just one more reason to never ever shop anywhere else!) So for the bottom layer in our bow we will need a total of 34 inches of our 2.25" satin ribbon. Since we are incorporating 2 gorgeous colors into our bow you will need 17" of each color.
All supplies can be found right here at HBC! You will need:
•2.25" Shocking pink satin ribbon
•2.25" Hot pink satin ribbon
•1.5" Shocking pink satin ribbon
•1.5" Hot pink satin ribbon
•7/8" Shocking pink satin ribbon
•1/4" Double sided fillet tape
•1.75" alligator clip
•Wire (or your choice of material for securing bow centers)
•Scissors
•Lighter
•Measuring tape
•Hot glue gun (optional!)
Some of you may remember reading how to make the "Easy 4 color boutique bow" awhile back. While that is definitely an easy method to follow I have since discovered how AMAZING HBC's double sided fillet tape is, therefor you can literally make this entire bow using absolutely NO hot glue if you chose to! Seriously! The first time I used this tape I was truly impressed so if you have not already purchased this amazing stuff I urge you to get it ASAP! Now let's get our gorgeous satin ribbon prepared! Since I am making a large bow I have chosen 2.25" ribbon which makes the perfect sized bows for my daughter. (HBC is the ONLY place I know of that carries this awesome size satin ribbon! Just one more reason to never ever shop anywhere else!) So for the bottom layer in our bow we will need a total of 34 inches of our 2.25" satin ribbon. Since we are incorporating 2 gorgeous colors into our bow you will need 17" of each color.
 After you have cut 17" of Shocking pink ribbon and 17" of Hot Pink ribbon (or the color combo of your choice!) don't forget to heat seal your ends with a lighter. I do not recommend using a wood burning tool on satin since it is much more delicate than grosgrain ribbon. So just a quick stroke of your lighter up & down each ribbon end does the trick perfectly! Next I am going to take my 17" piece of Hot Pink ribbon and fold this in half to make a crease In the middle. Open your ribbon back up and cut directly on your line making 2 equal 8.5" pieces.
 Now we need to attach all 3 pieces of ribbon together. Cut a 2" piece of your double sided fillet tape. Place your tape on the edge of your longest ribbon. Your tape doesn't have to fit all the way from end to end... this stuff has a super strong hold!
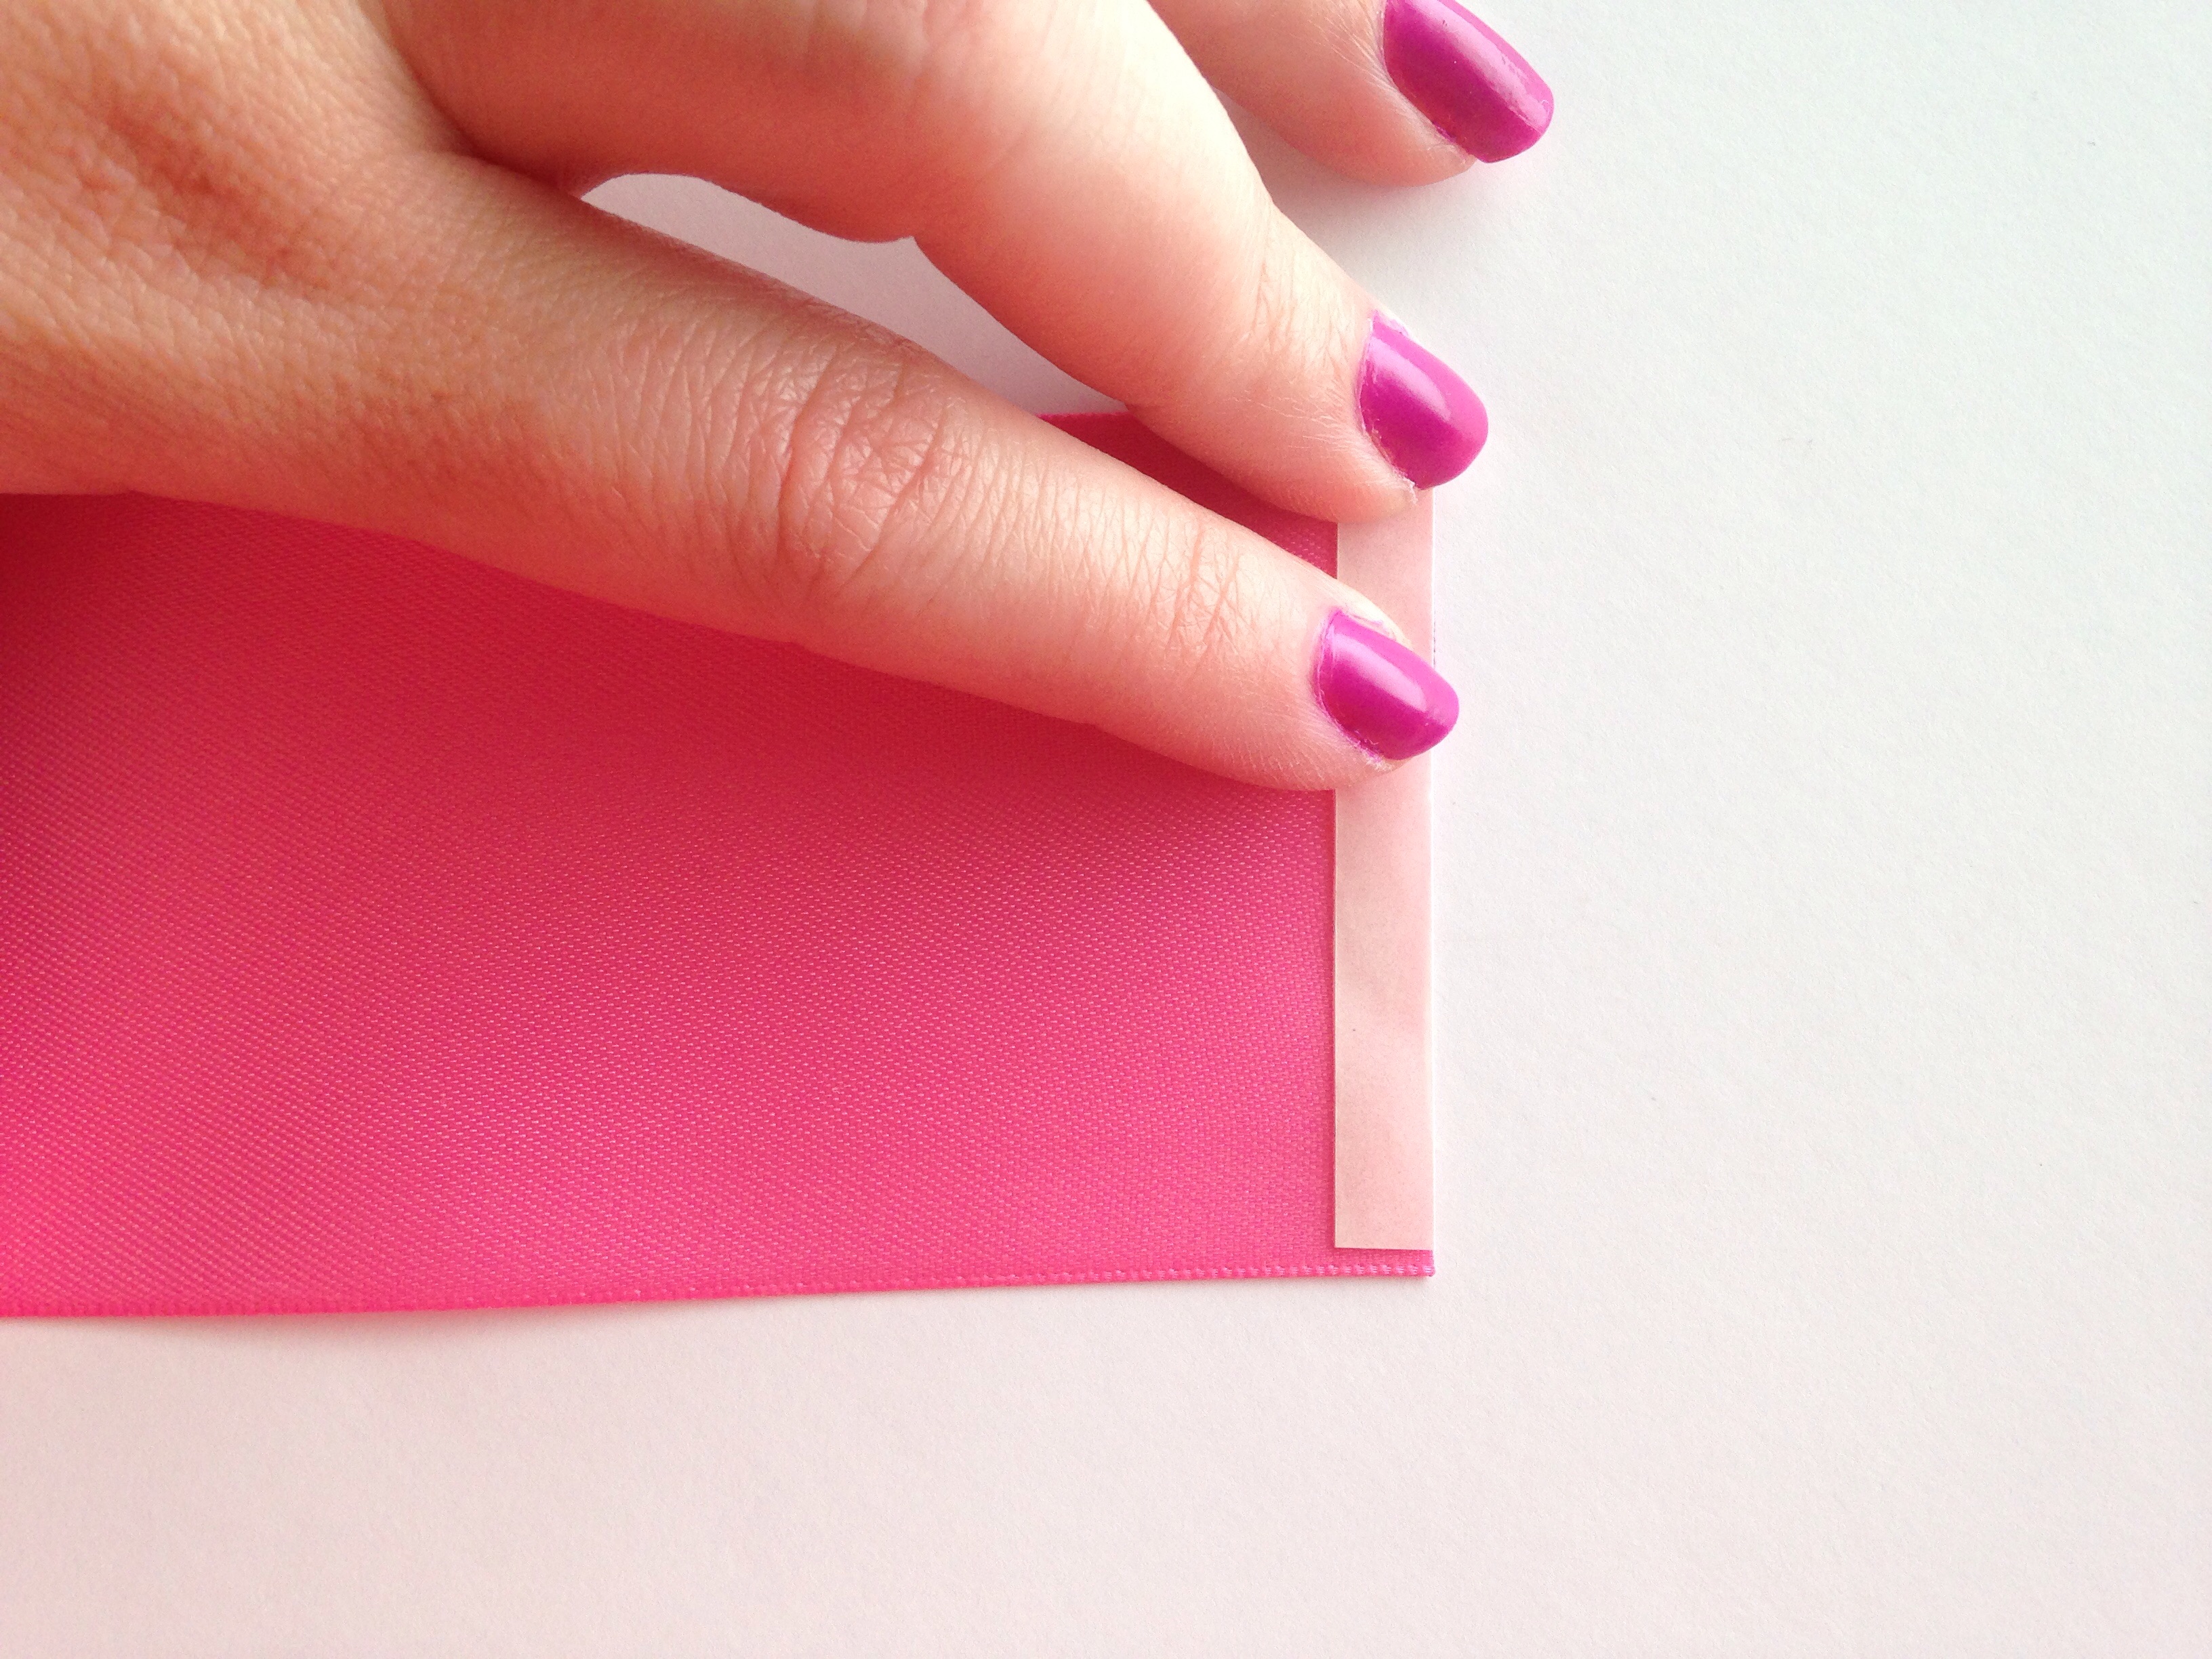 Once your tape is attached peel off the paper backing from the top.
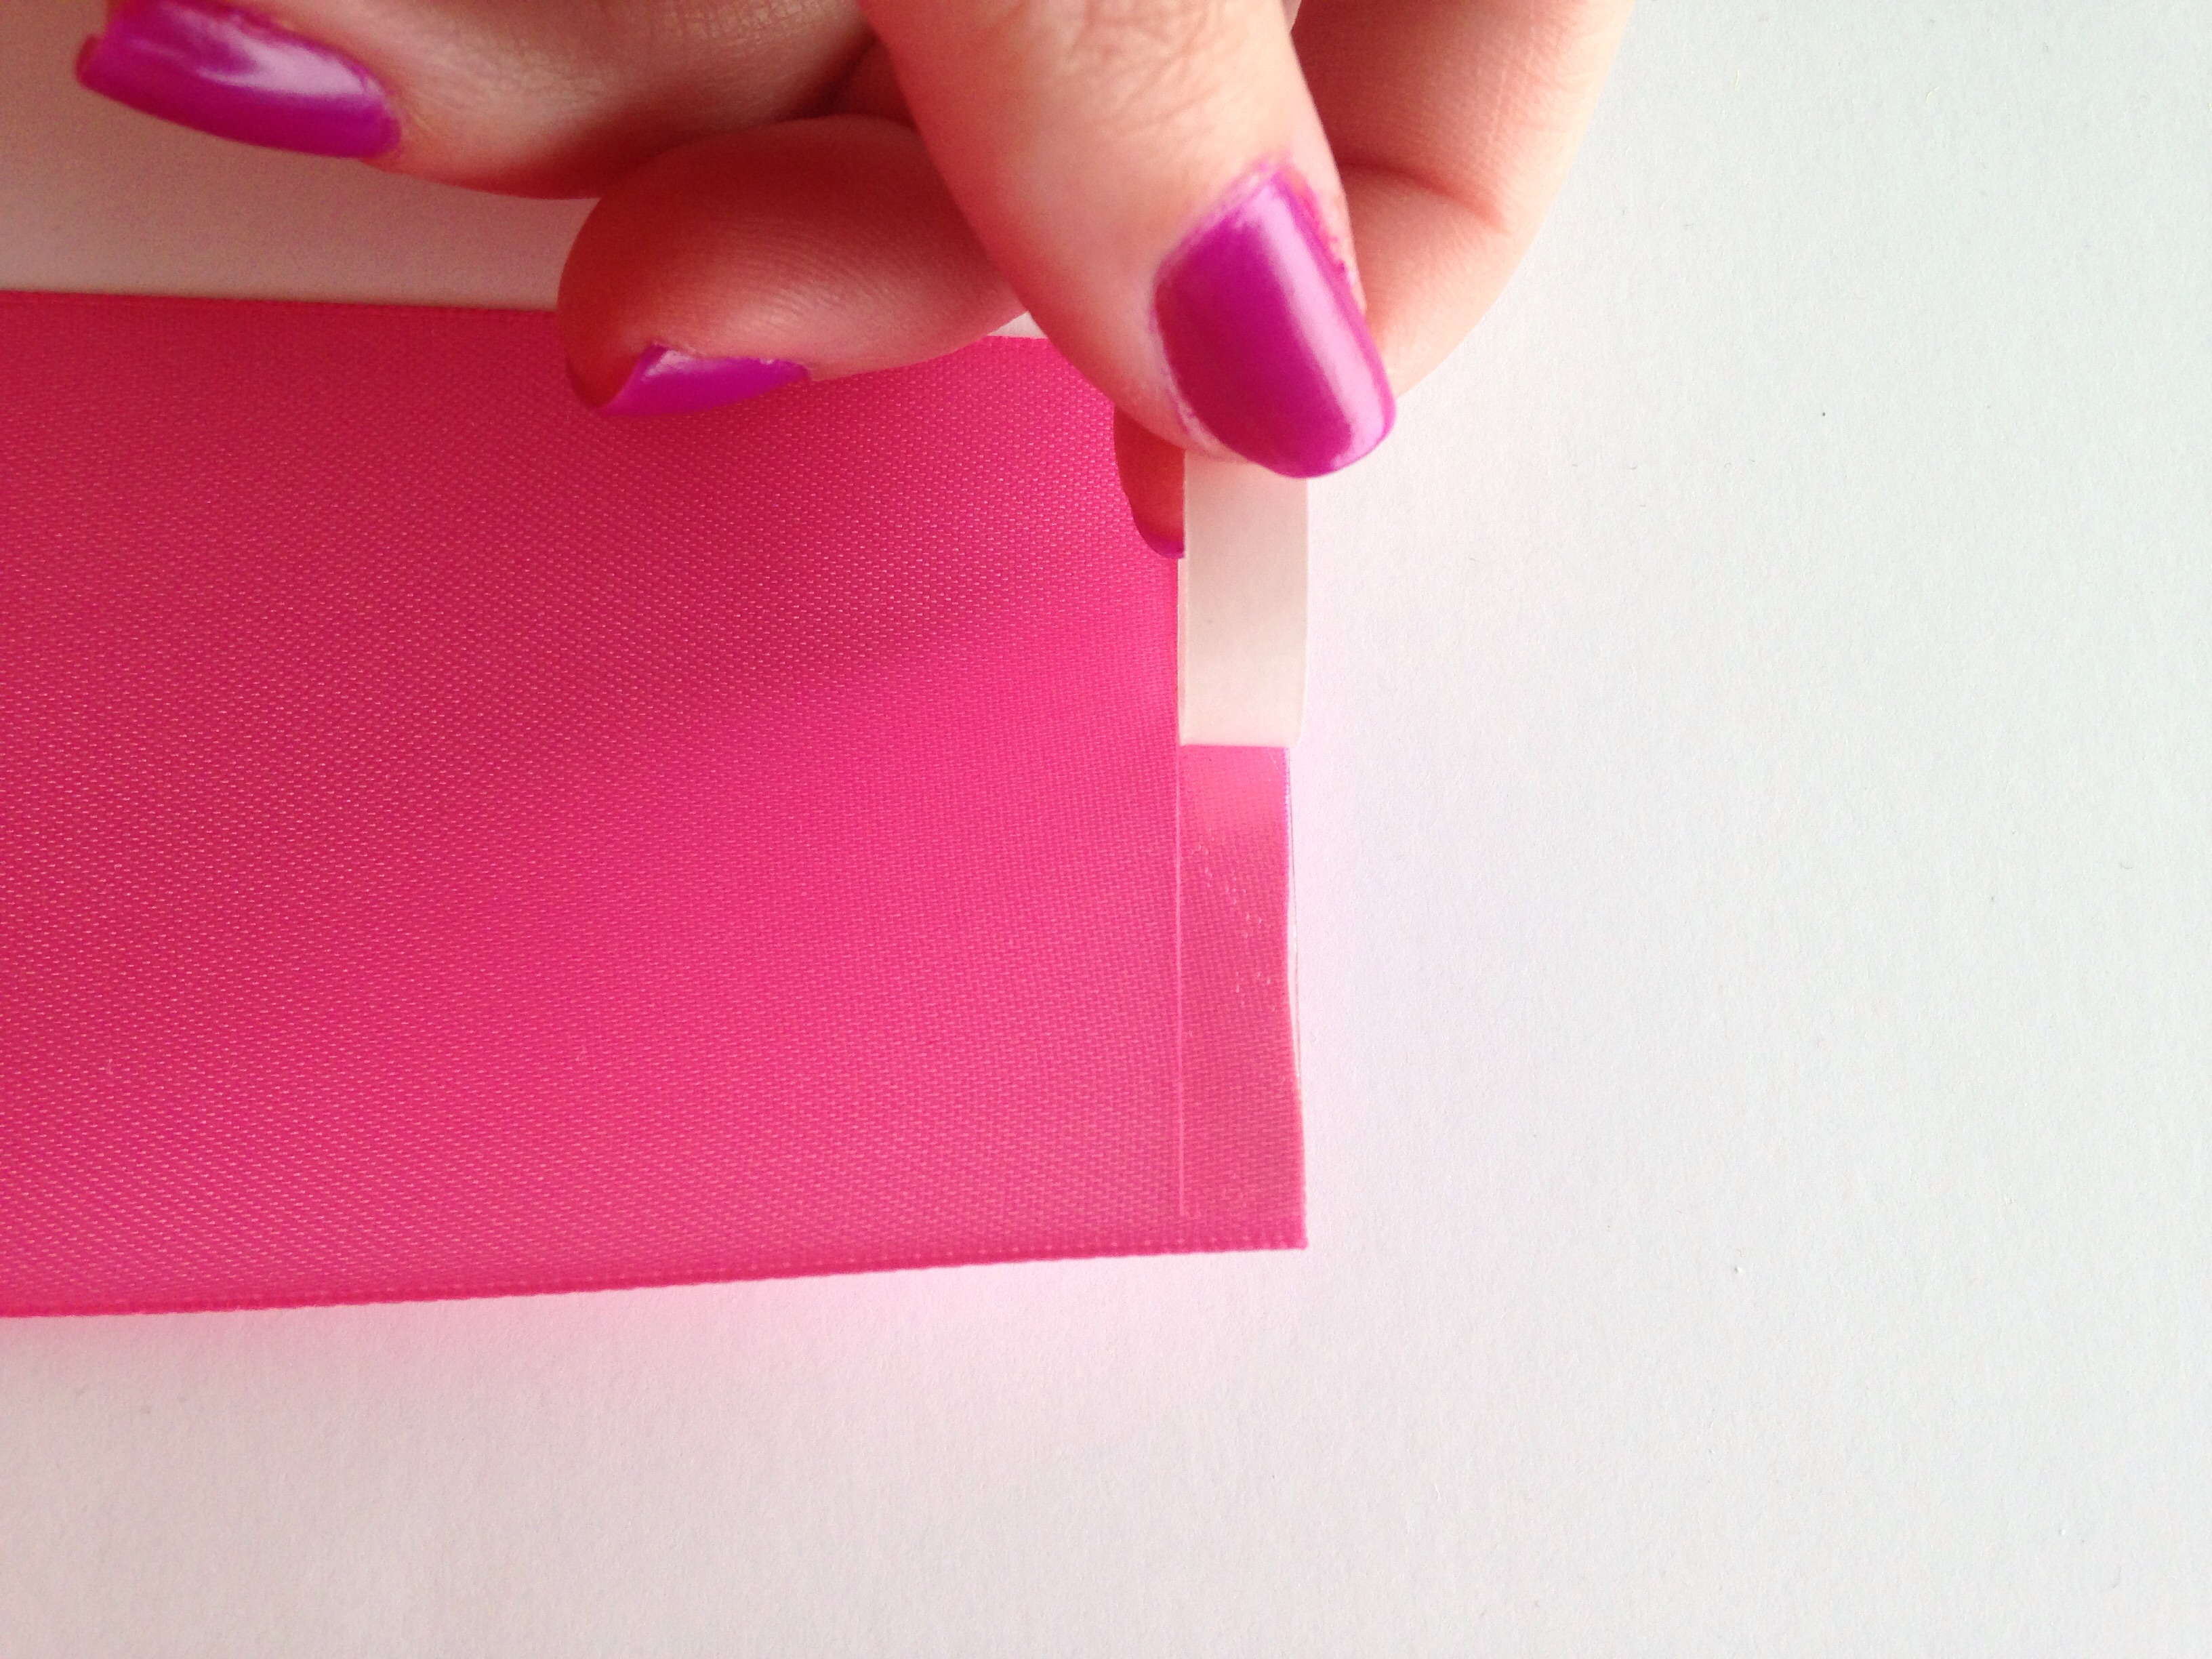 Attach one of the 8.5" pieces of ribbon directly on top of the tape to connect the two pieces together.
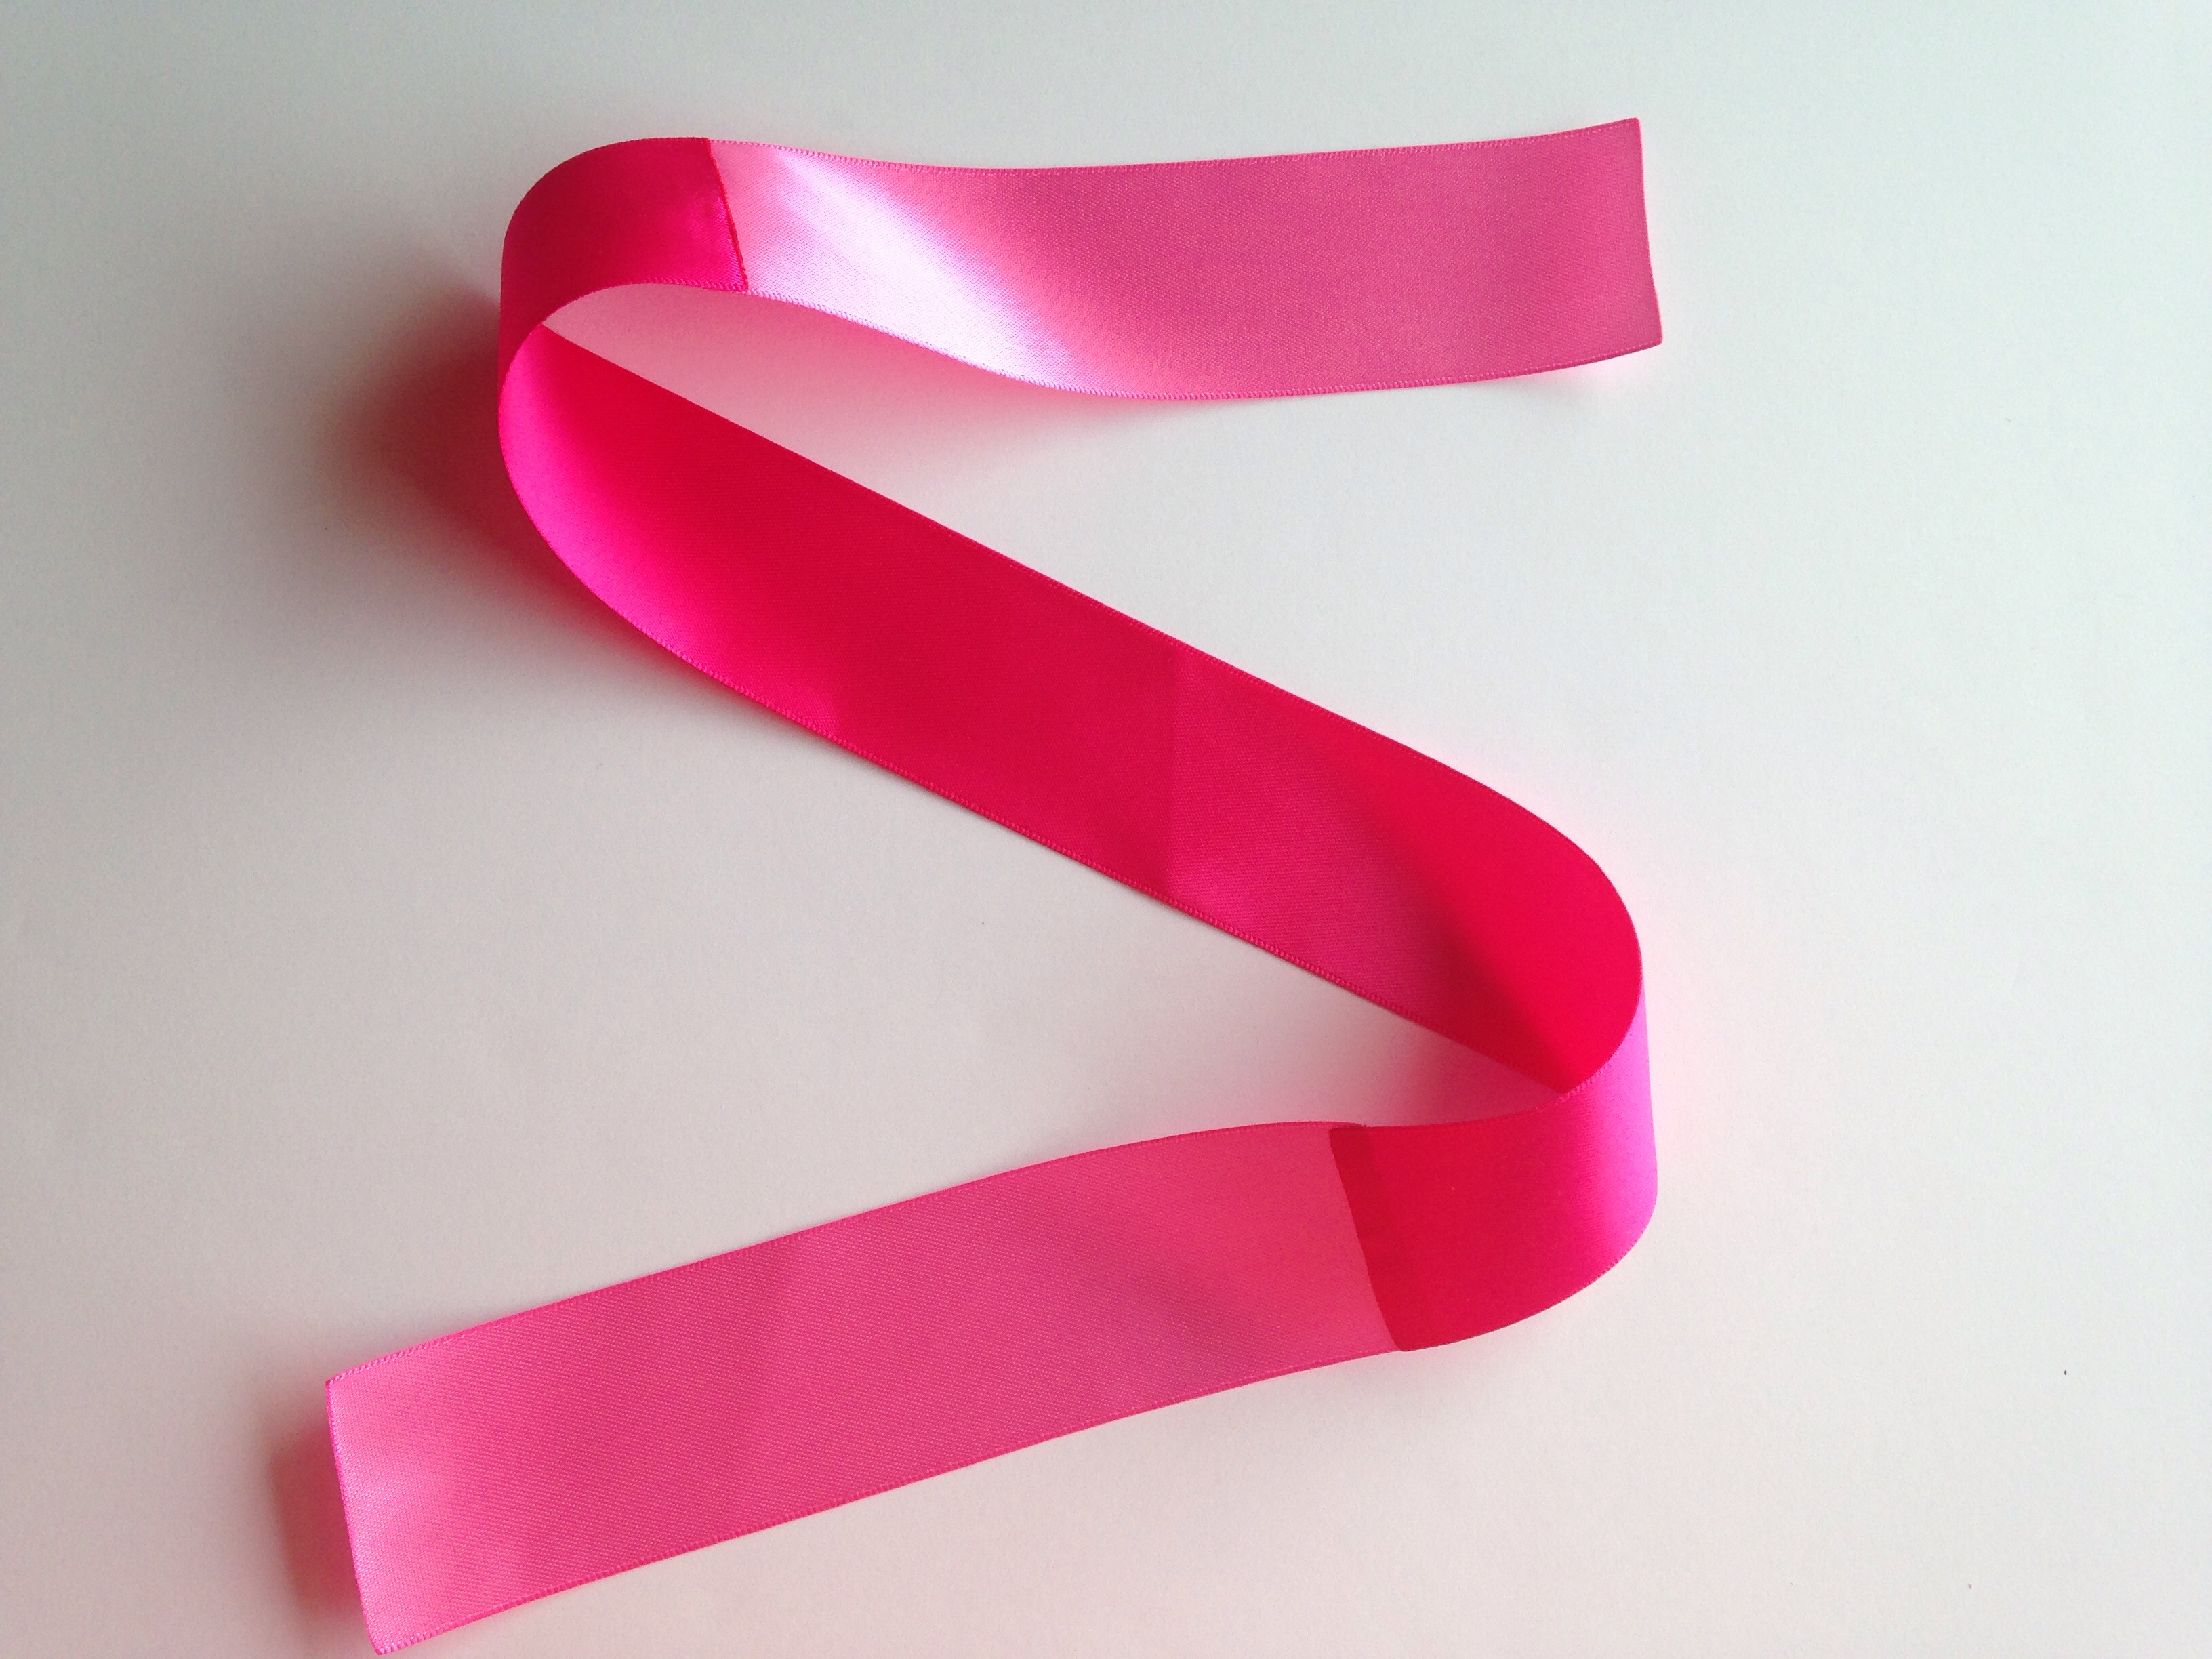
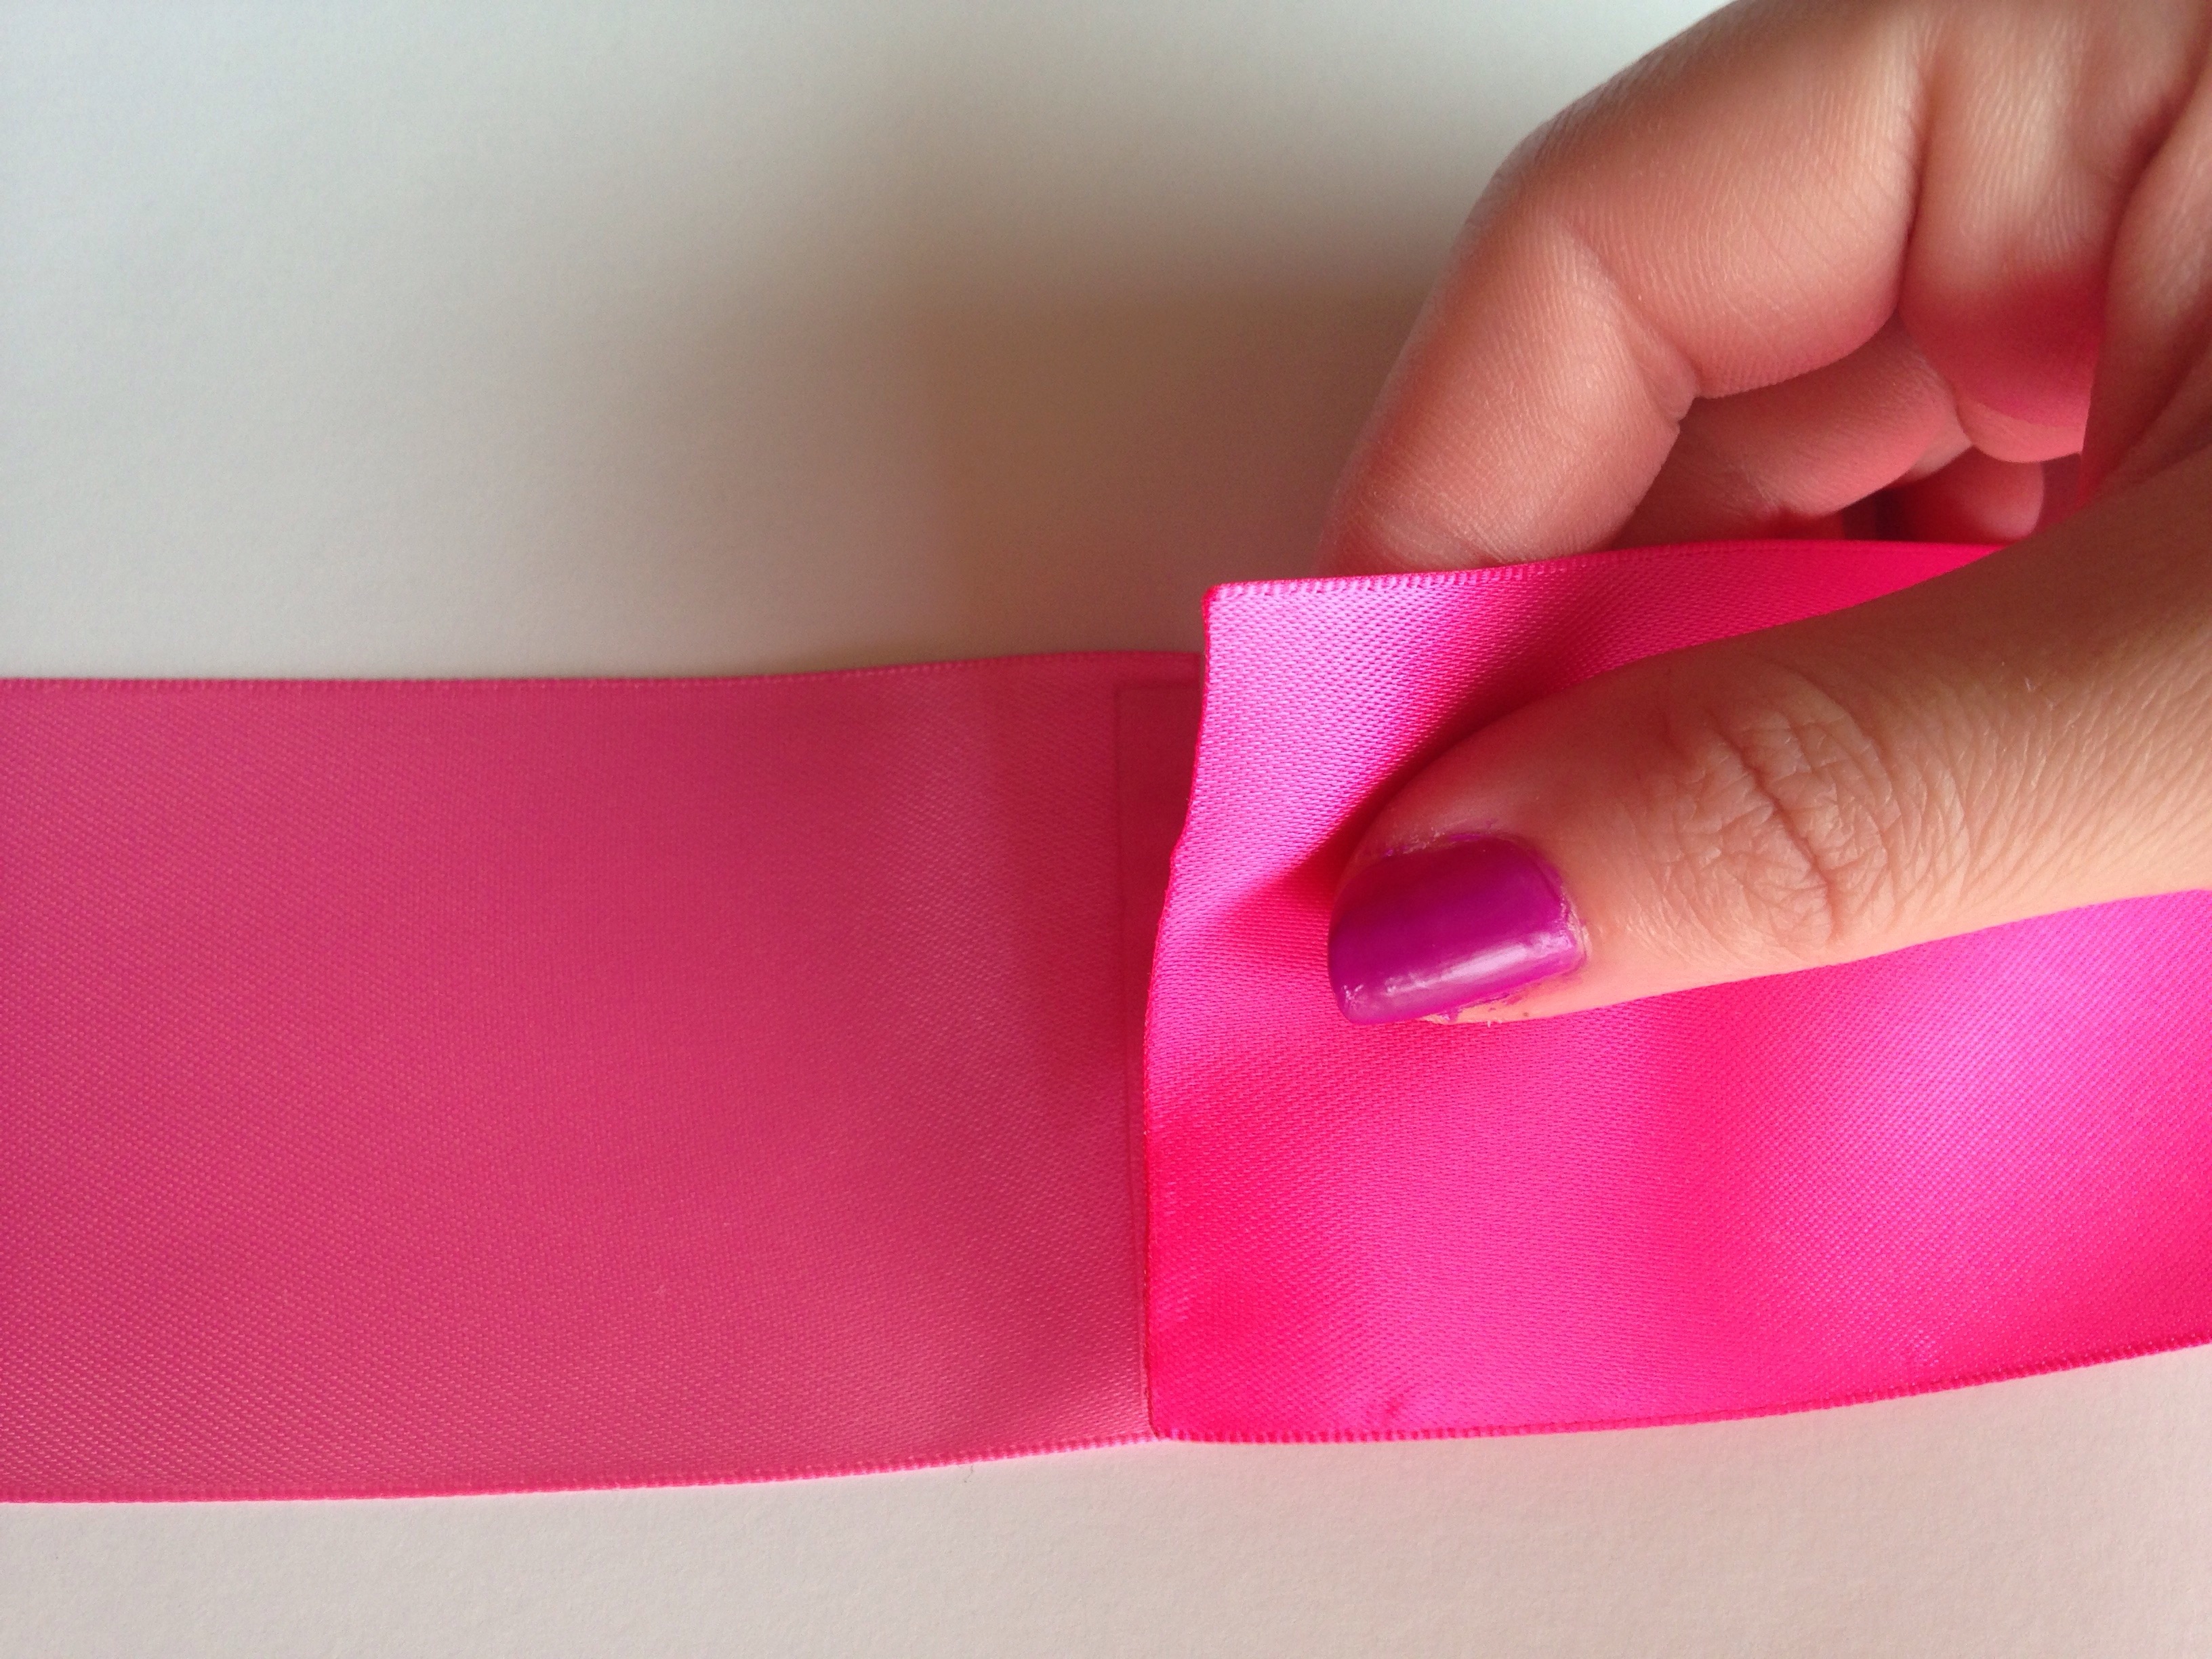 Attach the remaining piece of ribbon to the other end. Now you should have 1 continuos strip of ribbon that looks like this:
 That was much faster & easier than connecting ribbon with hot glue wasn't it?! You never have to worry with using too much or not enough glue, there's never a mess, and best of all you won't burn your fingers! The tape also leaves the ribbon much easier to accordion fold once the bow is constructed.
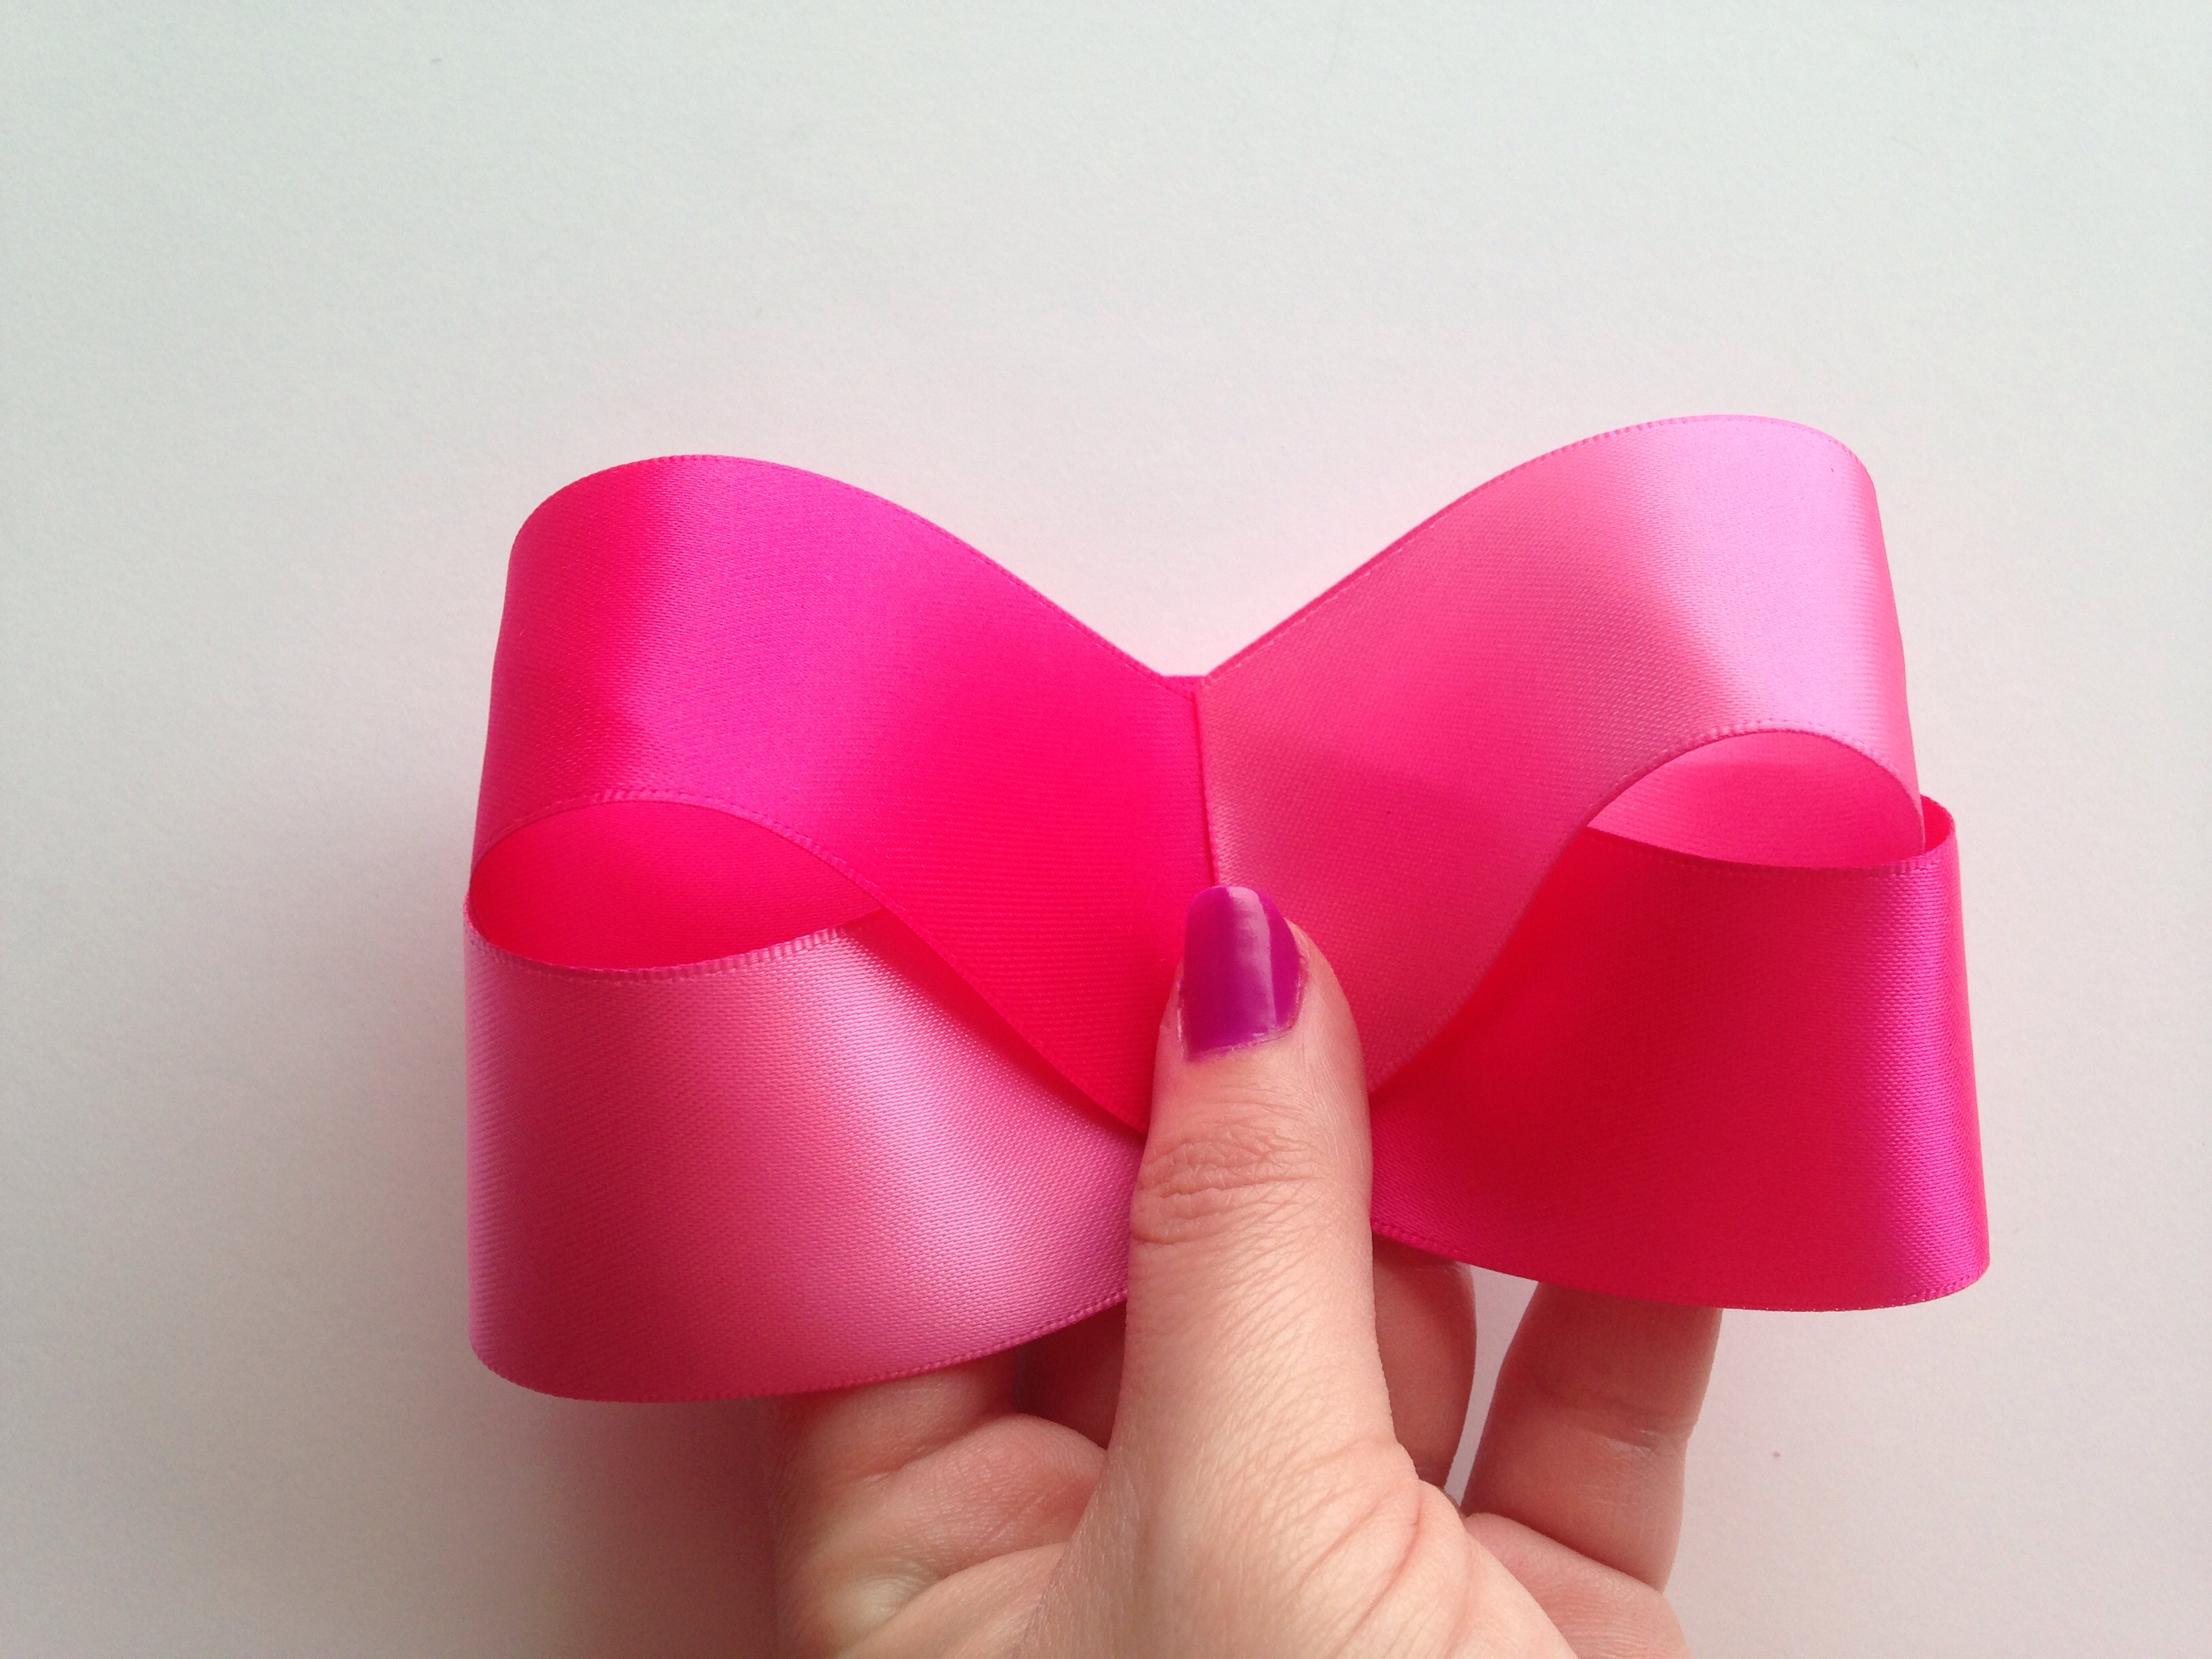
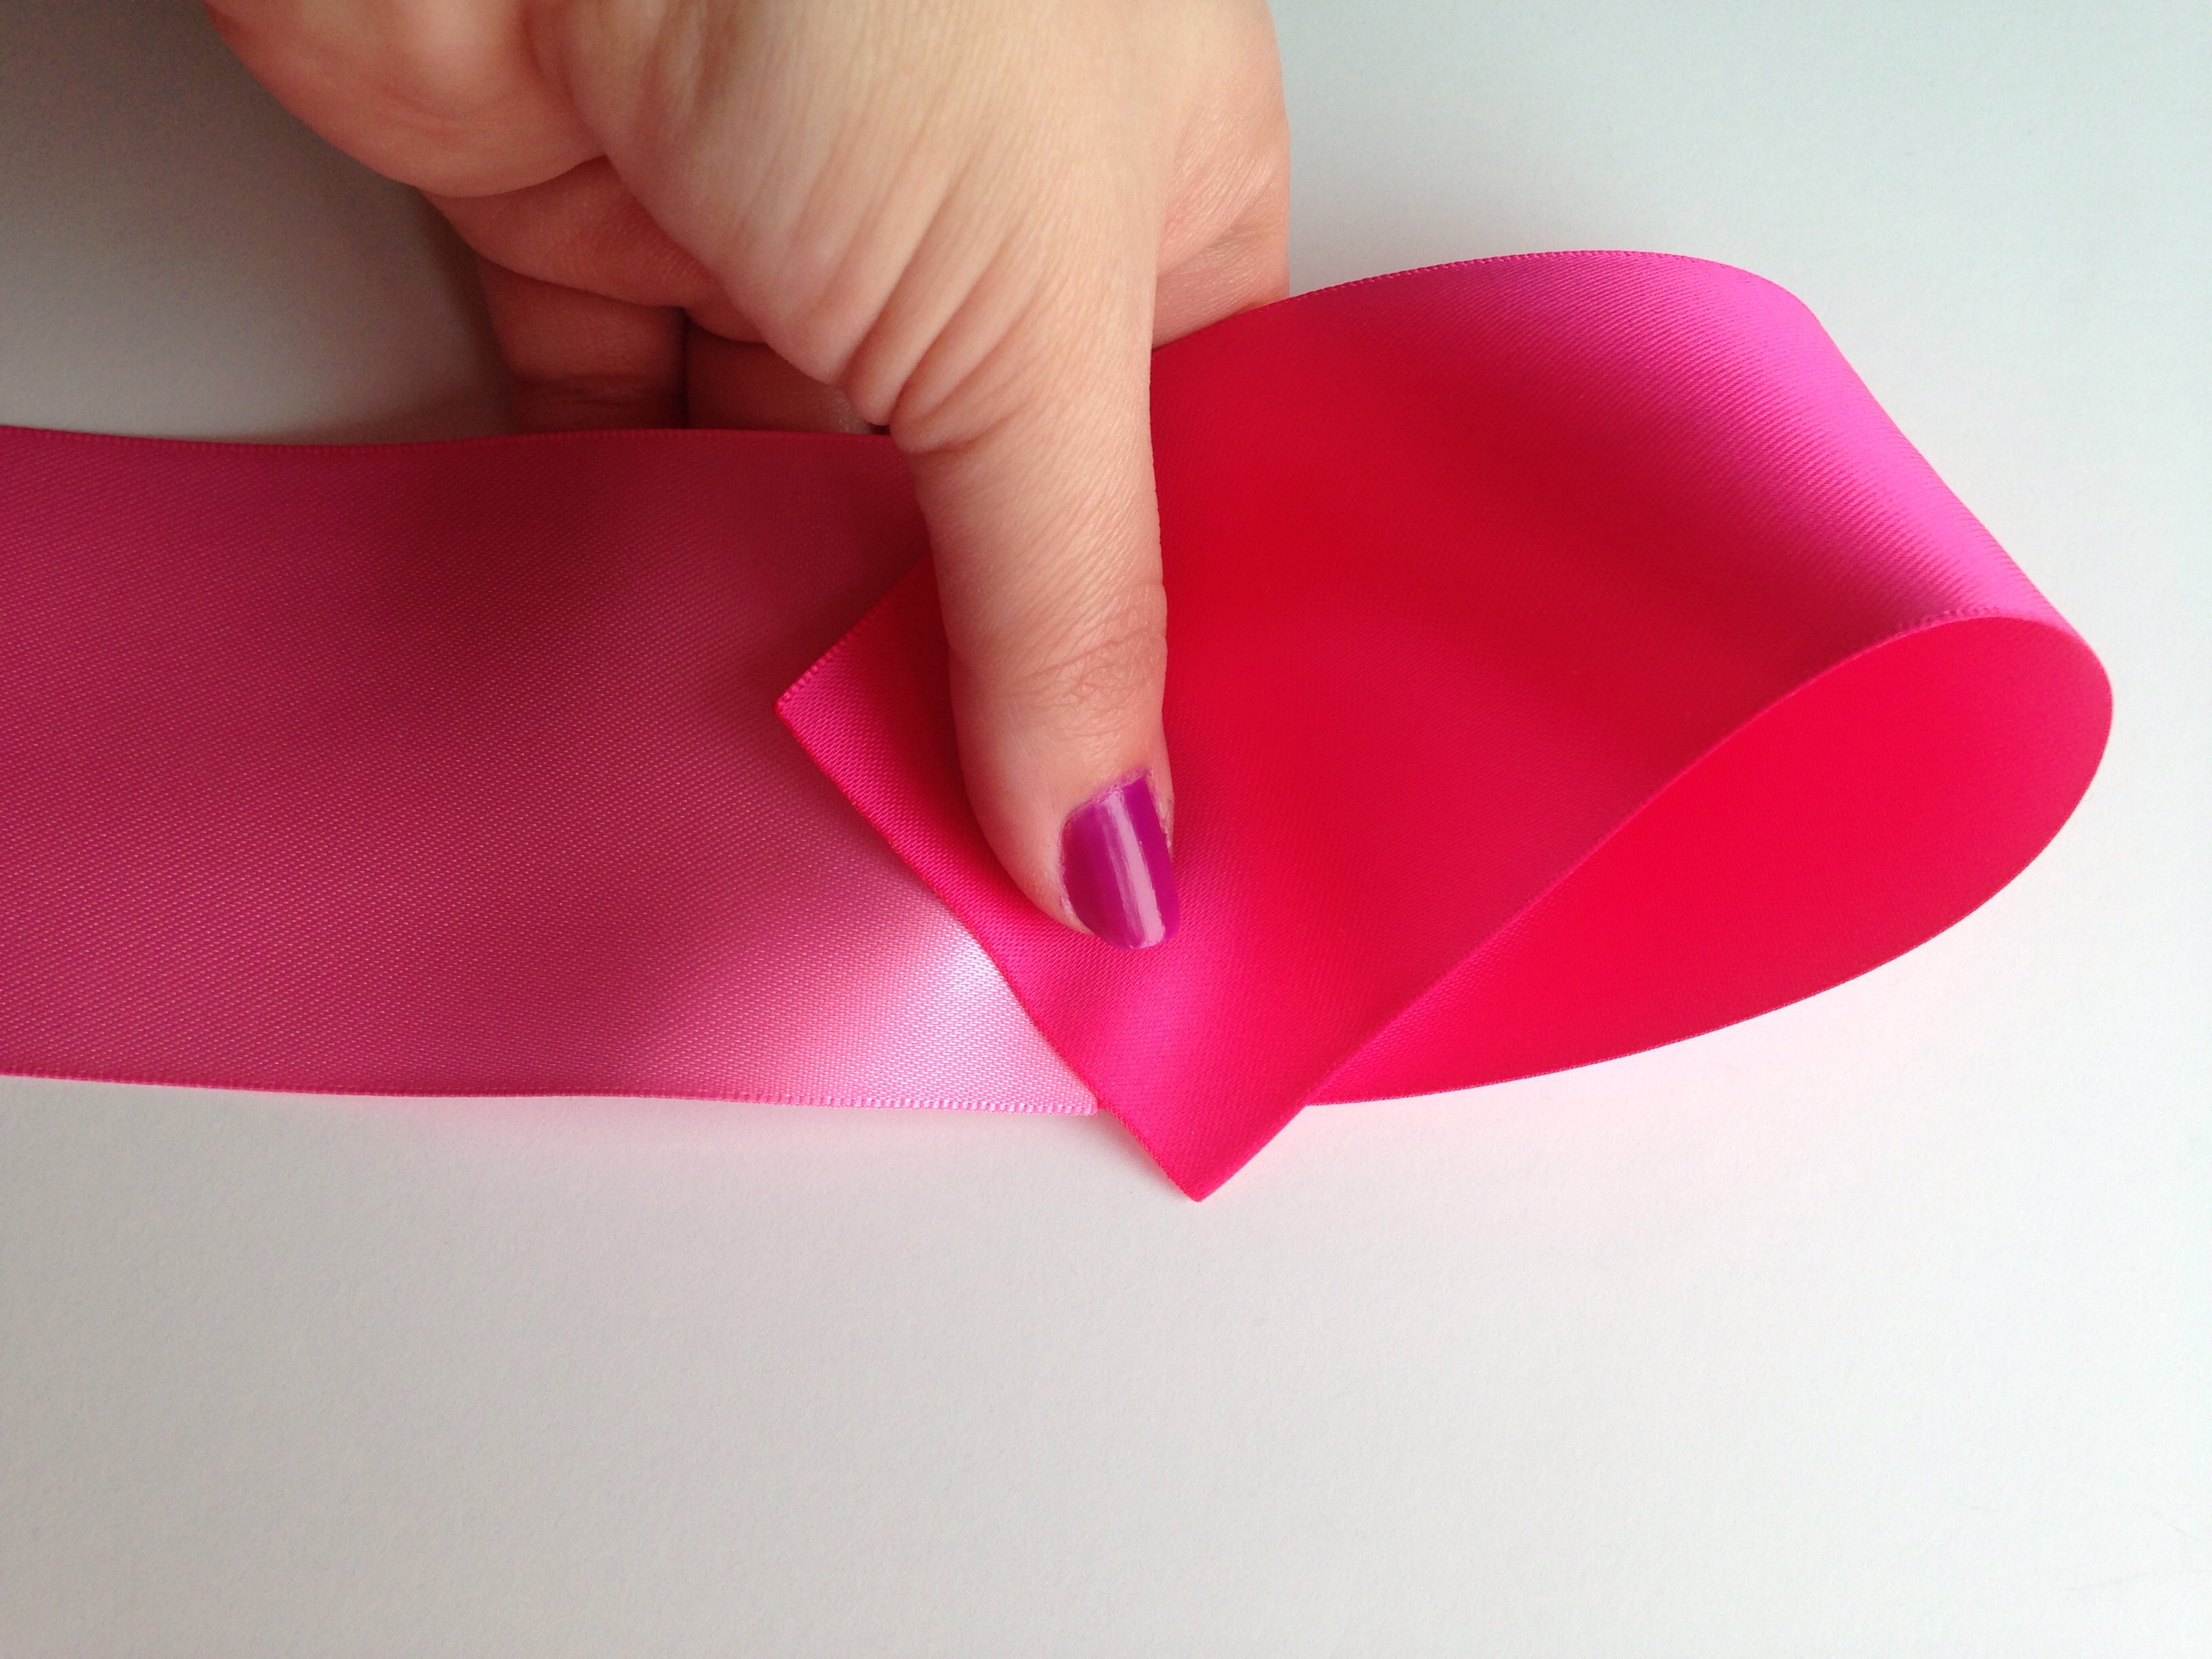 Fold the entire length of ribbon in half and make a crease to use as a guide. Each line where your ribbon colors meet will be your other lines to guide you. To form your first loop you can start at either end of your ribbon. Bring your end up and place ontop of your connecting ribbons at a slight angle. Hold this tightly in place with your thumb.
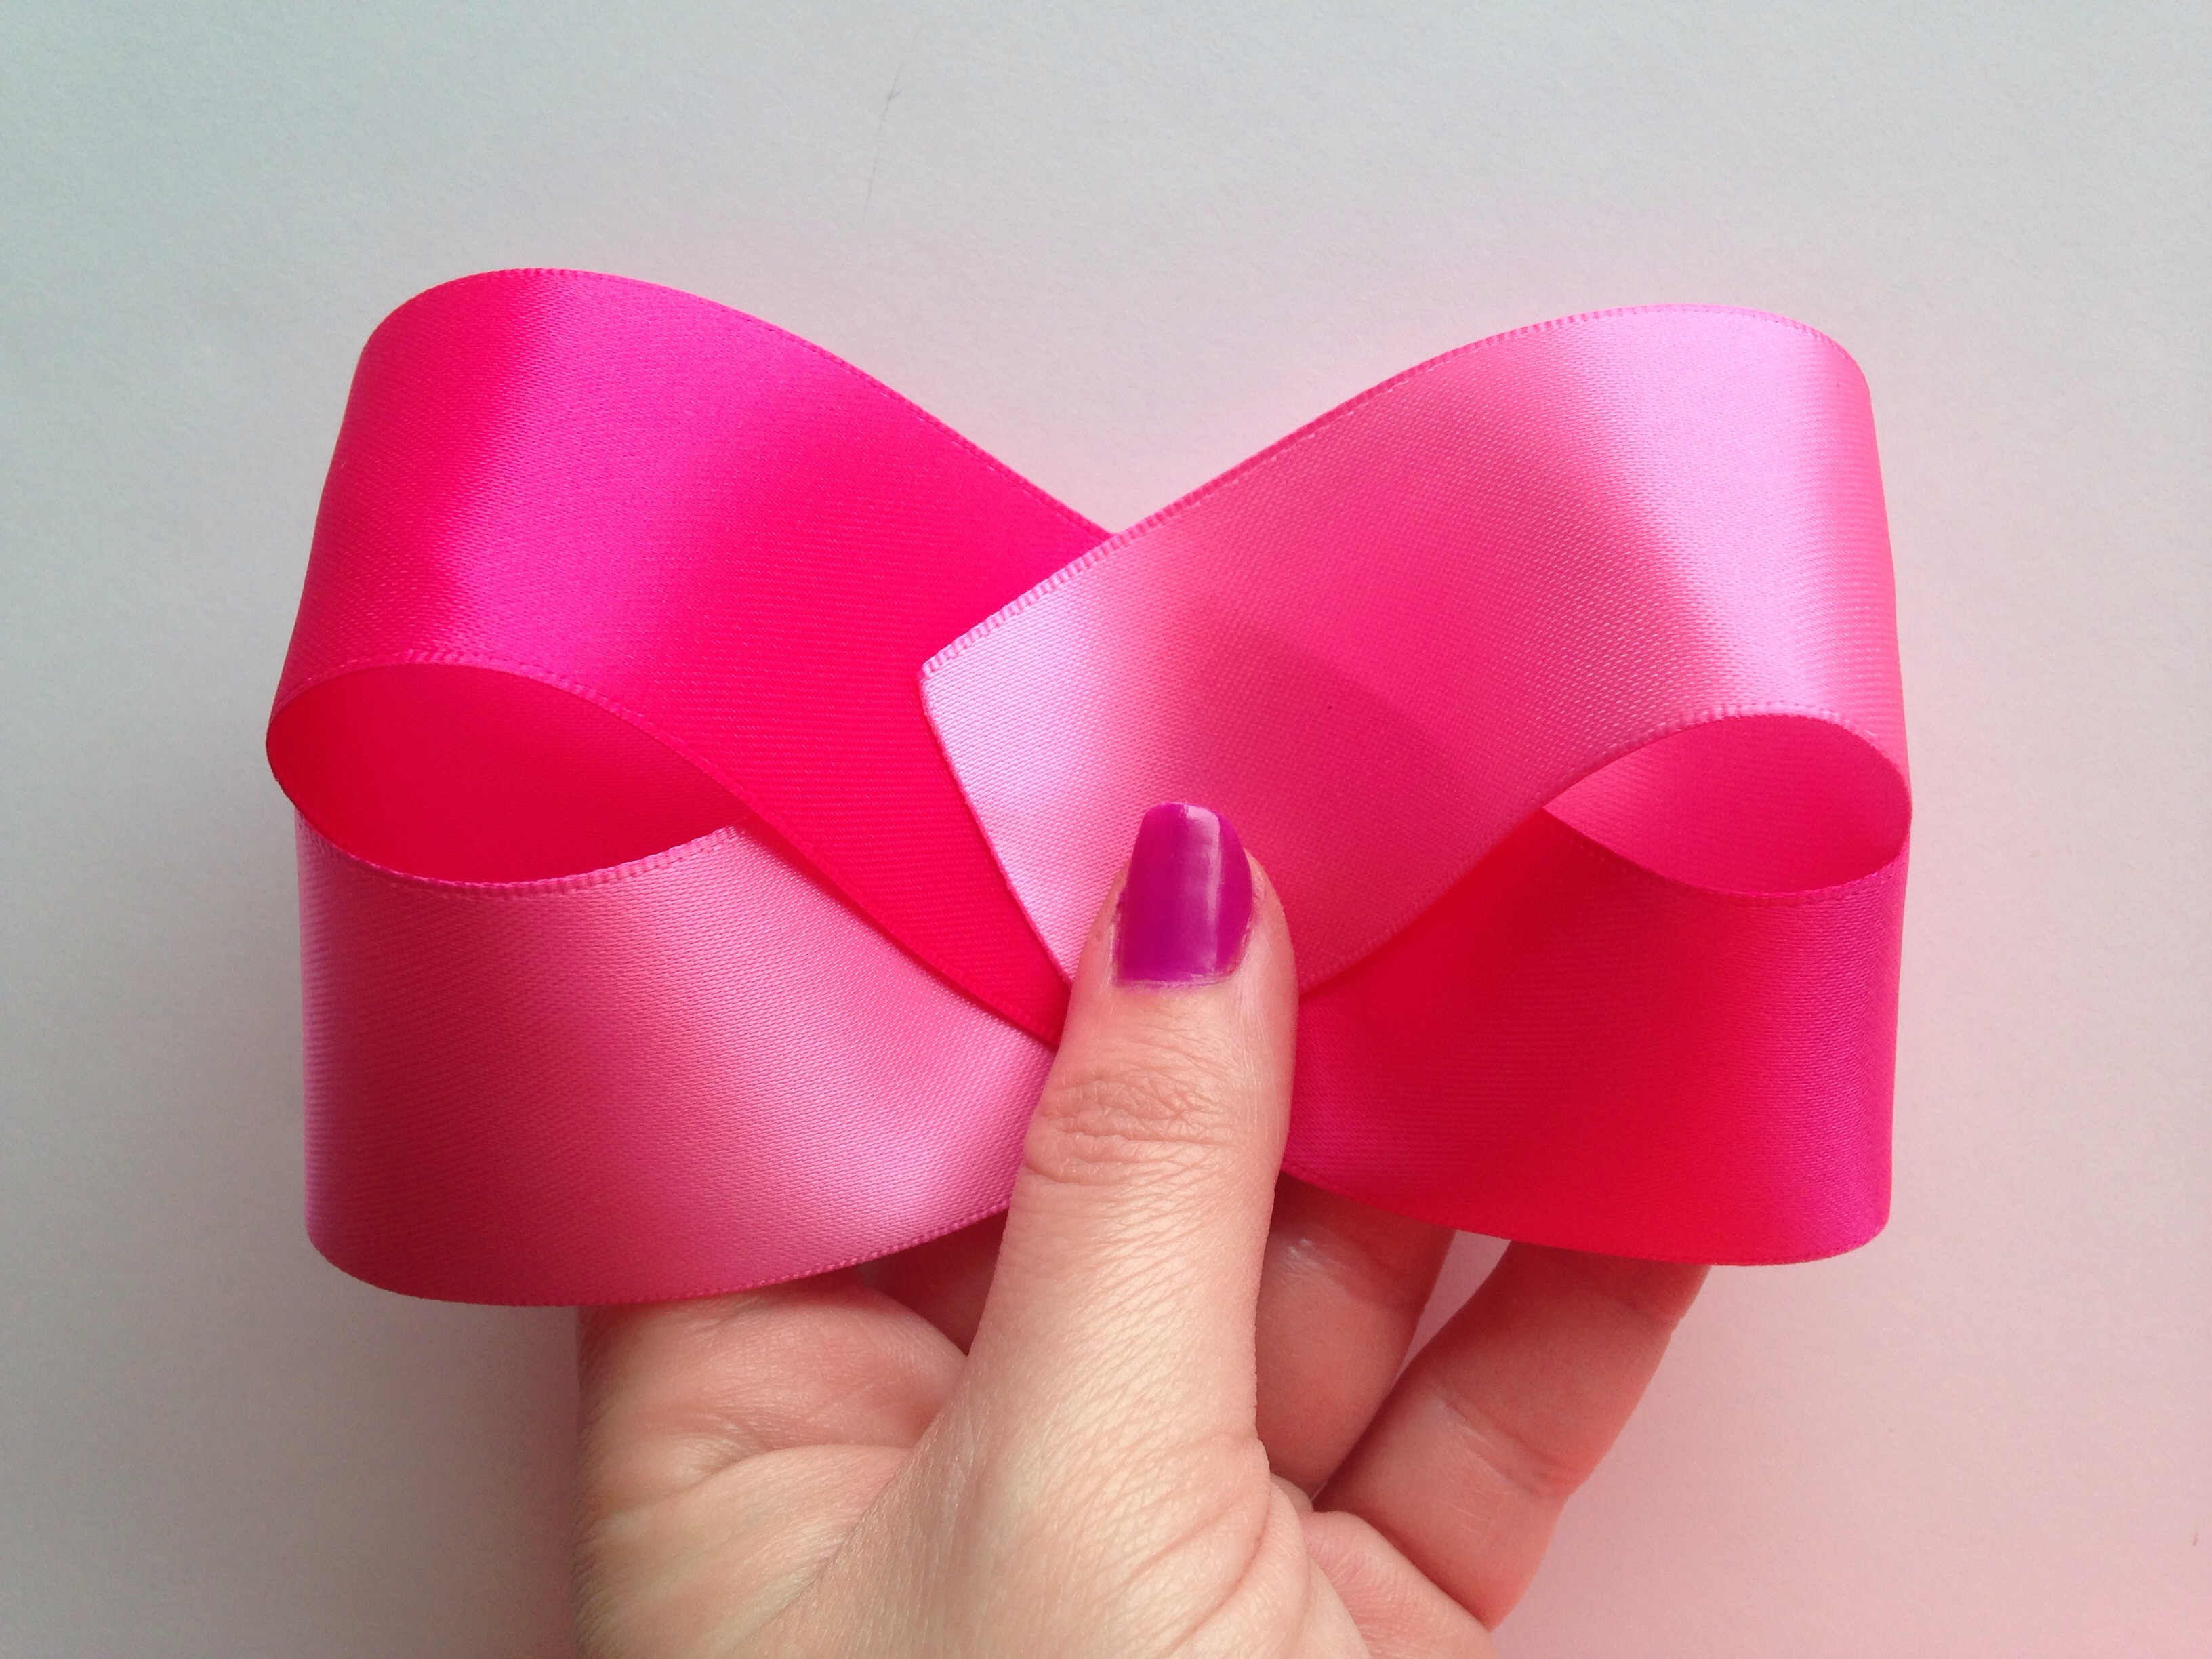
 Bring the crease that you just made in the center of your ribbon and place it on top to form an "x". Keep a tight hold on your ribbon at all times so your ribbon doesn't move. Satin is gorgeous but can also be very slick!
 To form your next loop bring your ribbon up and around to the backside. You should be holding 3 layers of ribbon in place underneath your thumb from forming your first 2 loops. In the pic below I have a clip holding my ribbon in place where my thumb should be so you can see that the connecting ribbon lines will line up perfectly in between the second and third layers of ribbon. Slide your ribbon directly on top of your bottom layer.
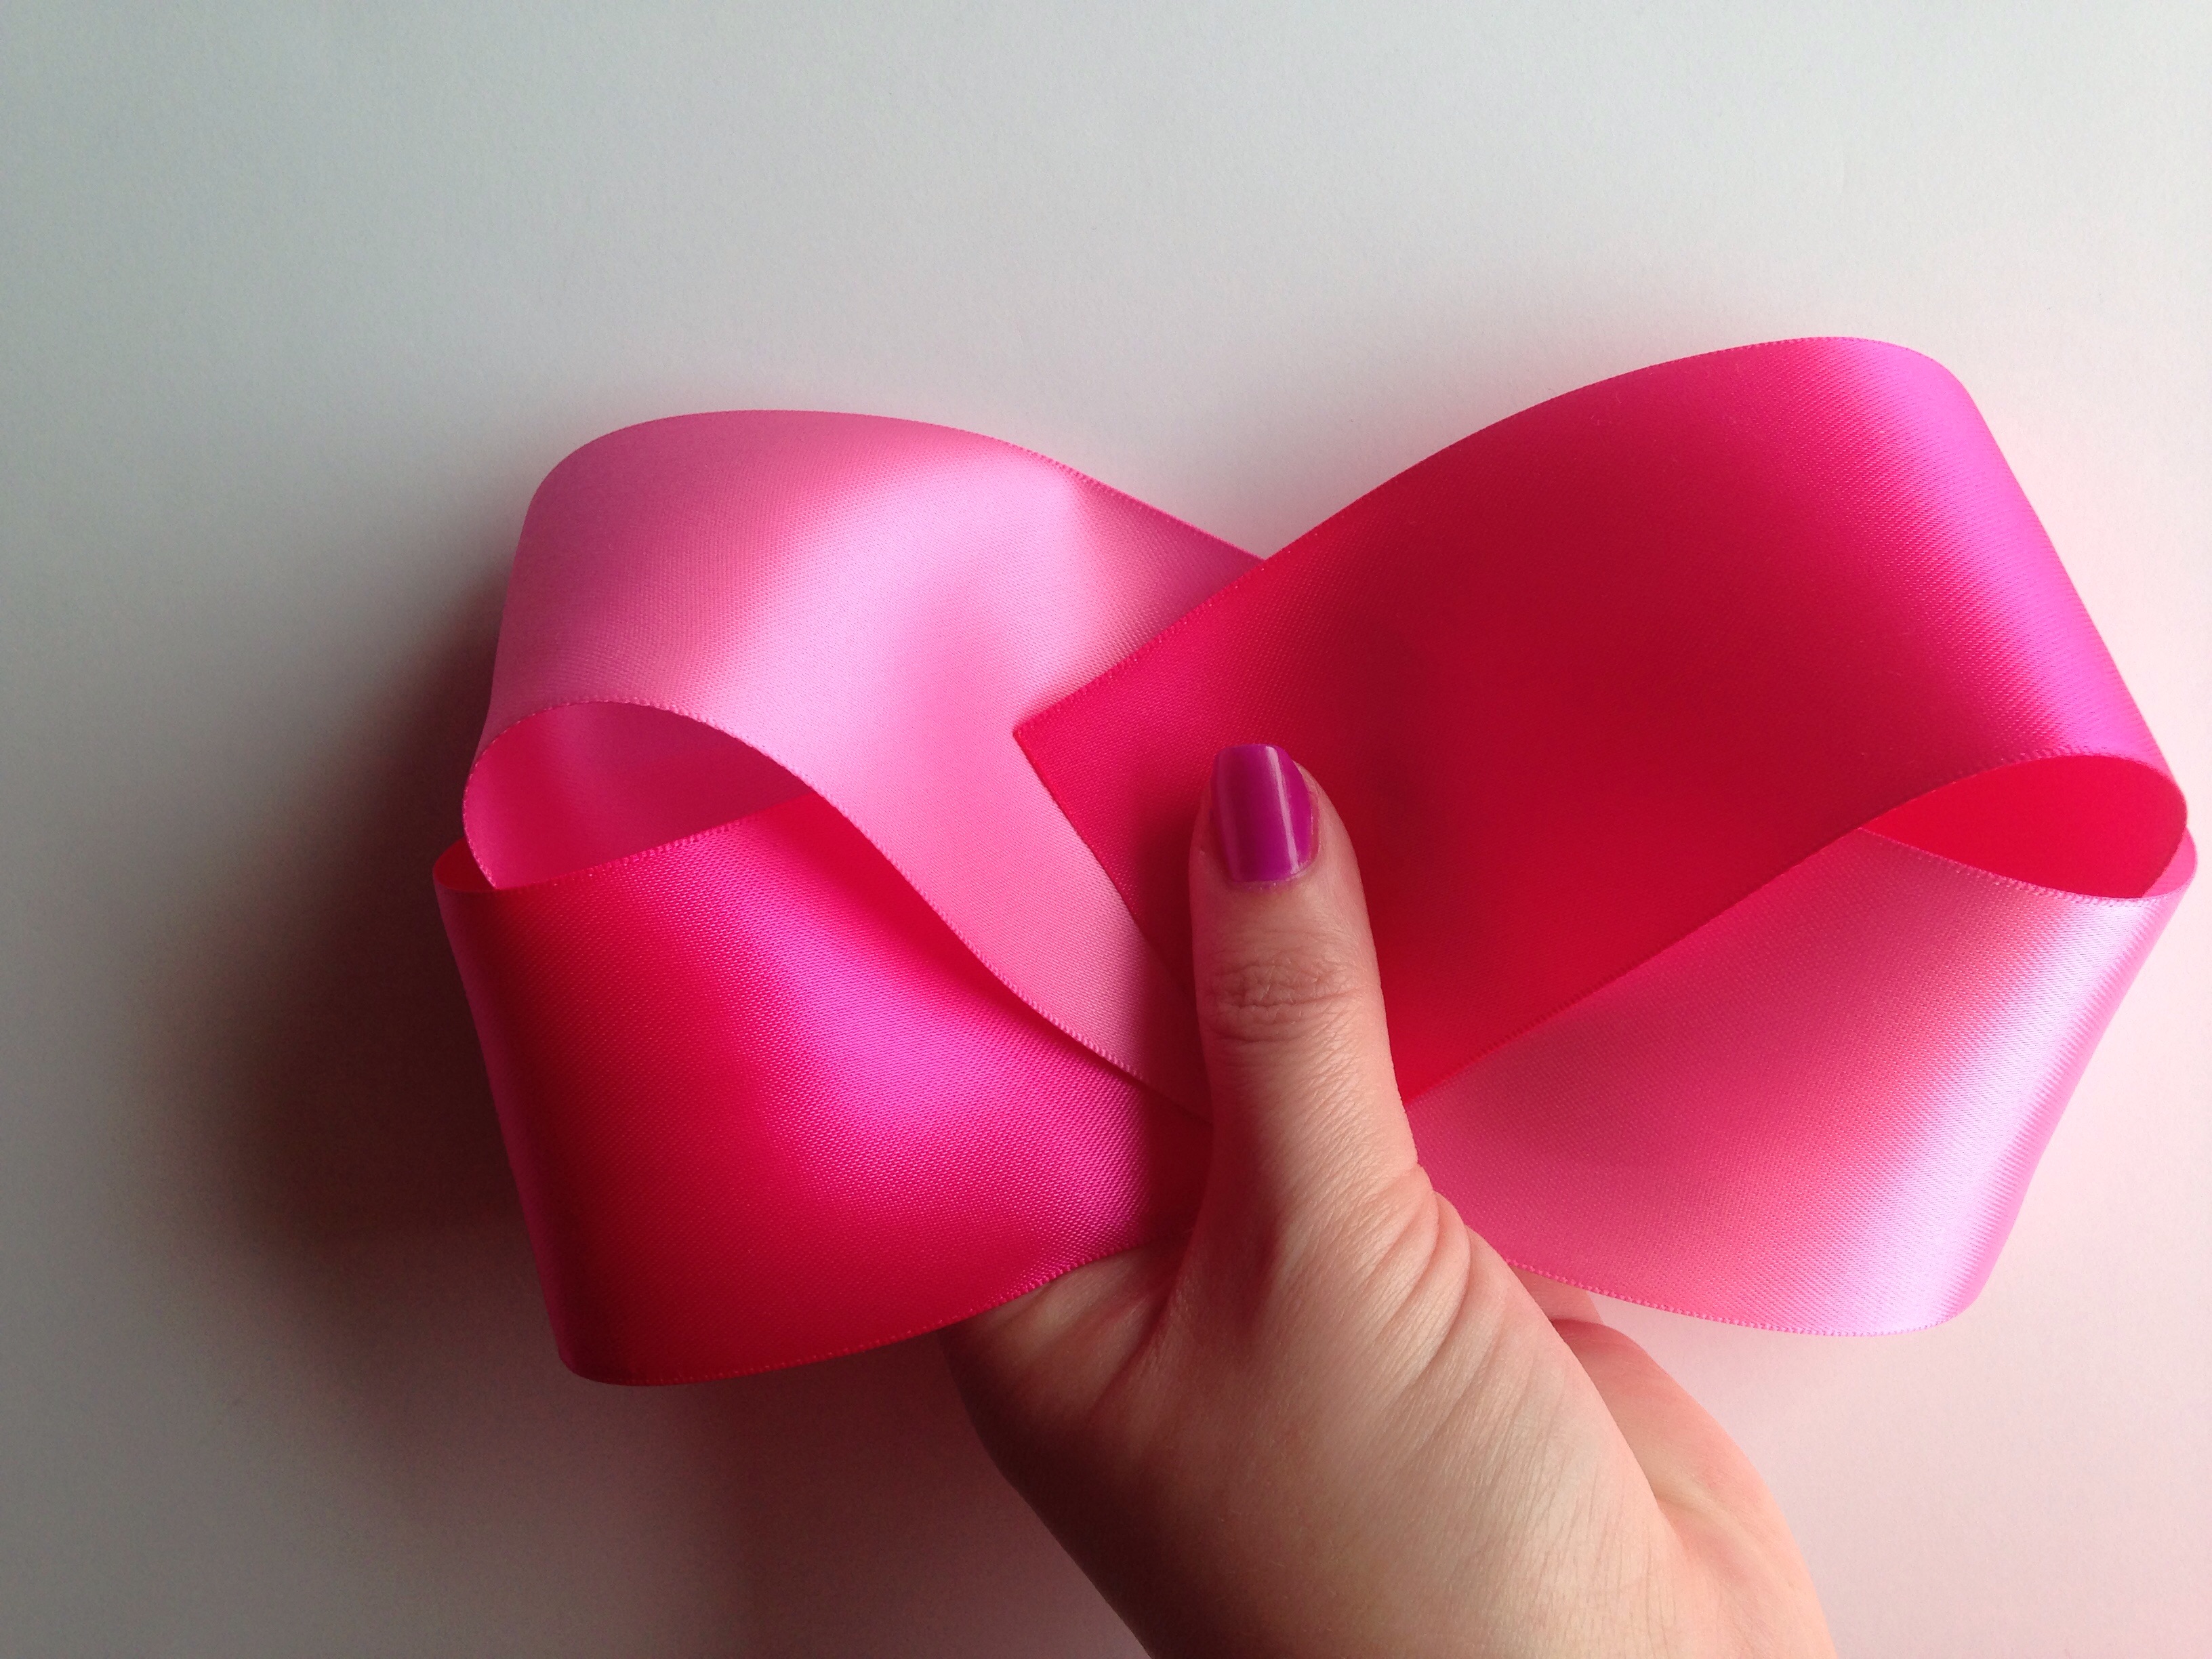
 To form your last loop bring it up and to the center. Check all loops to make sure they are even and adjust if necessary.
 Next we're going to make an accordion fold down the center of our bow.
 Start by pinching the middle and folding the sides down.
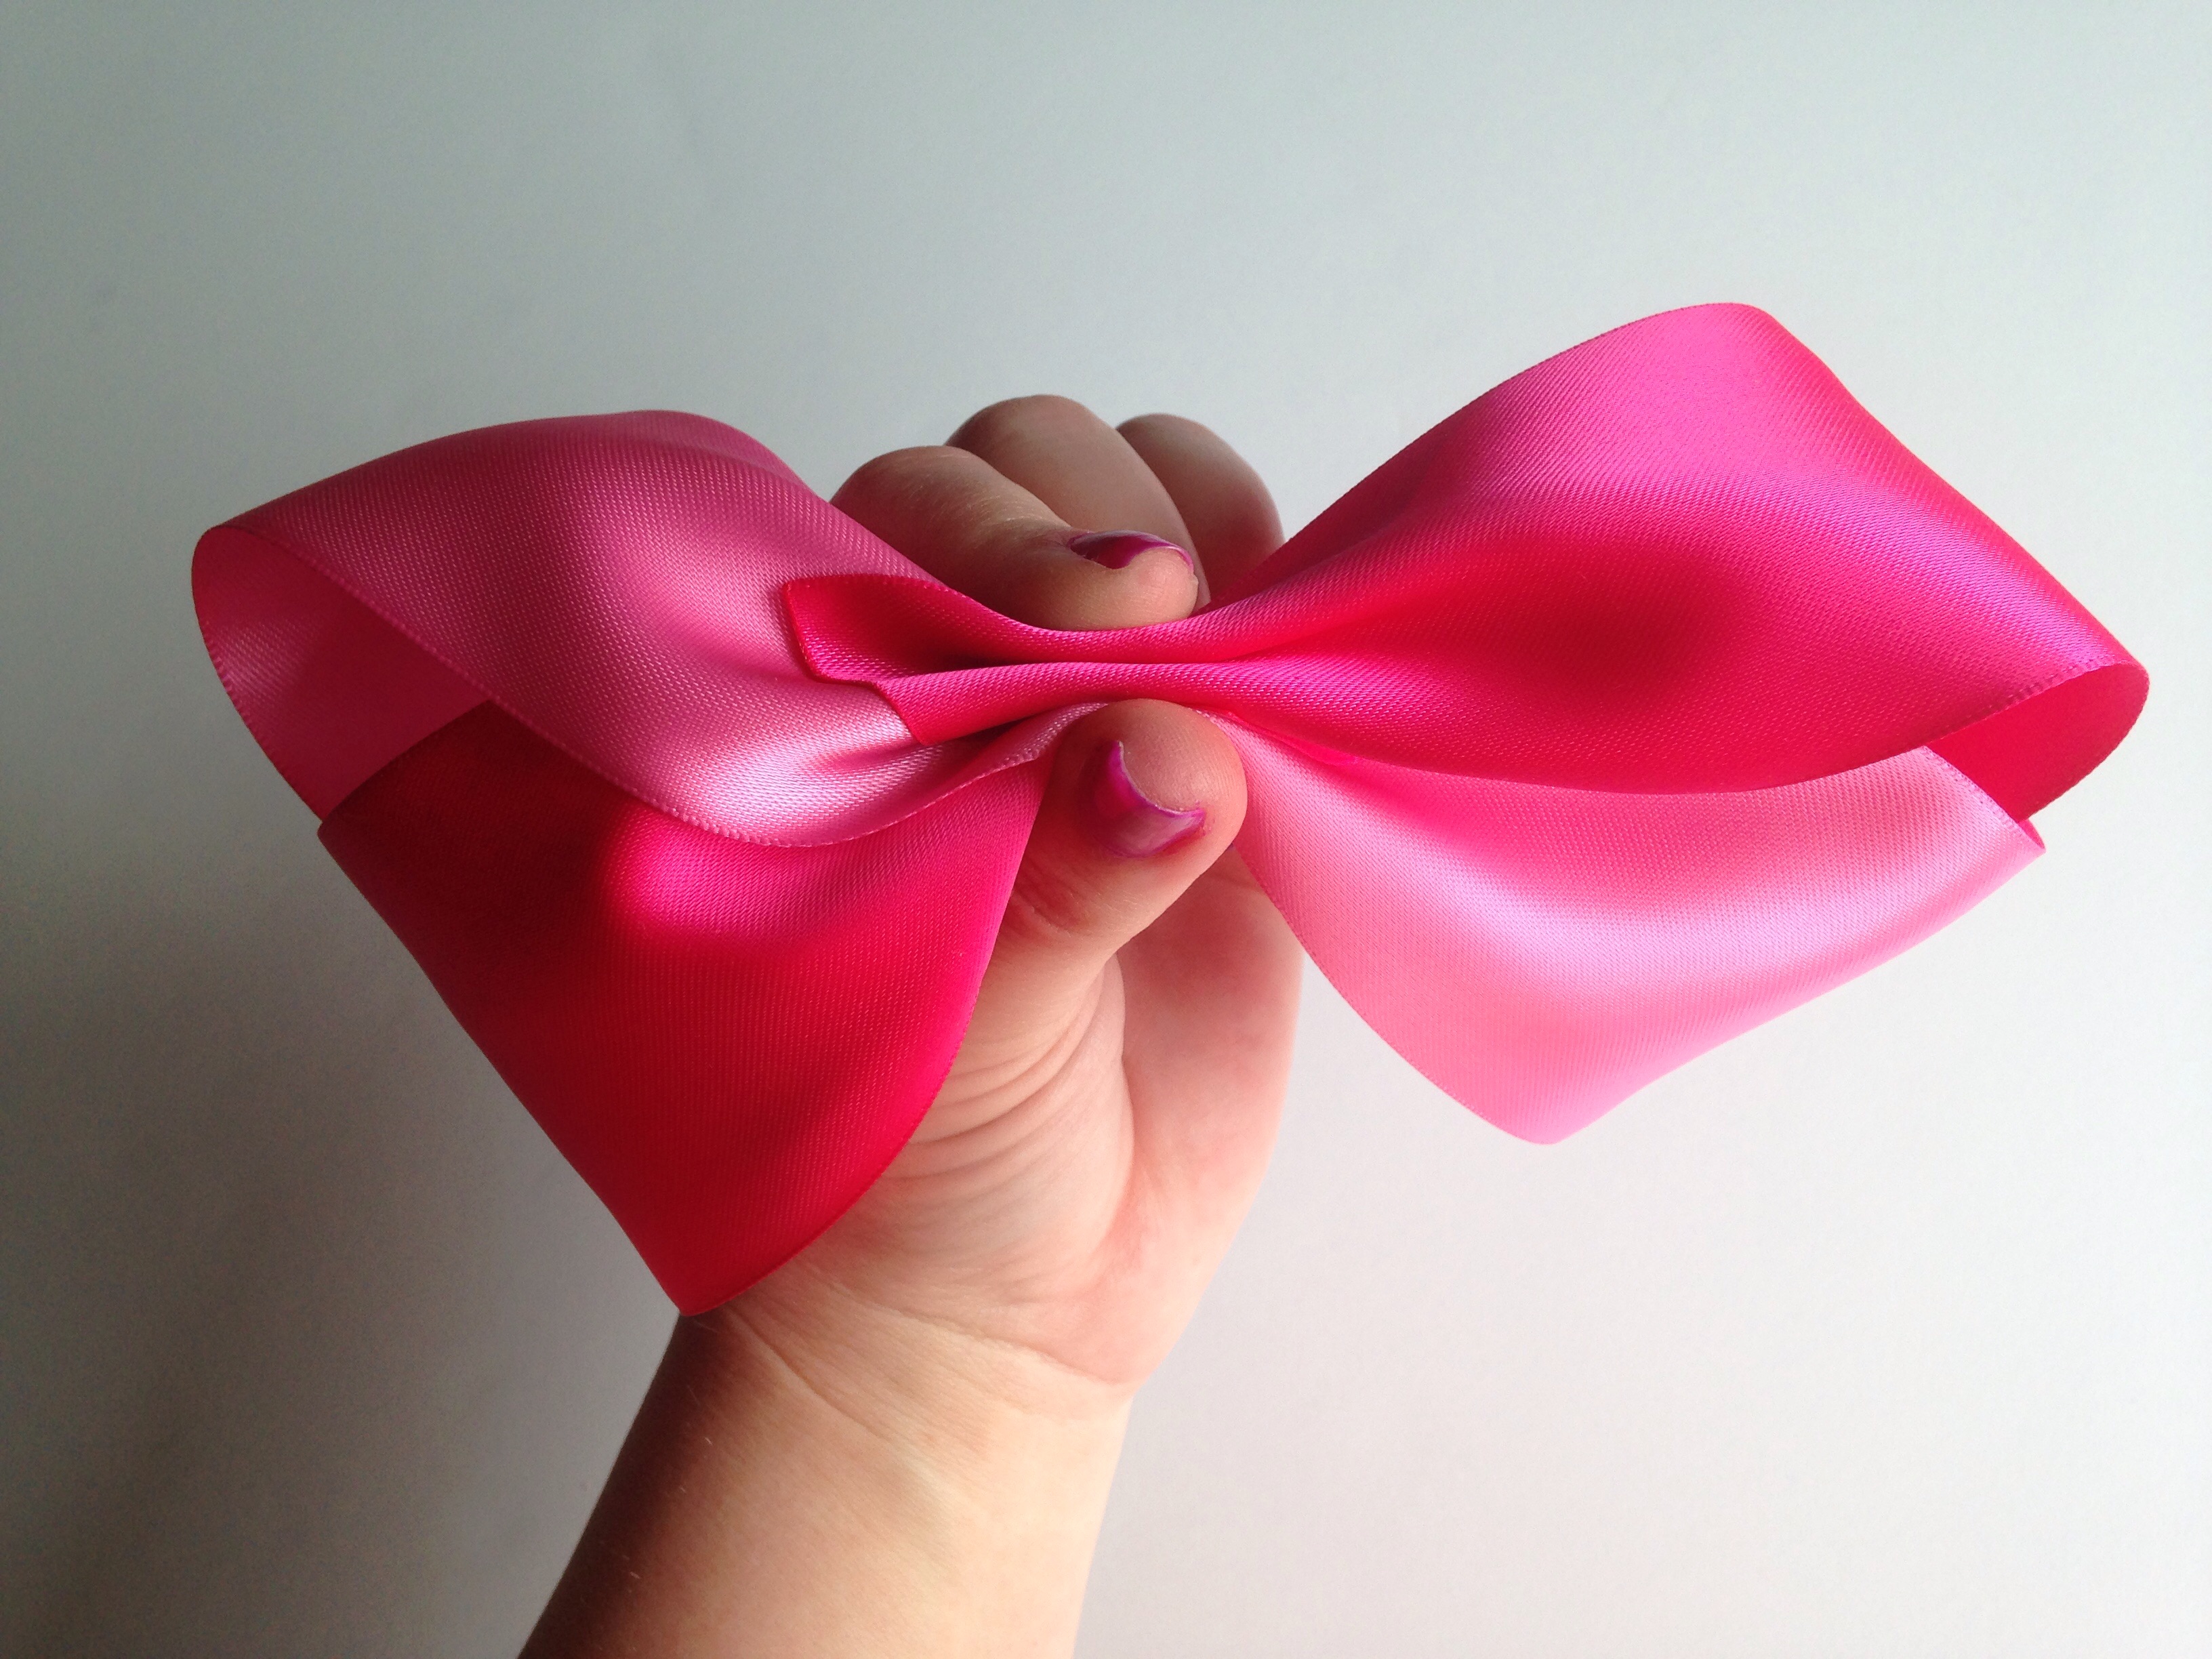 Now bring each side up and back down to create a total of 3 folds down the center.
 Secure the center with wire or whatever you prefer to use. Your bottom layer is complete!
 To make the top layer of this beautiful double stacked bow we are using the same colors in 1.5" satin ribbon. You will need a total ribbon length of 24" made from 12" hot pink & 12" shocking pink ribbon. Follow the same steps that we used for the bottom layer but this time we will cut the hot pink ribbon in half and attach to each end of the shocking pink ribbon.
 Starting at either end of hot pink follow the same steps once again to form the top layer of your bow.
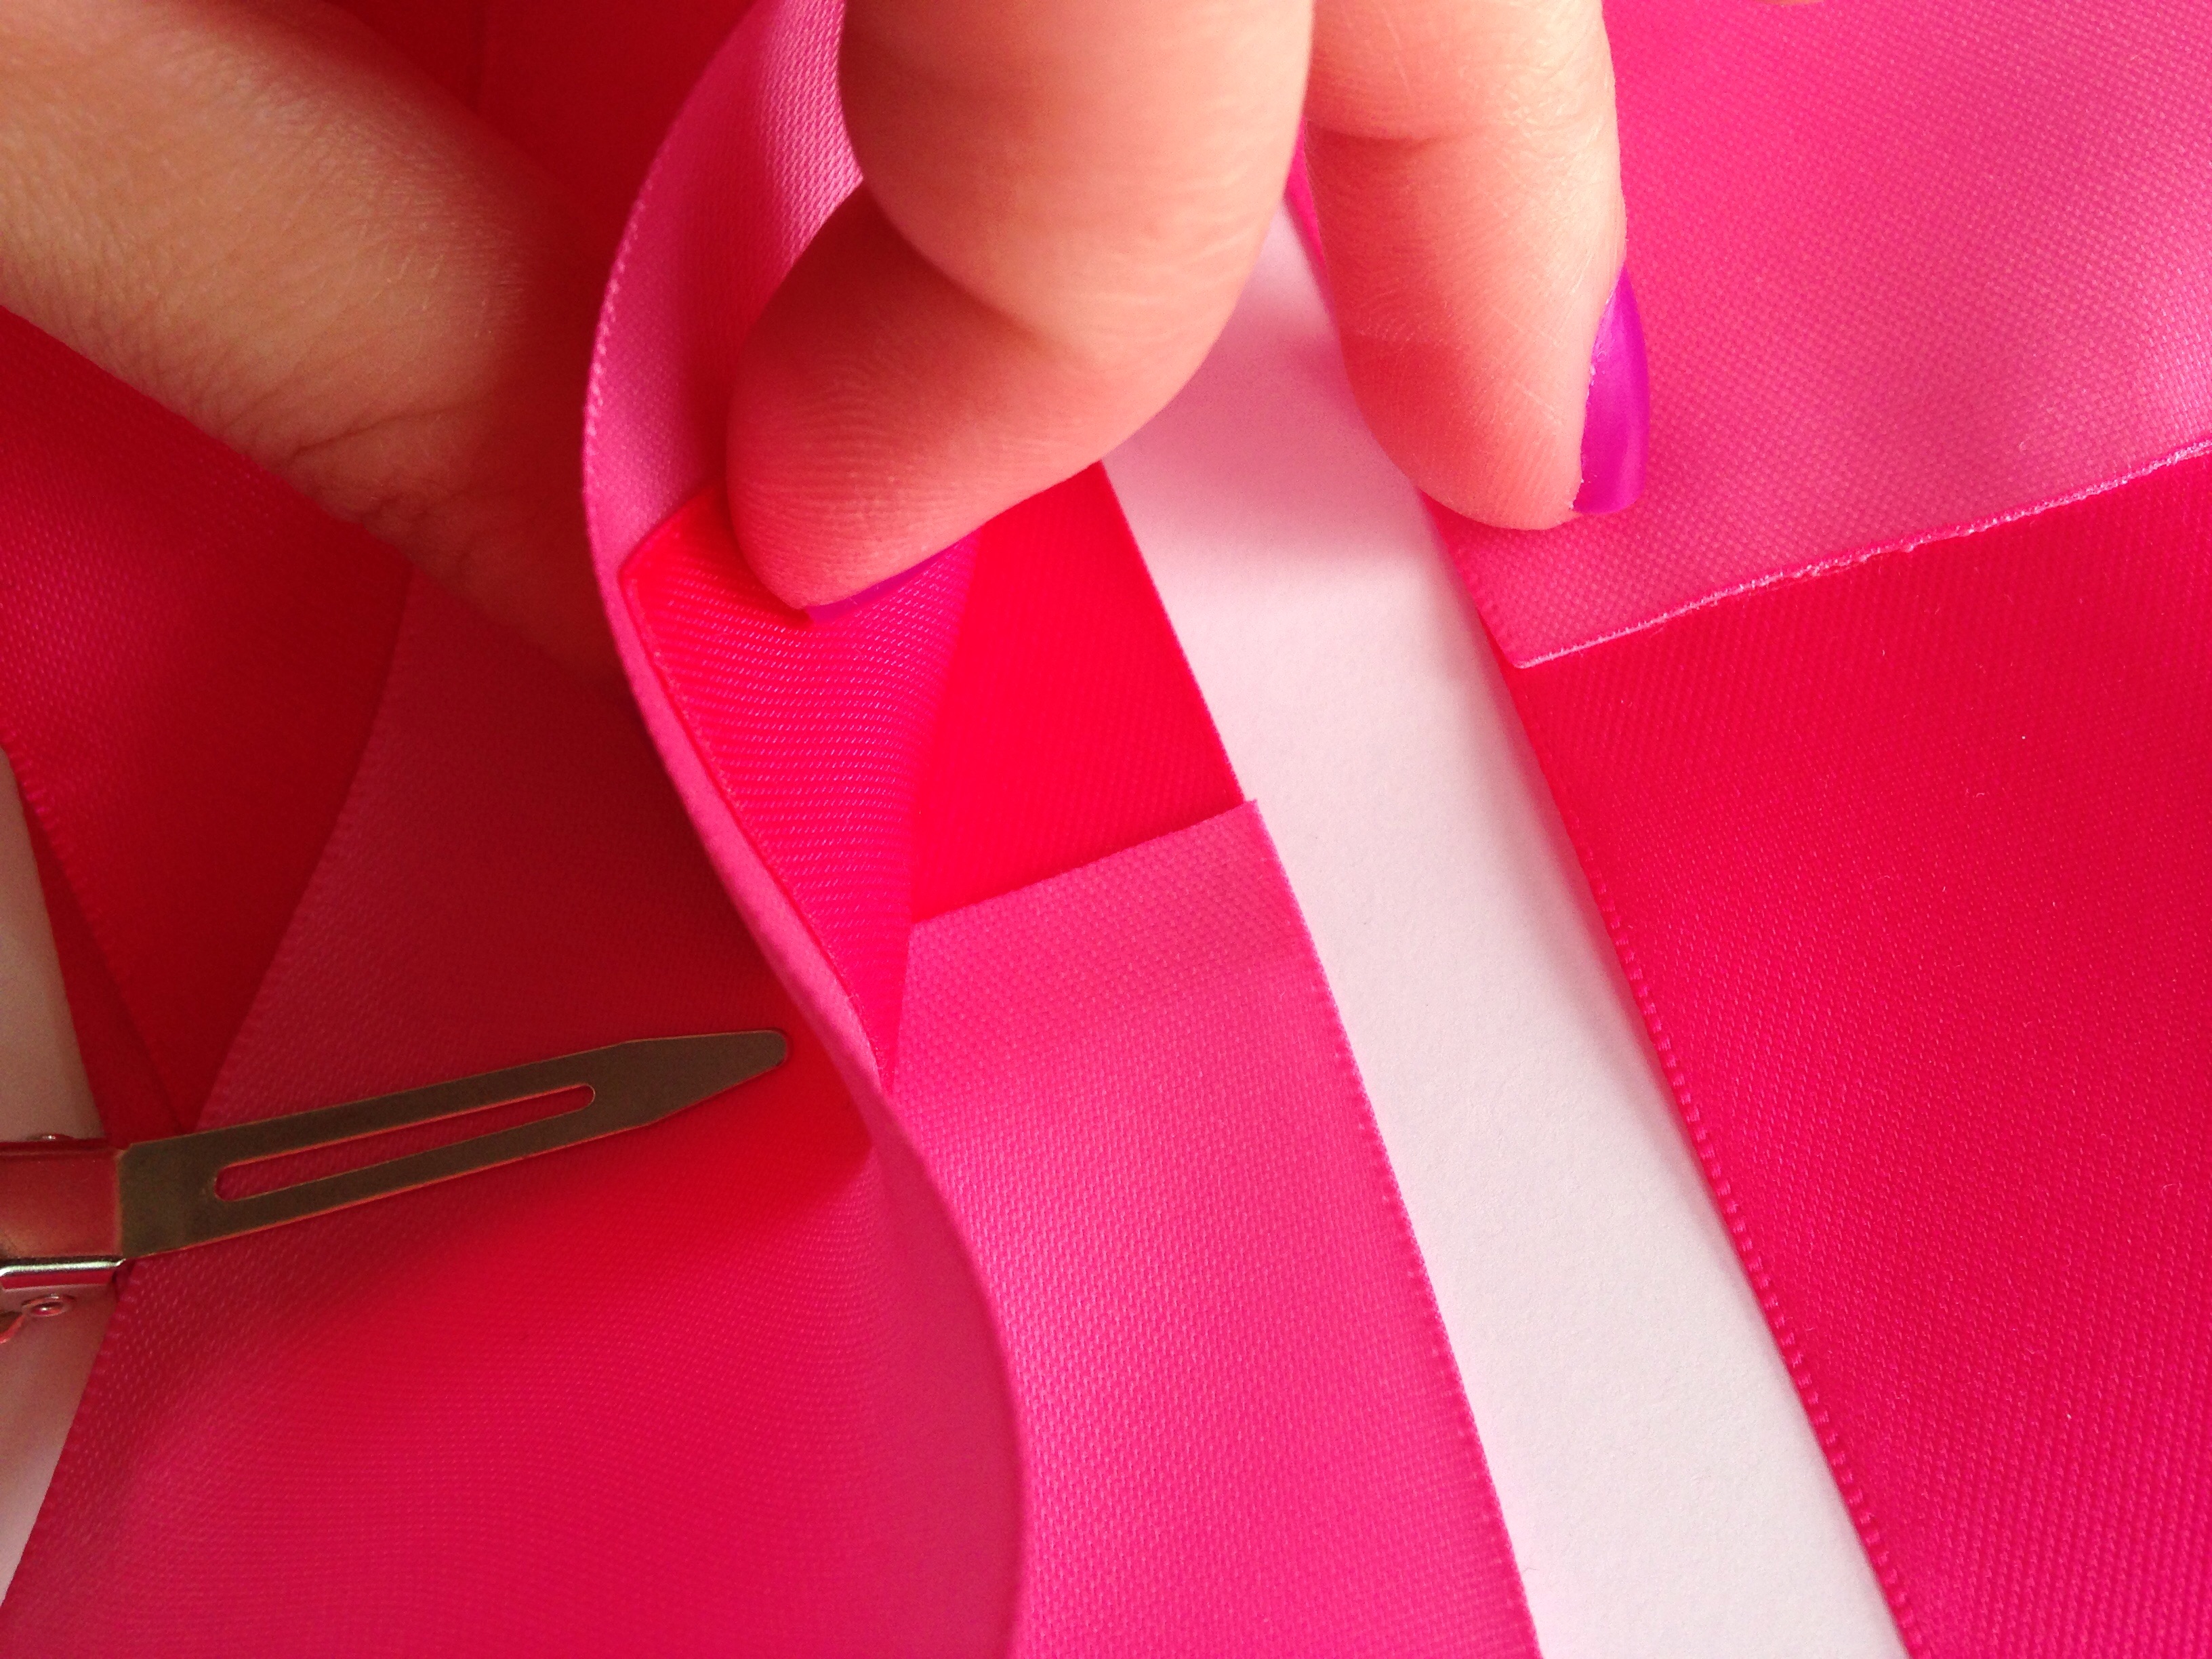
 After all 4 loops are formed you will have a smaller version of the bottom layer bow. This time before we start folding our bow down the center we need to trim off the corner from making the last loop to make a nice seamless bow. If you need an extra set of hands take an alligator clip and place in the center where your thumb is holding all layers in place to make your cut.
 Check to make sure all loops are even. Now we can make an accordion fold down the center just as we did before. Start by pinching the middle to fold in half and then fold each side back up & down to make a total of 3 folds. Secure the center of your bow by wrapping with wire once again.
 Now both layers of our bow are ready to be stacked together. Secure the smaller bow ontop of the large bow by using your choice of either double sided tape or a dab of hot glue in the center between the two bows. Finish off with a small piece of 7/8" shocking pink satin ribbon tied into a knot. Place your knot in the center with either double sided tape or a dab of hot glue. Continue wrapping the center with ribbon all the way around and finish off your bow with an alligator clip on the back. Once again you may secure your clip between your ribbon layers using that awesome double sided tape or hot glue!
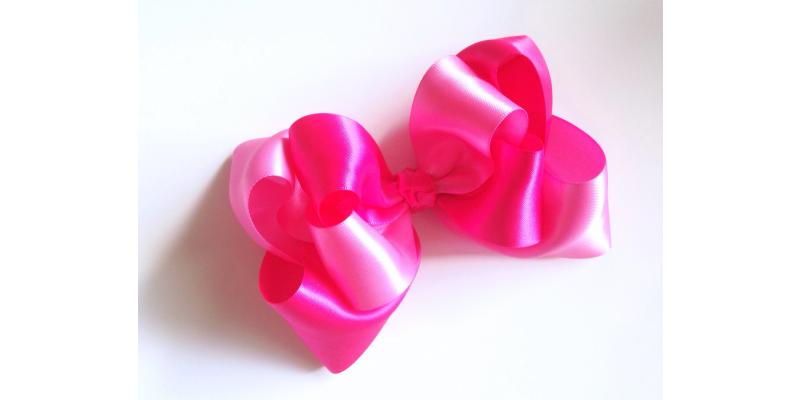
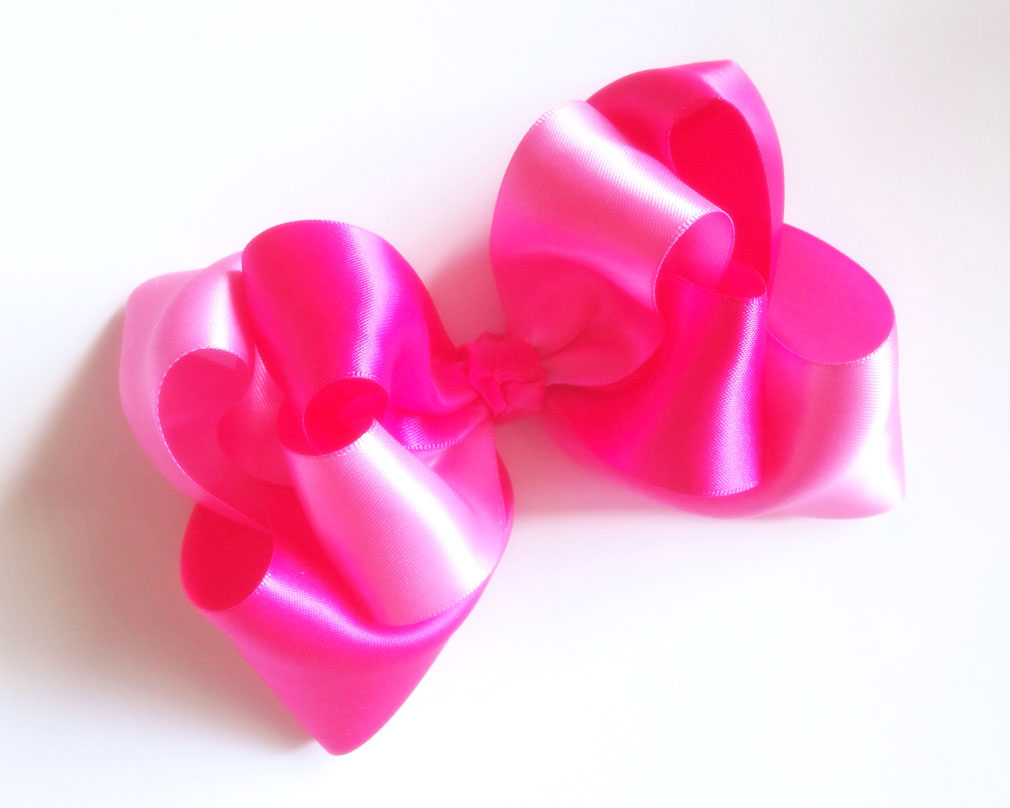
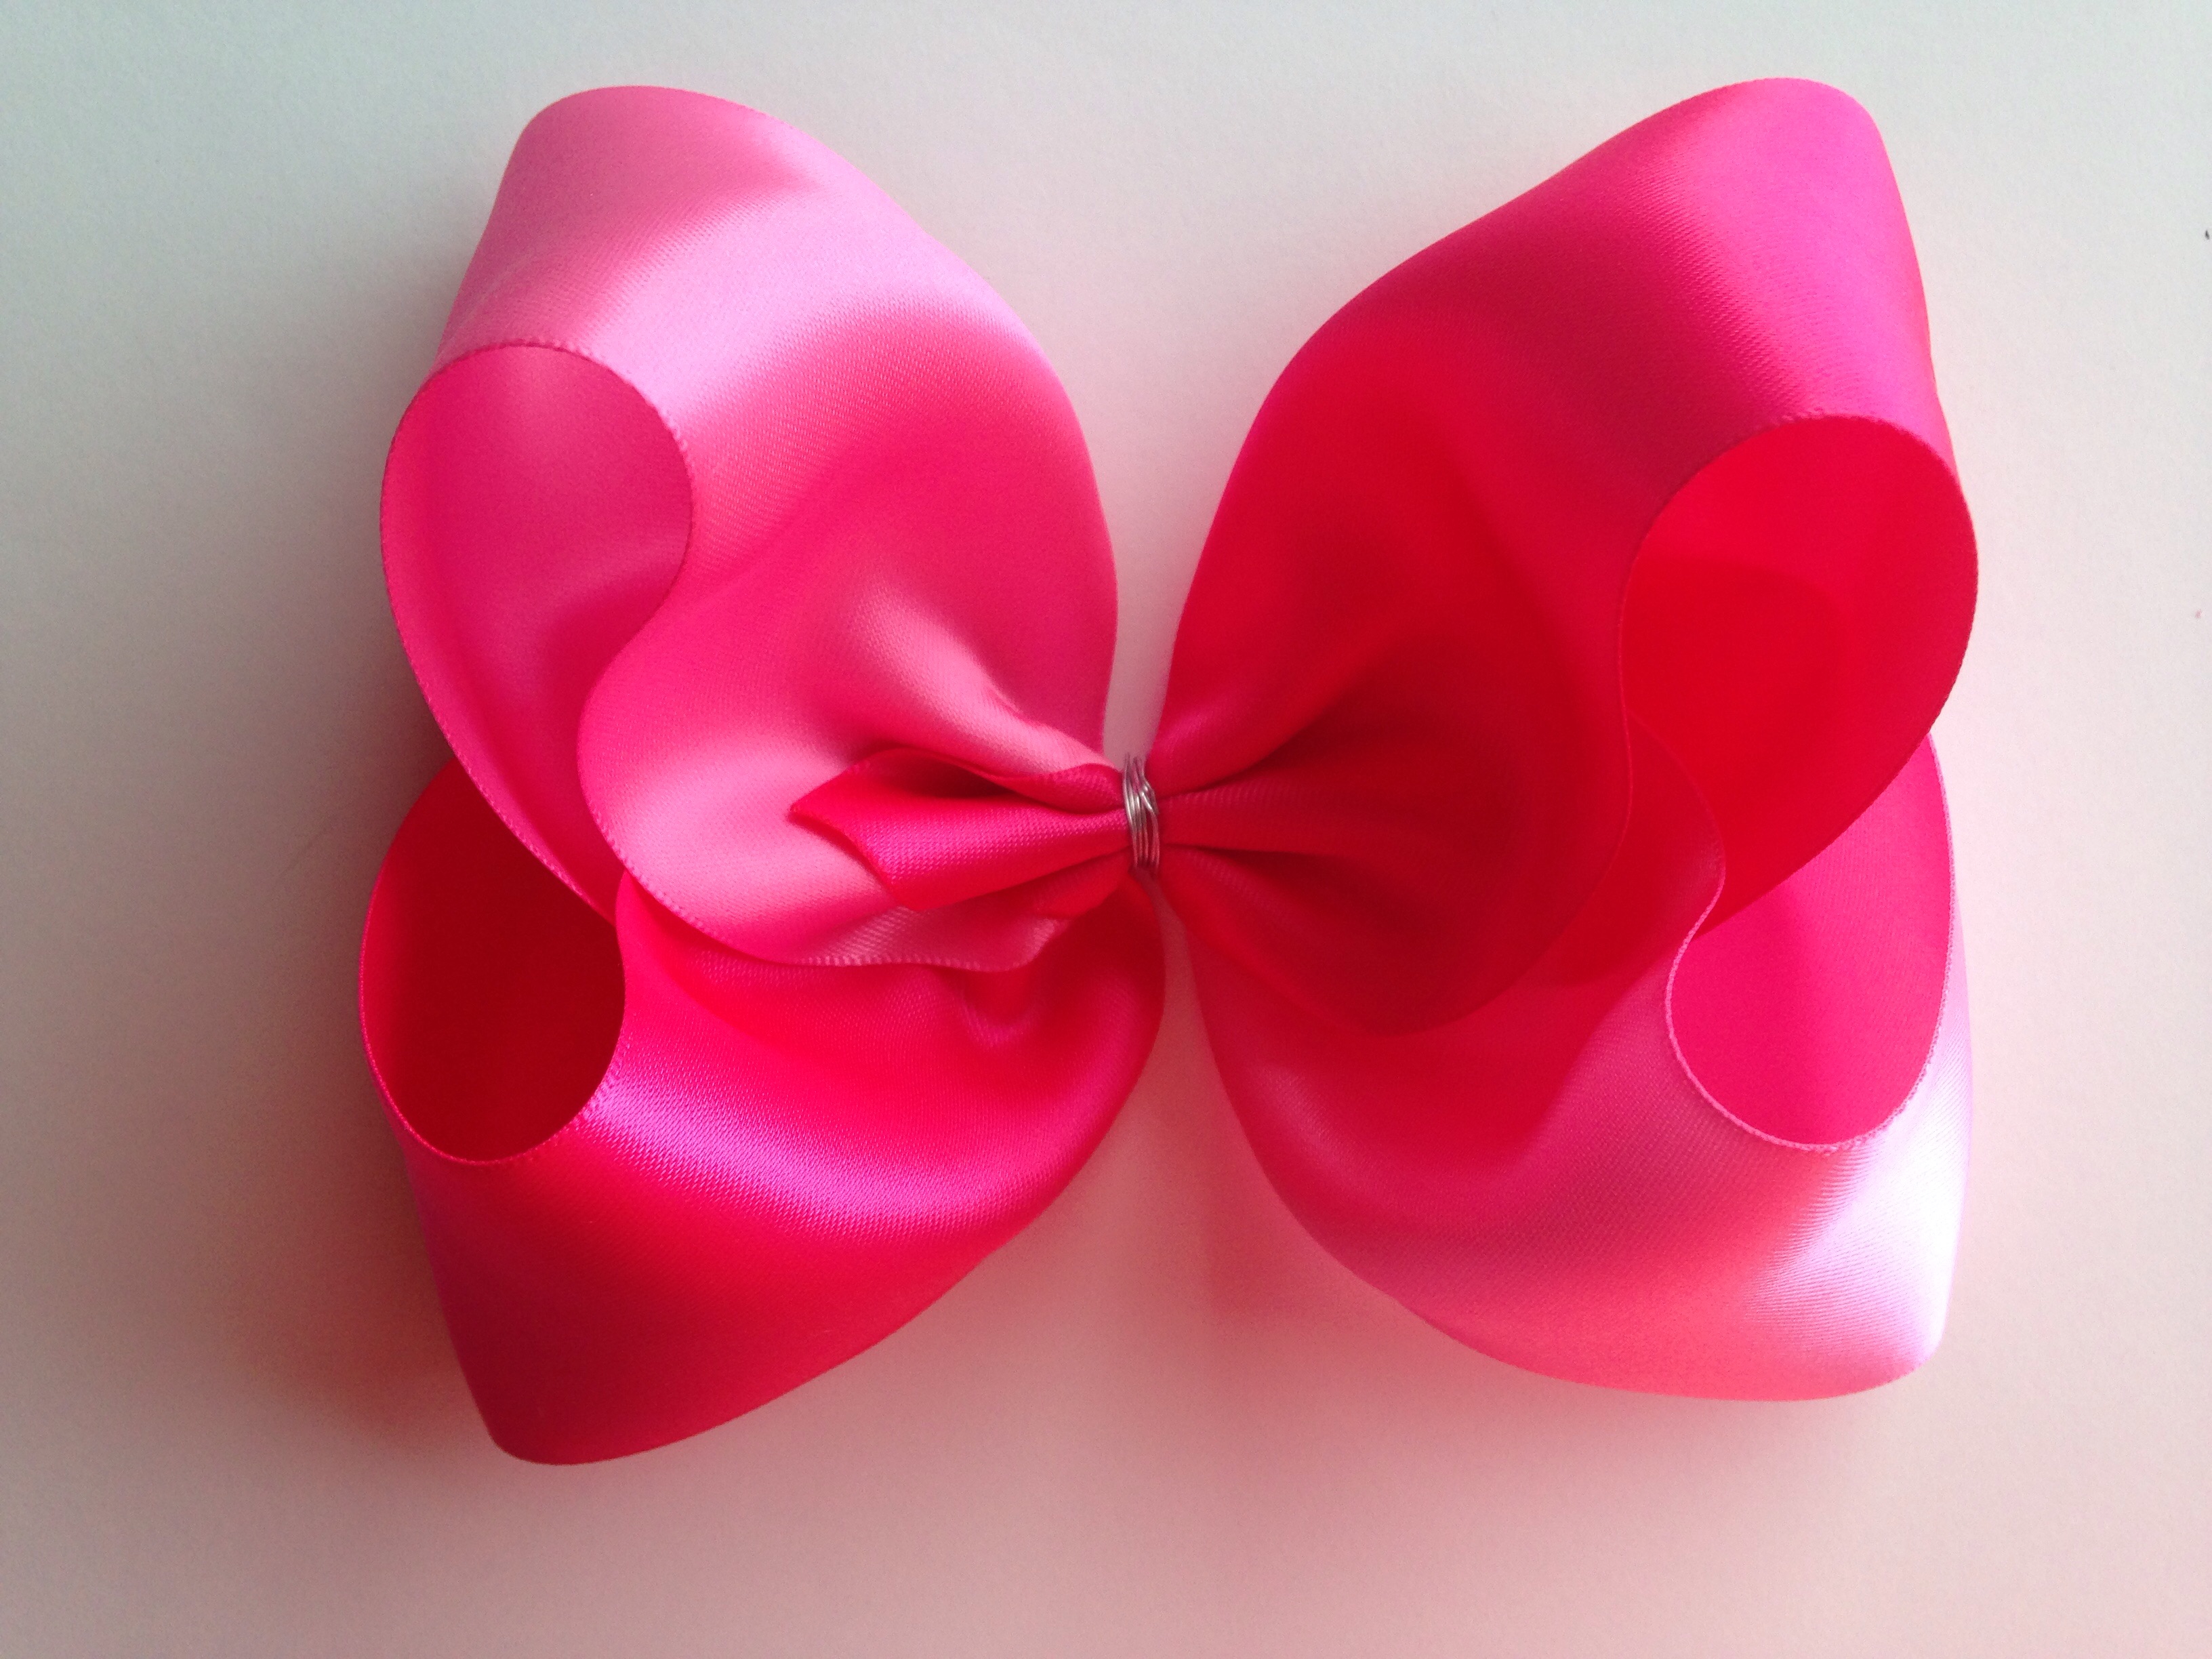
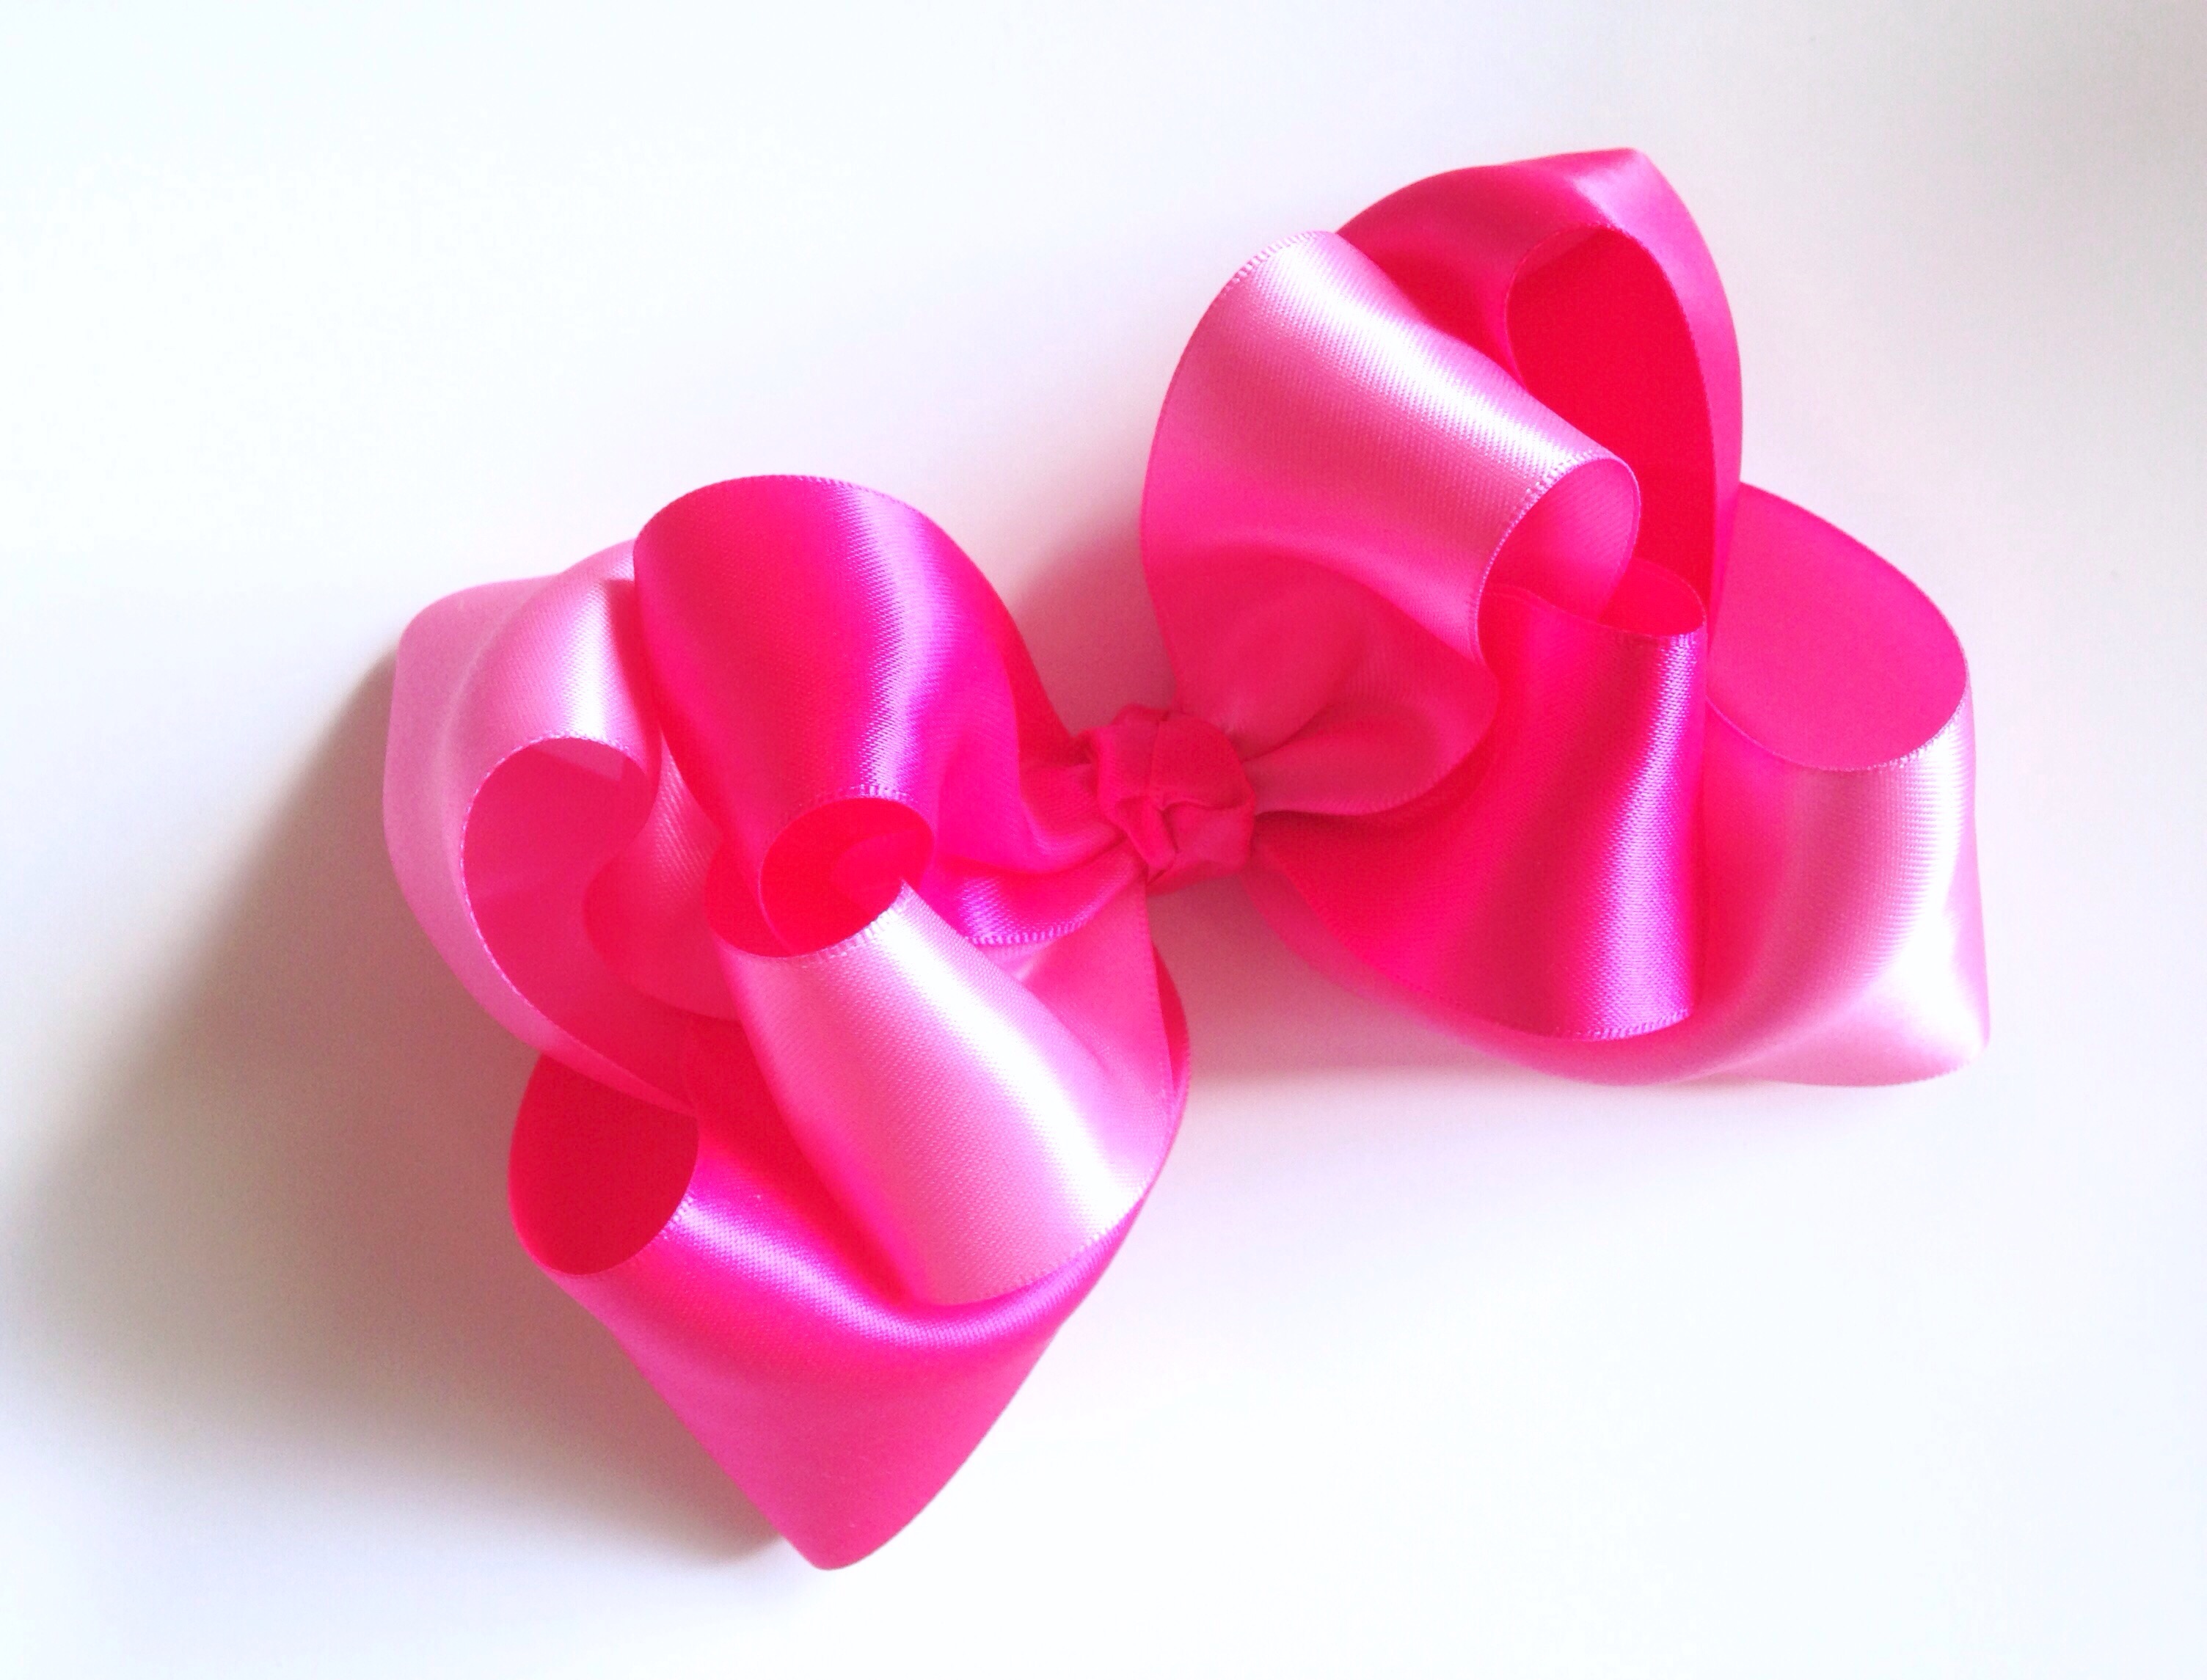 Look what we just made! Such a stunning eye catcher made of luxurious silky soft satin ribbon! This finished bow measures over 6" which is a wonderful size! It's full loopy layers and twisted shades of pink are sure to impress any Momma and make any little diva feel like a million bucks! I hope you've had fun learning how to make this sweet satin show-stopper and are just as excited as I am about the option of using literally no hot glue to make our bow! Thanks for reading and feel free to leave any comments below!
Visit the rest of our blog for more Crafting Tutorials and DIY Instructions!
Loading...

