
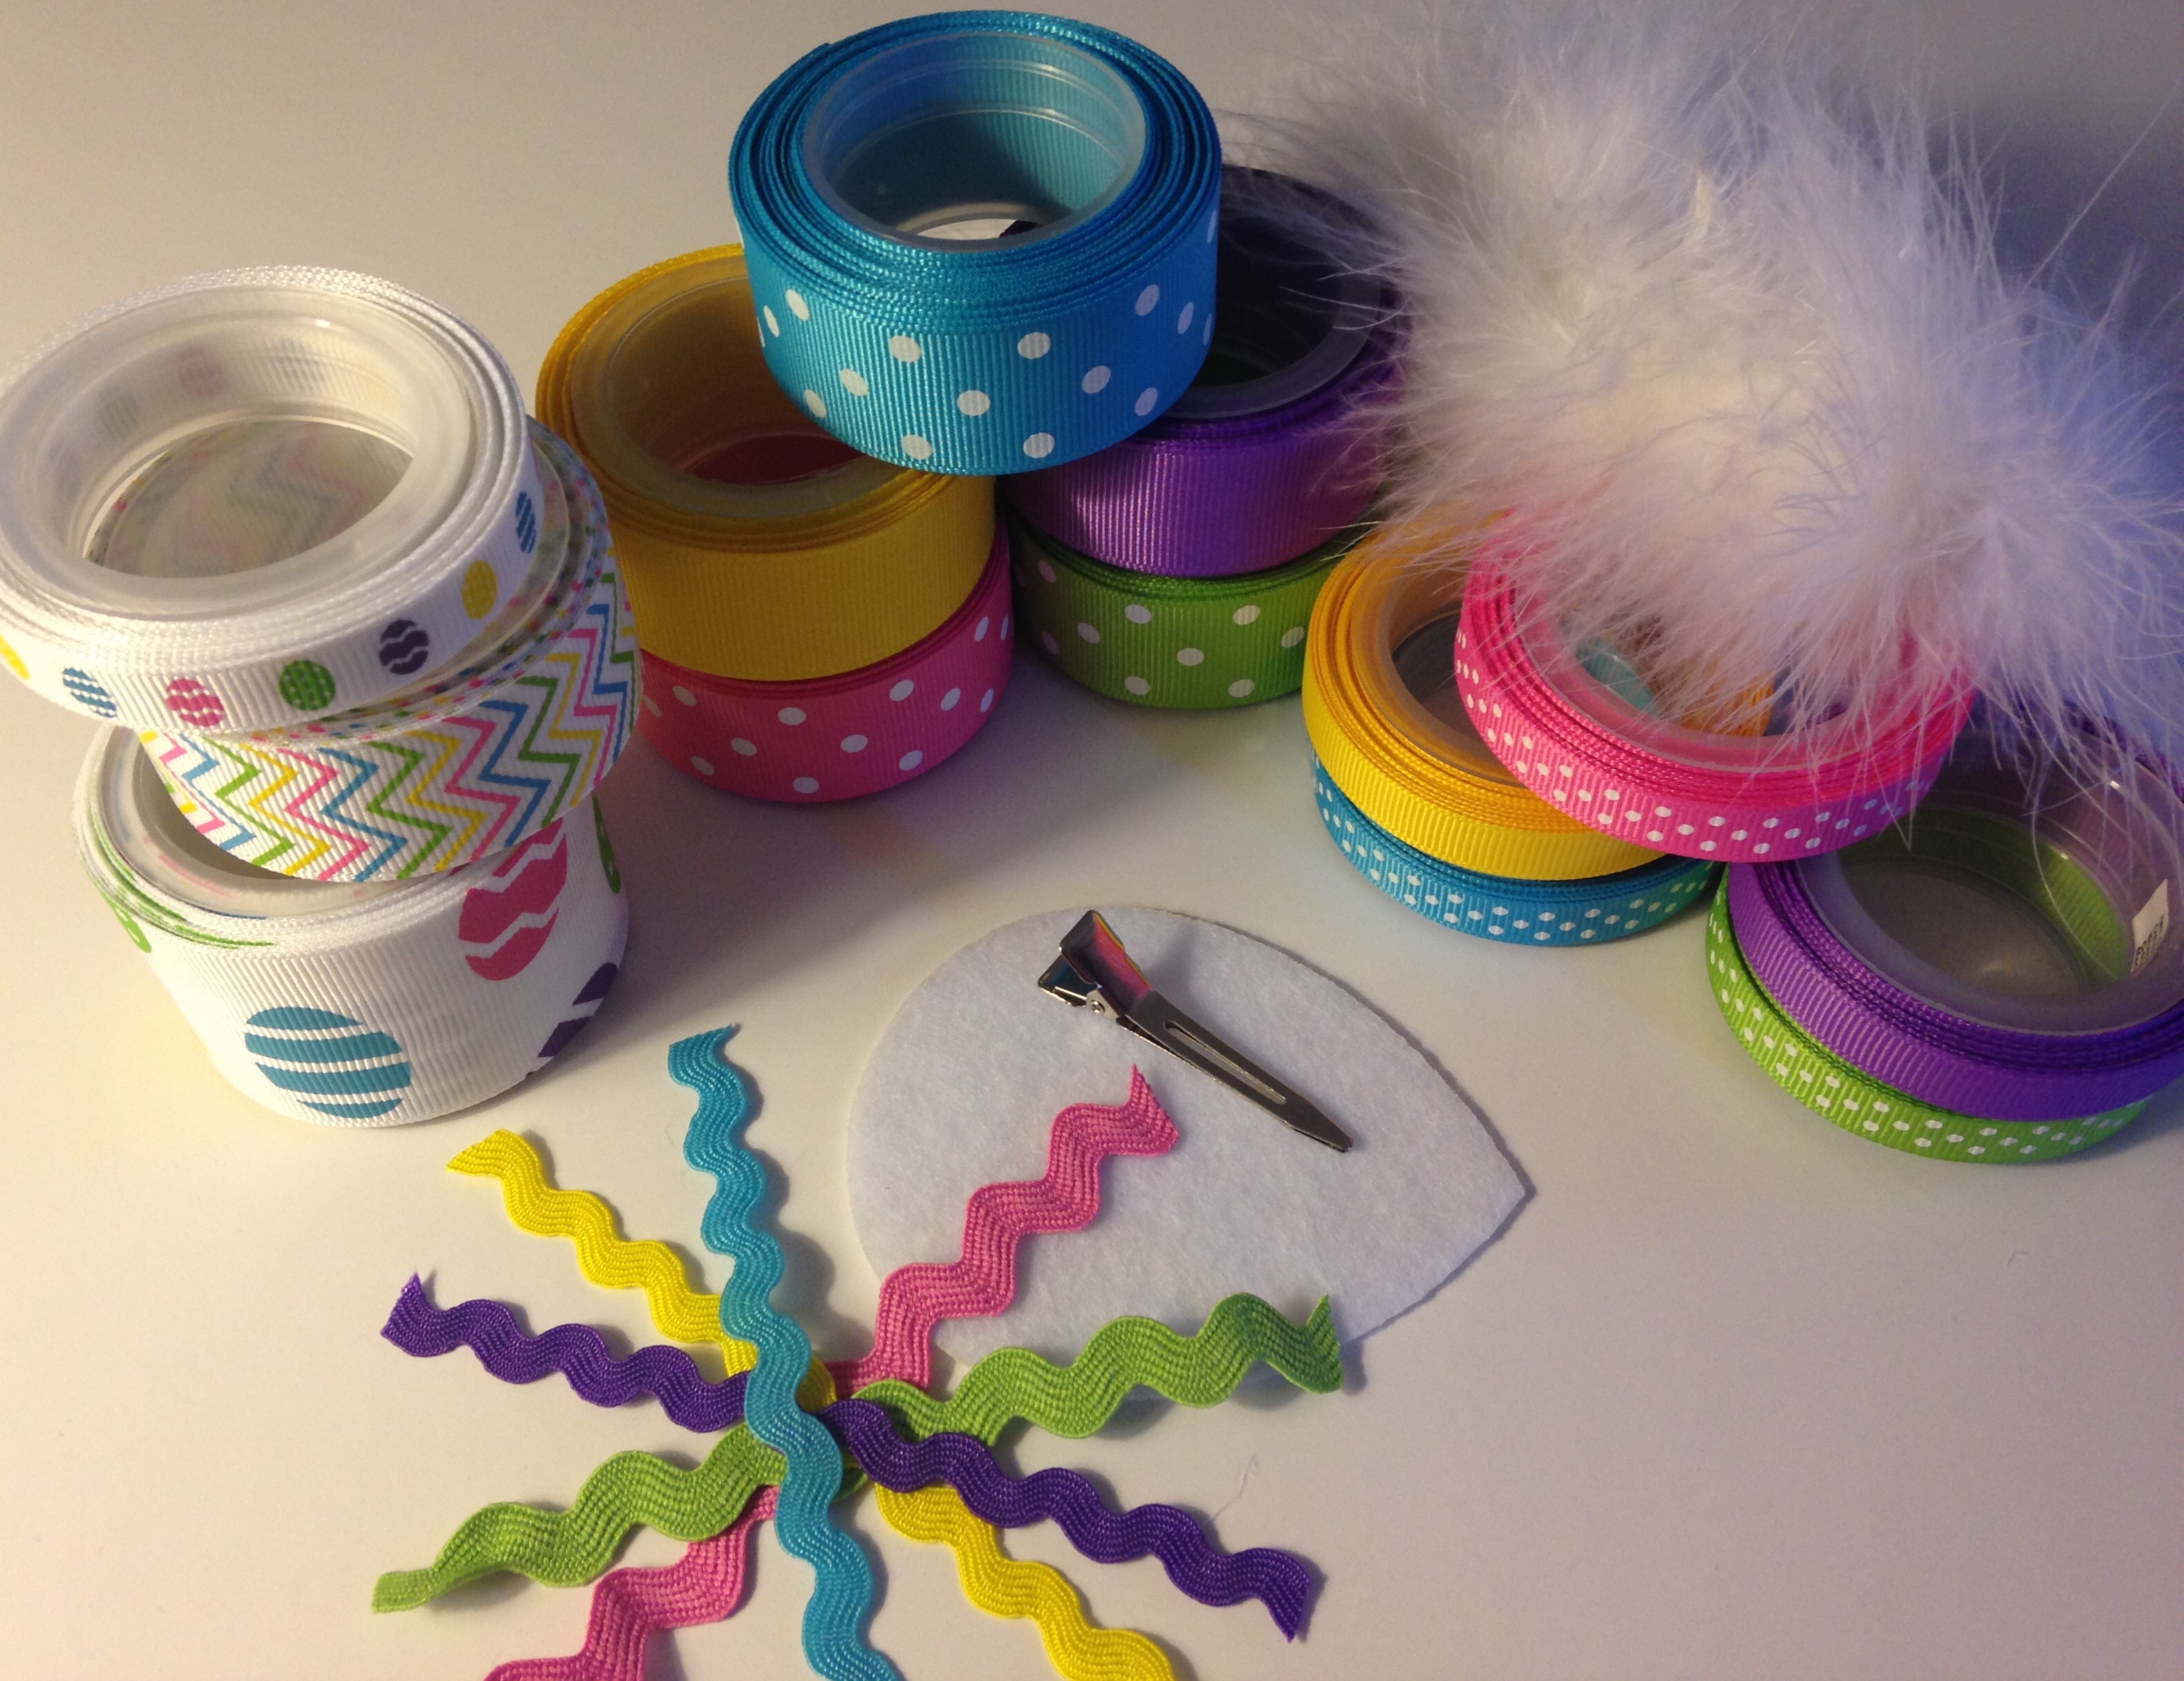
 Shown above are the supplies I used for my festive creation. Find them right here at HBC!
•1.5" Easter egg grosgrain ribbon
•3/8" Easter egg grosgrain ribbon
•7/8" Multi stripe chevron zig-zag grosgrain ribbon
•7/8" White dots grosgrain ribbon- Turquoise, Hot Pink & Apple Green
•7/8" Solid grosgrain ribbon- Yellow & Grape
•3/8" White dots grosgrain ribbon- Turquoise, Hot Pink & Apple Green
•3/8" Solid grosgrain ribbon- Yellow & Grape
•White marabou feathers
•Fan felt pad
•Alligator clip
•Ric Rac (optional)
Other tools you will need include scissors, measuring tape, hot glue gun, large salon clip, embroidery floss, and a lighter or wood burning tool.
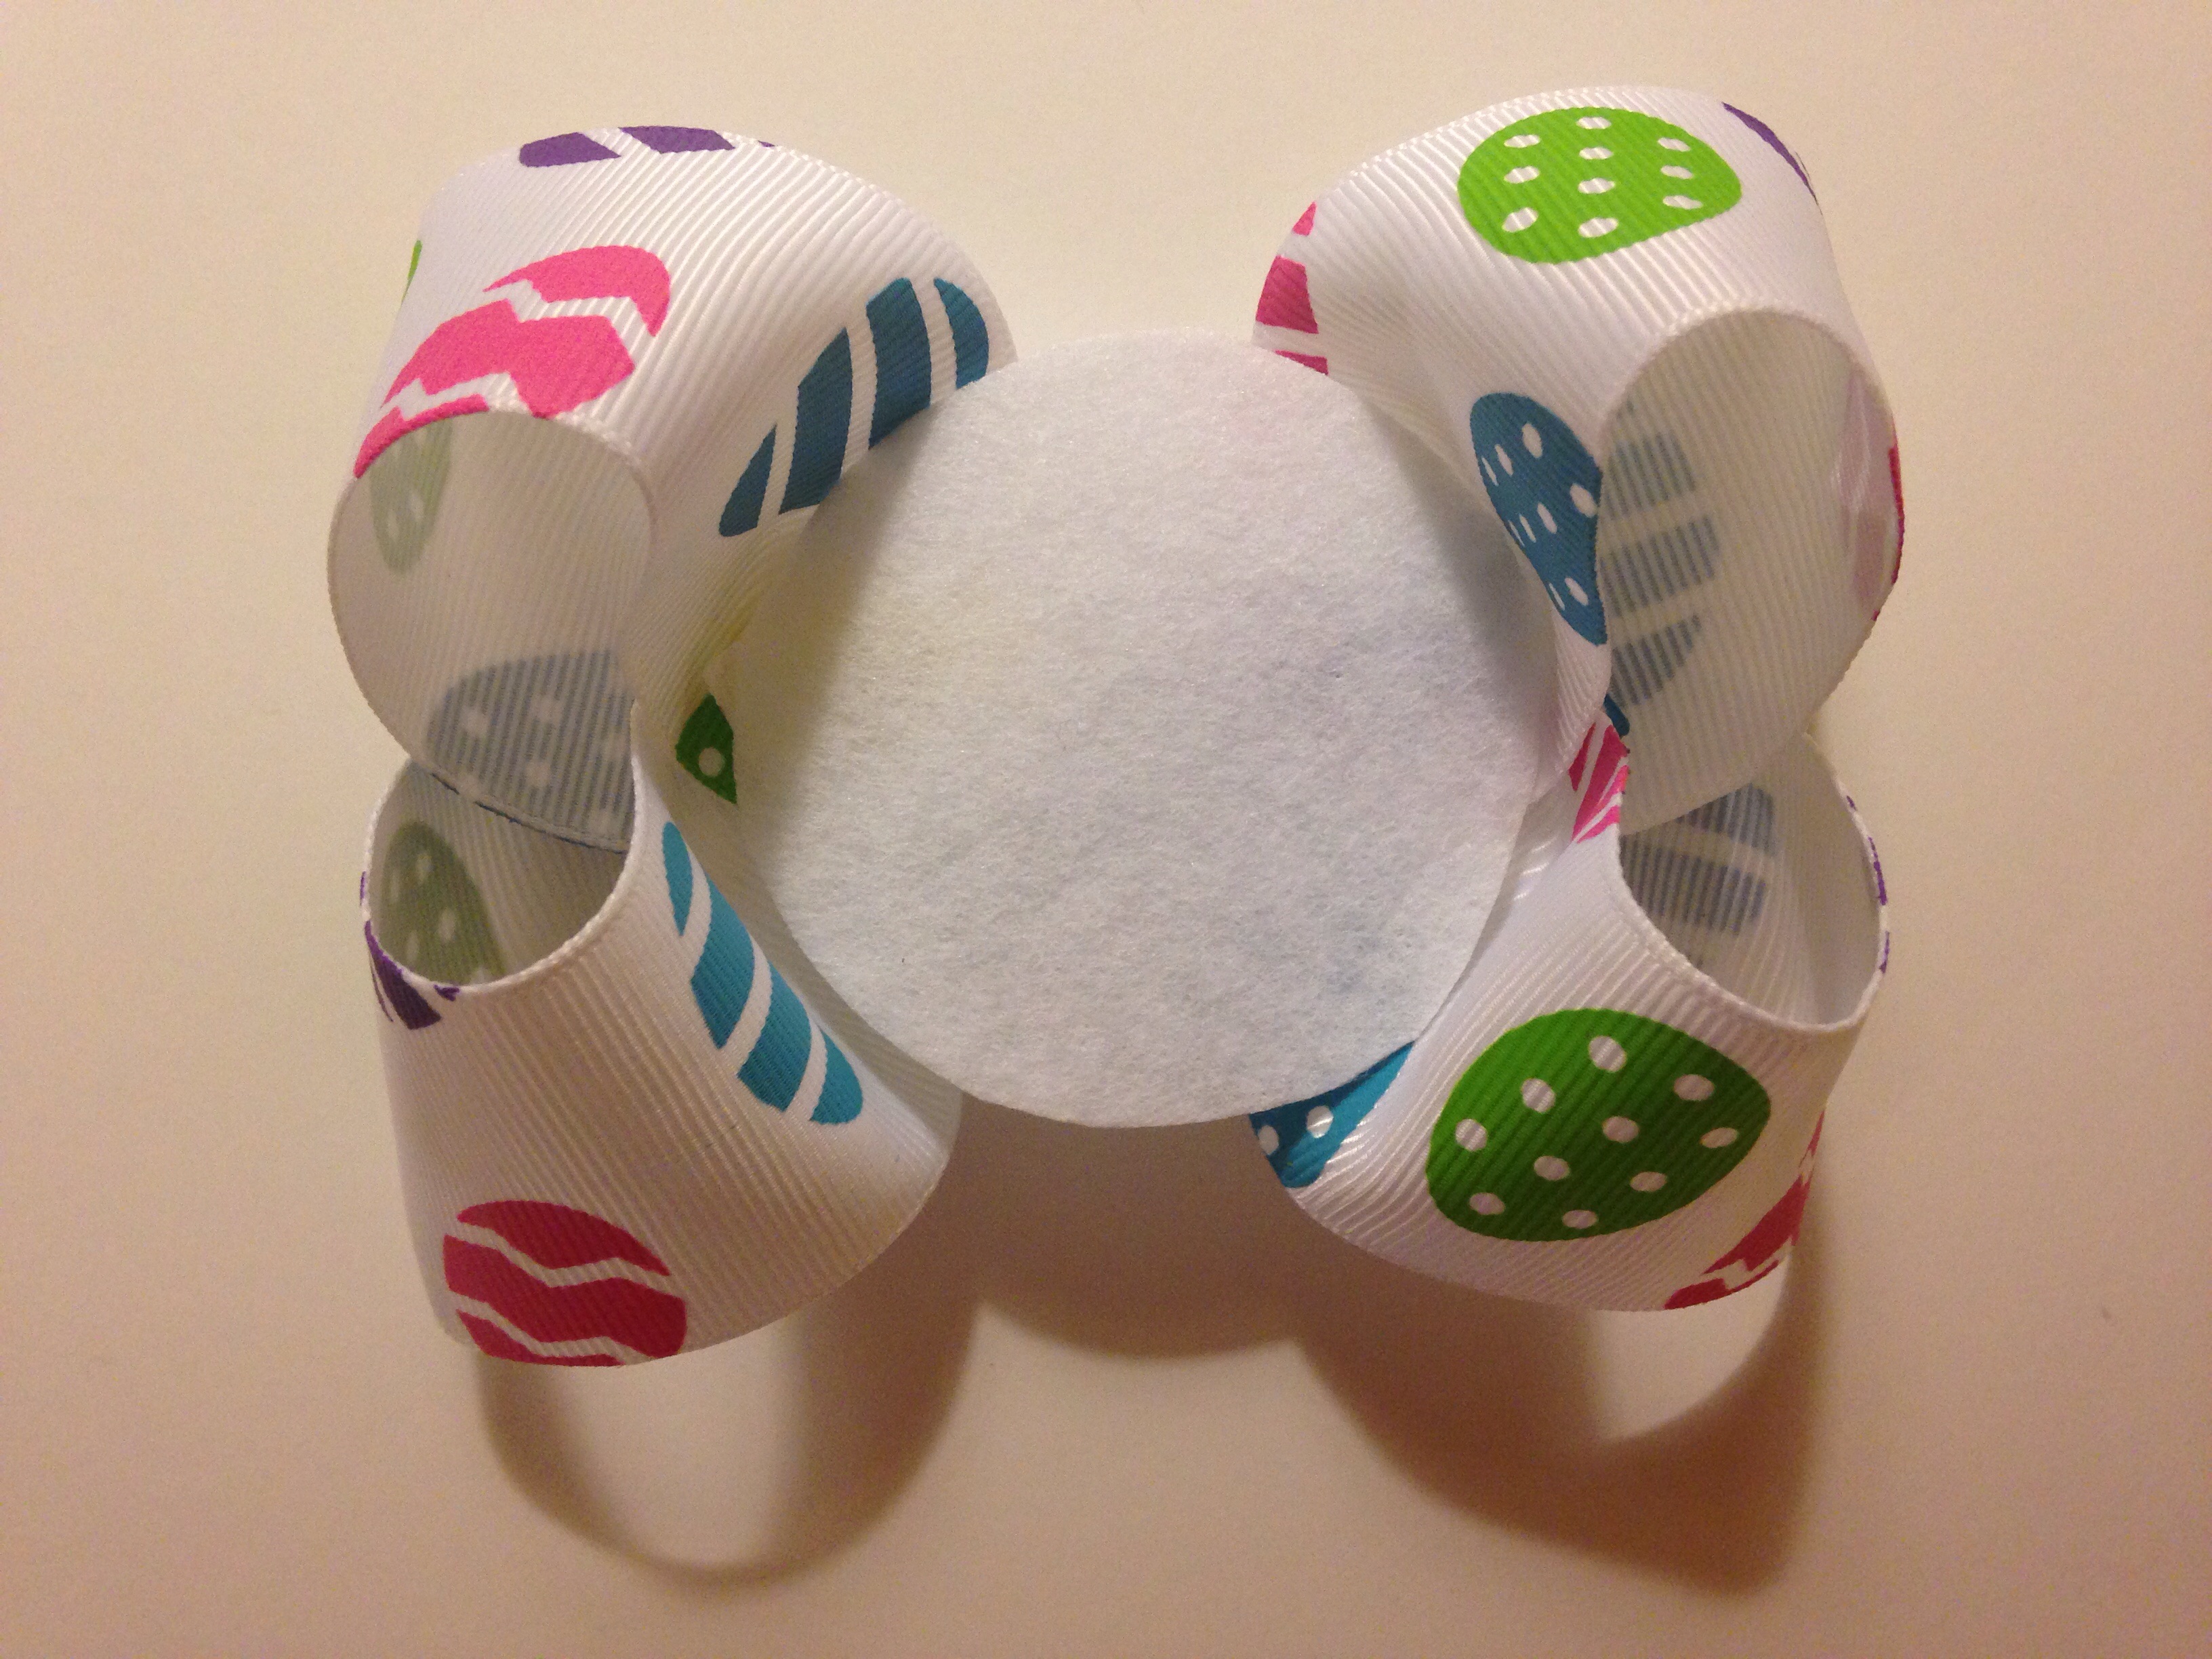
First we will start by making a simple boutique bow with the super duper adorable Easter egg grosgrain ribbon! I absolutely love this design, and the color scheme is simply beautiful! For this bow, which will be the base for our loops, I used 30" of 1.5" ribbon. (This completed bow measures 6.5" so if you prefer a smaller size you may need to adjust your measurements.) You may use any method you like to construct your base bow.
Shown above are the supplies I used for my festive creation. Find them right here at HBC!
•1.5" Easter egg grosgrain ribbon
•3/8" Easter egg grosgrain ribbon
•7/8" Multi stripe chevron zig-zag grosgrain ribbon
•7/8" White dots grosgrain ribbon- Turquoise, Hot Pink & Apple Green
•7/8" Solid grosgrain ribbon- Yellow & Grape
•3/8" White dots grosgrain ribbon- Turquoise, Hot Pink & Apple Green
•3/8" Solid grosgrain ribbon- Yellow & Grape
•White marabou feathers
•Fan felt pad
•Alligator clip
•Ric Rac (optional)
Other tools you will need include scissors, measuring tape, hot glue gun, large salon clip, embroidery floss, and a lighter or wood burning tool.
First we will start by making a simple boutique bow with the super duper adorable Easter egg grosgrain ribbon! I absolutely love this design, and the color scheme is simply beautiful! For this bow, which will be the base for our loops, I used 30" of 1.5" ribbon. (This completed bow measures 6.5" so if you prefer a smaller size you may need to adjust your measurements.) You may use any method you like to construct your base bow.
 After you have secured the center of your bow, gently pull your loops to the sides to make a nice flattened area in the center. Begin trimming down your fan felt pad into a circle. I cut a little at a time to insure a good fit in the center of the bow. My circle measured approx 2.25" to fill the center. You may choose a smaller circle if you do not want a lot of loops & feathers. (Do not attach the felt pad to your bow yet; this is only to check how it will fit into your bow.)
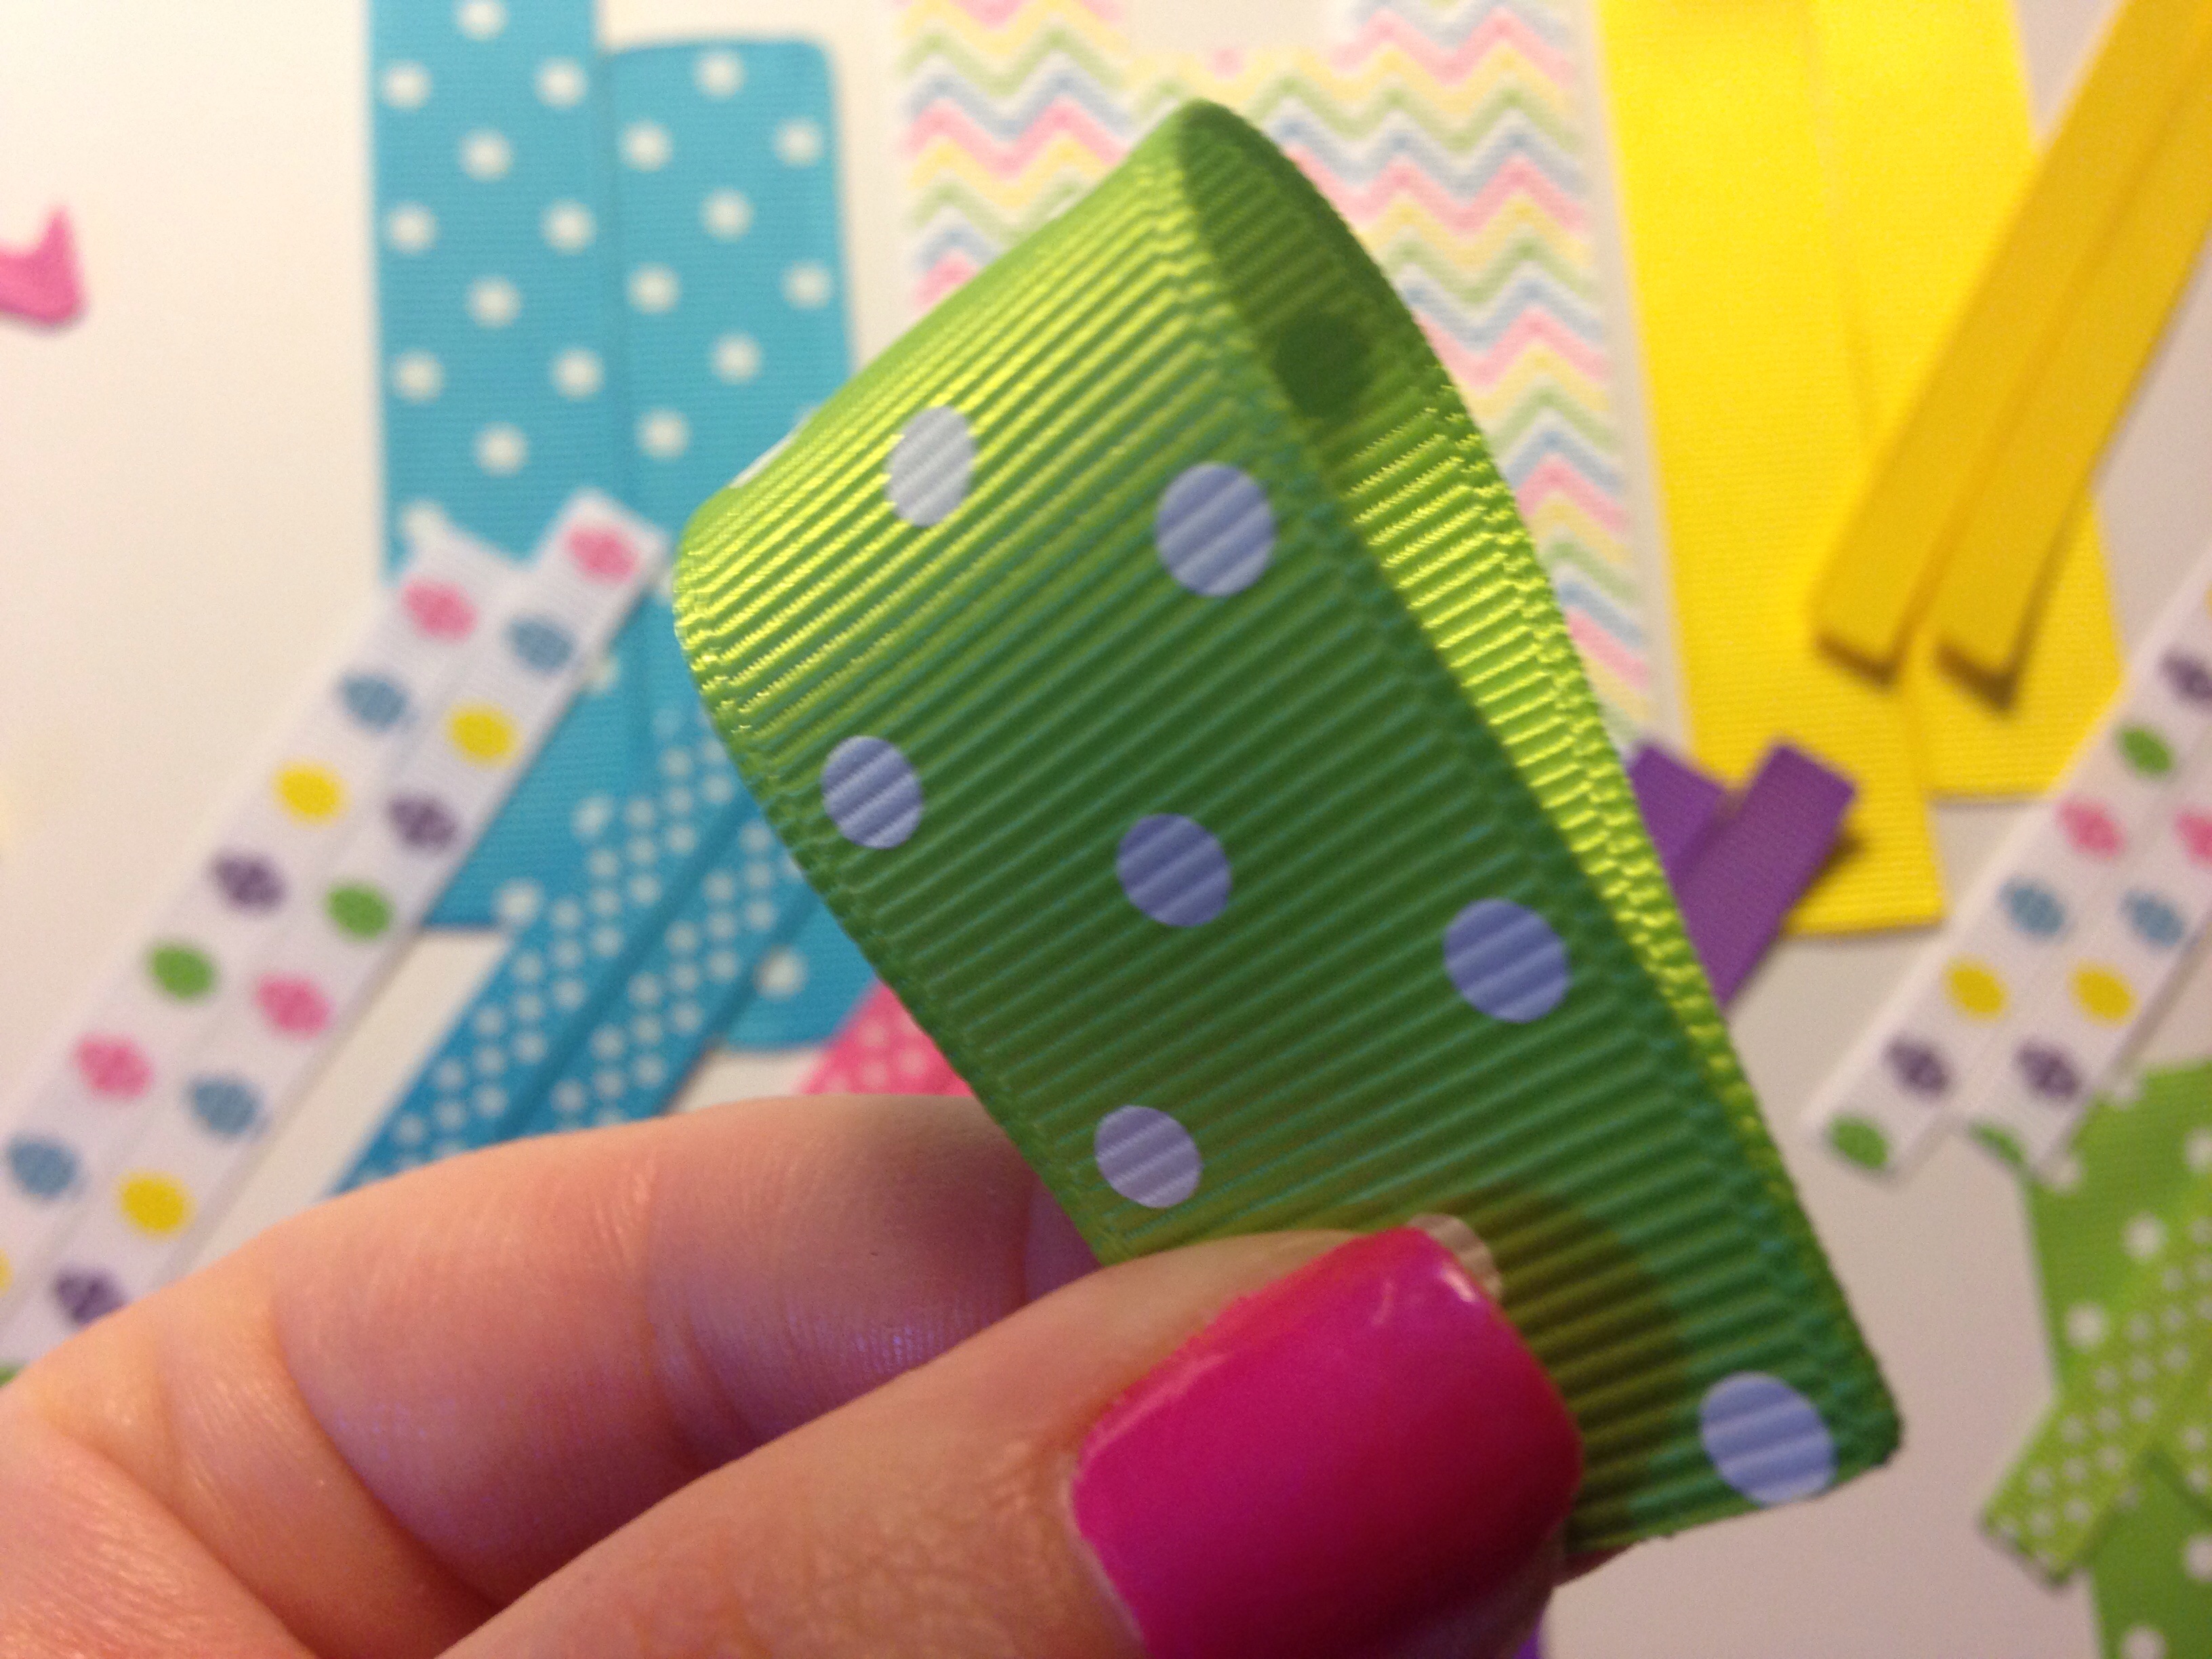
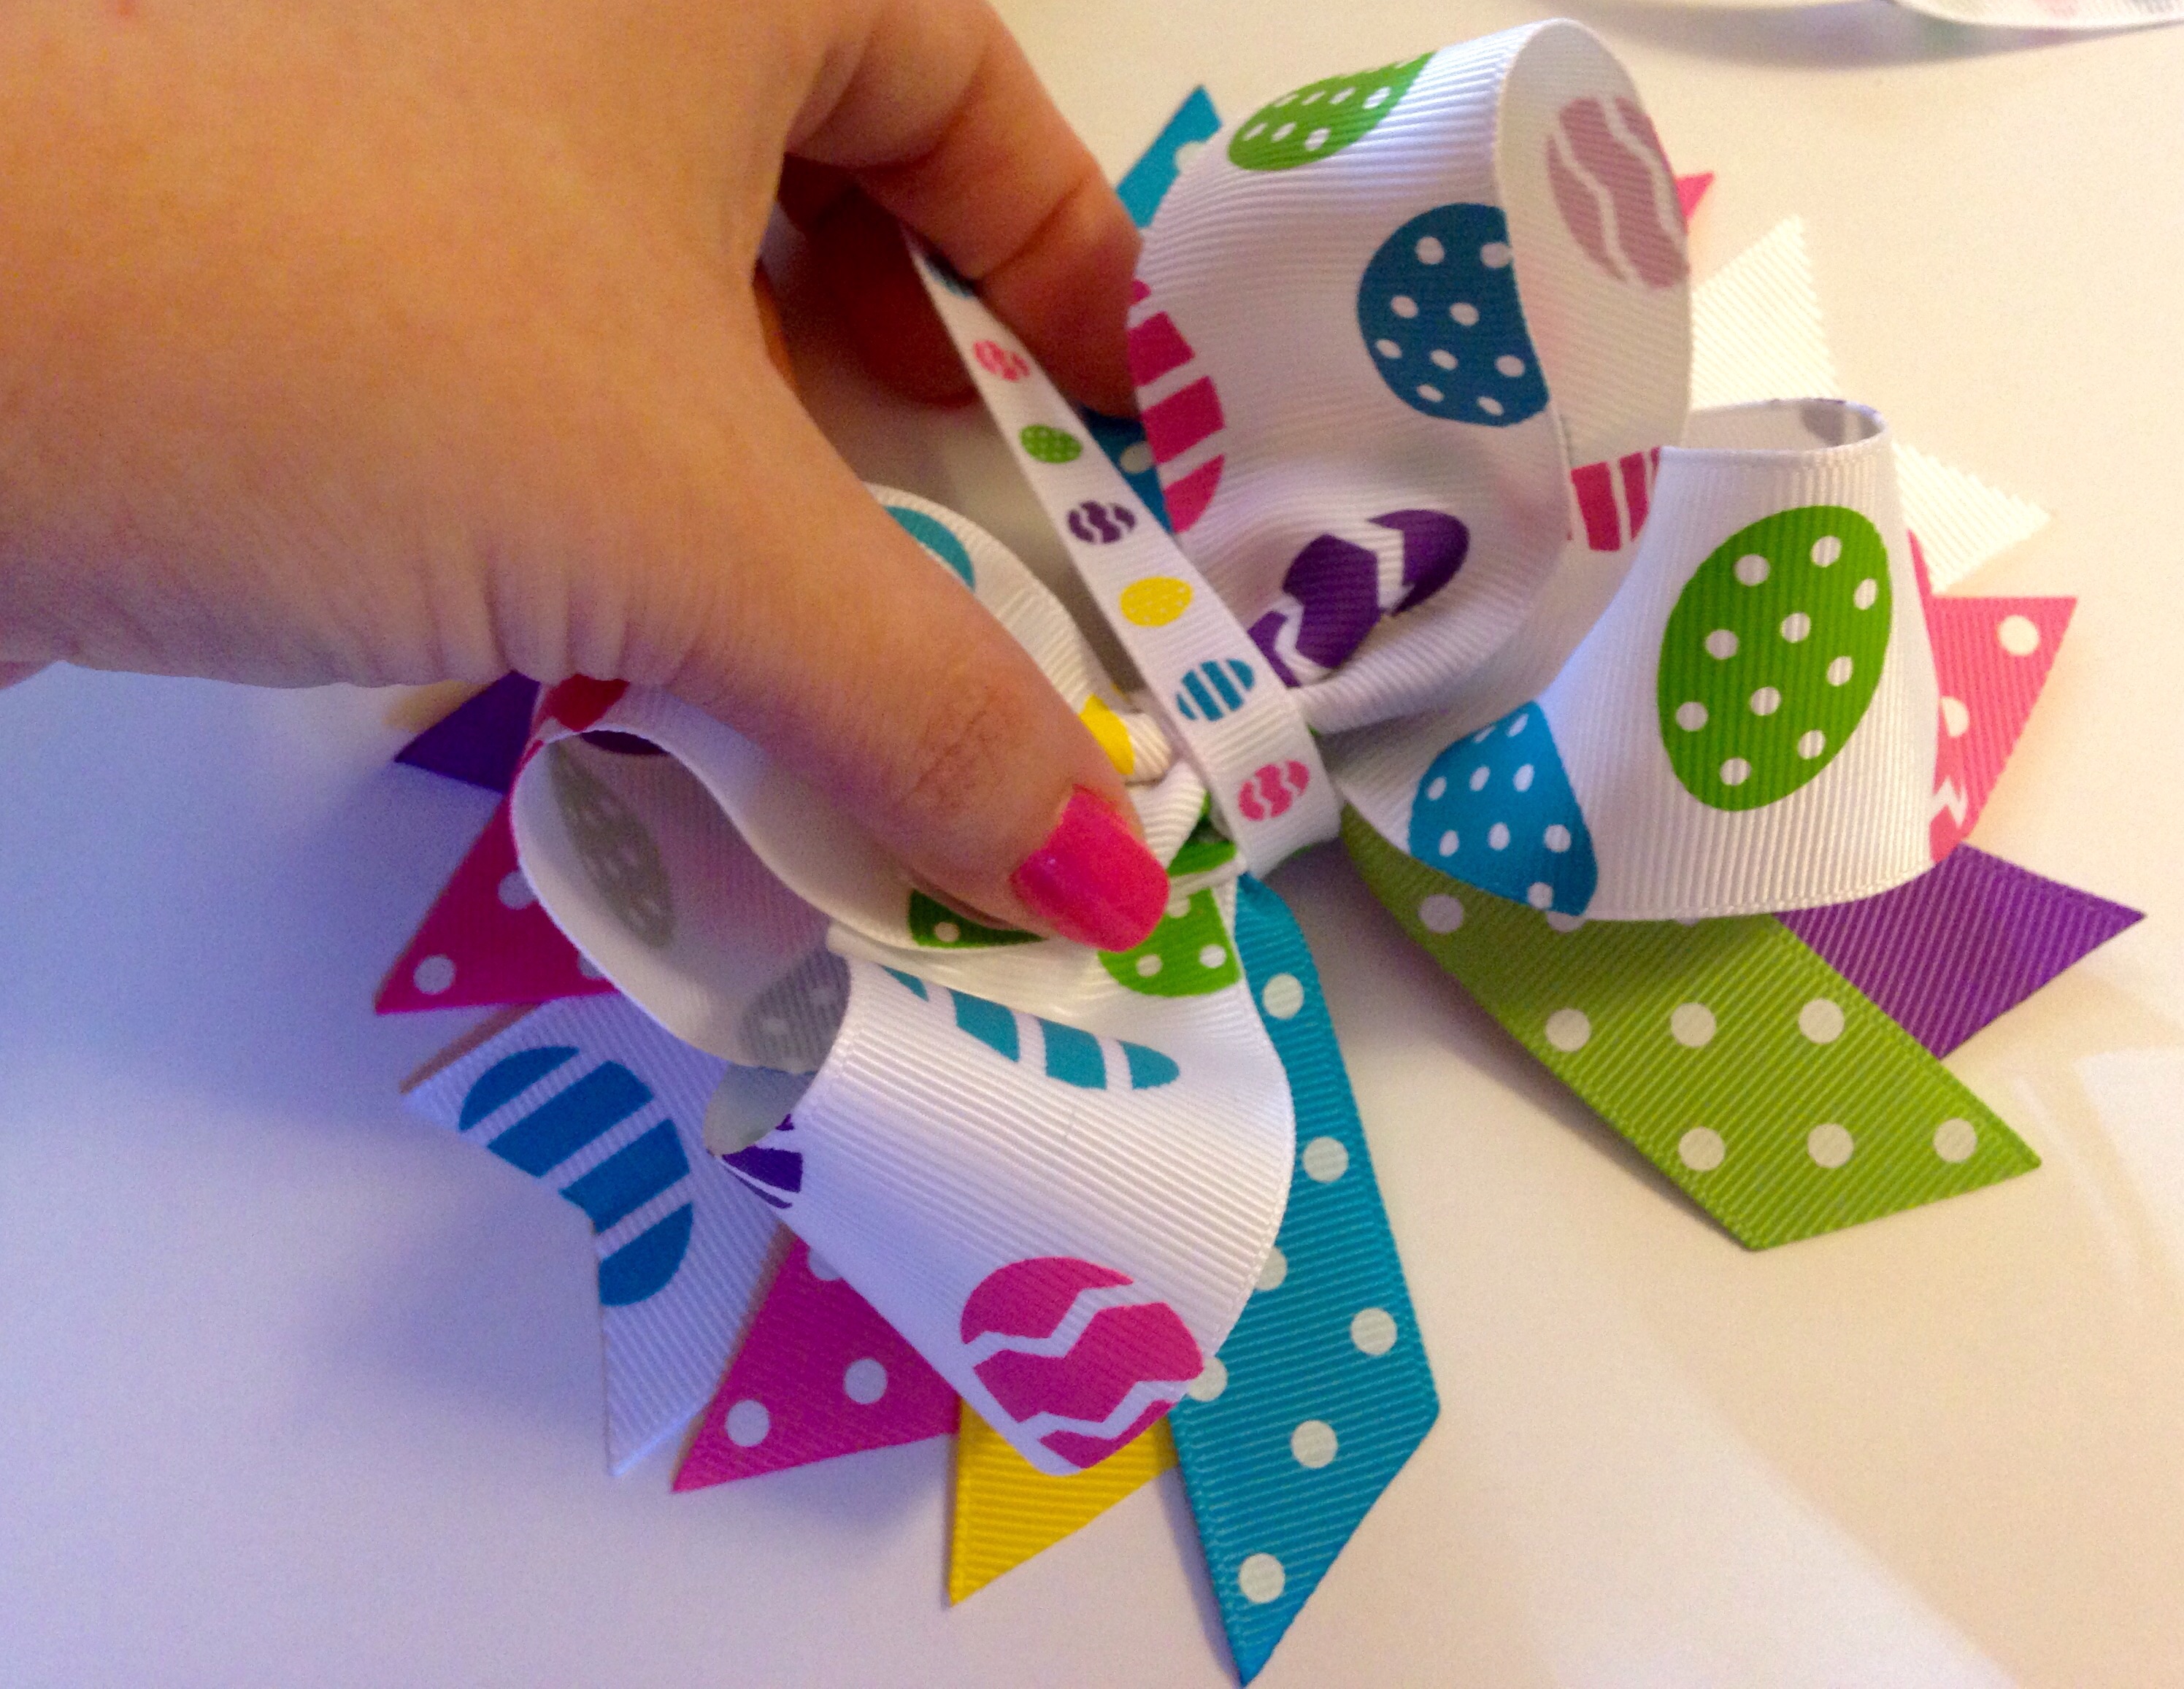
 Next you will need to prepare your ribbon to form into loops. Cut each strip into 4" pieces using all the 7/8" & 3/8" coordinating ribbon. You can use any combination of ribbon and really have fun with it! Let your imagination run wild and experiment with whatever you like... dots, solid colors, patterns, sheer, satin, and even glitter ribbon! The sky is the limit! I chose a variety of ribbon based on the cheerful Easter egg colors & designs as well as a few pieces of ric rac for added Interest. Make sure to heat seal all your ribbon ends using your lighter or wood burning tool.
 I ended up using a total of 35 strips of various ribbon and ric rac. The more you use, the fuller your bow will be!
 To form your strips of ribbon into loops, apply a thin line of hot glue to the backside of one end, then fold the other end on top. Gently press down and hold the ribbon in place for a few seconds before letting go to allow time for your glue to dry.
 Next you will begin filling your felt pad with loops. Apply another thin line of hot glue to one edge and press down onto your pad. Leave a small space in the center open for your marabou feathers.
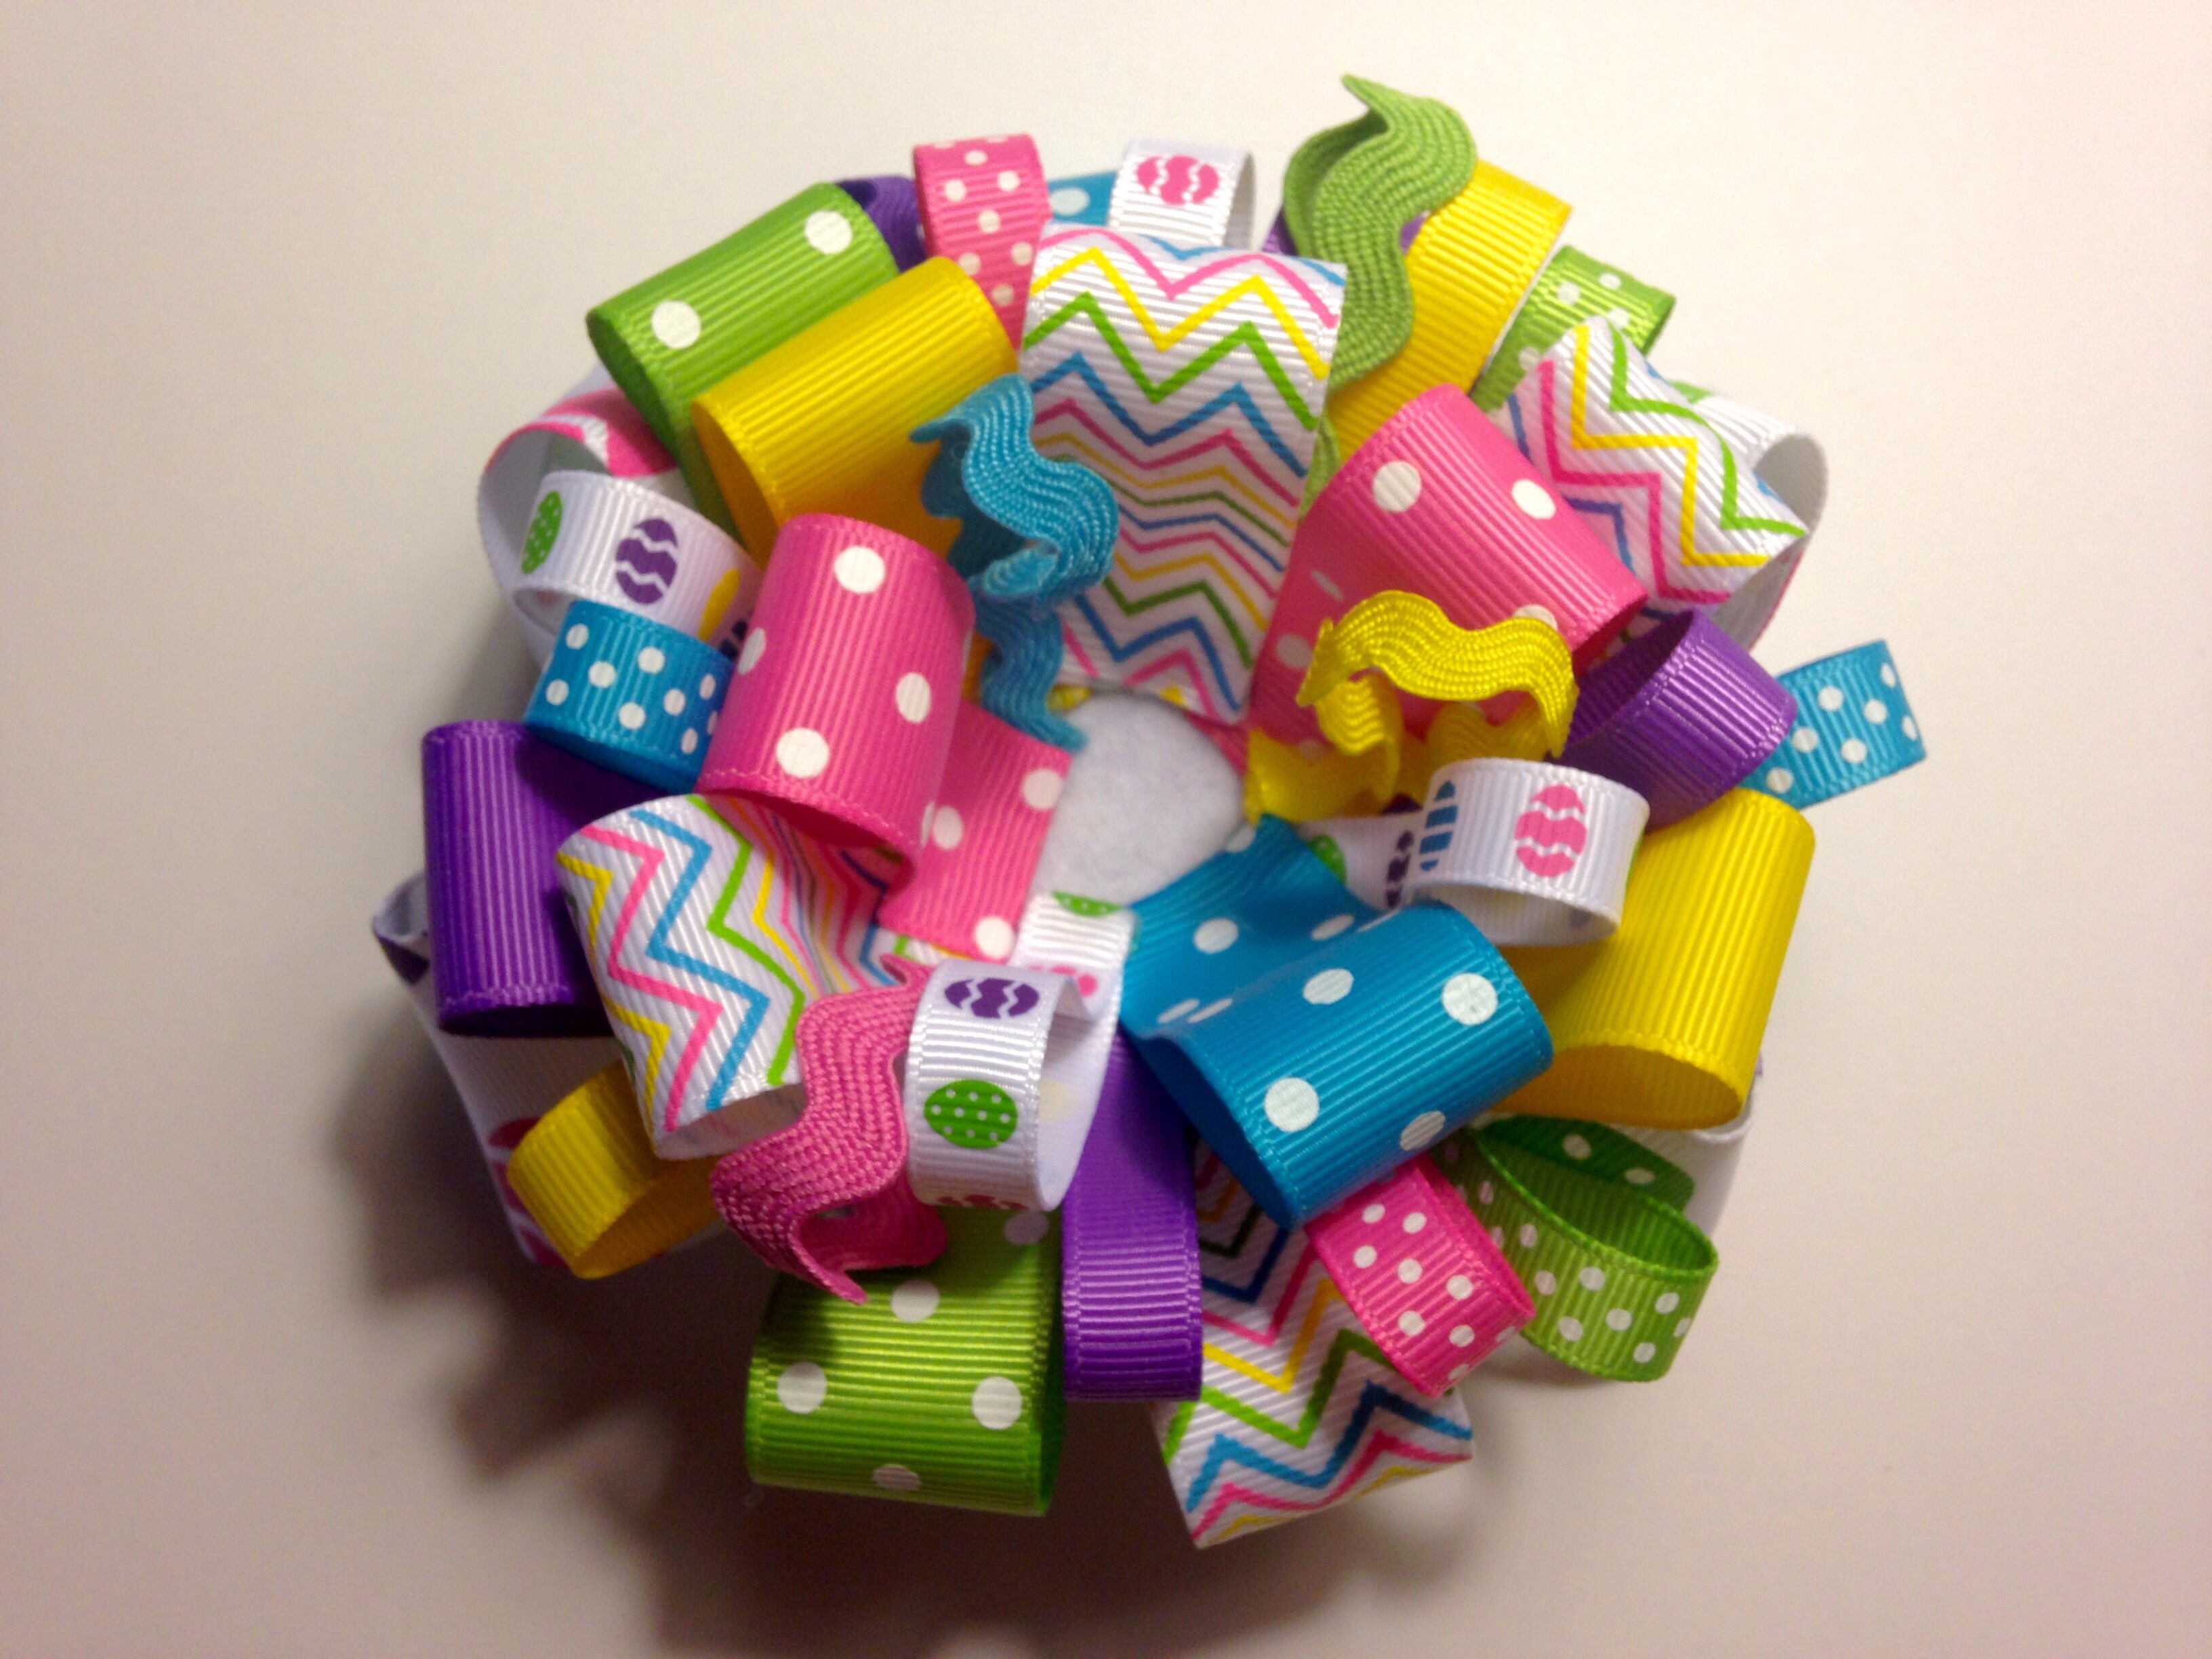 If you are happy with the look and fullness of your loops, place it back inside your base bow to see how they look together. If you need to add any additional loops now is the time! After your final loop is in place, we can add our marabou feathers to the center! HBC has a wonderful selection of beautiful feather colors so I am positive you will find exactly what you desire! I chose white to make all my existing colors really pop! (And it kind of reminds me of a sweet little bunnie's tail!)
 It only took between 3-4" of my fluffy marabou boa to fill my center... A little sure does go a long way! If you have never worked with these awesome marabou feather boas before, make sure to hold it over a trashcan while cutting to contain your mess. Attaching your marabou doesn't have to be hard or messy as some people claim. I use a super simple technique: Grab a scrap piece of 3/8" ribbon and cut 2 small squares. Hot glue your squares to the center piece of each end. To form a round feather puff bring your ribbon covered ends together, securing with hot glue. Now you have a perfectly round little fluffy puff! Add a generous amount of hot glue to the center of your felt pad and carefully add your feathers. Pretty easy right?! We are almost finished!
 With the same ribbon previously used, cut ribbon to make your bottom layer of spikes. I used a combination of 1.5" Easter egg ribbon and 7/8" ribbon in all colors cut to 6.5" in length. Cut your ends as desired and be sure to heat seal each piece. Arrange your spikes and hold the center together using a large salon clip.
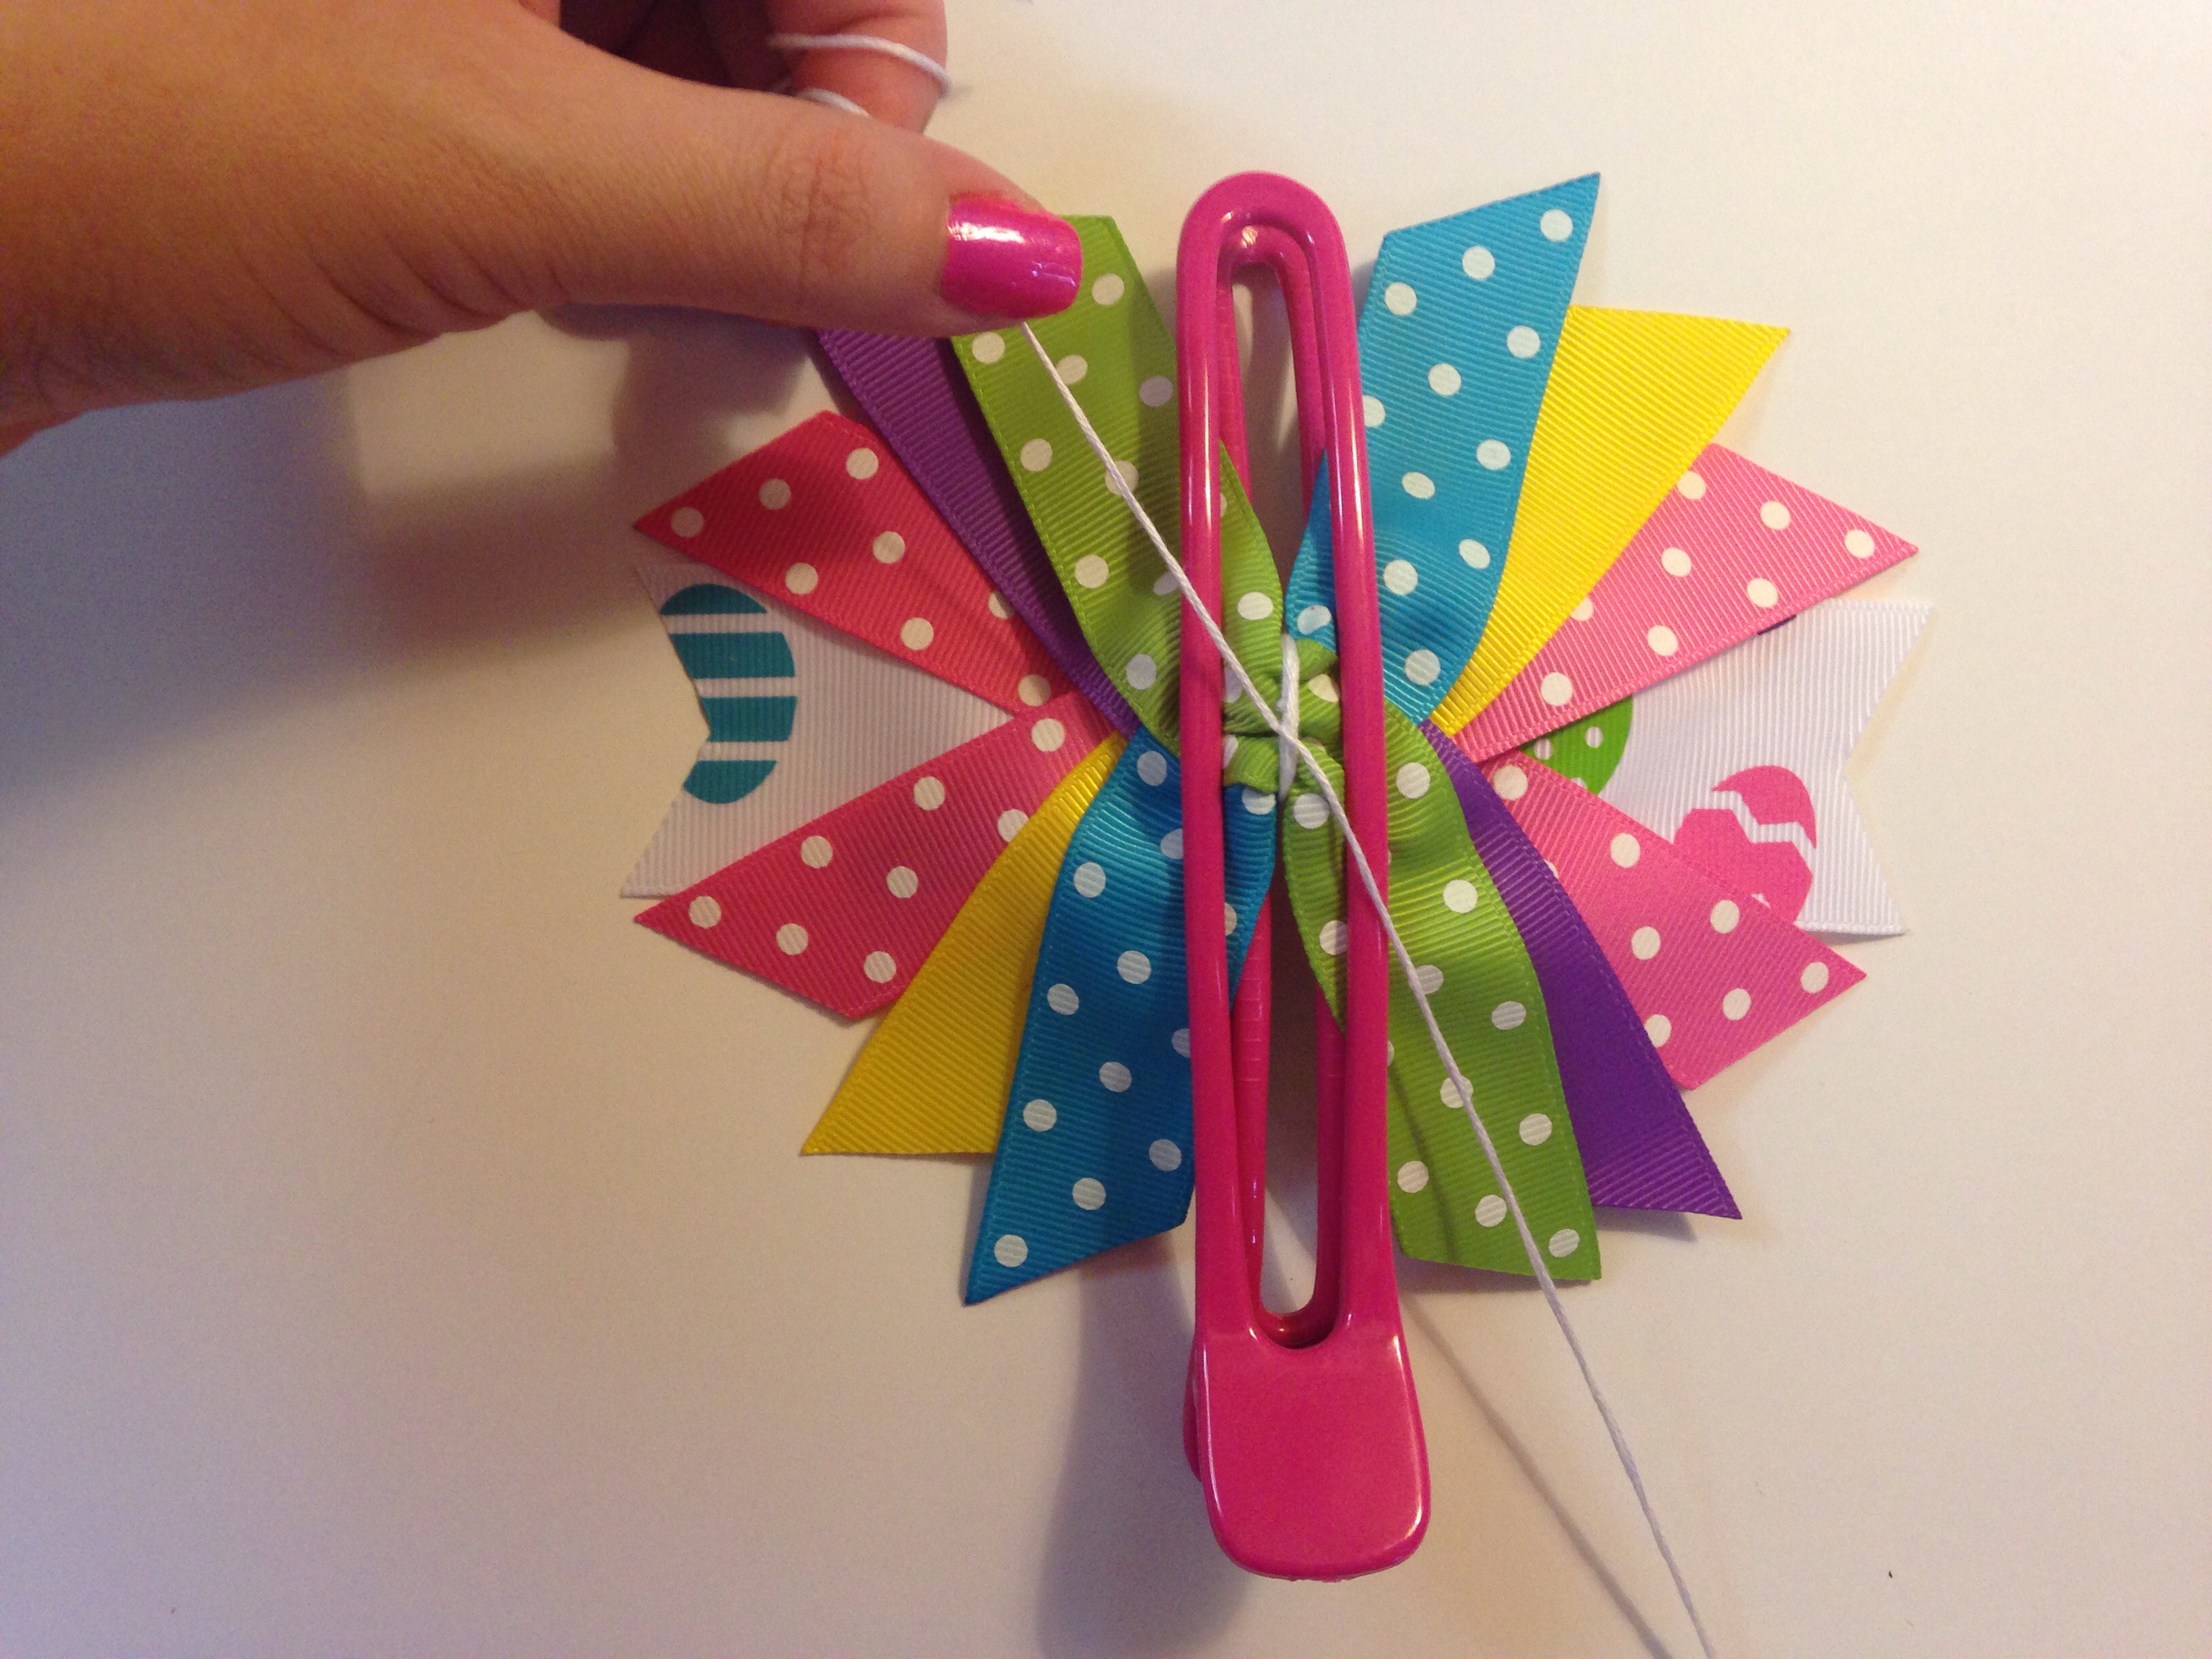 Thread your embroidery floss through the hollow spaces of the clip and around your ribbons twice. As you tie your thread into a knot, the ribbon centers will gather as you pull each side of the thread. After your knot is secure, un-clip your ribbon. I like to wrap around the center again and tie off for added security before cutting off my excess thread. If any of your ribbon slipped out of place during this process, don't worry! It can be held perfectly into place by adding a tiny dot of hot glue near the center gathering, and will not be seen in your finished bow.
 Now we will attach our bottom two layers. I like to make sure all my bows are excellent quality and hold together forever as they should. So before wrapping the center of my bow and spikes together, I like to secure the layers with hot glue. Using 3/8" ribbon of your choice, wrap around your bow and spikes. Don't forget to add your alligator clip to the back.
One last step! To attach your loops & feathers to the base layers, add hot glue to the entire area of the bow that your felt pad sits on. Be careful not to put too much glue close to the edges to avoid glue from oozing out. Let the top layer set in the glue for a few seconds to dry and then you can fluff up those loops!
Now we will attach our bottom two layers. I like to make sure all my bows are excellent quality and hold together forever as they should. So before wrapping the center of my bow and spikes together, I like to secure the layers with hot glue. Using 3/8" ribbon of your choice, wrap around your bow and spikes. Don't forget to add your alligator clip to the back.
One last step! To attach your loops & feathers to the base layers, add hot glue to the entire area of the bow that your felt pad sits on. Be careful not to put too much glue close to the edges to avoid glue from oozing out. Let the top layer set in the glue for a few seconds to dry and then you can fluff up those loops!
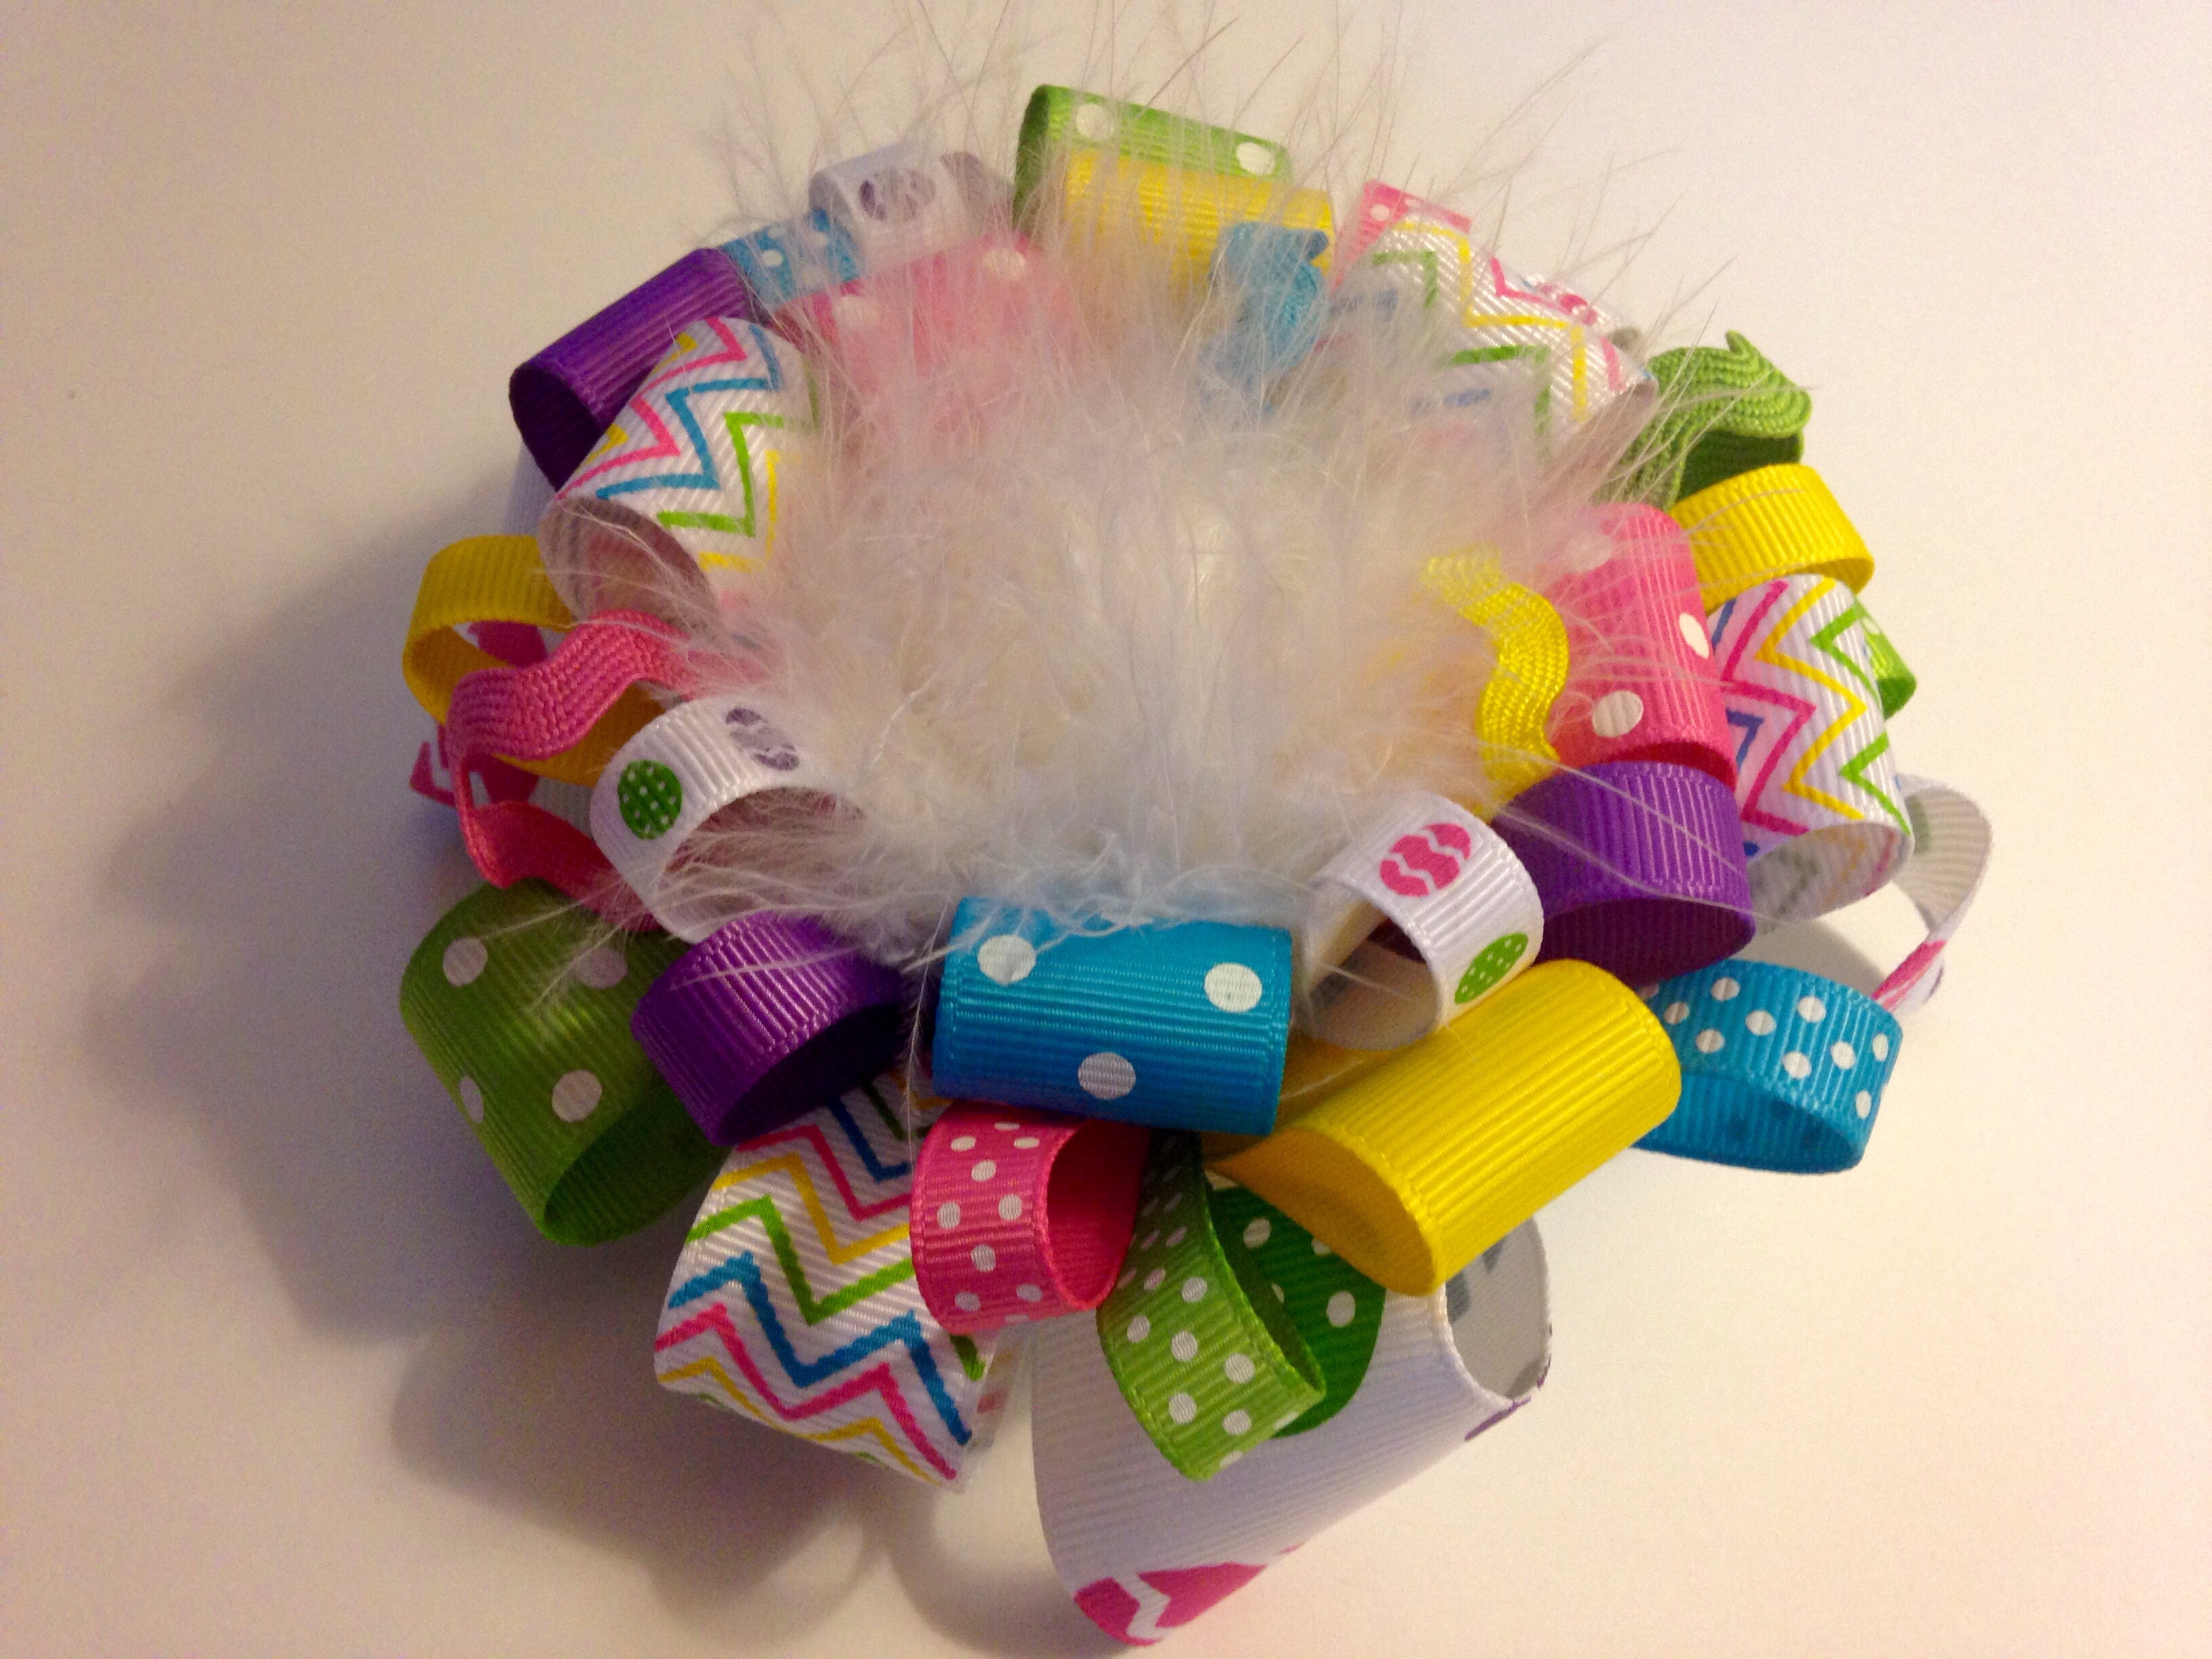
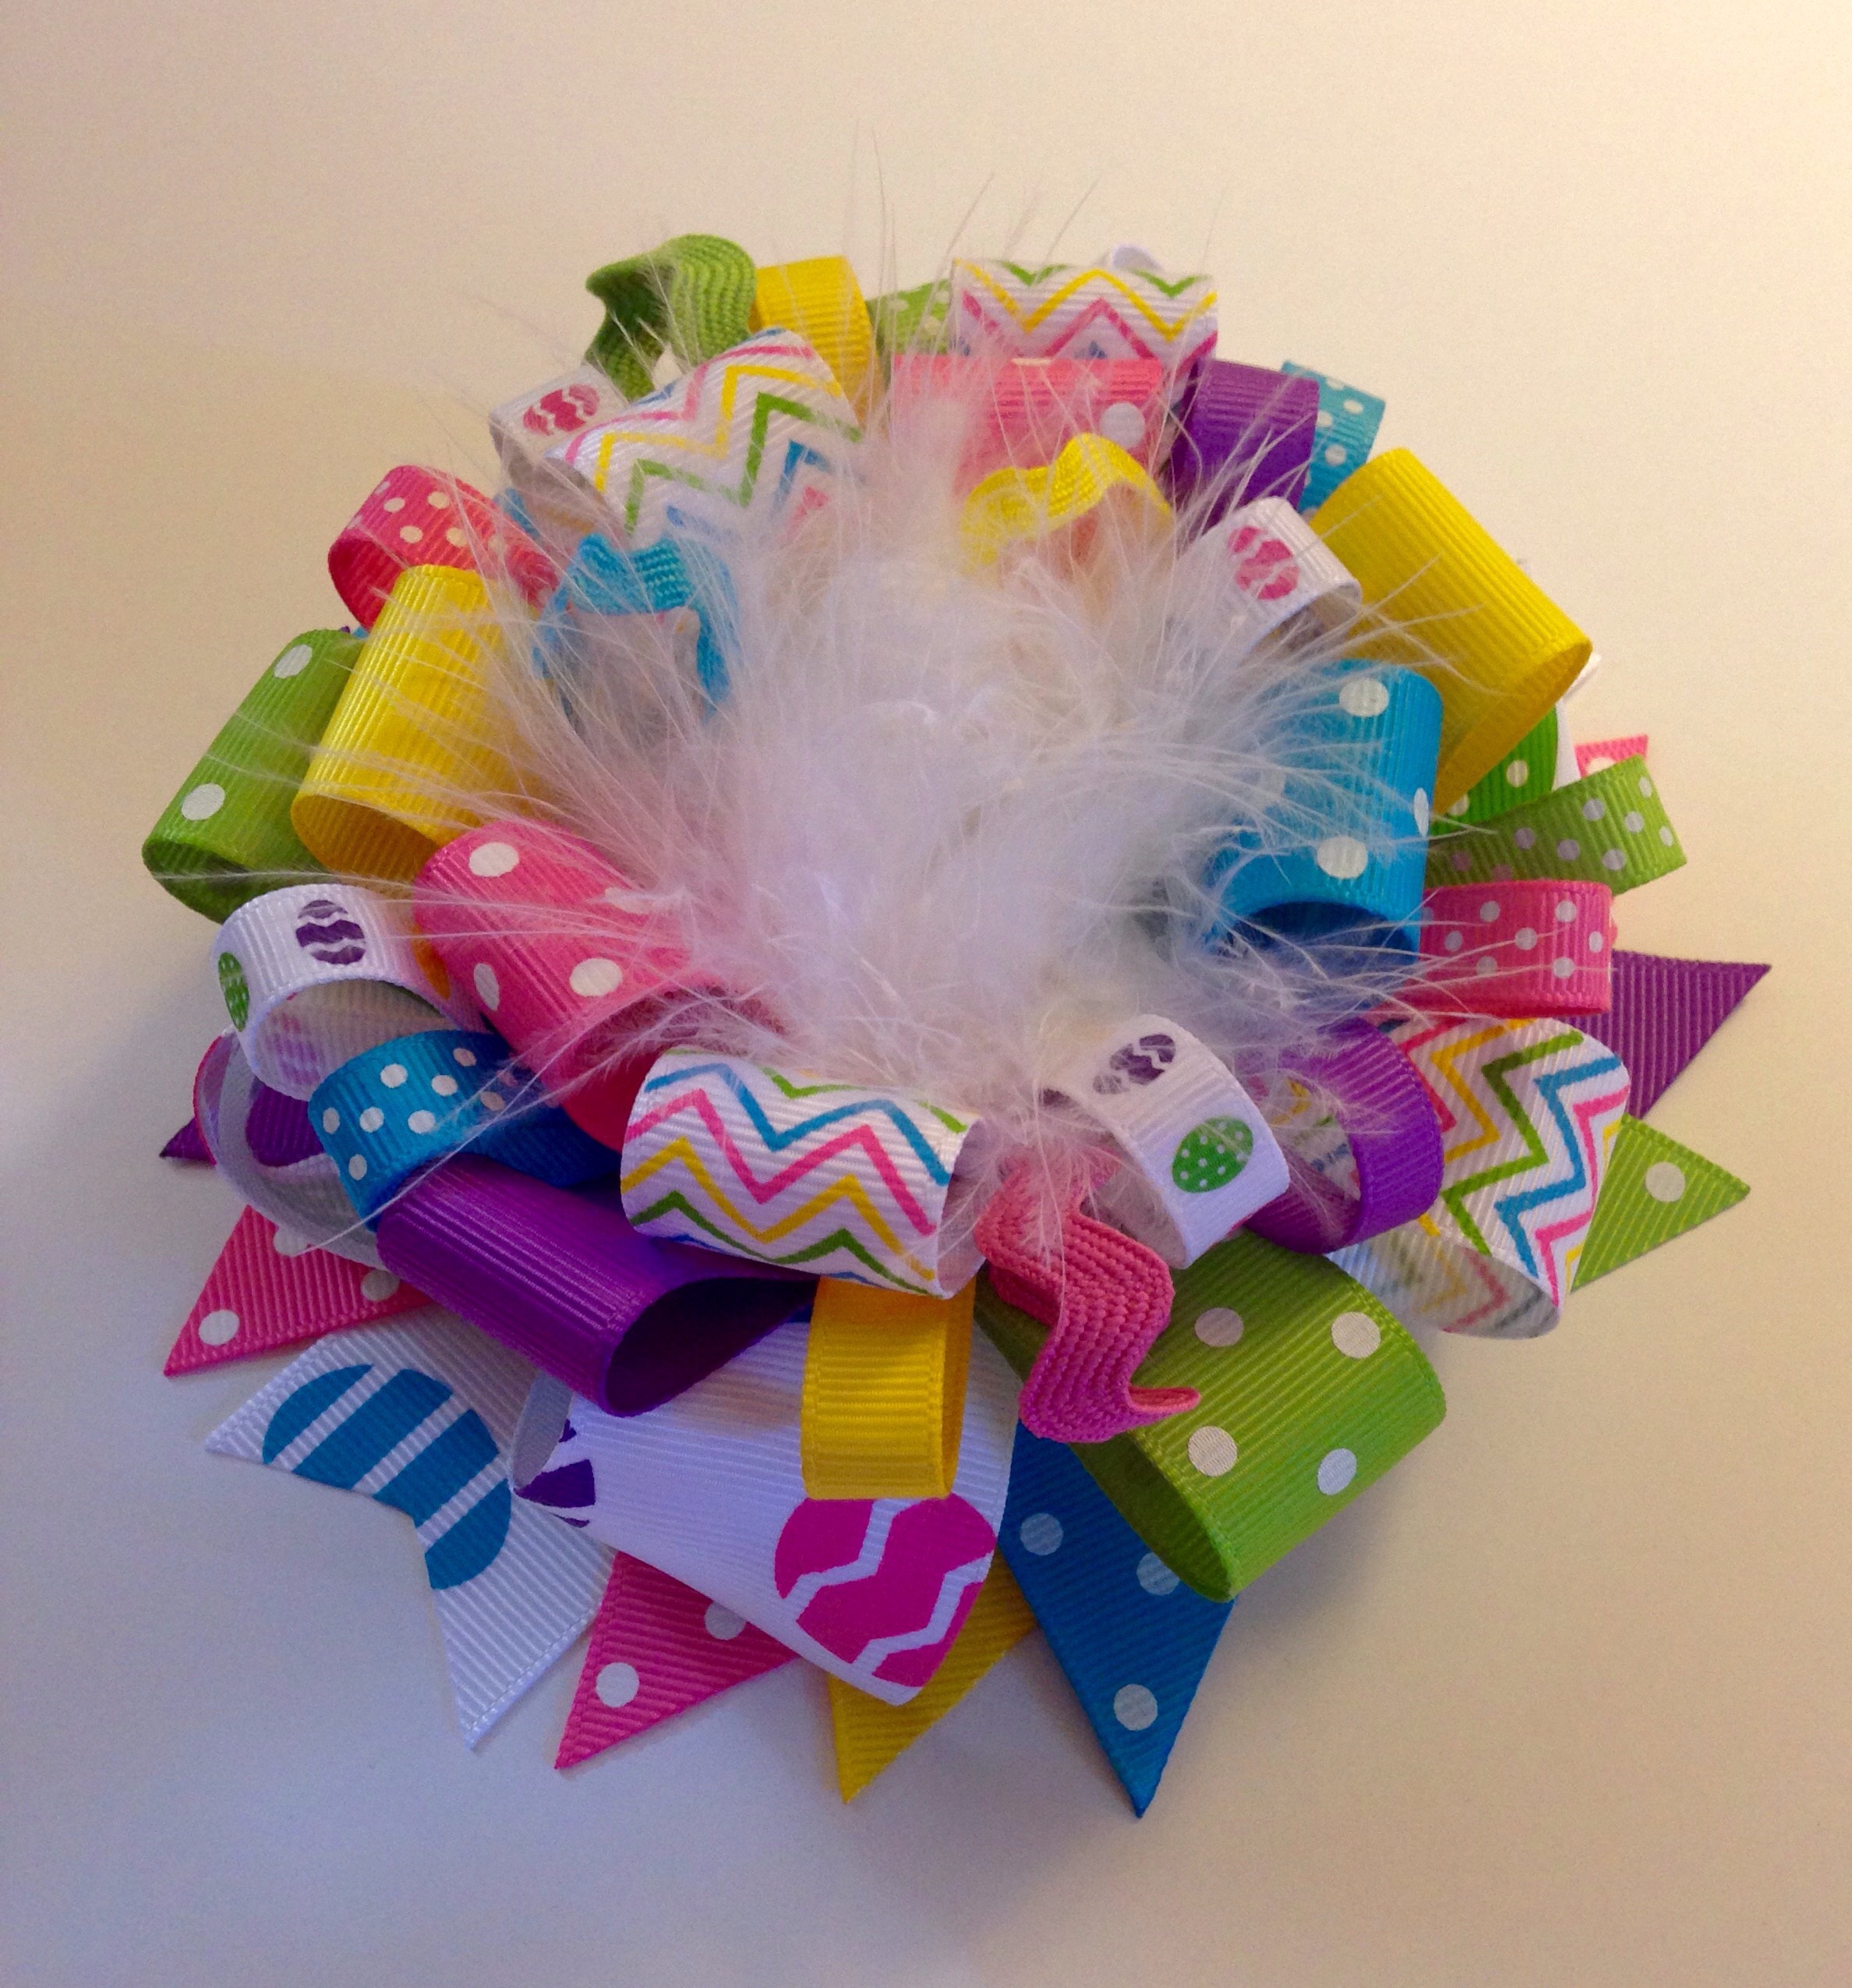 TA-DA! Take a look at the show-stopping masterpiece you have just created! Sure, it's more time consuming than your average bow, but in the end you have a beautiful, one of a kind design for your sweet little Easter lover that is sure to make her feel (& look!) EGGstra special!!
Visit the rest of our blog for more Crafting Tutorials and DIY Instructions!
Loading...

