Contributor post by Danielle at Korker Krazy
Today I'm going to show you how to make a layered loop bow - these are one of my favorite bows to create! These can be made very small and dainty or larger with even more layers added.
Supplies Needed: 3/8" Ribbon I'm using Hot Pink Swiss Dots, Pink and Shocking Pink Needle & Thread Scissors or Wood burner Hot Glue Alligator Clip or Lined Alligator Clip Optional* Bottle Cap Making Supplies (Bottle Cap, 1" Image, 1" Hole Punch, Super Glue)
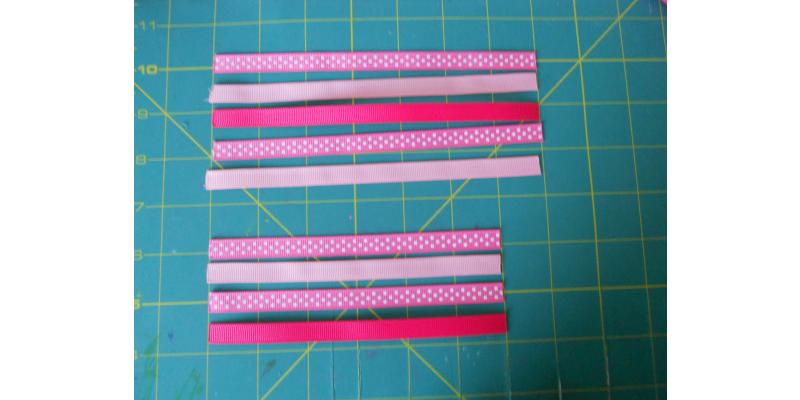
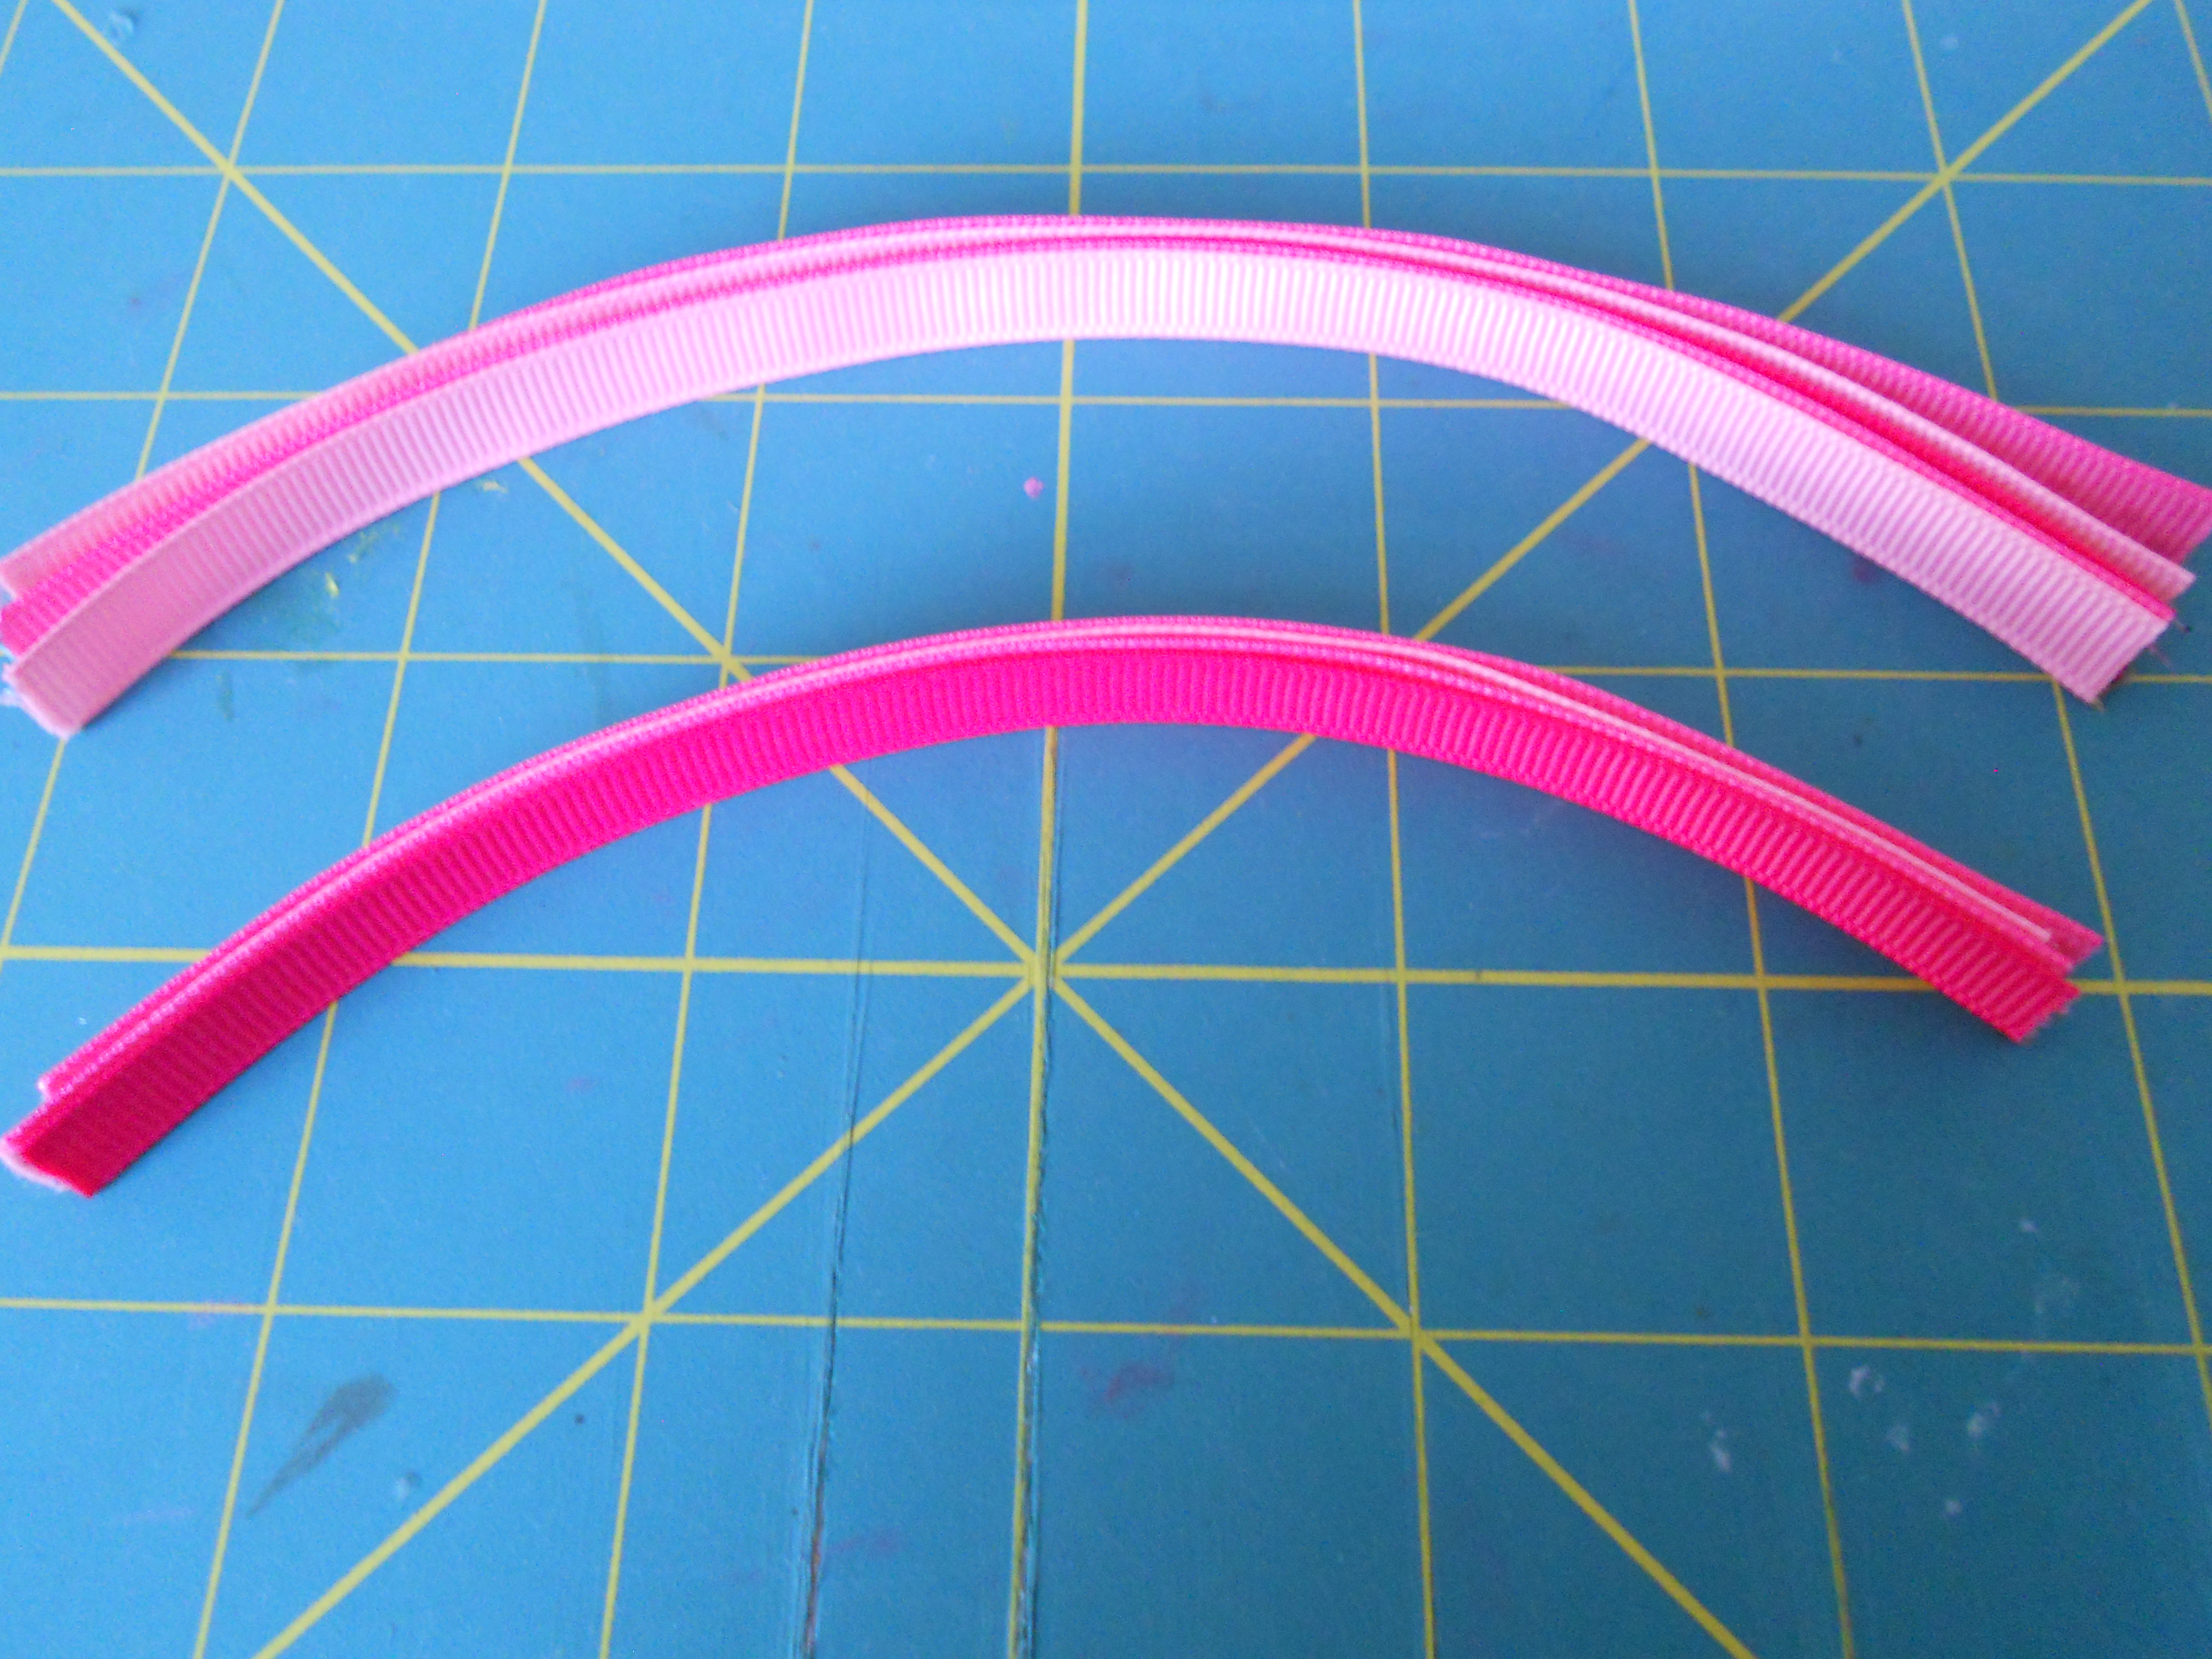
Step 1: Cut your ribbon! Cut 4 pieces of ribbon at 6" and 5 pieces of ribbon at 7". You can mix up the colors however you want! If you are not using a wood burner to cut your ribbon make sure you heat seal your ribbon ends!
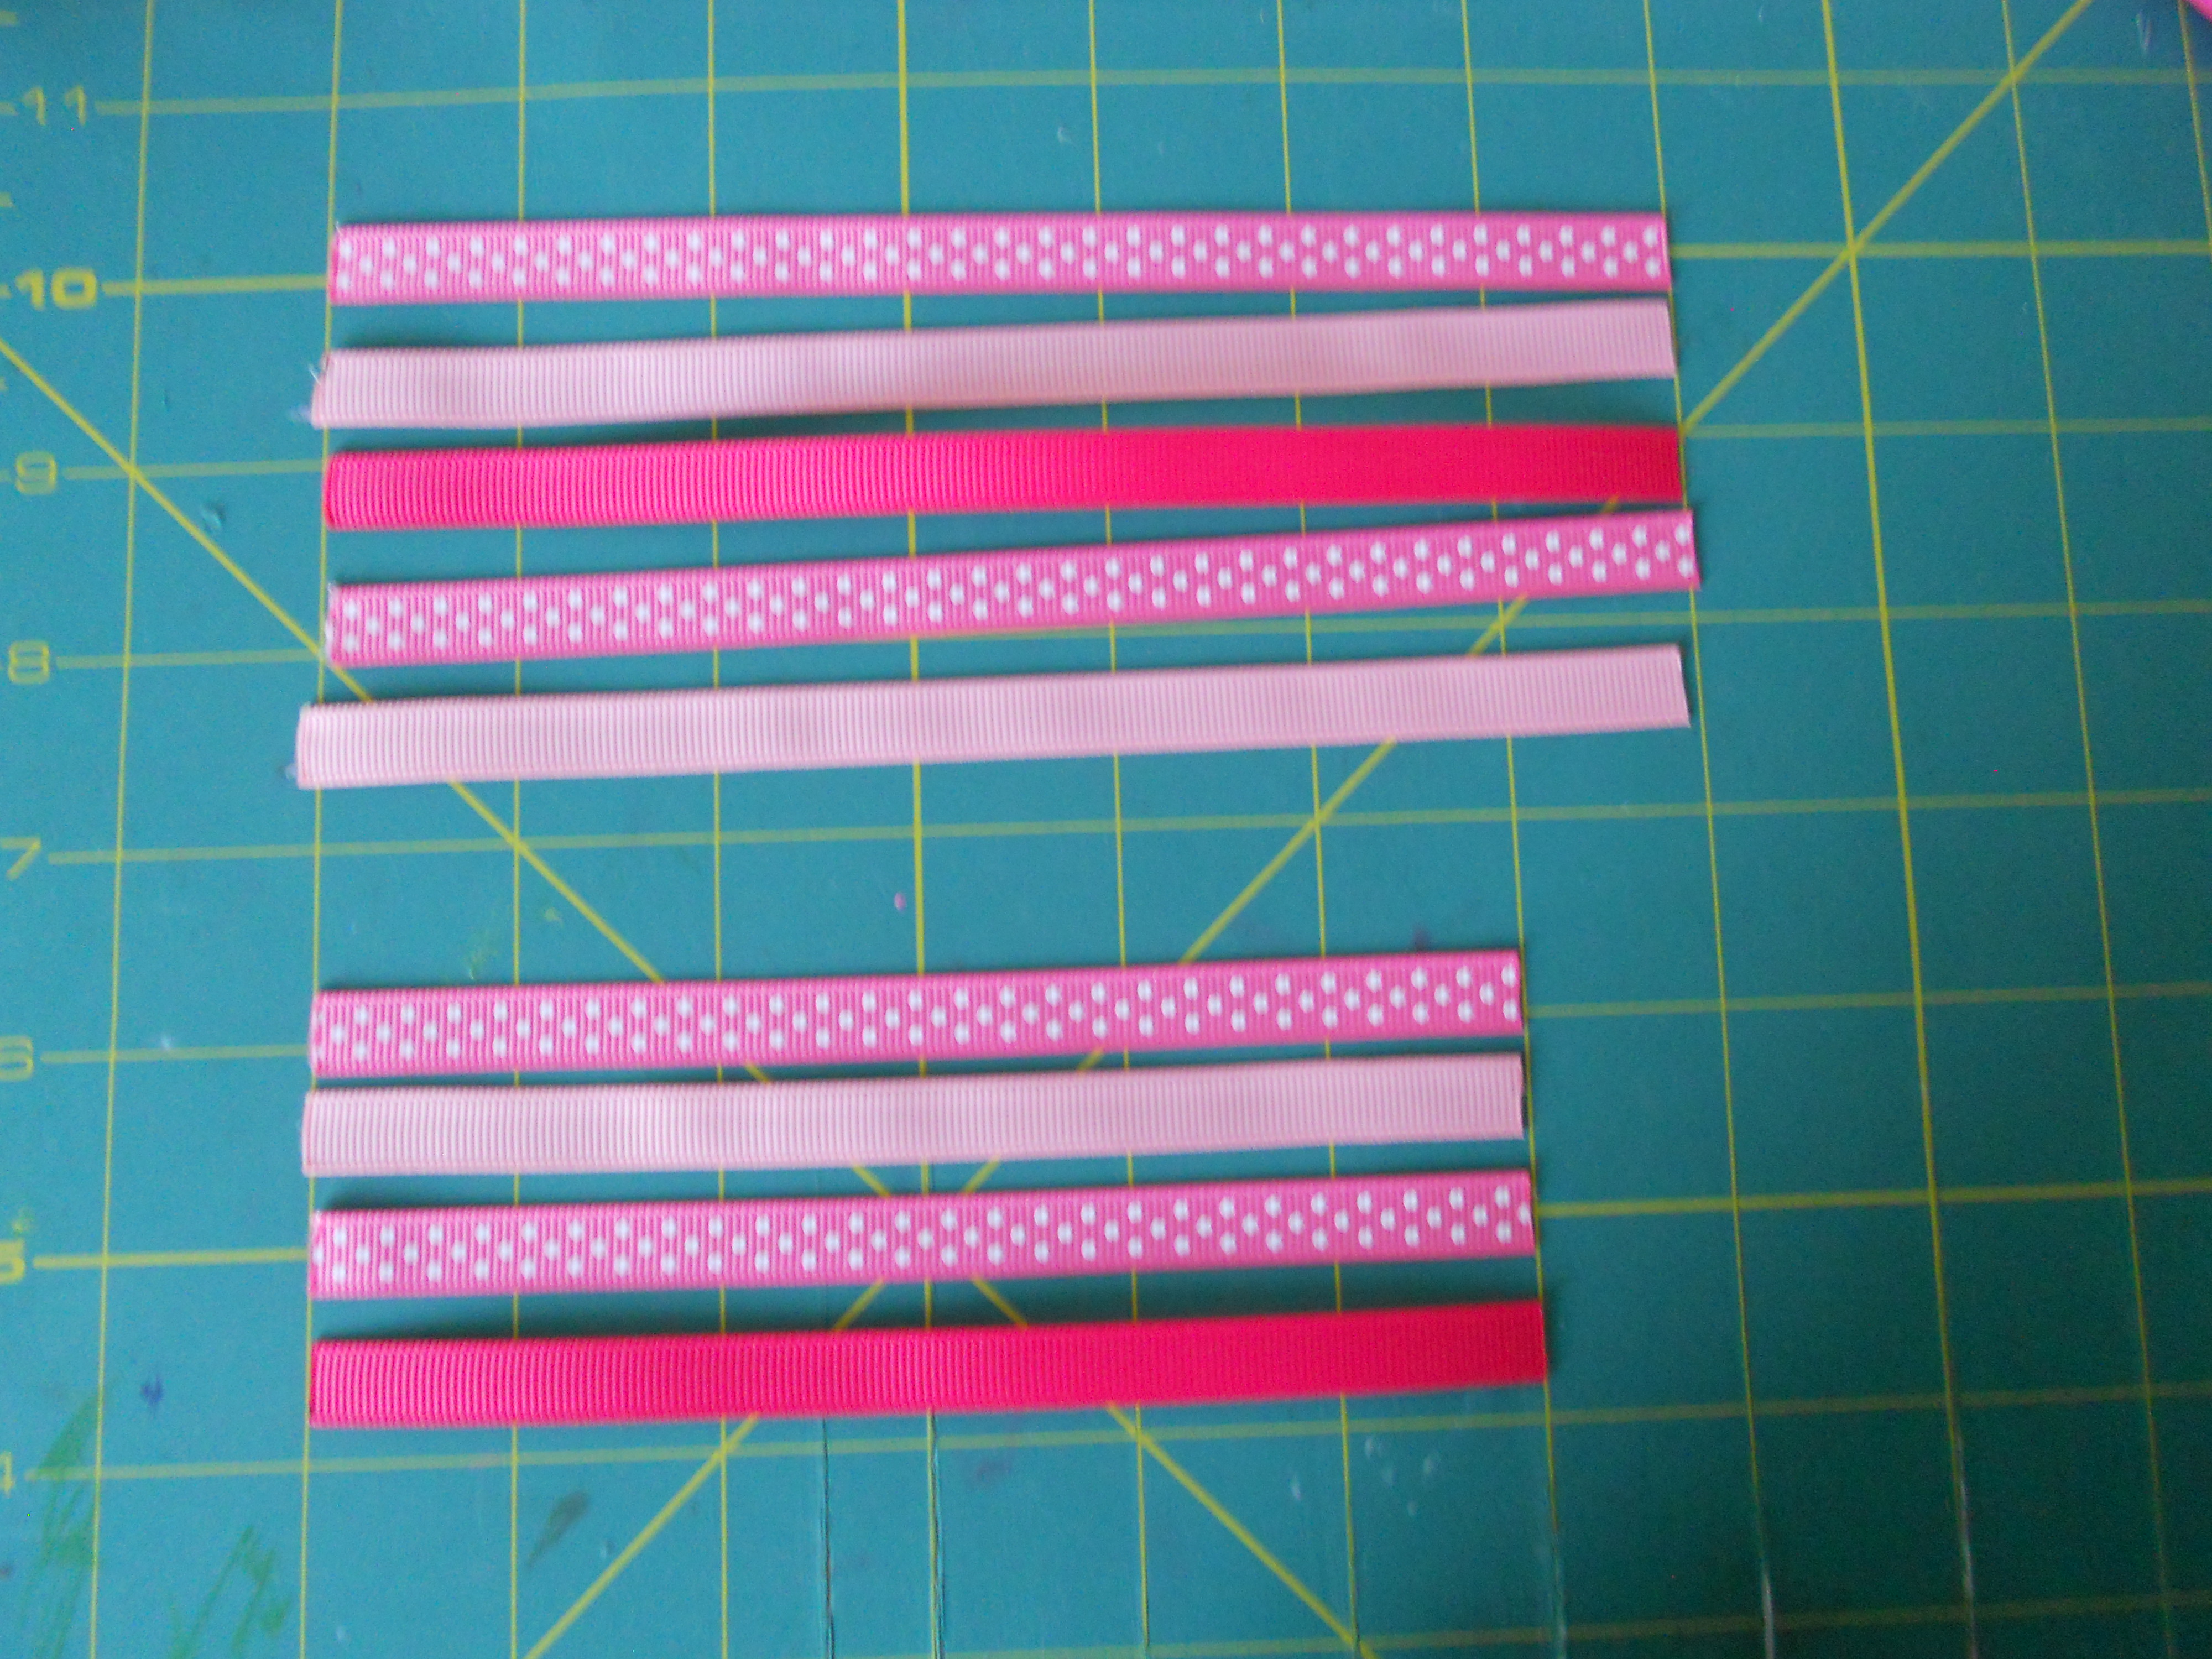
Step 2: Line up your four 6" pieces of ribbon in the order you would like them for your bow.
Step 3: Line up your five 7" pieces of ribbon in the order you would like them for your bow.
Step 4: Thread your needle and tie a secure knot. Thread your needle through the center of your four 6" pieces of ribbon. If you are using a printed ribbon make sure it is facing up.
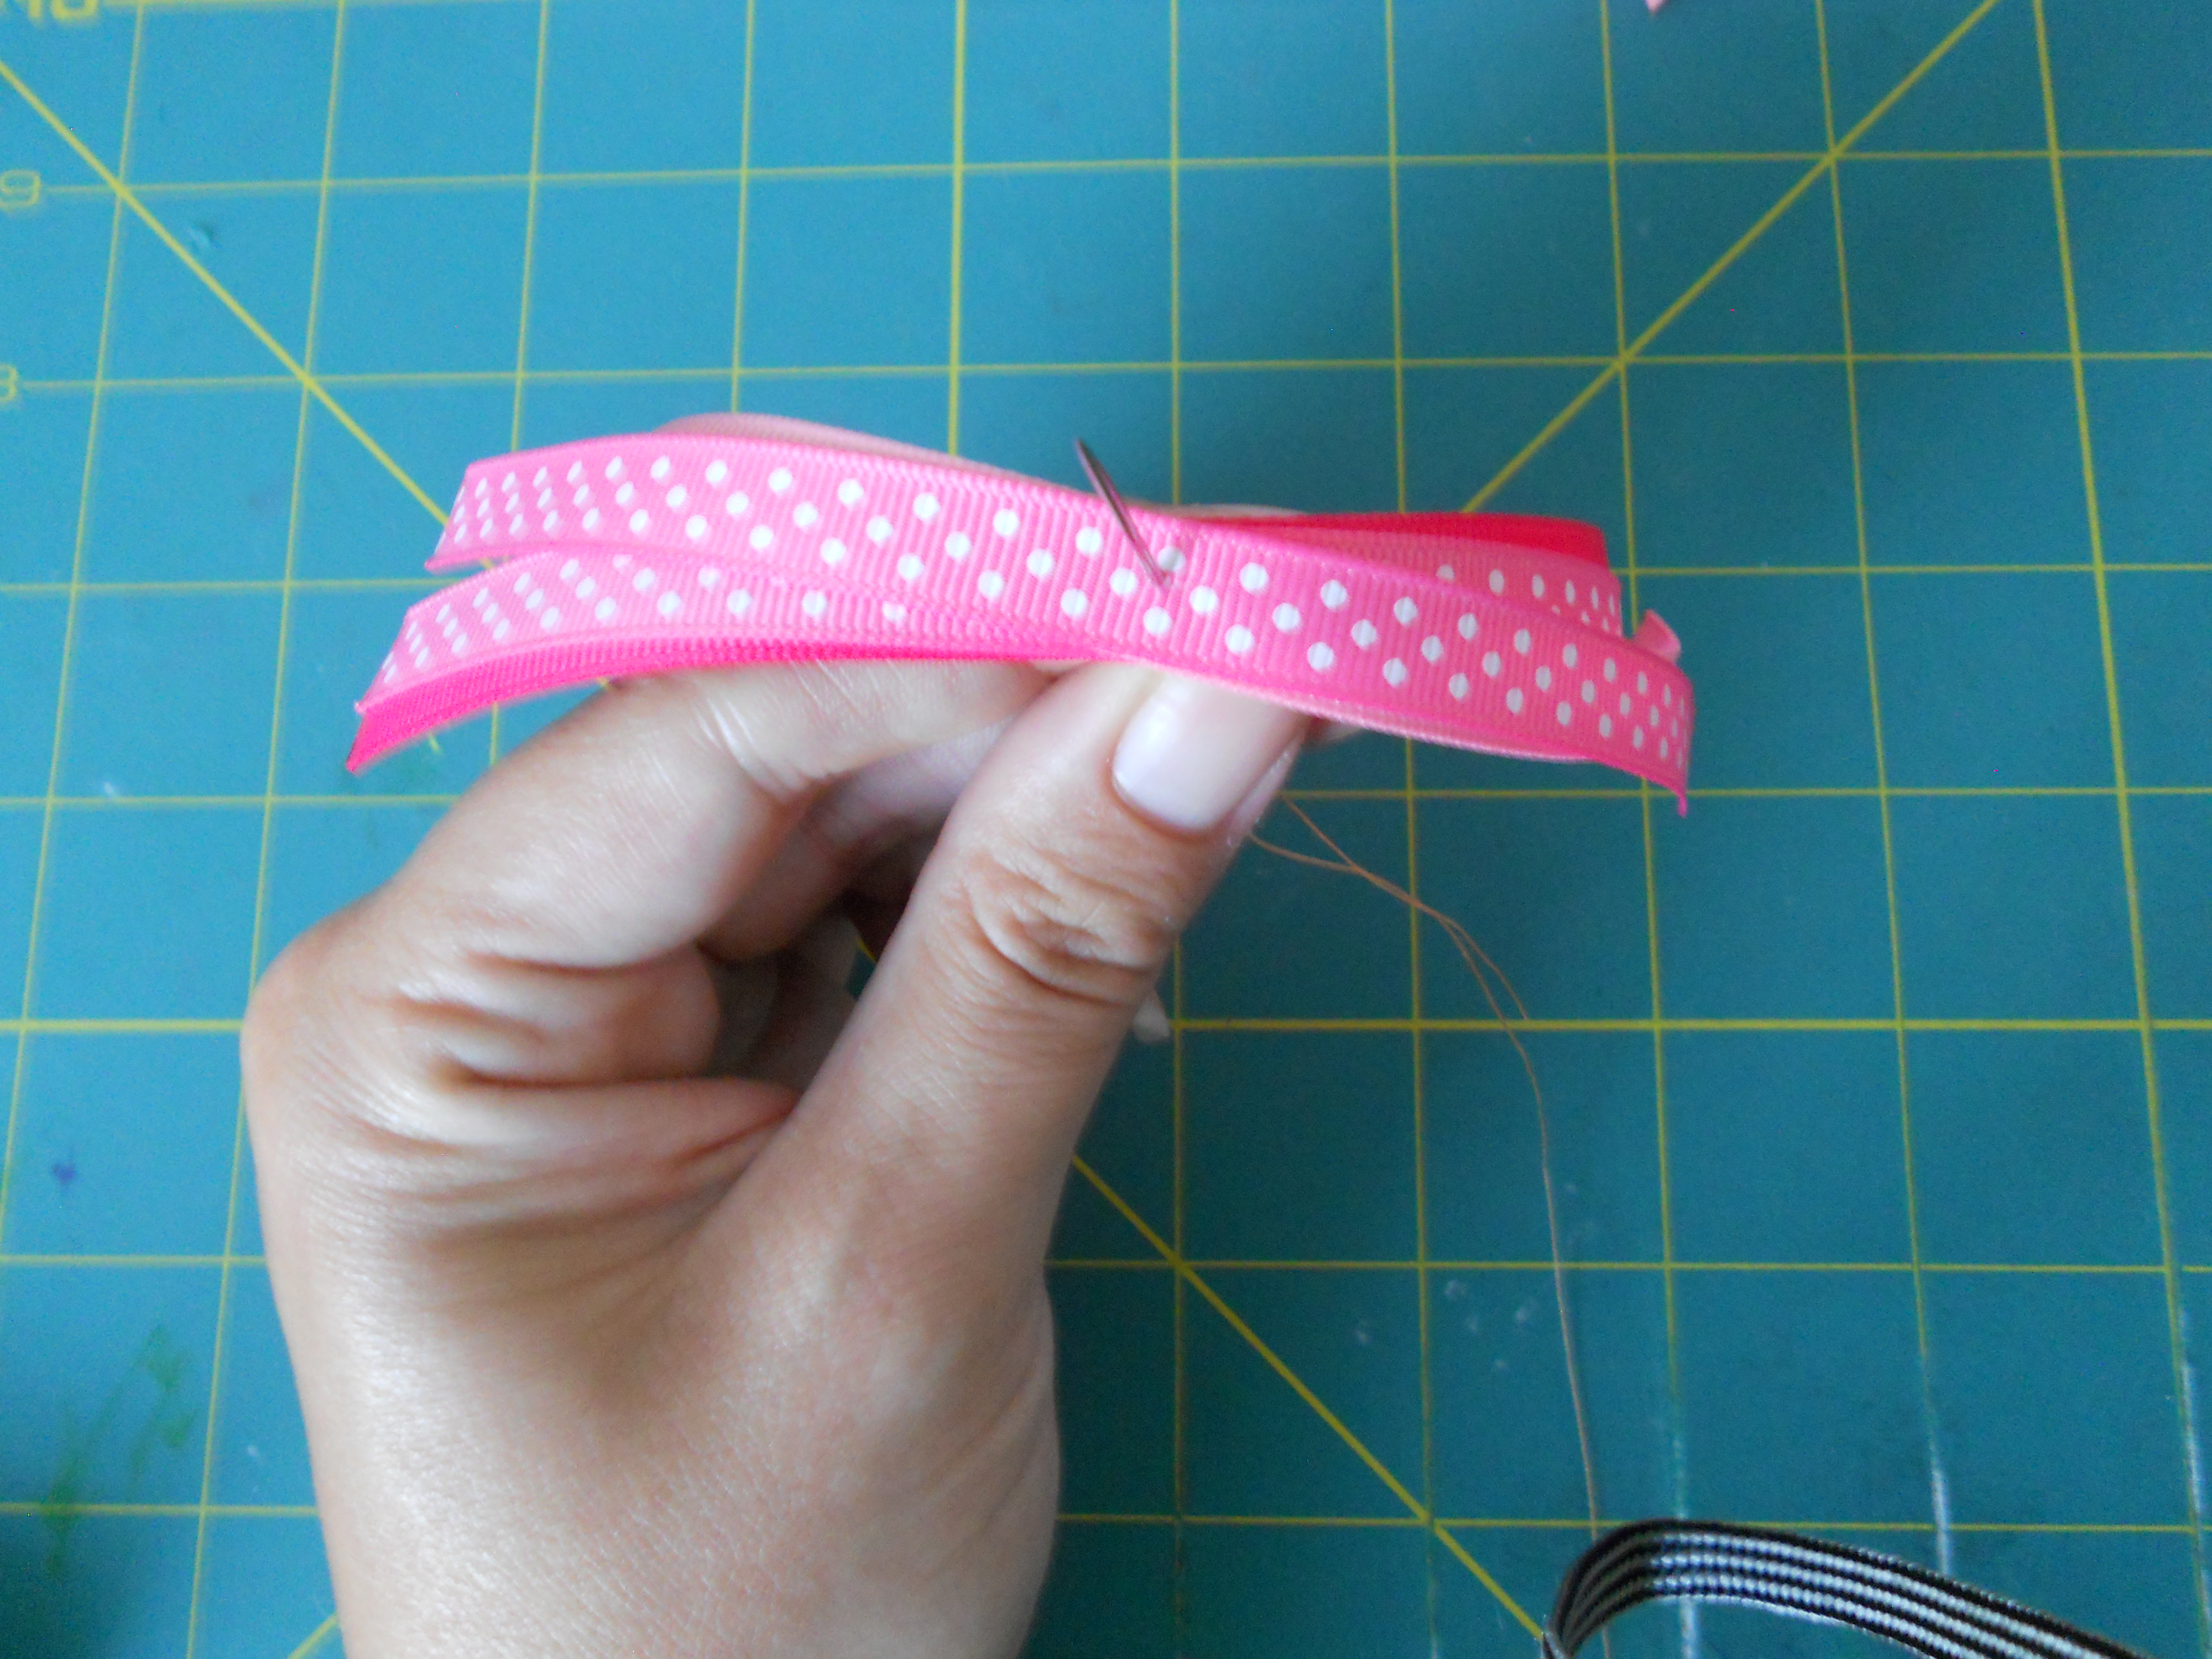
Step 5: Fan out your ribbon pieces. Thread them onto the needle starting with the ribbon on the bottom of the needle. One at a time loop your ribbon up and to the right and thread it onto the needle.
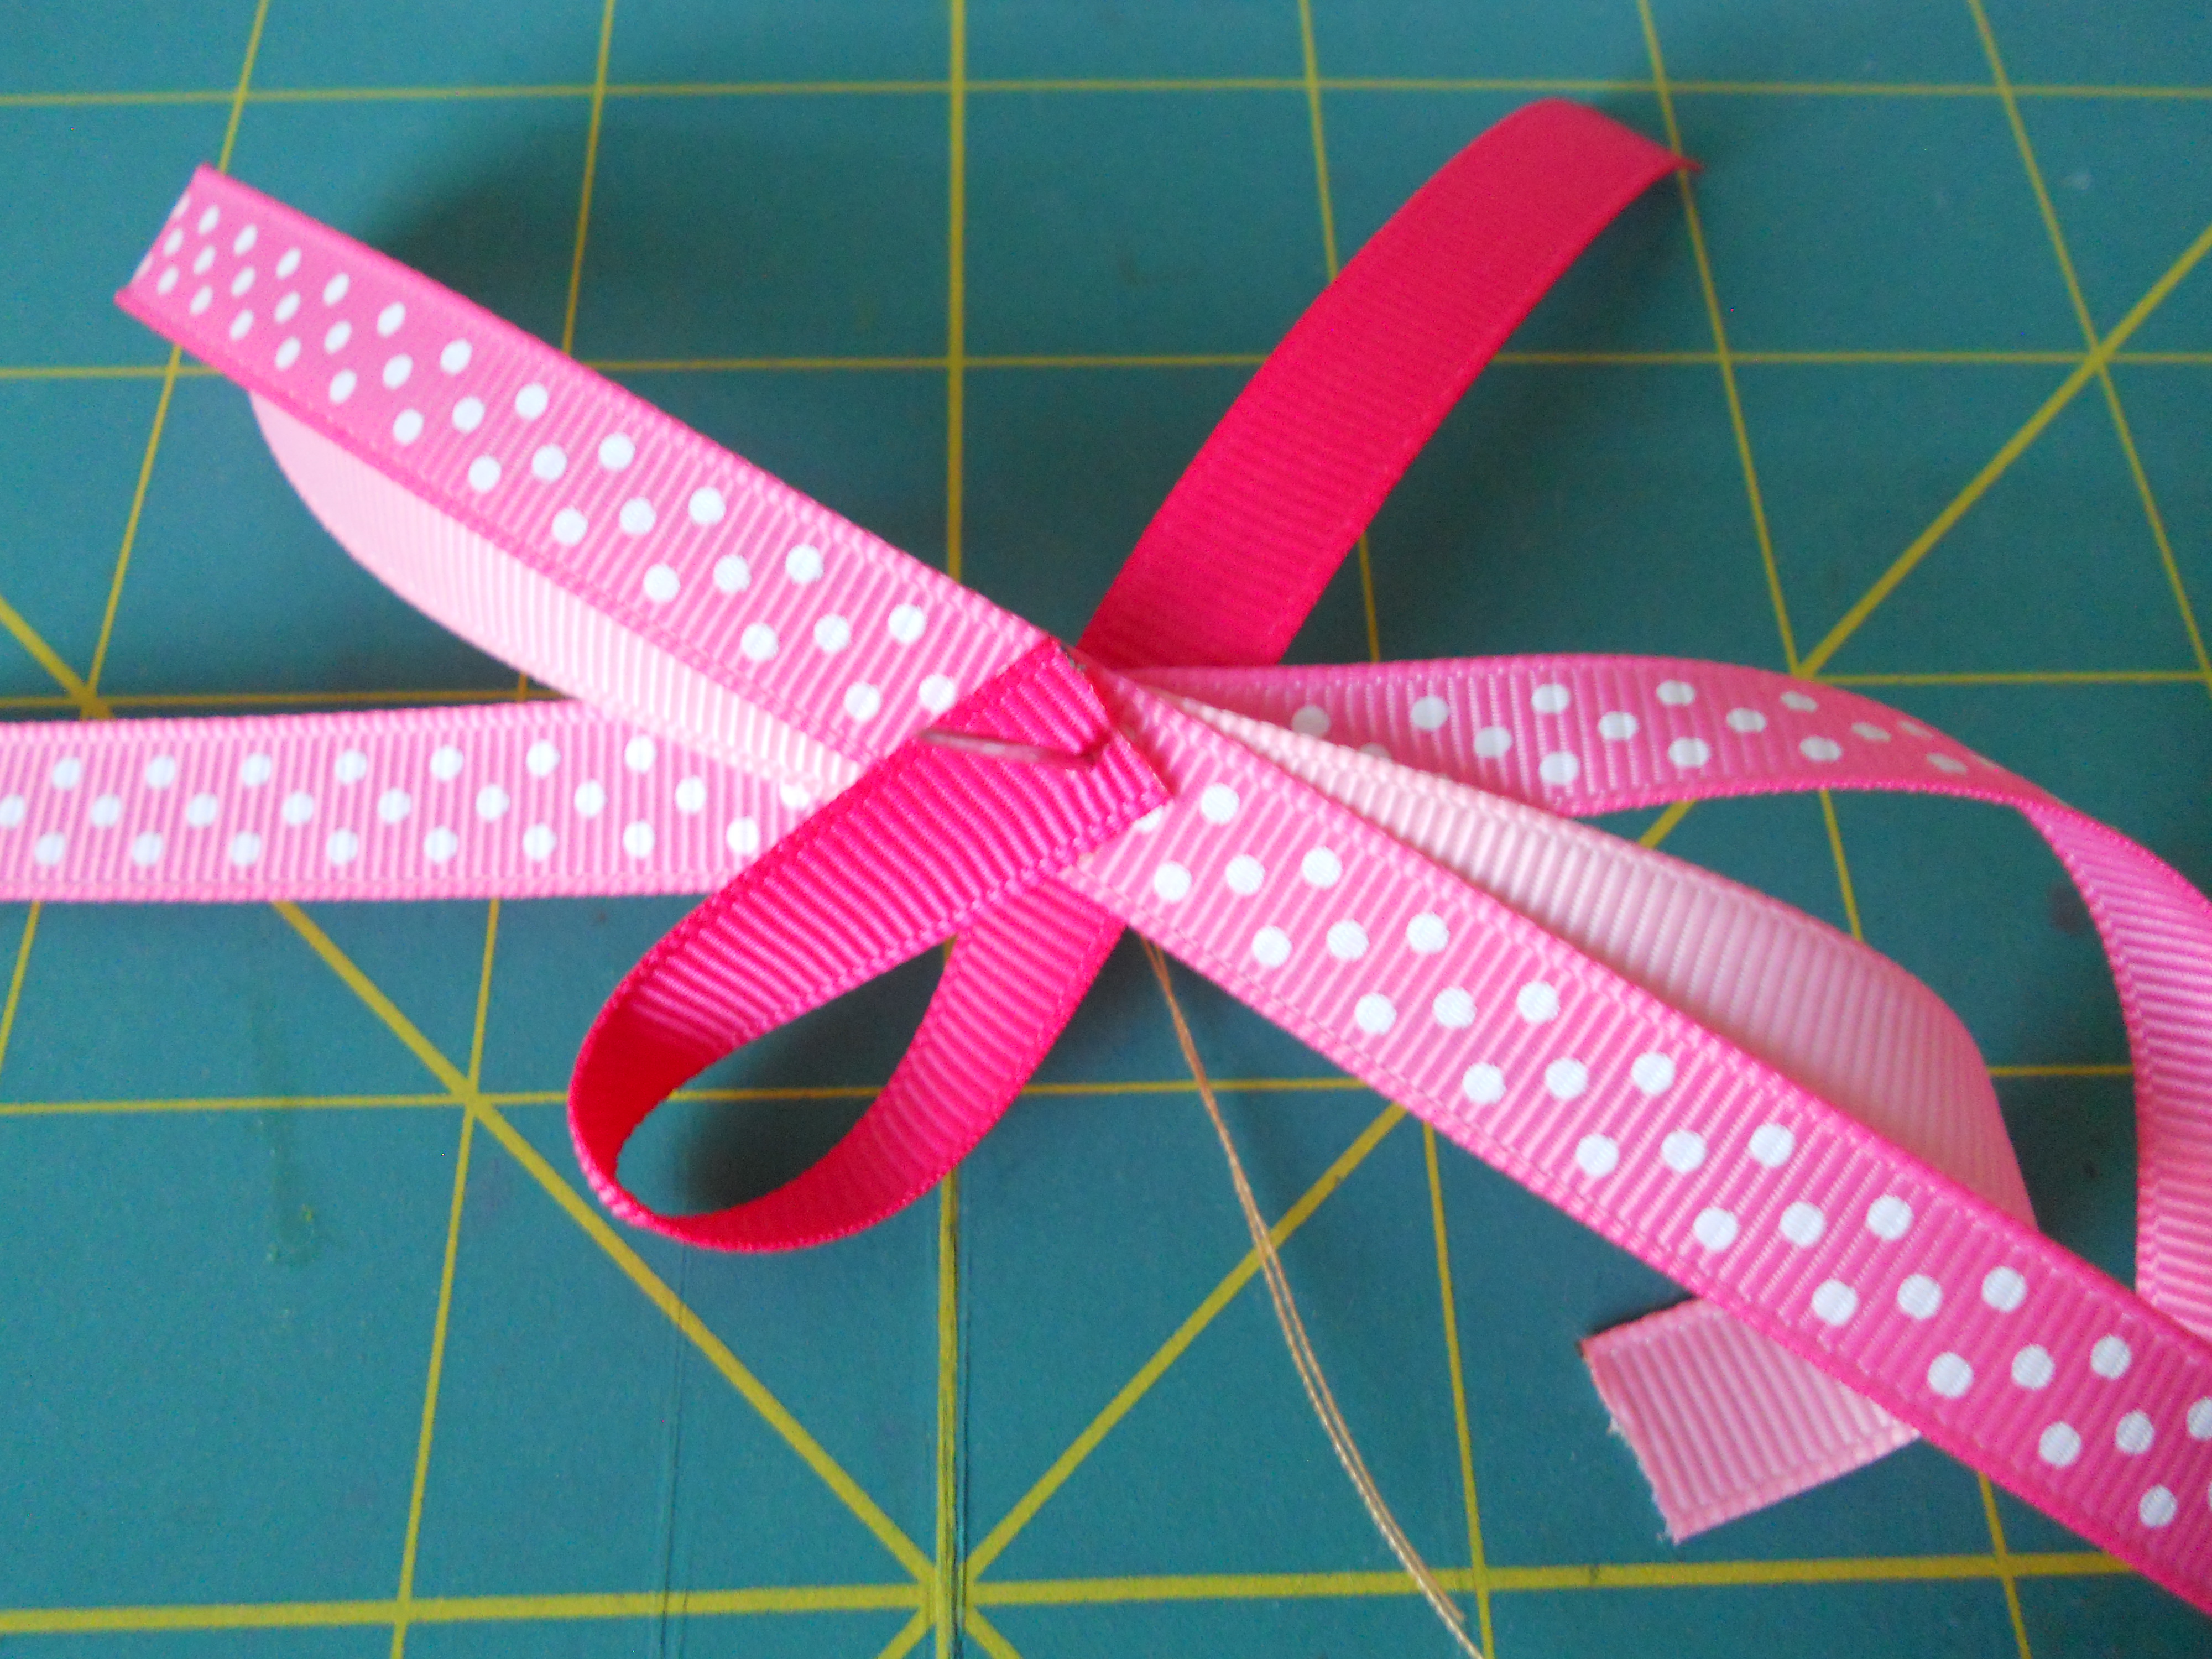
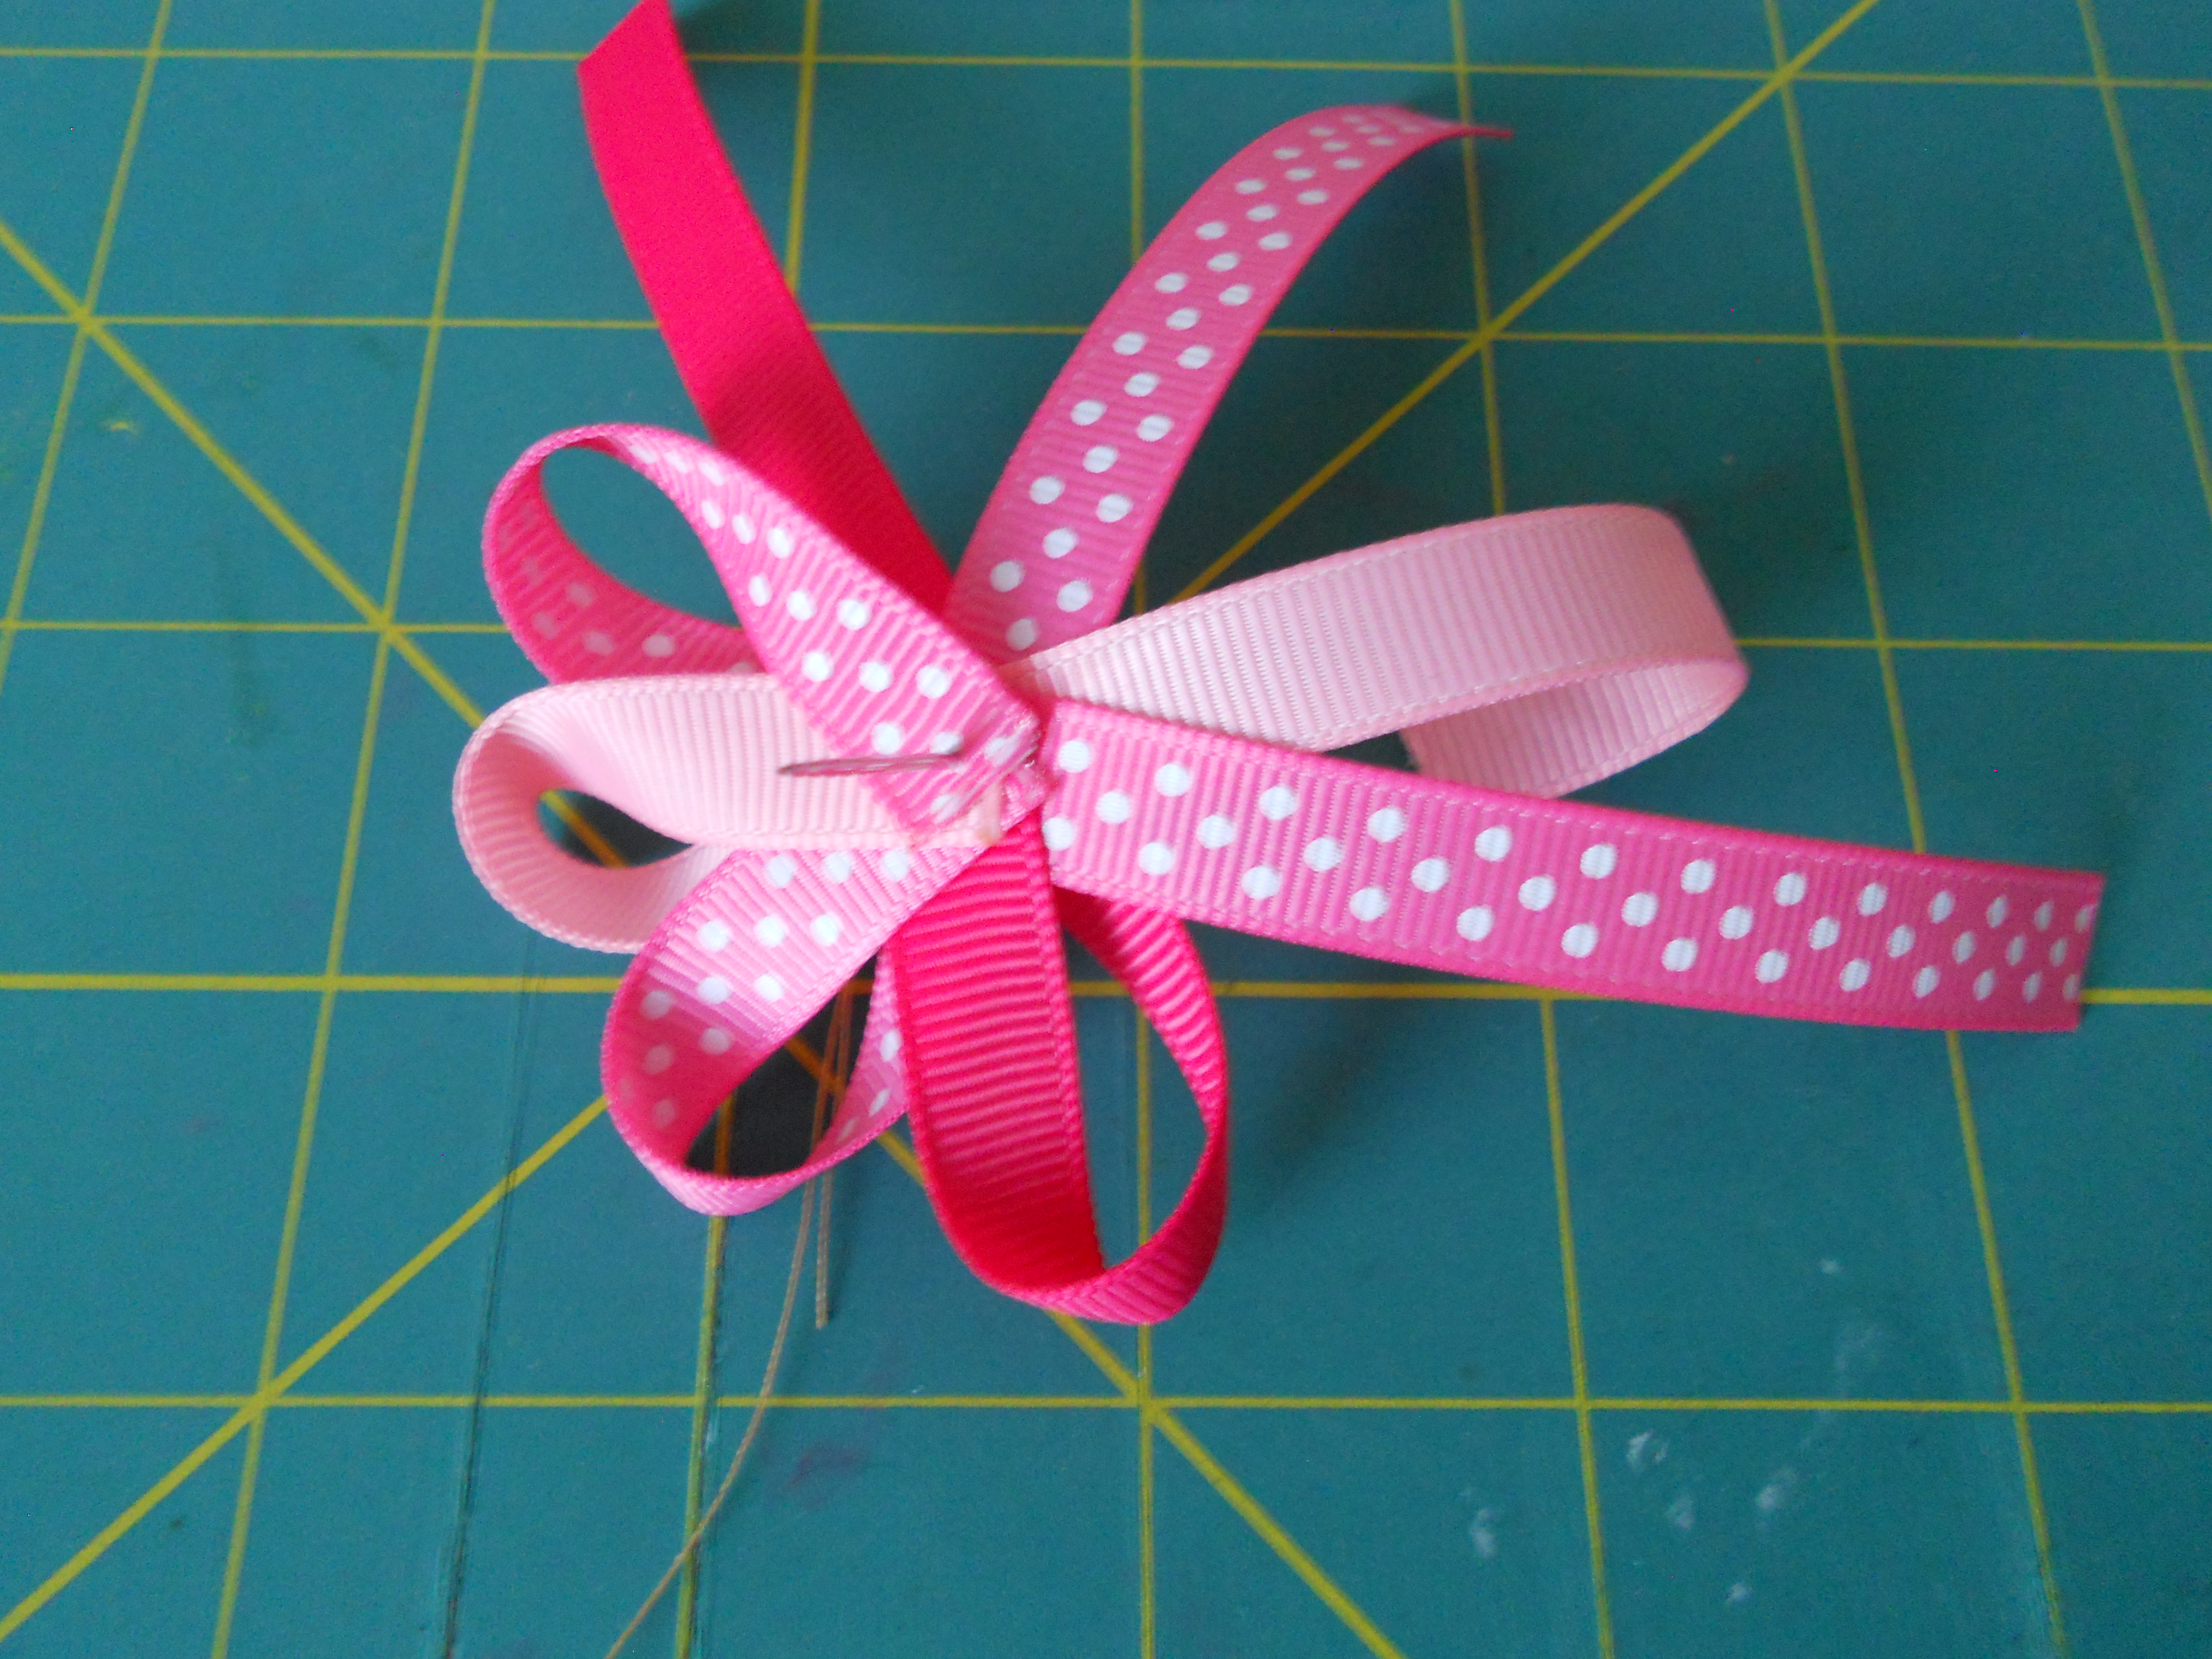
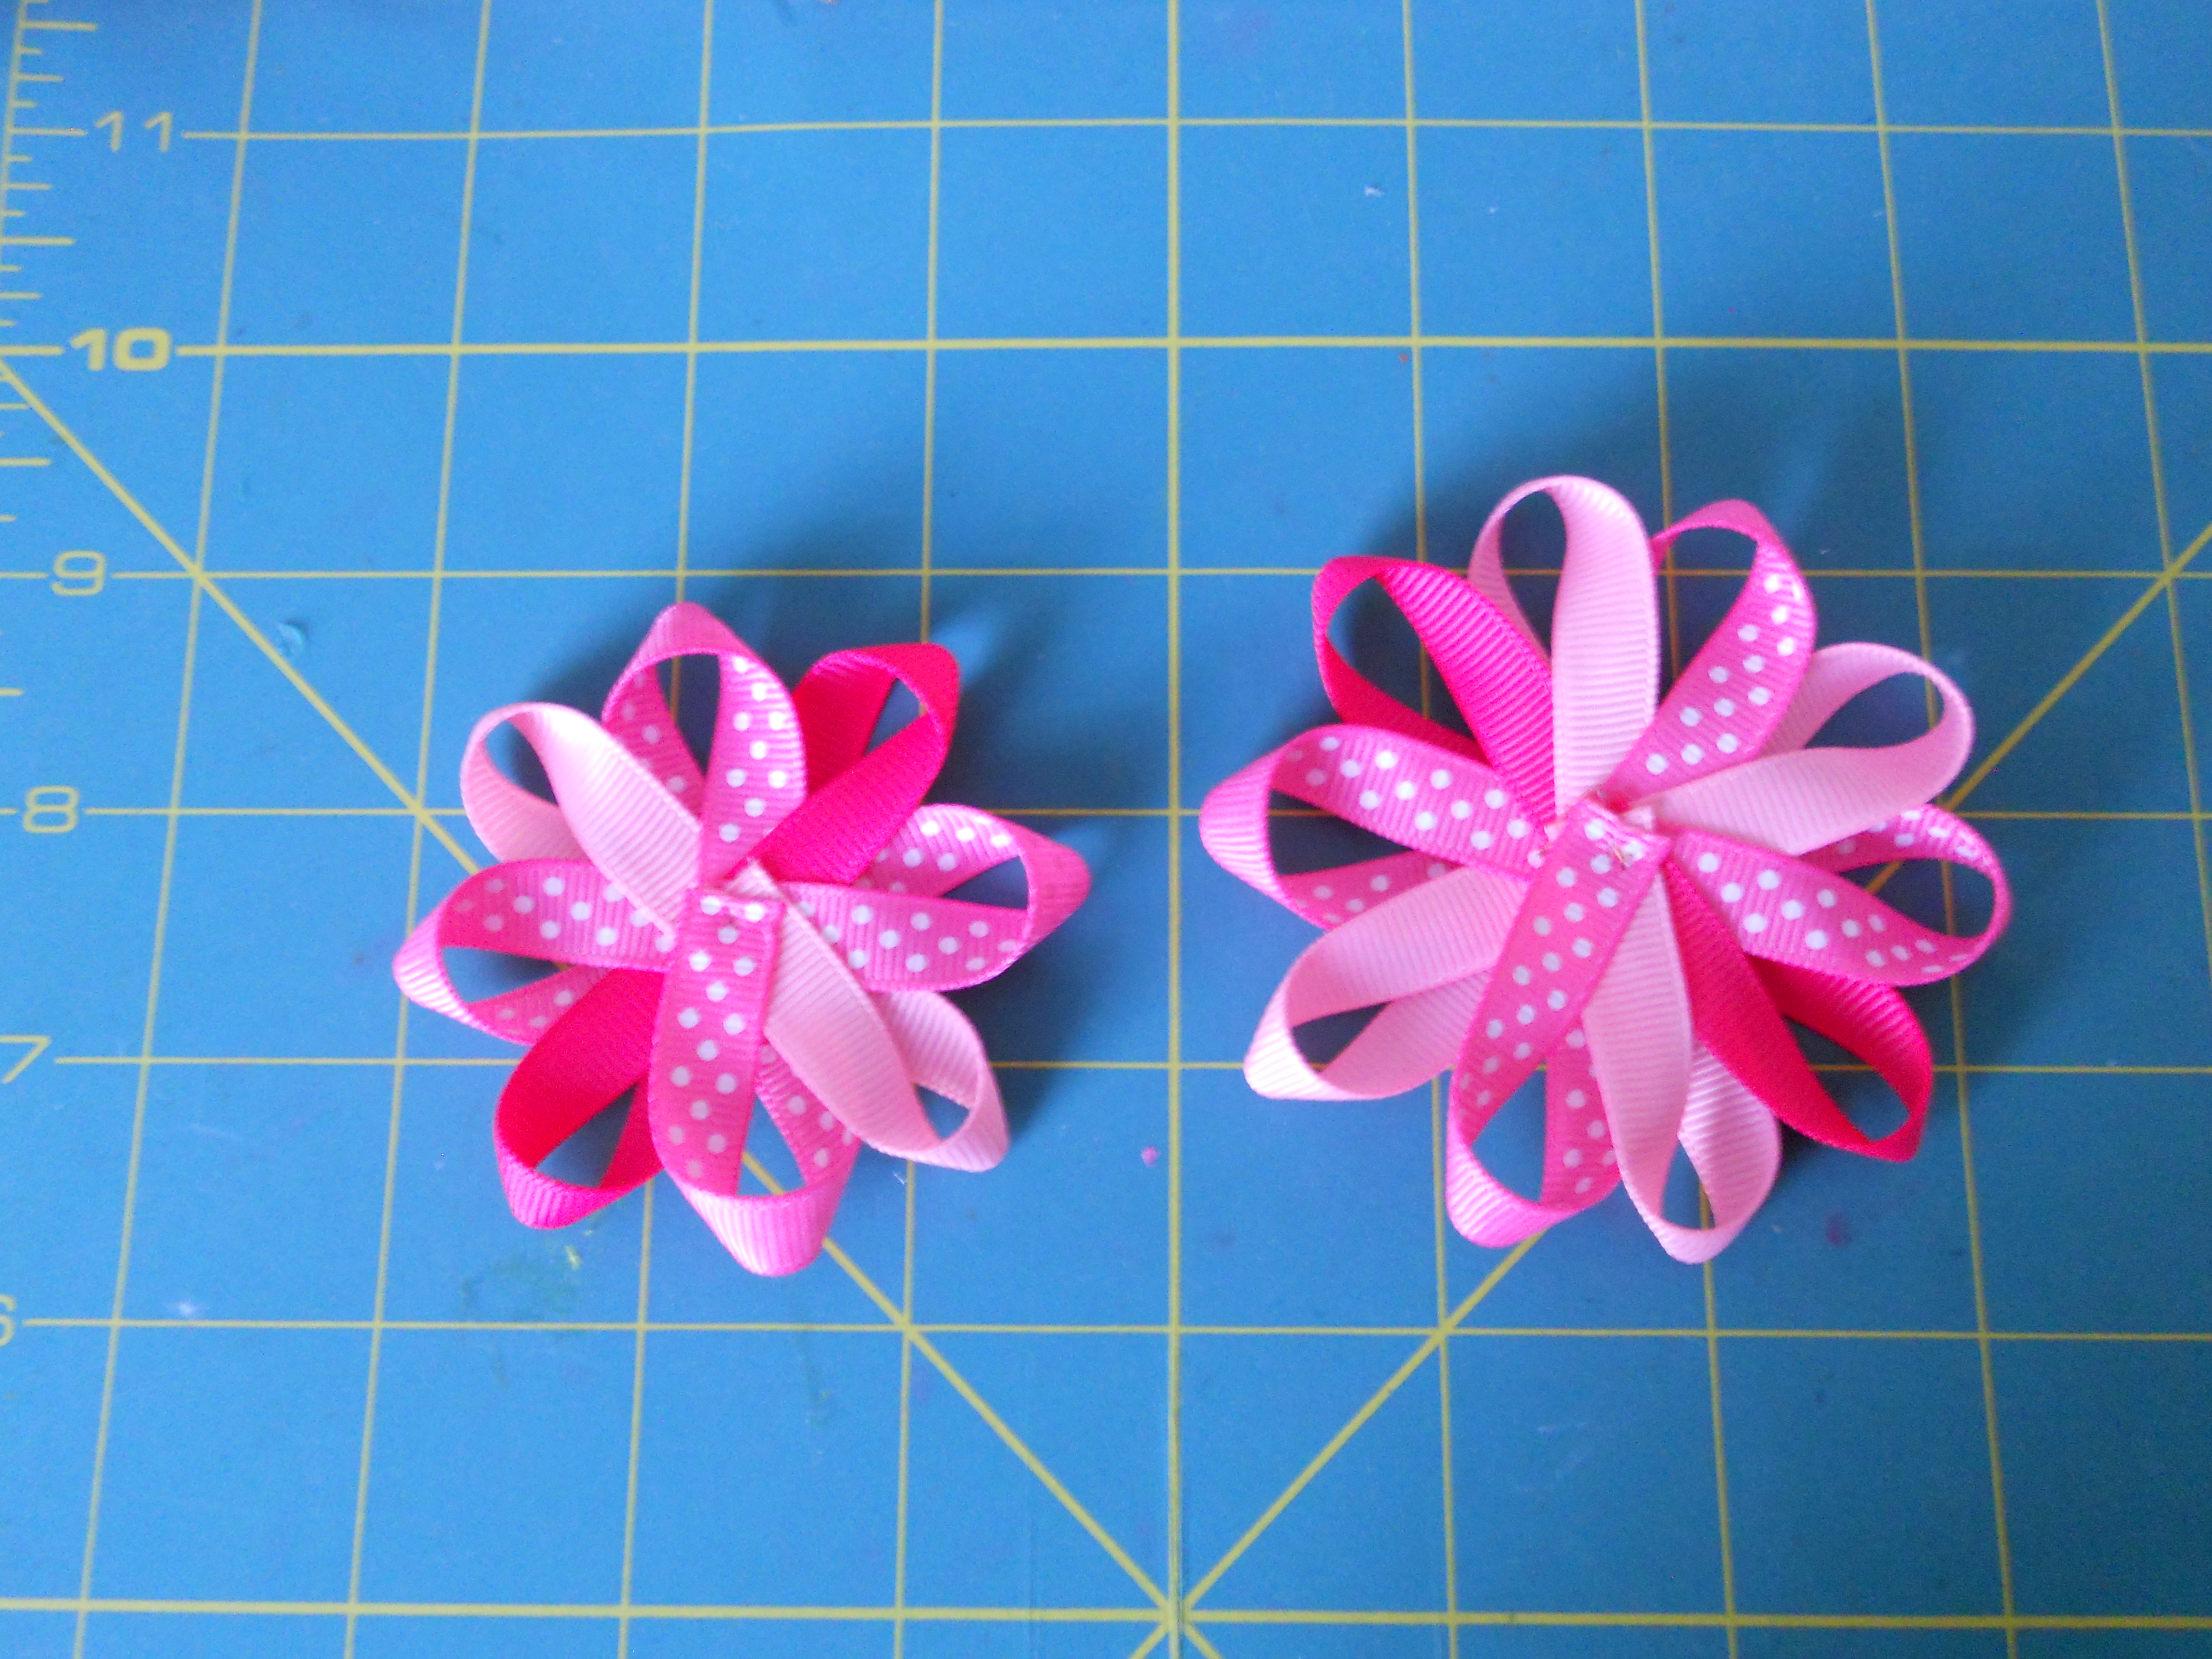
Step 6: Continue forming your loops onto the needle until you have formed 8 loops. Thread your needle through the center a few times and tie it off.
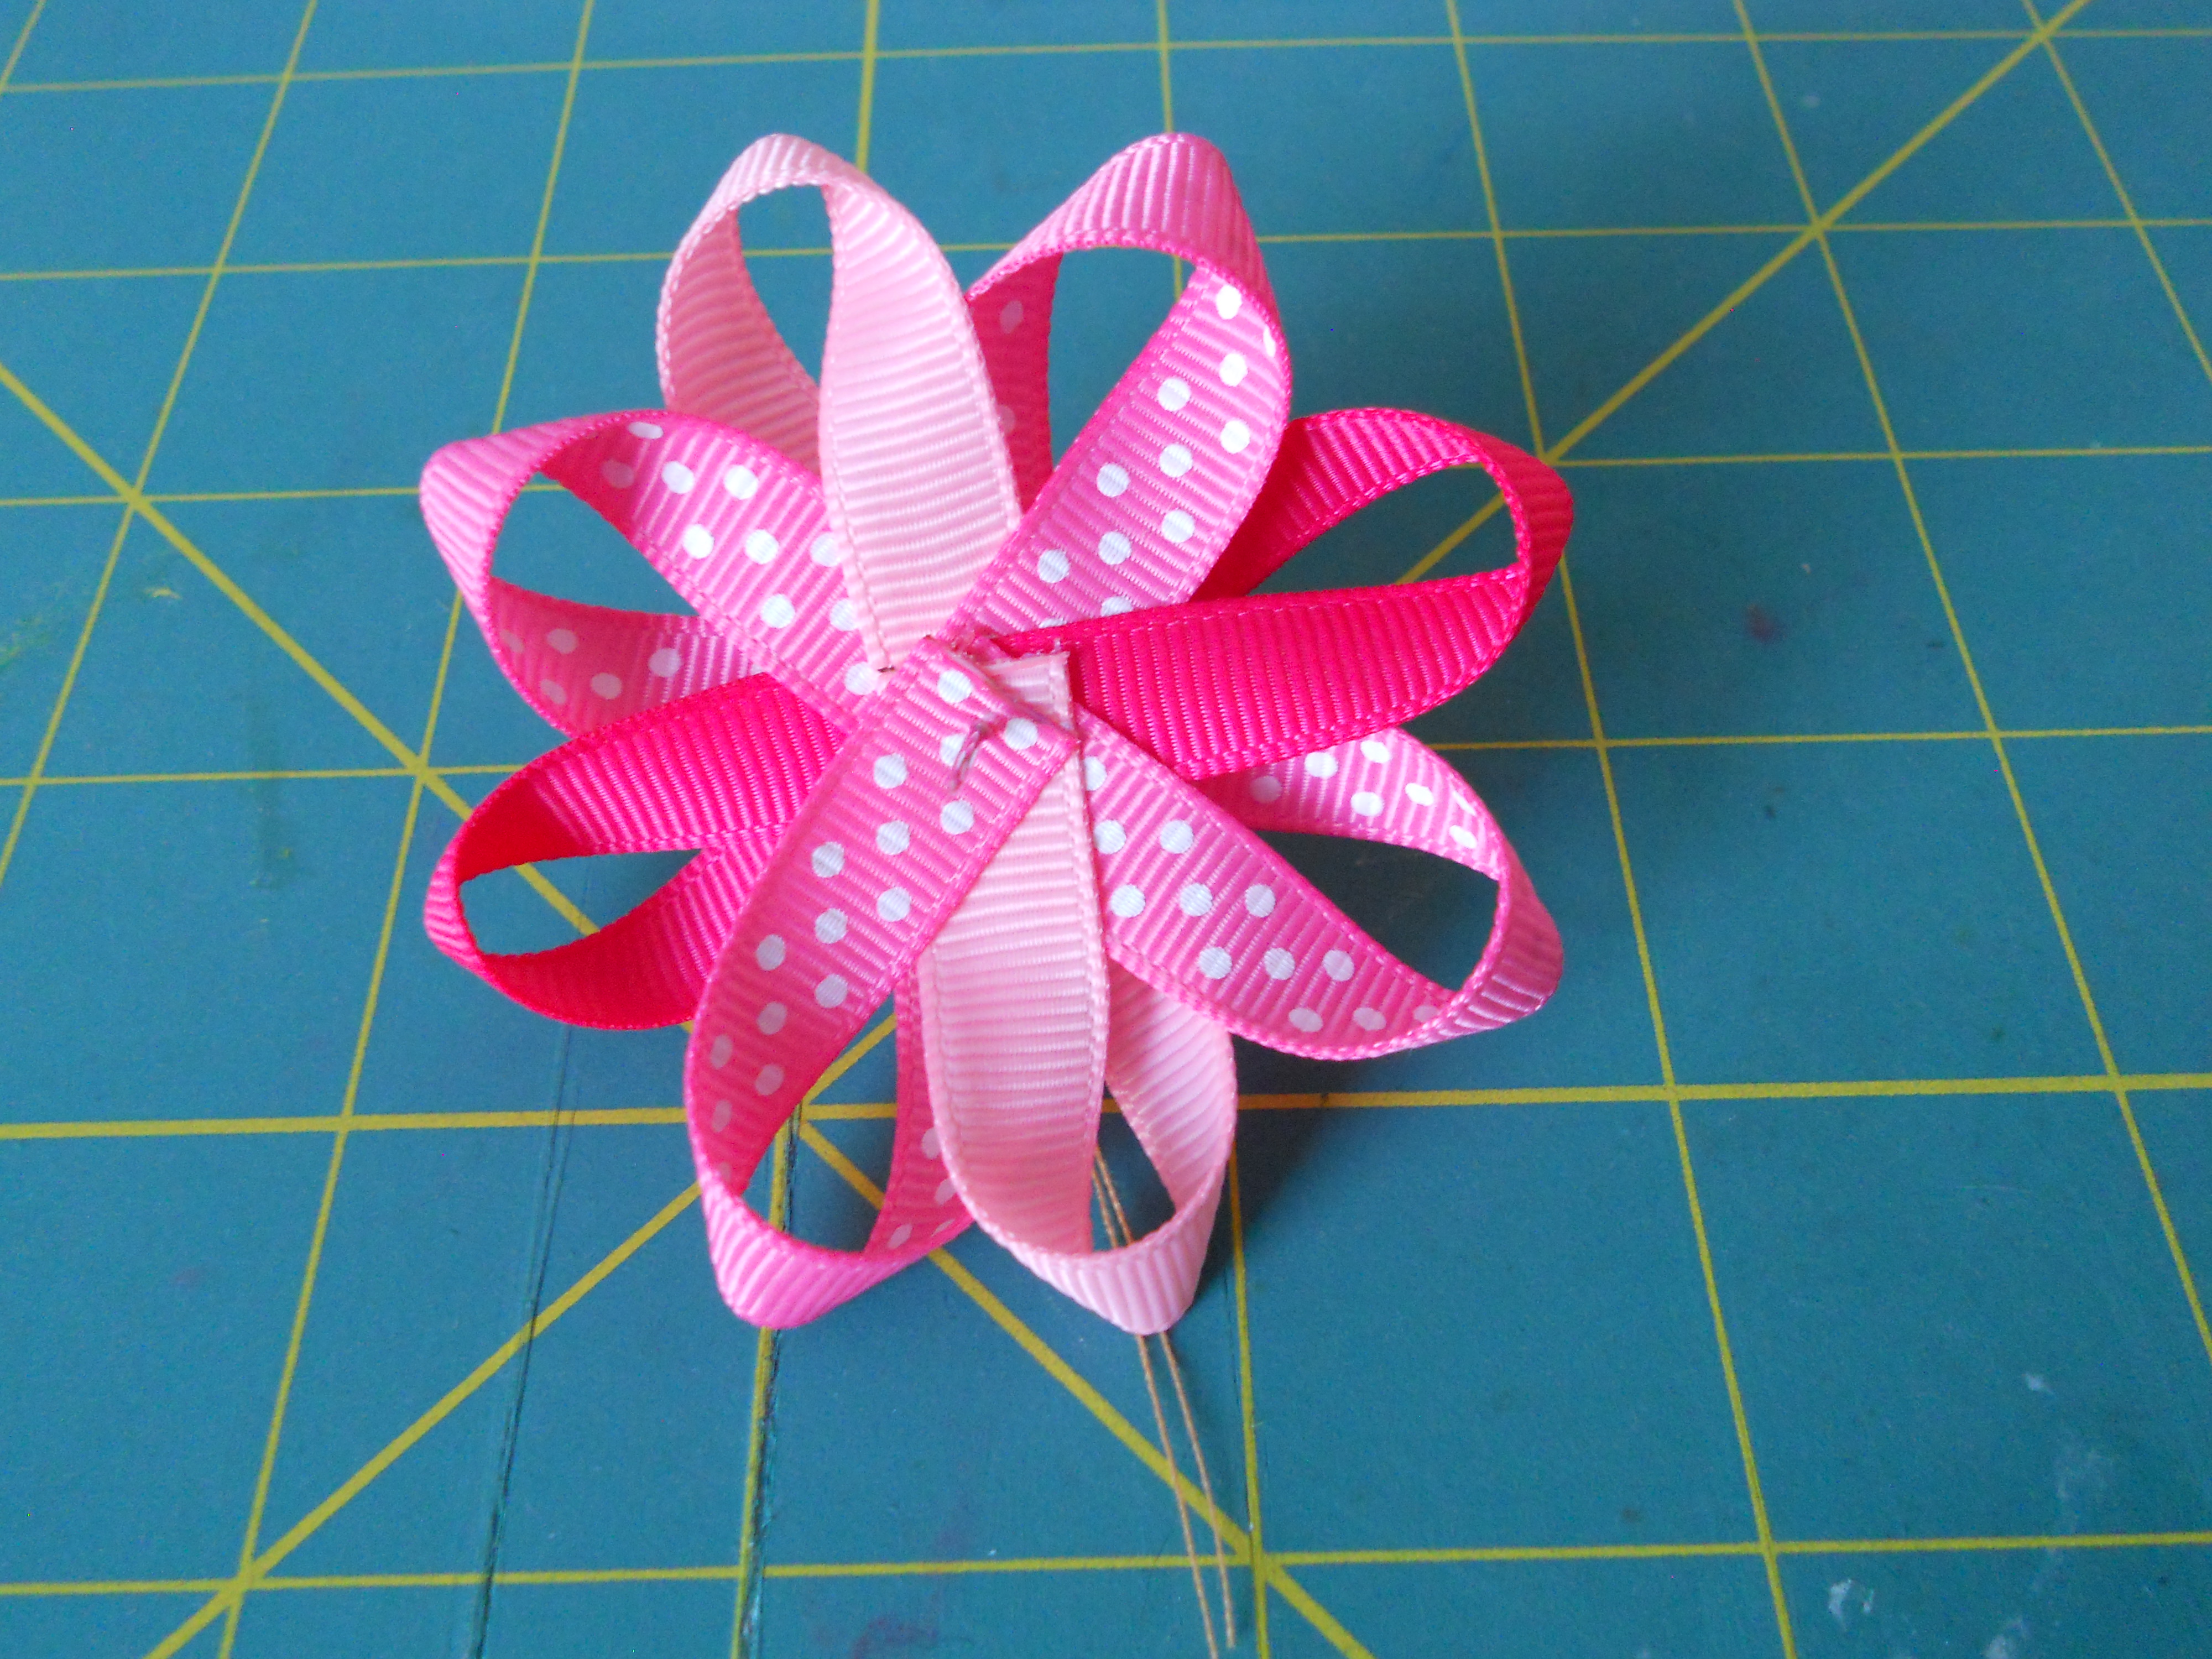
Step 7: Repeat steps 4-6 with your five 7" pieces of ribbon. You now have your two bow layers completed.
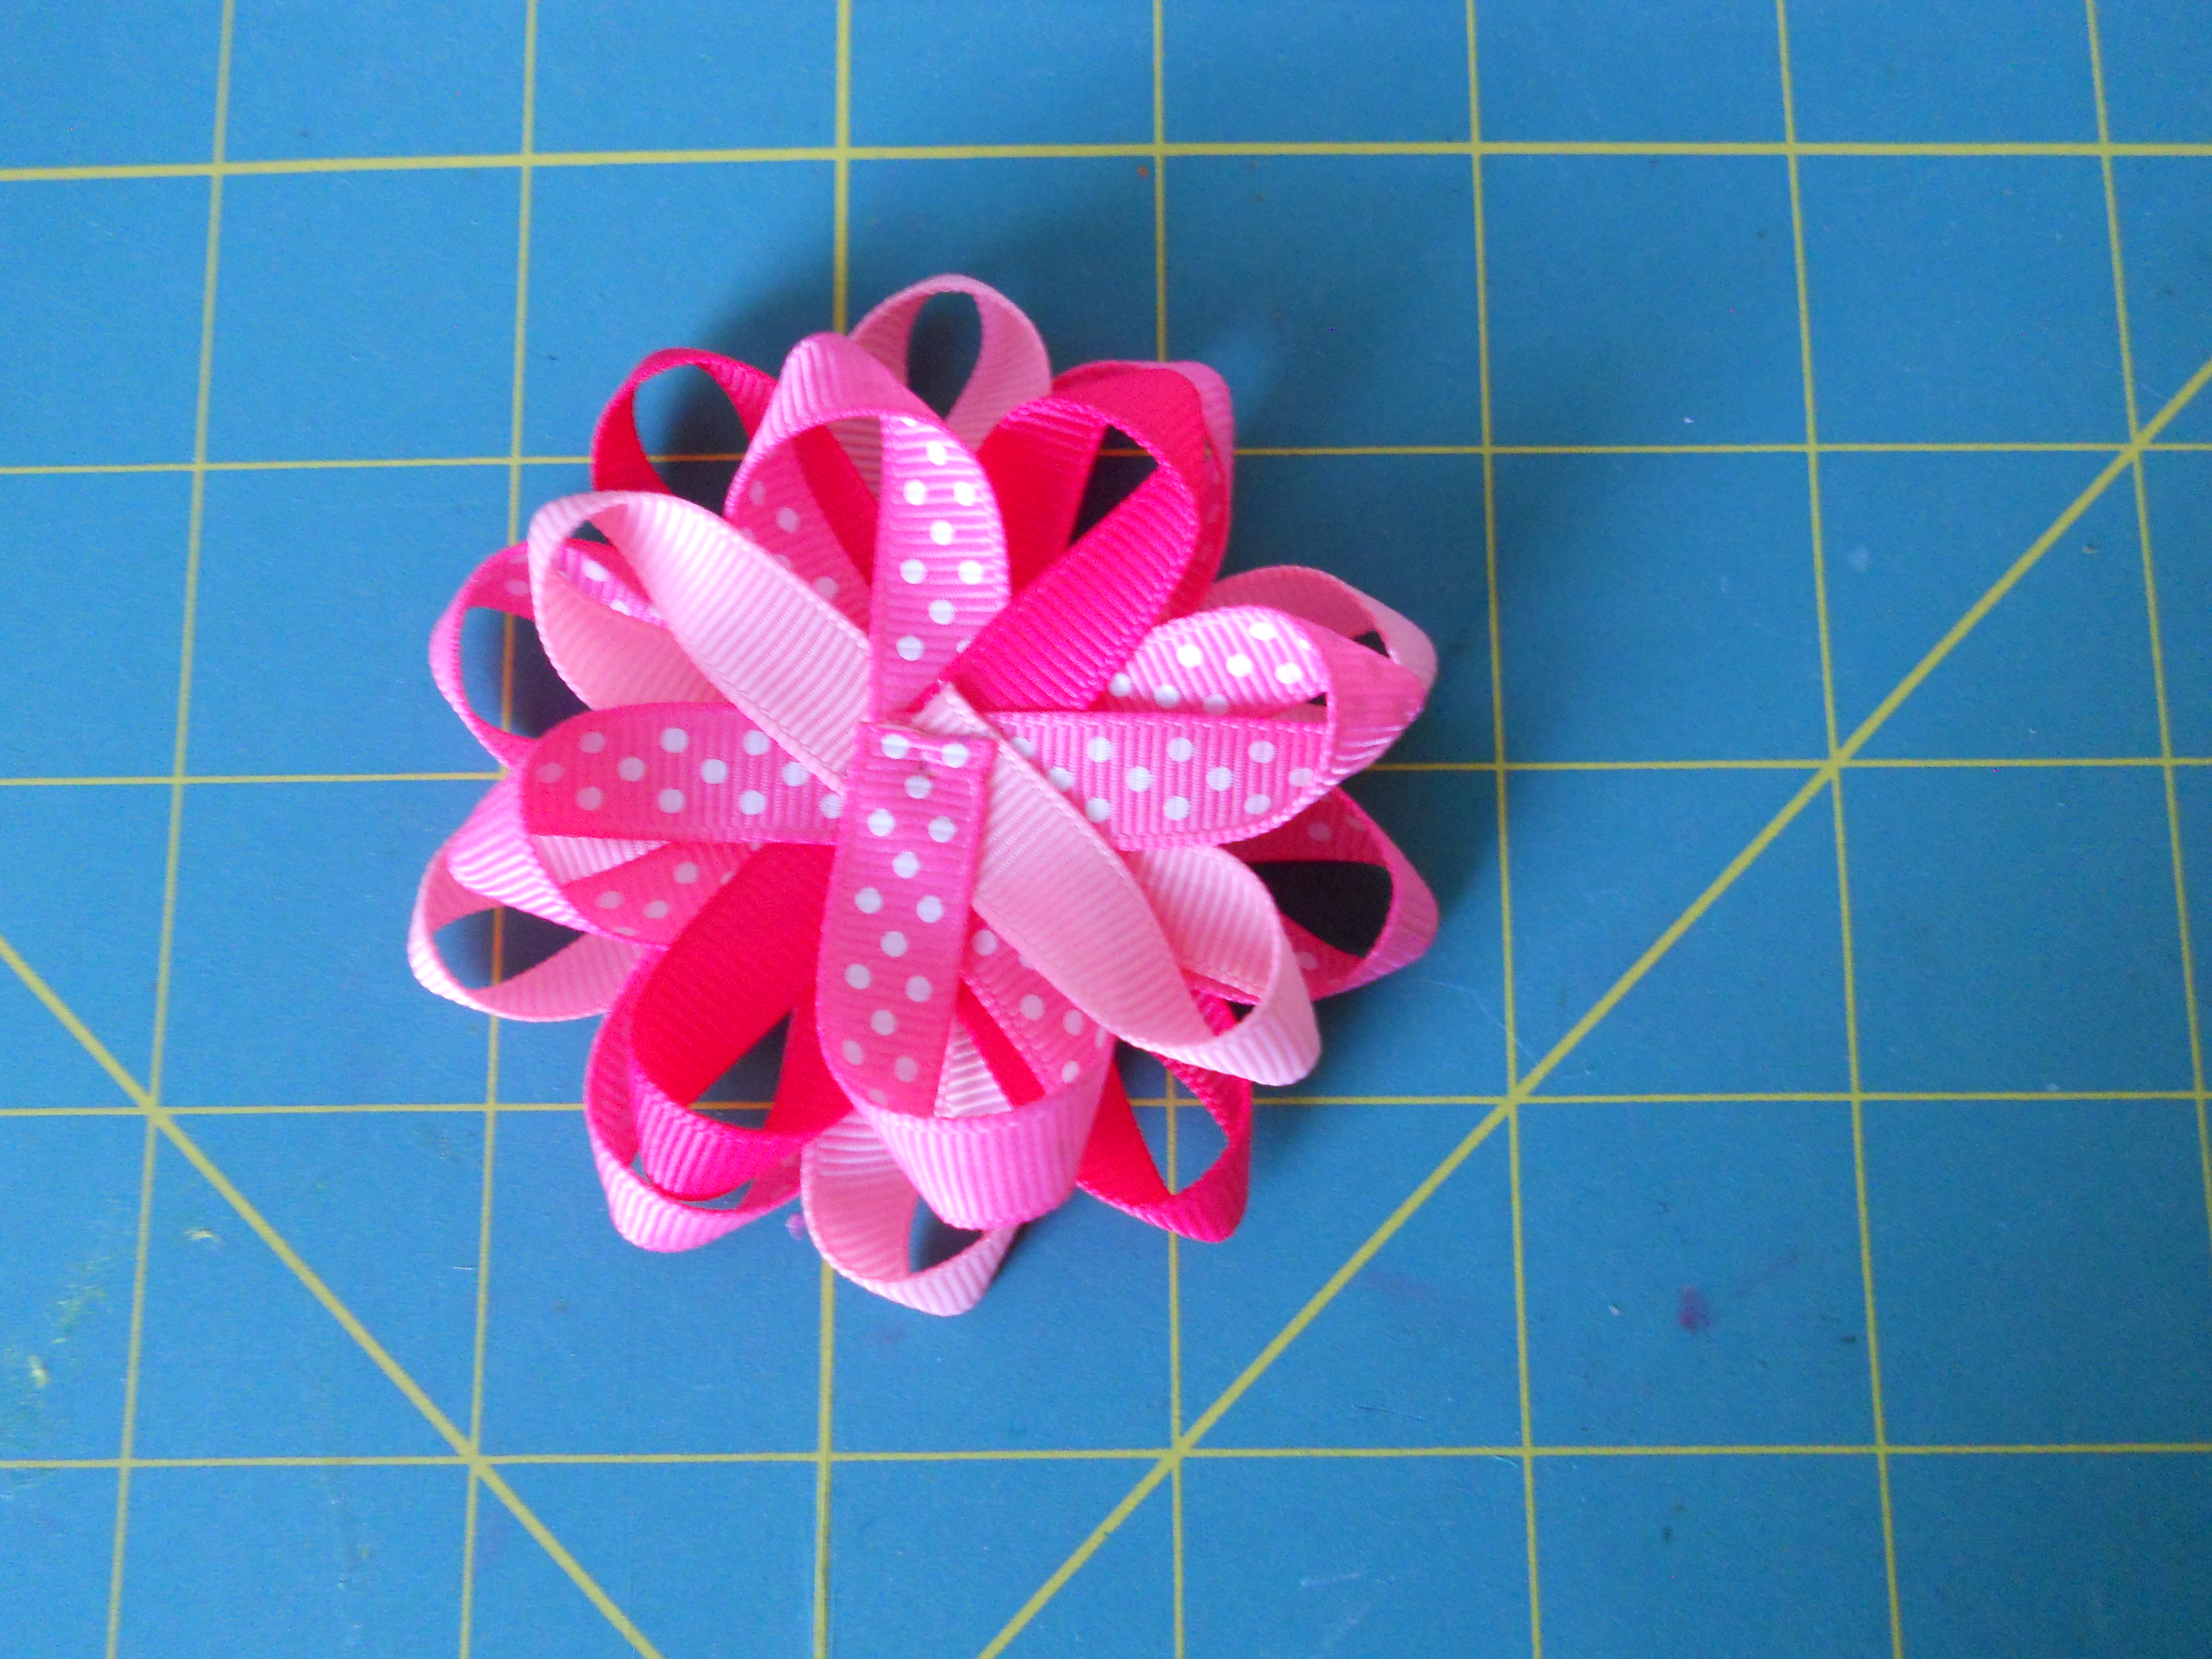
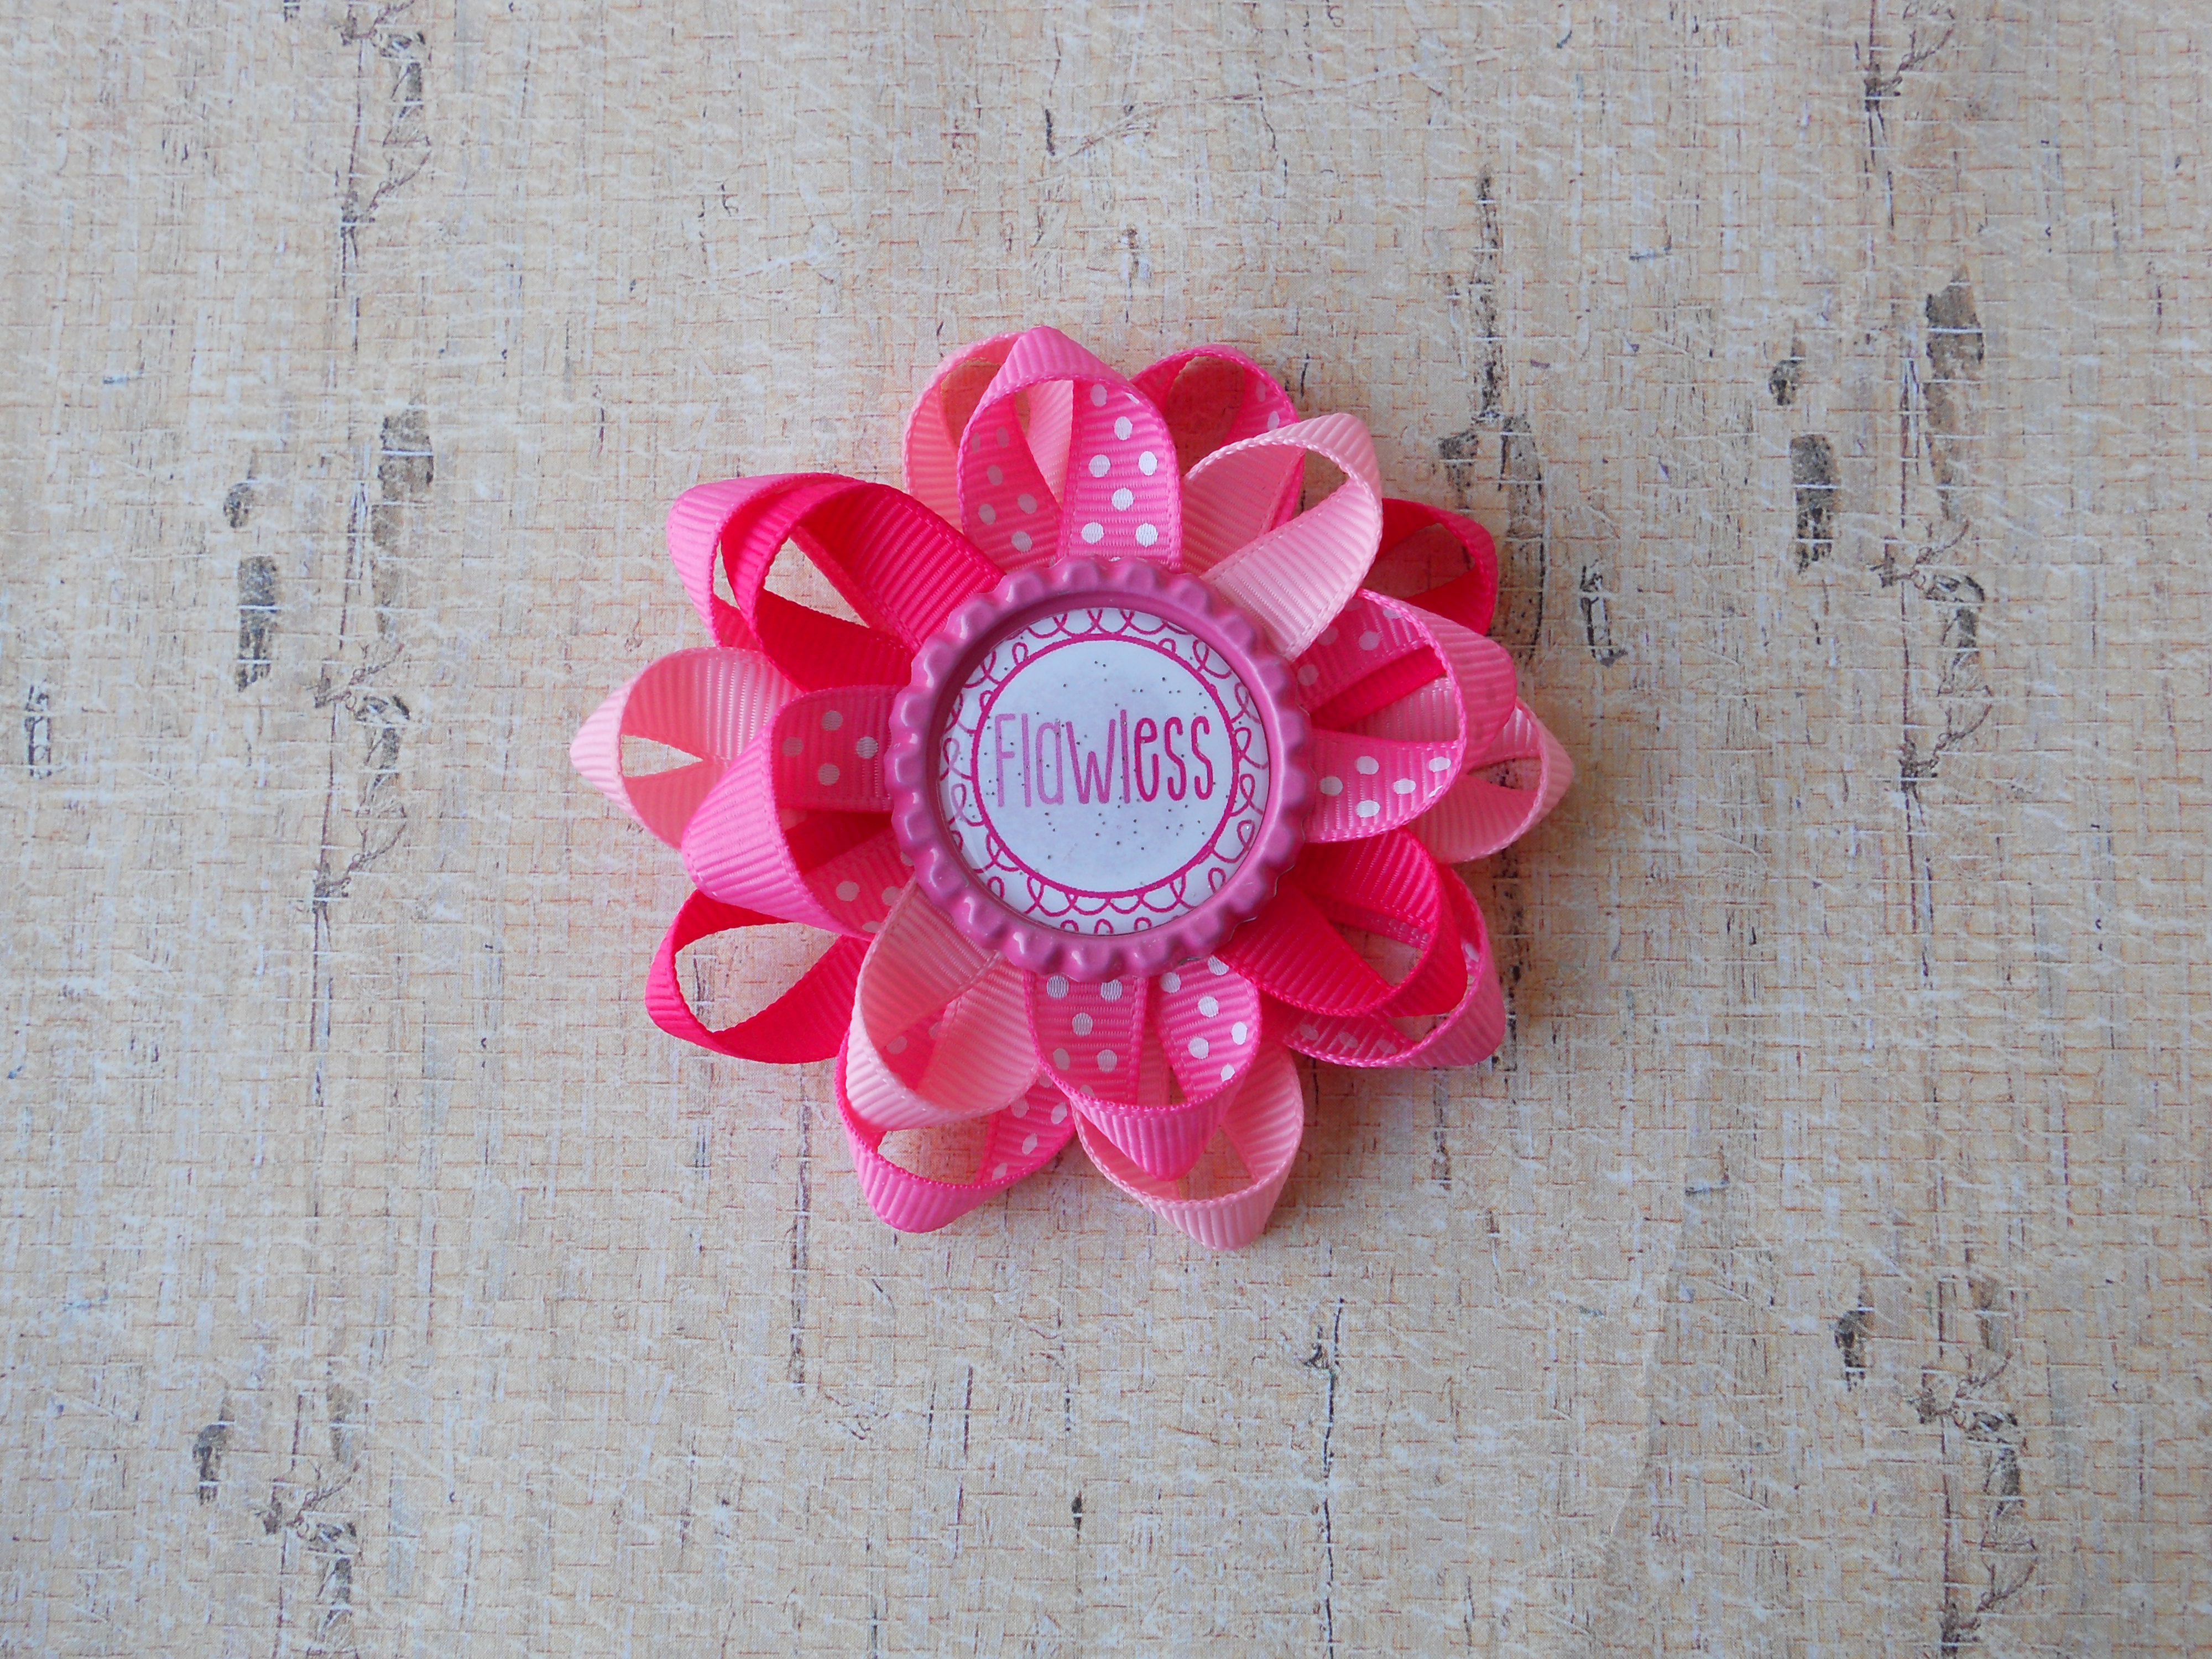
Step 8: Hot glue the two bows together with the smaller bow on top.
Step 9: Line your alligator clip and hot glue it to the back of the bow. If you are unsure of how to line your alligator clip you can find the steps here in one of my previous tutorials.

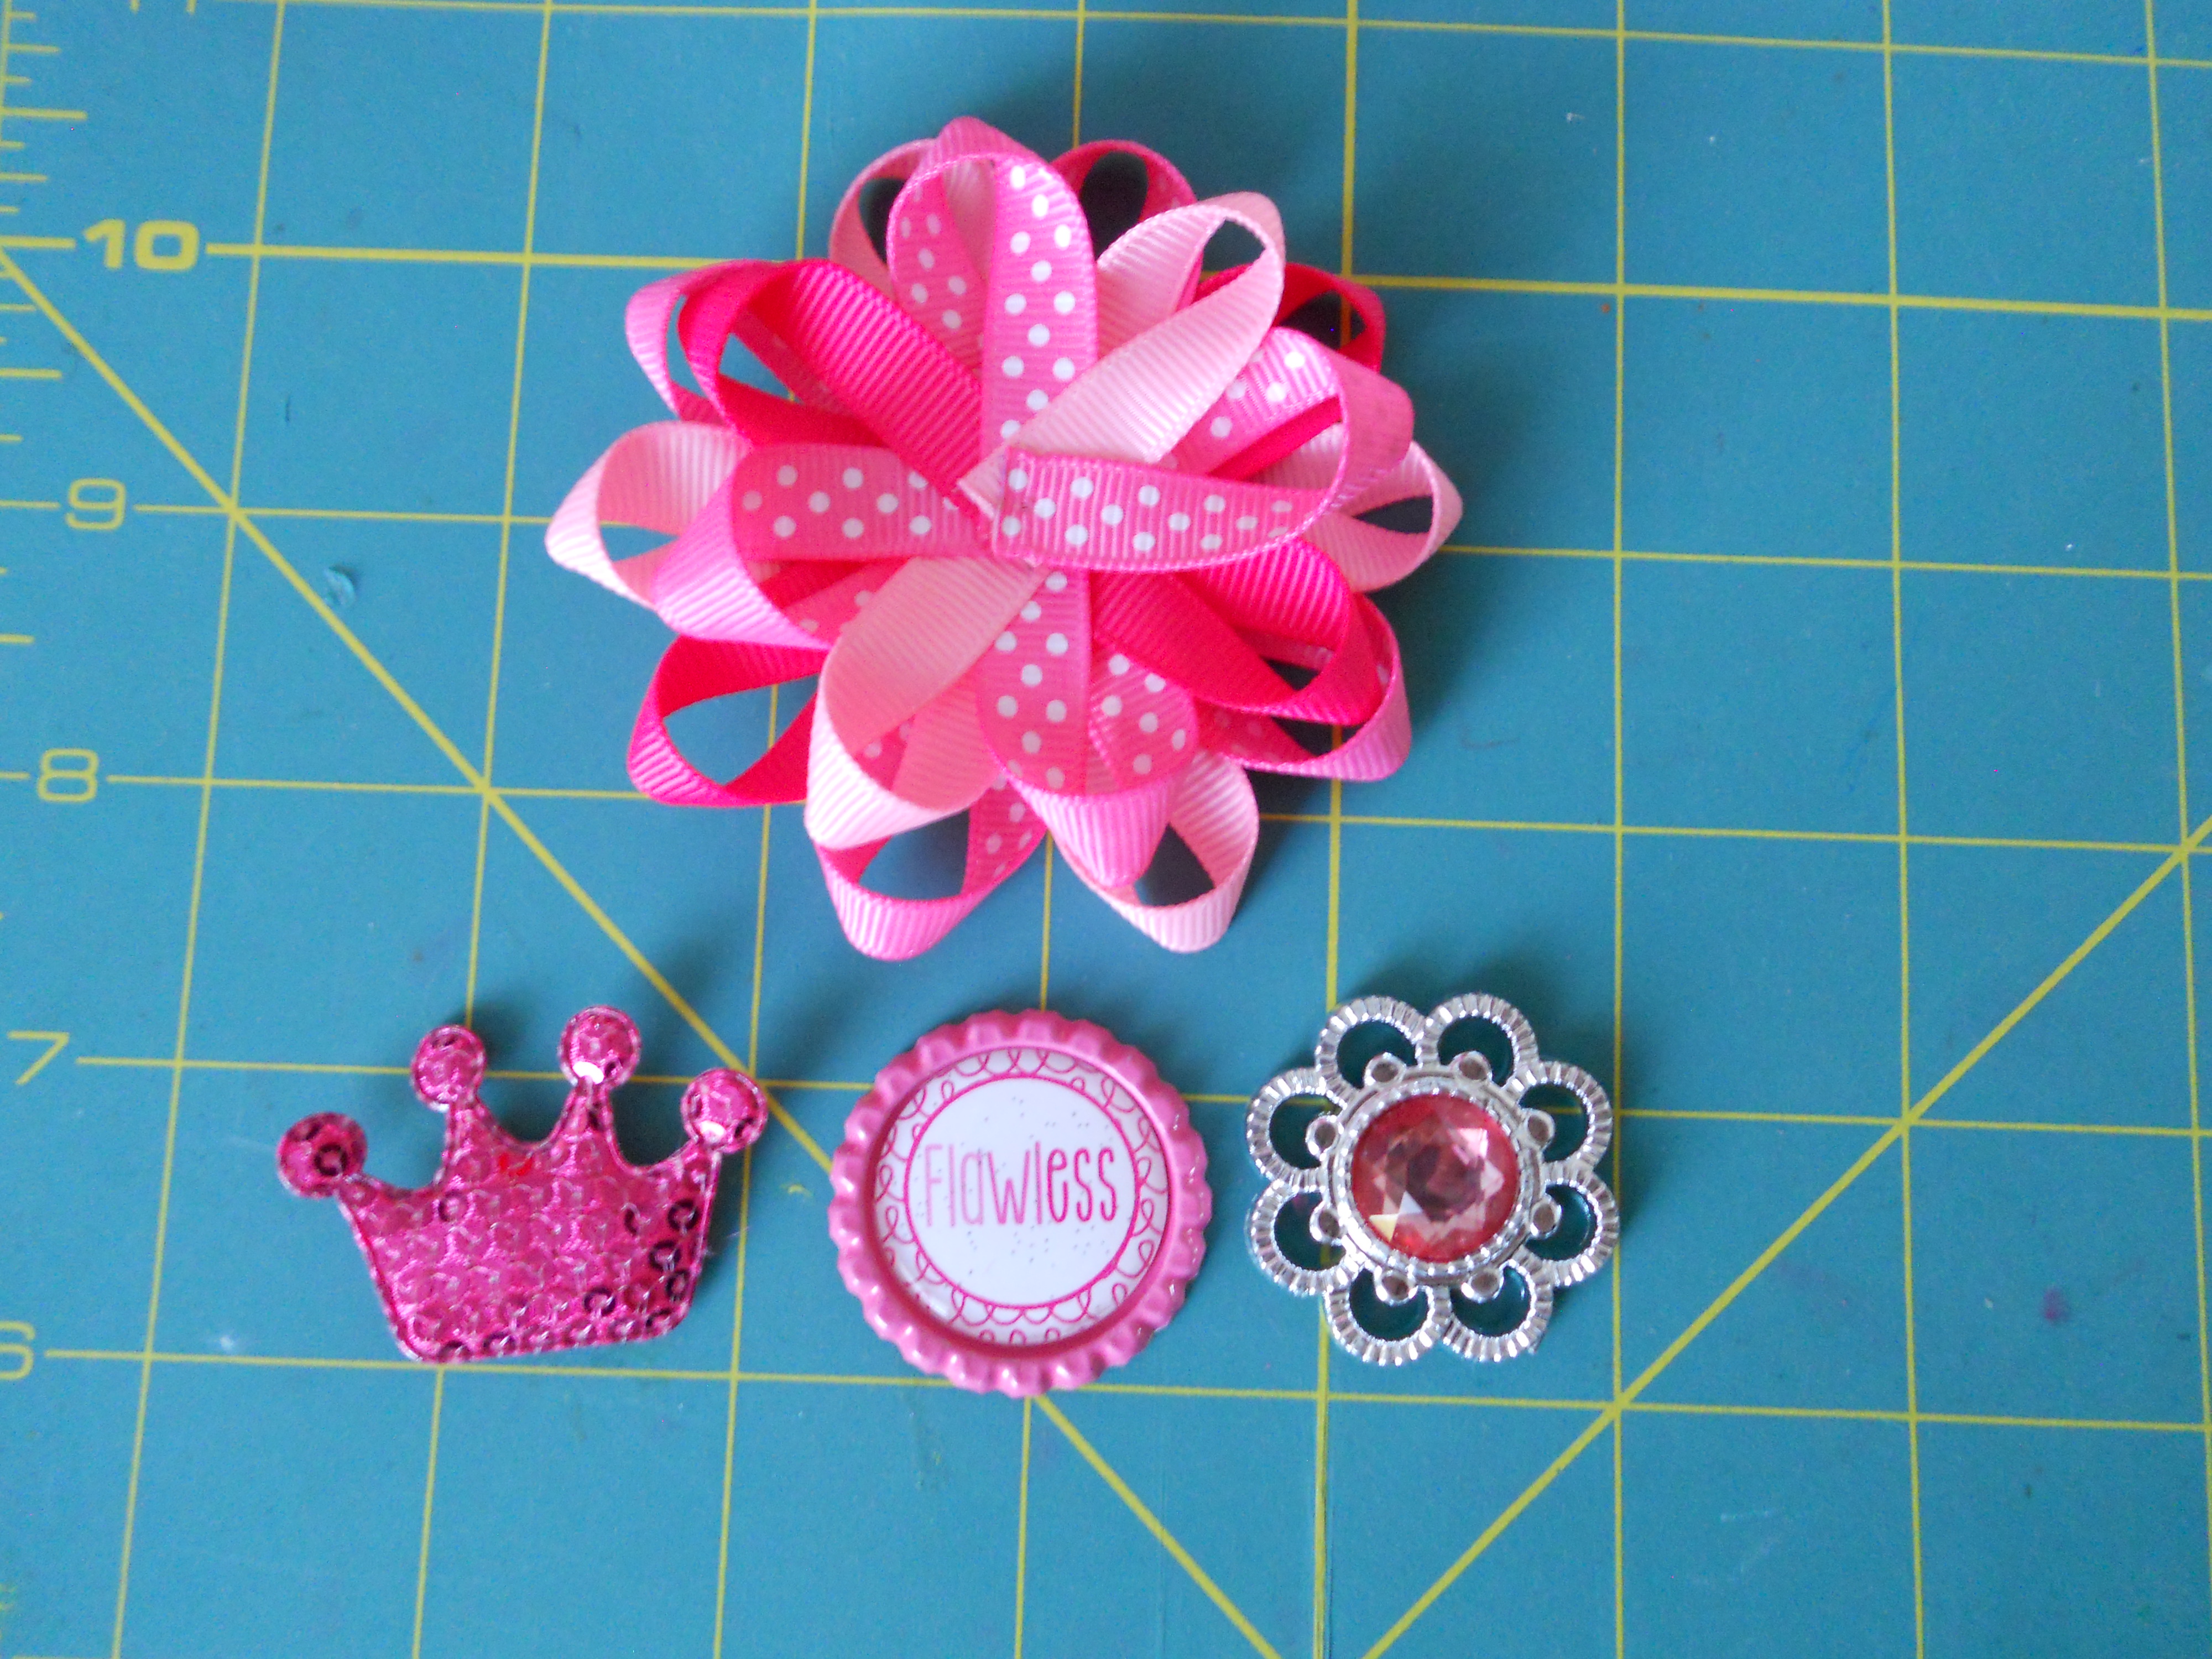
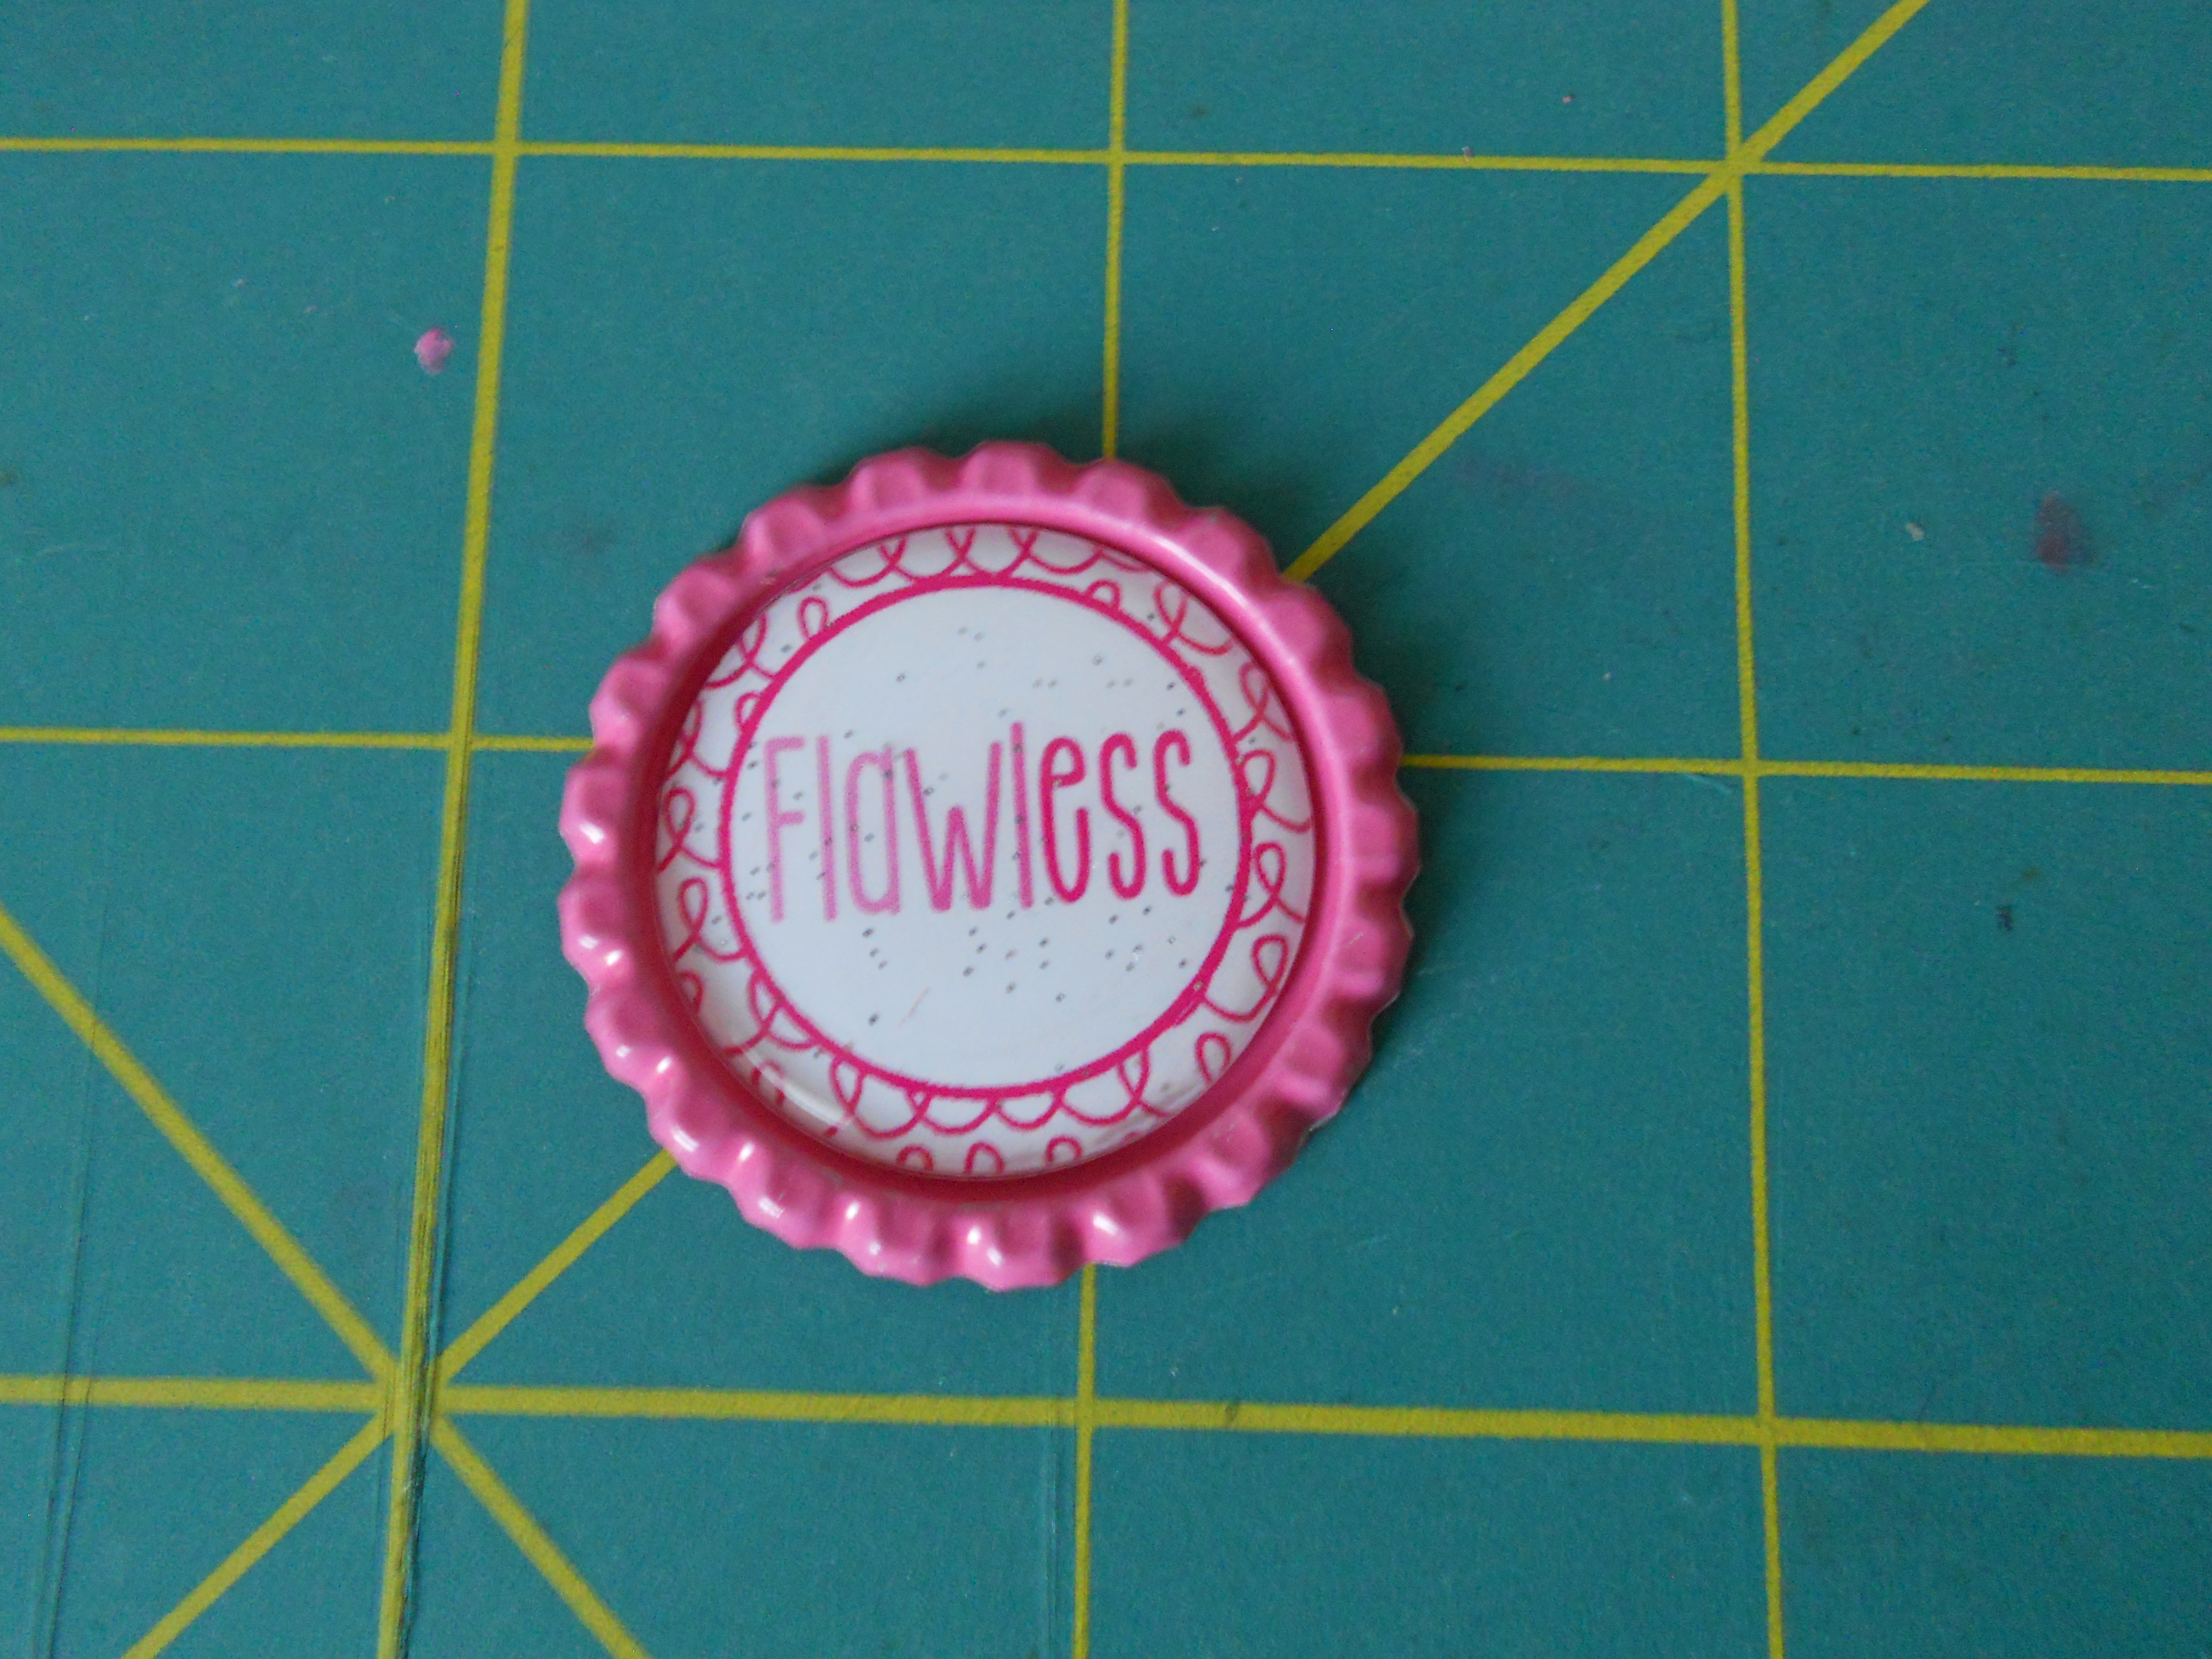
Step 10: Choose a center! The options are endless! You can use an applique, a button, a bottle cap or even a rhinestone embellishment!
Optional Steps to create a finished bottle cap.
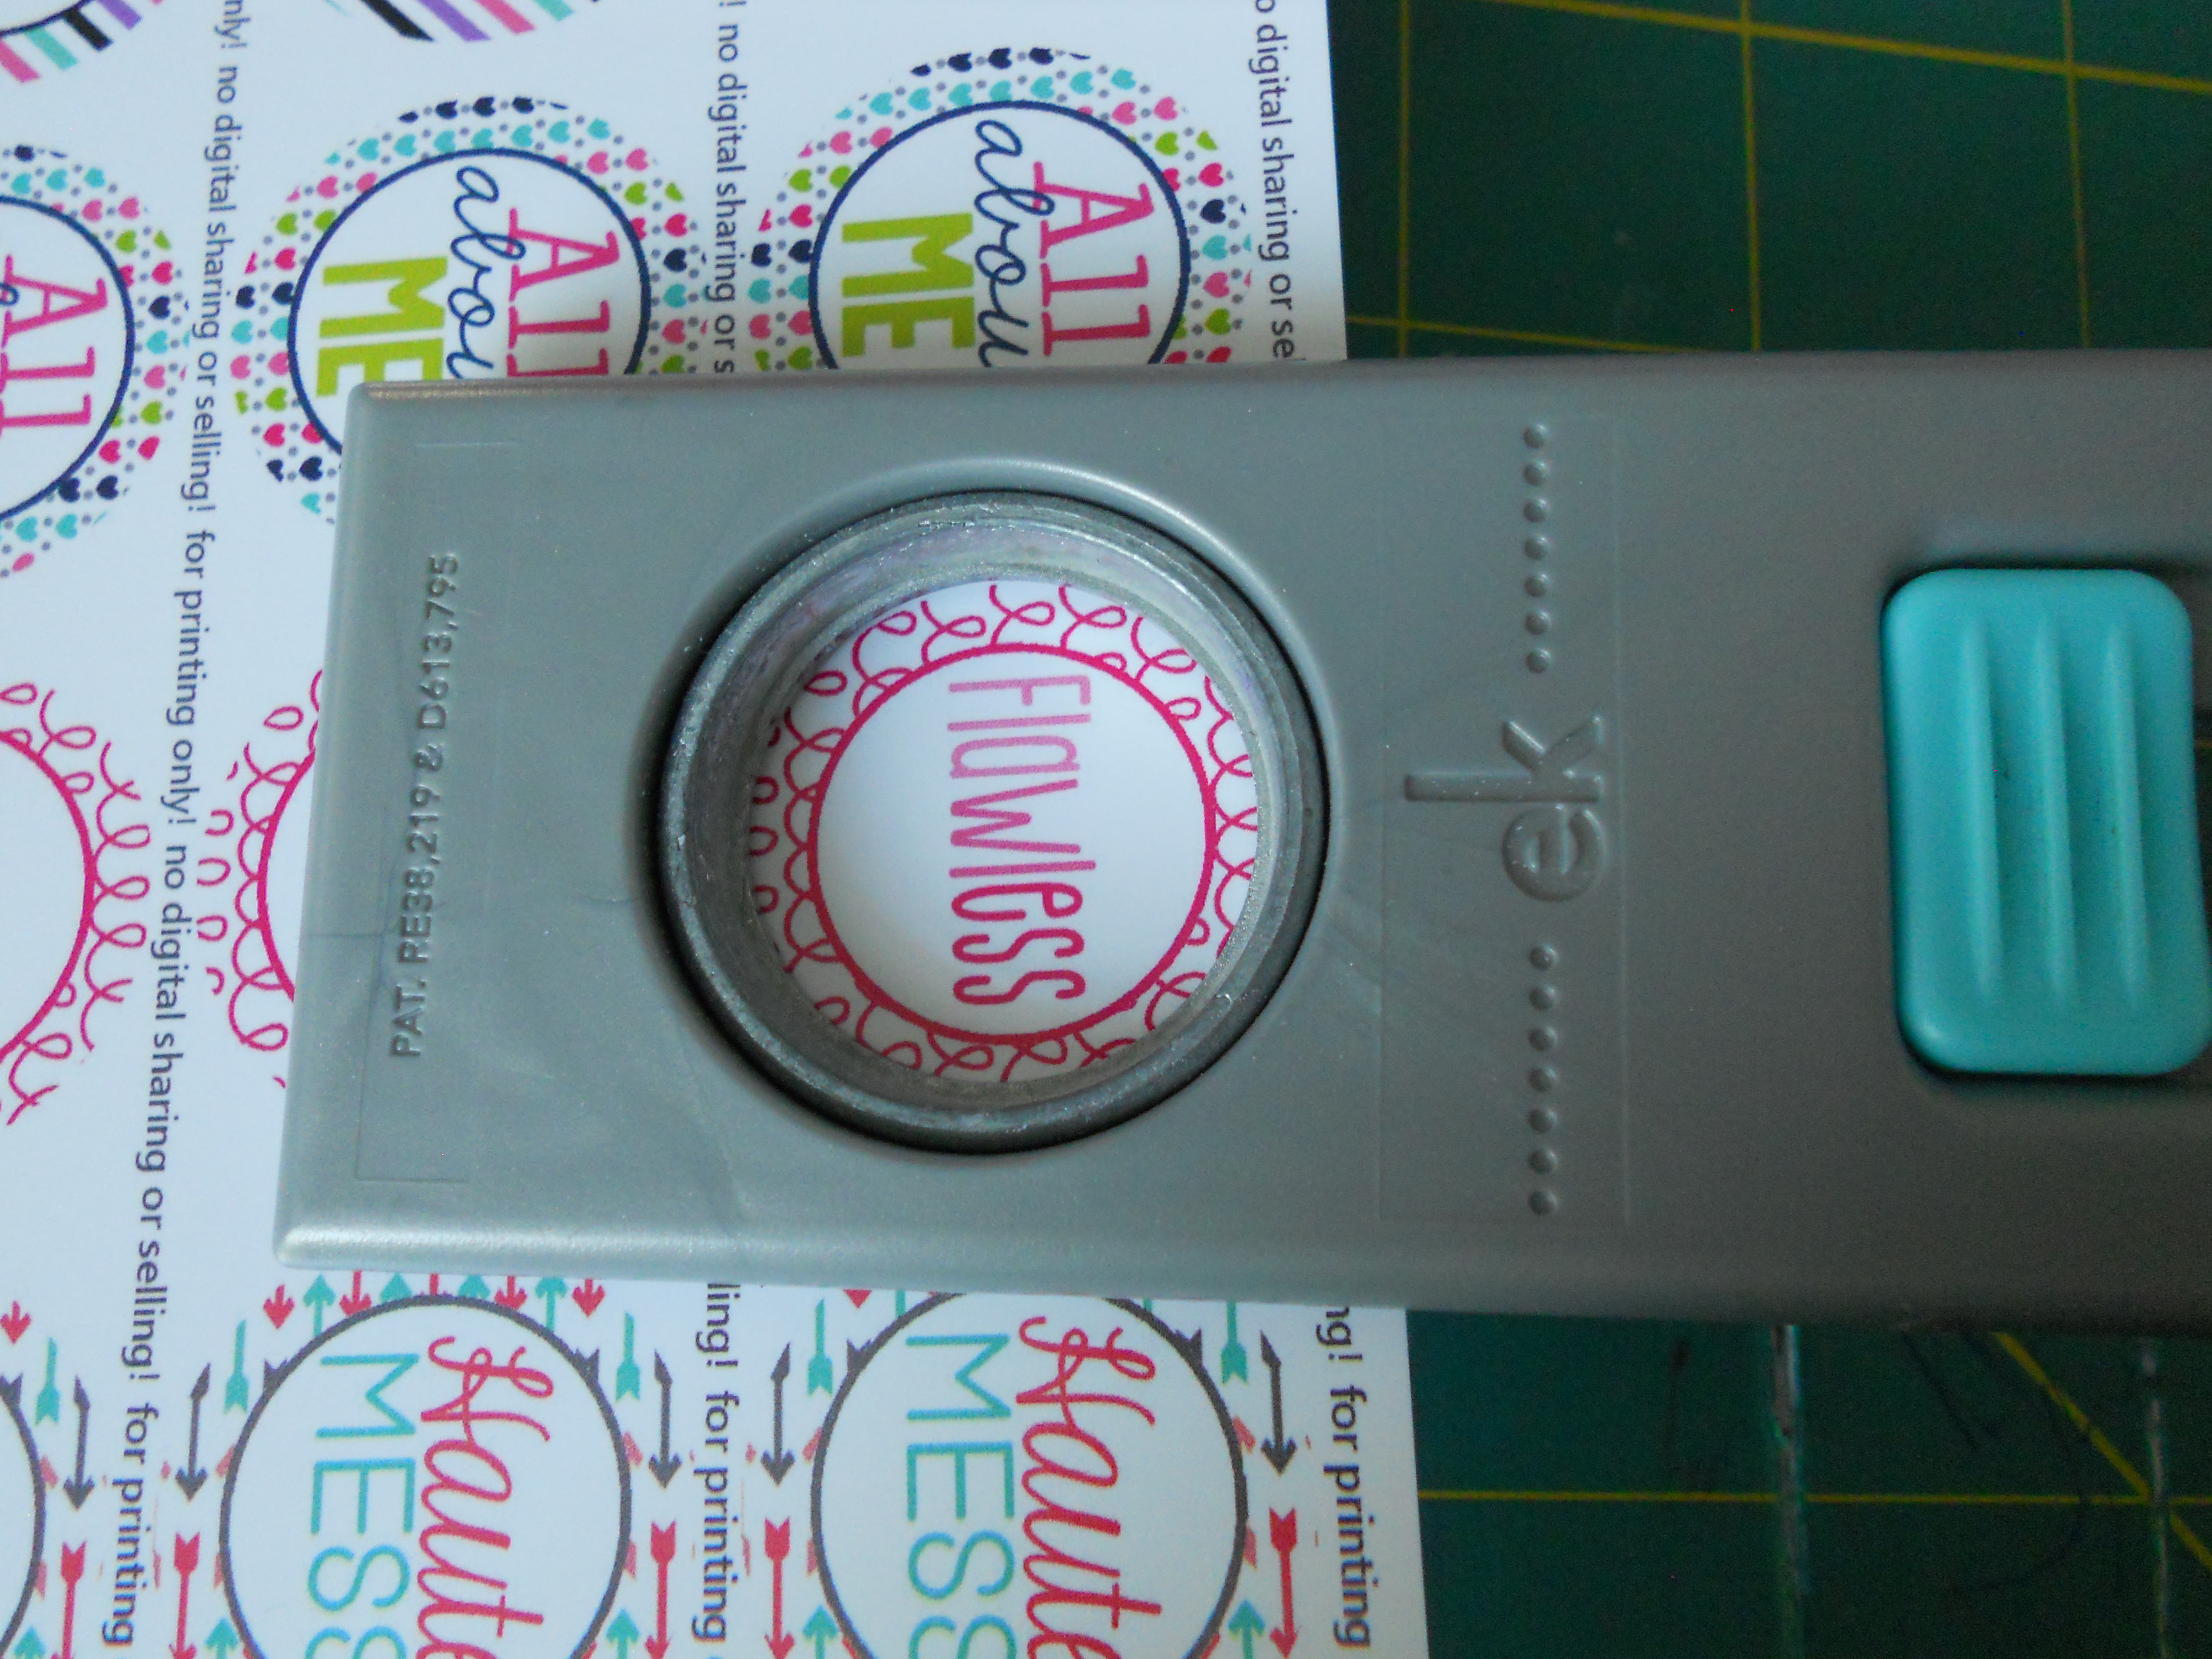
To create finished bottle caps you need 1" circle images. Use a 1" hole punch to punch out your image. Apply a 1" epoxy circle evenly over the image. Use super glue to adhere your image to the bottle cap. You can use whatever kind of glue you want but I highly recommend that you do not use hot glue for bottle cap images. The glue will peel off and the image will fall out!

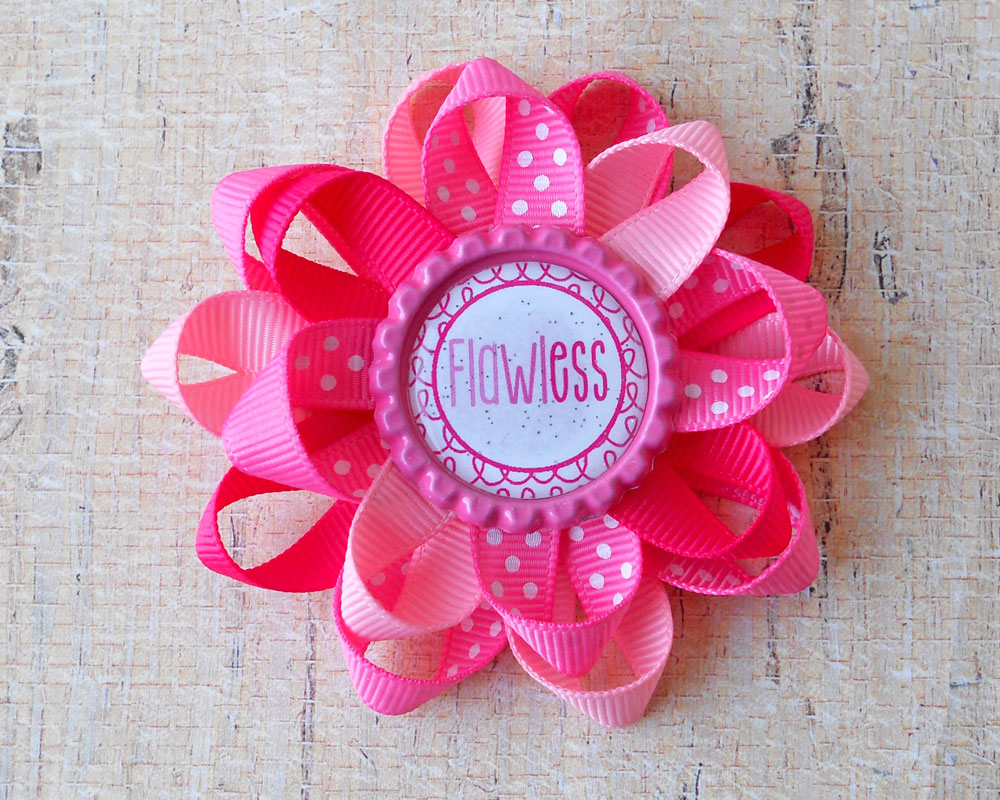
You're all finished! These are so easy to customize - from colors to centers the possibilities are endless! What center did you choose? Post your creations below!
Visit the rest of our blog for more Crafting Tutorials and DIY Instructions!
Loading...

