 Contributor post by Brittany
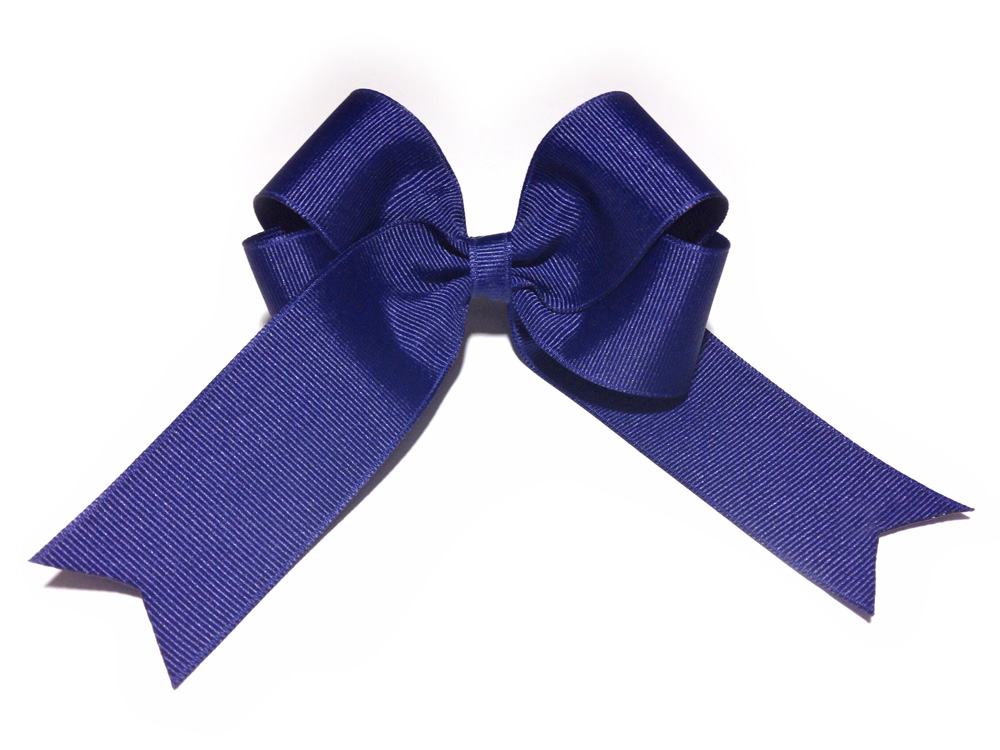
Summer is winding down and everyone is trying to stay cool despite the smoldering hot temps! A great way to help your little one (and yourself!) beat the heat is by pulling her hair up in a classic ponytail. Now you can stay cool AND wear the newest on-trend, super cute, ponytail hair bow that adds the most adorable finishing touch to your up-do! So let's get started and perk up that boring ponytail with a brand new look!
Contributor post by Brittany
Summer is winding down and everyone is trying to stay cool despite the smoldering hot temps! A great way to help your little one (and yourself!) beat the heat is by pulling her hair up in a classic ponytail. Now you can stay cool AND wear the newest on-trend, super cute, ponytail hair bow that adds the most adorable finishing touch to your up-do! So let's get started and perk up that boring ponytail with a brand new look!
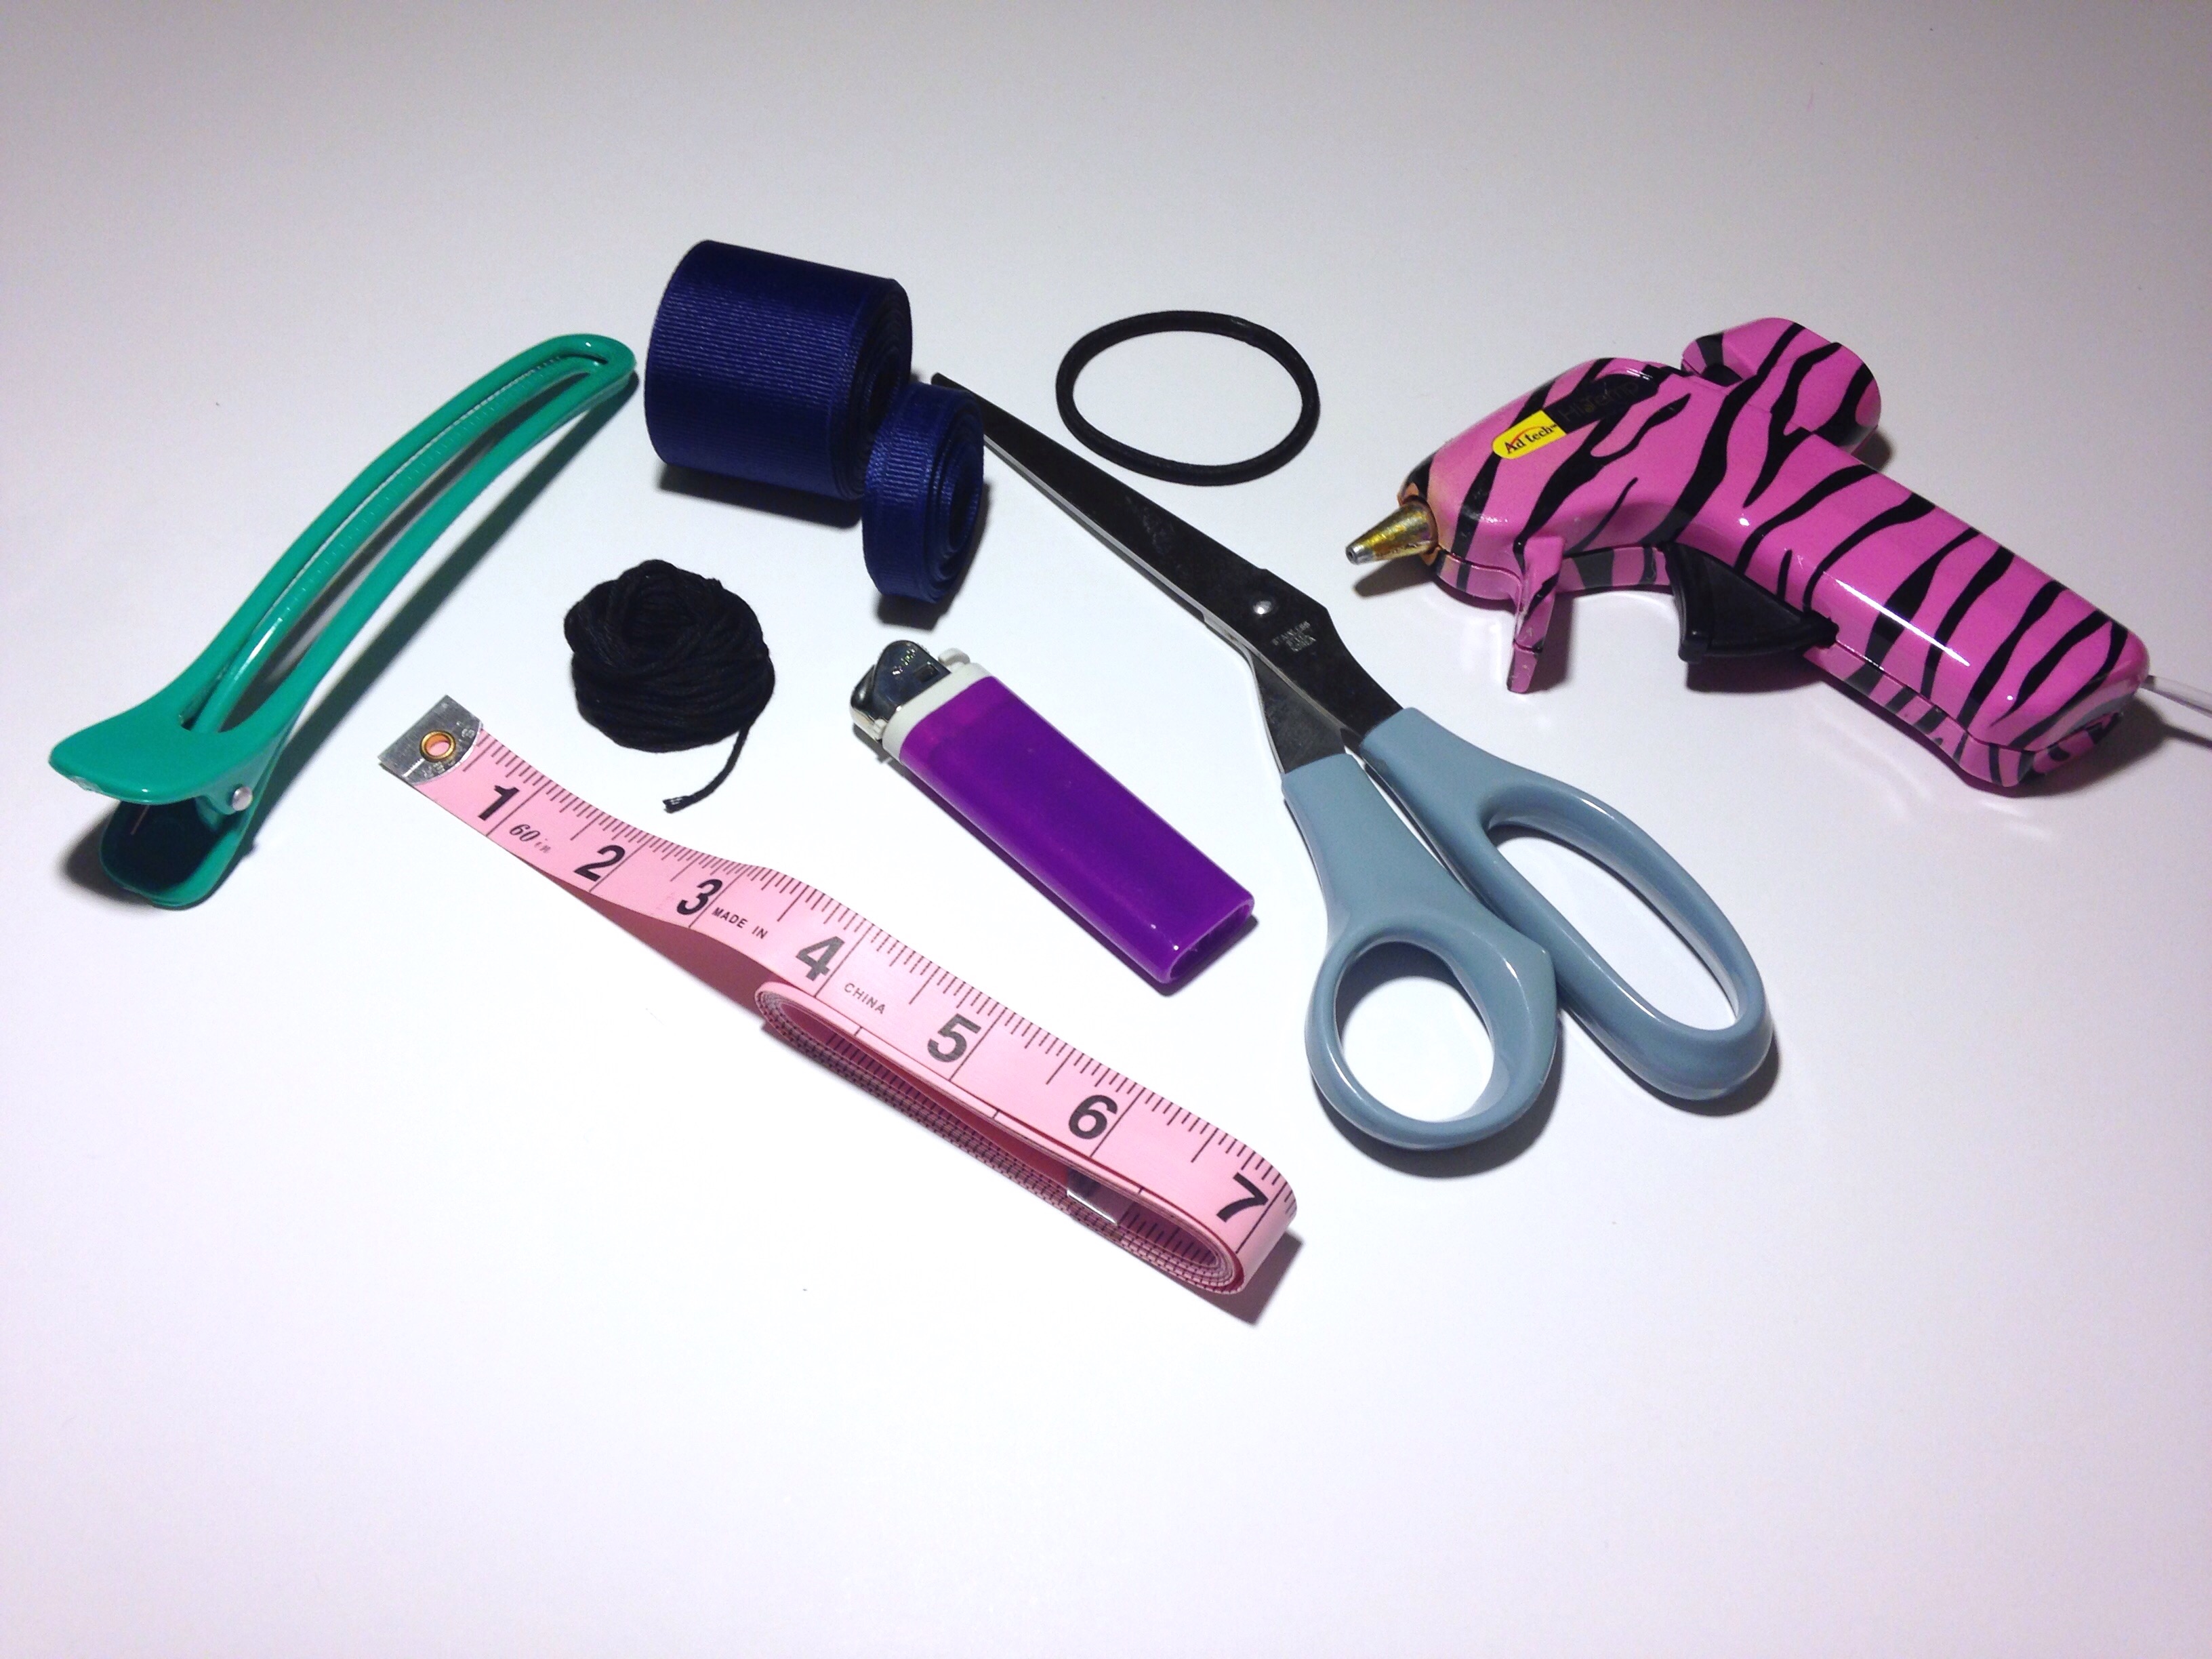 Shown above are the supplies you will need to make the perfect ponytail bow. These supplies include:
•Large salon clip
•1.5" grosgrain ribbon (any color)
•3/8" coordinating grosgrain ribbon
•Strong embroidery thread
•Measuring tape
•Lighter
•Scissors
•Large elastic hair band
•Hot glue gun
Shown above are the supplies you will need to make the perfect ponytail bow. These supplies include:
•Large salon clip
•1.5" grosgrain ribbon (any color)
•3/8" coordinating grosgrain ribbon
•Strong embroidery thread
•Measuring tape
•Lighter
•Scissors
•Large elastic hair band
•Hot glue gun
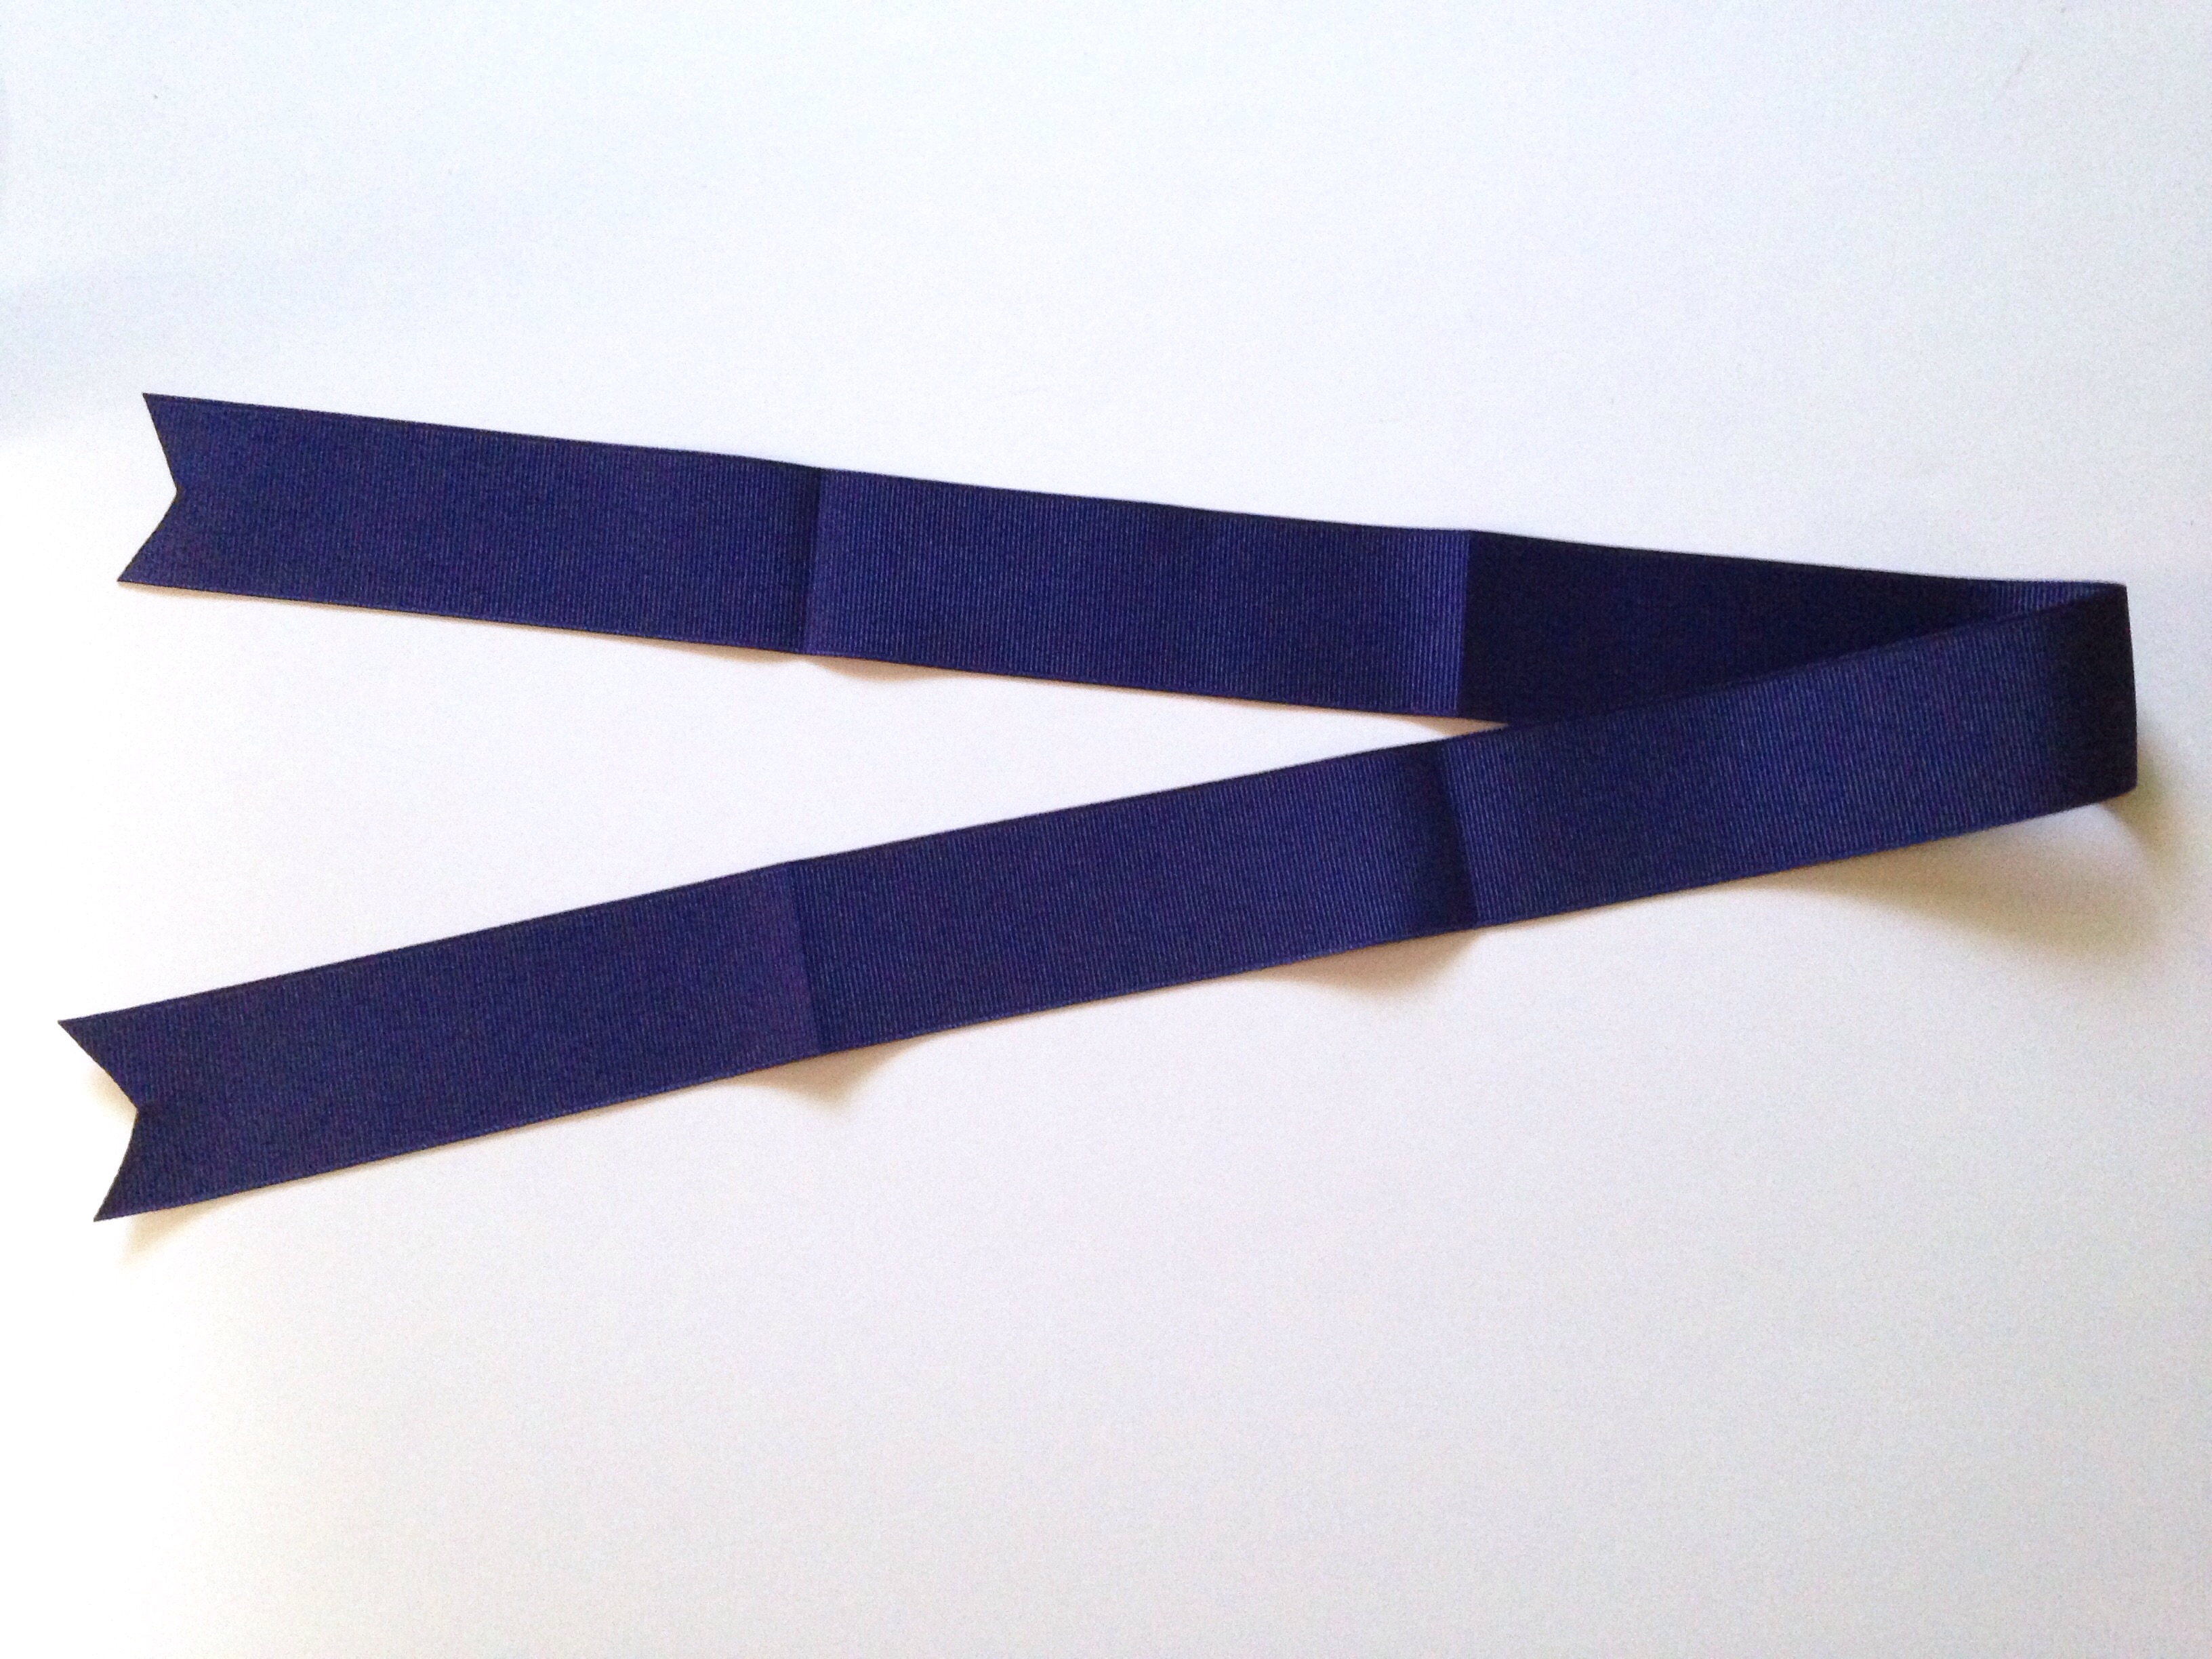
 I am using 30" of 1.5" grosgrain ribbon in navy.
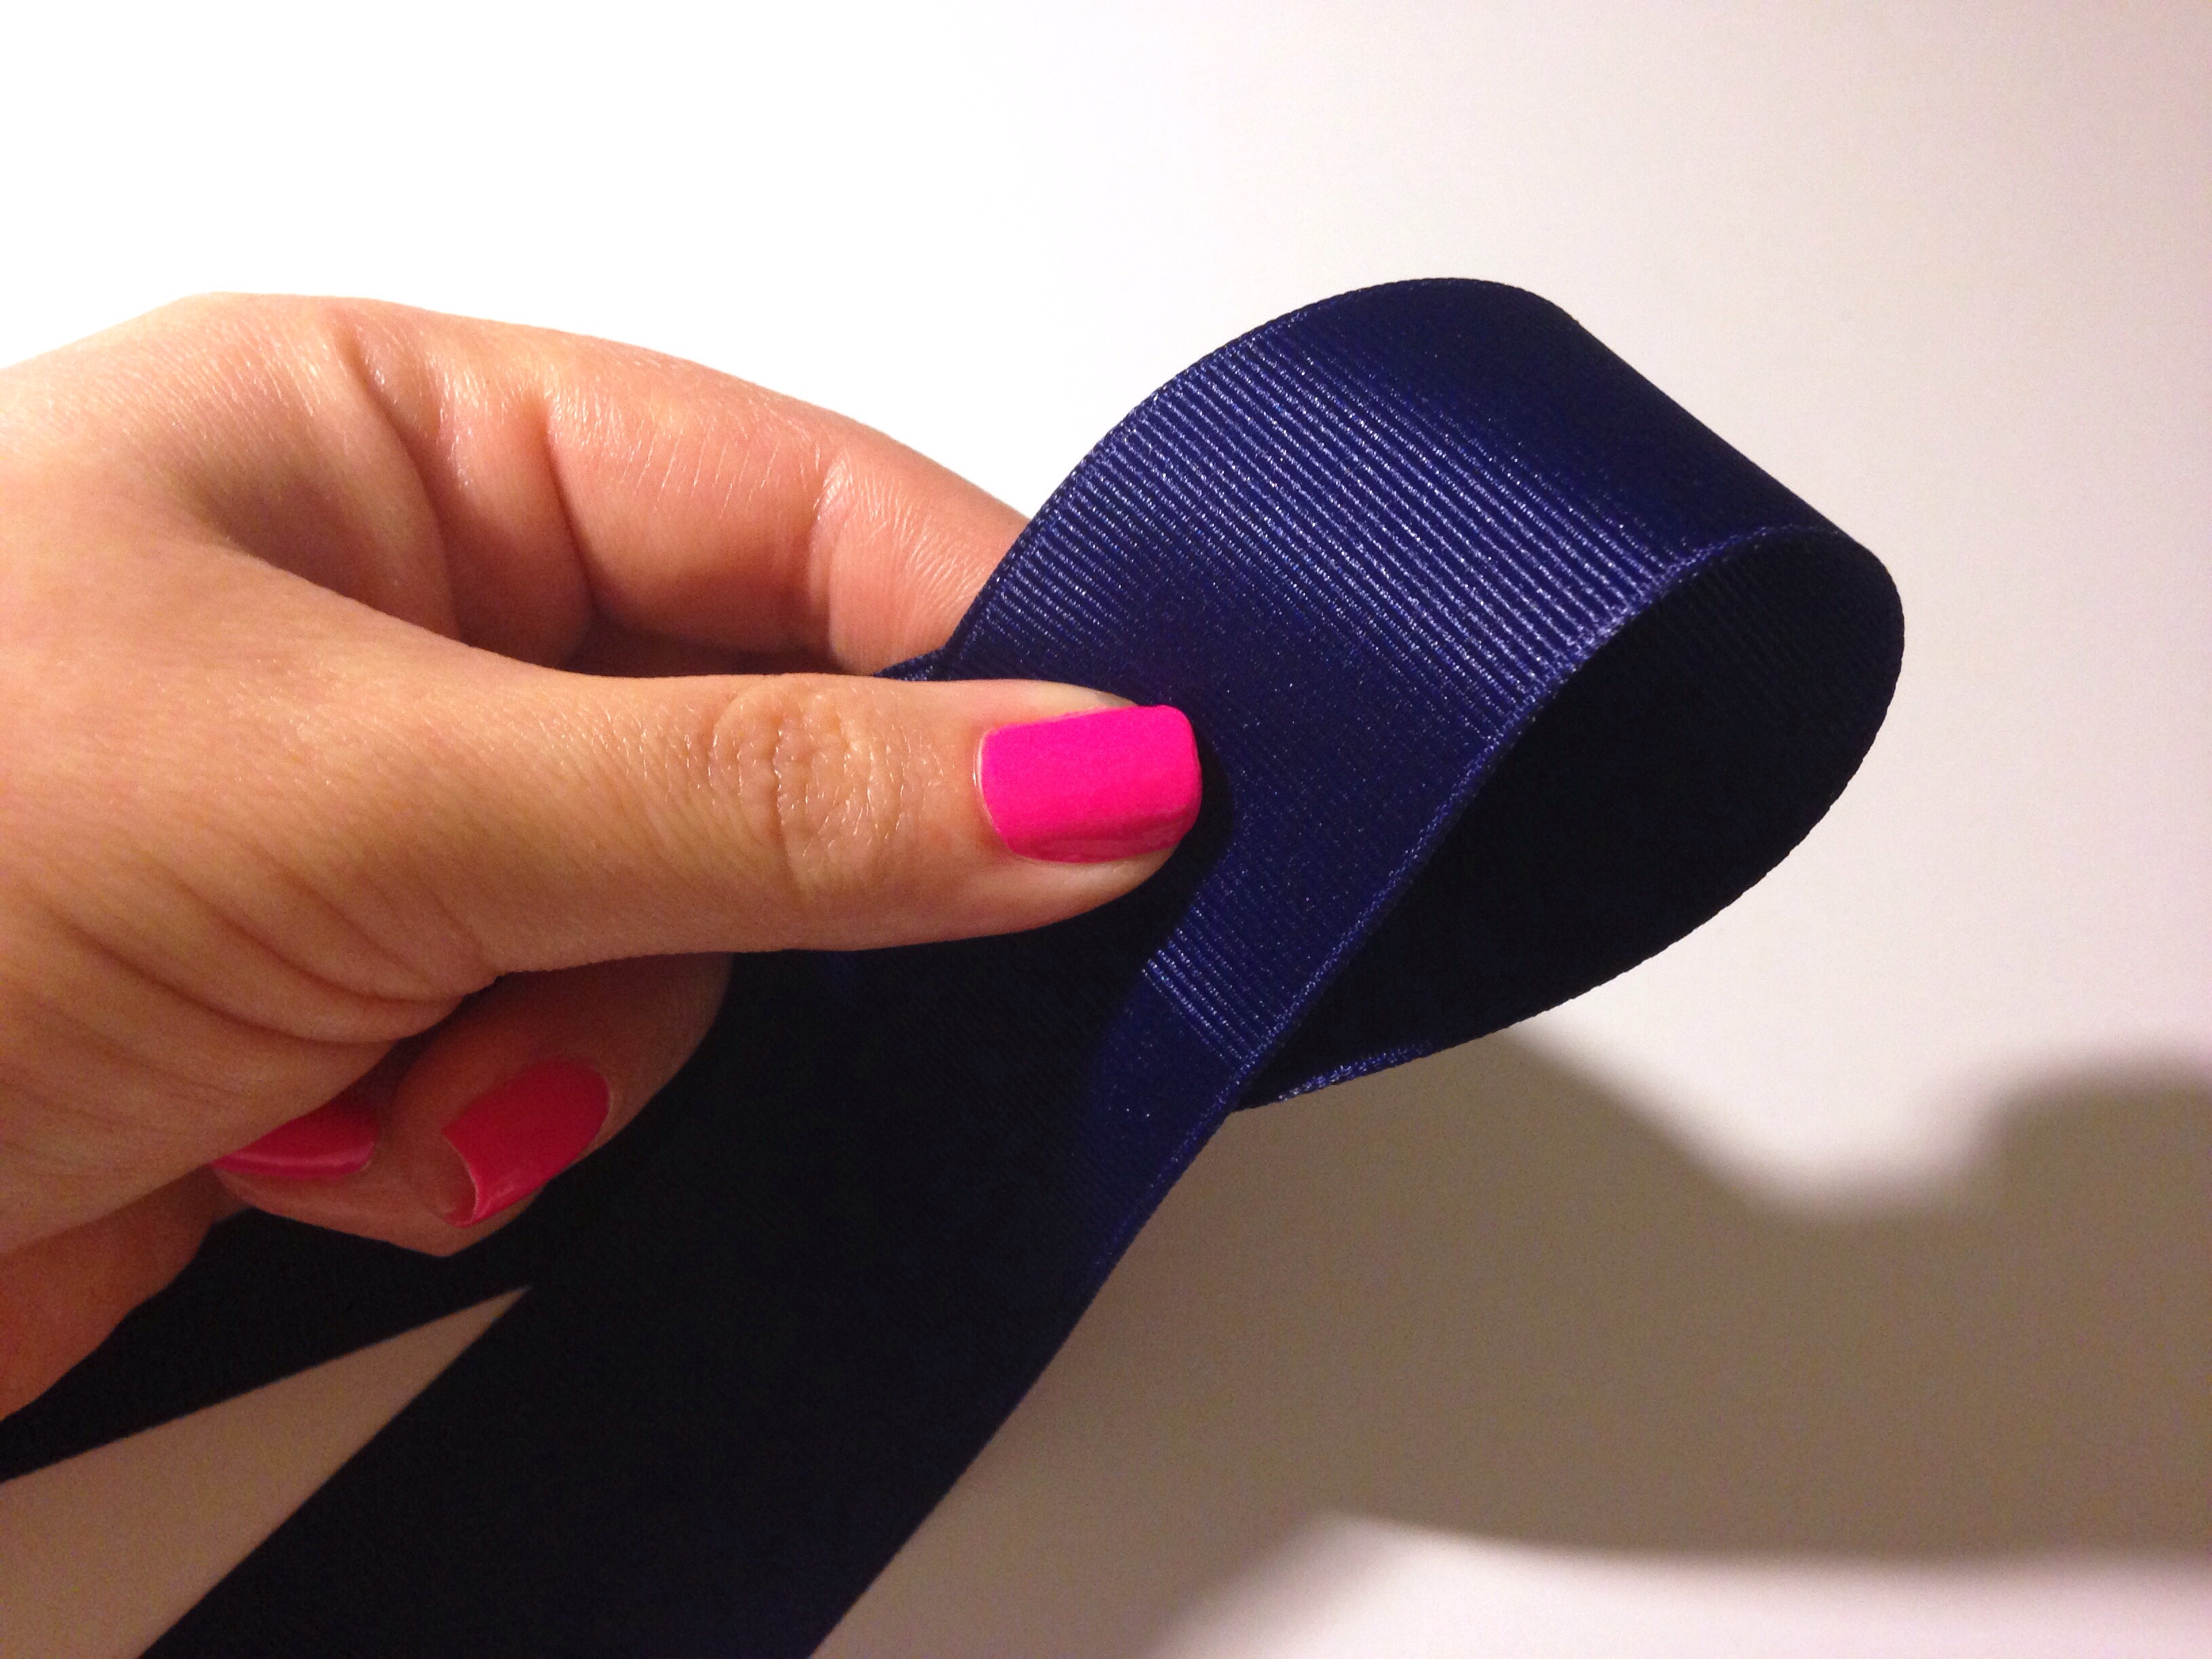
 I like to trim the ends of my ribbon in the beginning rather than after my bow is formed. I have chosen to cut them "V" shaped which is very easy. Simply fold the width of your ribbon in half. Do not fold down and make a hard crease as this would be seen in your finished product. While holding the sides of your folded ribbon together, cut from the middle (inside the fold about 2/3 of an inch up) back down to the corners of your ribbon at an angle. When you let go of your ribbon you should have a perfect "V"! Make sure to heat seal your finished end using your lighter.
 Now we are going to make a few creases in our ribbon to serve as our glide to insure we have a perfectly proportioned bow. Your first crease will be made by folding the entire 30" of ribbon in half. Now take each half of your ribbon and fold into 3 equal sections. Your creases should be every 5", creating 6 equal sections as shown in the pic above.
 Now our ribbon is ready to be folded into a beautiful bow! Start from your middle crease, and fold the crease to the right ontop as shown above to form your first loop.
 Now take your crease from the left side of the middle and place ontop as shown above to form your second loop. Our ribbon is already transforming into a nice bow shape!
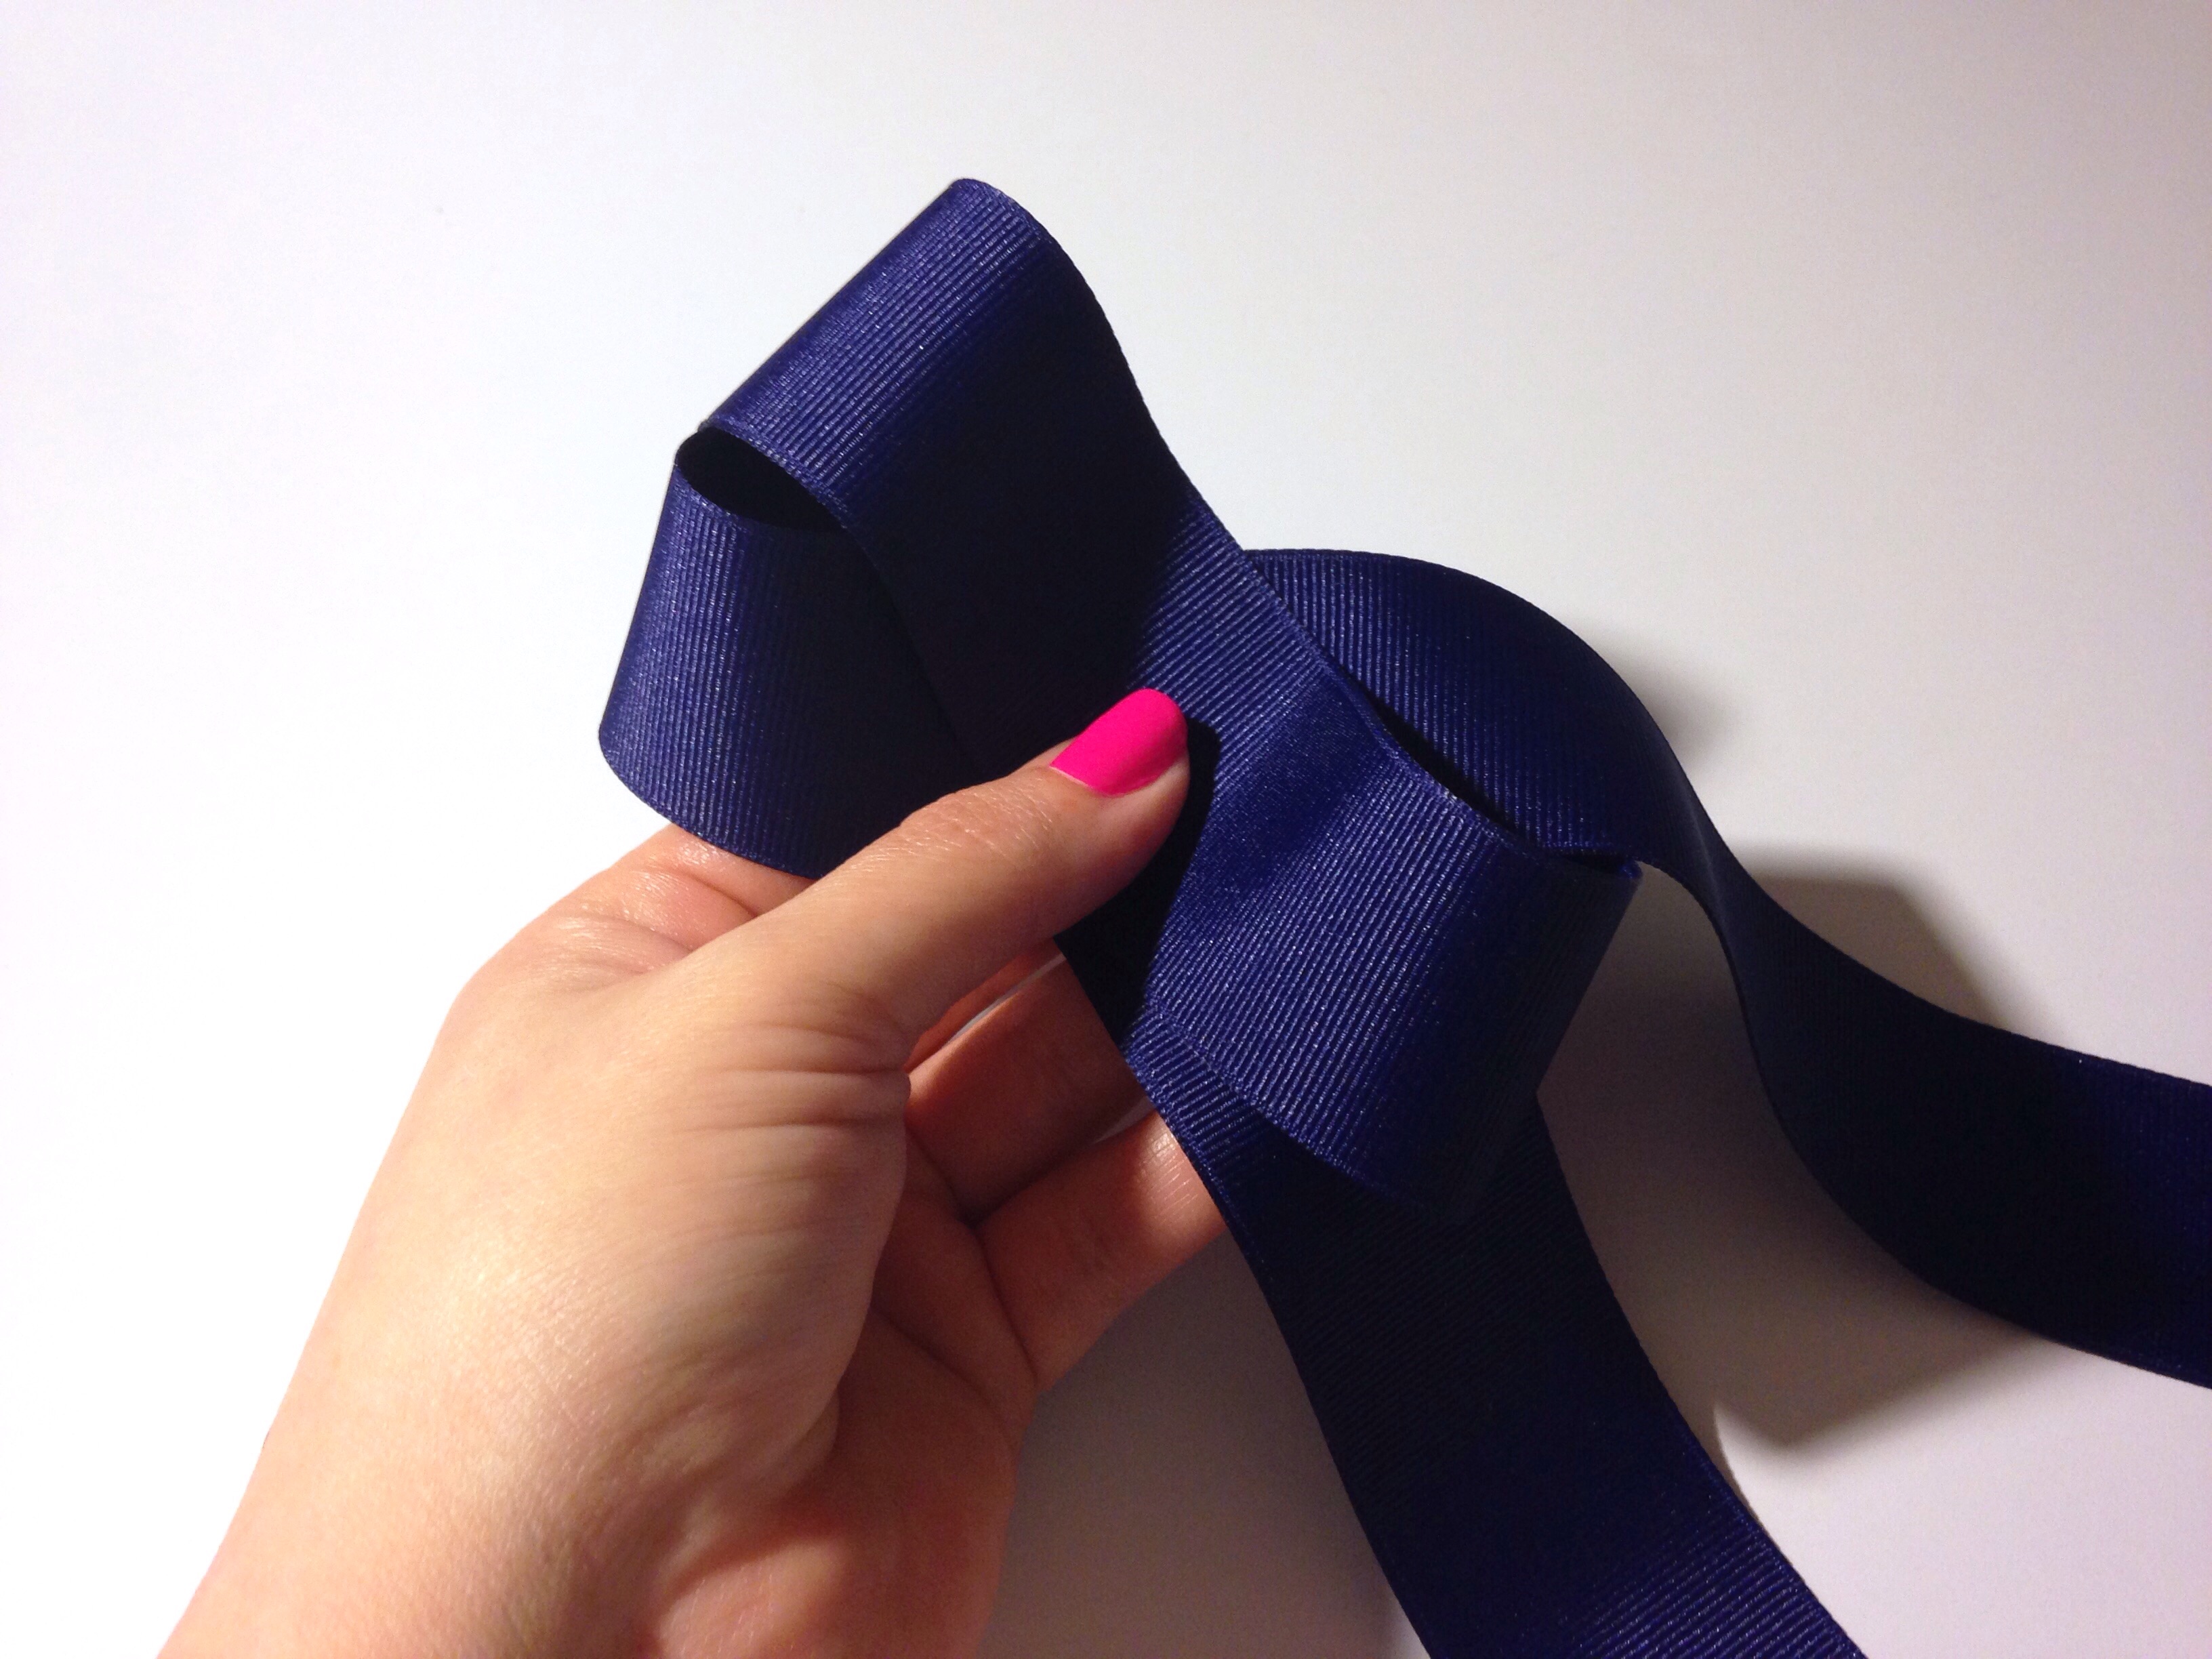 Using the same piece of ribbon from forming your last loop, fold it around to the backside of your bow to create your next loop.
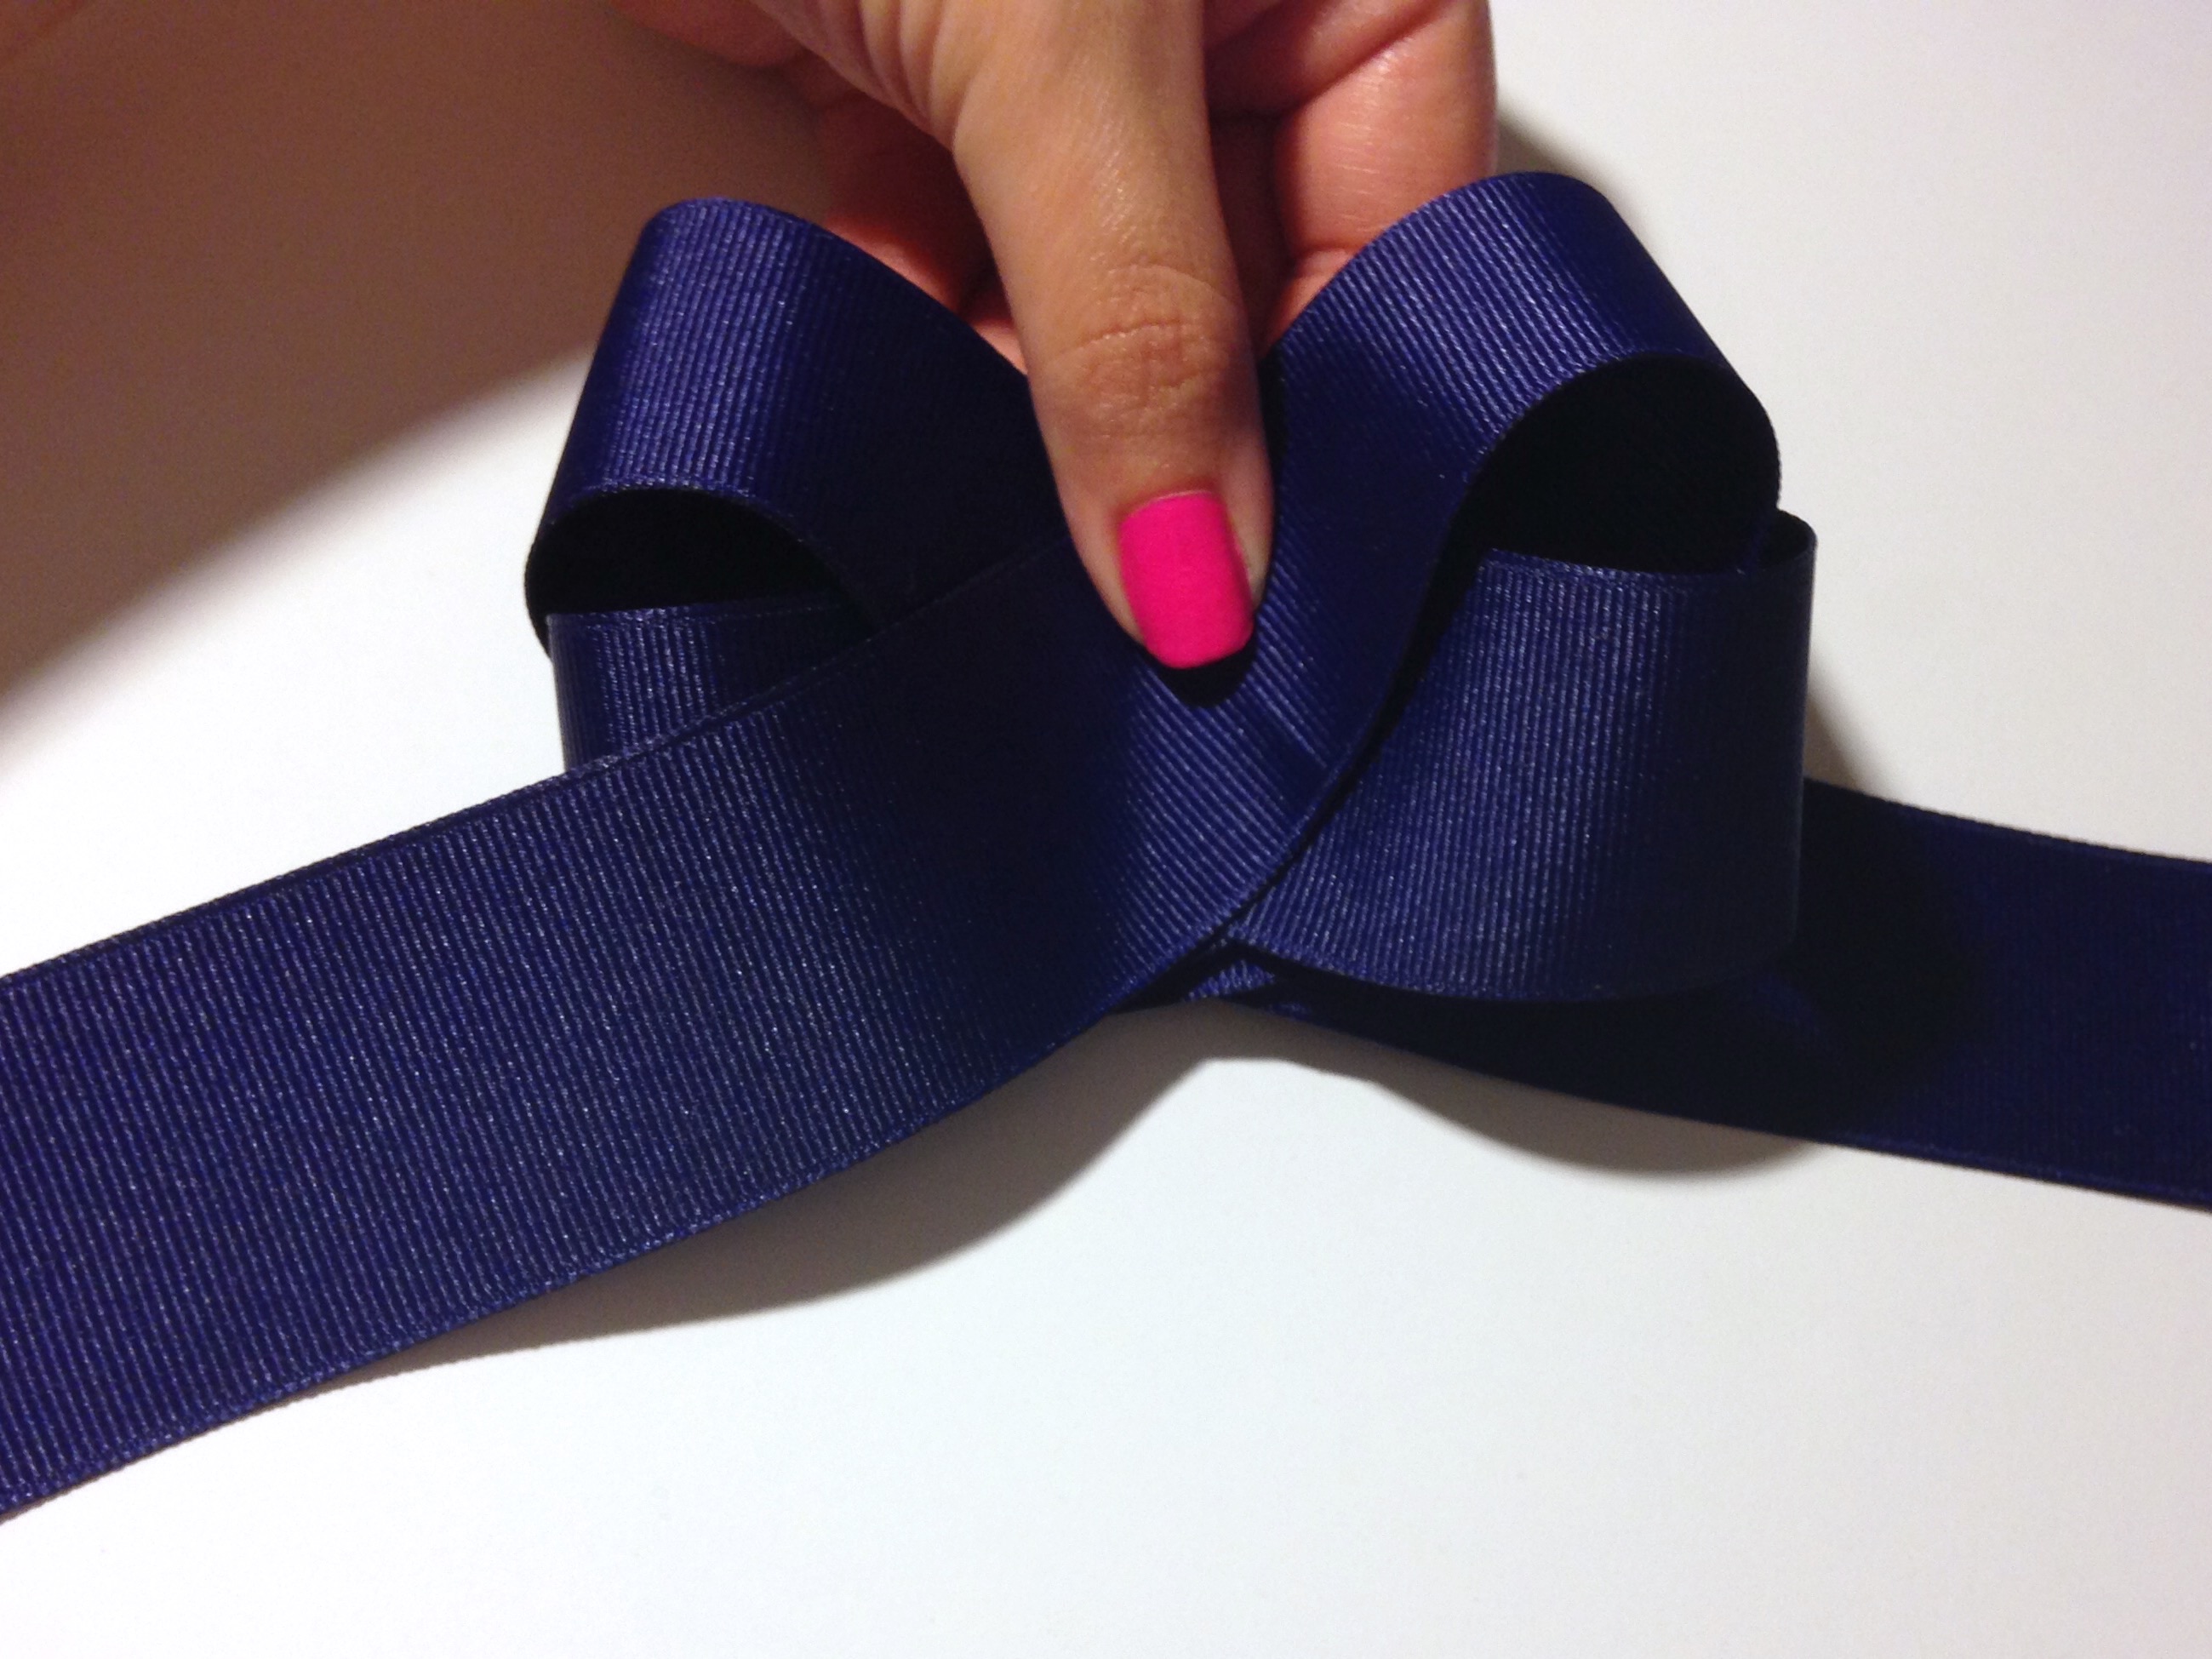 Take your remaining crease and bring up to the center of your bow. (If you prefer both tails to hang from the backside, bring your last crease to the center of the backside rather than the front.)
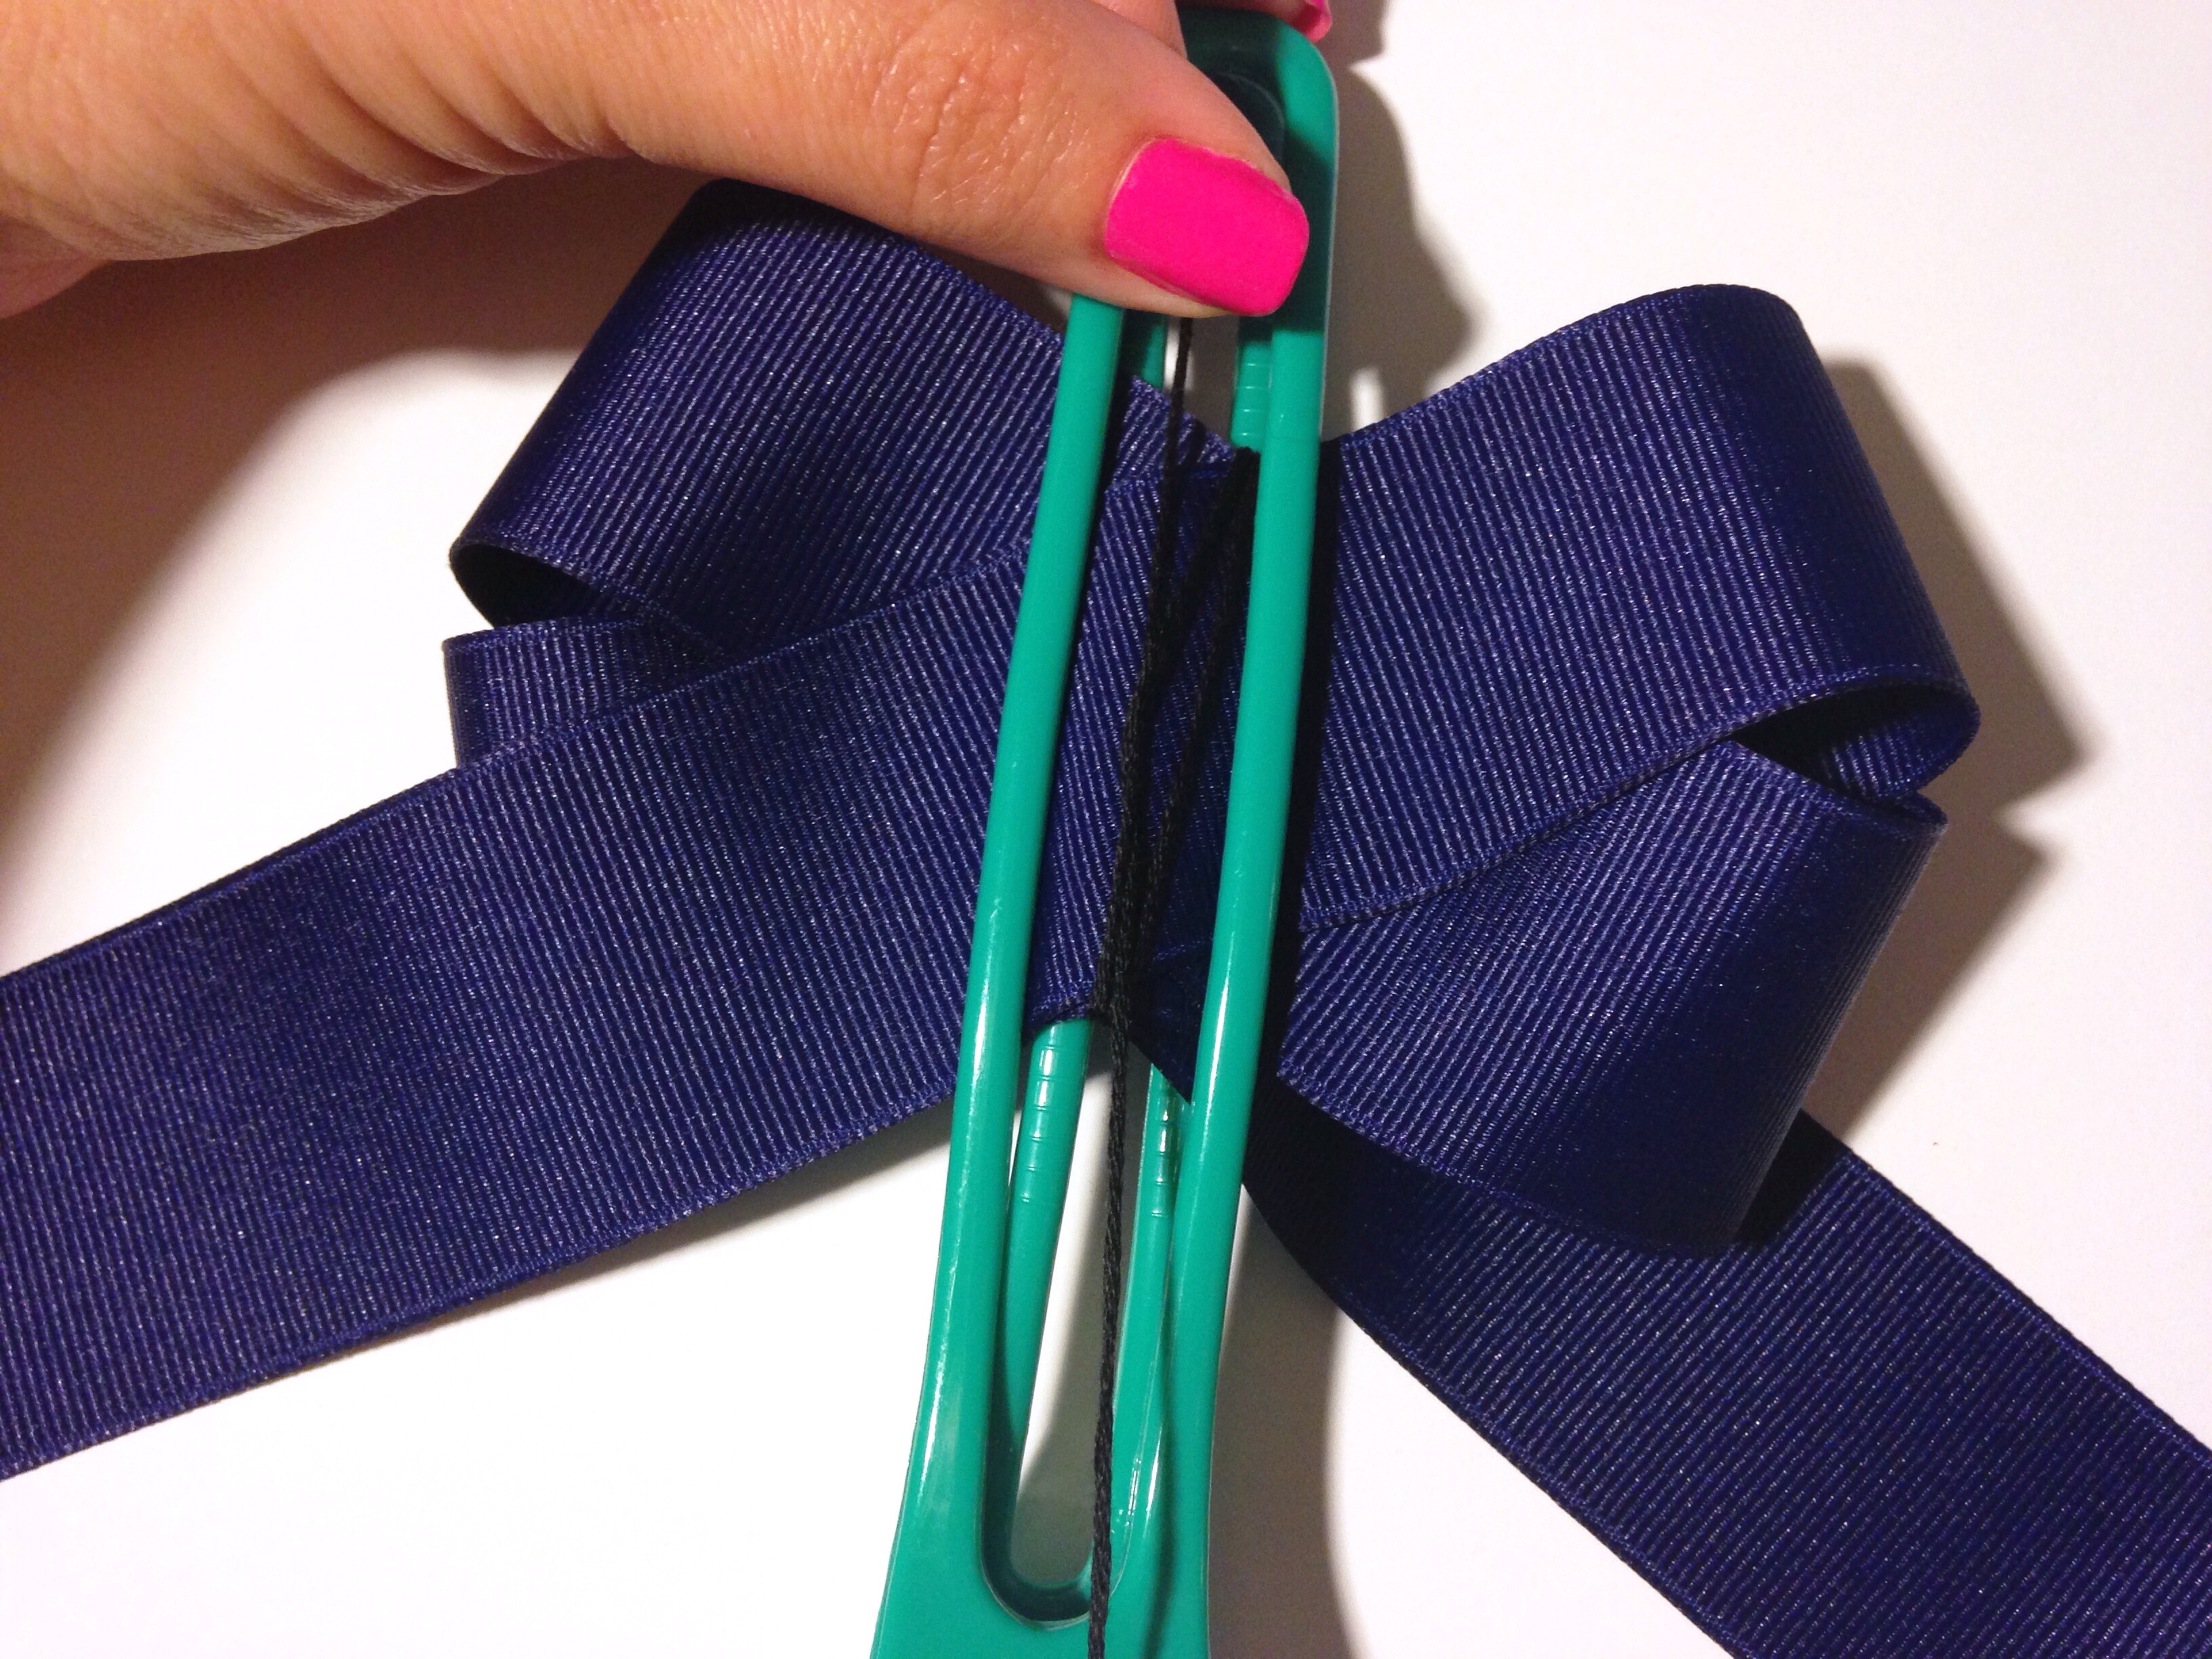 Place your large salon clip in the center of your bow. Wrap a long piece of embroidery thread around the center of your bow through the open spaces of your clip. I wrap my thread around twice.
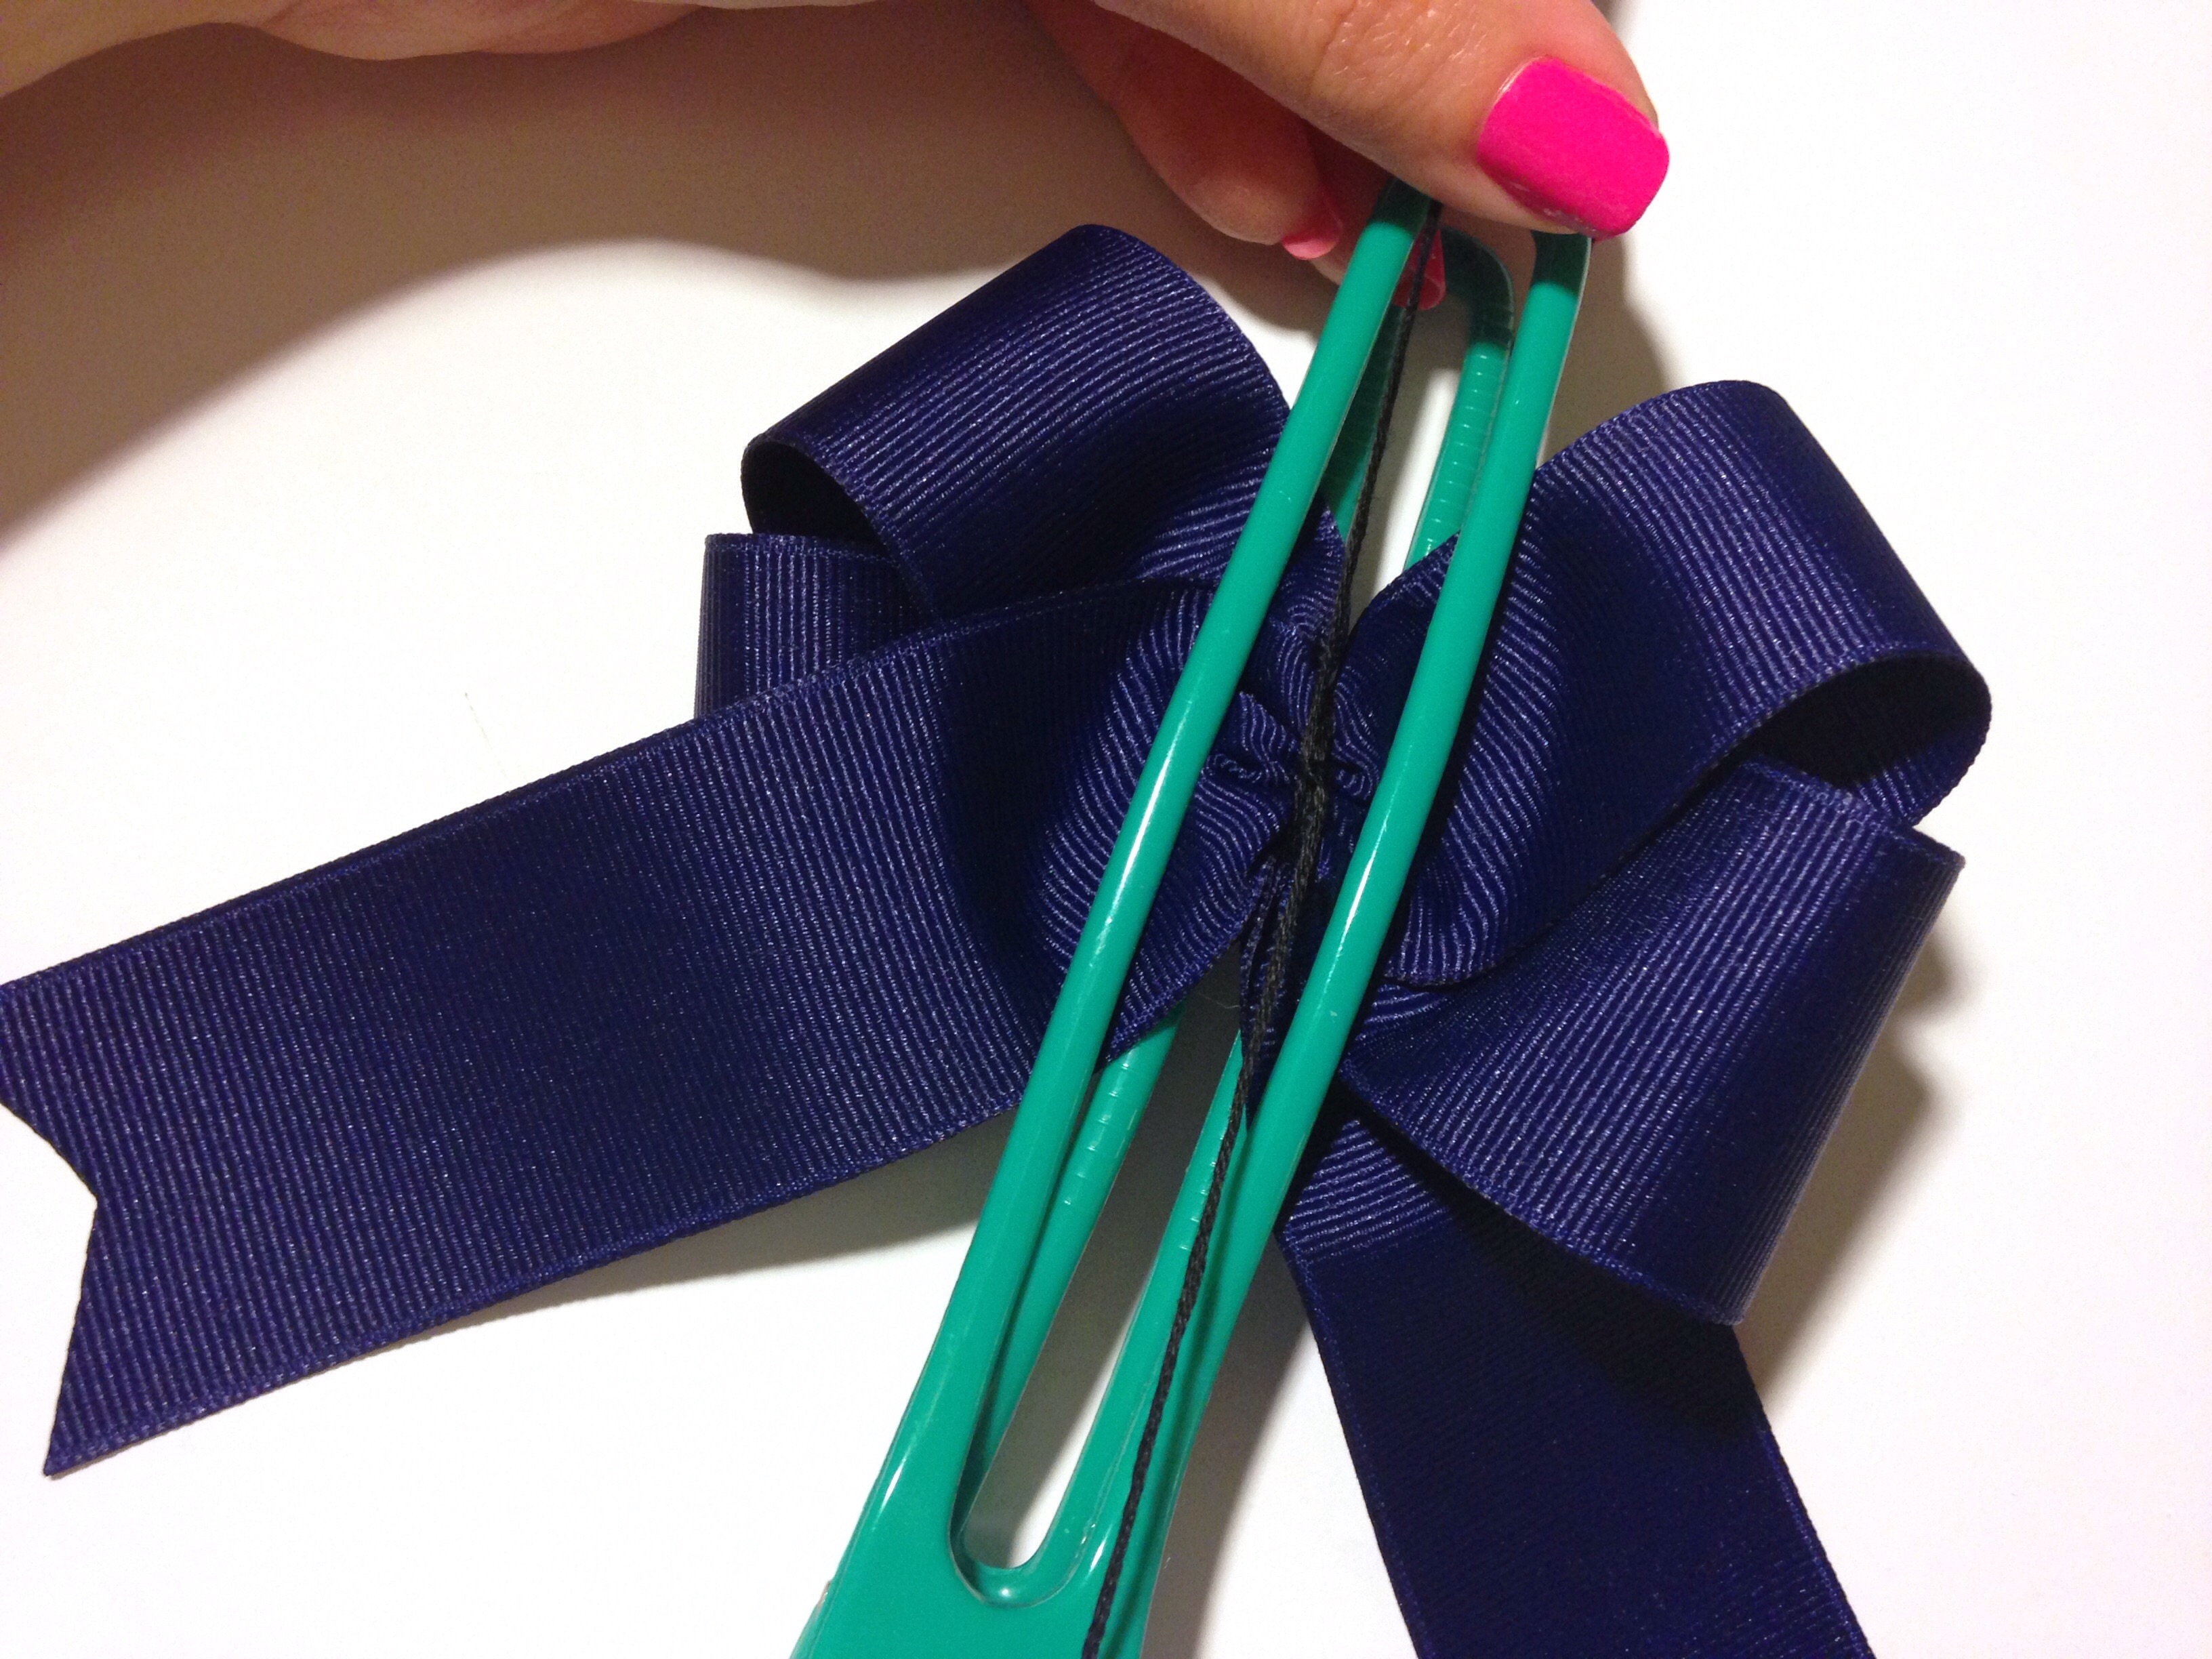 Gently pull your thread tight as you tie a double knot around your bow.
 After you have secured the center of your bow you can remove your salon clip. Do not trim the ends of your thread just yet!
 Flip your bow over to the backside. We are going to tie another double knot using our thread for additional security. Before tying your knot, slide your elastic hair band over one side of your thread so it will also be tied in with your knot. Once your knot is secure and hair band is in place you may trim off the extra thread.
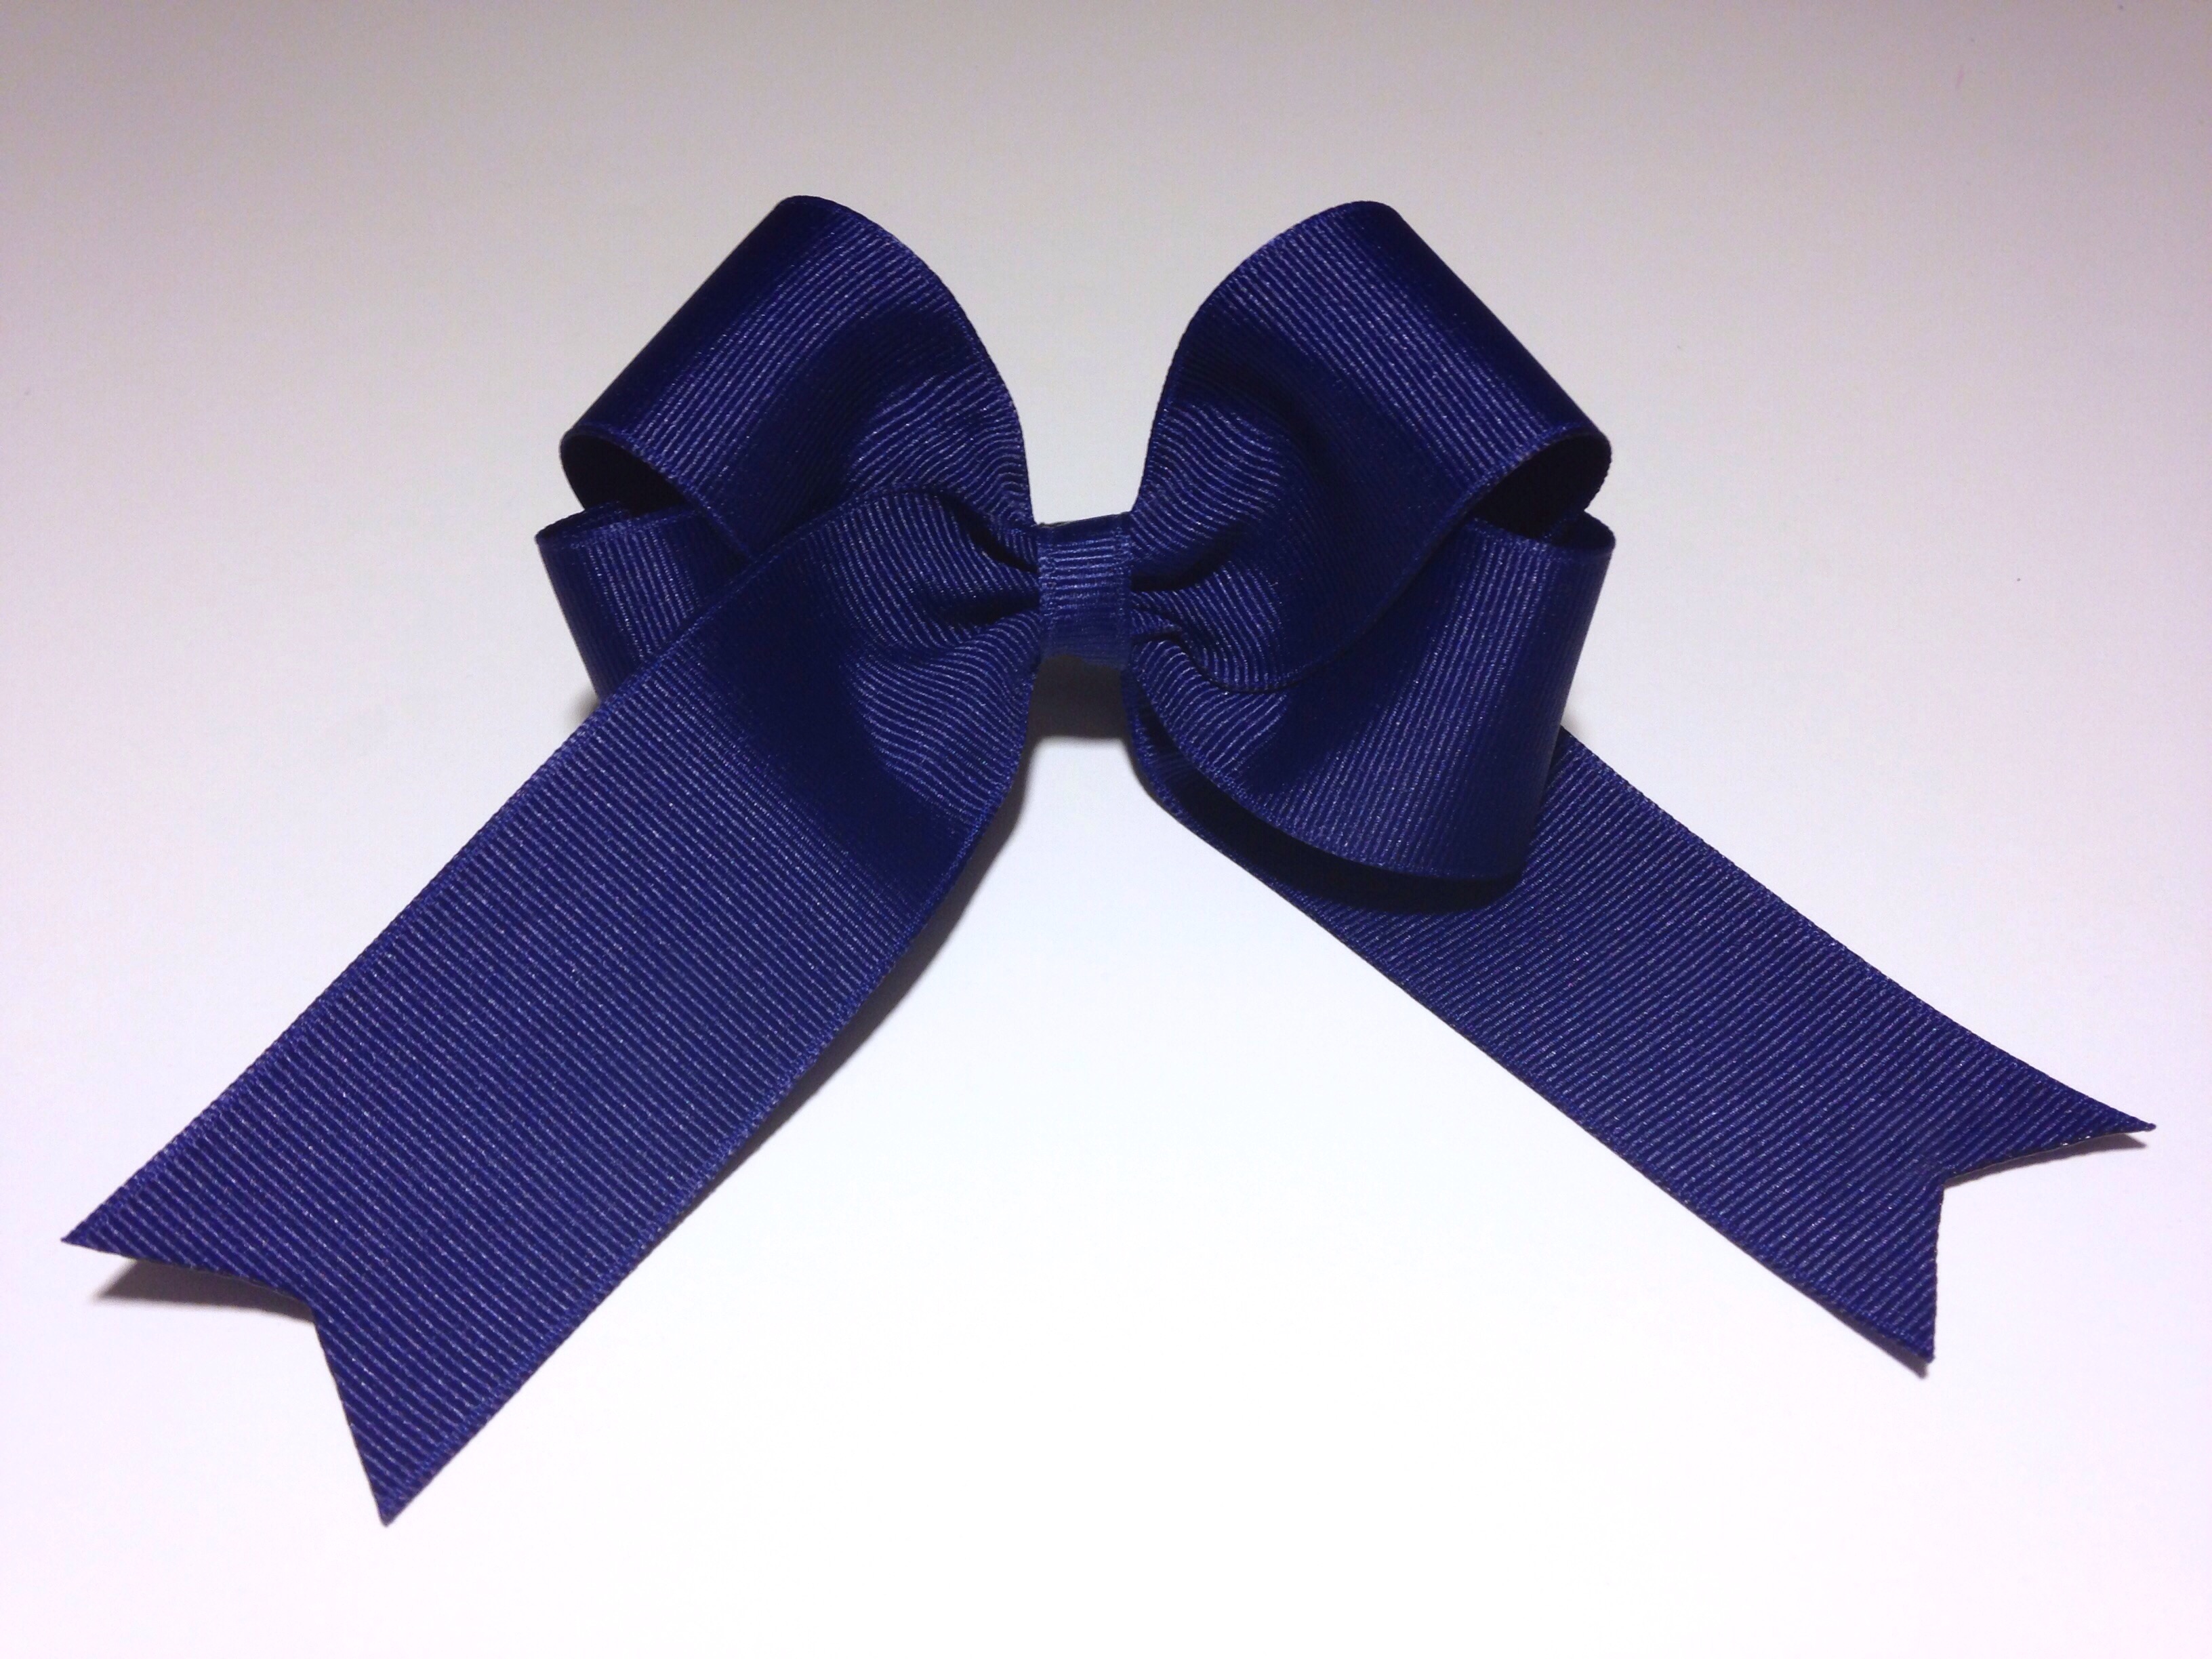
 Using 3/8" grosgrain ribbon in the coordinating color of your bow, we are going to wrap the center. You will need your hot glue gun for this step. Make sure to start by adding a generous amount of hot glue to hold your hair band even more securely in place. By using thread, hot glue & ribbon, our band is sure to stay in place forever! Wrap your ribbon around the center at least twice, using a thin line of hot glue the entire length of ribbon, not just at the beginning and end. Don't forget to heat seal the end of your 3/8" ribbon after it has been cut to prevent fraying later. Look what we have just created! A simple yet stunningly stylish bow with 5" tails to hang down alongside a sweet ponytail! Your classic hairdo never has to be boring ever again! Thanks for working with me today and allowing me to teach you how to make this trendy little essential that is a must-have for these hot summer months! ENJOY!! :)
Visit the rest of our blog for more Crafting Tutorials and DIY Instructions!
Loading...

