
Supplies Needed:
3/8" Grosgrain Ribbon in Emerald 7/8" Grosgrain Ribbon in Pink 1/4" Grosgrain Ribbon in White Needle & Thread Scissors or Rotary Cutter Hot Glue Gun & Glue Lined Alligator Clip
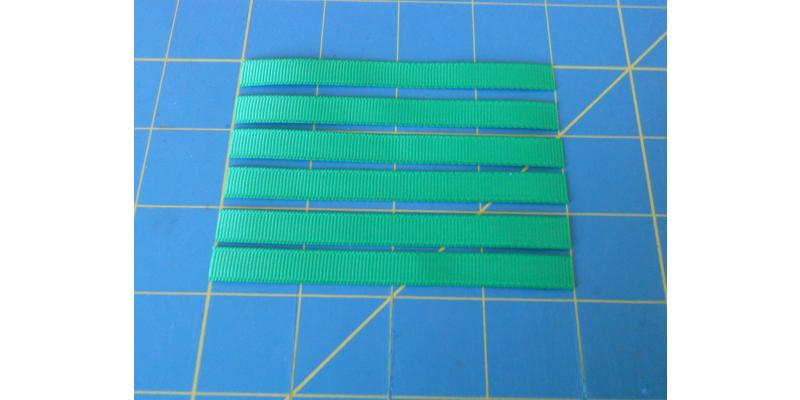
 Step 1: Cut six 4" pieces of your 3/8" Grosgrain Ribbon. Heat seal all ribbon ends.

 Step 2: Take two of your ribbon pieces and hot glue the corners together evenly.
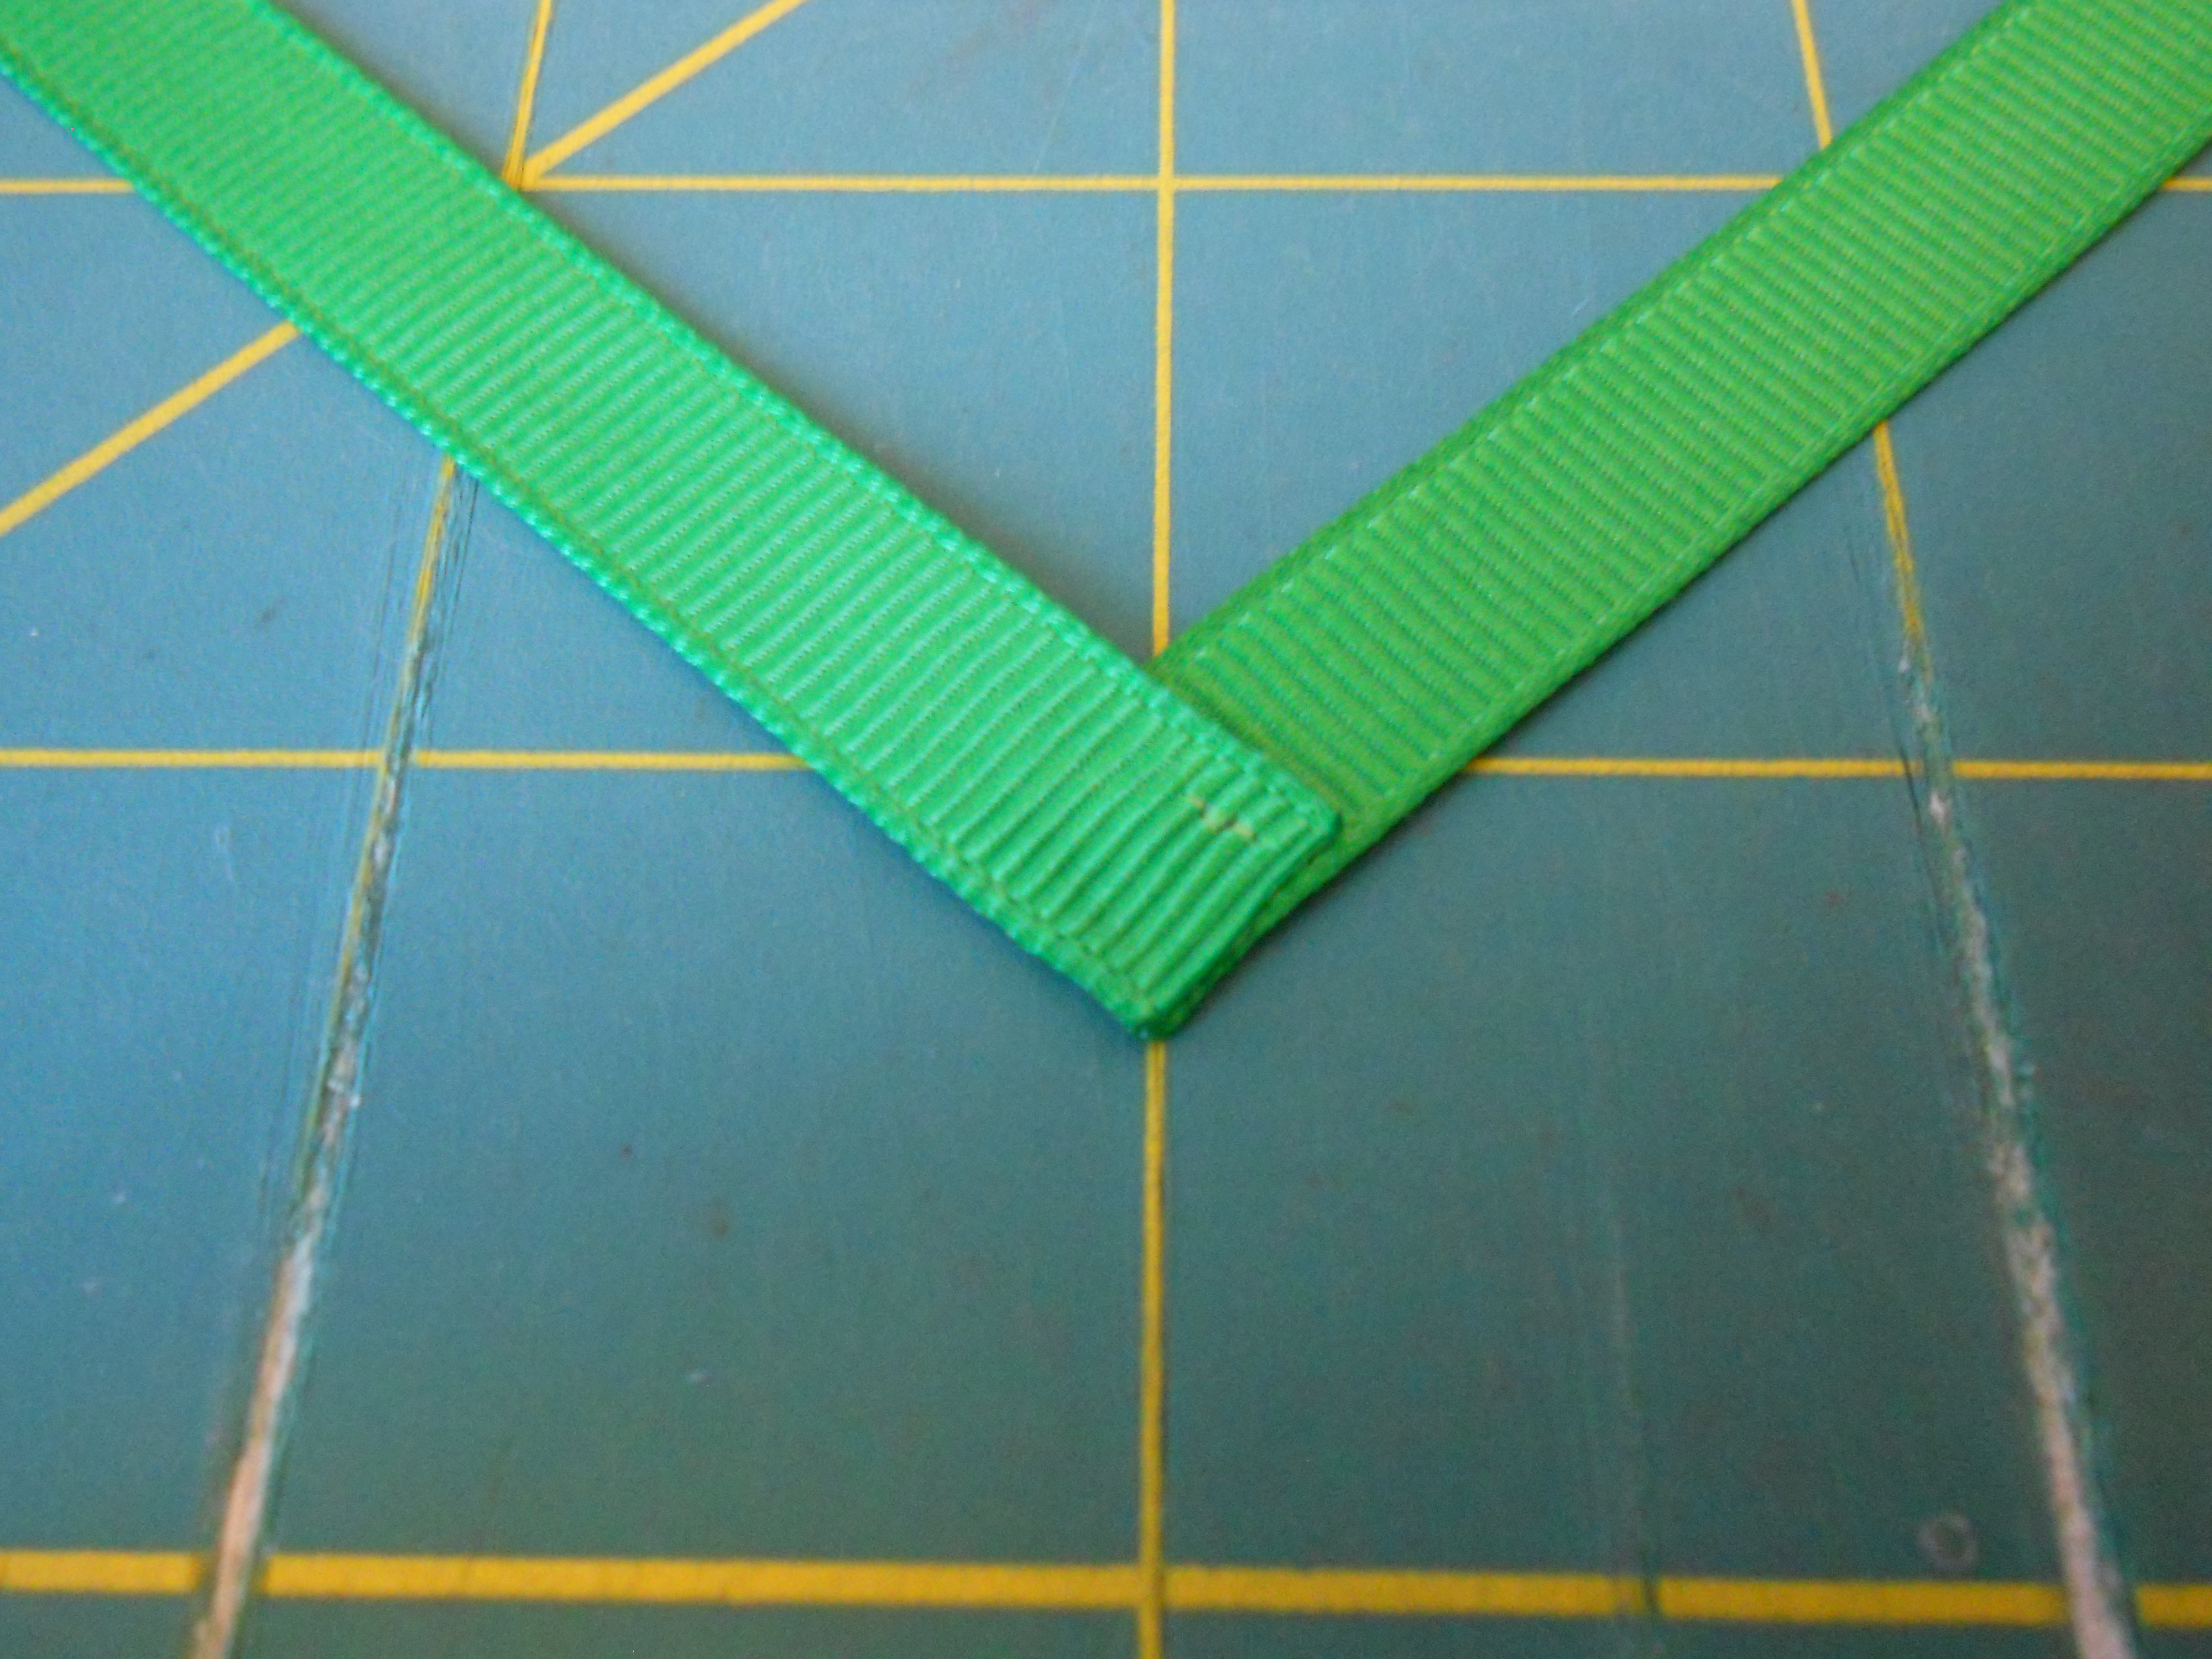
 Step 3: Form your first loop by looping the left ribbon piece up and over. Hot glue it evenly next to your corner piece.
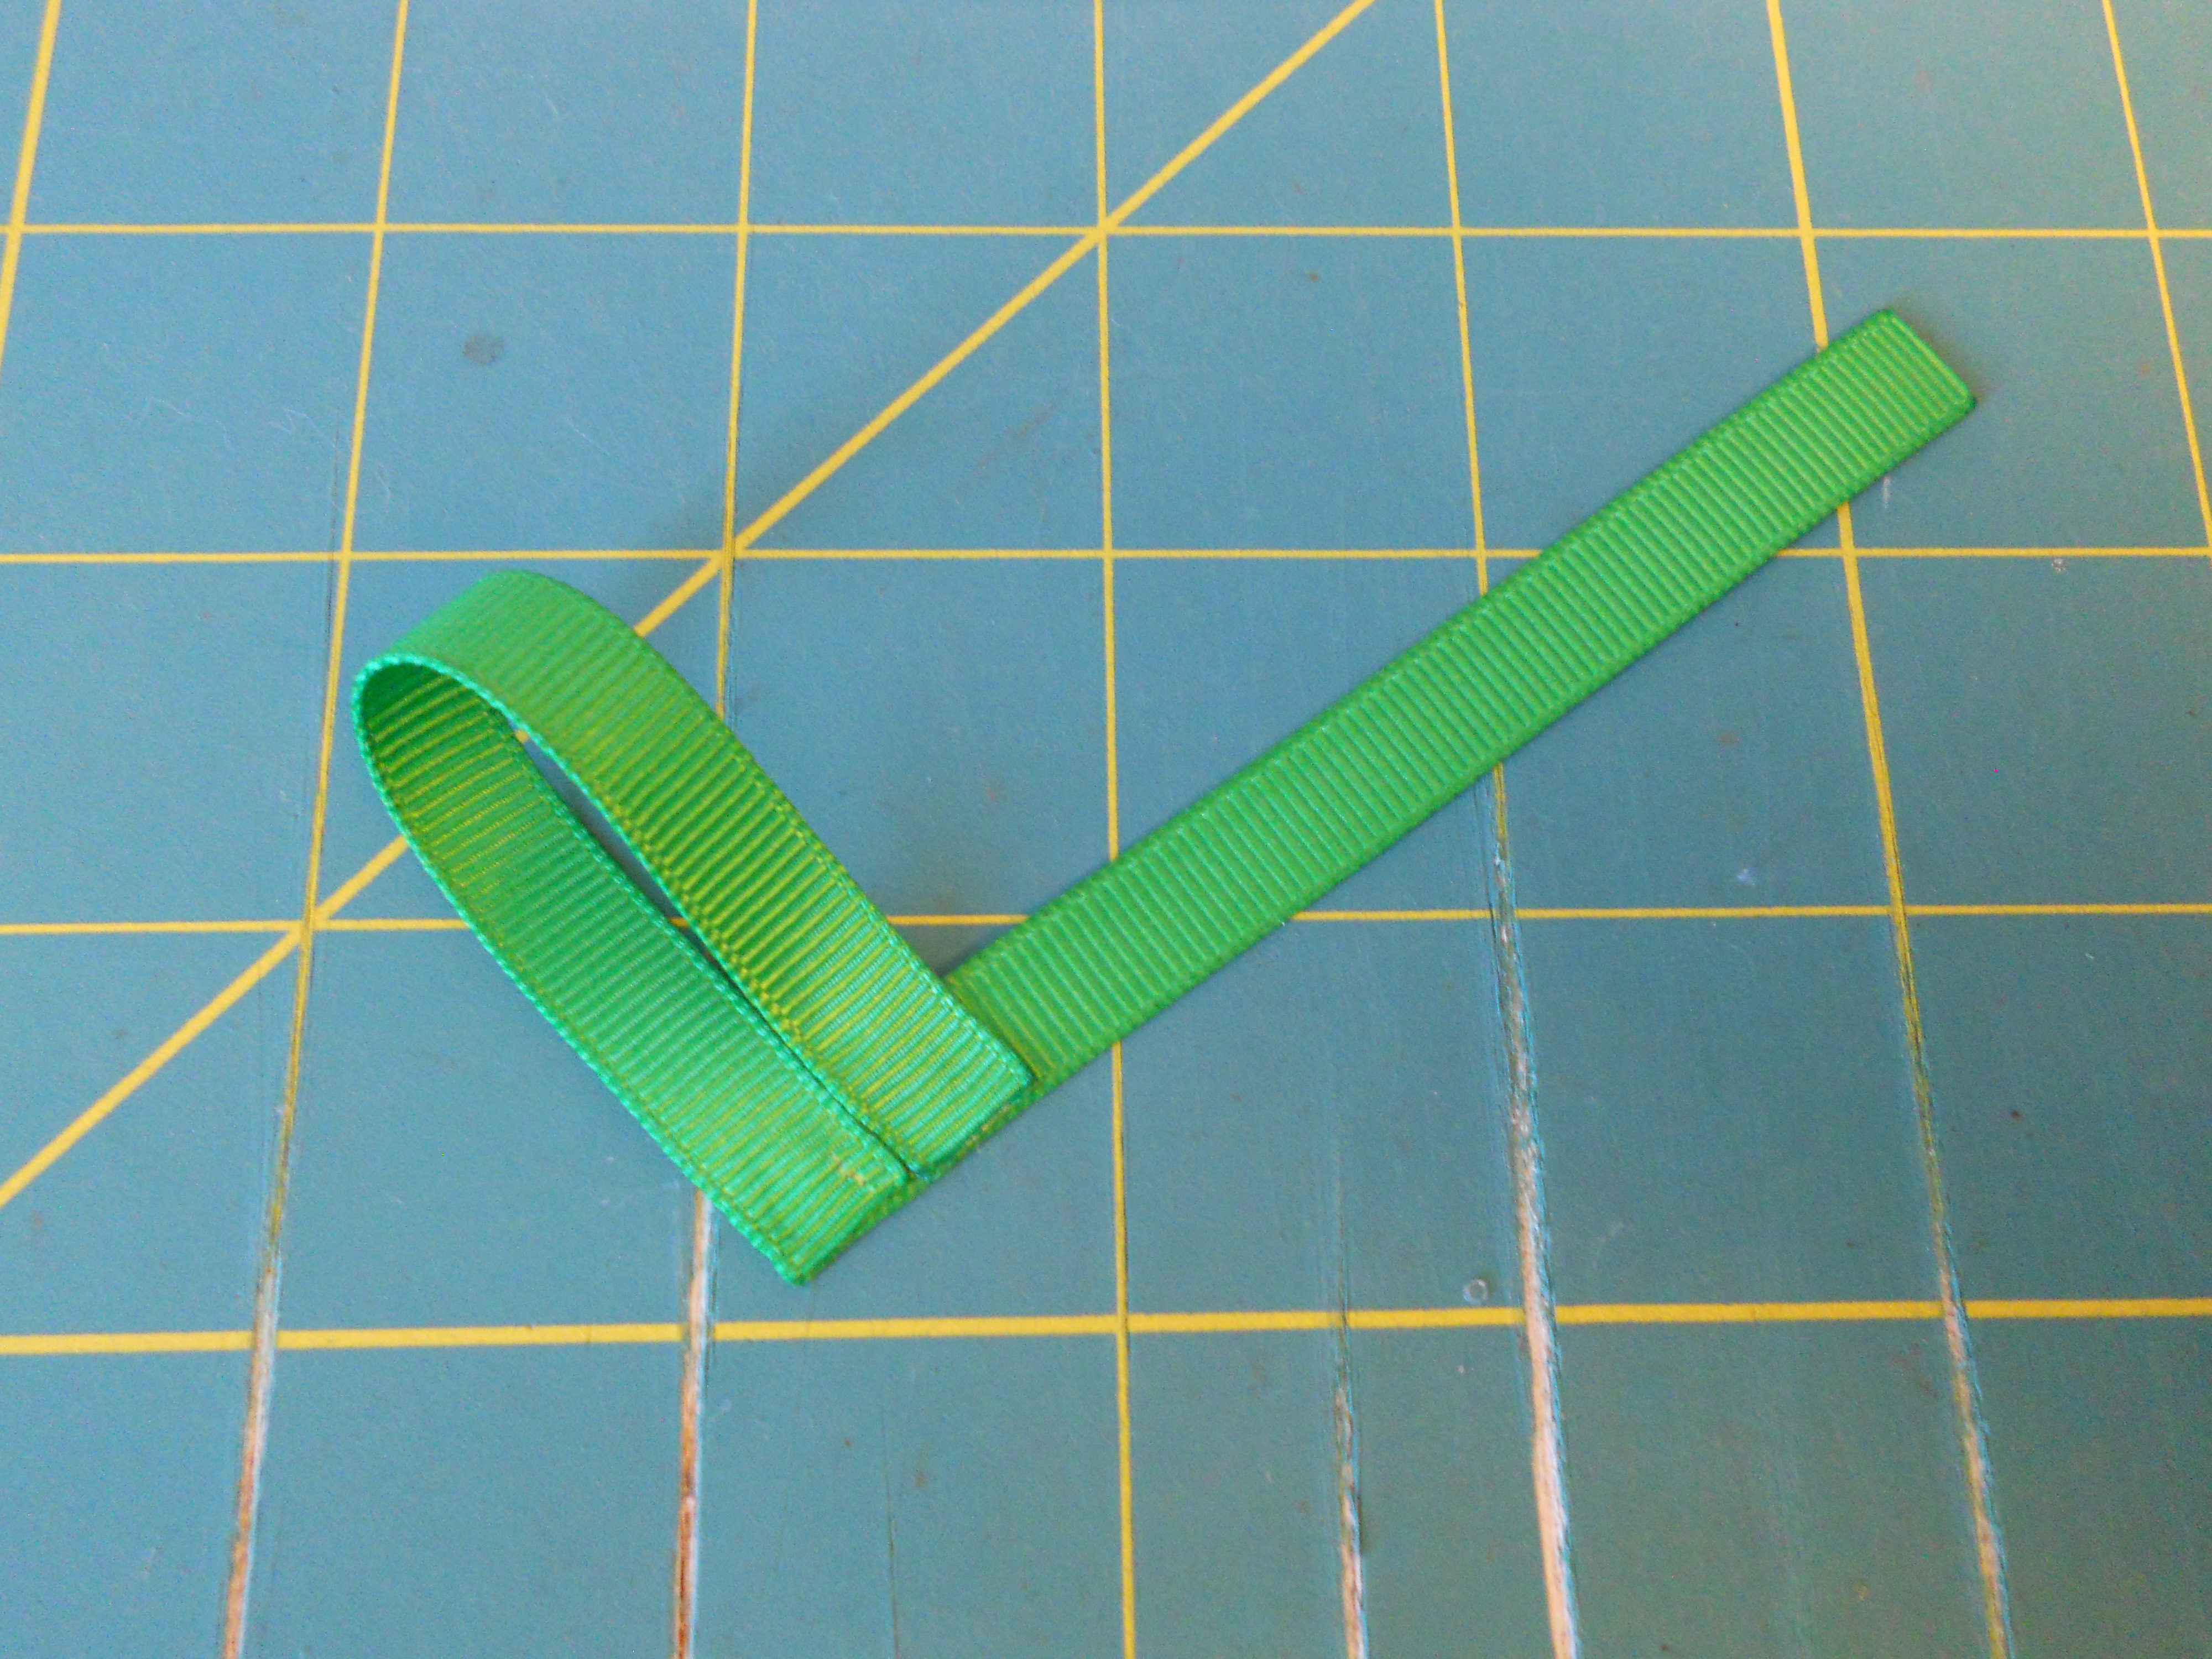
 Step 4: Form your second loop by looping the right ribbon piece under the first loop. Hot glue it evenly next to your corner piece.
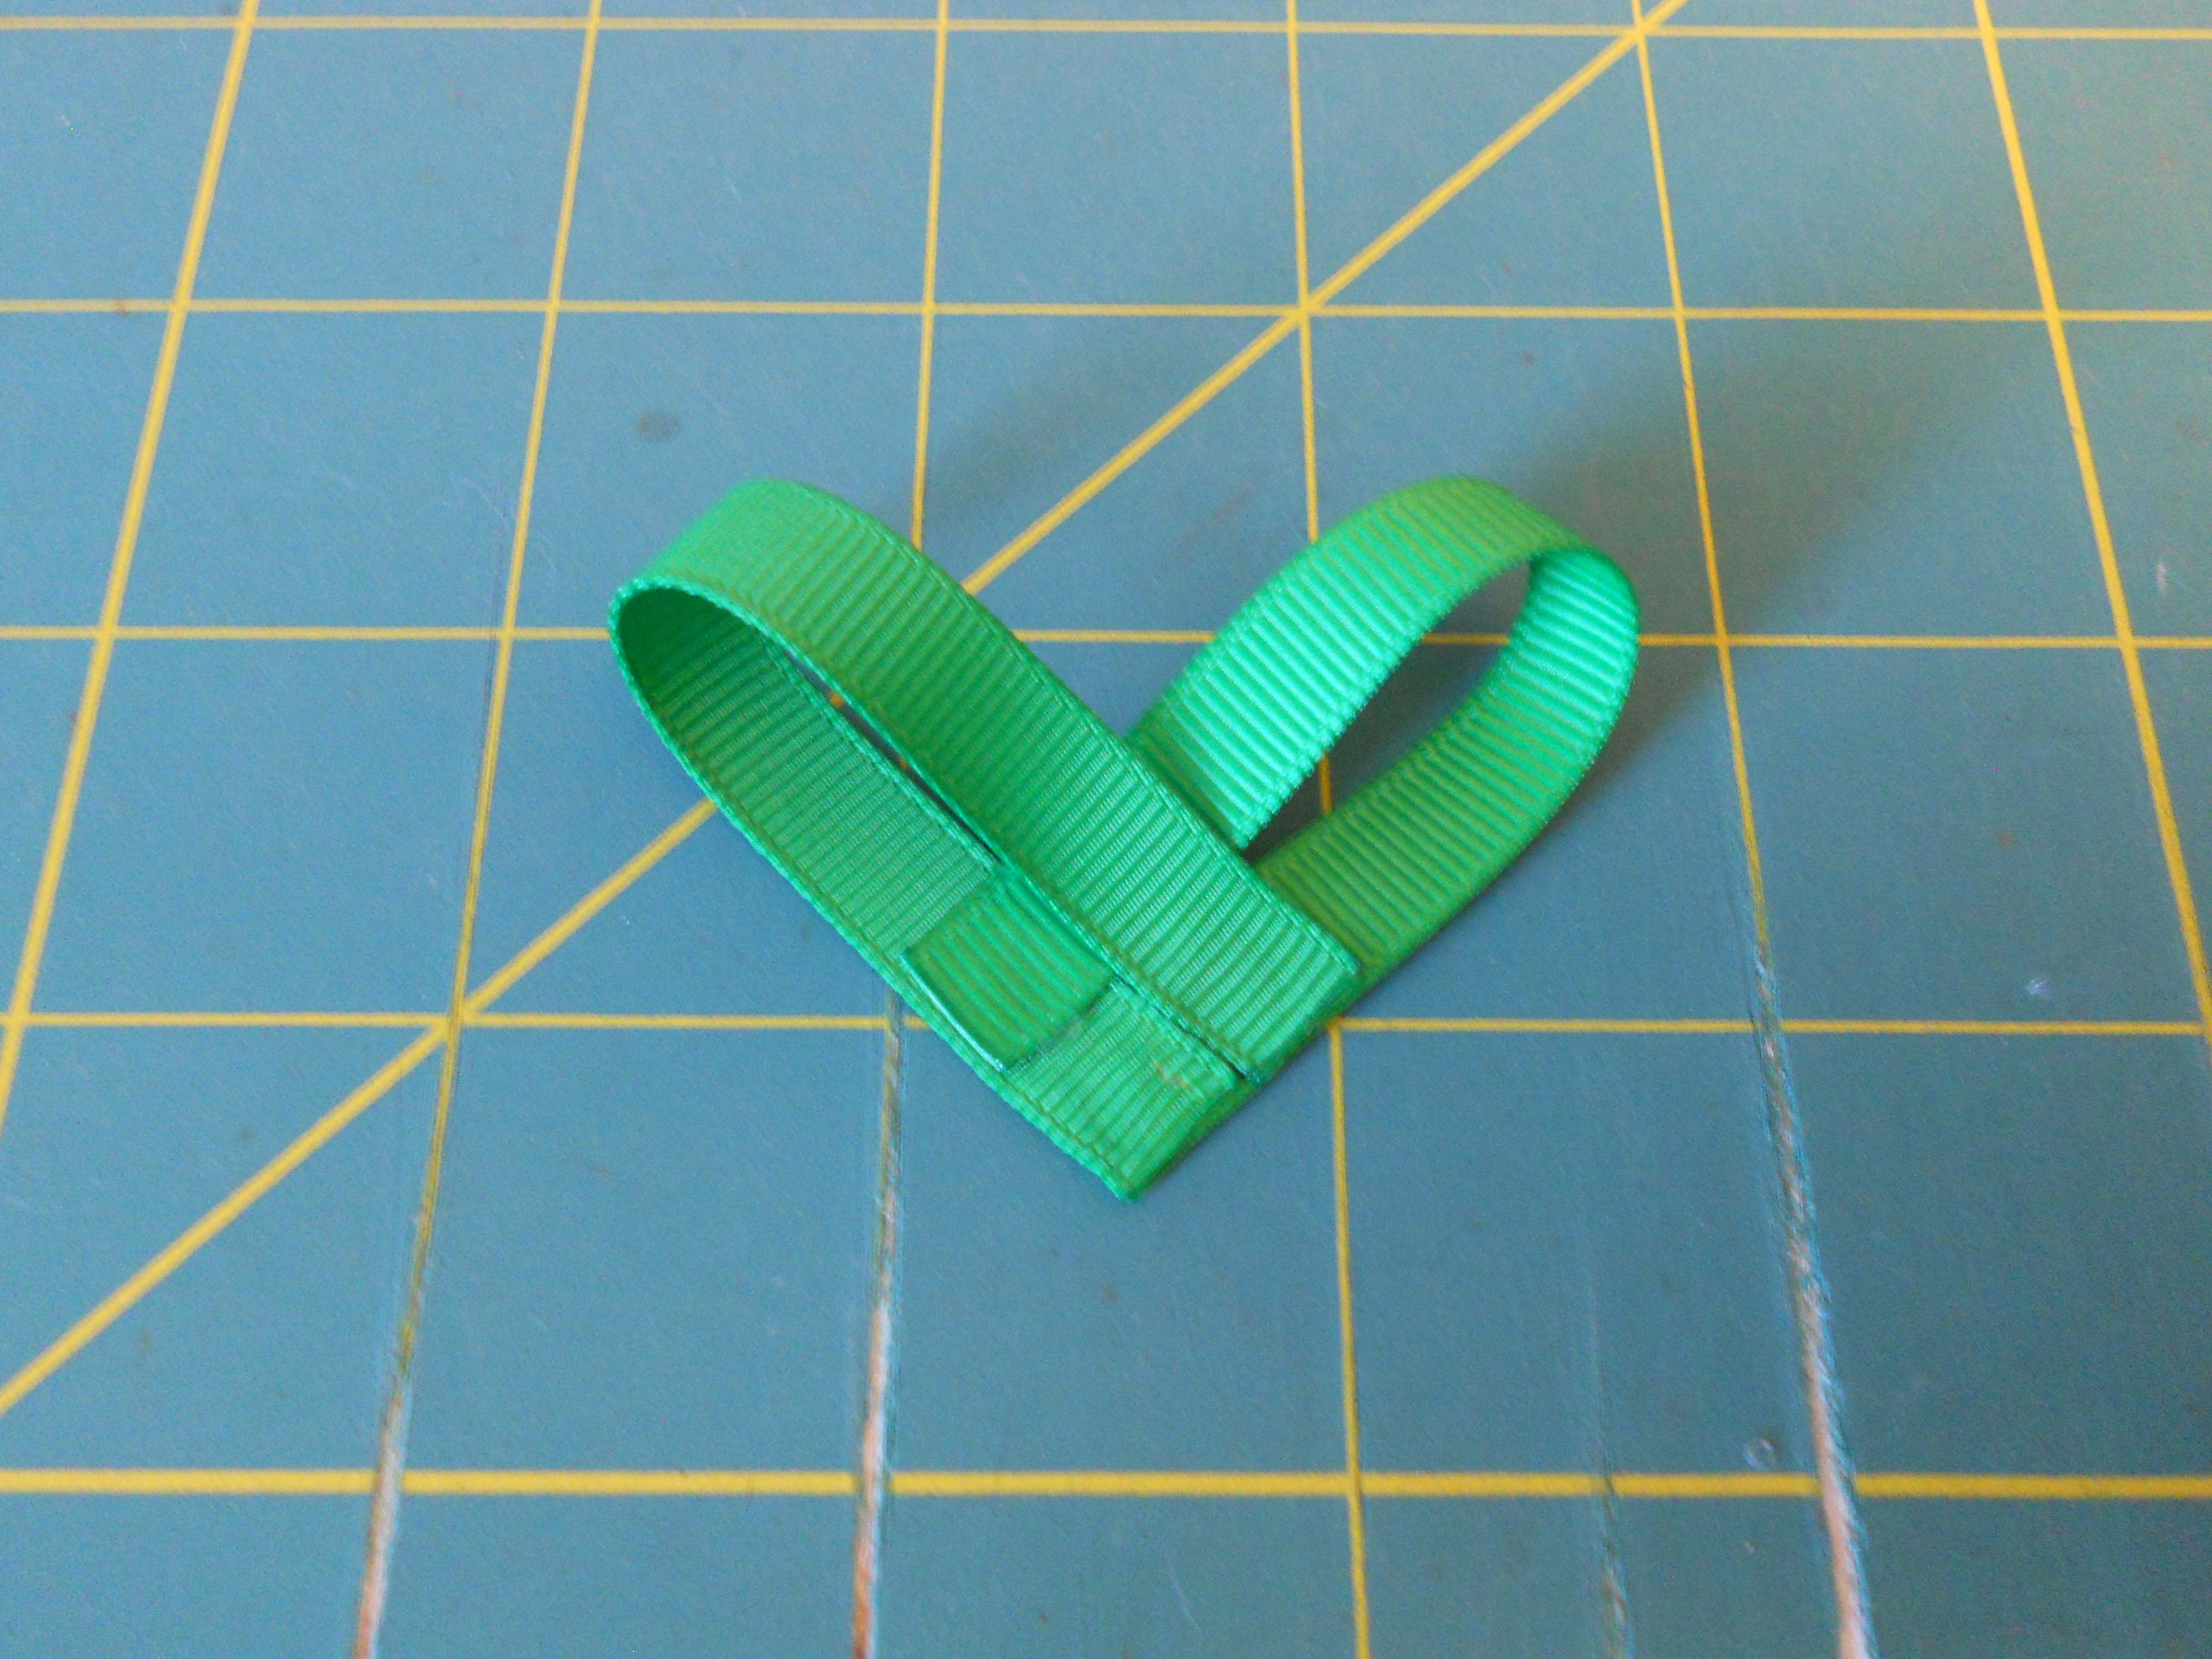
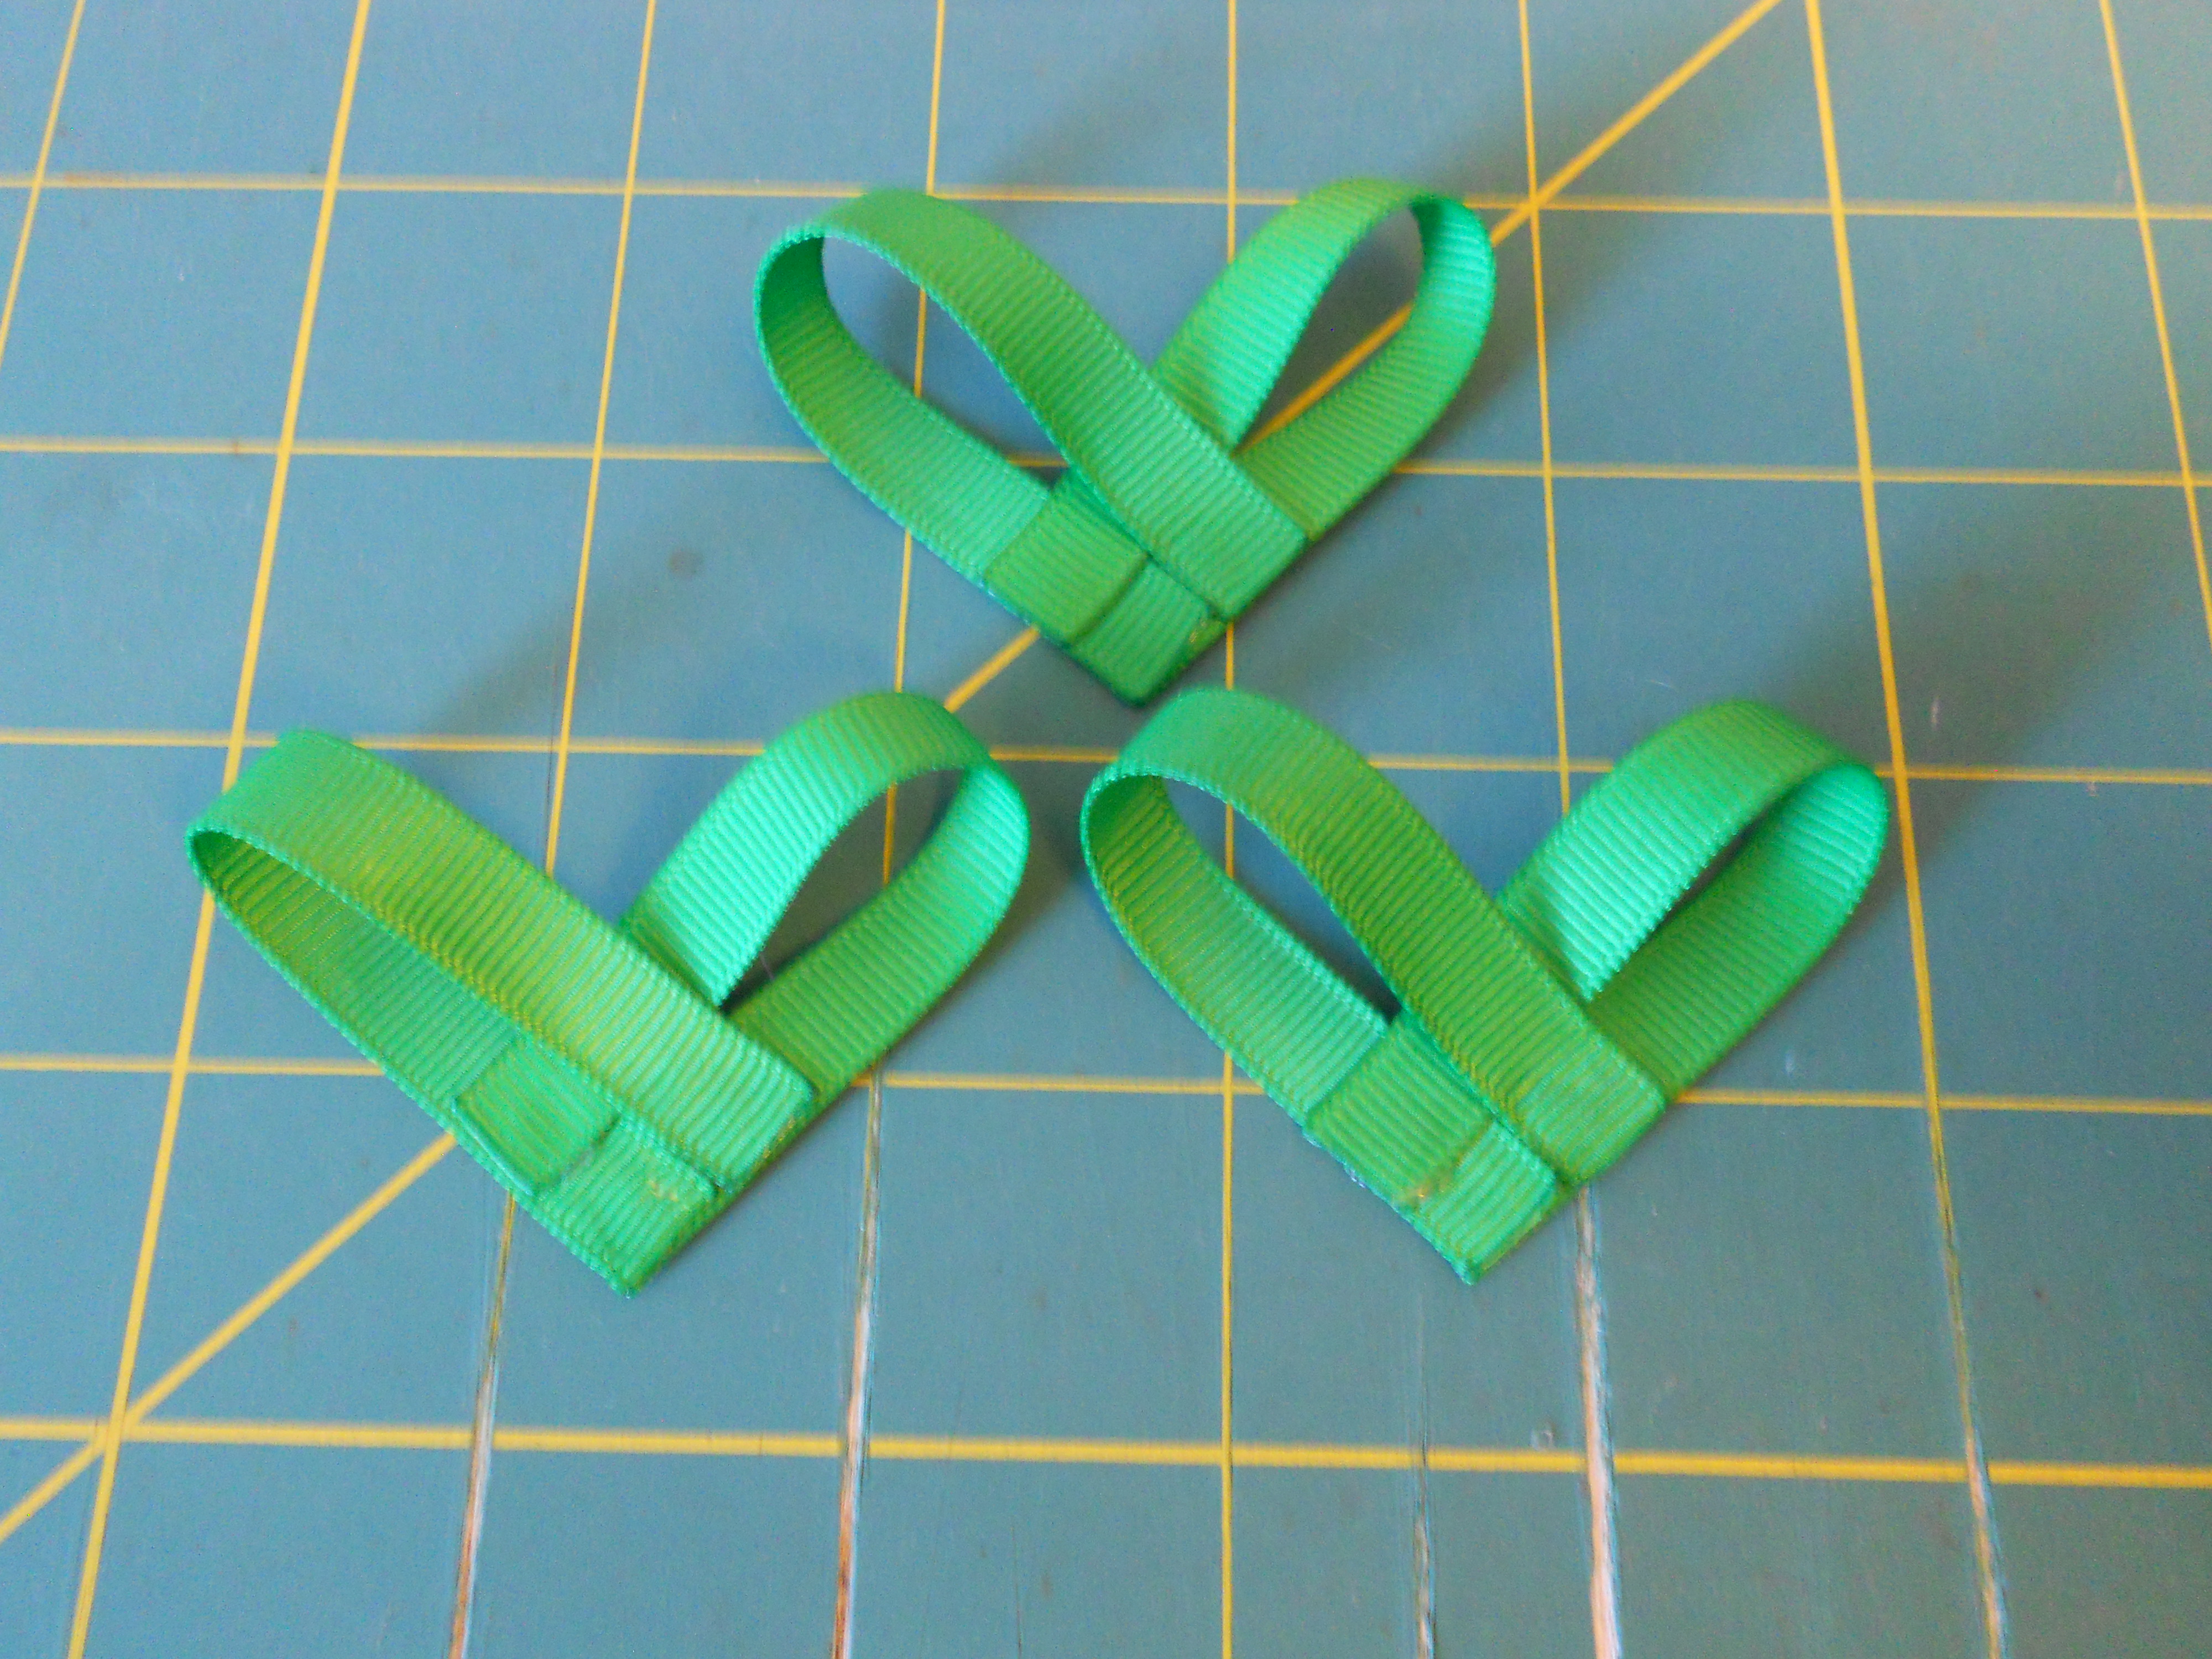 Step 5: Using your other 4 pieces of ribbon repeat steps 2 through 4. You now have three heart shapped pieces.
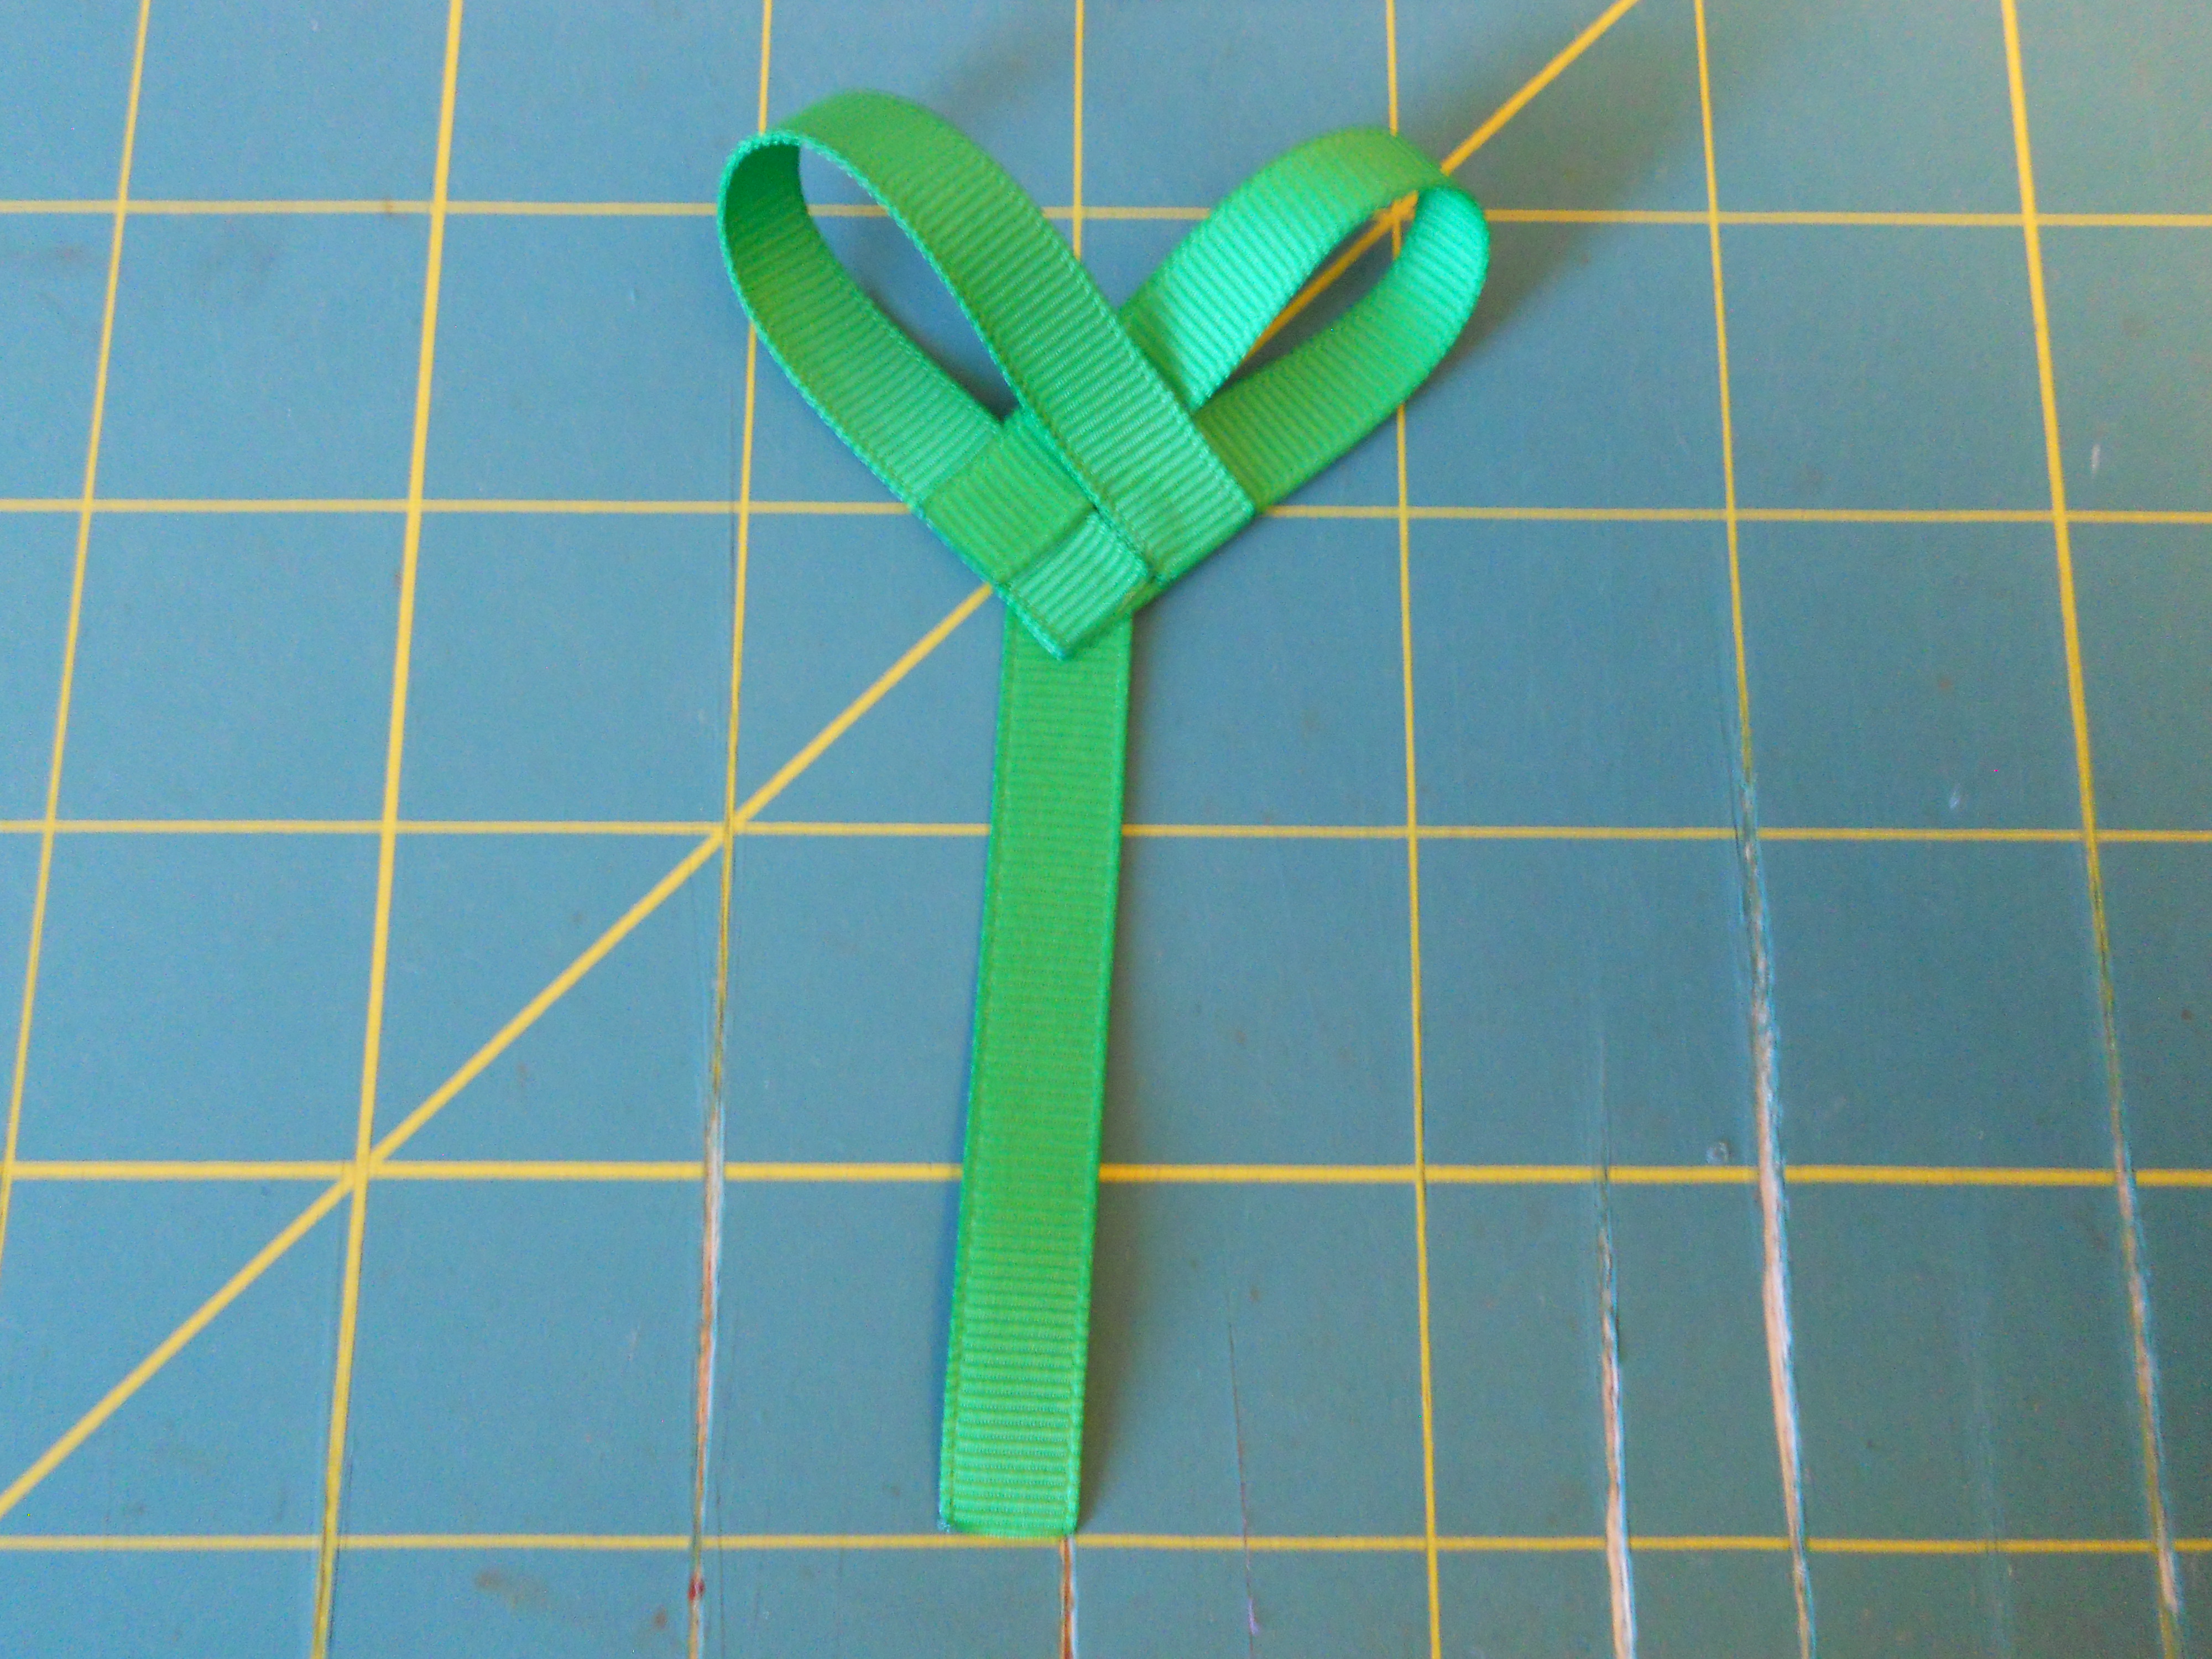 Step 6: Cut a 3" piece of your 3/8" emerald ribbon and heat seal the ends. Glue your best looking heart at the top.
 Step 7: Glue the piece you made above to the center of your lined clip.
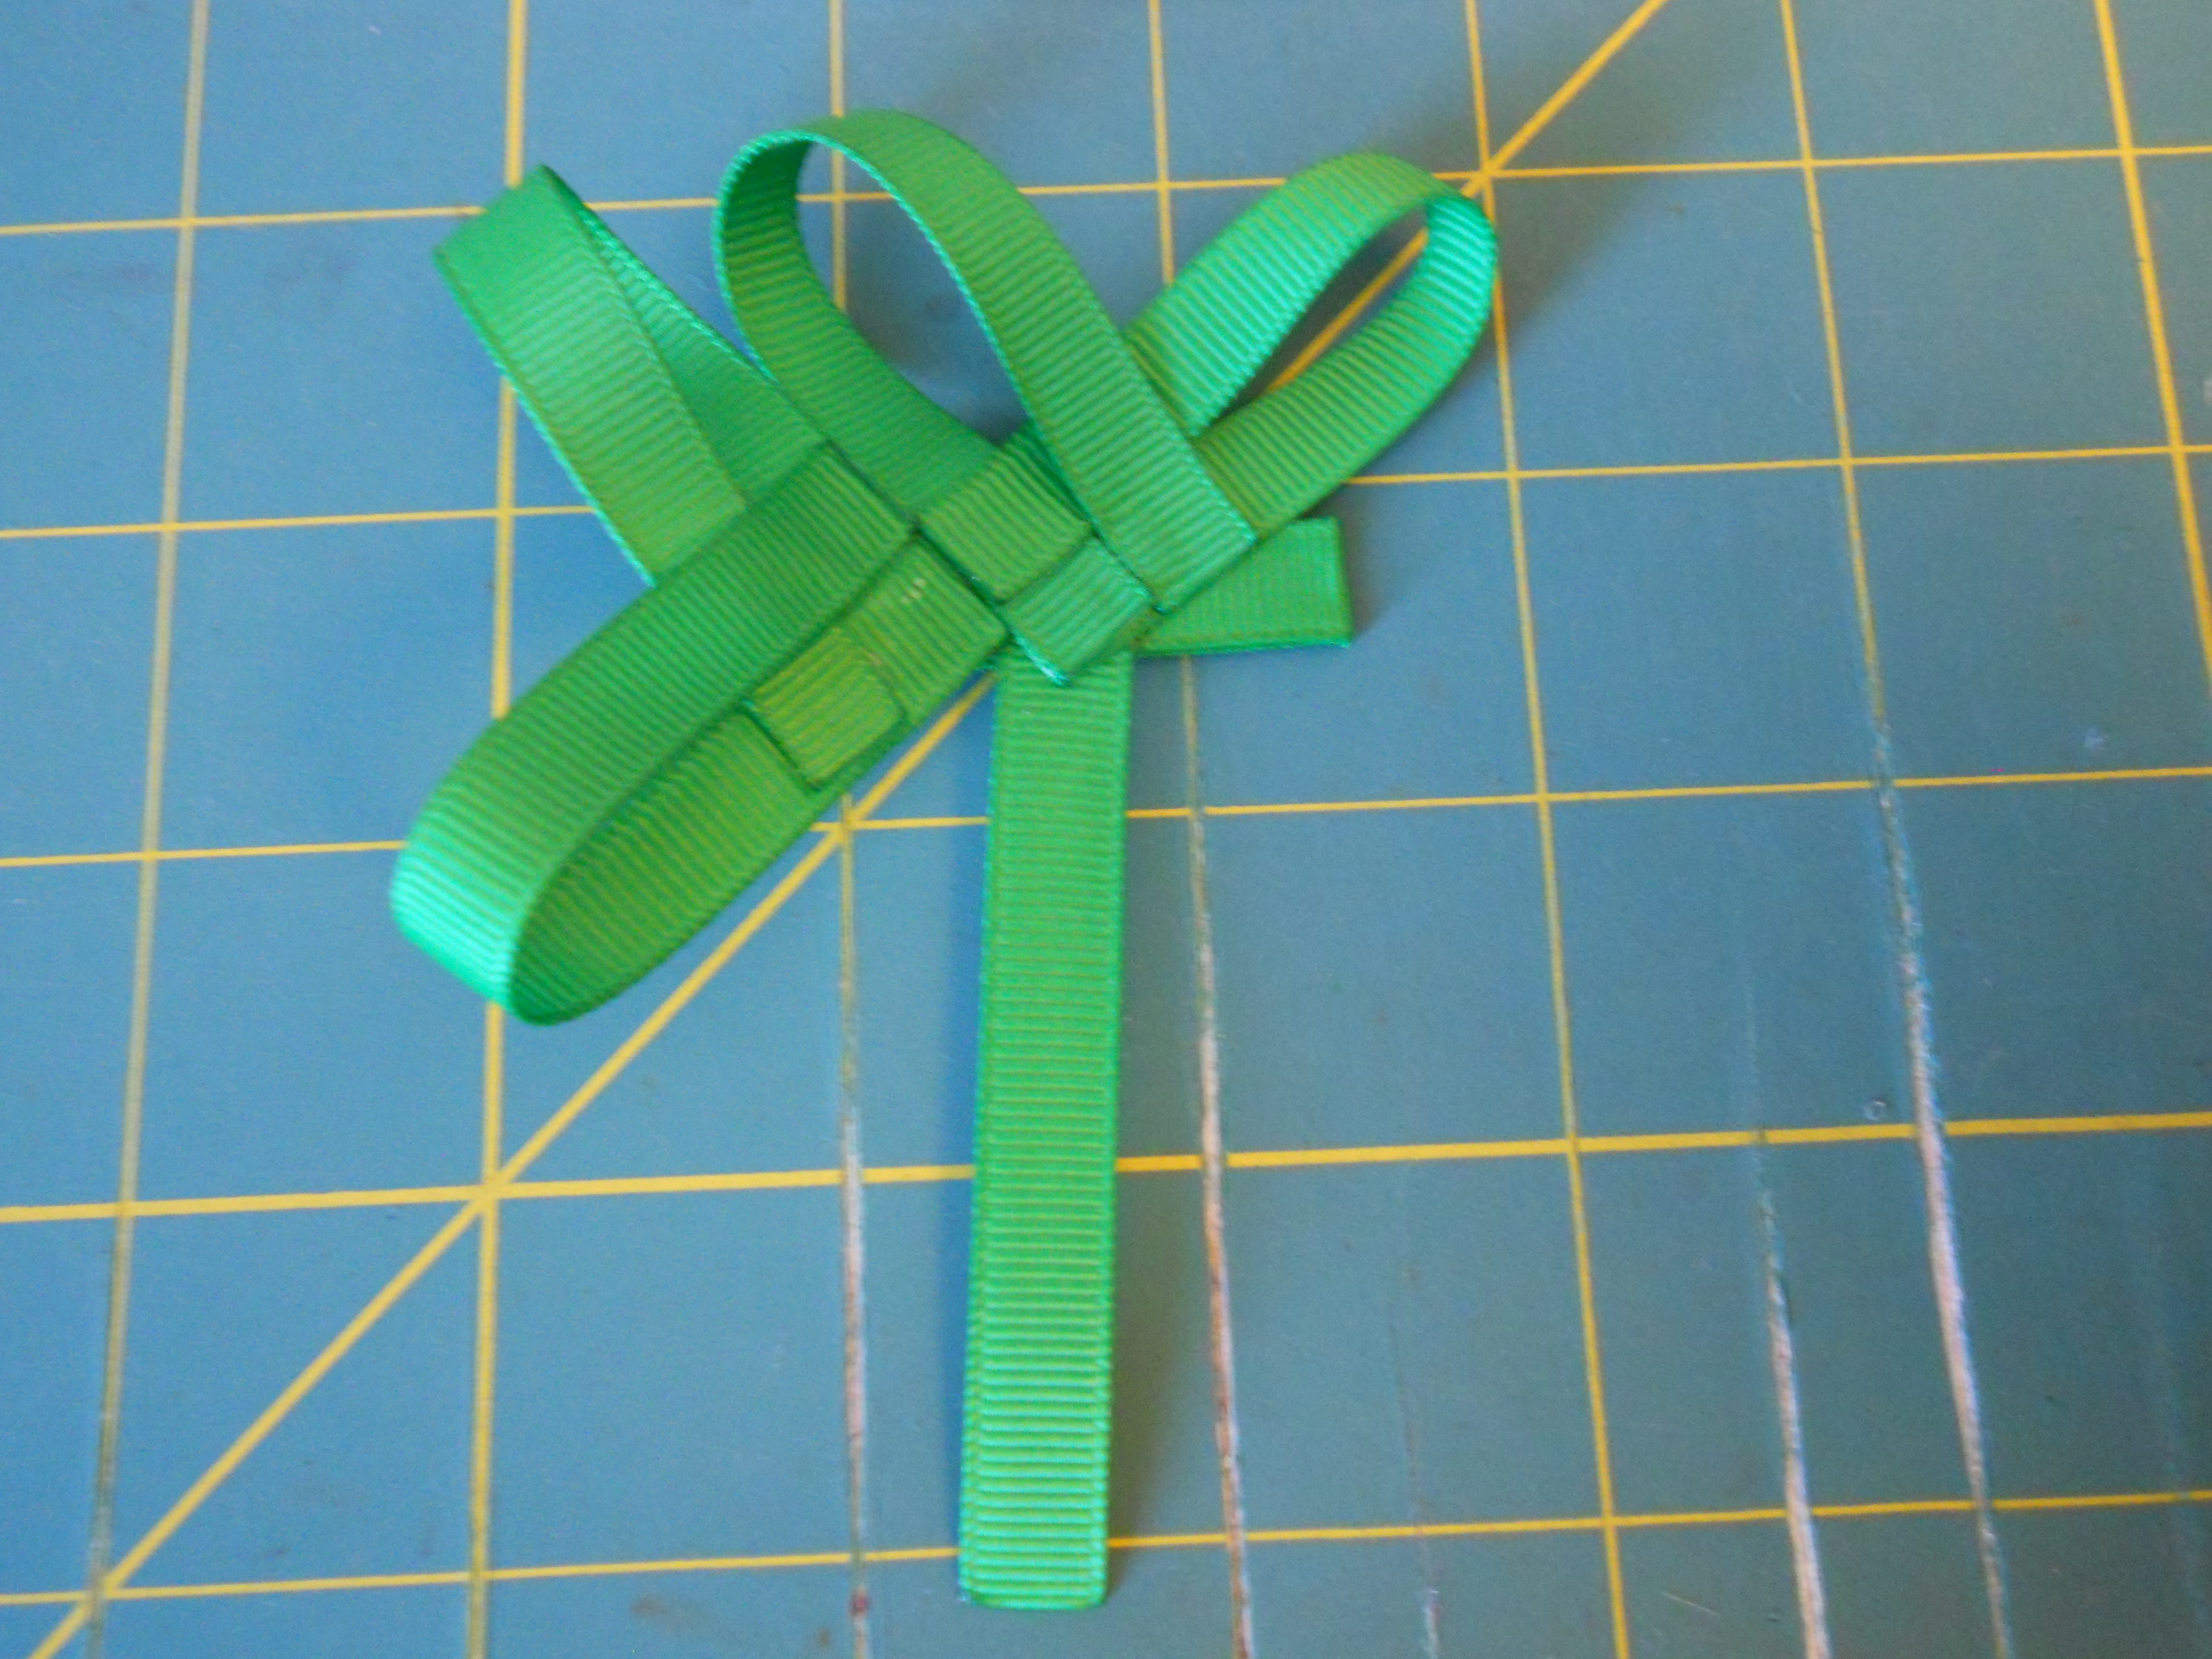 Step 8: Glue another heart onto the left side of the first heart. Make sure the pieces are glued evenly and touching but not overlapping.
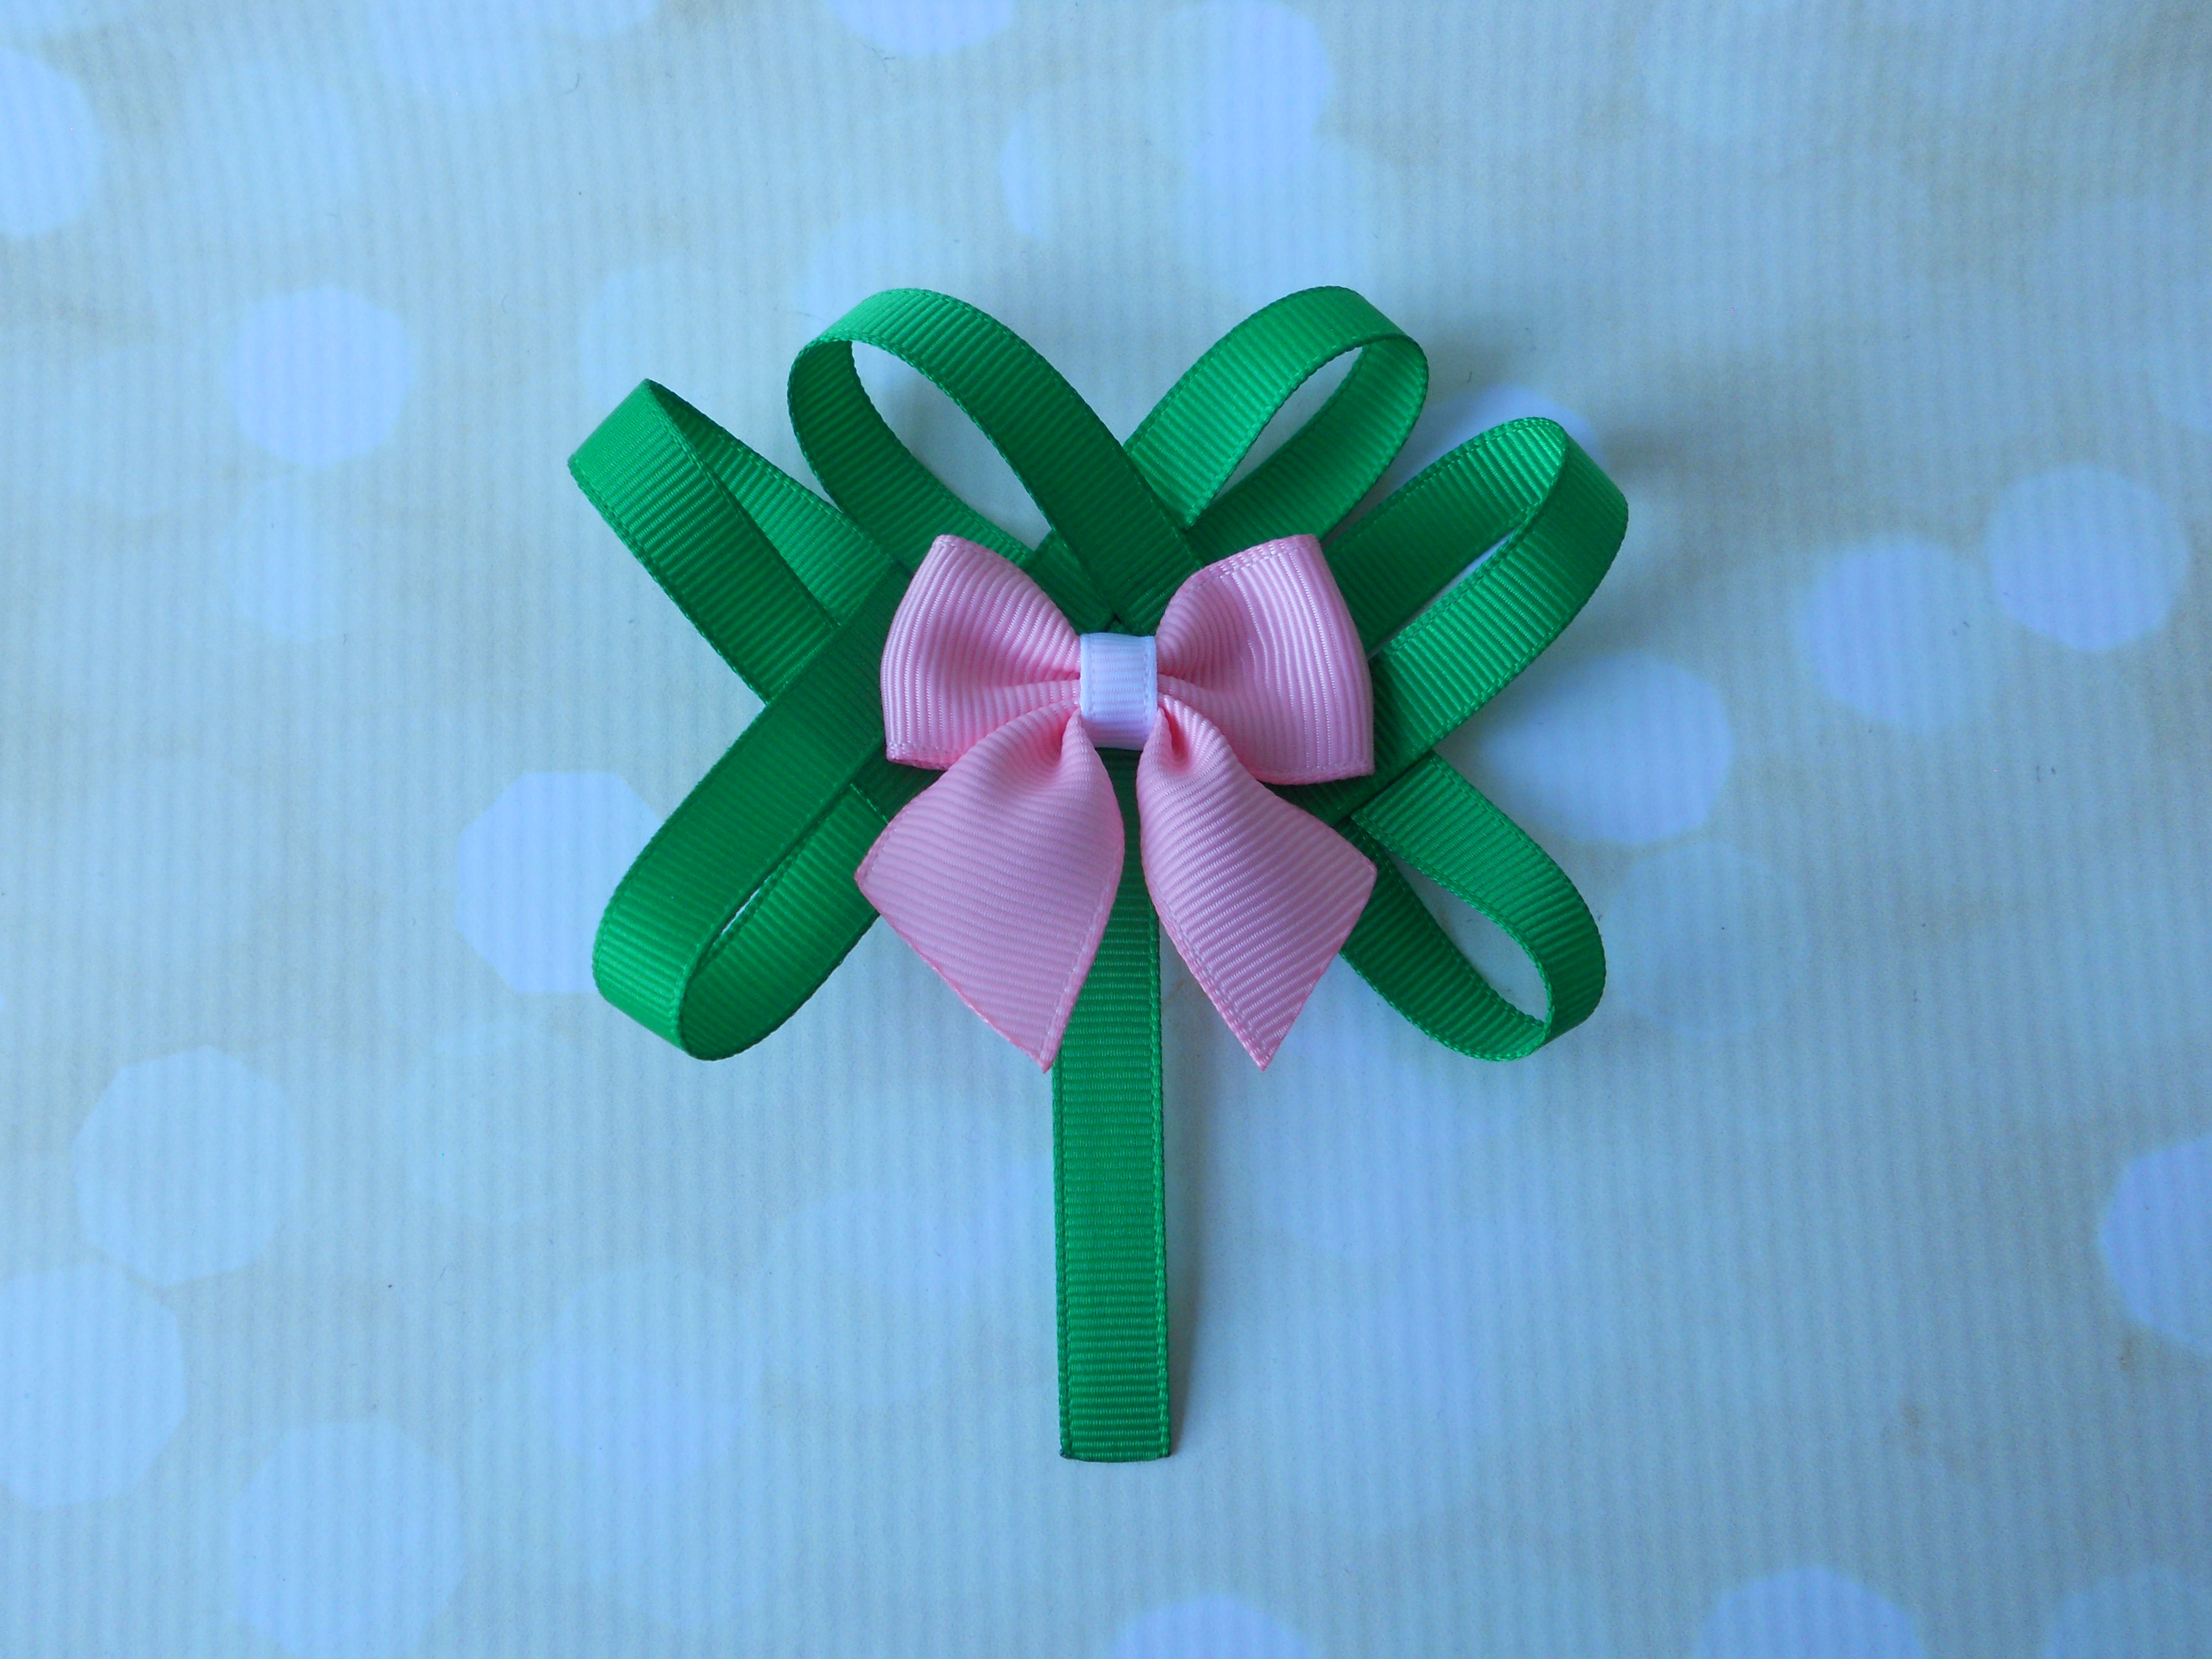
 Step 9: Glue your last heart onto the right side of the first heart. Make sure the pieces are glued evenly and touching but not overlapping. Your shamrock is complete!
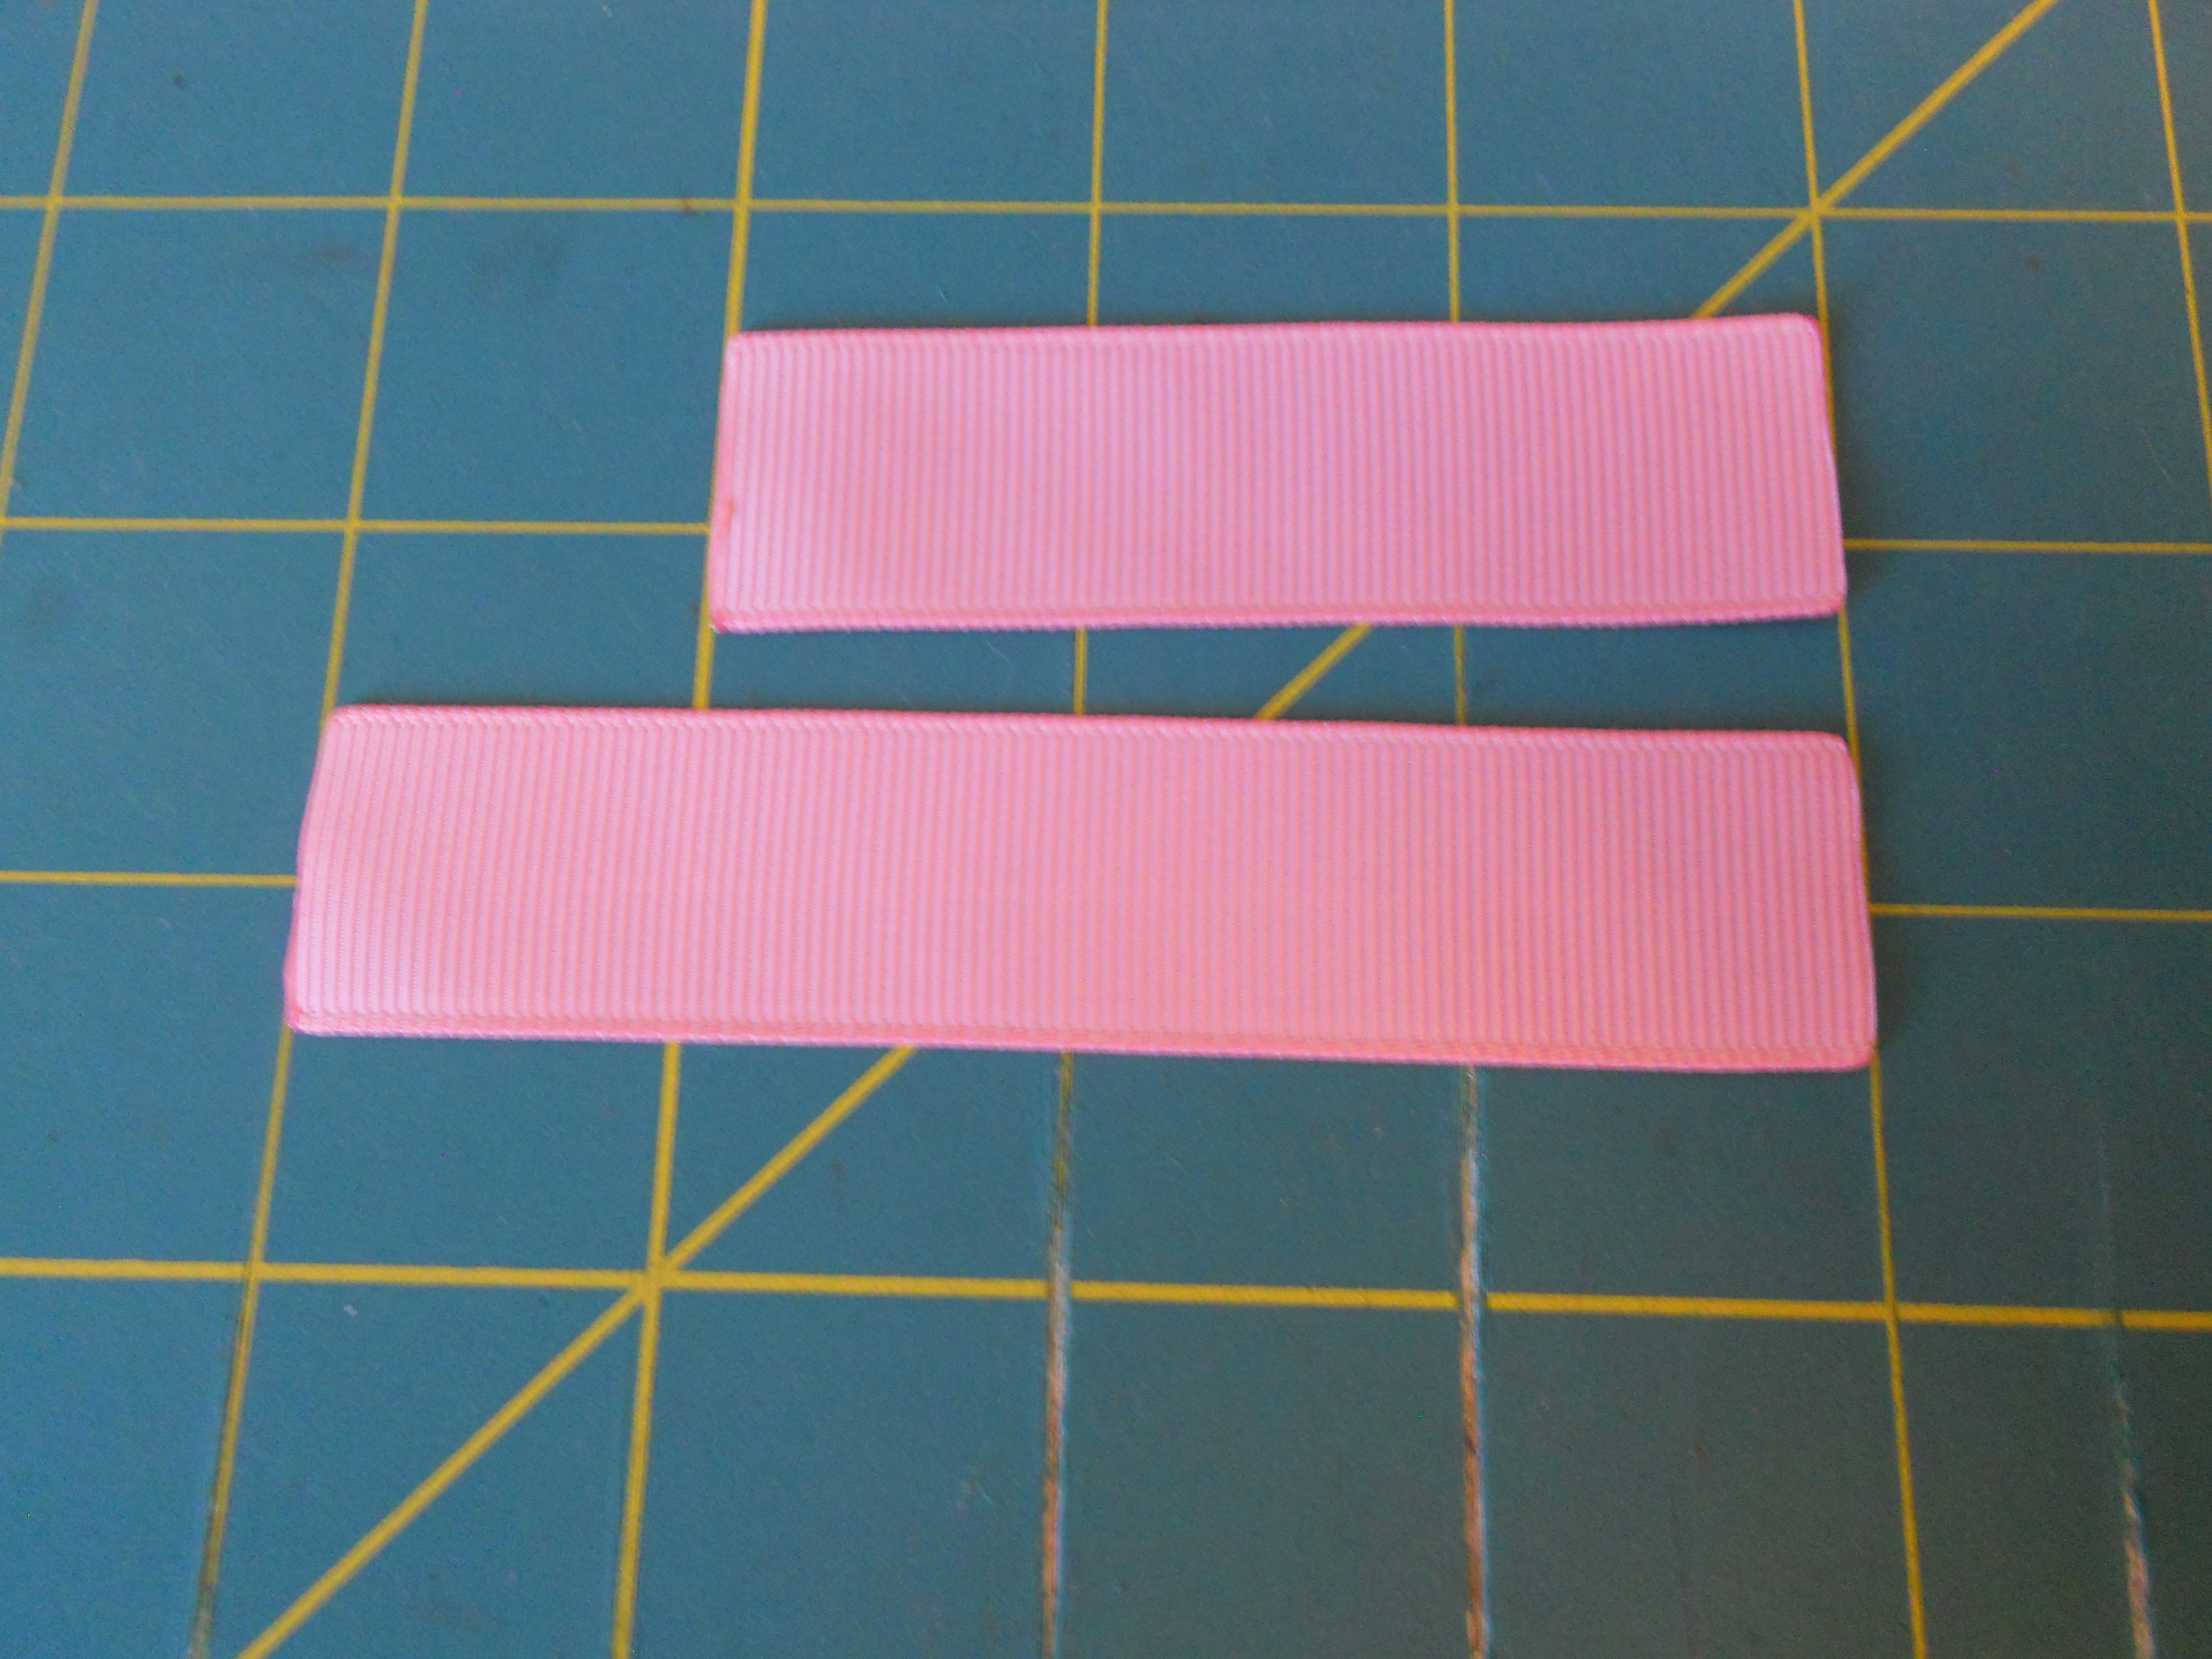 Step 10: Using your 7/8" pink Grosgrain ribbon cut one piece 3" and one piece 4". Heat seal the ribbon ends.
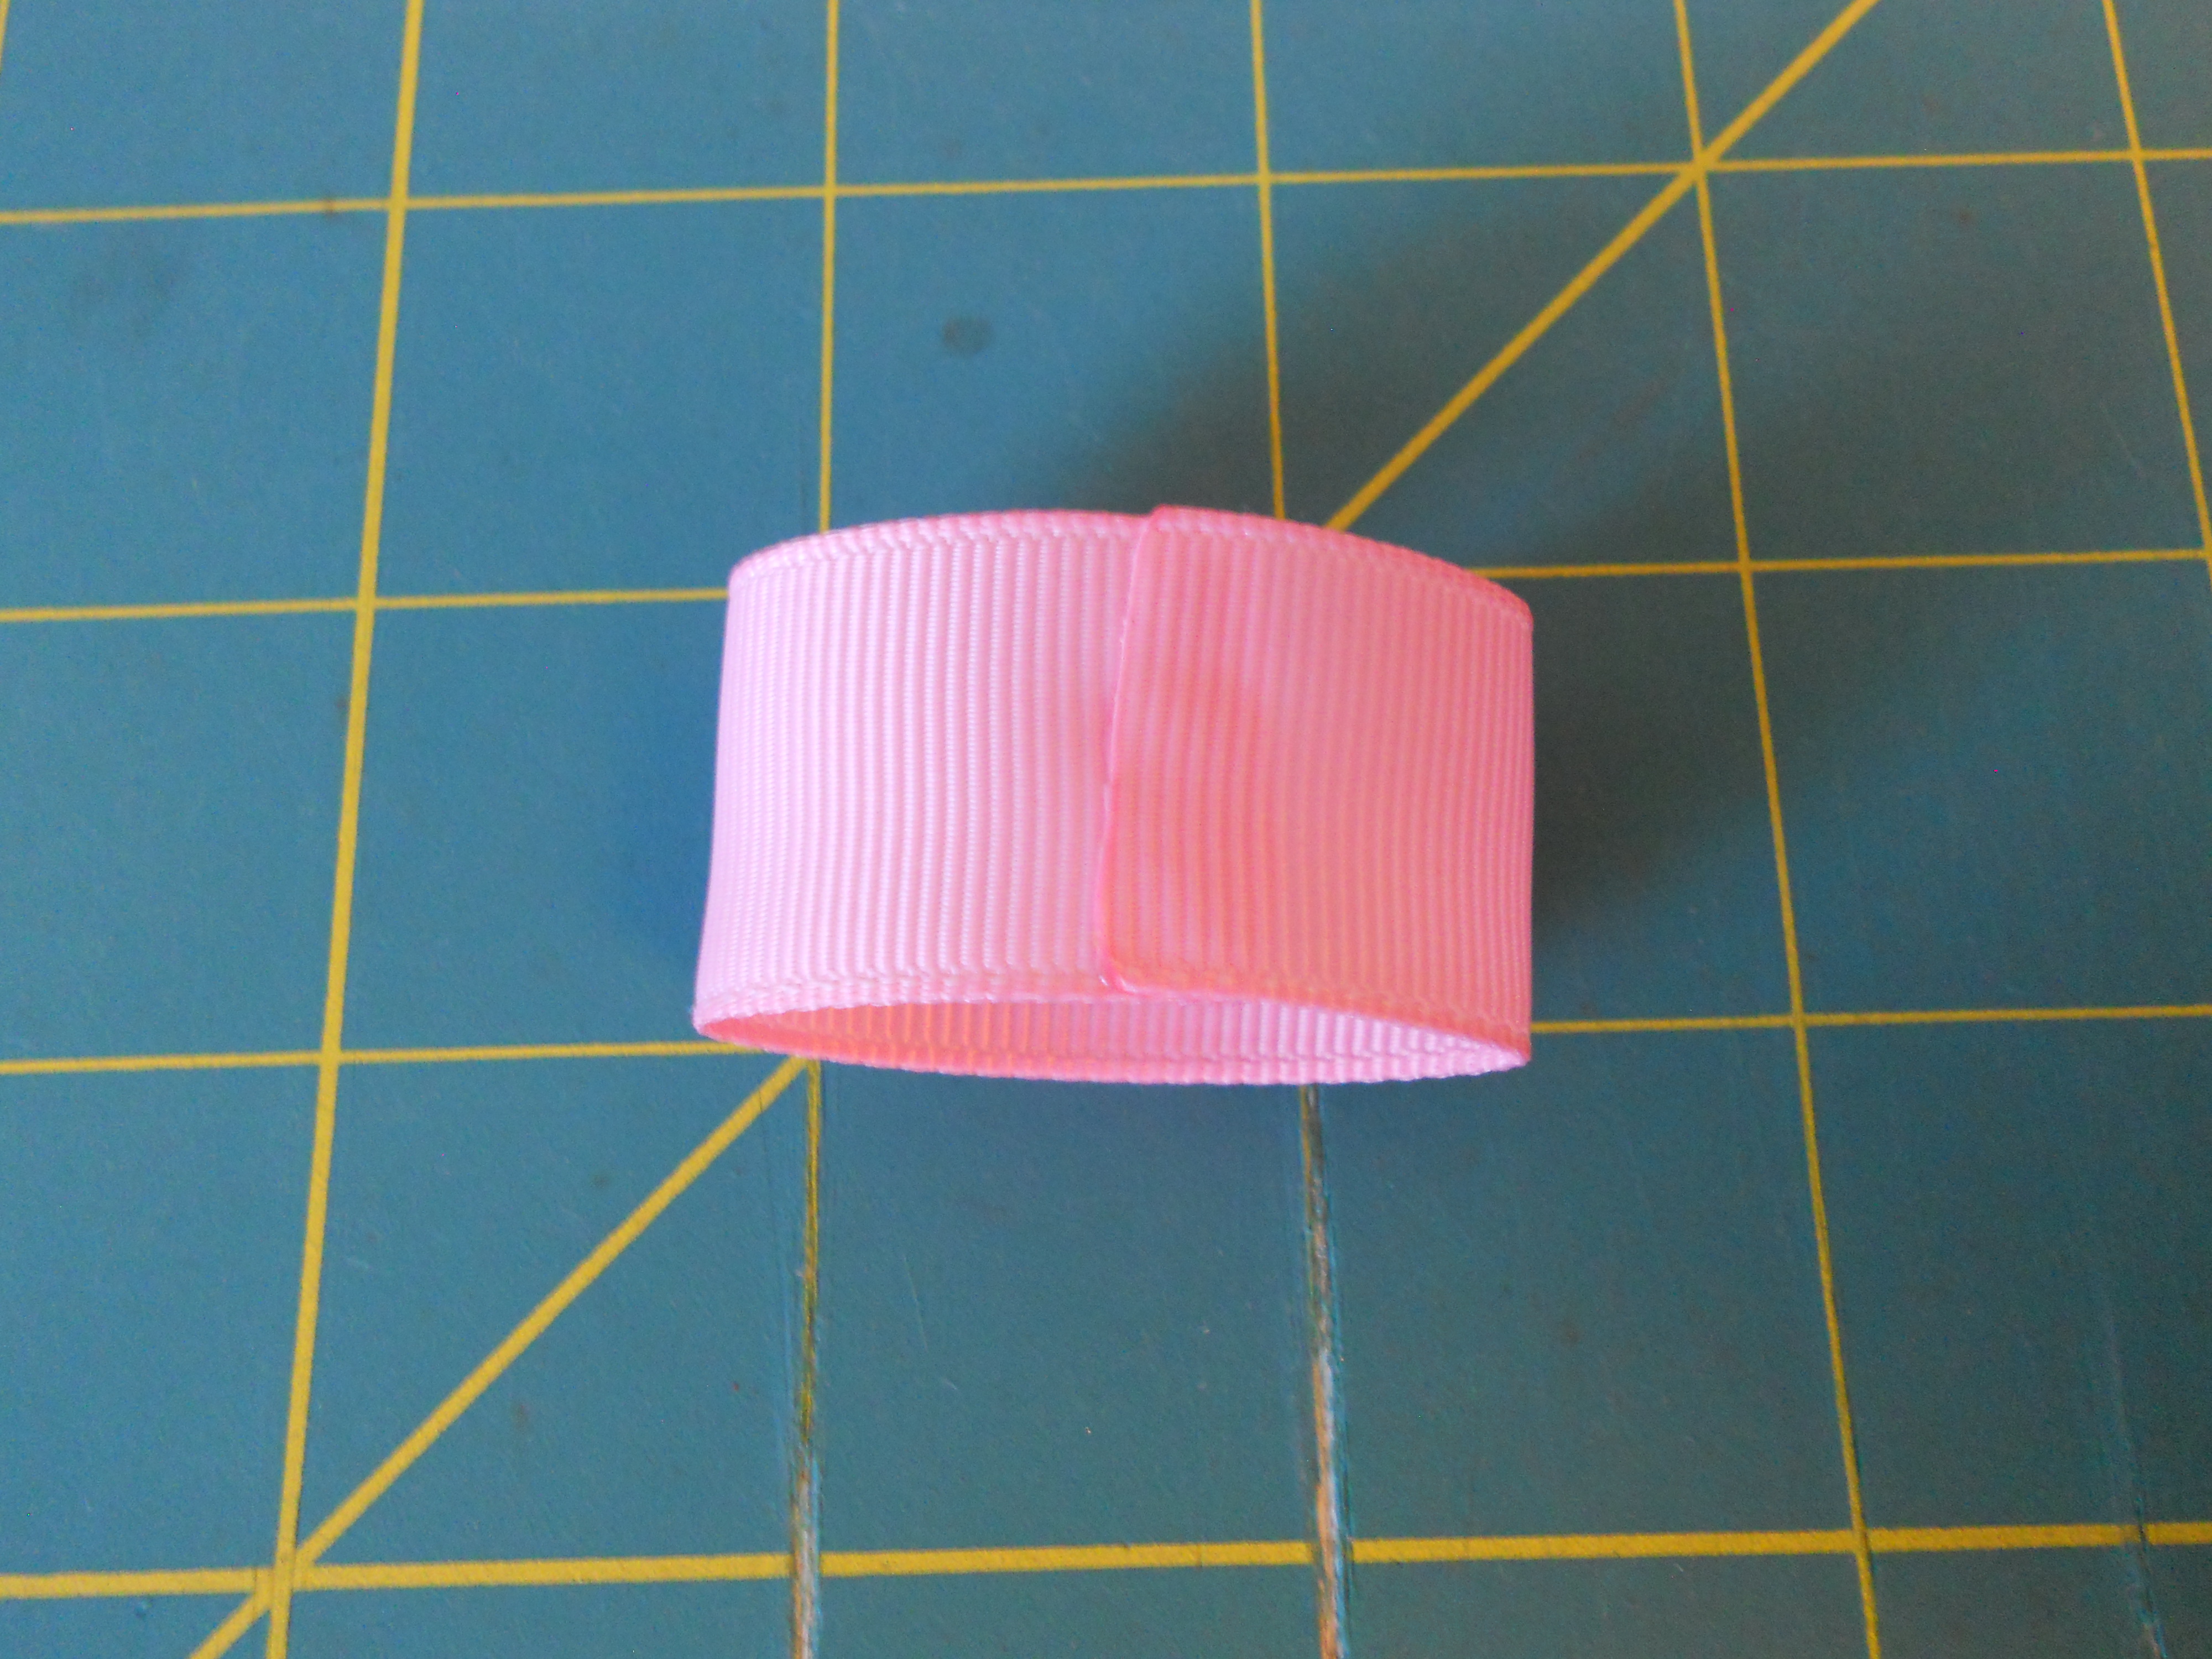
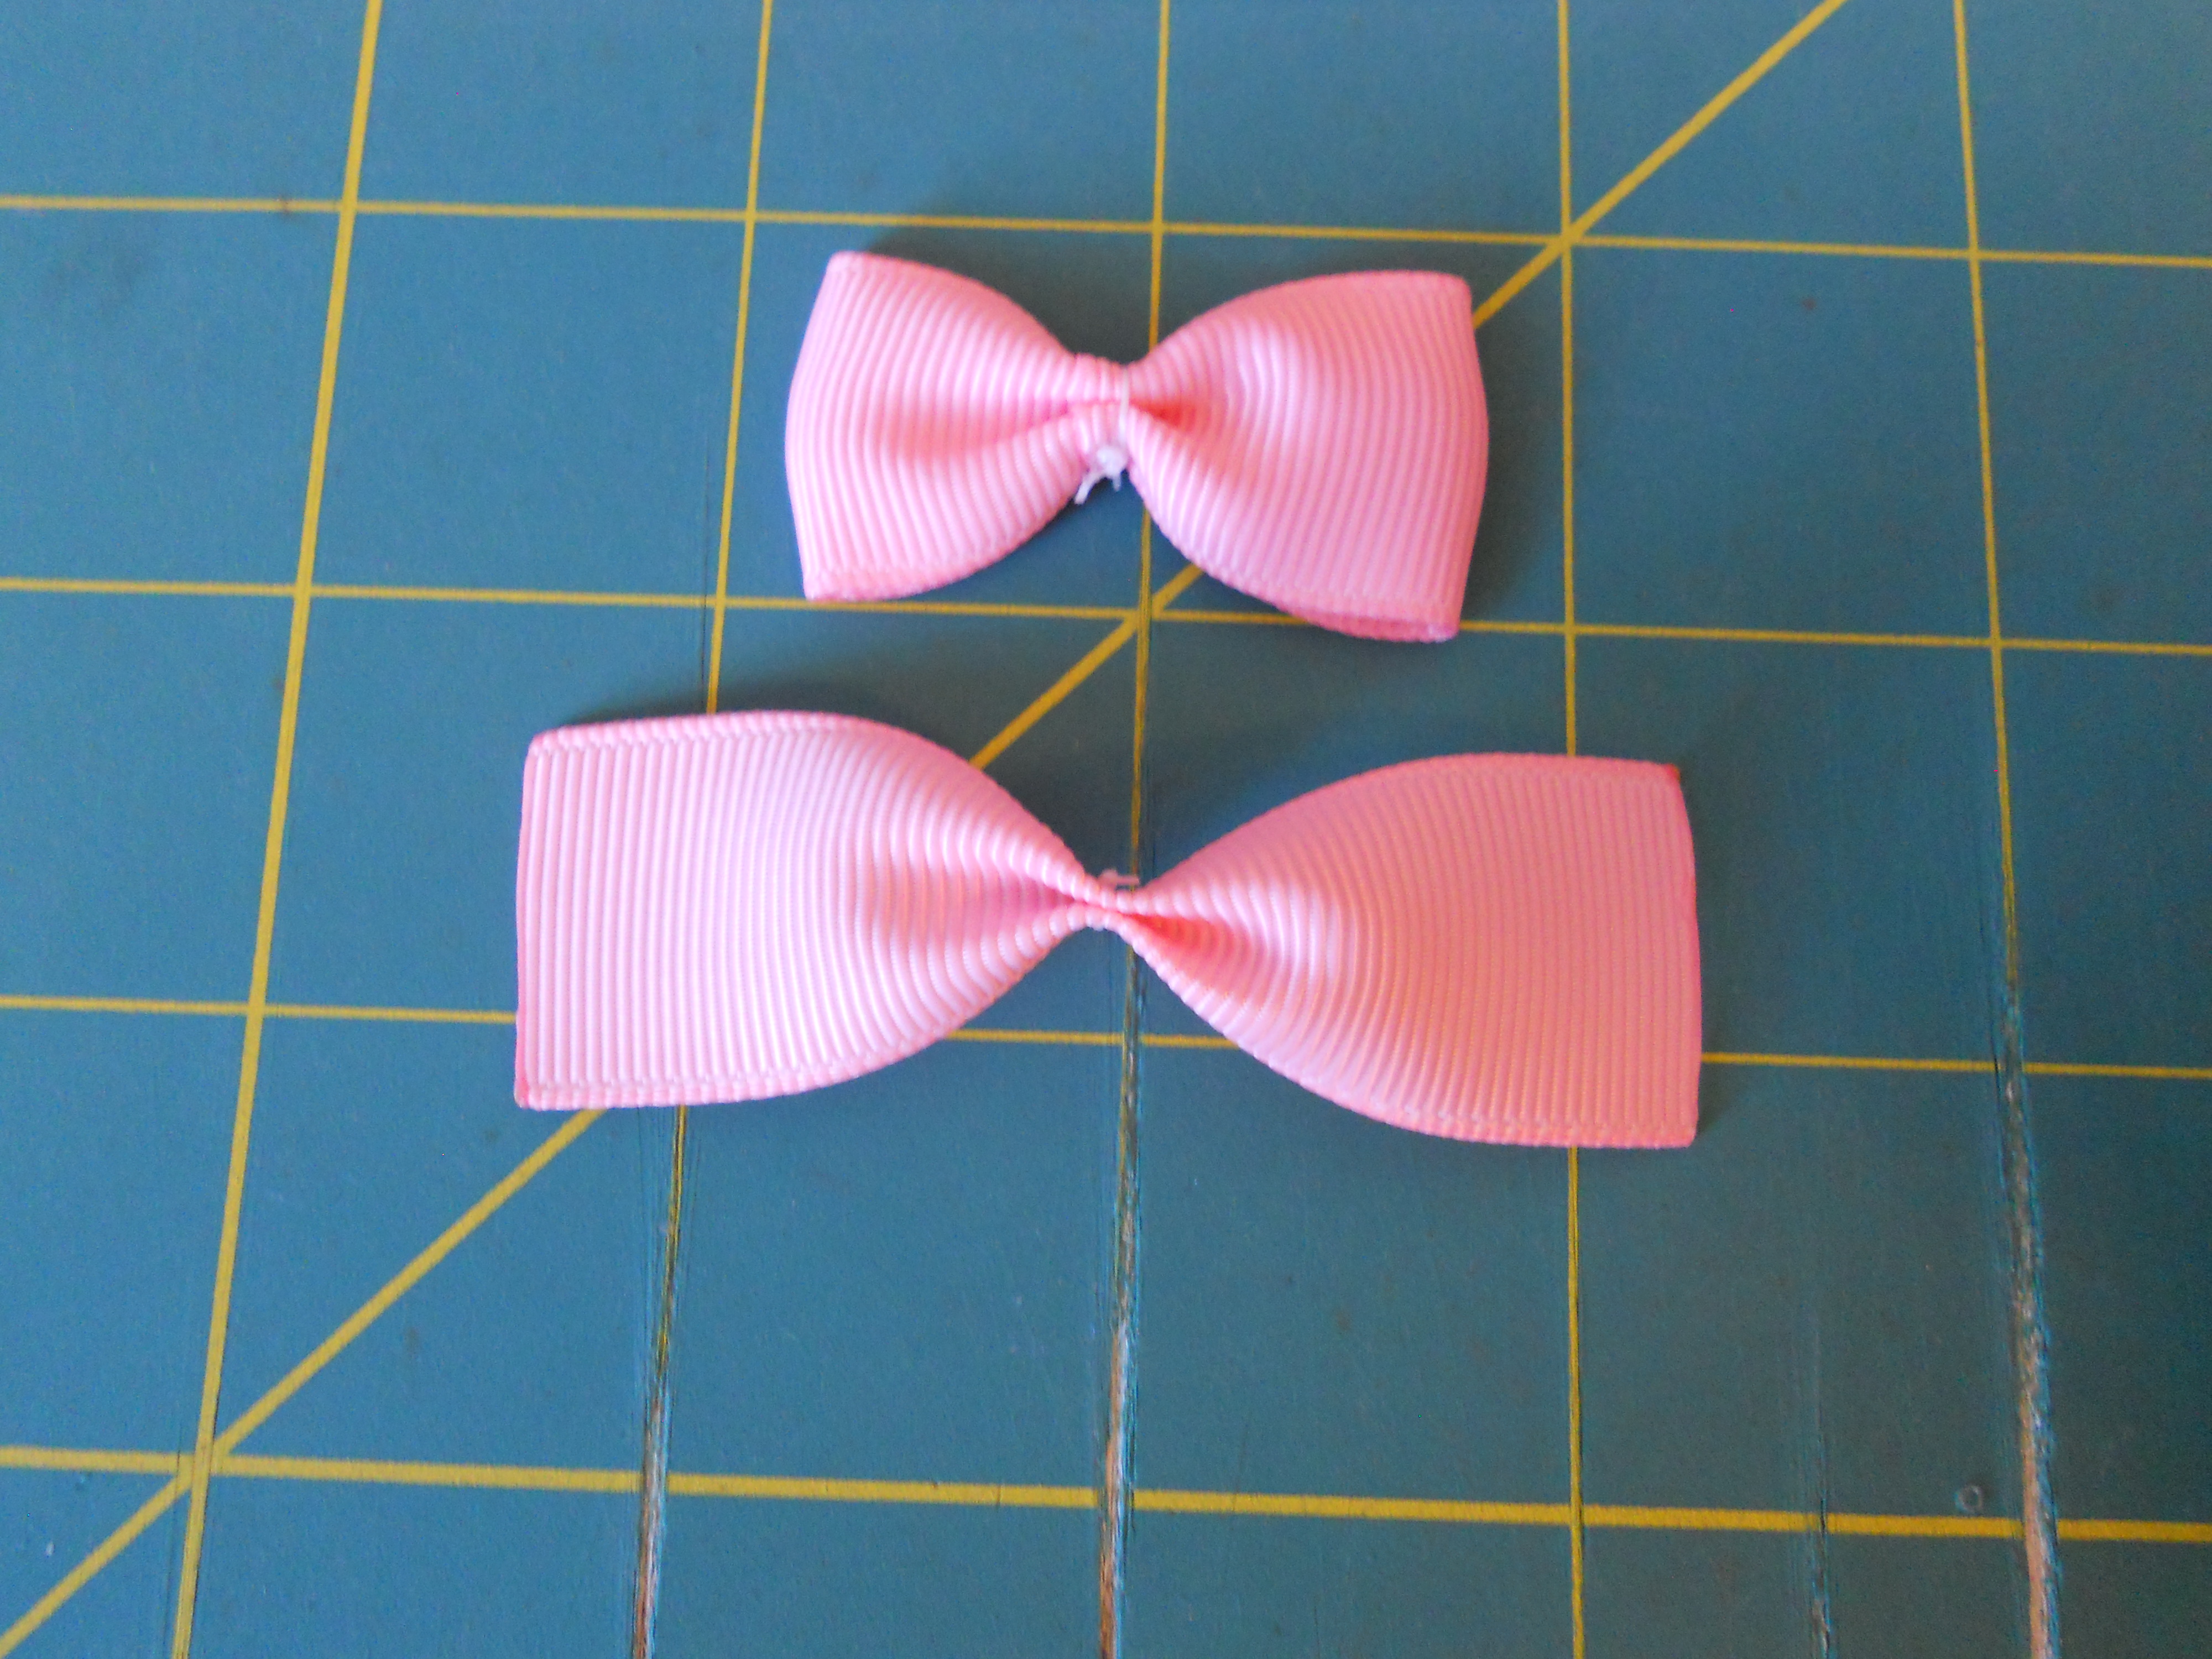 Step 11: Form a loop with your 4" piece of ribbon and hot glue it together. Two crease fold your loop to form your bow, sew the center. Two crease fold your 3" piece of ribbon and sew the center.
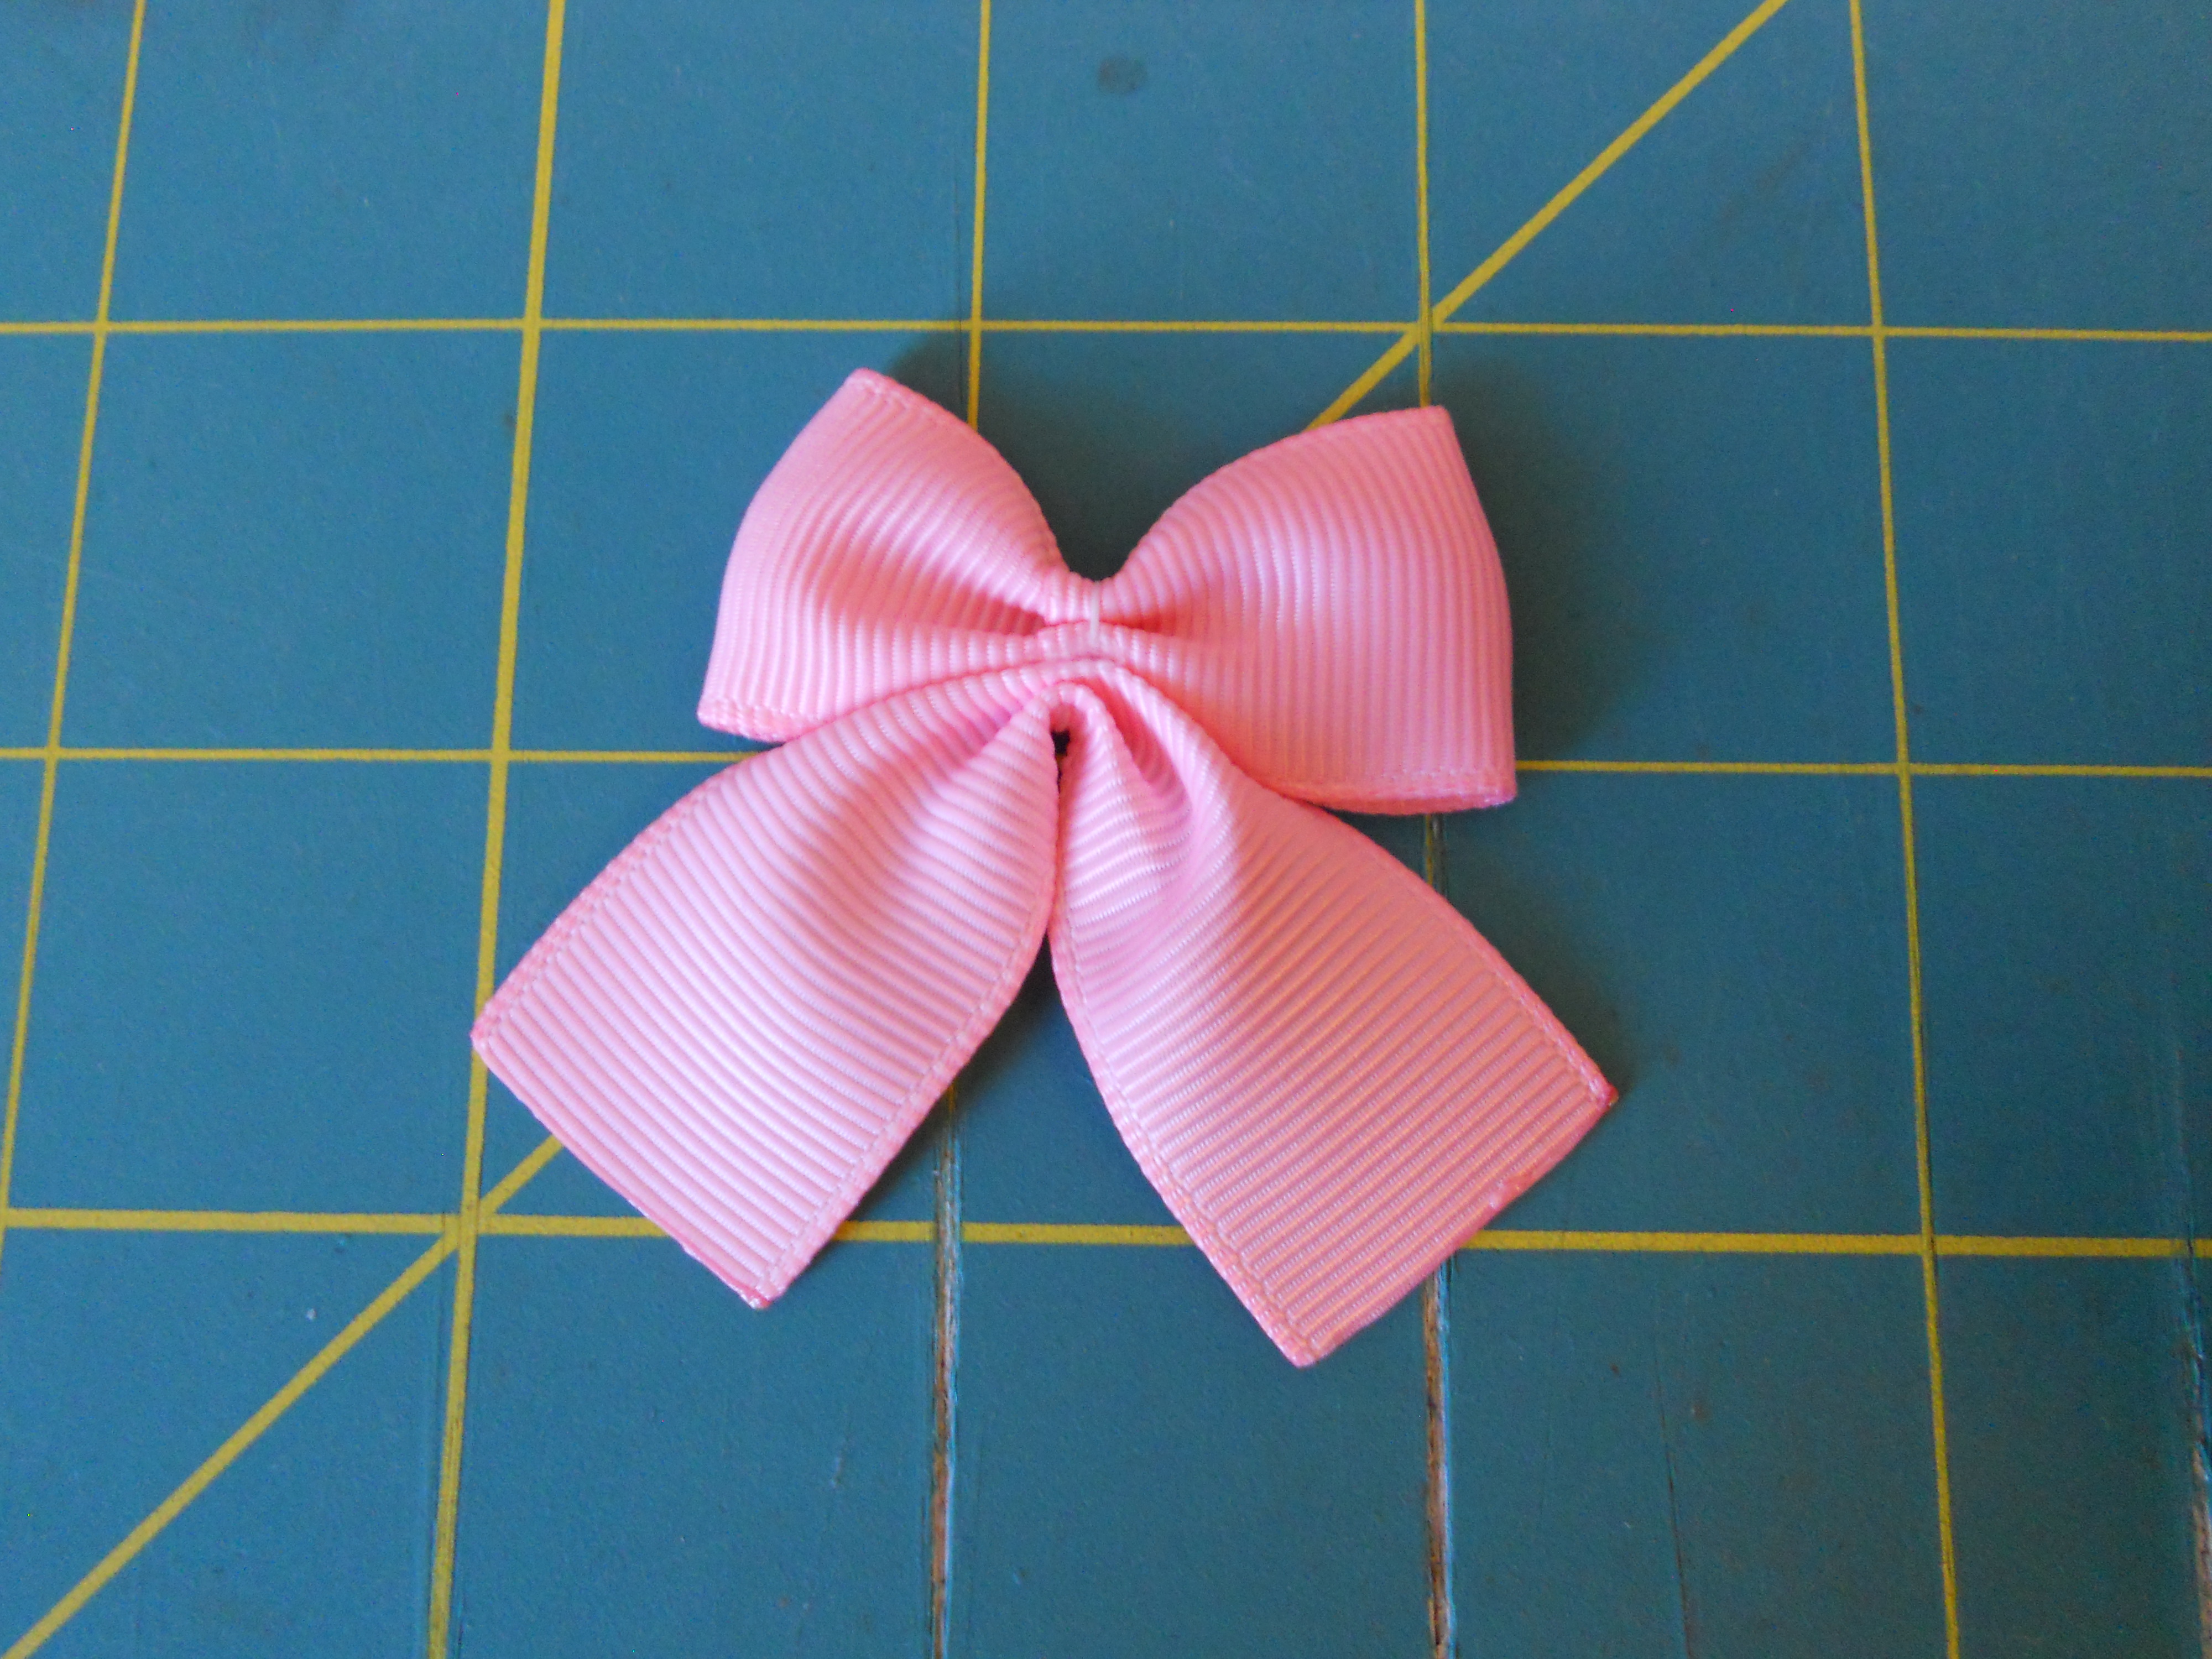
 Step 12: Glue the "tail" onto your bow. Using your 1/4" Grosgrain wrap the center. Cut the tails of your bow at an angle and heat seal the ends.
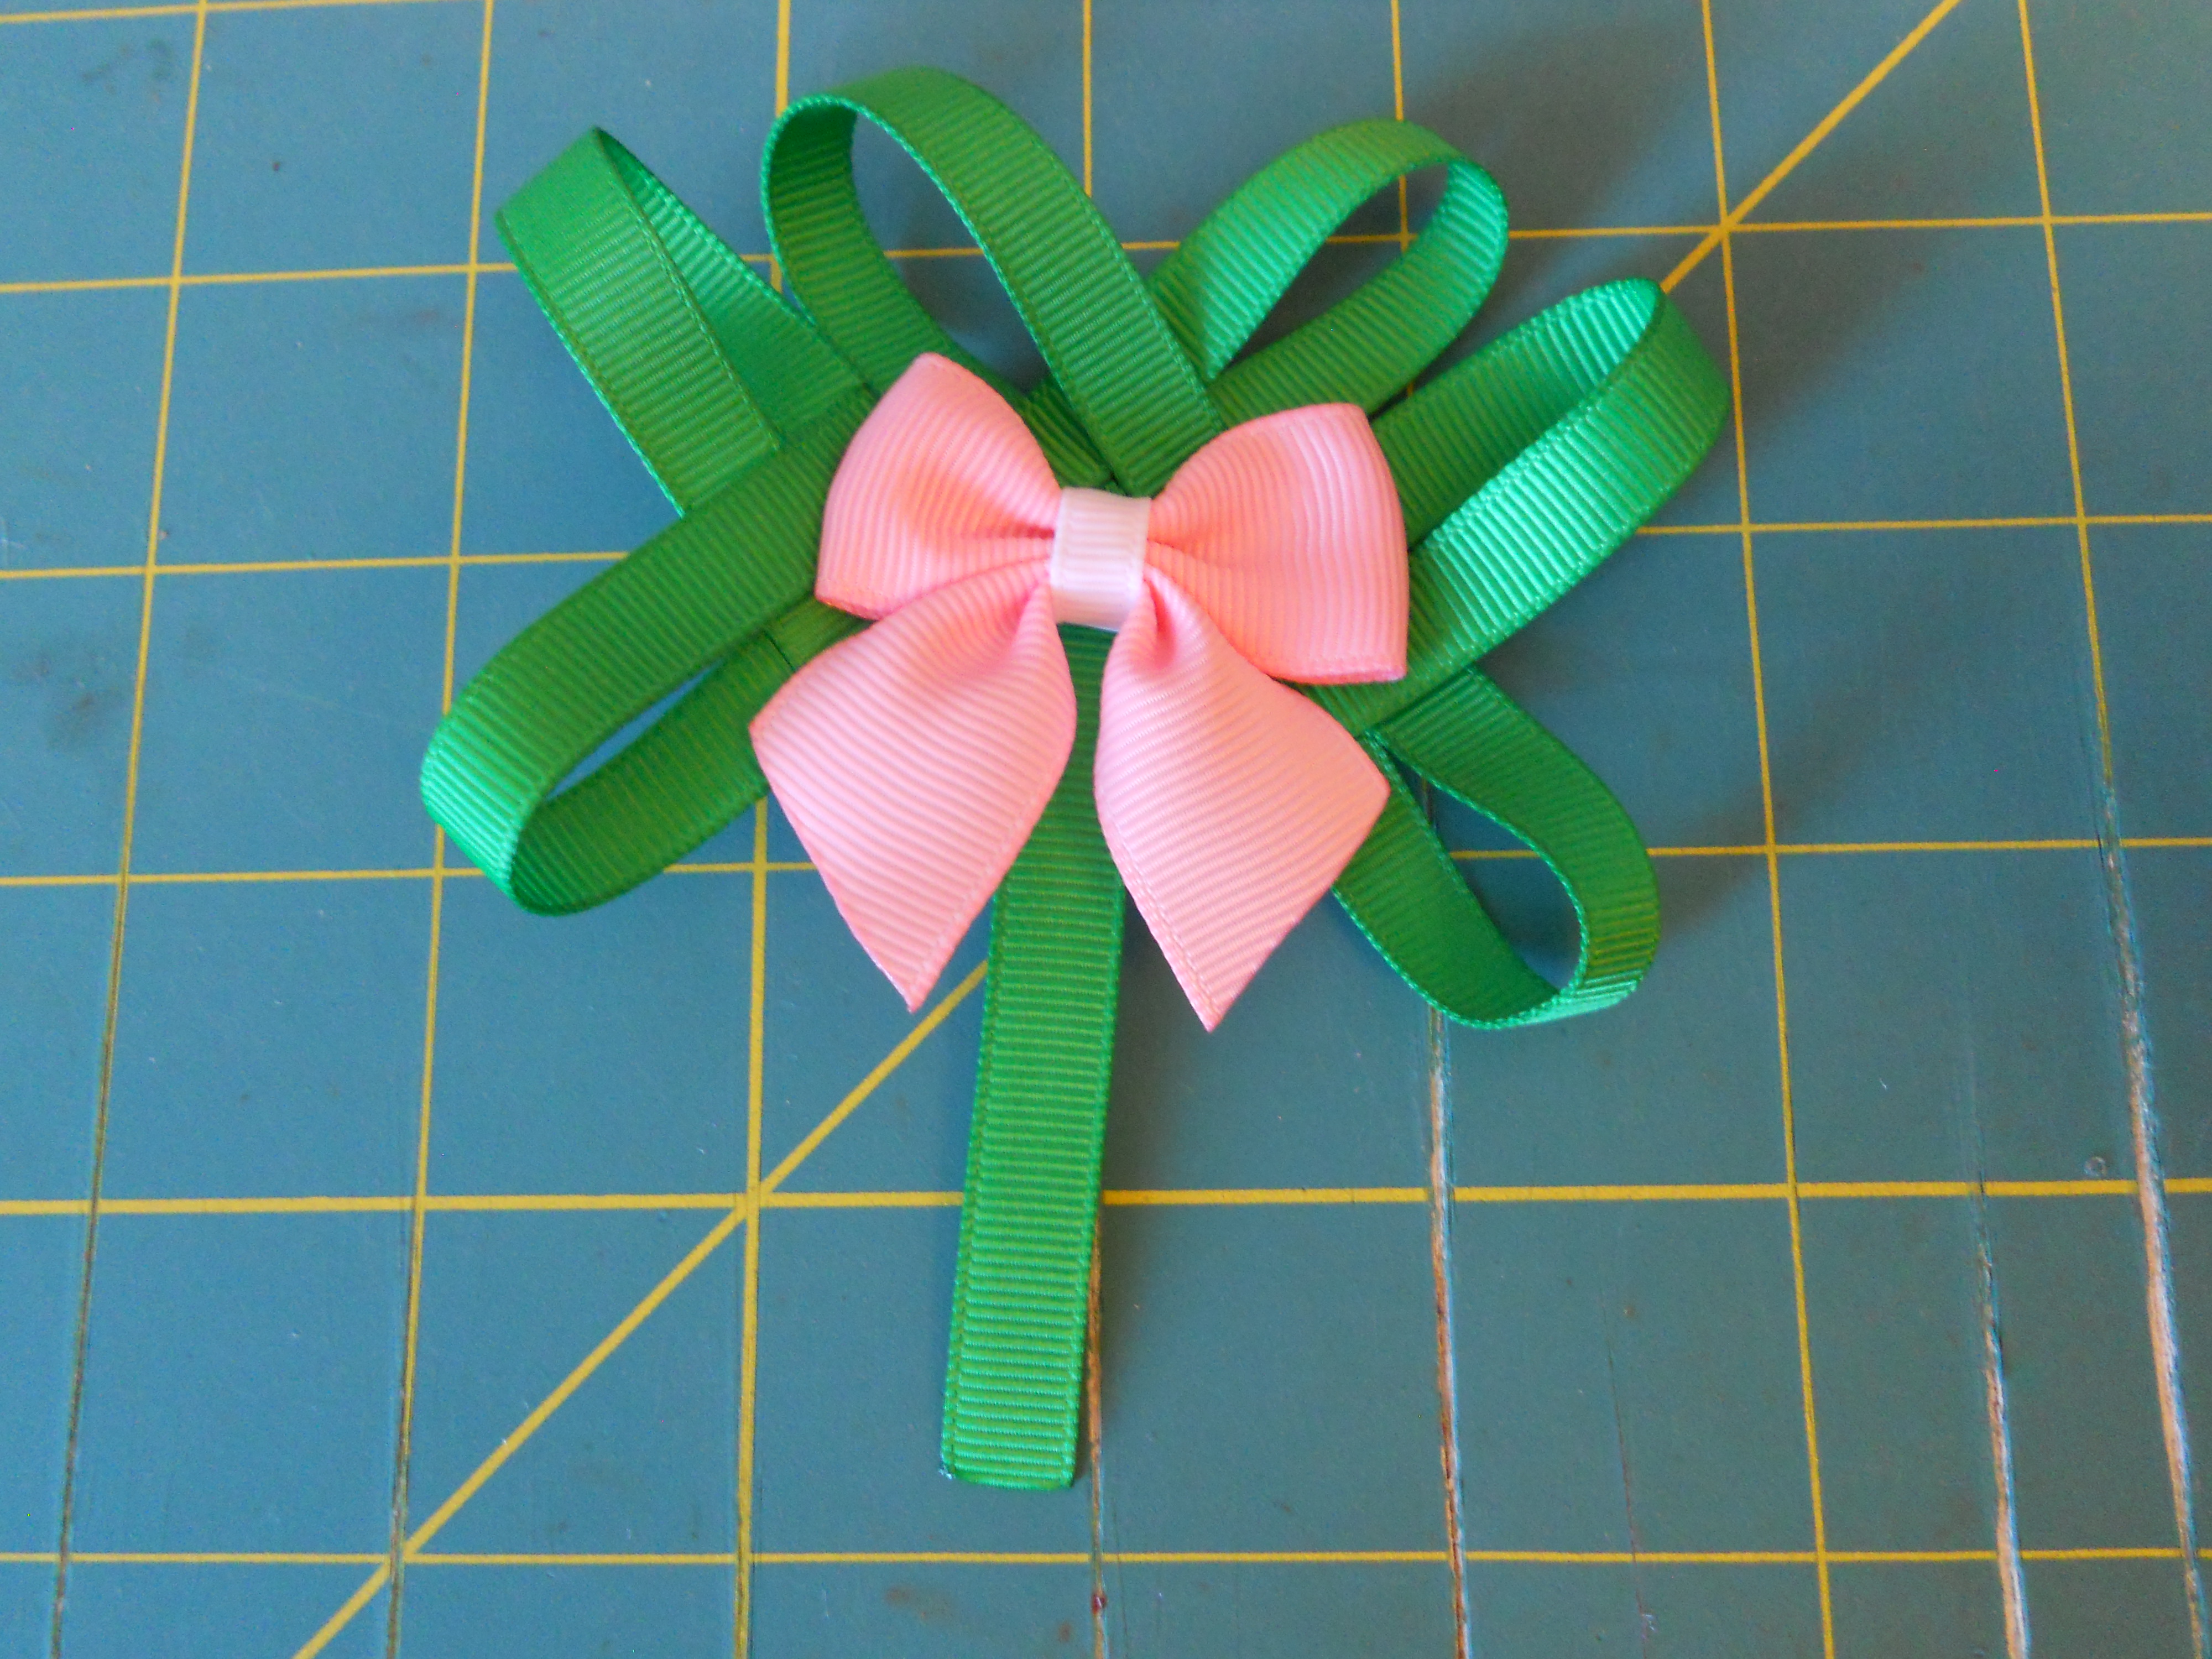 Step 13: Glue your bow to the center of your shamrock.
 I just love the way this turned out! You can make different variations of this sculpture by cutting your ribbon pieces shorter or longer. You can also change the finished look of this clip by making a different bow for the center or adding some rhinestones! I think some small rhinestones on the shamrock loops would be so cute.
Visit the rest of our blog for more Crafting Tutorials and DIY Instructions!
Loading...

