With spring officially here, hats make cute accessories for any little girl's whimsical colorful outfits. Here at the HairBow Center, we offer a variety of hats in child and infant sizes. The amount of different ways you can decorate a beanie is endless; You just have to let your creativity out of the bag and go for it! In this post I'm going to show you how to create three different looks, all of which are easy and will take no time to make. So let's get started!
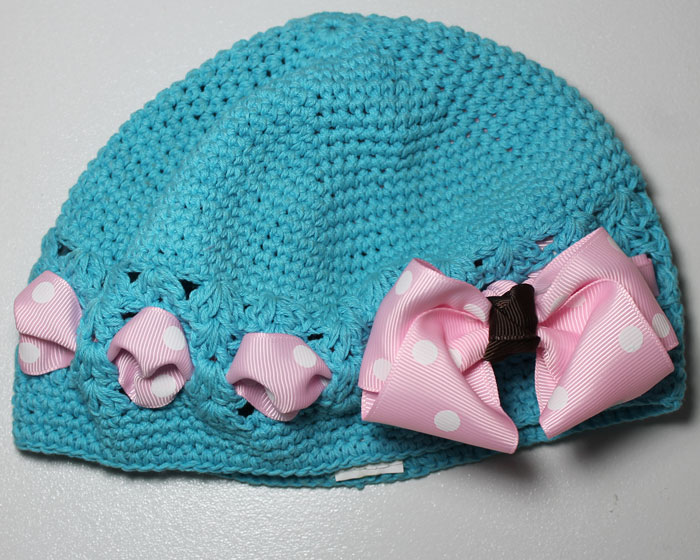
Boutique Kufi Crochet Beanie
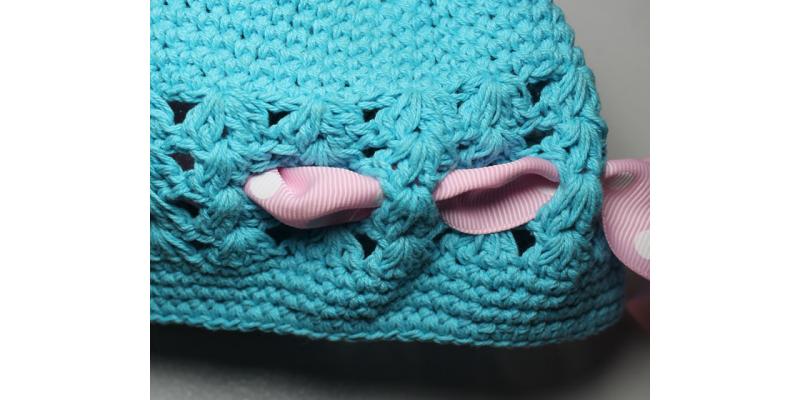
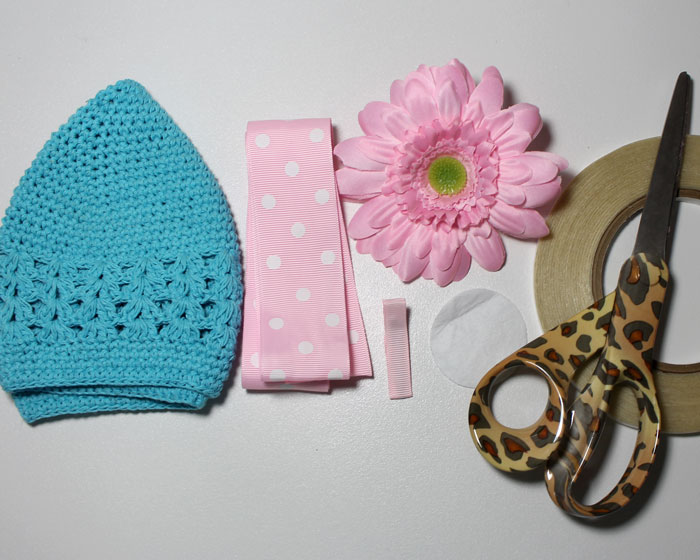
Supplies: Kufie Crochet Beanie Hat: Turquoise 40" of 1 1/2" Pearl Pink with White Dots Grosgrain 22" of 1 1/2" Pearl Pink with White Dots Grosgrain 5 1/2" of 7/8" Brown Grosgrain Light Pink Lined Clip Two Alligator Clips Double Sided Sticky Tape, or adhesive of your choice String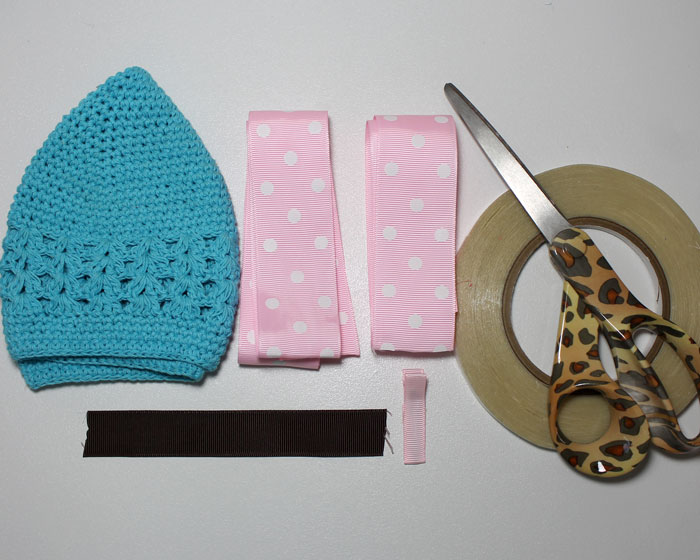
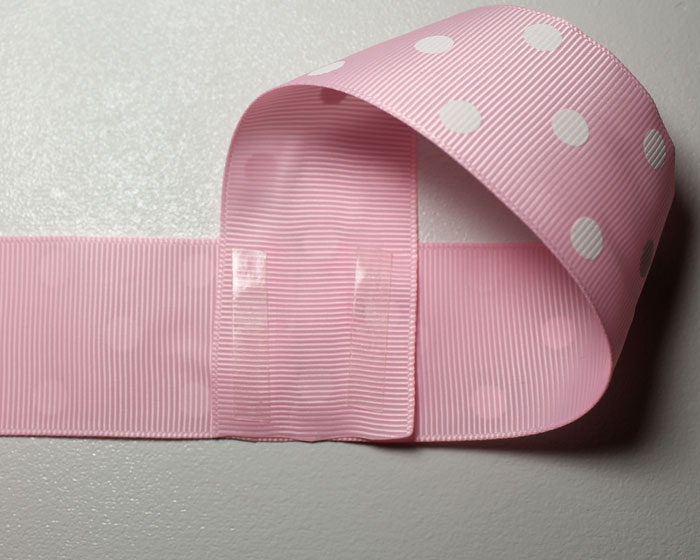
Now we are going to take the 22" section of ribbon and make a boutique bow. Lay your ribbon print side down, and loop one end over and glue it to the center. I folded my ribbon in half and creased it so that I would know where the middle was. Make sure when you are making your loop that the ribbon stays print side down when you glue it. Repeat this process for the other side of the ribbon. If you are using double sided sticky tape like I did, it doesn't take a lot. I used small strips and waited to peel the paper backing off until I knew exactly where I wanted to have my ribbon adhered.
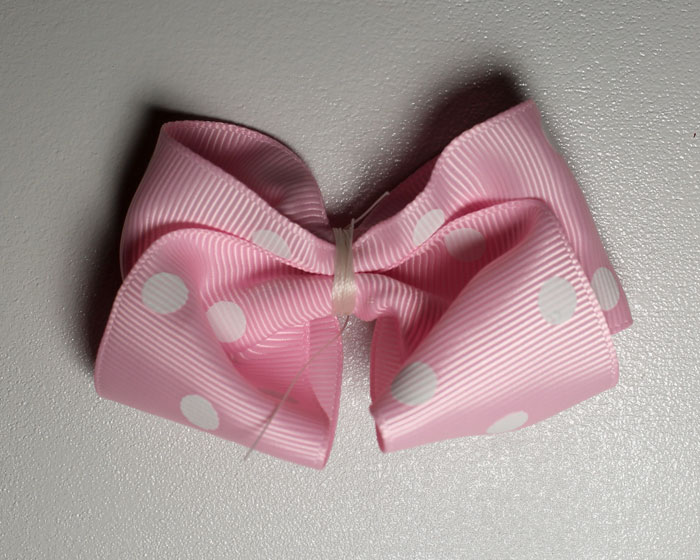
Once both sides are adhered your ribbon should look like it's in the shape of a figure eight. 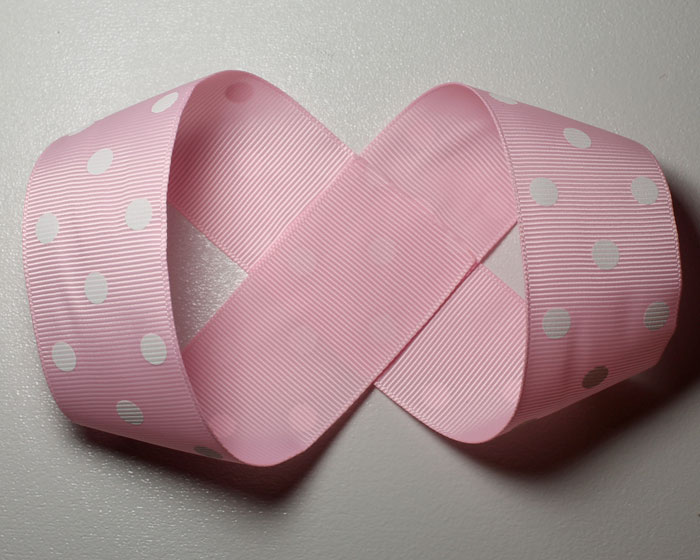
Next take the top of the loops and glue them in the center.
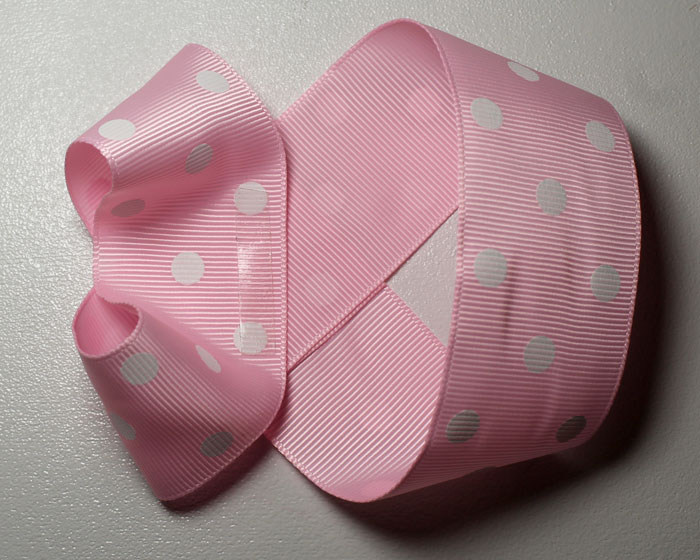
Once both loops are glued, take and gather the ribbon in the middle, and use your string to tie around and secure the center.
Using your 7/8" ribbon create a knot and glue it around the center of your bow.
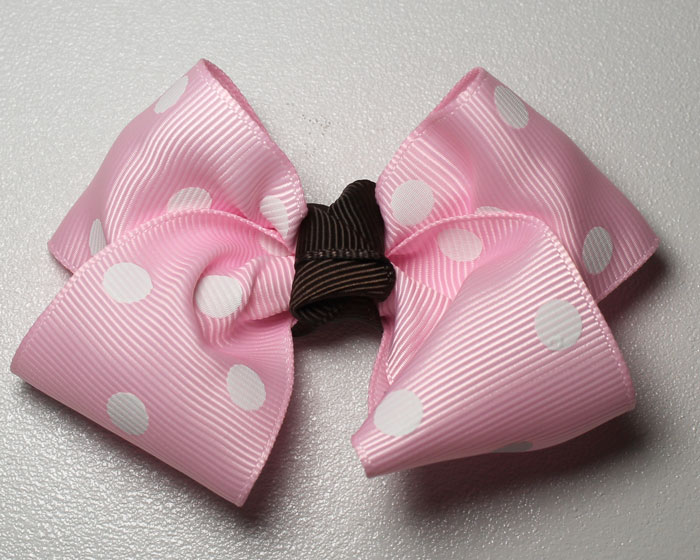
Take and apply your adhesive to the lined clip and press it to the back of your bow. Then attach the bow to the knot on the hat and you're done. :)
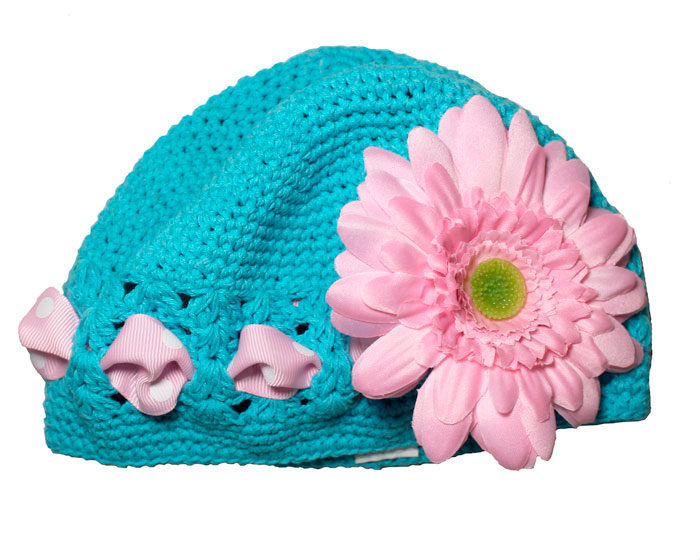
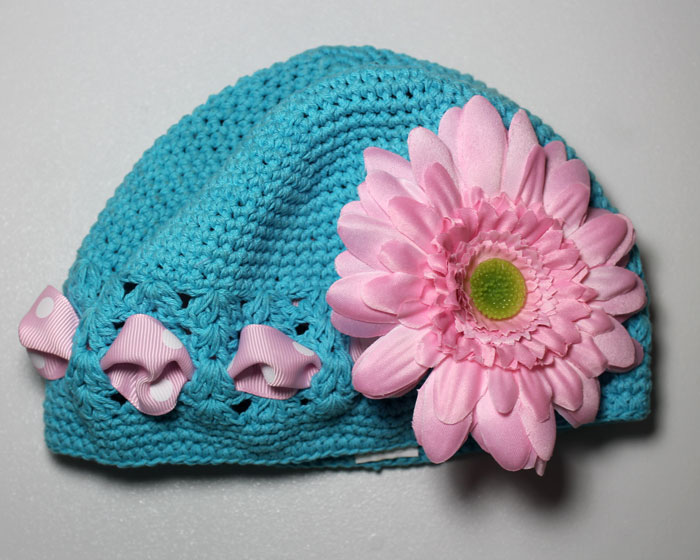
Simple Daisy Kufi Hat
Supplies:
Kufi Crochet Beanie Hat: Turquoise
40" of 1 1/2" Pearl Pink with White Dots Grosgrain
Light Pink Gerbera Daisy
Light Pink Lined Clip
Two Alligator Clips
Double Sided Sticky Tape
Scissors
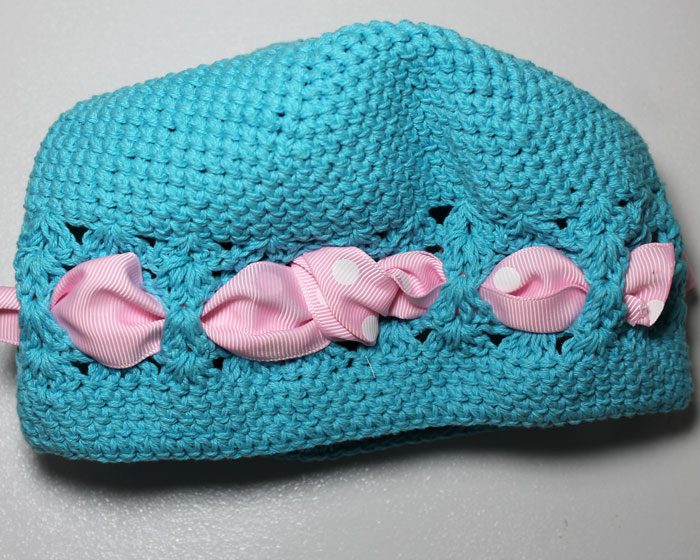
For the simple daisy hat, repeat the weaving process as that from the above tutorial for the Kufi Hat.
Once you are done weaving take your daisy and cut the long stem off of the back.
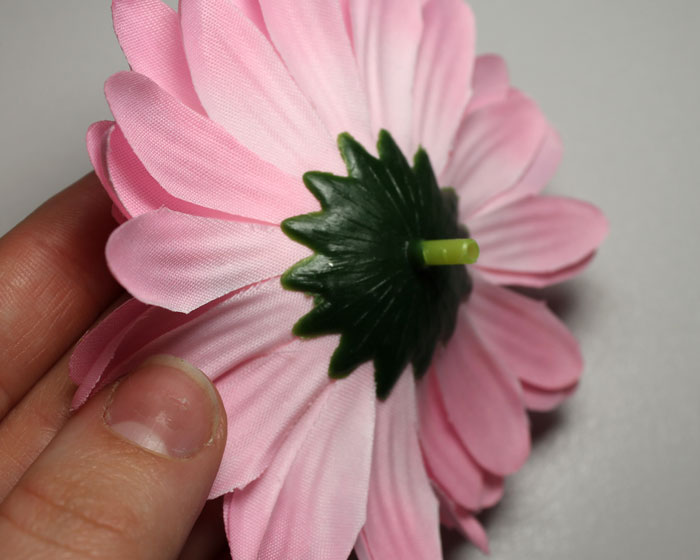
I applied two strips of Double Sided Tape on either side of the stem, closer the the edge of the greenery. Then I took the felt pad and placed it on the back of the daisy.

Take and apply adhesive to your lined clip and attach it to the felt circle.
For this hat I didn't knot the ribbon on the front, I wove the ends through to the inside of the hat and taped the ends loosely together and cut off the extra ribbon.
I then stuck the clip through the hat close to the ribbon. After you have done that you will have a cute Simple Daisy Kufi Hat! :)
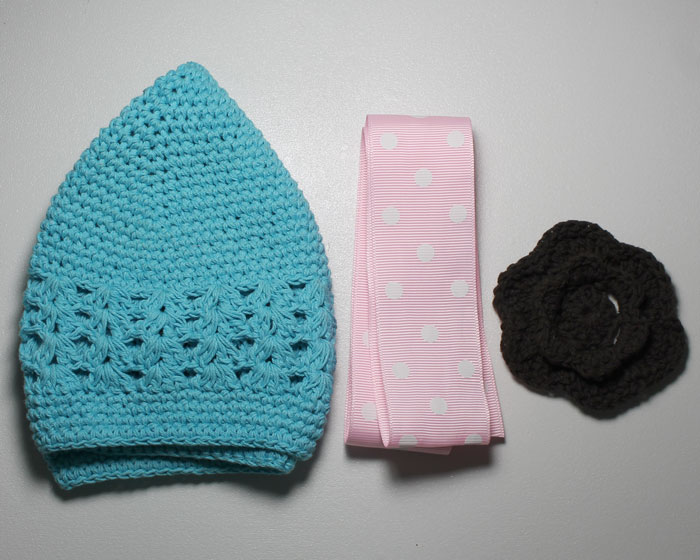
Chic Crochet Kufi Hat
Supplies:
Kufi Crochet Beanie Hat: Turquoise
40" of 1 1/2" Pearl Pink with White Dots Grosgrain
Two Alligator Clips
Double Sided Sticky Tape
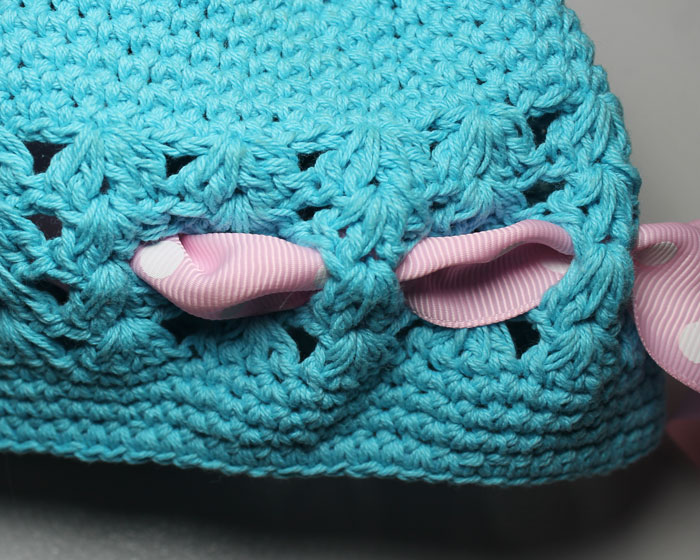
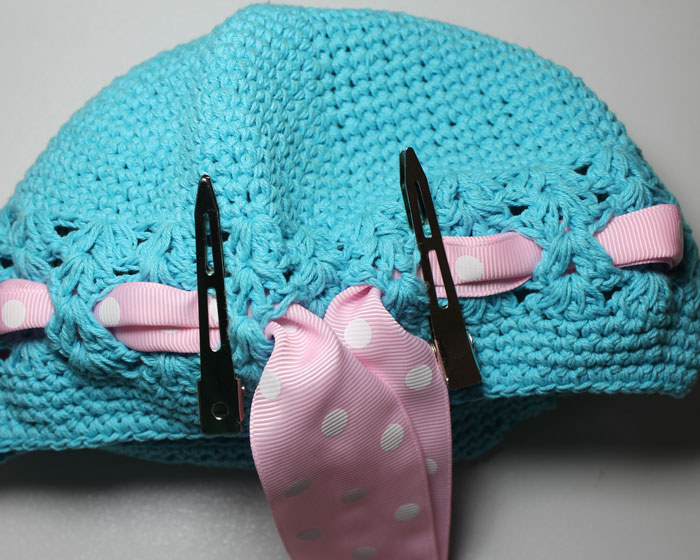
Take your Kufi Crochet Beanie Hat and the ribbon and repeat the weaving process from the Boutique Crochet Beanie Hat. Secure the ends with the alligator clips.
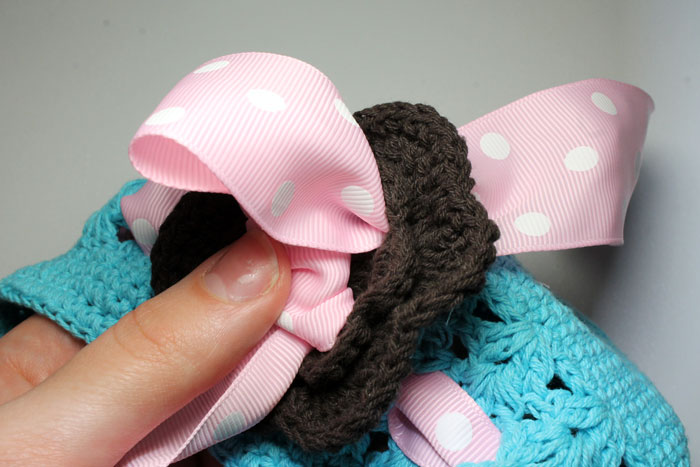
Take your brown crochet flower and using the left strand of ribbon go up from the bottom and through the hole closest to the center of the the flower.
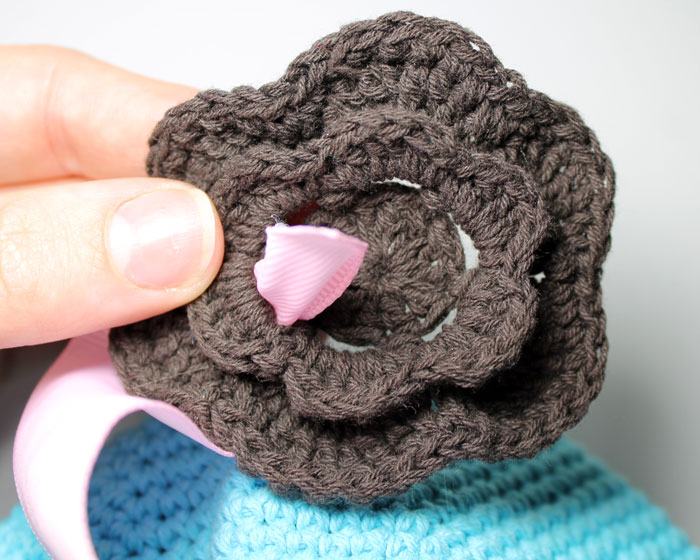
Repeat the process with the other side of the flower.
 Pull the flower snug to the beanie then proceed to tie a loose knot in the center of the flower with your ribbon ends.

Take the end pointing down and weave it through the hole in the center bottom of the flower and then through the beanie. So in the end you should have the ribbon on the inside of the beanie. Take the ribbon at the top and repeat the same process, go through the top center hole and then through the beanie.
Once the ribbon is on the inside of the hat, I carefully turned the hat inside out, and wove the ends through the hat and taped the ends to the back of the ribbon that shows on the front of the hat.
After that turn the hat right side out and you are done! :)

Thanks so much for reading and I hope you enjoyed this tutorial!
Visit the rest of our blog for more Crafting Tutorials and DIY Instructions!
Loading...

